Mopeka TC-SENSOR Bluetooth Transmitter User Manual
Mopeka Products, LLC Bluetooth Transmitter
Mopeka >
user manual

1
VISIT WWW.MOPEKA.COM FOR MORE INFO, TROUBLESHOOTING, AND FAQ’S
Smart Device/App Users
1. Go to your app store. Search for LPG Tank Check from Mopeka Products, and install.
2. Press the sensor SYNC button 5X quickly (Fig 1). This awakens it from sleep mode.
(It is only in sleep mode from the factory. Once awake, the sensor will never go into sleep mode again.)
3. Launch the app. When it starts it will automatically start a search for LPG Tank sensors.
4. While the app is scanning, press the SYNC button 1X. (Fig 1)
5. The sensor will then appear on your app as a new device under LPG Tank Devices.
6. Sensor is now Sync’d . You may now proceed to installing the sensor on the tank.
FIG 1
For LPG Tank Monitor Users:
8. Pull the battery protection strip completely out of monitor and discard. This will turn on the monitor. (Fig
2)
9. Hold one of the buttons on your Monitor until the lights for that button start flashing (approx 5 seconds).
10. Then press the Sync button on your sensor. The monitor lights will stop flashing and the sensor is now
synced with the monitor.
11. Repeat steps 9 and 10 to sync the second sensor to the button/gauge of the monitor. NOTE: For easy
reference, the buttons on the display are colored green & black to correspond to the colored dots on each
sensor label.
12. Both sensors are now sync’d to the monitor. You are now ready to install the sensor(s) on the tank(s).
FIG 2
Install Sensor on Tank
13. Clean the bottom of the tank of any debris, excess paint, and rust.
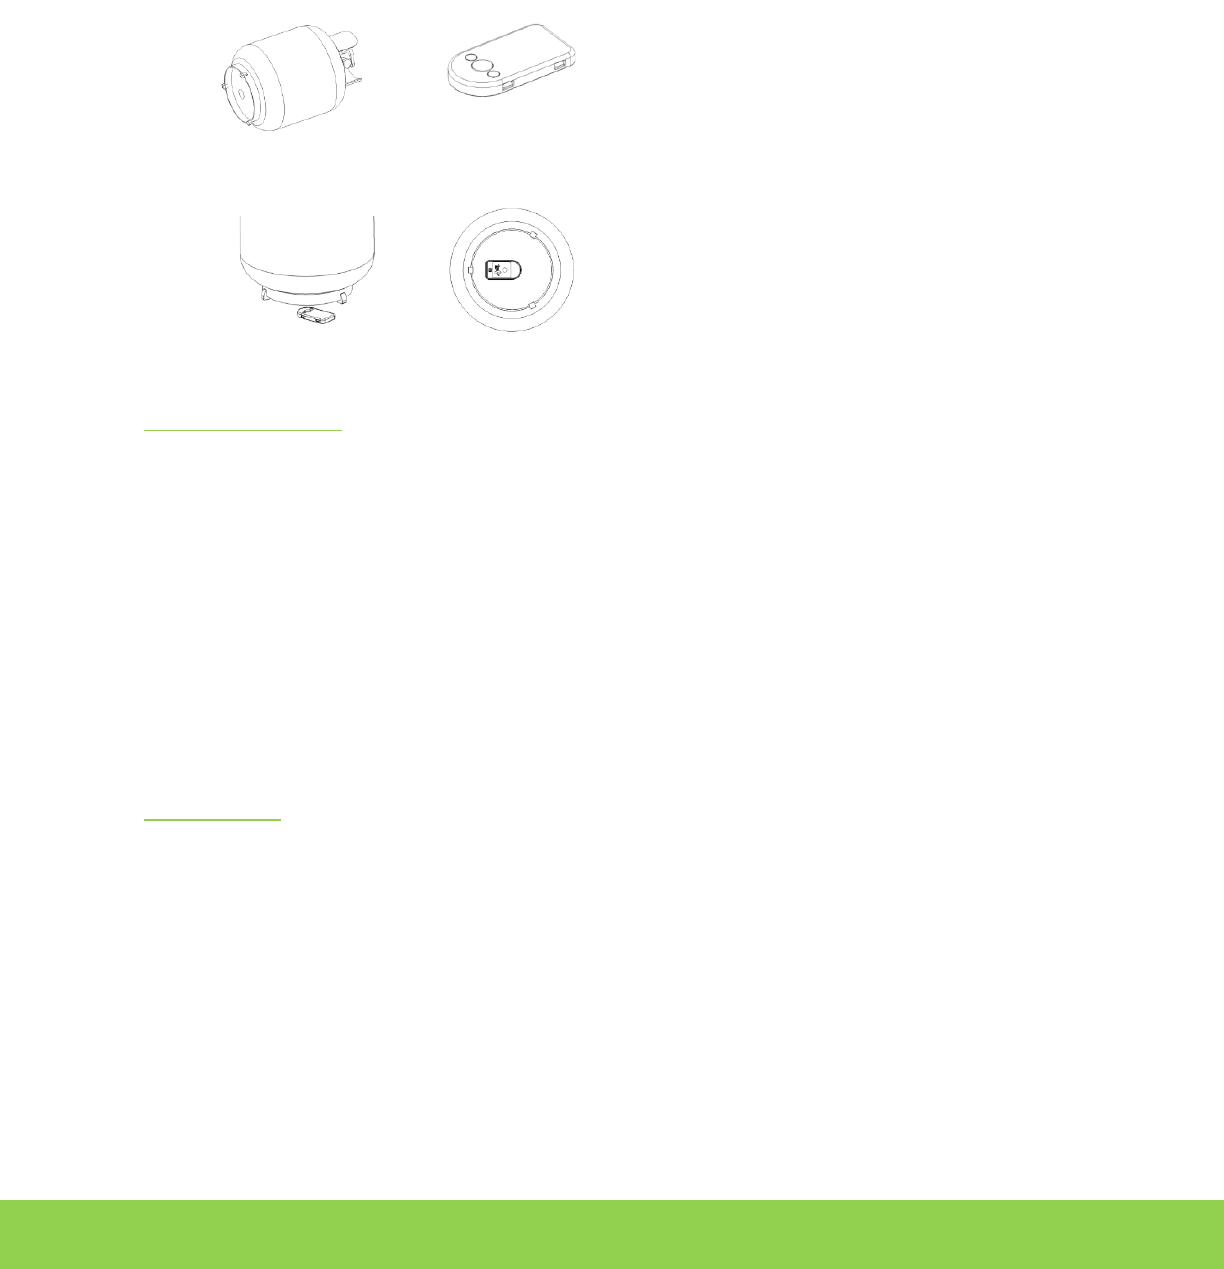
14. If your tank sits directly on the ground or other flat surface, then you will need to install the 3 LPG Tank
spacers to the bottom of the foot ring of your tank. This will provide adequate space and improved
wireless signal for the sensor. (Fig 3)
15. The sensor mounts to the bottom center of the tank using magnets. The black rubber pad on the sensor,
between the magnets, needs to be aligned to the bottom center of the tank. With the pad aligned, attach
the sensor to the tank. (Fig 4, 5, 6)

2
VISIT WWW.MOPEKA.COM FOR MORE INFO, TROUBLESHOOTING, AND FAQ’S
16. Return the tank to the upright position. Check that the tank is on a level and flat surface or otherwise is
level with ground. Even a slight tilt can degrade the quality of the measurement.
FIG 3 FIG 4
FIG 5 FIG 6
Using the LPG Tank
17. After a few seconds, up to a few minutes, the propane will settle and the readings will stabilize.
App Users:
Clicking on a sensor in the main list takes you to the sensor’s own screen. Most information is self-explanatory.
Click on the pencil icon to change settings or rename your sensor. Be sure to change the tank size setting to match
your tank.
Monitor Users:
Pushing the monitor's button will initiate a scroll of the lights, once it obtains a new tank level reading from the
sensor, that level will be displayed. It will remain lit for several seconds and then go back to sleep.
If the lights continue to scroll and never displays a level, the sensor and monitor are not communicating. Try
pushing the button again. If the monitor still does not read, you may need to reposition the monitor, or check the
FAQ’s and Troubleshooting below or on our website.
Your monitor will automatically monitor tank readings every 30 minutes. If a tank level goes below 10% of full, the
red light will start slowly flashing to alert you that your tank is near empty. The flashing may be stopped by
pressing that Tank's button on the Monitor. This sequence then repeats every 8 hours.
Notes and FAQ’s
• The main menu of the APP provides a link to the Mopeka website for additional instructions and
troubleshooting.
• Pressing the Sync button on your sensor will put the device into a “hyper” mode for the next 20 minutes
where it measures the tank level at a faster rate. This mode can be useful when trying to position the
sensor on a tank.
• By tapping the (pencil icon) on the app's tank screen, you may rename the sensor for easier identification
that you will remember.
• The app allows for a variety of monitoring parameters. Levels may be expressed in height by inches,
centimeters or, percentage full.
• Movement of the tank can cause the liquid to slosh, sometimes causing erratic readings. Readings should
go back to normal after a few minutes.
• If the tank is sitting at an angle, this can cause errant readings. Make sure your tank is level.
• If the LPG Tank sensor was not placed in the center of the tank, it may need to be repositioned.
• If the bottom of the tank is dirty or rusty it will need to be wiped clean of any debris first.

3
VISIT WWW.MOPEKA.COM FOR MORE INFO, TROUBLESHOOTING, AND FAQ’S
• If the tank is moving or vibrating it will degrade the quality of the signal.
• If you have a Tank monitor that needs to be synced to a new sensor, you can press and hold either
button on the monitor for 5 seconds to initiate a new sync process. Once the lights start flashing, press
the Sync button on the new sensor and that sensor will now be synced, and the old sensor will be
forgotten.
• Once a sensor has been awakened from manufacturing sleep mode, it will always be awake. So if you
ever need to sync to a new device, you should only have to press Sync button 1X.
Horizontal Tanks
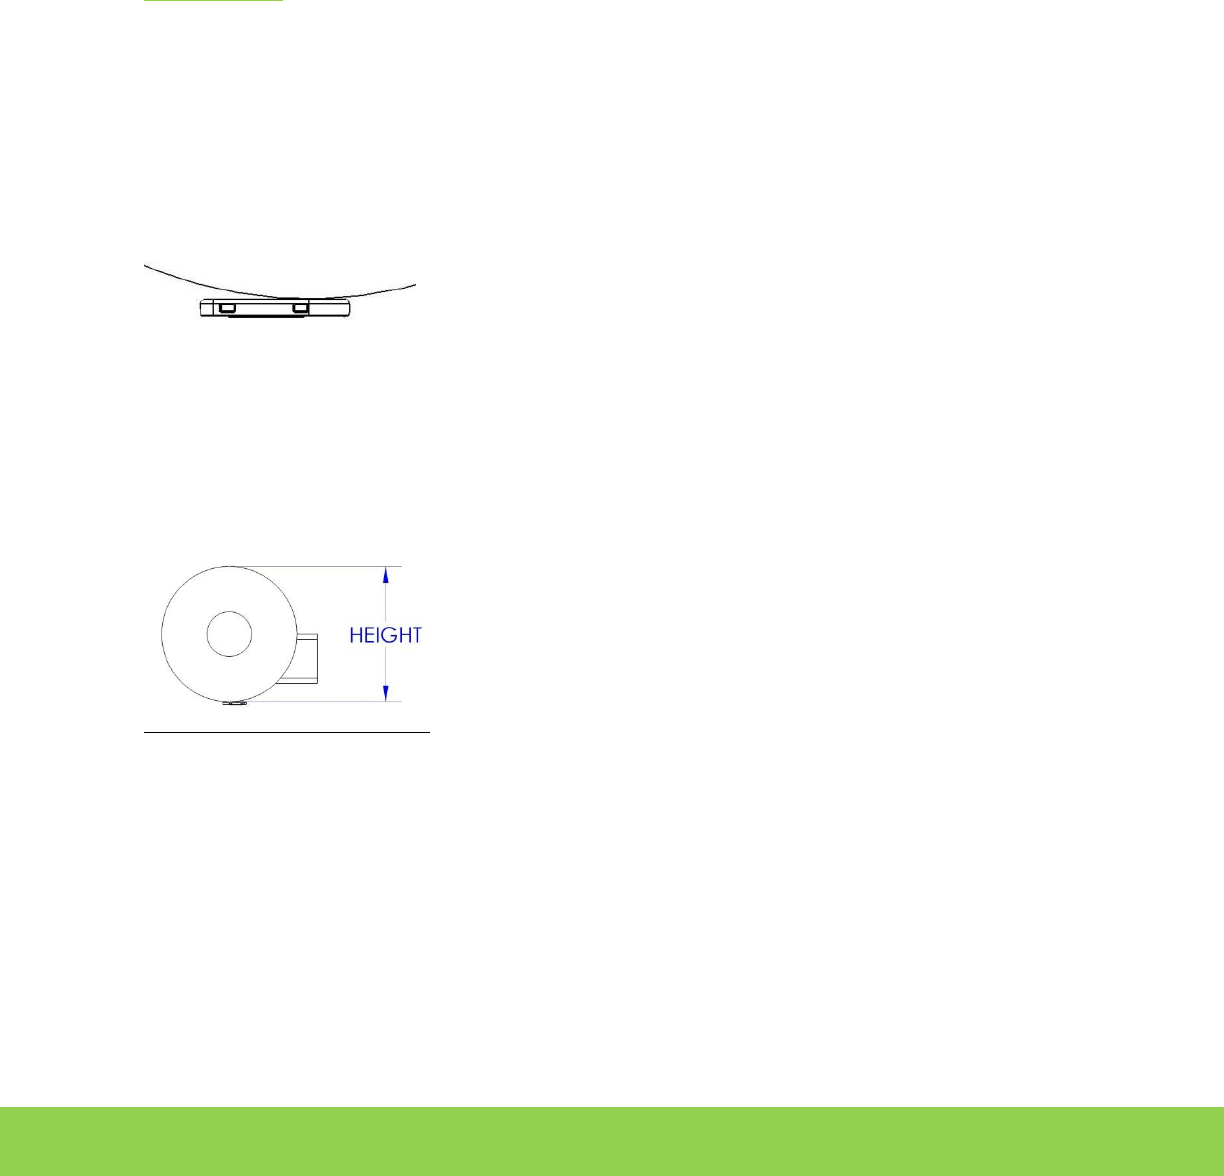
If installing on a horizontal tank, place the sensor on center, bottom of tank, with rubber pad and magnets against
tank as shown. It is important to place it on the center of tank so that sensor is horizontal, or sensor reading
quality can be poor. See fig 7
FIG 7
On the top right corner of your app click on the pencil icon. Go to the tank type and push Arbitrary. Measure your
horizontal cylinder as seen in fig 8. Enter the measurement in inches into the arbitrary setting and click ok. Now
the sensor will be reading your cylinder correctly. Use the same steps for any size of cylinder that is not listed
under the tank type on the app.
FIG 8
Federal Communications Commission (FCC) Interference Statement
This equipment has been tested and found to comply with the limits for a Class B digital device, pursuant to Part
15 of the FCC Rules.
These limits are designed to provide reasonable protection against harmful interference in a residential
installation. This equipment generate, uses and can radiate radio frequency energy and, if not installed and used
in accordance with the instructions, may cause harmful interference to radio communications.
However, there is no guarantee that interference will not occur in a particular installation. If this equipment does
cause harmful interference to radio or television reception, which can be determined by turning the equipment
off and on, the user is encouraged to try to correct the interference by one of the following measures:
Reorient or relocate the receiving antenna.
Increase the separation between the equipment and receiver.
Connect the equipment into an outlet on a circuit different from that to which the receiver is
connected.
Consult the dealer or an experienced radio/TV technician for help.
This device complies with Part 15 of the FCC Rules. Operation is subject to the following two conditions:
(1) This device may not cause harmful interference, and (2) this device must accept any interference received,
including interference that may cause undesired operation.
FCC Caution: Any changes or modifications not expressly approved by the party responsible for compliance could
void the user’s authority to operate this equipment.
RF exposure warning
This equipment complies with FCC radiation exposure limits set forth for an uncontrolled environment.
This equipment must be installed and operated in accordance with provided instructions and the antenna(s) used
for this transmitter must be installed to provide a separation distance of at least 20 cm from all persons and must
not be collocated or operating in conjunction with any other antenna or transmitter.