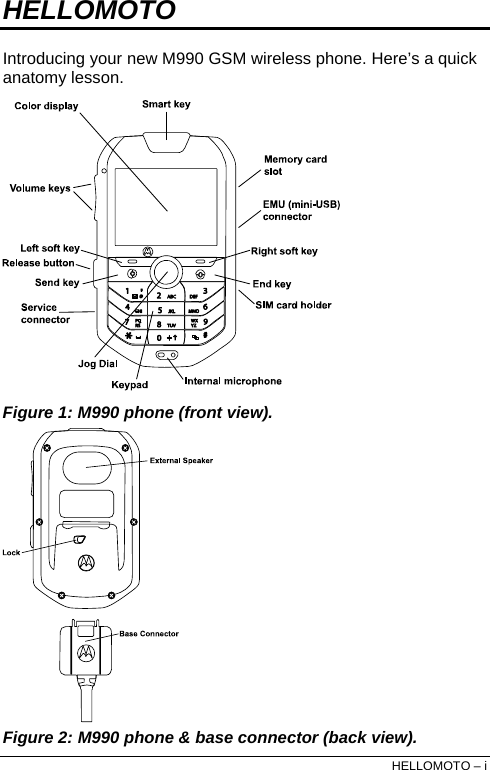
Motorola Mobility P56HN1 Automotive Cellular/PCS GSM/EDGE Transceiver w/ BT User Manual Exhibit 8 Users Manual
Motorola Mobility LLC Automotive Cellular/PCS GSM/EDGE Transceiver w/ BT Exhibit 8 Users Manual
UserManual.wiki
>
Motorola Mobility
>
P56HN1 User Manual
Exhibit 8 Users Manual
Navigation menu
Upload a User Manual
Namespaces
Wiki Guide
HTML
PDF
Info
Views
User Manual
Discussion / Help
Navigation


![Settings • Personalize • Home Screen • Main Menu • Greeting • Wallpaper • Screen Saver • Ring Styles • Style • [Style] Detail • Connection • Bluetooth Link • USB Settings • MOTOSYNC • Call Forward • Voice Calls • Fax Calls • Data Calls • Cancel All • Forward Status • In-Call Setup • In-Call Timer • Call Cost Setup • My Caller ID • Talk and Fax • Answer Options • Call Waiting • Aux Alert • Initial Setup • Time and Date • Speed Dial • Auto Redial • Backlight • Scroll • Text Marquee • Language • DTMF • TTY Setup • Master Reset • Master Clear • Phone Status • My Tel. Numbers • Active Line • Download Location • Storage Devices • AGPS Service • Car Settings • Auto Answer • Power-off Delay • Network • New Network • Network Setup • Available Networks • My Network List • Service Tone • Network Jingle • Call Drop Tone • Security • Phone Lock • Lock Keypad • Lock Application • Fixed Dial • Restrict Calls • Call Barring • SIM PIN • New Passwords • Certificate Mgmt • Java Settings • Java App Loader • Java System • Delete All Apps • App Volume • App Priority 2 – Menu Map](https://usermanual.wiki/Motorola-Mobility/P56HN1/User-Guide-898960-Page-12.png)

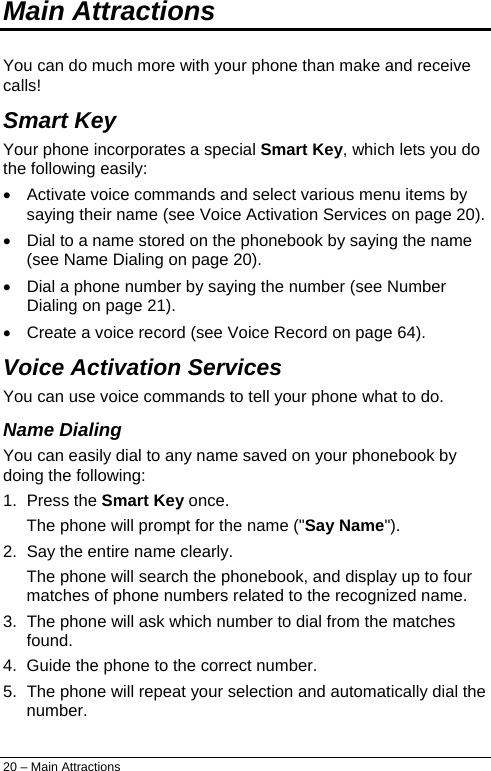
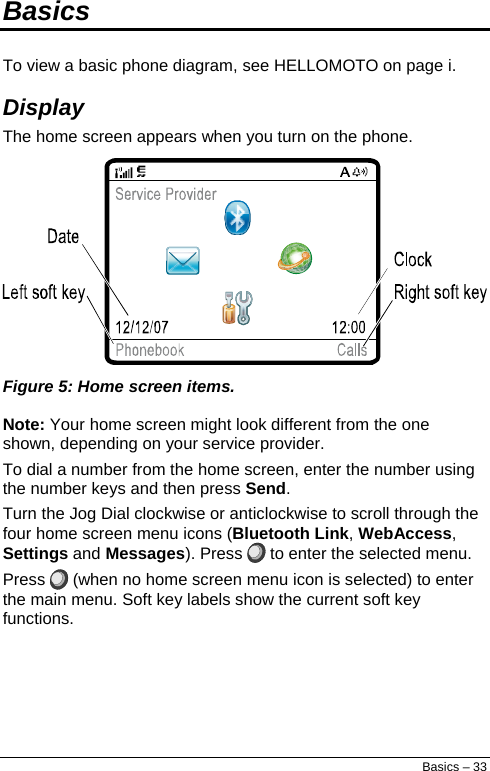
![14 – Essentials Essentials Caution: Before using the phone for the first time, read the Important Safety and Legal Information included in this guide. Getting Started Initial Setup Inserting your SIM With your phone powered off, slide the SIM card into the SIM card holder at the right side of the phone until it clicks into place. Turning On/Off The phone powers on and off automatically using the car’s ignition sensor. For manual operation press and hold the End key until the display panel lights on/off. Ring Tone Volume When no call is active, press either of the volume keys on the left side of the phone to set the ring tone volume. Call Volume During a call, press either of the volume keys on the left side of the phone to adjust the call volume.Muting Microphone During a call, press Mute to disable the microphone. Press Unmute to enable the microphone. Key Volume Press > Settings > Ring Styles > [Style] Detail > Key Volume. Setting Menu View Press > Settings > Personalize > Main Menu > View. Select Icons or List. Time & Date To set the time and date, press > Settings > Initial Setup > Time and Date. Ring Setting Press > Settings > Ring Styles > Ring Detail,and select your favorite tones.](https://usermanual.wiki/Motorola-Mobility/P56HN1/User-Guide-898960-Page-24.png)
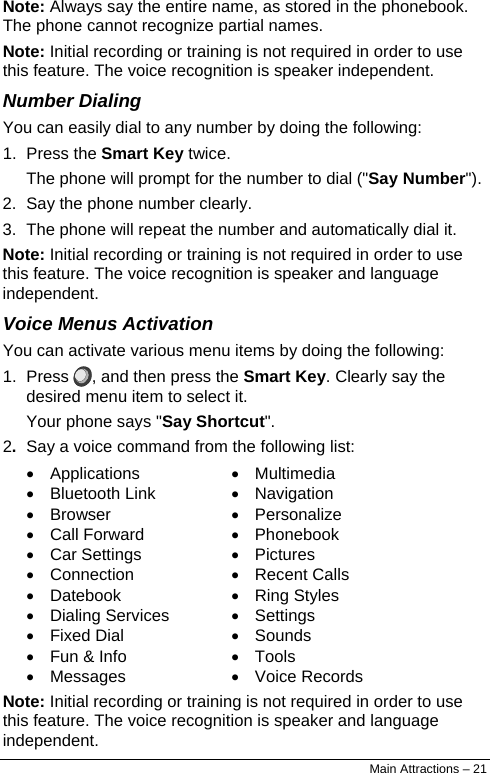
![Connect a Bluetooth Headset Before you try to connect your phone to a Bluetooth headset, make sure the headset is on and ready in pairing mode (for details about pairing the headset please refer to its user guide). You can connect your phone to only one headset at a time. Press > Settings > Connection > Bluetooth Link > Add Audio Device. Your phone lists the devices it finds within range. 1. Scroll to the desired headset and press . 2. Press Yes to connect to the headset. 3. If necessary, enter the headset passkey (for example, 0000) and press . 4. Press End to exit to the home screen. The phone will establish the connection to the Bluetooth headset and return to the home screen. When your phone is connected, the Bluetooth indicator ( ) appears in the home screen. Shortcut: When your phone’s Bluetooth power is on, your phone can automatically connect to a headset you have used before. Just turn on the device, or move it near the phone. If the device does not connect, turn it off and back on. Use your M990 as a Car Kit You can connect a compatible Bluetooth mobile device to your M990, and use the M990 as a car kit for handsfree operation. The other mobile device must support the Handsfree Profile for this feature to work. To connect another Bluetooth mobile device: 1. Press > Settings > Connection > Bluetooth Link > [Find Me]. Your phone will enter discoverable mode for 3 minutes. 2. On the other device, search for Bluetooth devices and select the M990 phone from the list of discovered devices. Enter the Bluetooth PIN 0000 and confirm. Main Attractions – 25](https://usermanual.wiki/Motorola-Mobility/P56HN1/User-Guide-898960-Page-35.png)
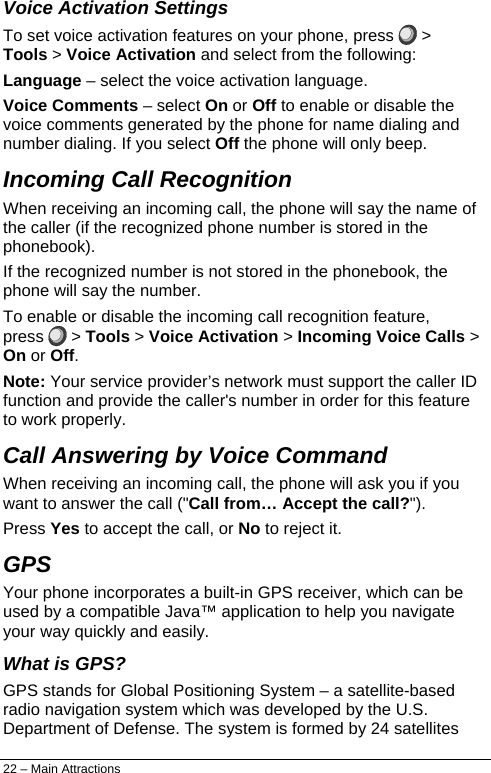
![3. On the M990, press Yes when the prompt Bond with other device? appears. 5. When the prompt Handsfree voice requested by appears, Press Grant. 6. Press End to exit to the home screen. When your M990 serves as a car kit for the other mobile device, you can: • Make and receive voice calls. • Reject an incoming voice call. • Terminate a voice call. Note: When working as a car kit, you cannot use a Bluetooth headset with your M990. Copy Files to Another Device You can copy a media file, phonebook entry, datebook event, or web shortcut from your phone to a computer or other device. Note: Some copyrighted objects cannot be copied. 1. On your phone, scroll to the object that you want to copy to the other device. 2. Press Options, then select: • Manage > Copy – for media files. • Send Contact – for phonebook entries. • Send – for datebook events. 3. Select a recognized device name, or [Look For Devices] to search for the device where you want to copy the file. If your phone could not copy the file to the other device, make sure the device is on and ready in discoverable mode (for details about making the device discoverable please refer to its user guide). Also, make sure the device is not busy with another similar Bluetooth connection. 26 – Main Attractions](https://usermanual.wiki/Motorola-Mobility/P56HN1/User-Guide-898960-Page-36.png)

![Print Message over a Bluetooth Connection You can use a Bluetooth connection to send a message from your phone to a printer. Press > Tools > Messages > Message Inbox, Email Msgs, Outbox, or Drafts. Scroll to the message you want to print and press Options > Print. You cannot print message templates. For more about Bluetooth connections, see Bluetooth® Wireless Technology on page 24. Store Text Messages on your SIM Card To store incoming text messages on your SIM card, press > Tools > Messages > Options > Setup > Message Setup > Text Msg Setup > Default Storage > SIM Card. Edit Email Settings You can edit the settings for your Email connections. To use email, you need to store your email User ID and Password. Press > Tools > Messages > Options > Setup > Email Msg Setup > Account Settings. If you have more than one email account, select an account to edit. Your phone shows a list of email settings. Here is where you store your email User ID and Password. Note: To create a new account, select [New Entry] in the Account Settings list. Your display shows a folder for each email account under > Tools > Messages > Email Msgs. Browser Messages To read messages received by your micro-browser, press > Tools > Messages > Browser Msgs. 44 – Basics](https://usermanual.wiki/Motorola-Mobility/P56HN1/User-Guide-898960-Page-54.png)
![Customize Home Screen To customize the home screen to your needs, press > Settings > Personalize > Home Screen. Select Home Keys to do the following: • Show or hide the four home screen icons. • Set the four home screen icons to be selected by the Jog Dial. • Set the right and left soft keys action on the home screen. • Set the Smart Key action on the home screen. Select Clock to choose the type of the clock displayed on the home screen (Digital or Analog). Select Layout to choose the layout of the home screen: Left Justified or Centered. Ring Style The ring style profile uses a different set of sounds for incoming calls and other events. Change Alerts in a Ring Style You can change the alerts for incoming calls and other events. Your changes are saved in the current ring style profile. Press > Settings > Ring Styles > [Style] Detail. Note: [Style] represents the current ring style. You cannot set an alert for the Silent ring style. 1. Scroll to Calls (or Line 1 or Line 2 for dual-line phones), then press Change to change it. 2. Scroll to the desired alert, then press . 3. Press Back to save the alert setting. 50 – Customize](https://usermanual.wiki/Motorola-Mobility/P56HN1/User-Guide-898960-Page-60.png)

![Press Picture to select the picture for the screen saver. Turn the Jog Dial right or left to select a picture or animation, or select None for no screen saver. Press Delay to enter the desired delay for the screen saver. Select the length of inactivity before the screen saver appears. Display Appearance To set your display brightness, press > Settings > Initial Setup > Brightness. To set your display backlight, press > Settings > Initial Setup > Backlight. Then select the backlight Mode (Automatic or Manual) and adjust the backlight Level to your needs. Personalizing You can use the following options to personalize your phone to your needs. Language To set the menu language, press > Settings > Initial Setup > Language. Scroll To set the scroll bar to Up/Down or Wrap Around in menu lists, press > Settings > Initial Setup > Scroll. Text Marquee To set the speed for scrolling text in your display, press > Settings > Initial Setup > Text Marquee. Activate Ringer IDs To activate ringer IDs assigned to phonebook entries and categories, press > Settings > Ring Styles > [Style] Detail > Ringer IDs. Ring Volume Press > Settings > Ring Styles > [Style] Detail > Ring Volume. 52 – Customize](https://usermanual.wiki/Motorola-Mobility/P56HN1/User-Guide-898960-Page-62.png)
![Keypad Volume Press > Settings > Ring Styles > [Style] Detail > Key Volume. Reminders To set a reminder for when you have not responded to an incoming call, message, or other event, press > Settings > Ring Styles > [Style] Detail > Reminders. Menu View To show the main menu as graphic icons or as a text-based list, press > Settings > Personalize > Main Menu > View. Reorder Main Menu To reorder your phone’s main menu, press > Settings > Personalize > Main Menu > Reorder. Show/Hide Menu Icons To show or hide menu feature icons in the home screen, press > Settings > Personalize > Home Screen > Home Keys > Icons. Master Reset To reset all options except unlock code, security code, and lifetime timer, press > Settings > Initial Setup > Master Reset. Master Clear Caution: Master clear erases all information you have entered (including phonebook and datebook entries) and content you have downloaded (including pictures and sounds) stored in your phone’s memory. After you erase the information, you cannot recover it. Press > Settings > Initial Setup > Master Clear. Customize – 53](https://usermanual.wiki/Motorola-Mobility/P56HN1/User-Guide-898960-Page-63.png)


![Choose a Speed Dial Key List To set speed dial to call the entries in your phone memory phonebook or your fixed dial list, press > Settings > Initial Setup > Speed Dial > Phone Memory or Fixed Dial. Edit or Delete a Phonebook Entry To edit a number stored in the phonebook, press > Phonebook, scroll to the phonebook entry, and press Options. You can select Edit Contact, Delete Contact, or other options. Shortcut: In the phonebook, use the keypad to enter the first letters of the desired entry. You can also press and to see the entries in your categories or entries you used recently. Set Ringer ID for a Phonebook Entry To assign a ring alert (ringer ID) to an entry, press > Phonebook > entry, then press Options > Edit Contact > Ringer ID > ringer name. Note: The Ringer ID option is not available for entries stored on the SIM card. To copy an entry from SIM to phone memory, see Copy a Single Phonebook Entry on page 63. To activate ringer IDs, press > Settings > Ring Styles > [Style] Detail > Ringer IDs > On. Set Picture ID for a Phonebook Entry To assign a picture to show when you receive a call from an entry, press > Phonebook > entry, then press Options > Edit Contact > Picture > picture name. Note: The Picture option is not available for entries stored on the SIM card. To copy an entry from SIM to phone memory, see Copy a Single Phonebook Entry on page 63. Set Picture ID View for Phonebook To show entries as a text list, or with caller ID pictures, press > Phonebook, then press Options > Setup > View by > view name. Other Features – 61](https://usermanual.wiki/Motorola-Mobility/P56HN1/User-Guide-898960-Page-71.png)
![Set Category for a Phonebook Entry Press > Phonebook > entry, then press Options > Edit Contact > Category > category name. Note: The category option is not available for entries stored on the SIM card. To copy an entry from SIM to phone memory, see Copy a Single Phonebook Entry on page 63. When you open your phonebook, press or to see your categories. Set Category View for Phonebook Press > Phonebook, then press Options > Filter by > Category > category name. You can show All entries, entries in a predefined category (Business, Personal, General, VIPs), or entries in a category you create. Shortcut: When you open your phonebook, press or to see your categories. Create a New Category Press > Phonebook, then press Options > Manage Contacts > Edit Categories > [New Category]. Enter the category name, and select its members from your phonebook entries. Edit a Category Press > Phonebook, then press Options > Manage Contacts > Edit Categories. Scroll to the category name and press Options > Edit Category. You can edit the category name, members, ringer ID, or picture. Your phone uses the ringer ID and picture whenever you receive calls from numbers in the category. 62 – Other Features](https://usermanual.wiki/Motorola-Mobility/P56HN1/User-Guide-898960-Page-72.png)

![View, Delete, or Manage Video Clips Press > Multimedia > Videos. To delete a file, scroll to it in the list and press Options > Manage > Delete. To copy or move a file from your memory card ( ) to your phone memory ( ), scroll to it in the list and press Options > Manage > Copy or Move > Memory Card. You cannot copy or move some copyrighted files. Hear, Delete, or Manage Sounds To manage ring tones and music that you have downloaded or composed, press > Multimedia > Sounds. To delete a file, scroll to it in the list and press Options > Manage > Delete. To copy or move a file from your memory card ( ) to your phone memory ( ), scroll to it in the list and press Options > Manage > Copy or Move > Memory Card. You cannot copy or move some copyrighted files. Create Ring Tones To create ring tones that you can use with your phone, press > Multimedia > Sounds > [New Melody]. Start Micro-Browser To start the Micro-Browser, press > Tools > WebAccess > Browser. Download Objects from a Web Page To download a picture, sound, or other object from a web page, start the Micro-Browser, go to the page that links to the file, scroll to the link, and select it. To activate downloaded copyrighted files, press > Tools > Activation List > file type > file. You can see file’s Status, Type, Activation, and Counts Remaining. Other Features – 67](https://usermanual.wiki/Motorola-Mobility/P56HN1/User-Guide-898960-Page-77.png)
![Store Downloaded Files in Phone or Memory Card You can choose to store your downloaded files on your phone or your memory card you download choose where to store the files you download. Press > Settings > Phone Status > Download Location > Memory Card or Phone. To see how much memory is available on your phone or memory card, see View Memory Card Information on page 32. Web Sessions A web session stores settings that your phone uses to access the Internet. To select or create a web session, press > Tools > WebAccess > Web Sessions. Clear Micro-Browser History To clear the micro-browser’s history, cache, or cookies, press > Tools > WebAccess > Browser Setup > Clear History, Reset Cache, or Clear Cookies. Download a Game or Application You can download a Java™ game or application the same way you download pictures or other objects. Start the Micro-Browser, go to the page that links to the file, scroll to the link, and select it. Start a Game or Application To start a Java™ game or application, press > Applications, scroll to the game or application and press . Note: To install and run applications stored on your memory card, press > Applications > [Install New]. 68 – Other Features](https://usermanual.wiki/Motorola-Mobility/P56HN1/User-Guide-898960-Page-78.png)