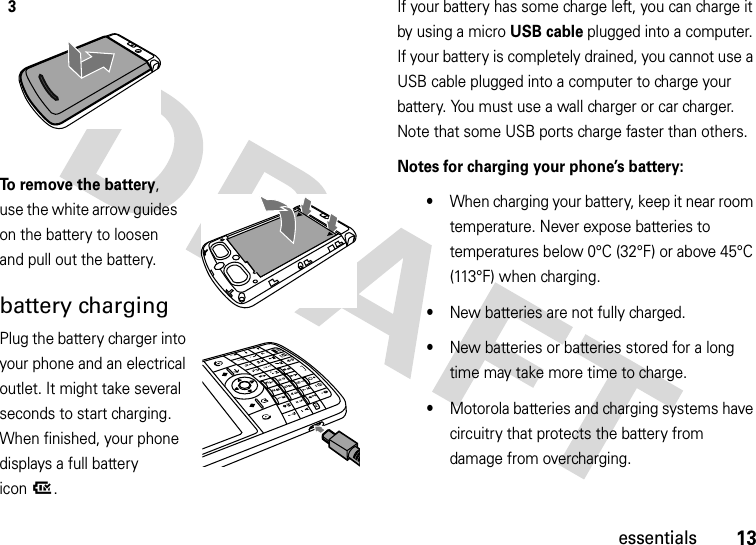
Motorola Mobility P56JL1 Portable Cellular/ PCS GSM/ CDMA Transceiver with WLAN and Bluetooth User Manual
Motorola Mobility LLC Portable Cellular/ PCS GSM/ CDMA Transceiver with WLAN and Bluetooth
Contents
- 1. Exhibit 8 Users Manual
- 2. Exhibit 8 Users Manual 2
Exhibit 8 Users Manual


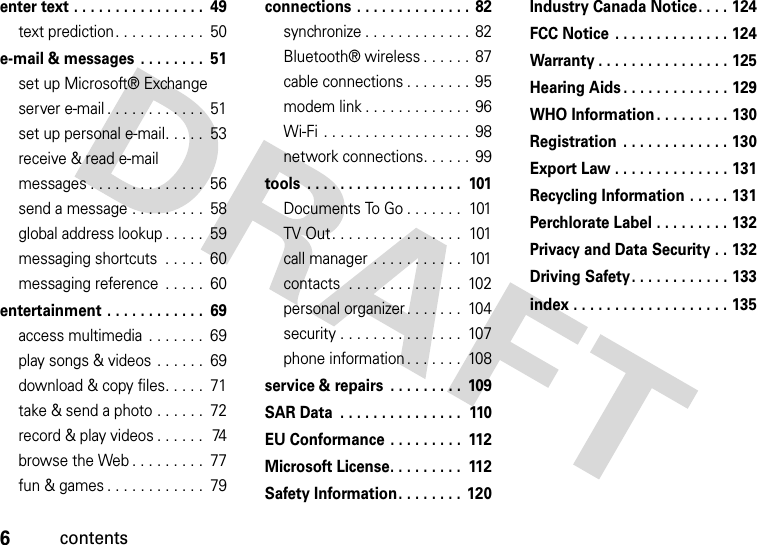
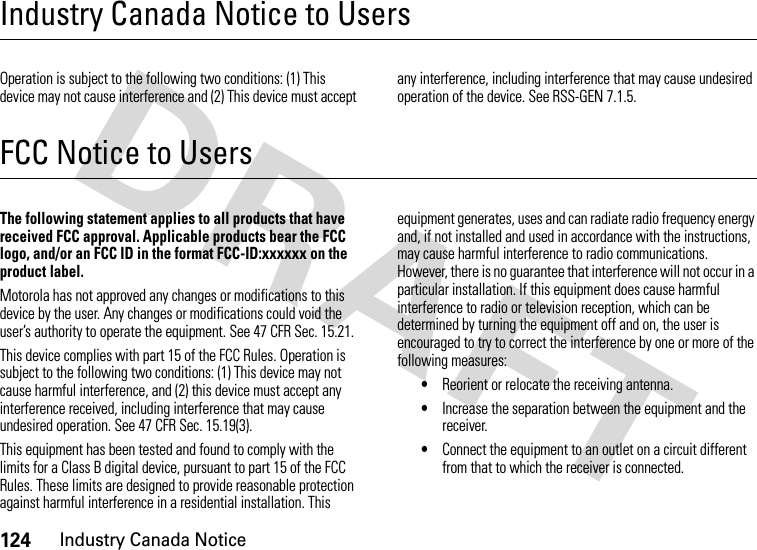
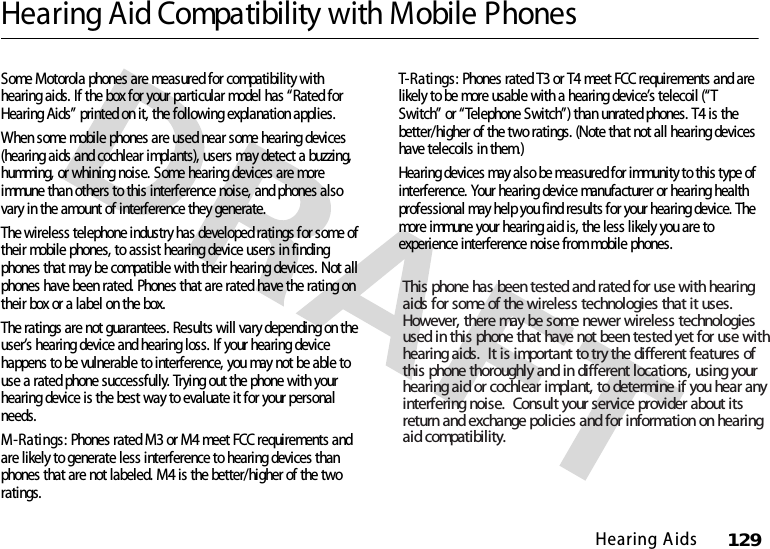
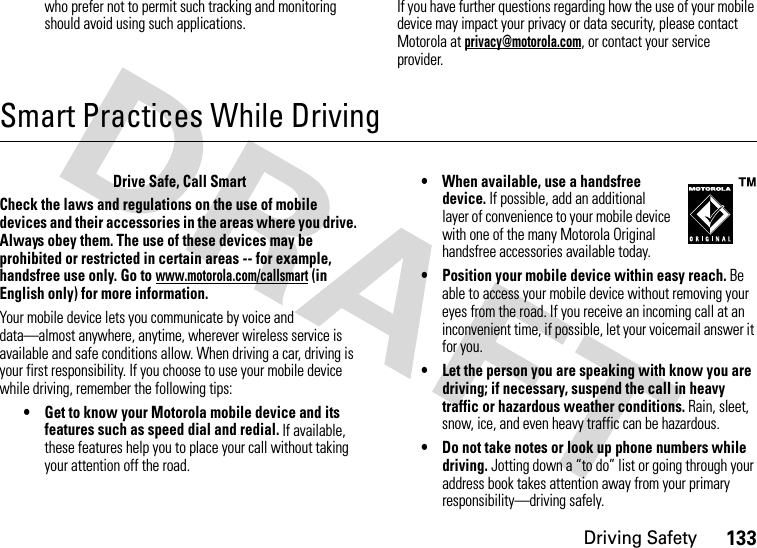
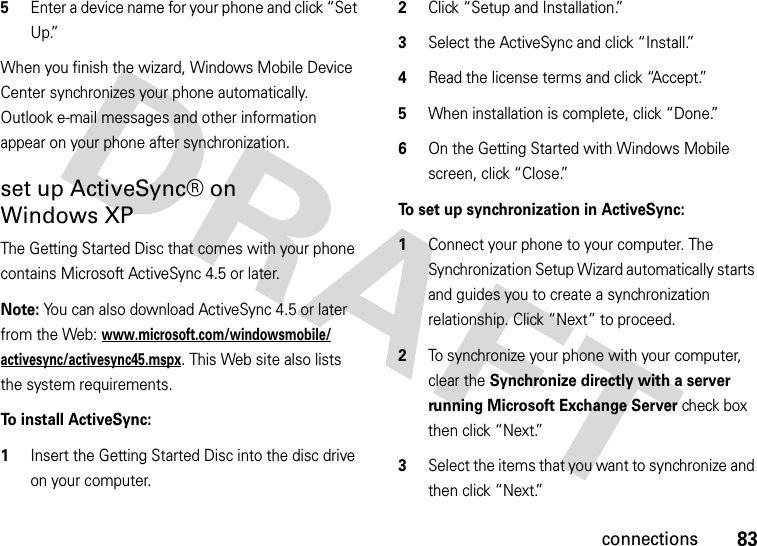
![start menu7start menuTo open the menu from the home screen, press Start(left soft key). Then press All Programs (Left Soft key). To select menu items, scroll to the icon and press the Center Select key (s). &Messaging• Text Messages• MMS• Setup E-mail%Calendar(Contacts)Settings• Phone• Sounds• Profiles• Home Screen•Clock & Alarm• Connections• Security• LED Notification• Remove Programs• Power Management• Power Saver•TV Out• Phone Settings• TTY Settings)Settings (continued)• Audio Enhancement• Accessibility• Regional Settings• Owner Information• Text Input Settings• About•Device Name• Customer Feedback• Windows Update• Setup E-mailgInternet Explorer©Get ApplicationsiWireless SynczPersonalize My Device]Bluetooth®cWindows Media8Keypad Lock>Documents To Go\Voice Recognition/File ManagerAActiveSyncÅCall HistoryÛCall ManageråClock & AlarmâGetting Started|MonitorWMessenger[MOTO Media Player3Speed Dial$Ta s k sÄVoice Notes÷WiFiyAccessoriesÃCamera and AlbumTGames9System Tools](https://usermanual.wiki/Motorola-Mobility/P56JL1.Exhibit-8-Users-Manual/User-Guide-1023750-Page-9.png)


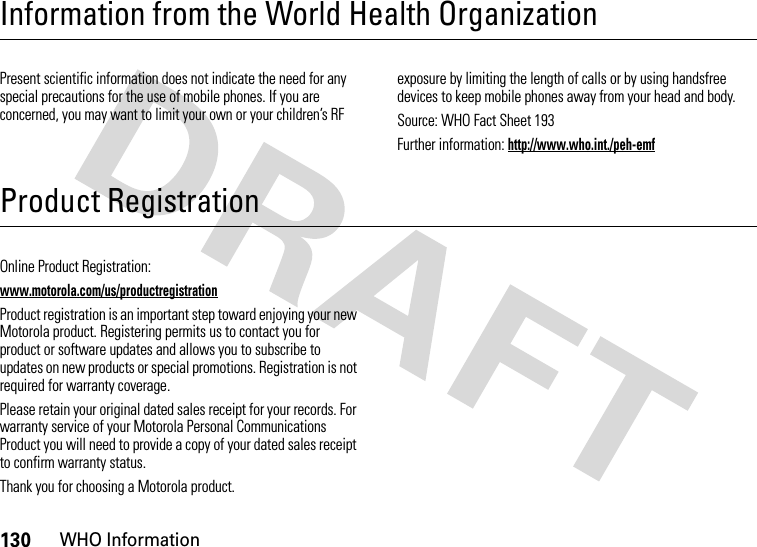
![112EU ConformanceEuropean Union Directives Conformance StatementEU Conformanc eHereby, Motorola declares that this product is in compliance with:•The essential requirements and other relevant provisions of Directive 1999/5/EC•All other relevant EU DirectivesThe above gives an example of a typical Product Approval Number.You can view your product’s Declaration of Conformity (DoC) to Directive 1999/5/EC (to R&TTE Directive) at www.motorola.com/rtte. To find your DoC, enter the Product Approval Number from your product’s label in the “Search” bar on the Web site.Microsoft End User License AgreementMicrosoft LicenseYou have acquired a device (“DEVICE”) that includes software licensed by Motorola, Inc. (“Motorola”) from Microsoft Licensing Inc. or its affiliates (“Microsoft”), for use in connection with wireless network services provided under separate agreement between you and a wireless telecommunications provider (“Mobile Operator”). Those installed software products of [France Only]0168 Product Approval Number](https://usermanual.wiki/Motorola-Mobility/P56JL1.Exhibit-8-Users-Manual/User-Guide-1023750-Page-114.png)

![Safety Information123Seizures/BlackoutsSome people may be susceptible to epileptic seizures or blackouts when exposed to flashing lights, such as when playing video games. These may occur even if a person has never had a previous seizure or blackout.If you have experienced seizures or blackouts, or if you have a family history of such occurrences, please consult with your physician before playing video games or enabling a flashing-lights feature (if available) on your mobile device.Discontinue use and consult a physician if any of the following symptoms occur: convulsion, eye or muscle twitching, loss of awareness, involuntary movements, or disorientation. It is always a good idea to hold the screen away from your eyes, leave the lights on in the room, take a 15-minute break every hour, and stop use if you are tired.Caution About High Volume UsageWarning: Exposure to loud noise from any source for extended periods of time may affect your hearing. The louder the volume sound level, the less time is required before your hearing could be affected. To protect your hearing:•Limit the amount of time you use headsets or headphones at high volume.•Avoid turning up the volume to block out noisy surroundings.•Turn the volume down if you can’t hear people speaking near you.If you experience hearing discomfort, including the sensation of pressure or fullness in your ears, ringing in your ears, or muffled speech, you should stop listening to the device through your headset or headphones and have your hearing checked.For more information about hearing, see our Web site at www.motorola.com/hearingsafety (in English only).Repetitive MotionWhen you repetitively perform actions such as pressing keys or entering finger-written characters, you may experience occasional discomfort in your hands, arms, shoulders, neck, or other parts of your body. If you continue to have discomfort during or after such use, stop use and see a physician.[Mar0108]](https://usermanual.wiki/Motorola-Mobility/P56JL1.Exhibit-8-Users-Manual/User-Guide-1023750-Page-125.png)