Motorola Mobility P56MM3 MOBILE PHONE User Manual
Motorola Mobility LLC MOBILE PHONE
Contents
- 1. Users Manual 1
- 2. Users Manual 2
- 3. Users Manual 3
- 4. Users Manual 4
Users Manual 3
19Location
Location
where you are, and where you’re going
Open Maps or just touch Search to find an address,
then get directions, check in, or save the location.
Quick start: Location
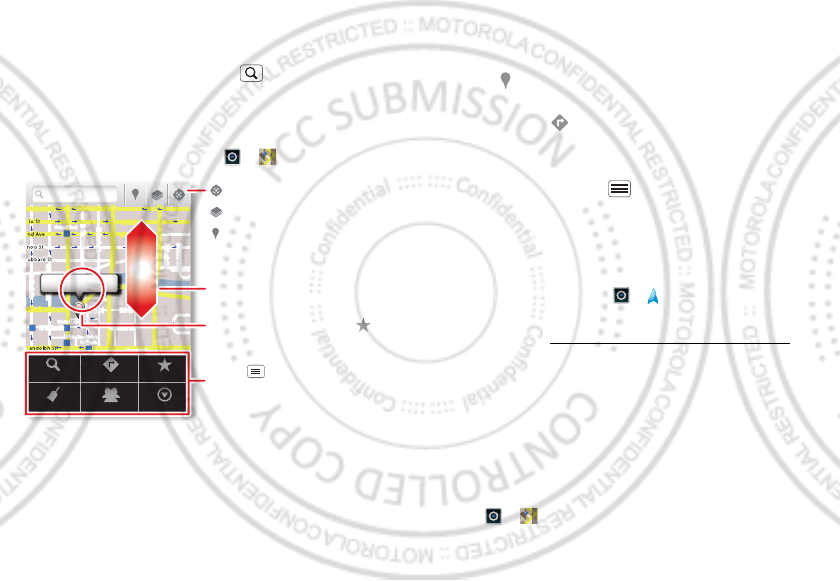
From the home screen, touch > Maps.
Google Maps™ offers powerful, user-friendly mapping
technology and local business information—including
business locations, contact information, and driving
directions.
•To find an address, enter it in the search box at the
top. The map moves to show the address.
Chicago, IL
N Clark St
Wacker Dr
M
E Ontario St
E Ohio St
N Rush St
N Park St
N New St
N Wabash Ave
N Dearborn St
E Grand Ave
E Randolph St
N Micigan Ave
N Micigan Ave
rD submuloC N
W Lake St W Lake St
E Wacker Pl
State/Lake
Grand Red
Lake
Randolph
St Metra
Randolph/
Wabash
Washington-Blue
E S WaterSt
M
M
M
M
Ontario St
D
D
D
e
e
e
e
e
a
a
a
r
r
b
b
b
o
o
r
r
n
n
S
S
S
t
44 West Street
A
Search
Clear Map
Directions
Join Latitude
My Places
More
Touch to open, then touch
to add to Starred Places.
Drag or flick to scroll.
Find nearby places.
Show your location.
Show layers on the map.
Touch to get directions,
open your starred places,
windows, and more.
Tip: You can touch and hold a spot on the map to
show the nearest address.
•To find stores, restaurants, and other places near you,
touch at the top.
•To get directions, find an address on the map, touch
it, then touch .
•To save an address for later, touch it, then touch the
star by its name to add it to your My Places.
•For help, touch Menu > More > Help.
Google Maps™ Navigation
Google Maps Navigation is an Internet-connected GPS
navigation system with voice guidance.
To open navigation, touch > Navigation. Follow the
prompts to speak or type your destination.
For more, go to www.google.com/mobile/navigation.
Google Latitude™
Google Latitude™ lets you see where your friends and
family are on Google Maps™. Plan to meet up, check
that they got home safely, or just stay in touch. Don’t
worry, your location is not shared unless you agree to it.
After you join Google Latitude, you can invite your
friends to view your location, or accept their invitations.
Touch > Maps and then:
February. 9th, 2012
20 Photos & videos
•To join Google Latitude, touch Menu > Join
Latitude. Read the privacy policy and, if you agree
with it, choose to continue.
•To add friends, touch Menu > Latitude >
Menu > Add friends.
Touch Select from Contacts or Add via email address,
then touch a contact and Add friends. Your friend will
receive an email notice.
•To remove friends, touch Menu > Latitude to
show your friends list. Touch a name, then touch
Remove.
•To share your location when you receive a request,
you can choose Accept and share back (show your
location and see theirs), Accept, but hide my location
(hide your location, but see theirs), or Don’t accept
(hide both locations).
•To hide your location, touch Menu > Latitude to
show your friends list. Touch your contact name, then
touch Menu > Settings > Detect your location.
•To sign out, touch Menu > Latitude to show your
friends list. Touch Menu > Settings > Sign out of
Latitude.
Photos & videos
see it, capture it, share it!
Capture photos and videos to send them to friends or
save them for later.
Quick start: Photos & videos
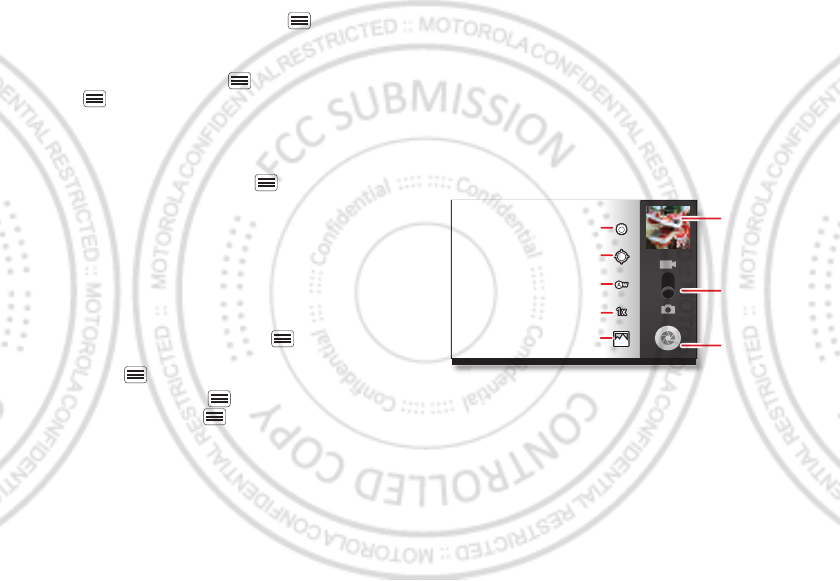
From any screen, press the Camera Key on the right side
of the phone to open the camera.
•To t a ke a photo, open the camera, then press the
Camera Key.
•To record a video, open the camera, touch the
screen, then touch Camera/Video to switch to the
camcorder. Press the Camera Key to start and stop
recording.
Open your last
photo or video.
Switch resolution & more.
Store photo location.
Set white balance for your
lighting.
Zoom.
Choose front or back
camera.
Choose camera
or camcorder.
Capture.
February. 9th, 2012
21Photos & videos
•To open photos and videos, touch >
My gallery, then touch Menu for options like
Share.
Tip: For the clearest photos and videos, clean the lens
with a soft, dry cloth.
View & share photos & videos
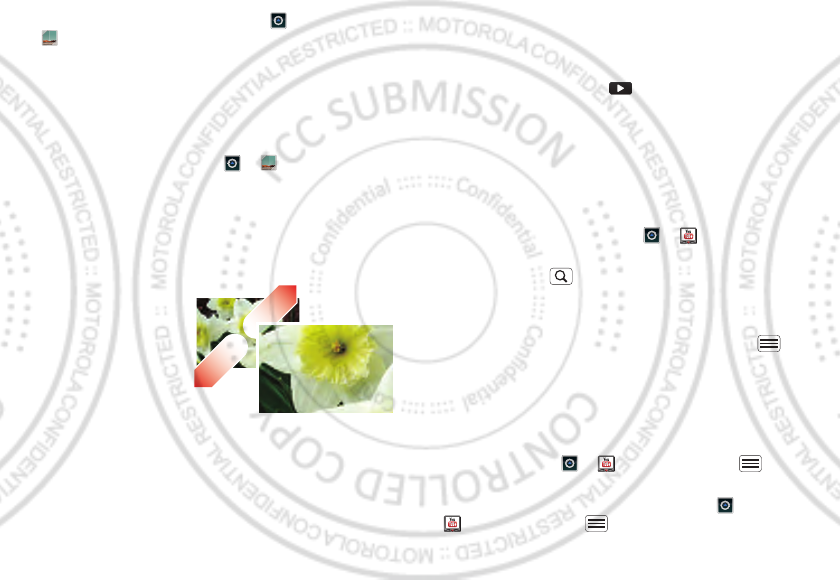
From the home screen, touch > My gallery.
Flick left and right to show folders. Touch a folder to
show its photos or videos, then touch a thumbnail image
to open, share, or delete it.
Tip: From the viewfinder, you can touch the thumbnail
on the left to open your last photo or video.
•To zoom in, touch
the screen with two
fingers and then drag
them apart. To zoom
out, drag your fingers
together.
•To send or post the
photo or video,
touch Menu > Share.
To use a Bluetooth or cable connection, see
“Bluetooth™, Wi-Fi, & cable connections” on page 24.
•To delete the photo or video, touch Menu > Delete.
•To set a photo as your wallpaper or a contact photo,
touch Menu > More > Set as.
•To crop or rotate a photo, touch Menu > More.
•To play a video, touch .
Tip: Turn the phone sideways for a widescreen view.
YouTube™
The YouTube user-generated content website lets you
share videos with YouTube users everywhere. You don’t
need a YouTube account to browse and view videos.
From the home screen, touch > YouTube.
•To watch videos, touch a category like Top rated or
touch Search to find a video. Touch a video to
watch it.
For more video categories, touch Related videos.
To watch a video in high quality, touch Menu >
Settings > High quality on mobile.
•To share a video, touch it to open it, touch More at the
top, choose Share, then choose how you want to
share it.
•To upload a video from your phone to your YouTube
account, touch > YouTube > Menu >
Upload. Touch the video, then touch Upload.
To sign into your YouTube account, touch >
YouTube > Menu > My Channel.
February. 9th, 2012
22 Music
Note: If you don’t have an account, touch the link to
create one. For more, visit www.youtube.com.Music
when music is what you need...
Keep your music with you! Put music on your phone so
you can listen and create playlists anytime.
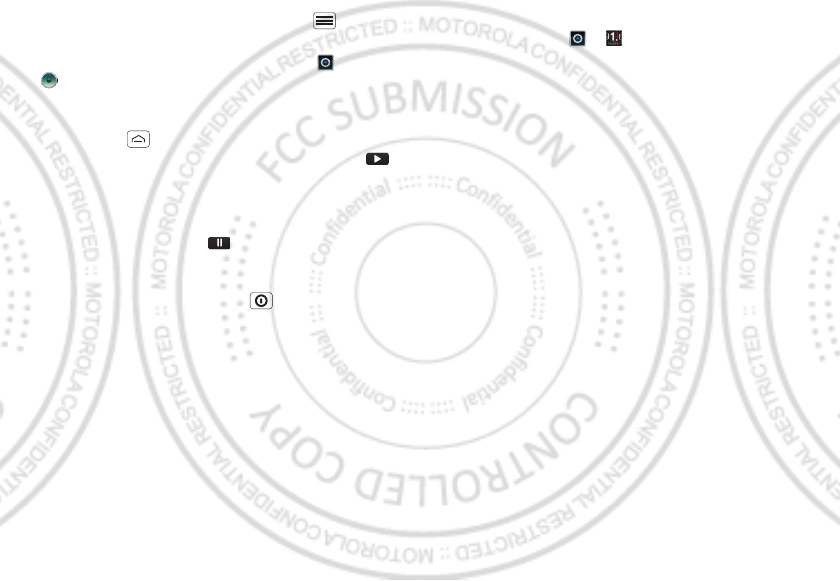
Quick start: Music
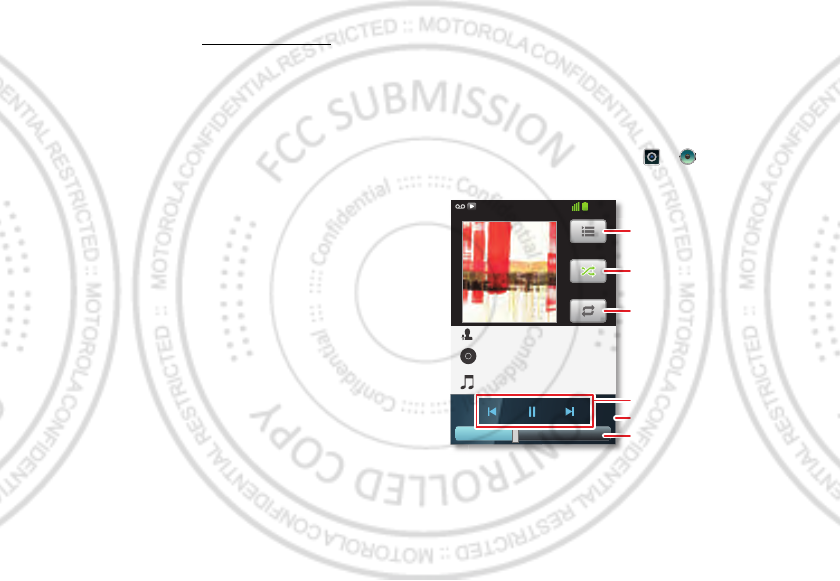
From the home screen, touch > Music, then
choose a song to play it:
•To adjust volume, use the volume keys.
0:26 1:35
Music Artist
Album Title
Song Title
11:19
Open Playlist
Shuffle On/Off
Repeat Off/All/Current
Music Controls
Total Song Time
Progress Bar
February. 9th, 2012
23Music
•When a song is playing, you touch Menu to add it
to a playlist or use it as a ringtone.
To edit, delete, or rename playlists, touch >
Music touch the Playlists tab, then touch and hold
the playlist name.
•To hide the player and use other apps,
touch Home . Your music keeps playing. To return
to the player, flick down the status bar and touch .
Tip: For quick music player controls, touch and hold
an empty spot in your home screen, then choose
Android widgets > Music.
•To stop the player, touch .
•Before a flight, turn off network and wireless
connections so that you can keep listening to music:
Press and hold Power/Lock key > Airplane mode.
Note: When you select airplane mode, all wireless
services are disabled. You can then turn Wi-Fi and/or
Bluetooth back on, if permitted by your airline. Other
wireless voice and data services (such as calls and
text messages) remain off in airplane mode.
Emergency calls to your region's emergency number
can still be made.
You can use your phone’s 3.5mm headset jack to
connect wired headphones, or go wireless with a
Bluetooth headset in “Bluetooth™, Wi-Fi, & cable
connections” on page 24.
To listen to FM radio stations, Plug in a 3.5mm OMTP
headset and touch > FM Radio. Your phone uses
the headset wire as the radio antenna.
Music files
To get songs for your music player, you can download
them from online services or copy them from your
computer. Your music player can play these file formats:
MP3, AAC, ACC+, eACC+, MIDI, WAV, or OGG Vorbis.
Note: Your phone does not support any DRM protected
files.
Note: Copyright—do you have the right? Always follow
the rules. See “Content Copyright” in your legal and
safety information.
To copy files from your computer to your phone, you
can use “Cable connections” on page 26 or “Bluetooth™
devices” on page 24.
To save a CD on your computer (“rip” the CD), you can
use a program like Microsoft™ Windows™ Media
Player. First, make sure you change the format to MP3
(under Rip > Format in Windows Media Player).
February. 9th, 2012
24 Bluetooth™, Wi-Fi, & cable connections
Bluetooth™, Wi-Fi, & cable
connections
home, office, or hotspot
Connect your phone to Bluetooth headsets, fast Wi-Fi
networks, or right to your computer.
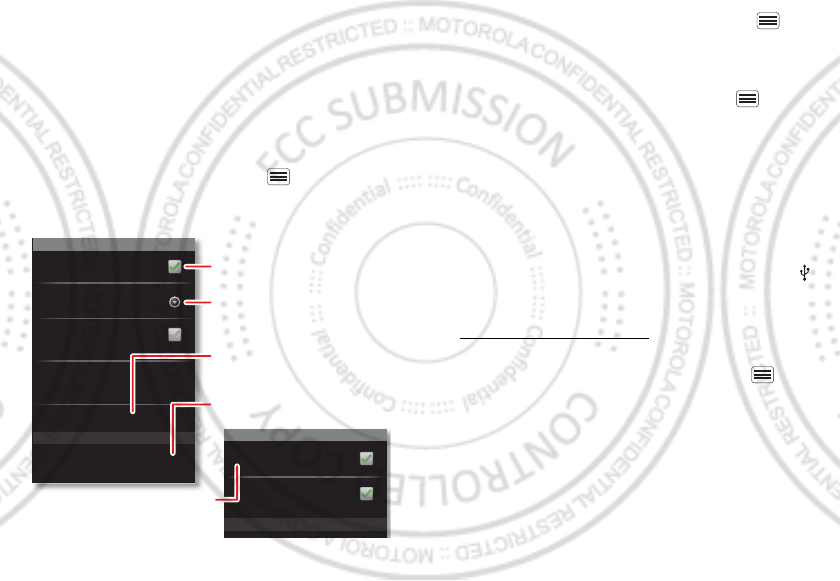
Quick start: connections
From the home screen, touch Menu > Settings >
Wireless & networks, then Bluetooth settings or Wi-Fi
settings.
Wi-Fi networks
Wi-Fi settings
Notify me when an open network is
available
Network notification
Wi-Fi
Bluetooth devices
Bluetooth settings
(Your Phone)
Device name
Scan for devices
Make device discoverable
Discoverable
Bluetooth
Pair with this device
(Nearby Bluetooth Device)
Set how long device will be discoverable
Discoverable timeout
Turn Bluetooth power on & scan,
or turn off.
Change your phone’s Bluetooth
device name.
Turn Wi-Fi power on & scan, or
turn off.
Re-scan.
Connect a device found by the
scan.
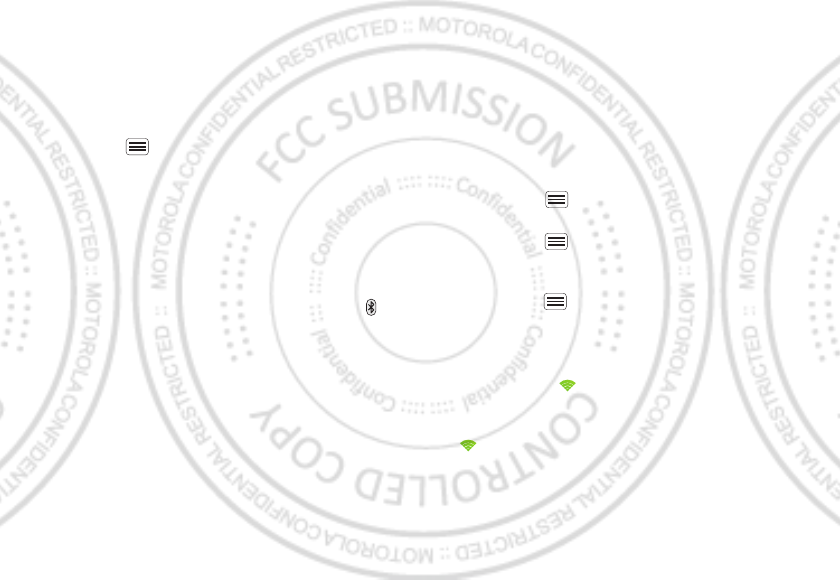
•To connect Bluetooth devices, touch Menu >
Settings > Wireless & networks > Bluetooth settings
> Scan for devices (or Bluetooth, if it is off). Touch a
device that your phone found, to connect it.
•To connect Wi-Fi networks, touch Menu >
Settings > Wireless & networks > Wi-Fi settings (then
touch Wi-Fi, if it is off). Touch a network that your
phone found, to connect it.
•To us e a cable connection, connect your phone’s
micro USB port to a standard USB port on your
computer, then use a computer program to transfer
files to and from your phone’s memory card. Your
phone supports microSD cards up to 32GB.
On your phone, flick down the status bar and touch
to enable your phone’s memory card.
You can download your phone’s driver files from
www.motorola.com/support.
•To make your phone a hotspot that other devices can
use to connect to the Internet, touch Menu >
Settings > Wireless & networks > Tethering &
portable hotspot. Then, choose to enable USB
tethering or Portable Wi-Fi hotspot.
Bluetooth™ devices
Note: This requires an optional accessory.
February. 9th, 2012
25Bluetooth™, Wi-Fi, & cable connections
You can connect your phone to other Bluetooth devices
for handsfree calls, file transfers, and more:
1Make sure the device you are pairing with is in
discoverable mode.
Note: For questions about a Bluetooth device, check
the manufacturer’s manual or website.
2Touch Menu > Settings > Wireless & networks >
Bluetooth settings.
3Touch Scan for devices (or touch Bluetooth if it is
turned off). Your phone scans, and lists nearby
devices.
4Touch a device to connect.
5If necessary, touch Pair or enter the device passkey
(like 0000) to connect to the device. When the device
is connected, the Bluetooth connected indicator
appears in the status bar.
To reconnect a device you’ve connected before, just
turn it on.
To disconnect a device, just turn it off.
Note: Using a mobile device or accessory while driving
may cause distraction and may be illegal. Always obey
the laws and drive safely.
Tip: Touch and hold an empty spot on your home
screen, then choose Android widgets > Power Control
for a widget that lets you turn on or off Wi-Fi, Bluetooth,
Use GPS satellites, and more.
Note: Your phone's Bluetooth features and Bluetooth
power levels are not allowed for outdoor operation in
France. To avoid unlawful interference with radio signals,
do not use the Bluetooth features in France unless you
are indoors.
Wi-Fi networks
You can connect to Wi-Fi networks for even faster
Internet access and to download data:
1Touch Menu > Settings > Wireless & networks >
Wi-Fi settings.
2Touch Menu > Scan (or touch Wi-Fi, if it is off. Your
phone scans for nearby networks.
To see your phone’s MAC address or other details,
touch Menu > Advanced.
3Touch a network to connect.
4If necessary, enter details from from the network
administrator. When your phone is connected, the
Wi-Fi indicator appears in the status bar.
When power is on and your phone finds a network
you’ve used, it automatically reconnects and shows
in the status bar.
Tip: Touch and hold an empty spot on your home
screen, then choose Android widgets > Power Control
for a widget that lets you turn on or off Wi-Fi, Bluetooth,
Use GPS satellites, and more.
February. 9th, 2012