Motorola Mobility P6JL1 Portable PCS GSM Transceiver with Bluetooth User Manual
Motorola Mobility LLC Portable PCS GSM Transceiver with Bluetooth
Exhibit 8 Users Manual

Safety Information
Safety and General Information
Safet y In formati on
This section contains important information on the safe and
efficient operation of your mobile device. Read this
information before using your mobile device.
Exposure to Radio Frequency (RF)
Energy
Your mobile device contains a transmitter and receiver. When it is
ON, it receives and transmits RF energy. When you communicate
with your mobile device, the system handling your call controls the
power level at which your mobile device transmits.
Your Motorola mobile device is designed to comply with local
regulatory requirements in your country concerning exposure of
human beings to RF energy.
Operational Precautions
For optimal mobile device performance, and to be sure that human
exposure to RF energy does not exceed the guidelines set forth in
the relevant standards, always follow these instructions and
precautions.
Product Operation
When placing or receiving a phone call, hold your mobile device
just like you would a landline phone.
If you wear the mobile device on your body, always place the
mobile device in a Motorola-supplied or approved clip, holder,
holster, case, or body harness. If you do not use a body-worn
accessory supplied or approved by Motorola, keep the mobile
device and its antenna at least 2.5 centimeters (1 inch) from your
body when transmitting.
Using accessories not supplied or approved by Motorola may
cause your mobile device to exceed RF energy exposure
guidelines. For a list of Motorola-supplied or approved
accessories, visit our Web site at:
www.motorola.com
.
RF Energy Interference/Compatibility
Nearly every electronic device is subject to RF energy interference
from external sources if inadequately shielded, designed, or
otherwise configured for RF energy compatibility. In some
circumstances your mobile device may cause interference with
other devices.

Safety Information
Follow Instructions to Avoid Interference
Problems
Turn off your mobile device in any location where posted notices
instruct you to do so.
In an aircraft, turn off your mobile device whenever instructed to
do so by airline staff. If your mobile device offers an airplane mode
or similar feature, consult airline staff about using it in flight.
Implantable Medical Devices
If you have an implantable medical device, such as a pacemaker or
defibrillator, consult your physician before using this mobile
device.
Persons with implantable medical devices should observe the
following precautions:
•
ALWAYS keep the mobile device more than
20 centimeters (8 inches) from the implantable medical
device when the mobile device is turned ON.
•
DO NOT carry the mobile device in the breast pocket.
•
Use the ear opposite the implantable medical device to
minimize the potential for interference.
•
Turn OFF the mobile device immediately if you have any
reason to suspect that interference is taking place.
Read and follow the directions from the manufacturer of your
implantable medical device. If you have any questions about using
your mobile device with your implantable medical device, consult
your healthcare provider.
Driving Precautions
The use of wireless phones while driving may cause distraction.
Discontinue a call if you can’t concentrate on driving.
Additionally, the use of wireless devices and their accessories may
be prohibited or restricted in certain areas. Always obey the laws
and regulations on the use of these products.
Responsible driving practices can be found in the “Smart Practices
While Driving” section in this guide (or separate guide).
Operational Warnings
Obey all posted signs when using mobile devices in public areas.
Potentially Explosive Atmospheres
Areas with potentially explosive atmospheres are often, but not
always, posted and can include fueling areas, such as below decks
on boats, fuel or chemical transfer or storage facilities, or areas
where the air contains chemicals or particles, such as grain dust,
or metal powders.
When you are in such an area, turn off your mobile device, and do
not remove, install, or charge batteries. In such areas, sparks can
occur and cause an explosion or fire.
Safety Information
Symbol Key
Your battery, charger, or mobile device may contain symbols,
defined as follows:
Batteries & Chargers
Caution: Improper treatment or use of batteries may present
a danger of fire, explosion, leakage, or other hazard. For
more information, see the “battery use & safety” section in
the user’s guide.
Keep Your Mobile Device and Its
Accessories Away From Small
Children
These products are not toys and may be hazardous to children. For
example:
•
A choking hazard may exist for small, detachable parts.
•
Improper use could result in loud sounds, possibly causing
hearing injury.
•
Improperly handled batteries could overheat and cause a
burn.
Glass Parts
Some parts of your mobile device may be made of glass. This glass
could break if the product is dropped on a hard surface or receives
a substantial impact. If glass breaks, do not touch or attempt to
remove. Stop using your mobile device until the glass is replaced
by a qualified service center.
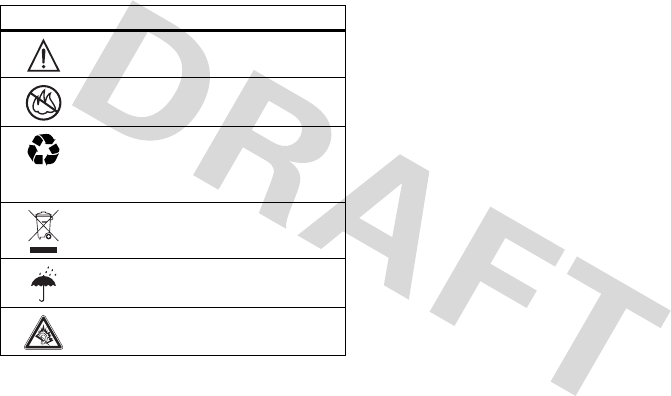
Symbol Definition
Important safety information follows.
Do not dispose of your battery or mobile device
in a fire.
Your battery or mobile device may require
recycling in accordance with local laws.
Contact your local regulatory authorities for
more information.
Do not throw your battery or mobile device in
the trash.
Do not let your battery, charger, or mobile
device get wet.
Listening at full volume to music or voice
through a headset may damage your hearing.
032374o
032376o
032375o

Safety Information
Seizures/Blackouts
Some people may be susceptible to epileptic seizures or blackouts
when exposed to flashing lights, such as when playing video
games. These may occur even if a person has never had a previous
seizure or blackout.
If you have experienced seizures or blackouts, or if you have a
family history of such occurrences, please consult with your
physician before playing video games or enabling a flashing-lights
feature (if available) on your mobile device.
Discontinue use and consult a physician if any of the following
symptoms occur: convulsion, eye or muscle twitching, loss of
awareness, involuntary movements, or disorientation. It is always
a good idea to hold the screen away from your eyes, leave the
lights on in the room, take a 15-minute break every hour, and stop
use if you are very tired.
Caution About High Volume Usage
Warning:
Exposure to loud noise from any source for
extended periods of time may affect your hearing.
The louder the volume sound level, the less time is
required before your hearing could be affected. To
protect your hearing:
•
Limit the amount of time you use headsets or headphones
at high volume.
•
Avoid turning up the volume to block out noisy
surroundings.
•
Turn the volume down if you can’t hear people speaking
near you.
If you experience hearing discomfort, including the sensation of
pressure or fullness in your ears, ringing in your ears, or muffled
speech, you should stop listening to the device through your
headset or headphones and have your hearing checked.
For more information about hearing, see our Web site at
www.motorola.com/hearingsafety
(in English only).
Repetitive Motion
When you repetitively perform actions such as pressing keys or
entering finger-written characters, you may experience occasional
discomfort in your hands, arms, shoulders, neck, or other parts of
your body. If you continue to have discomfort during or after such
use, stop use and see a physician.
Mar0108

FCC Notice
FCC Notice to Users
FCC Notice
The following statement applies to all products that have
received FCC approval. Applicable products bear the FCC
logo, and/or an FCC ID in the format FCC-ID:xxxxxx on the
product label.
Motorola has not approved any changes or modifications to this
device by the user. Any changes or modifications could void the
user’s authority to operate the equipment. See 47 CFR Sec. 15.21.
This device complies with part 15 of the FCC Rules. Operation is
subject to the following two conditions: (1) This device may not
cause harmful interference, and (2) this device must accept any
interference received, including interference that may cause
undesired operation. See 47 CFR Sec. 15.19(3).
This equipment has been tested and found to comply with the
limits for a Class B digital device, pursuant to part 15 of the FCC
Rules. These limits are designed to provide reasonable protection
against harmful interference in a residential installation. This
equipment generates, uses and can radiate radio frequency energy
and, if not installed and used in accordance with the instructions,
may cause harmful interference to radio communications.
However, there is no guarantee that interference will not occur in a
particular installation. If this equipment does cause harmful
interference to radio or television reception, which can be
determined by turning the equipment off and on, the user is
encouraged to try to correct the interference by one or more of the
following measures:
•
Reorient or relocate the receiving antenna.
•
Increase the separation between the equipment and the
receiver.
•
Connect the equipment to an outlet on a circuit different
from that to which the receiver is connected.
•
Consult the dealer or an experienced radio/TV technician
for help.

1
Safety precautions ............................6
Phone overview .................................9
Standby display icons ..................11
Getting started ................................12
Removing the back cover ............12
Inserting the SIM card .................12
Inserting the battery .....................13
microSD card ...............................13
Inserting the microSD card ......13
Installing the back cover ..............13
Charging the battery .....................14
Switching phone on/off ................14
Switching phone on .................14
First time startup ......................14
Home screen ............................15
Signal strength .........................15
Emergency Call (SOS) ............15
Offline mode ............................15
Switching phone off .................15
General instructions .......................16
Connectivity .................................16
DRM ............................................16
Menu Control ...............................16
Navigating the menus ..............16
Menu speed dialling .................17
Tabs .........................................17
Standard functions .......................17
Options menu ...........................17
Mark mode ...............................18
Fast list search .........................18
PIN codes ........................................18
PIN control ...................................19
Change PIN ..................................19
Change PIN2 ................................19
Change phone code ......................20
Text entry ........................................20
Input methods ...............................20
Changing input methods ..........20
Using text input without T9 .........20
Using T9 Text input .....................21
Adding a new word ..................21
Correcting a word ....................21
Text options .................................21
Entering symbols and special charac-
ters ................................................22
Text templates ..............................22
Creating text templates ............22
Inserting text templates ............22
Calling .............................................23
Making a video call ......................23
Video call options ....................23
Dialling with number keys ...........23
Ending a call ................................24
Setting earpiece volume ...............24
Dialling previous numbers ...........24
Listening to voicemail ..................24
Accepting a call ............................24
Rejecting a call .............................24
Handsfree talking .........................24
Swapping between 2 calls ............25
Establish a second connection .25
Swapping calls .........................25
Incoming calls during a call .....25
Ending calls .............................25
Conference ...................................26
Ending a conference ................26
Private call ...............................26
Call options ..................................26
Full/split screen ........................27

2
Contacts ...........................................28
Accessing Contacts ......................28
All contacts ..................................28
Adding a new contact ..............28
Groups ..........................................29
Adding a new group ................29
Adding members ......................29
Viewing members in a group ...30
Editing a group ........................30
SIM contacts ................................30
Adding a new SIM contact ......30
Moving a SIM contact to phone ..
30
Filter .............................................30
Options menu for Contacts ..........30
Fast contact search .......................33
Dialling a contact .........................33
Voice-activated dialling ...............33
Recording a voice tag ..............33
Using Voice-activated dialling 33
Call records .....................................33
Redial number ..............................33
Duration/charges ..........................34
Charge settings ........................34
Entertainment .................................34
Media player ................................34
Music .......................................35
Pictures ....................................35
Videos ......................................35
Bookmarks ...............................35
Camera .........................................36
Starting the camera ..................36
Displayed information .............36
Taking pictures/videos .............36
Reviewing pictures/videos .......37
Save pictures/videos ................37
Return to view finder ...............37
Delete pictures/videos ..............37
Camera options ........................37
Picture settings/Video settings .38
Create message ...............................38
SMS/MMS ...................................38
About MMS .............................38
Writing/sending an SMS ..........39
Writing/sending an MMS ........39
SMS/MMS options ..................40
E-mail ...........................................41
Inbox ................................................42
Inbox structure .............................42
Reading SMS, MMS, CB ........42
Reading E-mail ........................43
WAP push ....................................44
Message lists ....................................44
Drafts ............................................44
Outbox ..........................................44
Sent ..............................................44
Message settings ..............................44
SMS settings ................................44
SMS Profiles ............................45
Auto header ..............................45
Auto signature ..........................45
Save sent items ........................45
Auto delete SMS ......................45
Emoticons ................................45
Text size ...................................45
MMS settings ...............................45
MMS profiles ...........................45
Home retrieval/Roaming retriev. .
46

3
Req. read report .......................46
Req. deliv report ......................46
Delivery time ...........................46
Validity period .........................46
Hide number ............................46
Anon. messages .......................46
Allow read reprt .......................46
Allow deliv reprt ......................46
Creation mode ..........................46
Auto signature ..........................47
Save sent items ........................47
Allow adverts ...........................47
Emoticons ................................47
Text size ...................................47
Max msg size ...........................47
E-mail settings .............................47
Activating an account ..............47
Deleting an account .................47
Editing an account ...................47
CB settings ...................................48
Receive broadcasts ..................48
Cell info display .......................48
Topic list ..................................48
Voicemail .....................................48
Voicemail settings ...................48
Listening to voicemails ............48
Internet ............................................48
Home Page ...................................49
Enter URL ....................................49
Bookmarks ...................................49
History .........................................49
Settings .........................................49
Multimedia ...............................49
Look and feel ...........................49
Security ....................................49
Certificates ...............................50
WAP push ................................50
Browser profiles .......................50
Navigation in the browser ............50
Ending a connection .....................50
Download .........................................51
Java Application Manager ...........51
Games ..............................................51
Organiser .........................................51
Calendar .......................................51
Daily view ................................52
Weekly view ............................52
Monthly view ...........................52
Calendar Settings .....................52
New event/Edit event ...............53
Information on the alarm .........53
Voice memo .................................53
New recording .........................53
Playback ...................................53
Set as call ringtone ...................53
Time zones ...................................53
Synchronisation ............................54
Remote sync .............................54
Active profile ...........................54
Sync mode ...............................54
Apps to synchronise .................55
Sync log ...................................55
Extras ...............................................55
SIM toolkit (optional) ..................55
My menu ......................................55
Using My menu .......................55
Change My menu .....................55
Alarm clock ..................................55
Set alarm ..................................55

4
Apply Alarm to every day .......56
End alarm .................................56
Calculator .....................................56
Unit converter ..............................56
Converting the units/currency .56
Currency settings .....................57
Sound recorder .............................57
Stopwatch .....................................57
My stuff ...........................................57
Folder structure ............................57
License manager ......................59
Settings ............................................59
Profiles .........................................59
Ringtones .....................................59
Themes .........................................60
Display .........................................60
Wallpaper .................................60
Logo .........................................60
Animation mode ......................60
Screensaver ..............................60
Greeting message .....................61
Backlight time ..........................61
Brightness ................................61
Power save ...............................61
Vibration ......................................61
Connectivity .................................61
Bluetooth® technology ............61
Data counter .............................63
Connect profiles .......................63
Internet profiles ........................63
Linger time ..............................63
Shortcuts ......................................63
Setting a function shortcut .......63
Setting a speed-dial key ...........63
Start function/call number using
shortcuts ...................................64
Call setup .....................................64
Hide ID ....................................64
Call waiting ..............................64
Diverts ......................................64
Any key answer .......................65
Auto redial ...............................65
Video calls ...............................65
Display call timer .....................65
Phone ............................................65
Language ..................................65
Default input method ...............66
Key tones .................................66
Info tones .................................66
Auto power on .........................66
Auto power off .........................66
File system ...............................66
Phone identity ..........................66
Master reset ..............................66
Clock ............................................67
Time/Date ................................67
Time zone ................................67
Time format .............................67
Date format ..............................67
Show clock ...............................67
Auto time .................................67
Security ........................................67
Only protect. SIM ....................67
PIN codes .................................67
This SIM only ..........................67
Barrings ....................................67
License manager ......................68
Download prompt ....................68
Network ........................................68
Network info ............................68

5
Choose network .......................68
Auto network ...........................68
GPRS auto attach .....................68
Preferred network ....................68
Mode selection .........................68
Fast search ...............................69
Accessories ..................................69
Car kit ......................................69
Headset ....................................69
Charge via USB .......................69
Mass storage ............................69
GPS settings .................................69
Questions & Answers ...................70
Care and maintenance ...................73
SAR ..................................................74

6
Safety precautions
Information for parents
Please read the operating instructions and safety precautions carefully before use.
Explain the content to your children and the hazards associated with using the phone.
• Remember to comply with legal
requirements and local restrictions when
using the phone. For example, in
aeroplanes, petrol stations, hospitals or
while driving.
• Mobile phones can interfere with the
functioning of medical devices such as
hearing aids or pacemakers. Keep at
least 20cm/9 inches between phone and
pacemaker. When using the mobile
phone hold it to the ear which is furthest
away from the pacemaker. For more
information consult your doctor.
• Always keep the phone and accessories
out of reach of small children.
• Small parts such as the SIM card, dust
cap, lens ring and lens cap as well as the
microSD card can be dismantled and
swallowed by small children.
• Do not place the phone near to
electromagnetic data carriers such as
credit cards and floppy disks.
Information stored on them could be
lost.
• Do not look directly into the LED (e.g.
flash LED) with optical magnifiers
because of radiation.
• This product complies with IEC/EN
60825-1 “Safety of Laser Products” for
LED Class 1M products; such products
are safe under reasonably foreseeable
operating conditions.
• Permanent hearing loss may occur if
you use ear- or headphones at high
volume.You can adapt over time to a
higher volume, which may sound
normal but can be damaging to your
hearing. Set your volume to a safe level.
If you experience discomfort or buzzing
in your ears, reduce the volume or
discontinue use of your ear- or
headphones.
• Ringtones, info tones and handsfree
talking are reproduced through the
loudspeaker. Do not hold the phone to
the ear when it rings or when you have
switched on the handsfree function.
Otherwise you risk serious permanent
damage to your hearing.
• The mains voltage (V) specified on the
power supply unit must not be exceeded.
Otherwise the charging device may be
damaged.
• The power supply must be plugged into
an easily accessible AC mains power
socket when charging the battery. The
only way to turn off the charging device
after charging the battery is to unplug it.
• You may only open the phone to replace
the battery, SIM and microSD card. You
must not open the battery under any
circumstances. All other changes to this
device are strictly prohibited and will
invalidate the guarantee.
• The phone may cause interference in the
vicinity of TV sets, radios and PCs.

7
Bluetooth®
Your phone has a Bluetooth® interface.
This makes it possible to establish a
wireless connection with your phone and a
headset, a car kit or other Bluetooth-
enabled devices.
In order to establish a secure link between
the devices and to prevent a third party
from having access to your phone, you
should observe the following points:
• The initial connection between two
devices, what is called "pairing", should
take place in familiar surroundings.
• Both devices must be able to identify
themselves one time by using a
password/PIN. To ensure sufficient
security, you should choose a 16-digit
number combination for a password that
would be difficult to guess (if a PIN has
not been assigned).
• An automatic connection acceptance
("connection without confirmation")
should only be used in exceptional cases.
• In general, only trustworthy devices
should be linked in order to minimise
security risks.
• You should restrict the "visibility" of
your phone if possible. This will make it
much more difficult for unknown
devices to establish a connection with
your phone. To do this, in the Bluetooth
menu, set the option Bluetooth visibility
from On to Off (page 67).
• The name of your phone is transmitted in
a Bluetooth connection. The factory
default is "M7". The first time Bluetooth
function is activated, or later in the
Bluetooth menu, you can change this
name (page 67).
• If Bluetooth technology is not needed,
this function should be deactivated.
• Before using Bluetooth accessories, or a
mobile phone inside a vehicle, check the
• Use only original accessories. This will
avoid potential risks to health or
property and ensure compliance with all
relevant regulations.
• Dispose of unwanted batteries and
phones as permitted by the laws in your
countries.
• Only use original batteries and charging
devices. Otherwise you risk serious
damage to health and property. The
battery could explode, for instance.
• All batteries can cause property damage,
injury or burns if a conductive material
such as jewelry, keys or beaded chains
touch exposed terminals. The material
may complete an electrical circuit and
become quite hot. Exercise care in
handling any charged battery,
particularly when placing it inside your
pocket, purse or other container with
metal objects.
• Do not dispose of batteries in fire as they
may explode.
• Do not charge the original li-ion
batteries in the environment with its
temperature below 0 °C (+32 °F) as it
may cause loss of charged battery
capacity.
Improper use will invalidate the
guarantee! These safety instructions also
apply to original accessories.
As mobile devices offer a range of
functions, they can be used in positions
other than the head, such as on the body.
In this case, a separation distance of
1.5 cm is required.

8
vehicle user guide for any limitations on
the use of these products.
9
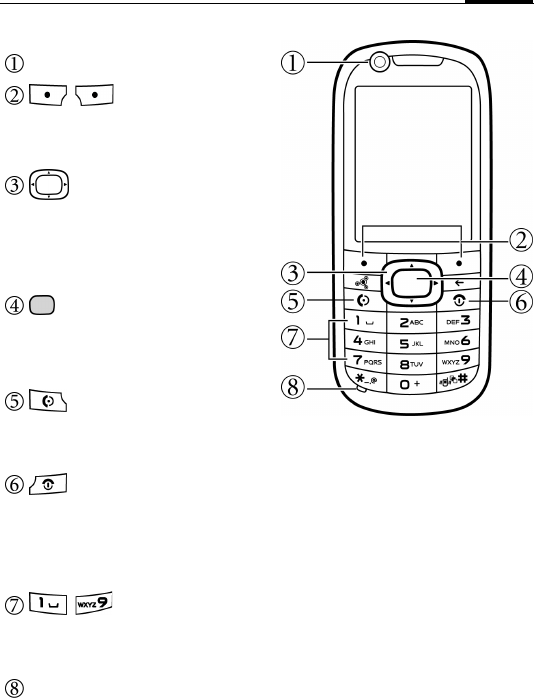
Phone overview
Internal Camera
/ Soft keys
• The current functions of these keys
are shown in the bottom line of the
display (see Shortcuts, page 69).
Navigation key
• In home screen: press to start
shortcut functions (see Shortcuts,
page 69).
• In lists, messages and menus: scroll
up, down, left and right.
OK key
• In home screen: press to open the
main menu.
• In lists and menus: start a function /
confirm selection.
Call key
• Press to send or answer calls.
• In home screen: press to open call
records.
Power on/off/End key
• Press and hold to turn the phone on/
off.
• Press to end a call.
• Press to reject an incoming call.
• Press to cancel dialling.
- Number keys
• Press to enter numbers.
• Press and hold to start a shortcut
function/speed-dial a number.
Microphone
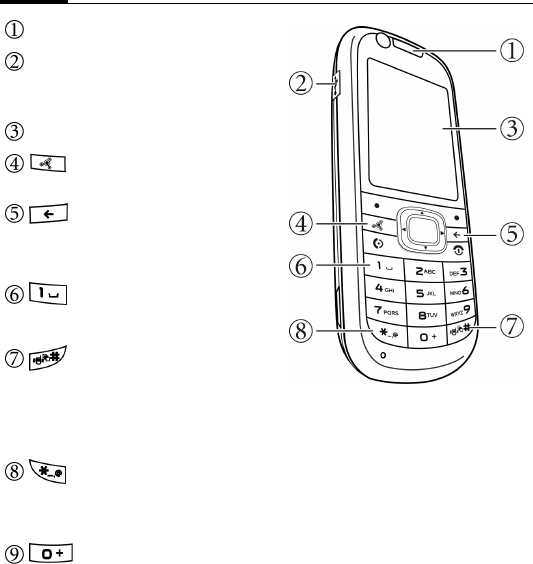
10
Speaker
Connection jack
For charger, headset, and USB
cable.
Main display
key
key
• Press to delete entered text.
• Press and hold to delete all entered
text quickly.
Voicemail key
In home screen: press and hold to dial
your voicemail number.
Pound key
• Press to enter "#".
• Press and hold to activate/deactivate
the Silent mode (only incoming call
ringtones and messaging tones will
be switched off).
Asterisk key
• Press to enter an asterisk "*".
• Press and hold to activate/deactivate
keypad lock.
key
While dialling a number, press and
hold to make an international call
(enter "+").
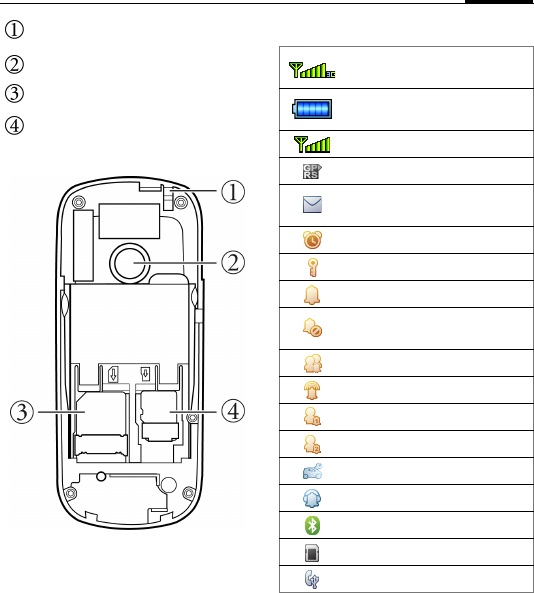
11
Standby display icons
Strap Hole
microSD card holder
SIM card holder
Camera lens
3G signal strength
Battery charge level, e.g.
100%
GSM signal strength
GPRS is activated
New SMS/MMS/E-mail
messages
Alarm set
Keypad locked
General profile active
Silent profile active (all
sounds will be switched off)
Meeting profile active
Outdoor profile active
User profile 1 active
User profile 2 active
Car kit profile active
Headset profile active
Bluetooth technology active
microSD card in use
USB data cable connected
12
Getting started
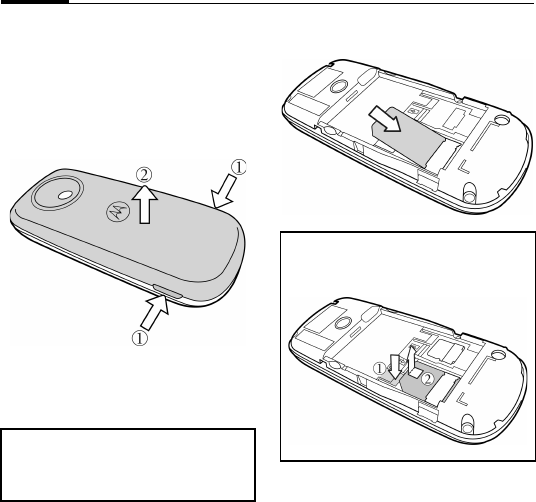
Removing the back
cover
1. Press and hold the tabs as illustrated
to release the lock.
2. Lift the cover off the phone.
Inserting the SIM card
Slide the entire SIM card into the SIM
card holder, with the metal contacts of
the SIM card facing downward and the
cut corner at the top left as illustrated.
A SIM card can be easily damaged if its
metal contacts become scratched.
Therefore, take special care when
holding or inserting it.
To remove the SIM card, you must
first remove the battery to unlock the
SIM card holder.
13
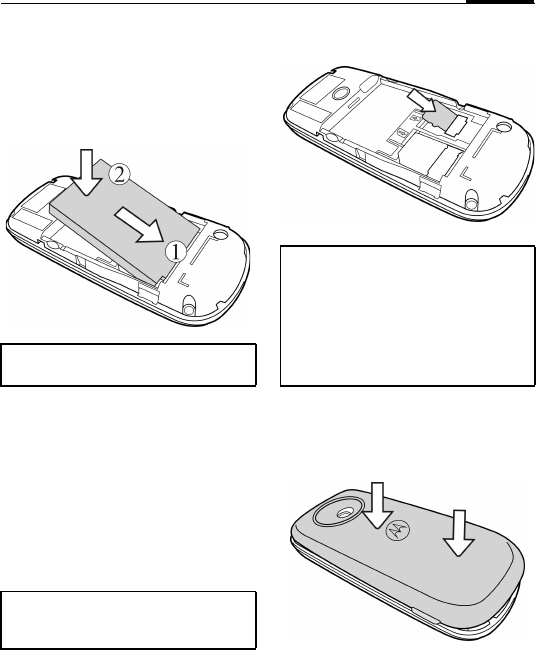
Inserting the battery
1. Slide the the bottom end of the
battery into the bottom end of the
battery bay.
2. Press the top end of the battery down
so that it locks in place.
microSD card
The microSD card gives your phone a
very large memory capacity. This
allows you to save picture/video files,
sound recordings, and any other files.
You can access the list of folders and
files in the My stuff menu (page 57).
Inserting the microSD card
Slide the entire microSD card into the
microdSD card holder with the metal
contacts of the microSD card facing
downward .
Installing the back cover
Press the cover down onto the back of
the phone to lock it in place.
Switch off your phone before removing
the battery.
To insert the microSD card, you must
first remove the back cover and the
battery.
• Your phone can support a microSD
card with capacity up to 2GB.
• Your phone does not support a
microSD card in FAT32 or NTFS
format.
•An icon is shown on the display of
your phone when the microSD card is
loaded.
14
Charging the battery
The battery is not fully charged when
first unpacked.
1. Swing the cover of the connection
socket out.
2. Plug the charger connector into the
connection socket on the top left side
of your phone. Note that the
connector is inserted with the arrow
sign facing upward.
3. Plug the charger into a power outlet
and charge for at least 2 hours (the
battery is 90% charged in 2 hours).
4. Once the phone is fully charged,
remove the charger from both the
power outlet and the phone.
Switching phone on/off
Switching phone on
1. Press and hold to switch the
phone on. The phone will display a
greeting message (page 60).
2. When being asked, enter your PIN
code using number keys and confirm
with (OK) or .
When the PIN code has been accepted,
the phone will automatically search for
the designated network. This search
process may take a few seconds.
First time startup
After you have powered on the phone
for the first time, or if you have re-
installed a battery removed for a long
period of time and then power on the
phone, you will be guided by Startup
assistant to set the time information.
Follow the on-screen instructions to
complete the initial setup.
• Do not remove the battery while
charging.
• When the battery is discharged, the
charging may not start immediately
when you plug in the connector. Wait 2
to 5 minutes for the phone to begin
charging.
• Charging is only possible within a
temperature range of 0 °C (+ 32 °F) to
+45 °C (+113 °F).
• Do not charge the original li-ion
batteries in the environment with its
temperature below 0 °C (+32 °F) as it
may cause loss of charged battery
capacity.
When the battery is low, you will be
warned with an alert sound.
• PIN (Personal Identification Number)
is the password provided by your
network operator. You need this
password in order to begin using the
SIM card.
• If you enter PIN incorrectly three
times in a row, the SIM card will be
locked. You must now enter PUK
(Personal Unblocking Key) for that
SIM card in order to unlock it. Please
contact your service provider to obtain
PUK.
• To activate/deactivate/change PIN,
see page 19.
15
Home screen
The phone is in the home screen and is
ready for use when the name of the
service provider is displayed on the
home screen.
Press to return to the home screen
from any situation.
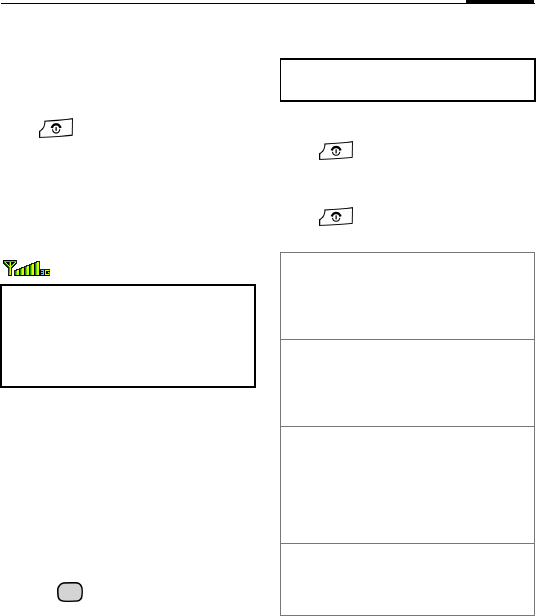
Signal strength
The signal strength is indicated in the
top left corner of the display. More bars
indicate a stronger signal.
Strong signal.
Emergency Call (SOS)
You can make an emergency call even if
your phone is locked or cannot access
your network, or if there is no SIM card
inserted, as long as you are within range
of a network of the type supported by
your phone.
1. Enter 112 (the international
emergency number).
2. Press .
Offline mode
You can operate many phone functions
in offline mode but you are not
connected to any network (you are not
available for incoming calls and you
cannot initiate a call).
Switching phone off
Press and hold to switch the
phone off.
Or
Press briefly and select one of the
off options.
If the phone is not able to detect the
designated network, or links to a
network that you are not authorized to
use, the signal strength meter will show
no bars. You will only be able to make
emergency calls.
To switch offline mode on/off, see
below.
Switch off Switch the phone off.
Phone switches on
automatically if an
alarm or calendar event
occurs.
Offline mode/
Online mode Phone is not switched
off but is not connected
to any network (see
Emergency Call (SOS),
page 15).
Phone &
alarms off Switch the phone off.
Phone will not power on
when an alarm or
calendar event occurs.
This mode is useful,
such as in a hospital or
on an airplane.
Task Manager Select whether to
display the main menu
(menu) or to return to
the home screen (home).
16
General instructions
Connectivity
Your phone supports different methods
for transmitting data in the mobile
network:
• The fastest method is UMTS
(Universal Mobile
Telecommunications System). If you
use UMTS, you can make high-
quality video calls. You can be
connected to the Internet
permanently. Some service providers
do not support this service.
• GPRS (General Packet Radio
Service) is another method for
transmitting data in the mobile
network. With GPRS you can be
connected to the Internet
permanently as well, if the network
has sufficient capacity.
• GSM (Global System for Mobile
Communications) is a fully digital
standard for mobile networks mainly
used for voice calls and text
messages (SMS).
Depending on the surrounding network
and your service provider, different
methods are used automatically. You
can set which method to use depending
on your provider.
DRM
This phone features Digital Rights
Management (DRM) technology. DRM
allows copyright-protected audio/visual
content transmissions for playback in
computers, portable devices and
network devices, while protecting them
from unauthorized use.
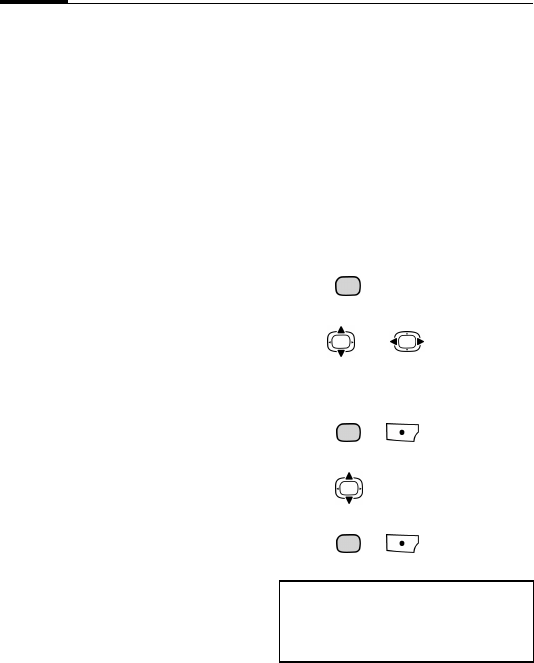
Menu Control
Navigating the menus
The phone features various functions
and settings organized in menus and
submenus.
To select a function from menus:
1. Press in the home screen to
open the main menu.
2. Use and to scroll up,
down, right or left through the main
menu. For example, scroll to
Settings.
3. Press or (Select) to enter
the Settings menu.
4. Press to scroll to a submenu, for
example, Ringtones.
5. Press or (Select) to enter
the Ringtones menu.
In this user manual, the steps needed to
reach a menu are shown in a
condensed form.
For example: Settings > Ringtones.
17
Menu speed dialling
All menu functions are numbered
internally according to the position of
the menu icon/option on the display. A
function may be selected directly by
entering the corresponding keys or
numbers in sequence.
E.g., to select Settings > Ringtones from
standby screen:
1. Press to open main menu.
2. Press and then press .
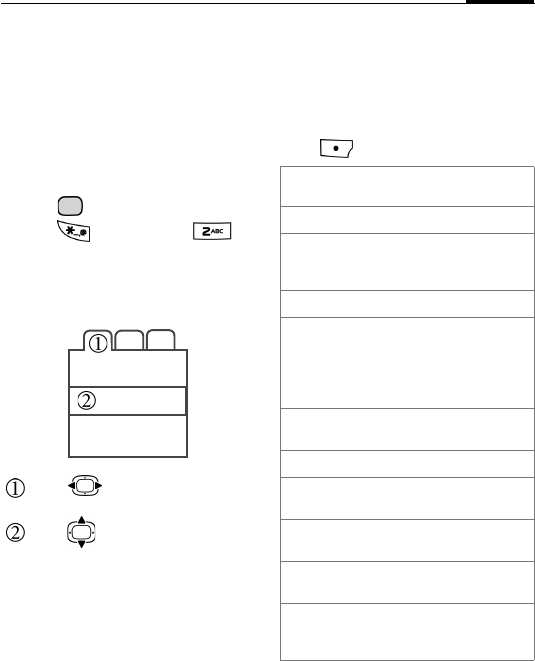
Tabs
Tabs allow fast access to information
and applications.
Standard functions
Options menu
The list below contains standard
functions offered across various options
menus.
Press (Options).
Press to switch between tabs.
Press to leave the current input
field/entry and to switch to the next
input field/entry.
<New
entry> Create a new entry.
Save Store the selected entry.
Change Open an options list or
toggle through different
options.
View Display an entry.
Details Display additional
information about the
selected entry.
Display properties of the
file.
Delete/
Delete all Delete an entry/delete all
entries after confirmation.
Exit Leave the application.
Edit Open an entry to edit/open
an input field to edit.
Text input
meth. Open the input method
menu (page 20).
Text edit
menu Open the text edit menu
(page 21).
Sort by Select sort criterion (e.g.
alphabetical, type, status,
sender, date/time).
18
Mark mode
In some applications (e.g. Contacts/My
Stuff), one or more entries in a list can
be highlighted to carry out a function
jointly.
1. Press to select an entry.
2. Press (Options) and select
Mark.
3. Press to select more entry/
entries.
4. Press to mark/unmark an entry/
entries.
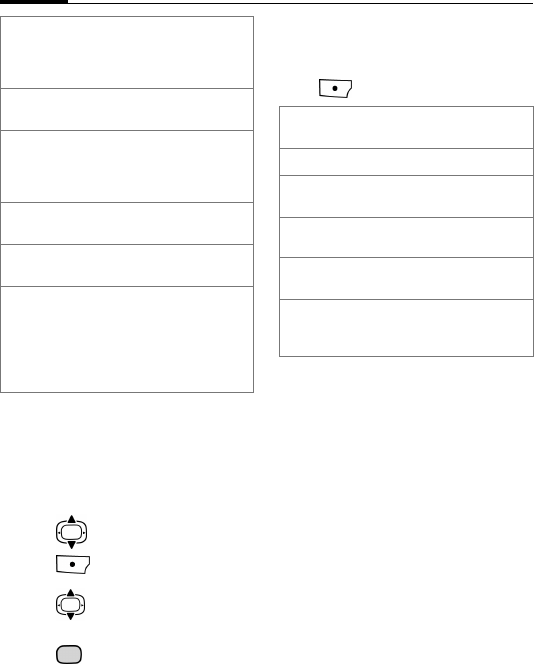
Mark options
Depending on the actual situation,
different functions will be offered.
Press (Options).
Fast list search
Pressing number keys while you are in
alphabetically ordered lists
(e.g. Contacts) opens a fast search
window.
Enter texts to jump quickly to the entry
that corresponds most closely with the
entered texts.
PIN codes
Settings > Security > PIN codes
The phone and the SIM card are
protected against misuse by several
security codes.
Set as e.g. set pictures as the
wallpapers, logos or
screensavers; or set
melodies as ringtones.
Rename Rename the selected
entry.
Send Select transmission type
(e.g. MMS, SMS, e-mail
or Bluetooth technology)
and then send the file.
Create
message Select transmission type
and create a message.
Reply/
Reply to all The sender becomes the
recipient.
Capacity/
Memory
status
Display memory status for
phone, SIM card or the
microSD card.
If memory is insufficient,
start Memory assistant
(page 66).
Mark/
Unmark Mark/unmark the selected
entry.
Mark all Mark all entries.
Unmark all Unmark all marked
entries.
Delete
marked Delete all marked entries.
Send
marked Send marked entries (e.g.
e-mails from draft folder).
Retrieve
marked Retrieve marked e-mails
(if only header is
retrieved).
19
Keep these confidential numbers in a
safe place where you can access them
again if required.
PIN control
Settings > Security > PIN codes > PIN
control
The PIN code is the password provided
by your network operator and is usually
requested each time the phone is
switched on. You can deactivate this
feature but you then risk unauthorized
use of your SIM card. Some network
operators do not permit deactivating the
control.
1. Press (Change) to activate/
deactivate PIN control.
2. Enter PIN and confirm with
(OK) or .
Change PIN
Settings > Security > PIN codes >
Change PIN
You can change PIN to any 4 to 8-digit
number.
1. Enter current PIN code and confirm
with (OK) or .
2. Enter new PIN code and confirm
with (OK) or .
3. Re-enter new PIN code and confirm
with (OK) or .
Change PIN2
Settings > Security > PIN codes >
Change PIN2
To change PIN2, proceed as with
Change PIN.
You cannot deactivate PIN2.
• If you enter PIN incorrectly three
times in a row, the SIM card will be
locked. You must now enter PUK
(Personal Unblocking Key) for that
SIM card in order to unlock it. Please
contact your service provider to obtain
PUK.
• If PUK has been lost, please contact
your service provider.
PIN (Personal Identification
Number 1)
Protects your SIM card from
unauthorized use.
PIN2 (Personal Identification
Number 2)
Needed to set the charge
detail display and to access
additional functions on
special SIM cards.
PUK (Personal Unblocking Key 1)
Used to unlock your SIM
card after PIN has been
entered incorrectly three
consecutive times.
PUK2 (Personal Unblocking Key 2)
Used to unlock your SIM
card after PIN2 has been
entered incorrectly three
consecutive times.
Phone
code
Protects your phone from
unauthorized use.
If activated, you have to enter
the phone code when the
phone is switched on
(default: 1234).
20
Change phone code
Settings > Security > PIN codes >
Change phonecode
You can define the phone code
(4 to 8-digits) when you activate a
phone-code protected function for the
first time. It is then valid for all phone-
code protected functions.
To change the phone code, proceed as
with Change PIN.
If you enter the phone code incorrectly
three times in a row, these phone-code
protected functions will be locked.
Text entry
Input methods
When an editing screen is displayed, the
current text input method is indicated in
the upper right corner of the display.
Following are some of the input
methods.
Changing input methods
•Press repeatedly to select an
input method available in the same
language.
• Press and hold to display the
text input method list.
Using text input without
T9
• Press a number key repeatedly until
the required letter appears. After a
brief interval the cursor will advance.
For example:
Press once briefly to write the
letter a, twice to write b, etc. Press
and hold to write the number.
• Press briefly to delete the letter
left of the cursor. Press and hold to
delete all text quickly.
• Press / to move the cursor.
• Press once/repeatedly: . , ? ! ’ "
0 + - ( ) @ / : _
Press and hold: insert 0.
• Press briefly: insert space.
Press twice: insert a line feed.
Press three times/press and hold:
insert 1.
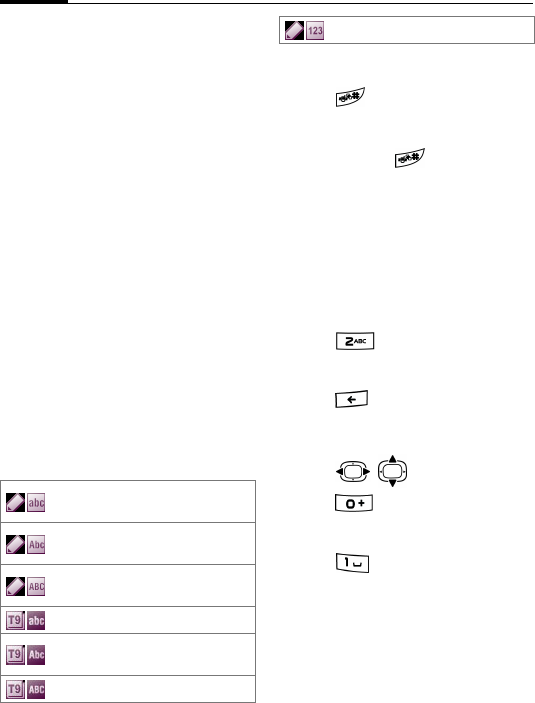
Lowercase text input without
T9.
Text input without T9 with the
first letter capitalized.
Uppercase text input without
T9.
Lowercase text input with T9.
Text input with T9 with the first
letter capitalized.
Uppercase text input with T9.
Numeric input.
21
Using T9 Text input
T9 predicts the most probable word
from a sequence of keys you press.
1. Press each key associated with the
letter you want to enter only once.
The letters you have entered appear
on the display. The candidate words
change with each key you press.
2. If the first highlighted word is not the
word you want, press
repeatedly to toggle through all the
possible combinations of words until
your desired word is displayed.
3. Press to enter the highlighted
word.
4. To end a word, press to insert a
blank, or press to move the
cursor to the right of the word. Press
to move the cursor to the left of
the word.
Adding a new word
If a desired word is not in the list of
candidate words (as a dotted line i.e. ---
indicates), the word is not yet included
in the T9 dictionary. You can add the
word to the dictionary.
1. Press (Spell), or press and hold
to select Spell word.
2. Enter the word and confirm with
.
The next time you enter the word, it is in
the list of candidate words.
Correcting a word
1. Press to move the cursor to the
right of the word you wish to correct,
and then press so that the word
is highlighted.
2. Press to scroll through the T9
word suggestions again.
Alternatively, press to delete
the letter to the left of the cursor and
displays a new possible word.
3. Press to enter the corrected
word.
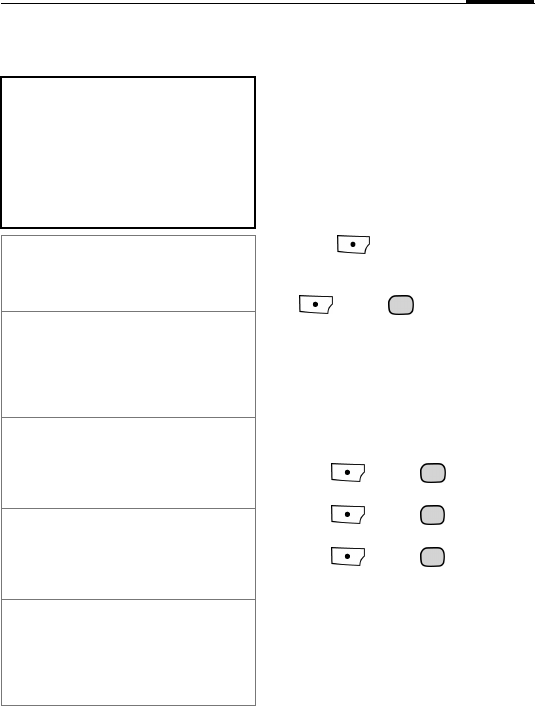
Text options
Depending on the current situation,
different functions will be offered.
Press and hold or press
(Options) and select Text edit
menu to open the options menu:
T9® Text Input is licensed under one or more of
the following: U.S. Pat. Nos. 5,187,480,
5,818,437, 5,945,928, 5,953,541, 6,011,554,
6,286,064, 6,307,548, 6,307,549, and
6,636,162, 6,646,573, 6,970,599; Australia Pat.
Nos. 727539, 746674, 747901; Austria Pat.
Nos. AT225534, AT221222; Brazil P.I. No.
9609807-4; Canada Pat. Nos. 1,331,057,
2,227,904, 2,278,549, 2,302,595; Japan Pat.
Nos. 3532780, 3492981; United Kingdom Pat.
No. 2238414B; Hong Kong Standard Pat. No.
HK1010924; Republic of Singapore Pat. Nos.
51383, 66959, 71976; European Pat. Nos. 0 842
463 (96927260.8), 1 010 057 (98903671.0), 1
018 069 (98950708.2); Republic of Korea Pat.
Nos. KR201211B1, KR226206B1, 402252;
People’s Republic of China Pat. No.
ZL96196739.0; Mexico Pat. Nos. 208141,
216023, 218409; Russian Federation Pat. Nos.
2206118, 2214620, 2221268; and additional
patents are pending worldwide.
22
Entering symbols and
special characters
1. Press to open the symbol table.
2. Press / to navigate
characters one by one.
3. Press to insert the selected
character.
Text templates
Text templates are short excerpts of
texts that you can insert in your
messages (SMS, MMS).
Creating text templates
Messages > Templates > Text
The list of existing templates is
displayed.
1. Press (Options) to select New
template.
2. Write text.
3. Press (Options) or to
select Save.
Inserting text templates
Messages > Create message > Message
1. Write a message.
2. Press (Options) to select Insert
text > Template.
3. Select a text template from the list
and confirm with . The text
template is inserted in the message.
Insert
symbol Insert a special character
or a line feed.
Mark/
Unmark You can mark/unmark text
in order to copy and paste
it to a different place.
Copy/Paste Copy/paste highlighted
text to a different place.
Input
language Select the language in
which you want to
compose your message.
If you select Automatic,
the input language is based
on the display language.
Only if T9 is activated
Spell word Open the spell box and add
new words to dictionary.
• To create a new SMS directly from the
Templates menu:
1. Select a text template.
2. Press or press (Options)
and select New message.
• To set a template as header/signature
for new messages:
1. Select a text template.
2. Press (Options) and select Set
as header/Set as signature.
23
Calling
With your phone you can make voice
calls as well as video calls. However, it
is not possible to make a voice call and a
video call at the same time.
Making a video call
To initiate a video call:
1. Enter a phone number, or press
to highlight a contact from Contacts.
2. Press (Options) and press
to highlight Video call.
3. Press (Select) or make the
call.
Video call options
In video call mode press
(Options).
Dialling with number
keys
1. Enter a phone number in the home
screen.
2. Make a voice call: Press or
.
Make a video call: Press
(Options) and select Video call.
3. The displayed number is dialled.
• You can also select a number from call
records to make a video call (see
Dialling previous numbers,
page 24).
• During a video call, press to
zoom in/out.
• For options available during a video
call, see page 26.
The called party as well as the network
have to be capable of handling video
calls. If you are calling a number that
does not meet these requirements you
will be offered the option of making a
voice call instead.
Video call Call the entered number.
Save Save the entered number to
a new or existing contact.
Contacts Enter a number from the
contact list.
View View the entered number’s
contact information, if any.
Insert
pause Insert "P" for extension
dialling.
Entering international dialling
codes:
Press and hold until "+" is
displayed. Then enter country and area
codes.
Dialling with number extension:
1. Enter the number.
2. Press (Options) and select
Insert 2-s pause to insert "P".
3. Enter the extension number.
4. Press or (voice call).
You can also use the Contacts list to dial
a number (page 33).
24
Ending a call
Press or (End call).
You can then press (Save) or
to save the number to a new or existing
contact.
Setting earpiece volume
(Only possible during a call)
Press to adjust the volume.
Dialling previous
numbers
1. Press to open call records.
2. Press to scroll to the preferred
tab: All calls/Dialled calls/Missed
calls/Received calls.
3. Press to pick out a number from
the list.
4. Press or to call the
number.
To make a video call, press
(Options) and select Video call.
Listening to voicemail
Press and hold .
Accepting a call
Voice call
Press , or (Answer) to
accept a call.
Video call
If the incoming call is a video call and
Show my image is deactivated (default,
page 65) Do you want to show your
video image? is displayed. You have the
following options:
• Press (Yes): Your video is
shown to the caller.
• Press (No): The video mute
image is shown to the caller
(page 65).
Rejecting a call
Press or (Reject).
Handsfree talking
You can put the phone aside during a call
and hear the caller via the loudspeaker.
If the voicemail number is not stored on
your SIM card, you will be asked to set
the number.
• If Any key answer is activated
(page 65), you can accept the call by
pressing any key.
• To avoid the disturbance caused by a
ringing phone, you can press and hold
to switch Silent mode on/off.
Warning!
Please make sure you have accepted the
call before holding the phone to your ear.
This will avoid damage to your hearing
from loud ringtones.
25
Press to switch to Speaker/Handset
to activate/deactivate handsfree talking.
Swapping between
2 calls
(Network support dependent and not
available during video calls)
Establish a second connection
1. Press and select Hold call. The
active call is put on hold.
2. Dial a new number and press
or .
Alternatively, dial the new number and
press or . The active call is put
on hold.
Swapping calls
When the new connection is established
you can swap between calls:
Press .
Or
Press and select Swap.
Incoming calls during a call
You will hear a special tone during the
call (page 64). You have the following
options:
Accepting the waiting call in addition
to the first call
Press , or (Swap)to
accept the waiting call. The current call
is put on hold.
To swap between the two calls when
two connections are established, press
.
Or
Press and select Swap.
Rejecting the waiting call
Press (Reject).
Accepting the waiting call, ending the
current call
1. Press to end the current call.
2. Press , or (Answer)
to accept the new call.
Ending calls
Press or (End call) to end
the active call.
Or
Press and select Drop to select the
call to end.
If Return to held call? displays, you have
the following options:
• Press (Yes): Accept the held
call.
Warning!
Always switch off "handsfree talking"
before holding the phone to your ear!
Otherwise you will damage your hearing!
Additional information
During a video call, the Speaker
(loudspeaker) is activated by default.
26
•Press (No): End the held call.
Conference
(Network support dependent and not
available during video calls)
Call up multiple parties one by one and
link them together in a multiparty call.
Once a call has already been
established:
1. Press and select Hold call. The
active call is put on hold.
2. Dial a new number and press
or .
Alternatively, dial the new number
and press or . The active
call is put on hold.
3. When the second call is established,
Press and select Conference.
The held call is joined.
Ending a conference
Ending all calls
Press .
All calls in the multiparty conversation
are ended.
Ending one call
Press and select Drop to select the
call to end.
Private call
You can remove a party from a
conference and make a private call to
that party while the conference is put on
hold.
Press and select Private. Then
select the entry for the private call.
Swapping between the private call
and conference
Press and select Swap.
When a private call is finished
• Press : End the private call and
return to the conference.
• Press and select Conference.
The private call is joined to the
conference again.
Call options
The following functions are only
available during a call.
Press .
Mute call/
Mute sound
The person on the other
end of the line cannot
hear you (muting). In
video calls your video
is still shown on the
other end of the line.
Hands free Call via the
loudspeaker.
Upgrade to
video/
Switch to voice
Change the current
voice call to a video
call or vice versa. The
current call is ended
and a new connection
with the same partner is
established.
Add to
Contacts Save the number To
new contact/To exist.
contact
Main menu Open the main menu.
27
Full/split screen
Select the video presentation on your
display. You have the following
options:
Splitscr. - me sm.
The video of the other party as well as
your own video are displayed. The
video of the other party is shown in full
screen mode and your video is shown in
an additional small frame.
Them fullscreen
The video of the other party is shown in
full screen mode. Your own video is not
displayed.
Splitscr. - me lg.
The video of the other party as well as
your own video are displayed. Your
video is shown in full screen mode and
the video of the other party is shown in
an additional small frame.
Not available during video calls:
Hold call Hold current call.
Swap Swap between calls.
Conference (see page 26)
Drop End a call in a
conference.
Private Make private call in a
conference.
DTMF Enter tone sequences
(numbers) for remote
inquiries to an
answering machine.
Only during video calls:
Mute video The incoming video is
muted and the video
mute image is sent (see
page 65).
Pause outg./
Pause inc. Pause the incoming
video (of the other
party) or outgoing
video (yours). The
menu entry changes to
Resume inc./Resume
outg.
<DISPLAY>Sw
itch camera Determines whether
your own video is
captured by internal
camera or external
camera.
Full/split
screen Select the video
presentation on your
display. See details
below.
Frame rate Adjust how many
frames per second the
camera will capture.
White balance Adjust the sensitivity to
light.
Flicker
adjustment Adjust the sensitivity to
indoor lightening
flicker rate.
Send picture/
Send video Select a picture/video
from the My stuff menu
and show it to the
person on the other end
of the line.
28
Me fullscreen
Your video is shown in full screen
mode. The video of the other party is not
displayed.
Contacts
You can store contacts with a variety of
phone and fax numbers as well as
additional address details.
The contacts may contain the following
types of entries:
• Contacts saved on the phone (see All
contacts).
• SIM contacts saved on the SIM card
(page 30).
• Groups: contact categories (e.g.
shared ringtone). A contact can
belong only to one group (page 29).
• Distribution lists: shortcuts for
communication with more than one
contact (e.g. sending SMS). Contacts
may belong to several distribution
lists (page 31).
Accessing Contacts
In standby screen, press and select
Contacts.
For fast access, contacts are organised
on 4 tabs. Press to switch
between tabs.
All contacts
All contacts (including SIM contacts)
are displayed in alphabetical order.
Distribution lists are displayed
additionally.
Adding a new contact
Opening a contact entry
•In the All contacts tab: select <New
entry>.
• In standby screen:
1. Enter a number.
2. Press (Options) and select Save.
3. Select To new contact.
4. Select a phone type.
Filling contact information
The input fields are organised on 4 tabs:
General info, Private, Business,
Personal. Press (Options) and
select Switch tab... to swap between
them.
Assigning media files
In some input fields (ringtone, picture)
you can assign ringtones and pictures.
All
contacts All contacts (including
SIM contacts) and
distribution lists.
Groups All groups.
SIM
contacts Contacts saved on the
SIM card.
Filter:
Voice dial Apply different filter criteria
to all contacts.
29
Press to select a media field (e.g.
picture) and confirm with .
Depending on the media type you can
either record a new media file via
camera or sound recorder or select a file
from the corresponding My stuff folder
(page 57).
Saving a contact
1. Press (Options) and select Save
contact.
2. Press to confirm save
notification.
Adding numbers with wildcards
Digits may be replaced by a "?"
(wildcard) when numbers are entered in
contacts:
Press (Options) and select Insert
wildcard.
Or
Press and hold to insert "?".
These wildcards must be replaced with
numbers before dialling (e.g., with the
extension numbers in a phone system).
Calling a number containing a
wildcard "?"
1. Select the number from contacts.
2. Press .
3. Enter numbers to replace "?".
4. Press or . Number is
dialled.
Groups
Groups are collections of contacts that
can be used to categorise contacts. A
group can have the same incoming call
alert.
The following groups have already been
created and can be renamed but not
deleted: Family, Friends, Office, VIP.
Adding a new group
You can add personal groups.
1. Select New group and enter the name
of a new group.
2. Press (Options) and select
Save.
Adding members
1. Press to select a group. The
number of entries is displayed in the
second line when highlighted.
2. Press (Options) and select Add
new member. A list of all contacts
that are not already in the group is
displayed.
3. Select new members and confirm
with .
For additional options for editing a
contact, press (Options).
SIM contacts cannot belong to a group,
you have to copy them to the phone
contacts first.
30
4. Press (Add) to confirm
selection.
Viewing members in a group
Select a group and press .
Editing a group
1. Press (Options) and select Edit.
2. Rename the group and attach an
audio ringtone and a picture.
SIM contacts
Contacts saved on SIM card are
managed on this tab. SIM contacts
contain less information than contacts
saved on the phone.
Adding a new SIM contact
1. Select <New entry> and fill in the
fields.
2. Press (Options) and select Save
contact.
Moving a SIM contact to
phone
1. Press to select a SIM contact.
2. Press (Options) and select Edit.
3. Press (Options) and select Add
more fields. The SIM contact is
converted to a regular contact saved
on phone memory.
Filter
Depending on the selected filter,
contacts and distribution lists can be
listed on the filter tab.
Press (Options) and select Filter.
The following filter criteria are
available:
Press to select criterion and
confirm with .
A list is displayed with contacts that
contain the chosen feature, e.g. all
contacts including a birthday entry.
Options menu for
Contacts
Depending on the current situation,
different functions will be offered.
These functions can be applied to the
entry currently selected as well as to
multiple selected entries.
Press (Options).
You cannot convert protected SIM
contacts.
31
Distribution lists
New distr. list Enter name.
You can rename the
distribution list and
attach a ringtone and a
picture using the Edit
option.
Add to distr.
list Add contact/distribution
list/group to a new or
existing distribution list.
If SIM contact selected,
confirm to move contact
to phone memory.
Add new
member Open contact list. Select
contacts and add them to
the selected distribution
list.
Groups
New group Enter name.
Add to group Add contact(s) to new or
existing group. If SIM
contact selected,
confirm to move contact
to phone memory.
SIM contacts
Add more
fields Convert SIM contact to
a regular contact saved
on phone memory. (not
for protected SIM
contacts).
Special
numbers Your provider may
supply you with special
numbers. Select classes
you want to show/hide
(Network support
dependent).
Business card
Create biz
card Create a business card,
which is a contact
containing your own
contact information.
The business card is
displayed outside the
sort order at the top of
the contact list. You
cannot add the business
card to a distribution list
or group.
Set as biz
card Selected contact is set as
business card. If a
business card already
exists, it is converted to
a regular contact. SIM
contacts cannot be set as
business cards.
Undo biz card Convert selected
business card to a
regular contact.
32
Media field selected
Play ringtone/
Play video/
View picture
Start playback of current
ringtone/video/ View
picture.
Replace
ringtone/
Replace
video/Replace
picture
Select new ringtone/
video/picture.
Remove
ringtone/
Remove
video/
Remove
picture
Confirm to delete
current ringtone/video/
picture from contacts.
General options
Open web site If contact information
contains URL, start the
browser and load URL.
Send contact Contacts are sent/
received as a vCard via
Bluetooth technology,
MMS, or e-mail.
Set as vid.
allow’d/
Undo
vid.allow’d
Set a number as default
for video call dialling.
When you select Video
call to call contact, this
number will be dialled
as default.
(Not available for SIM
contacts.)
Save options Depending on save
location, select
Copy to SIM/Move to
SIM: Only SIM
information is saved
while copying/moving
contact from phone to
SIM.
Copy to phone/Move to
phone.
Protected SIM contacts,
special numbers and the
business card cannot be
copied or moved to
another save location.
Save location Select SIM card/Phone
mem. as default save
location.
Duplicate Add new contact with
duplicate information.
Find Contacts search: Enter
text/number and
confirm with .
Filter contacts: Display
contacts and distribution
lists according to the
selected filter.
Synchronise Initiate synchronisation
of contacts.
For standard functions see page 17.
33
Fast contact search
In the contact list, pressing number keys
opens a fast search window.
Enter text to jump quickly to the entry
that corresponds most closely with the
entered text.
Dialling a contact
1. Scroll to a contact in Contacts list.
2. Press : Make a voice call to the
displayed (default) number.
If several numbers are stored under the
contact, you can press to view all
numbers and select one to call.
Voice-activated dialling
You can dial numbers from the contacts
by speaking the name. SIM contacts,
distribution lists and groups cannot
have a voice tag.
You can associate one voice tag to each
number of a contact.
Recording a voice tag
Record the voice tag in a quiet
environment.
1. Open the All contacts tab.
2. Select a contact.
3. Press (Options) and select Edit.
4. Select a number input field.
5. Press (Options) and select
Record voice tag.
6. Press (Start) to start recording.
7. Speak the name. Repeat the name
after playback.
Using Voice-activated dialling
In standby screen press and hold .
Speak the name after the signal tone.
Call records
(Network support dependent)
In standby screen press and select
Call records.
Or
Press .
The different call information is listed
on 5 tabs:
All calls, Dialled calls, Missed calls,
Received calls and Duration/charges.
A caller’s name is displayed if it is
stored as a contact.
Press (Options) for options for call
records.
Redial number
1. Select a records tab (e. g. Missed
calls).
2. Select entry.
3. Press or : make a call to
the number.

34
Duration/charges
(Network support dependent)
You can display the call duration and
the currency and rate of a call. You can
set the currency and rate for charge
display.
These call types are displayed: Last call/
Outgoing calls/Incoming calls
For the selected call type the following
information is displayed: the date/time
and the duration and charges. For all
incoming and all outgoing calls the
number of recorded calls is displayed,
too.
Reset all incoming/outgoing calls lists
Press (Reset) to reset the
current list.
Charge settings
Select Settings.
<EMPHASIS>Currency
(PIN2 protected)
1. Enter currency code
(up to 3 characters).
2. Press (Options) and
select Save.
Personal Rate
(PIN2 protected)
1. Enter per minute rate.
2. Press (Save).
Display costs
Activate/deactivate cost display.
Account limit info
(PIN2 protected)
•Account limit
Activate/deactivate account limit.
•Enter max. units
Enter maximum units for the
account.
•Reset remaining
Confirm notification to reset account
limit.
Entertainment
Media player
Entertainment > Media player
The media player functions are
accessible via 4 tabs: Music, Pictures,
Videos and Bookmarks.
• Press to select tab.
• Press for more options when a
file is selected in a tab. Depending on
the file type, different options will be
offered.
If the display of costs is disabled or the
currency is not entered, cost information
is not displayed.
To enter "." press .
The account limit is not supported by
all SIM cards. If your SIM card does not
support the account limit, an according
notification is displayed.
35
The media player contains files stored
on the phone memory as well as on the
microSD card.
Music
The music tab includes MP3 and AAC
files. For fast access, the tracks are
sorted by the following categories:
Playback/Pause.
Press: skip to previous/next
track.
Press and hold: Rewind/fast
forward within the current
track.
End playback.
Create new playlist
1. Select Playlists.
2. Select <New playlist>.
3. Enter the playlist name.
4. Press (Options) and select
Save.
You can add/remove files and change
the order within the playlist via the
options menu (see My stuff, page 57).
Pictures
All files are listed with file name and
size.
Display picture
Select the desired picture and press
to display it.
The following functions can be applied
to a displayed picture:
Switch to full screen mode
and normal view.
Skip to previous/next
picture.
Videos
Select the desired video and press
to start playback.
The media player offers the following
functions for video playback:
Playback/Pause.
Press and hold: Rewind/Fast
forward.
Switch full screen mode and
normal view.
Bookmarks
Play music/video directly from
bookmarks.
The Bookmarks tab shows a listing of
all streaming content links. Each URL
• You cannot pause an audio/video live
stream.
• Incoming calls, alarms and events stop
streaming.
• Your phone does not support playback
of a flash file taking more than 1MB of
your phone memory; you will be
prompted by the warning of Low
memory, recording stopped, and the
playback will be stopped to protect
your phone.
36
must correspond to a single online
audio/video file. These bookmarks are
not listed as browser bookmarks.
Select the desired bookmark and press
to start playback of music/video
directly from the bookmark (live
stream).
Camera
Entertainment > Camera
You can view photos/videos recorded
with the integrated camera
immediately:
• Send picture/video via MMS, e-mail
or Bluetooth technology.
• Save pictures/videos on the phone or
on the microSD card.
Starting the camera
Picture mode
In standby screen press and select
Entertainment > Camera > Picture mode.
Video mode
In standby screen press and select
Entertainment > Camera > Video mode.
Displayed information
Current picture/video settings
The following symbols are displayed:
Current brightness setting.
Current zoom level.
Self timer (when activated).
Active self timer is indicated only in
picture mode.
Remaining memory
The following memory information is
displayed:
• Memory location: Pictures/videos
can be saved either on the phone
or on the microSD card . To
change save location see page 38.
• Remaining memory: Picture count/
available record time on the current
memory location. The remaining
memory depends mainly on the
selected resolution and the motif.
Taking pictures/videos
Settings prior to taking pictures/
recording videos
• Press : Decrease/increase
brightness.
• Press : Zoom in/out.
Taking pictures
1. Start the camera in picture mode.
2. Press .
For further settings see options menu.
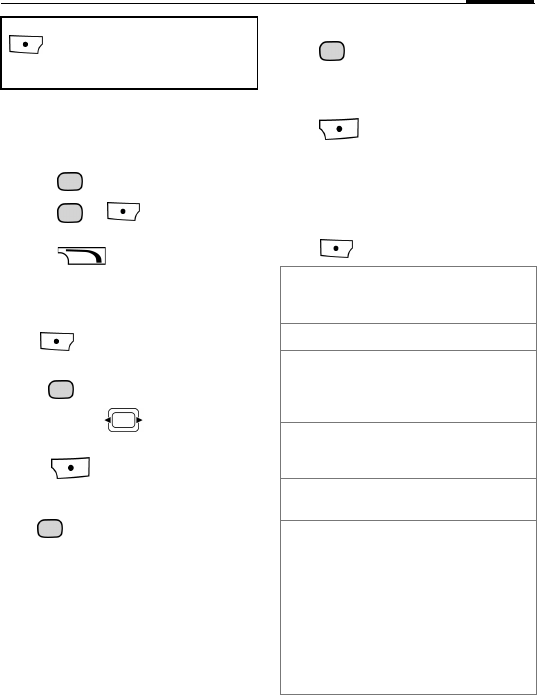
37
Recording videos
You can record up to 5 minutes.
1. Start the camera in video mode.
2. Press : Start recording.
3. Press or (Pause/Resume):
Control recording.
4. Press (Stop): End recording.
Reviewing pictures/videos
Start video playback
Press (Options) and select
<DISPLAY>Play video.
•Press : Playback/pause.
• Press and hold : Rewind/Fast
forward.
•Press (Stop): Stop playback.
Save pictures/videos
Press to confirm save notification.
The picture/video is displayed.
The picture/video is saved with a name
in Entertainment > Media player >
Pictures/Videos (page 34) or in
My stuff > Pictures/Videos (page 57).
Return to view finder
Press : Open view finder to take
another picture/record another video.
Delete pictures/videos
Press (Discard): Delete picture/
video and open view finder.
Camera options
The following functions are available,
depending on the current situation.
Press (Options).
To take a self-portrait, press
(Options) and select Switch
camera, and use the internal camera lens
as view finder.
New picture/
New video
Open view finder to take
another picture/record
another video.
Play video Play recorded video.
View
pictures/
View videos
Open corresponding
Media playertab to view
pictures/videos
(page 57).
Picture
mode/
Video mode
Switch between picture
and video mode.
Switch
camera Switch between the
external/internal camera.
Message
mode Message mode is
optimised for sending
video via MMS/
Bluetooth technology.
Record time: 30 seconds.
Low resolution.
Message mode is
activated automatically if
video mode is started
from MMS application.

38
Picture settings/Video settings
<EMPHASIS>Resolution front
Set the quality of the picture/video
captured by the internal camera,
regardless of the preview image
resolution.
<EMPHASIS>Resolution back
Set the quality of the picture/video
captured by the external camera,
regardless of the preview image
resolution.
<EMPHASIS>Default name
Enter default file name.
<EMPHASIS>Save location
Select default save location: Phone
memory/microSD card.
<EMPHASIS>Frame rate (only for
video settings)
Set how many frames per second the
video should capture: Low/High.
<EMPHASIS>White balance
Select: Auto/Indoor/Outdoor.
<EMPHASIS>Flicker adjustment
Adjust the sensibility to indoor
lightening flicker rates: Off/50 Hz/60 Hz.
Create message
Messages > Create message
You can create SMS and MMS
messages and e-mails.
SMS/MMS
About SMS
You can transmit and receive long
messages on your phone.
The phone will automatically convert
long SMS messages that you send to
MMS after your confirmation. Long
SMS messages you send are
automatically divided into concatenated
SMS messages.
About MMS
The Multimedia Message Service
(MMS) enables you to send texts,
pictures/videos and sounds in a
combined message to another mobile
phone or to an e-mail address. All
elements of an MMS message are
merged into a "slide show".
Ask your service provider whether this
service is available. You may need to
register for this service separately.
Self timer Picture is taken approx.
10 seconds after
triggering. For the last 3
seconds, you will hear a
signal tone each second.
Audio record Turn microphone on/off
for video mode.
Picture
settings/
Video
settings
Open settings (see
below).
For standard functions see page 17.

39
Writing/sending an SMS
Messages > Create message > SMS
1. Enter text/add items (see SMS
options).
2. Press and select Add recipient.
3. Select a contact from Contacts list
(From Contacts) or enter a number
manually.
4. Press or press and select
Send.
SMS options
Depending on the current situation,
different functions will be offered.
Press (Options).
Writing/sending an MMS
Messages > Create message >
<DISPLAY>MMS
1. Enter text/add items (see MMS
options).
2. Press and select Add recipient.
3. Select a contact from Contacts list
(From Contacts) or enter a number/e-
mail address manually.
4. Press or press and select
Send.
MMS options
Depending on the current situation,
different functions will be offered.
Press (Options).
The following is displayed in the top
display line: text entry mode, number of
segments needed to send the current
message and number of remaining
characters.
Add item Picture/Video/ Sound/
Flash: Select file from the
corresponding My stuff
folder (page 57)
If you try to add items that
cannot be sent via SMS,
the message is converted
to MMS after
confirmation.
Send
options Set Status report/ Validity
period/
SMS type/Send with
(Message centre number)
for current SMS. (page 44)
Further functions, see page 40.
The following is displayed in the top
display line: text entry mode, number of
remaining characters and size of the
message.
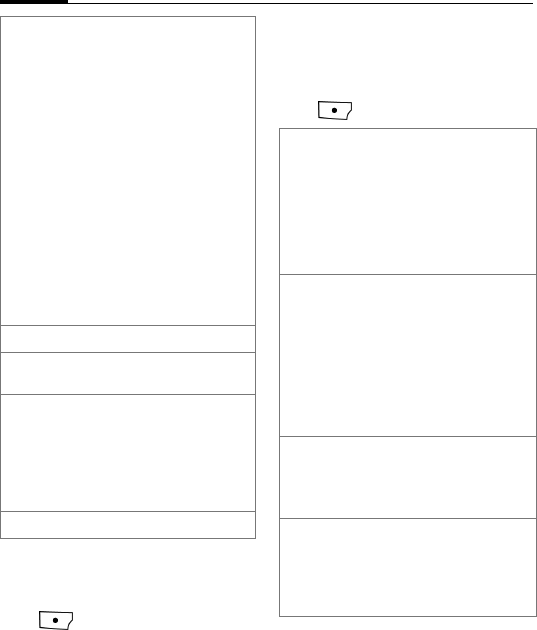
40
Preview MMS
If you start Preview MMS you can
change the presentation of the message.
Press (Options) for more options.
SMS/MMS options
Depending on the current situation,
different functions will be offered for
both SMS and MMS.
Press (Options).
Add item •Picture/Video/ Sound:
Select any file from the
corresponding My stuff
folder (page 57) and
add to a new slide.
•Flash: Select a flash file
from the corresponding
My stuff folder
(page 57) and add as an
attachment (You cannot
attach more than one
flash per MMS).
•Text: Enter text to a new
slide.
•Contact: Select a
contact and add as
vCard. (You cannot
attach more than one
vCard per MMS).
Add subject • Enter subject.
Preview
MMS • Start preview mode
(see below).
Send
options •Set Read report,
Delivery report,
Validity period, Priority
and Delivery time for
current MMS (see also
MMS settings,
page 45).
Further functions, see below.
Add recipient •From Contacts:
Select a contact from
Contacts list.
•Enter number:/Enter
email addr: Specify
the number/email
address of the
recipient.
Create item •Take picture/Record
video: Take a photo/
record a video
(page 36) to add to
the message.
•Record sound: Make
a sound recording
(page 53) to add to
the message.
Insert text •Template (page 22).
•Contact details: open
contact and select
contact information.
Save as •Draft: Save message
in draft folder.
•Template: Save
message as text/MMS
template.

41
E-mail
Your phone has an e-mail program
(client). You can use it to create and
receive e-mails. To create new e-mails
you have to configure at least one e-mail
account (page 47).
Writing/sending e-mails
Messages > Create message > E-mail
1. Enter text/add items (see E-mail
options).
2. Press (Options) and select Add
recipient (see E-mail options).
3. Select a contact from Contacts list
(From Contacts) or enter e-mail
address (Enter e-mail addr.)
manually.
4. Press or press and select
Send.
E-mail options
Depending on the current situation,
different functions will be offered.
Press (Options).
Remove
picture/
Remove video/
Remove sound/
Remove flash/
Remove
contact/
Remove text/
Remove
recipient
Remove picture/video/
sound/flash/contact/
text/recipient from
message.
For standard functions see page 17.
Add recipient •From Contacts: Select
a contact from
Contacts list.
•Enter e-mail addr.:
Enter e-mail address
manually. T9 is not
available.
Edit recipient • Edit entered address.
Attach item •From My stuff: Select
any file from the My
stuff folder.
•From Contacts: Select
contact and add as
vCard.
Add Cc • Add contact(s) of copy
recipient(s).
Add Bcc • Add contact(s) of copy
recipient(s). Bcc
recipients are not
visible for other
recipients.
Remove item/
Remove
recipient
• Remove highlighted
attachment/recipient.
Save as draft • Save e-mail in draft
folder.
Add signature Add signature at the
current cursor position.
Send options Set Req. deliv. receipt:,
Request read receipt:,
Priority: for current
e-mail (see E-mail
settings, page 47).
For standard functions see page 17.
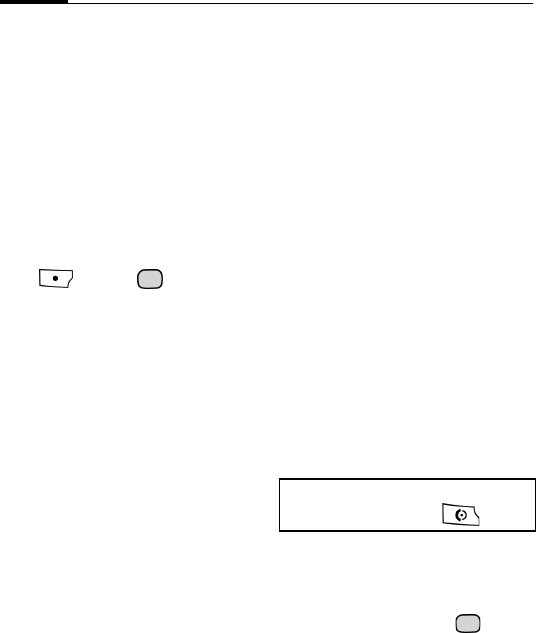
42
Inbox
Messages > Inbox
The inbox contains all MMS, SMS,
CB (Cell Broadcast), e-mail and WAP
push messages received on the phone.
When new messages are received, a
notification is displayed.
SMS
If a new SMS is received, a notification
is displayed. New messages are saved in
the Inbox automatically.
Press (View) or to read new
message.
MMS
An MMS is received in two steps: First
the MMS notification, then the MMS.
If a new MMS message is available for
downloading, the MMS notification is
displayed including number/contact and
subject of the MMS. You can download
the MMS immediately or later.
You can change MMS settings to
download new MMS immediately
without request.
Cell Broadcast Service
Some service providers offer Cell
Broadcast Services (CB), supplying you
with messages on the activated topics.
When the function is activated, CB
messages are received automatically.
Depending on the current setting, CB
messages are displayed in standby
screen or stored in Inbox.
E-mail
E-mails are not received automatically.
Before an e-mail can be read, it must be
retrieved from the server (page 43).
WAP push
WAP push messages are provided by
special service centres. Depending on
the current setting (page 50), WAP push
messages are received/rejected
automatically or you are prompted to
accept/reject when WAP push is
received.
Inbox structure
For fast access, the inbox is organised
on three tabs:
• MMS, SMS, CB
•E-mail
• WAP push messages
Reading SMS, MMS, CB
All new messages are listed in
chronological order.
Select a message and press .
Numbers, e-mail addresses, vCards and
other saveable objects are highlighted
automatically.
Make a call to the sender: Select SMS,
MMS or e-mail and press .
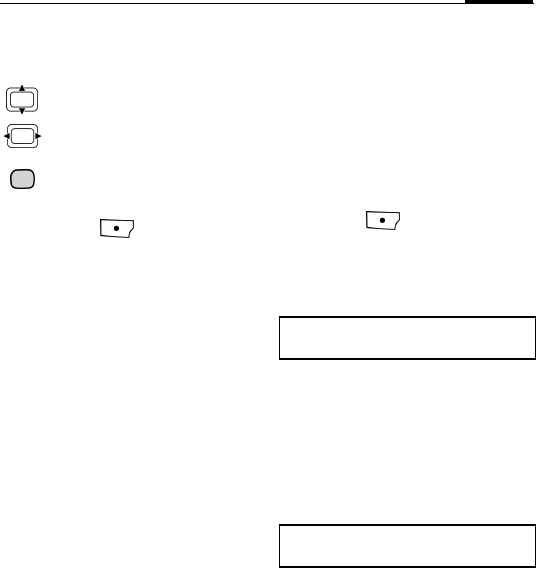
43
Use these keys while reading a
message.
Only MMS:
Navigate within a slide.
Switch to next/previous
slide.
Play media file.
For options available while reading a
message, press (Options).
Depending on the current situation,
different functions will be offered.
Reading E-mail
If more than one account is configured,
the list of accounts is displayed.
Before an e-mail can be read, it must be
retrieved from the server.
The listed files and the options menu
vary depending on the receive server
type of the selected account.
POP3 account
The Inbox on the phone contains all the
e-mails that are in the Inbox on the
POP3 server.
You can configure whether or not an
e-mail is deleted on the server when
deleted on the phone.
If you configure so, the e-mails which
are deleted on the phone will not be
deleted on the server until next e-mail
retrieving.
IMAP4 account
The Inbox lists e-mails as well as
subscribed folders (e.g. mailboxes).
You can subscribe to various folders on
the IMAP4 server. E-mails are retrieved
only from the subscribed folders.
If you delete e-mails on the phone, they
will be deleted on the server after next
e-mail retrieving.
For options available while reading an
e-mail, press (Options).
Depending on the current situation,
different functions will be offered.
For details on E-mail settings, see
page 47.
Retrieve e-mail
Depending on the download mode,
either entire e-mails or only the headers
are retrieved, or you may be asked
whether the entire e-mail or only the
header should be downloaded. The
number of retrieved e-mails is
displayed.
Subscr. to folders
(only IMAP4 accounts)
You have to subscribe to folders on the
receive server in order to retrieve e-mail
from these folders.
You can set the max. size of downloaded
e-mails (page 47).
IMAP4 accounts: only e-mails in the
subscribed folders are retrieved.
44
All subscribed and unsubscribed folders
on the receive server are listed. Only
two levels of folders are supported.
1. Press to select folder(s) and
confirm with to subscribe /
unsubscribe to folders.
2. Press (Options) and select
Subscr. to marked.
WAP push
The following messages are displayed:
• Service Indication (SI)
•Service Loading (SL)
• Audio, video, image, text
Service Indication message
An SI push message gives you the
option of connecting directly to a
particular URL via the phone's browser.
Service Loading message
Depending on your setting (page 50),
accepting an SL push message will start
the browser to download Web content
(e.g. images, applications) to the phone.
Message with audio/video/image
content
The message can contain attached files.
You can view/play and save the
attached content.
Message lists
Messages are displayed the same as in
the Inbox. The most recently edited/sent
message is displayed at the top of the
list.
Drafts
Messages > Drafts
The list is organised on two tabs: Drafts -
SMS/MMS and Drafts - E-mail.
You can save a message as a draft while
creating it.
Outbox
Messages > Outbox
The list contains all messages you failed
to send and is organised on two tabs:
<DISPLAY>Outbox SMS/MMS and
<DISPLAY>Outbox - E-mail.
Sent
Messages > Sent
The list contains all sent messages and
is organised on two tabs: Sent - SMS/
MMS and Sent - E-mail.
Message settings
Configure SMS, MMS, e-mails, cell
broadcast (CB) and voice mail.
SMS settings
Messages > Msg settings > SMS
45
SMS Profiles
The SMS parameters are configured in
up to 10 different profiles.
Setting default profile
If profile is already configured: Select
profile and press to set profile as
default.
Edit profile
1. Select profile.
2. Press (Options) and select Edit.
Reset profile
Press (Options) and select Reset
profile.
If your provider has locked a predefined
profile, it cannot be reset.
Auto header
If the function is activated the Header
template (page 22) is automatically
inserted at the start of any created SMS.
Auto signature
If the function is activated, the
Signature template (page 22) is
automatically inserted at the end of any
created SMS.
Save sent items
If the function is activated, all sent SMS
messages are saved automatically in the
Sent folder.
Auto delete SMS
If the function is activated, the oldest
SMS message in the Inbox will be
deleted upon arrival of a new SMS
message.
Emoticons
Emoticons are little symbols (Smilies)
expressing your feelings. If the function
is activated, emoticons are
automatically displayed as little
pictures.
Text size
You can set the displayed size of
the text in the SMS Viewer.
MMS settings
Messages > Msg settings > MMS
MMS profiles
The MMS parameters are configured in
up to 5 different profiles. You will
receive the necessary data from your
service provider.
Setting default profile
If profile is already configured: Select
profile and press to set profile as
default.
The first 5 profiles are saved on the SIM
card, the last 5 profiles are saved on the
phone memory. When replacing the SIM
card, the profiles saved on the phone are
not changed.
46
Edit profile
1. Select profile.
2. Press (Options) and select Edit.
Reset profile
Press (Options) and select Reset
profile.
If your provider has locked a predefined
profile, it cannot be reset.
Home retrieval/Roaming
retriev.
Configure when new MMS messages
are to be downloaded from the message
server for Home and Roaming retrieval.
Req. read report
If the function is activated, request the
recipient to send back read report.
Req. deliv report
If the function is activated, request the
recipient to send back delivery report.
Delivery time
Select how long an MMS message
should be held on the server before
sending it to the recipient.
Validity period
If an MMS message could not be
delivered during this period, it is deleted
from the server automatically.
Hide number
The recipient will not see your phone
number.
Anon. messages
If set to Reject, anonymous MMS
messages are rejected automatically.
Allow read reprt
(Network support dependent.)
If the function is activated, allow the
server to send read reports to the sender.
If set to Yes confirm the charge
notification.
Allow deliv reprt
If the function is activated, allow the
server to send delivery reports to the
sender.
If set to Yes confirm the charge
notification.
Creation mode
You can restrict the content that can be
added to an MMS.
Automatic Messages are
automatically downloaded
as soon as an MMS
notification is received.
Always ask When an MMS
notification is received,
you are asked whether to
download it or not.
Restricted When an MMS
notification is received,
only the notification is
displayed.
47
The following settings are possible:
Auto signature
See SMS settings on page 44.
Save sent items
See SMS settings page 45.
Allow adverts
If the function is deactivated, MMS-
based advertisements are automatically
rejected.
Emoticons
See SMS settings on page 44.
Text size
See SMS settings on page 44.
Max msg size
The size restriction affects downloaded
and created MMS messages.
E-mail settings
Messages > Msg settings > E-mail
Before using e-mail service you must
set the server access and your e-mail
parameters. You may receive the
necessary data from the service
provider.
The e-mail parameters are configured in
up to 5 different accounts. One account
might be predefined by your service
provider. You cannot edit predefined
accounts.
Activating an account
If an account is already configured:
Select the account and press to
activate.
Deleting an account
Press (Options) and select Delete.
Editing an account
Edit the account according to the
information from your provider.
Press (Options) and select Edit.
<EMPHASIS>User info
Setup your e-mail address (for example,
name@domain.abc) and login
information for the e-mail server.
<EMPHASIS>Connection info
You can configure accounts with two
different receive server types: POP3
Free You can add any content to
the MMS.
Warning You are warned when
attempting to add content
to an MMS that cannot be
sent.
Restricted If you attempt to add
content that is not
compliant an error
message is displayed.
All e-mails in the Inbox, the Drafts and
the Sent folders and all attachments
belonging to the deleted account are
deleted.

48
and IMAP4. The configured accounts
may have different server types.
<EMPHASIS>Msg preferences
Setup how messages are displayed, how
they are retrieved and sent, and the
notification of delivery report.
<EMPHASIS>Add signature
Select No e-mail/New e-mail/All e-mails.
<EMPHASIS>Create signature
Enter signature and confirm with .
CB settings
Messages > Msg settings >
Cell broadcast
Receive broadcasts
Activate and deactivate the CB service.
If the CB service is activated, the
standby time for the phone will be
reduced.
Cell info display
Select whether or not the local cell
information should be displayed in
standby screen.
Topic list
You can configure the types of
broadcast messages you want to
receive. The list of configured topics
is displayed. You can add/remove
topics. Press (Options) for more
options.
Voicemail
(Network support dependent.)
Most service providers supply you with
a mailbox in which a caller can leave a
voice mail for you.
If the voice mail service is not part of
your service provider's standard
package, you will need to register for it,
and possibly set the voice mail
manually. The following sequence may
vary from service provider to service
provider.
Voicemail settings
Messages >Msg settings > Voicemail
Voicemail no.:
Enter your voicemail number.
Notification
Activate and deactivate display of a
message notifying of new voice mail
entries.
Listening to voicemails
In standby screen press and hold .
Or
Messages > Voicemail.
Internet
Get the latest information from the
Internet that is specifically adapted to
the display options of your phone. In
addition, you can download games and
applications to your phone. Internet
49
access may require registration with the
service provider.
The browser is activated with the preset
option as soon as you call up the
function. Browser settings may be
specified/pre-assigned by the service
provider.
Home Page
Start the browser and display the
predefined Home Page.
Enter URL
Internet > Enter URL
1. Enter URL.
2. Press or press (Options)
and select Go to start the browser and
display the entered Internet site.
Changing the prefix
1. Press (Options) and select
Prefix.
2. Select a prefix or select Custom and
enter prefix.
Bookmarks
Internet > Bookmarks
Display the list of bookmarks stored in
the phone.
Select the bookmark and confirm with
to call up URL.
History
Internet > History
Display the list of most recently visited
Internet domains and pages.
1. Press : select the history entry.
2. Press : call up the URL.
Settings
Internet> Settings
Multimedia
Choose whether or not to show/play
images/sounds or download objects
embedded on the Internet pages.
Look and feel
Setup the font size (Font size), the way
to navigate within the Internet page
(Scroll step), and the maximum wait-
time for the web response (Connection
timeout).
Security
Press (Options) and select Save.
Secure
prompt Display a security request
when leaving a page with
secure connection to enter
a page that is non-secure.
ID cache Set whether or not the
browser should store your
user ID and password.
Cookies Enable/Disable cookies.
Link referral Allow/Do not allow the
current page to see
previous URL.
50
Certificates
Display the list of stored certificates.
Current
Display the current certificate
information.
Certificates list
Press to display the selected
certificate information.
WAP push
You can accept or reject SL (Service
Loading) push messages from trusted
and untrusted sources.
Press (Options) and select Save.
Browser profiles
You can choose one of 5 browser
profiles.
The current browser profile is marked.
Activate profile
Press to select a profile and
confirm with .
Edit profile
Press (Options) and select Edit.
Press (Options) and select Save.
Reset profile
Press (Options) and select Reset
profile.
The browser profile is reset to an
unconfigured state. If your provider has
locked a predefined profile, it cannot be
reset.
Navigation in the
browser
Ending a connection
Press and then
(<DISPLAY>Yes) to end the
connection and close the browser.
Profile
name Enter profile name.
Internet
profile/
Connection
profile
Select profile (page 63).
Start page Set current URL as
startpage for the profile.
Select a link.
(Back)Press to go back a page.
One input field/link
forward/back.
Scroll one line.
Tab through active
content (links on page).
51
Download
Downloads are offered on the Internet.
Once downloaded, the content is
available to you on the phone.
You cannot download more than one
content at the same time.
Java Application
Manager
Accessible via My stuff > Appls./Games.
Java Application Manager (JAM)
displays the list of Java applications/
games/MIDlet suites currently available
on the phone and helps manage those
applications.
Press to select the desired
application.
Depending on the application selected,
different options are available.
Press (Options).
Games
Games
Games are offered on the Internet. You
can download games to the phone. Once
downloaded, these are available to you
via the phone.
Some games are already pre-installed
on your phone.
Organiser
Calendar
Organiser > Calendar
You can enter events in the calendar.
The time and date must be set for the
calendar to work correctly.
AM/PM or 24h display depends on your
clock settings (page 67).
The calendar offers you 3 views: daily,
weekly and monthly. When you switch
the view, the current hour/day/week is
marked.
Press (Options) and select Daily
view/Weekly view/<DISPLAY>Monthly
view to switch to different views, or for
more options.
Your Internet browser is under license of:
• When the download is completed, you
can either continue browsing or open
the downloaded content and use it (e.g.
set picture as wallpaper, play sound/
video). However, when Animation
mode is set on, some of the display
settings, e.g. Wallpaper or Logo, will
be deactivated.
• Downloaded content is listed in the
corresponding folder in My stuff
(page 57). You can select to save
downloaded Java applications in the
Appls. (applications) or Games folder.

52
Daily view
Display events of the current day. You
can scroll from 12 AM to 11 PM. A
vertical line indicates the event
duration.
One day forward/back.
One hour forward/back.
Edit/New event (page 53).
Weekly view
Events are shown as vertical bars of
different colours on the horizontal hour
division. The first 2 upcoming or
current events for the current day are
displayed below the calendar.
One day forward/back or
one week forward/back if
Monday or Sunday is
highlighted.
Forward/back two hours
through the day.
Display daily view for
highlighted day.
Monthly view
Week numbers are displayed in the first
column. The first 2 upcoming or current
events for the current day are displayed
below the calendar.
One day forward/back
or one month forward/ back
if first or last day is
highlighted.
One row up/down
or one month forward/
back if first or last row is
highlighted.
Display daily view for
highlighted day.
Calendar Settings
Press (Options) and select
Settings.
<EMPHASIS>Default repeat:
Set the default repeat time frame for
newly created events.
<EMPHASIS>Default alarm mode:
Set the default alarm time span for
newly created events.
<EMPHASIS>Day start time:
Set the start time displayed on the first
line in the daily/weekly view.
A contact’s birthday is displayed with
subject "Birthday" in a single hour slot at
the day start time (page 52). If a birthday
event is highlighted, press to open
the contact.
To set a contact’s birthday, see page 28.
To set the ringtone see page 59.
53
<EMPHASIS>Week start day:
Set the start day displayed in the
weekly/monthly view.
New event/Edit event
Events are displayed in all calendar
views. Overlapping events are
displayed in parallel as different
vertical bars.
Press (Options) and select New
event/Edit event.
Press (Options) and select Save to
save the event.
Information on the alarm
When the set date and time of the event
are reached an audio and a visual alarm
occur.
When the alarm occurs, follow the on-
screen commands and press
corresponding keys. Or press to
launch the calendar and display the
event.
Voice memo
Organiser > Voice memo
Use the function to record short memos.
New recording
1. Select Record new. Select a save
location for recording.
2. Press or (Record): Start
recording.
3. Press : Pause/record.
4. Press (Done): End recording.
The recording is saved in the Sounds
folder in My stuff (page 57).
Playback
1. Select recording.
2. Press : Playback/pause.
3. Press (Stop): Stop playback.
Set as call ringtone
1. Select recording.
2. Press (Options) and select
Set as.
3. Confirm with (Yes).
Time zones
Organiser >Time zones
The world clock shows the current
system time, the time zone (colour
• If you edit a repeating event, select
whether you want to save changes to
the highlighted event or to all
occurrences and confirm with .
• If the time format 12-hour is activated
(page 67) press / to
switch between <DISPLAY>am/
<DISPLAY>pm for start and end time.
An alarm sounds even when the phone
is switched off (except the phone is
switched off in alarms off mode,
page 15).
An incoming call ends recording. The
record is saved automatically.
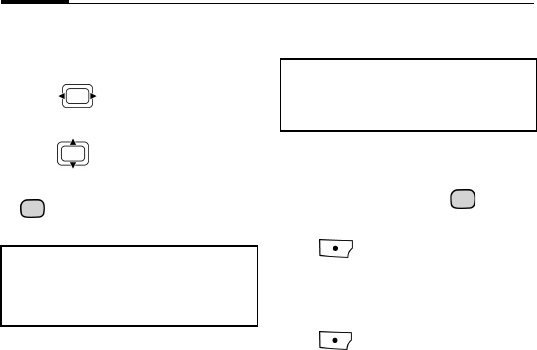
54
vertical bar on the map), the time zone
name and the time in the selected city.
The time zone display can be changed:
1. Press : Select the time zone in
the world map.
2. Press : Select a city in the
selected time zone.
3. : Set time zone to the selected
city.
Synchronisation
Organiser > Synchronisation
You can use this function remotely to
access externally filed data (addresses,
calendar) and synchronise these with
the data on your phone. The data can,
for example, be saved on a company
computer.
Remote sync
You can configure up to 5 profiles
for remote synchronisation. Before
you start the synchronisation,
check Active profile, Sync mode and
Apps to synchronise (see below).
Initiate the synchronisation. The
computer is selected and
synchronisation started. When
completed, the actions which have been
performed are displayed.
Active profile
Select profile you want to use for
synchronisation and press .
Edit profile
Press (Options) and select Edit.
For details on settings, please contact
your service provider.
Restore defaults
Press (Options) and select Restore
defaults.
Sync mode
If you changed the time zone:
The alarm clock is not affected.
Calendar events are updated to the
current time zone.
If you accept/establish a call during
synchronisation, the synchronisation
might be stopped depending on your
network.
Date to sync Select whether All data or
only Modified data is to
be transferred during
synchronisation.
Sync
direction
Select the direction in
which synchronisation is to
occur.
Two-way: Data is
transferred in both
directions between the
phone and the server.
Mob.overwrit.: phone
transfers data to the server.
Serv.overwrit.: server
transfers data to the phone.
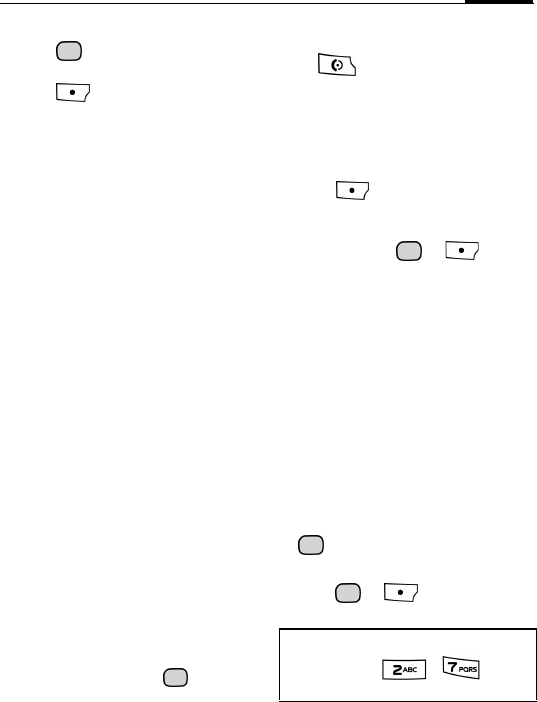
55
Apps to synchronise
1. Press to check/uncheck the data
type to sync: Contacts, Calendar.
2. Press (Done) to confirm.
Sync log
Display a summary of the latest
synchronisation. The log indicates
whether the synchronisation attempt
was successful, e.g. date, time and
details about the synchronised
application.
Extras
SIM toolkit (optional)
(Network support dependent)
Extras>SIM toolkit
Your service provider may offer special
applications such as mobile banking,
share prices, etc. via the SIM card.
For further information, please contact
your service provider.
My menu
Extras >My menu
Create your own menu with frequently
used functions, phone numbers from the
contact list or applications.
Using My menu
Select an entry and press to
activate the function.
Or
If the selected entry is a phone number,
Press to call it.
Change My menu
You can replace each entry with another
entry from the selection list.
1. Select an entry.
2. Press (Change) to open the
function list.
3. Select a function to assign to the
entry and press or (Select)
to save the entry.
If None is selected, the assignment is
cleared from the list.
If Assign speed dial is selected, the
Contacts list is opened. Select a
contact’s phone number.
Alarm clock
Extras >Alarm clock
The alarm clock can be set for each day
of the week separately.
Set alarm
1. Select a day of the week and press
.
2. Enter time.
3. Press or (Save) to activate
alarm.
If the time format 12-hour is activated
(page 67) press / to
switch between am/pm.
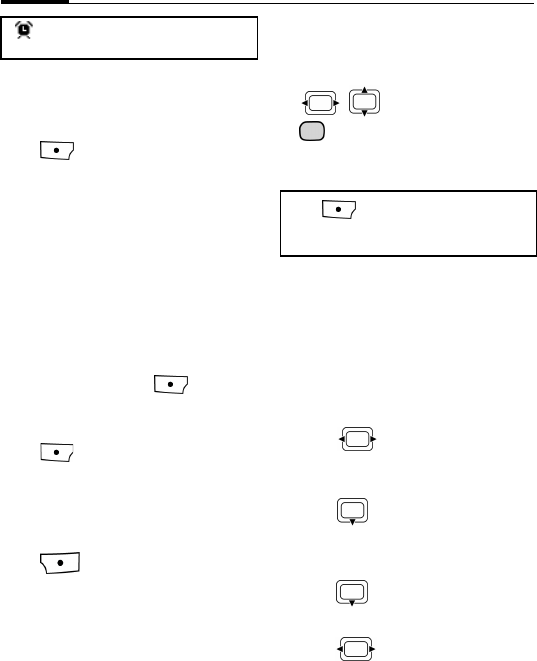
56
Apply Alarm to every day
Apply the highlighted alarm time to
every day of the week.
Press (Options) and select Apply
to every day.
End alarm
The alarm will ring at the set time, even
when the ringtone or the phone is
switched off (except the phone is
switched off in alarms off mode,
page 15).
If the phone is switched on by the alarm,
it won’t switch off again if you end the
alarm.
To end the alarm, press (Options)
and select Turn off.
Reset alarm
Press (Snooze): Stop the alarm
tone, and reset it for 10 minutes.
The original time of the alarm is not
changed.
End alarm
Press (Off): End alarm.
The alarm remains active and will occur
at the same time in one week.
Calculator
Extras > Calculator
The calculator can be used in a basic
version and with an advanced range of
functions.
• Number keys: Enter digit(s).
•/: Navigate to functions.
• : Select function.
The result is calculated and displayed
immediately.
Unit converter
<DISPLAY>Extras > <DISPLAY>Unit
Converter
You can convert various amounts into
other units.
Converting the units/currency
1. Press to select the desired
measure type: length, temperature,
currency, etc.
2. Press to switch to the input
field.
3. Enter the quantity to be converted.
4. Press to switch to the selection
field.
5. Press to select the source unit/
currency.
is displayed in standby screen
when alarm is turned on.
Press (Options) to switch between
Basic Mode and Extended Mode to get
different functions.
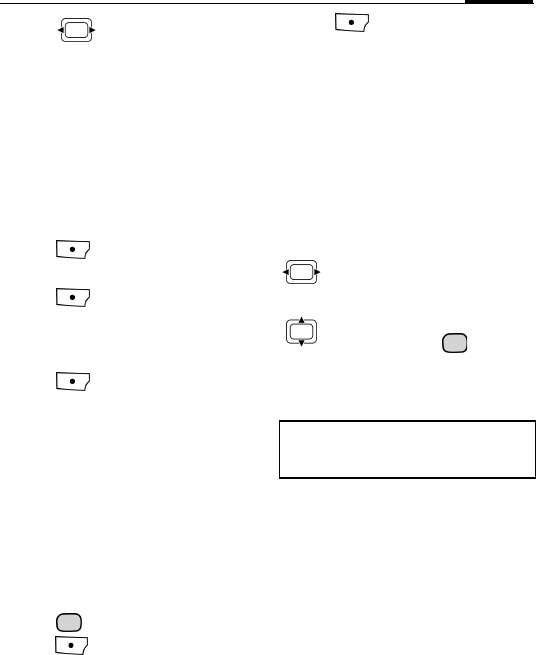
57
6. Press to select the target unit/
currency. The result is displayed
below.
Currency settings
When you call up the function, you
must enter both source and target
currencies as well as their exchange
rate.
1. Enter source currency in the input
field.
2. Press (Save) and select Save.
3. Scroll to the target currency field.
4. Press (Options) and select Add
currency.
5. Enter target currency and exchange
rate.
6. Press (Save) and select Save.
Sound recorder
Extras > Sound recorder
Same function as Organiser > Voice
memo (page 53).
Stopwatch
Extras > Stopwatch
Use the stopwatch to measure time or to
save accumulated times.
• Press : Start/Stop/Restart.
•Press (Lap): Save lap time. A lap
is counted as the time between 0
second to key presses.
• Press (Reset): Reset time to
zero when the stopwatch stops.
My stuff
Select My stuff.
You can use My stuff to organise your
files in folders.
If the microSD card is inserted, folders/
files stored on it are organised on a
separate tab. Files are managed the
same way as files saved on the phone.
Select tab (phone memory/
microSD card). List of
folders/files is displayed.
Select folder/file or link and
confirm with .
Depending on your selection, the file
and respective application are opened,
or download is started.
Folder structure
Files are organised in folders.
Predefined folders have already been
created for different data types and
cannot be changed.
The content of the fixed folders is
filtered. The folders contain special
media types. Files that do not fit in
another folder are listed in Misc.
Remember that pictures, sounds or
applications may be protected
(DRM, page 16).
58
You can add personal folders on the top
level as well as subfolders. Personal
folders are displayed behind the default
folders.
Personal folders on the top level can
contain mixed media types. You can
delete personal folders.
Within fixed folders you can add
personal subfolders, which are
restricted to the media type of the fixed
folder.
To organise folders, press
(Options).
Press (Options) for options for
organising folders.
Folder Content Formats (e.g.)
Sounds MP3 tracks,
ringtones,
recordings.
mp3, aac+
m3u, mid,
amr, wav
Picture
sPictures. bmp, jpg,
jpeg, png, gif
Videos Videos. 3gp, H263,
MPEG4
Themes Load theme
(packed)
Theme
configuration
(unpacked).
Select theme
to activate it.
*
Appls. Launch Java
Application
Manager and
display list of
saved
applications.
*
Games Launch Java
Application
Manager and
display list of
saved games.
jar, jad
Misc. Files of media
types that are
not included
in other
folders, e. g.
text modules,
Internet
pages. If you
try to open a
file of
unknown
type an error
message is
displayed.
e.g. html, wml
Flashs Flash files. swf, svg
• Depending on your provider the
structure, content and functionality
may differ.
• Your phone does not support playback
of a flash file taking more than 1MB of
your phone memory; you will be
prompted by the warning of
<DISPLAY>Low memory, recording
stopped, and the playback will be
stopped to protect your phone.
59
License manager
Display alphabetical list of all rights
associated with files stored on the phone
or the microSD card.
Scroll to a desired file, press
(Options) and select License
manager.
If the selected file has no license:
1. Press (Yes) to start License
manager anyway.
2. Select license.
Press (Options).
Settings
Profiles
Settings > Profiles
Several settings can be stored in a phone
profile, for example to adapt the phone
to the surrounding level of noise.
6 standard profiles are provided with
default settings. You can set and rename
2 personal profiles (User profile 1 and
User profile 2).
To activate the selected profile, press
.
To edit a default profile or create a new
personal file, press (Options) and
selectChange settings.
Headset
The special profile Headset is
automatically set when an original
headset is attached.
Ringtones
Settings > Ringtones
In Volume, set the tones on the phone to
suit your requirements. The volume
setting controls the volume of the
ringtone as well as the general volume
level of beeps and tones played by
different applications. The volume
setting does not affect the media player.
In other options, set the melodies and
tones for different functions separately.
View license Display license details.
Renew license Open browser to URL
of license server.
Purchase new rights.
License
search Enter rights name to
search for license.
Go to content/
Downld
content
Go to associated content
file for specified license
in according folder.
If chosen content is not
found on the phone or
the microSD card, you
have to download
content first. Load URL
of content server.
Delete license Remove license from
phone. Confirm
notification.
60
Themes
Settings > Themes
Load a completely new user interface in
your phone. With the press of a key,
various functions are re-organised
based on a theme, e.g.
• switch on/off melody and animation.
• wallpaper.
In addition to the automatic exchange of
theme parameters (e.g. switch on/off
melody), you will have to manually set
parameters such as Logo, Screensaver.
Display
Settings > Display
Wallpaper
Background image used on either
display in standby screen. You can set a
wallpaper for each display separately.
Logo
Graphic to be displayed instead of the
provider logo.
Animation mode
A default Flash file to replace the
wallpaper.
Screensaver
The screensaver is displayed when a
specified time period has elapsed. An
incoming call or pressing any key will
end the function.
• Press to scroll to different fields.
• Press to scroll to options in a
field.
• Press (Options) and select (Save)
to save the screensaver.
Auto key lock
• Press to scroll to Auto key lock.
• Press and select On to activate
Auto key lock function. When the
specified time period has elapsed, the
screensaver is activated
automatically, and so is the keypad.
To unlock the keypad, press .
When you select a theme all the
components of the theme apply to the
phone, e.g. ringtones, wallpaper. The
existing settings might be overwritten.
When Animation mode is set on, some of
the display settings, e.g. Wallpaper or
Logo, will be deactivated.
Warning!
When the screensaver is manually set,
talk/standby time is reduced dramatically.
61
Greeting message
Create a message to be displayed when
the phone is switched on.
Backlight time
Set the backlight duration for the
display.
Brightness
Press / to set the brightness
level for the display.
Power save
Activate/deactivate power save mode.
The standby time before the display
goes into power save mode is fixed.
Vibration
Settings > Vibration
To avoid the disturbance caused by
a ringing phone, you can activate the
silent alert function as an alternative.
The silent alert can also be activated in
addition to the ringtone (e.g. in noisy
environments).
Connectivity
Settings > Connectivity
Bluetooth® technology
Bluetooth technology is a short-range
radio connection by means of which a
headset or car kit or such can be
connected without the need for wires.
Using the Send function in the options
menu for the application concerned you
can also use this route to send data.
To establish a Bluetooth connection
between your phone and other
Bluetooth devices you must activate the
function.
Bluetooth technology active
Activate/deactivate Bluetooth technology
Bluetooth technology reduces the
phone’s standby time if it is activated.
•The Auto key lock option is available
only when the Screensaver function is
activated.
• If the backlight time duration you set is
shorter than the screensaver duration,
the backlight for the display will be
switched off and the keypad will be
locked automatically once the backlight
time elapses. To set up the backlight
duration, refer to Settings > Display >
Backlight time.
• The keypad can also be locked and
unlocked directly in standby screen by
pressing .
Decreasing the brightness of the display
extends the operating time of your
phone.
The Bluetooth® word mark and logos are
owned by the Bluetooth SIG, Inc. and
any use of such marks by BenQ
Corporation is under license. Other
trademarks and trade names are those of
their respective owners.

62
is displayed when Bluetooth
technology is activated.
File location
Select where the files are to be stored
after being transferred via Bluetooth
technology.
Search
Search for specific categories of devices
or for all Bluetooth devices.
Found devices are displayed in a list
(for list options see below).
If Audio is selected Headsets, Car kit
and audio or video devices are listed.
Known devices
Display the list of known devices (max.
10 devices).
Last connected
Display the list of last 10 connected
devices, including those that are
currently connected.
Bluetooth name
Display device address. Enter the
device name that is shown to other BT
devices when they request this (see
Bluetooth visibility).
If no name is entered, the device address
is shown to other BT users (the device
address cannot be changed).
Bluetooth visibility
The device address/name is shown or
not to other BT devices if they request
this in order to receive or send data.
Bluetooth device options
Depending on the current list (Search,
Known devicesor Last connected),
different functions will be offered.
1. Press to select a device from
list.
2. Press (Options).
On/Off Activate/deactivate
visibility.
Auto Set visibility for 5 minutes,
then visibility is disabled
automatically.
Trust/
Do not trust Trust: Enter your
password both on the
phone and on the
device to trust the
device, so that
Bluetooth connection
can be established.
If you are pairing with
an audio device, enter
the password
predefined for the
device.
Do not trust: Remove
trust option of device.
Trusted devices are
added to the known list
automatically and do
not require the
password to connect.
Connect/
Disconnect Establish/end
Bluetooth connection
to a known audio
device. Only one audio
device may be
connected at a time.

63
Data counter
Display the data transfer information.
Connect profiles
(Network support dependent)
Depending on your provider up to
25 profiles may be preset containing a
collection of settings utilised by
applications.
Press (Options) and select Edit to
edit the selected profile. For more
information on settings, please contact
your service provider.
Your provider will supply you with
your login and password.
Internet profiles
(Network support dependent)
Depending on your provider up to
25 profiles are preset containing a
collection of settings utilised by
applications, such as Internet (WAP
browser) and MMS.
Press (Options) and select Edit to
edit the selected profile. For more
information on settings, please contact
your service provider.
Your provider will supply you with
your login and password.
Linger time
(Network support dependent)
Depending on your provider you may
be able to specify the linger time which
will apply to all applications.
Shortcuts
Settings > Shortcuts
You can assign one important number/
function to each soft key, the navigation
key (up, down, left, right) and the
number keys 2 to 9. These keys can
then be used as shortcuts to start
functions/dial numbers (speed-dial
numbers).
Setting a function shortcut
1. Select the desired key and confirm
with .
2. Select shortcut function and confirm
.
Setting a speed-dial key
To assign a number to a key, select
<DISPLAY>Speed dial and then select
the desired contact.
View details Display the device
details: Name:, Device
type:, Address: and/or
Service: (not available
if no Service Class of
the device can be
searched).
Add to known
list Add the device to the
known list.
New search Start a new search.
is predefined as the speed dial
key for the voicemail number. You
cannot change its function.
64
Start function/call number
using shortcuts
• Press the corresponding soft key and
navigation key briefly to start the
function.
• Press and hold a corresponding
number key to start the function/dial
number.
Call setup
Settings > Call setup
Hide ID
(Network support dependent)
When you make a call, your number can
be shown on the display of the called
party or suppressed.
Call waiting
(Network support dependent)
If you are registered for this service, set
call waiting.
You will hear the call waiting tone
during a call when there is another call
waiting.
Diverts
(Network support dependent)
You can specify the conditions
under which the call types should be
diverted to your mailbox or other
numbers.
Divert voice calls/video calls
1. Select call type.
2. Press (Options) and select Set.
3. Enter the number to divert to. Or
Press (Options) and select
Contact to choose a contact’s
number.
Divert all calls/data/fax/messages
1. Select Set.
2. Enter the number to divert to. Or
Press (Options) and select
Contact to choose a contact’s
number.
All calls
All calls are diverted ( is displayed
when activated).
If no function is assigned, you can set a
function if you
• press and hold the number key in
standby screen and confirm request.
• press the soft key and navigation key
briefly.
The service provider may have already
assigned functions to a softkey (e.g
access to "SIM services" or direct call-up
of the Internet portal). It may not be
possible to modify this key assignment.
The left soft key may sometimes be
replaced automatically by View to access
a new message for example.
The setting applies to voice and video
calls.
Note that the divert is stored in the
network and not in the phone (e.g., when
the SIM card is changed).
65
All conditional
A call is diverted in the following
situations: Not reachable, No reply,
Busy.
Not reachable
A call is diverted if the phone is
switched off or is out of range.
No reply
A call is diverted if you don’t answer it.
Busy
A call is diverted if another call is in
progress.
Fax
Fax calls are diverted to a number with a
fax connection.
Data/Messages
Data calls are diverted to a number with
a PC connection.
Any key answer
Incoming calls can be accepted by
pressing any key (except for ).
Auto redial
If a call you make is not answered, the
phone will automatically redial that call.
Video calls
Specify the additional settings for video
calls.
Show my video
If the function is activated, your video
image is always transmitted to the caller
during a video call.
If the function is deactivated, you can
choose whether or not to send the video
image when you receive an incoming
video call.
Select image
If you do not want to transmit your
video image to the caller (Show my
image is deactivated), you can select a
video mute picture that is shown
instead.
1. Press (Change) to change
setting.
2. Select a picture from My stuff
(page 57) folder and confirm with
(Select).
Display call timer
Display the call timer during a voice/
video call.
Phone
Settings > Phone
Language
Set the language of the display text.
Display language
Show the currently set display
language. When Automatic is set, the
language of your home service provider
is used.
66
Input language
Select a language for text entry.
Languages with T9 support are marked
with the T9 symbol. When Automatic is
set, the input language is based on the
display language.
If a language that you do not understand
happens to be set, the phone can be reset
to the language of your home service
provider with the following input (in
standby screen): * # 0 0 0 0 # or
.
Default input method
Set T9 (intelligent text entry) or the
multi-tap (ABC) as default text entry
method for most of the text entry items.
Key tones
Set the tone that is played when
pressing keys.
Info tones
Activate/deactivate the service and
alarm tones.
Auto power on
Set the time that the phone is switched
on automatically.
Auto power off
Set the time that the phone is switched
off automatically.
File system
Format card
Format the microSD card and delete all
saved data.
Memory assistant
Works the same way as My stuff
(page 57), listing all saved folders and
files in phone memory and on microSD
card.
Phone identity
Switch between tabs to display the
phone identity number (IMEI), the
software configuration or start a Device
check.
The IMEI number may be useful for
customer service.
Device check
A self-test as well as individual tests are
offered. If you select <DISPLAY>Self
test, all individual tests are carried out.
Master reset
Reset the phone to default values
(factory setting). This does not affect
the SIM card or the network settings.
To reset the phone in standby screen
press * # 9 9 9 9 #.
Attention
When on an airplane, be sure that Auto
power on is set to off.
To start the Phone identity feature in
standby screen, press * # 0 6 #.
67
Clock
Settings > Clock
Time/Date
Enter time (hours/ minutes) or date
(month/day/year) and confirm with
.
If Auto time is activated (page 67), the
network time is displayed.
Time zone
The same function as Organiser >Time
zones (page 53).
Time format
Set the 24-hour/12-hour format for time
used in various applications.
Date format
Set the display format for date.
Show clock
Set the time and date display in standby
screen.
Auto time
If you activate auto time, the time zone
is switched automatically to local time
by the network.
Security
Settings > Security
Only protect. SIM
(PIN2 or phone code protected)
Dialling options are restricted to the
SIM protected numbers in the contacts.
PIN codes
See page 18.
This SIM only
(PIN2 or phone code protected)
The phone can be linked to a SIM card
when the phone code is entered. Unless
the phone code is known the phone will
not operate with a different SIM card.
If the phone is to be used with a
different SIM card, enter the phone
code when requested.
Barrings
(Network support dependent)
Barring restricts the use of your
SIM card (not supported by all service
providers). You need a 4-digit network
password for network barring. Your
service provider will supply you with
this password. You may need to register
separately for each barring.
All outgoing
All outgoing calls except emergency
numbers are barred.
If the 12-hour time format is activated in
Time format, press / to
switch between am/pm.

68
Outg. internat.
(International outgoing)
Only national calls can be made.
Outg. int. x home
(International outgoing without home
country)
International calls are not permitted.
However you can make calls to your
home country when abroad.
All incoming
The phone is barred for all incoming
calls.
When roaming
You do not receive calls when you are
outside your home network.
Network password
Change the network barring password
obtained from the service provider.
Clear all
All barrings are deleted.
License manager
Start the License manager to view/edit
license information of all saved files.
Download prompt
Enable or disable a content download
notification.
Network
Settings > Network
Network info
Retrieve information about the network
operator currently set.
Choose network
Start network search. This is useful if
you are not in your home network or
want to register in a different network.
The list of networks currently available
is displayed.
Auto network
If you activate this function, the phone
searches automatically for the available
network. Otherwise you can select a
different network manually from the
network list.
GPRS auto attach
Select to allow the phone to search for
GPRS signal automatically while it is in
2G mode.
Preferred network
Display a list of preferred networks.
Customise the list by changing entries.
Mode selection
(Network support dependent)
Make sure that your service provider
supports the selected network mode.

69
Fast search
If you activate this function, network
reconnection is speeded up (standby
time is reduced).
Accessories
Settings > Accessories
Car kit
The Car kit profile is activated
automatically as soon as the phone is
connected to the car kit.
Edit profile
To edit the Car kit profile see Profiles,
page 59.
Auto answer
Voice and video calls are accepted
automatically after a few seconds.
Key assignments
(only for Car kit)
You can assign new functions to keys
on the car kit.
Headset
If an original headset is used, the
Headset profile is automatically
activated when the headset is plugged
in.
Edit profile
To edit Headset profile see Profiles,
page 59.
Auto answer
Voice and video calls are accepted
automatically after a few seconds.
Charge via USB
The phone is charged via USB when
connected to a computer via USB data
cable.
Mass storage
See Using the phone as card reader
(page 59).
GPS settings
Settings > GPS Settings
You can choose to edit settings of one of
the 25 AGPS servers to better receive
GPS data. For details on the AGPS
server settings, contact your network
operator.
70
Questions & Answers
If you encounter problems while using the phone, or if it performs erratically, you can
consult the information in the chart below. If your particular problem cannot be resolved
using the information in the chart, contact the dealer where you purchased the phone.
Problem Possible causes Possible solution
Poor reception The network signal is too
weak at your current location,
for example, in a basement or
near a tall building, because
wireless transmissions can
not effectively reach it.
Move to a location where the network signal
can be properly received.
The network is busy at the
current time (for example,
during peak times, there may
be too much network traffic
to handle additional calls).
Avoid using the phone at such times, or try
again after waiting a short time.
You are too far away from a
base station for your service
provider.
You can request a service area map from your
service provider.
Echo or noise Poor network trunk quality
on the part of your service
provider.
Press and dial again. You may be
switched to a better-quality network trunk or
phone line.
Poor local telephone line
quality.
Press and dial again. You may be
switched to a better-quality network trunk or
phone line.
Battery will not
charge.
The battery or battery charger
is damaged.
Contact the dealer.
The phone's temperature is
below 0 °C (+32 °F) or higher
than +45 °C (+113 °F).
Adjust the battery charging environment to
avoid extremes of temperature.
Poor contact between the bat-
tery and charger.
Check all connectors to make sure all connec-
tions have been properly made.
71
Shortened stand-
by time
The standby time is related to
your service provider system
configuration. The same
phone used with different
service providers’ systems
will not provide exactly the
same length of standby time.
If you are located in an area where signalling
is weak, temporarily switch off the phone.
The battery is depleted. In
high-temperature environ-
ments, battery life will be
shortened.
Use a new battery.
If you are not able to connect
to the network, the phone will
continue to send out signals
as it attempts to locate a base
station. Doing so consumes
battery power and will conse-
quently shorten standby time.
Change your location to one where the net-
work is accessible, or temporarily turn off
your phone.
You cannot
switch your phone
on.
Battery power has been de-
pleted.
Recharge the phone's battery.
SIM card error SIM card malfunction or
damage.
Take the SIM card to your service provider
for testing.
SIM card inserted improper-
ly.
Insert the SIM card properly.
Debris on the SIM card con-
tacts.
Use a soft, dry cloth to clean the SIM card
contacts.
Unable to con-
nect to the net-
work.
SIM card invalid. Contact your service provider.
You are not within the net-
work's service area.
Check the service area with your service pro-
vider.
Poor signal. Move to an open space, or if you are inside a
building, move closer to a window.
You cannot an-
swer incoming
calls.
You have activated call bar-
rings.
Go to Settings > Security >Barrings > All
calls, and then select Clear all.
Problem Possible causes Possible solution

72
You cannot make
outgoing calls.
You have activated call bar-
rings.
Go to Settings > Security >Barrings > All
calls, and then select Clear all.
Charge limit reached. Reset limit with PIN2.
PIN Code is
blocked.
You have entered an incor-
rect PIN code three consecu-
tive times.
Contact your service provider. If the service
provider provides the SIM card's PUK code,
use the PUK code to unlock the SIM card.
Unable to add
contacts to the
Phone.
Memory for contacts is
already full.
Delete unnecessary contact information from
the Phone.
Unable to select
certain features.
Your service provider does
not support these features, or
you have not applied for serv-
ices that provide these fea-
tures.
Contact your service provider.
Problem Possible causes Possible solution

73
Care and maintenance
Your phone has been designed and
manufactured to the highest of standards
and should be treated with great care. The
suggestions below will help you to enjoy
your phone for many years.
• Protect your phone from moisture and
humidity. Precipitation, humidity and
liquids contain minerals that will corrode
electronic circuits. Should your phone
become wet, disconnect it immediately
from the power supply to avoid electric
shock. Do not place your phone (even to
dry it) on/in a source of heat such as a
microwave oven, oven or radiator. The
phone may become overheated and
possibly explode.
• Do not use or store the phone in dusty,
dirty areas. Its moving parts may be
damaged and the casing may become
deformed and discoloured.
• Do not store your phone in hot
environments (e.g. vehicle instrument
panel in the summer). High temperatures
can shorten the life of electronic devices,
damage batteries and warp or melt
certain plastics.
• Do not store your phone in cold
environments. When the phone warms
up again (to its normal ambient
temperature), moisture can form inside
the phone, which may damage electronic
circuit boards.
• Do not drop, knock or shake your phone.
Rough handling can damage internal
circuit boards.
• Do not use harsh chemicals, cleaning
solvents, or strong detergents to clean
the phone.
The suggestions given above apply
equally to your phone, battery, charger and
all accessories. If any of these parts is not
working properly, obtain fast and reliable
help at our service centres.
Battery quality
statement
The capacity of your mobile phone battery
will reduce each time it is charged/
emptied. Storage at too high or low
temperatures will also result in a gradual
capacity loss. As a result the operating
time of your mobile phone may be
considerably reduced, even after a full
recharge of the battery.
Regardless of this, the battery has been
designed and manufactured so that it can
be recharged and used for six months after
the purchase of you mobile phone. After
six months, if the battery is clearly
suffering from loss of performance, we
recommend that you replace it. Please buy
only original batteries.
Display quality
statement
For technological reasons, a few small dots
with different colours may appear in the
display in exceptional cases.
Just remember that the appearance of
brighter or darker dots generally does not
mean that a fault has occurred.

74
Specific Absorption Rate Data
The model wireless phone meets the government’s requirements
for exposure to radio waves.
Your wireless phone is a radio transmitter and receiver. It is designed and
manufactured not to exceed limits for exposure to radio frequency (RF)
energy set by the Federal Communications Commission (FCC) of the U.S.
Government and by the Canadian regulatory authorities. These limits are
part of comprehensive guidelines and establish permitted levels of RF
energy for the general population. The guidelines are based on standards
that were developed by independent scientific organizations through
periodic and thorough evaluation of scientific studies. The standards
include a substantial safety margin designed to assure the safety of all
persons, regardless of age or health.
The exposure standard for wireless mobile phones employs a unit of
measurement known as the Specific Absorption Rate, or SAR. The SAR
limit set by the FCC and by the Canadian regulatory authorities is 1.6 W/
kg
1
Tests for SAR are conducted using standard operating positions
accepted by the FCC and by Industry Canada with the phone transmitting
at its highest certified power level in all tested frequency bands. Although
the SAR is determined at the highest certified power level, the actual SAR
level of the phone while operating can be well below the maximum value.
This is because the phone is designed to operate at multiple power levels
so as to use only the power required to reach the network. In general, the
closer you are to a wireless base station, the lower the power output.
Before a phone model is available for sale to the public in the U.S. and
Canada, it must be tested and certified to the FCC and Industry Canada
that it does not exceed the limit established by each government for safe
exposure. The tests are performed in positions and locations (e.g., at the
ear and worn on the body) reported to the FCC and available for review by
Industry Canada. The highest SAR value for this model phone when
tested for use at the ear is 1.23 W/kg, and when worn on the body, as

75
described in this user guide, is 0.58 W/kg. (Body-worn measurements
differ among phone models, depending upon available accessories and
regulatory requirements).
2
While there may be differences between the SAR levels of various phones
and at various positions, they all meet the governmental requirements for
safe exposure. Please note that improvements to this product model
could cause differences in the SAR value for later products; in all cases,
products are designed to be within the guidelines.
Additional information on Specific Absorption Rates (SAR) can be found
on the Cellular Telecommunications & Internet Association (CTIA) Web
site:
http://www.phonefacts.net
or the Canadian Wireless Telecommunications Association (CWTA) Web
site:
http://www.cwta.ca
1.
In the United States and Canada, the SAR limit for mobile phones used by
the public is 1.6 watts/kg (W/kg) averaged over one gram of tissue. The
standard incorporates a substantial margin of safety to give additional
protection for the public and to account for any variations in measurements.
2. A
The SAR information includes the Motorola testing protocol, assessment
procedure, and measurement uncertainty range for this product.