Motorola Mobility T56DS1 Portable Cellular/ PCS GSM Transceiver User Manual E365 Eng crop
Motorola Mobility LLC Portable Cellular/ PCS GSM Transceiver E365 Eng crop
Contents
- 1. Exhibit 8 Users Manual
- 2. Supplemental Users Manual to TC3240
Exhibit 8 Users Manual


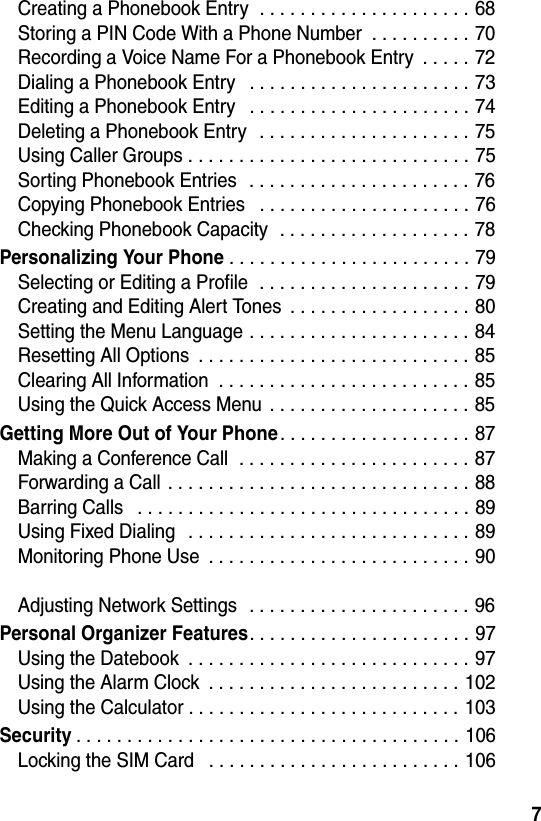


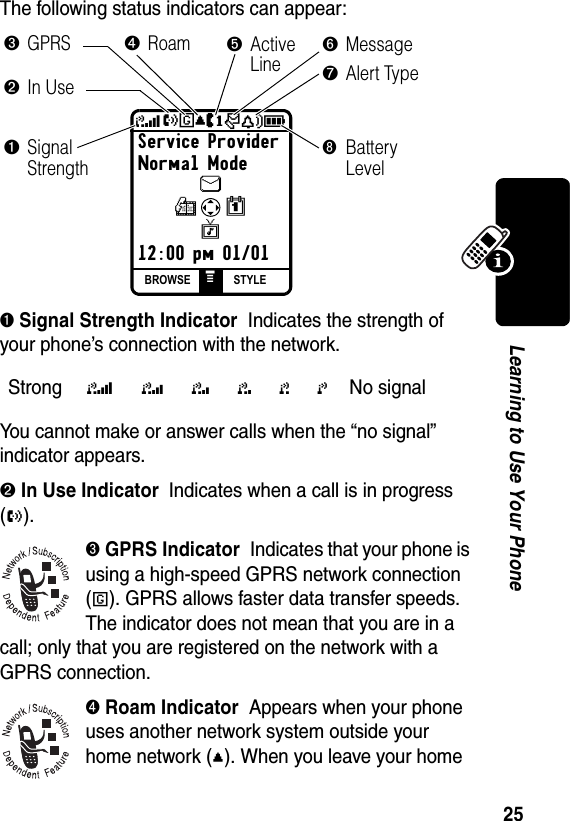


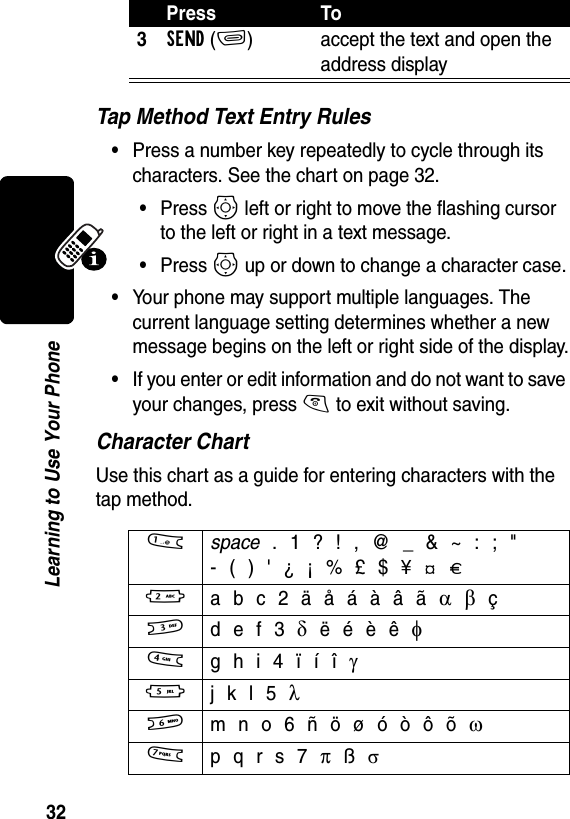
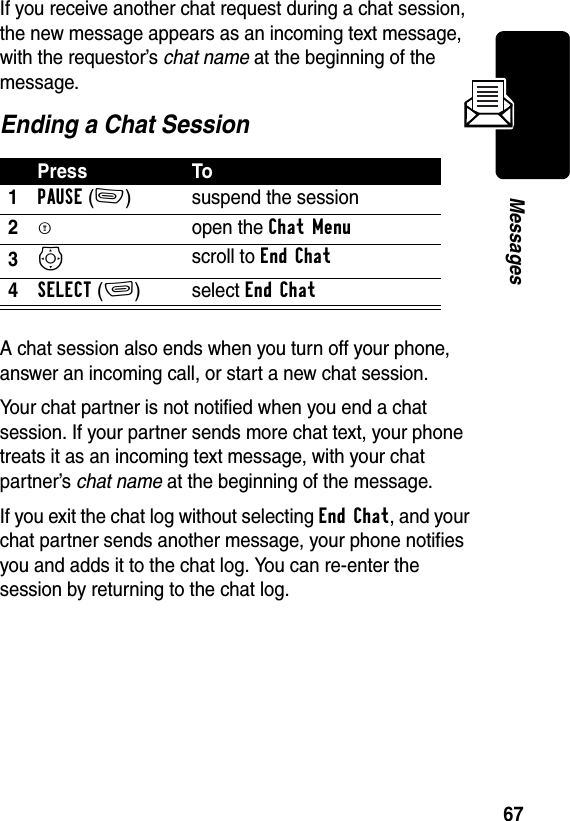
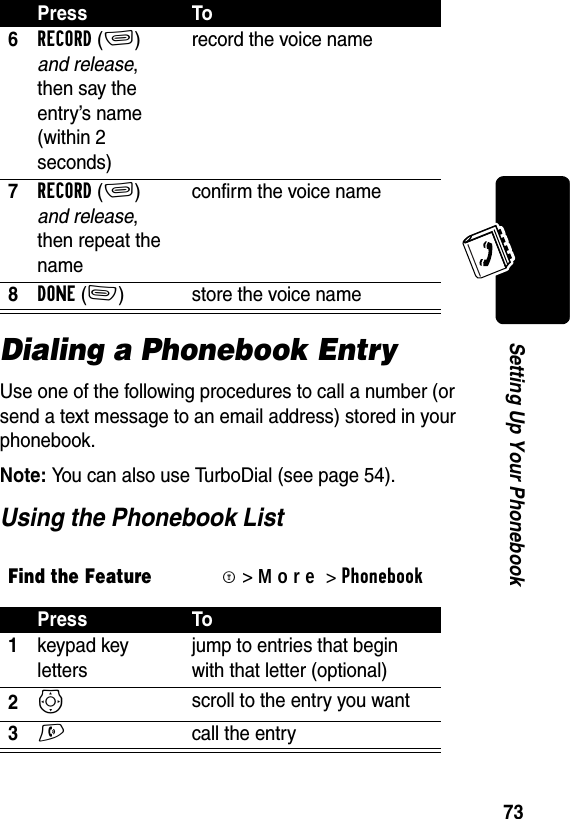
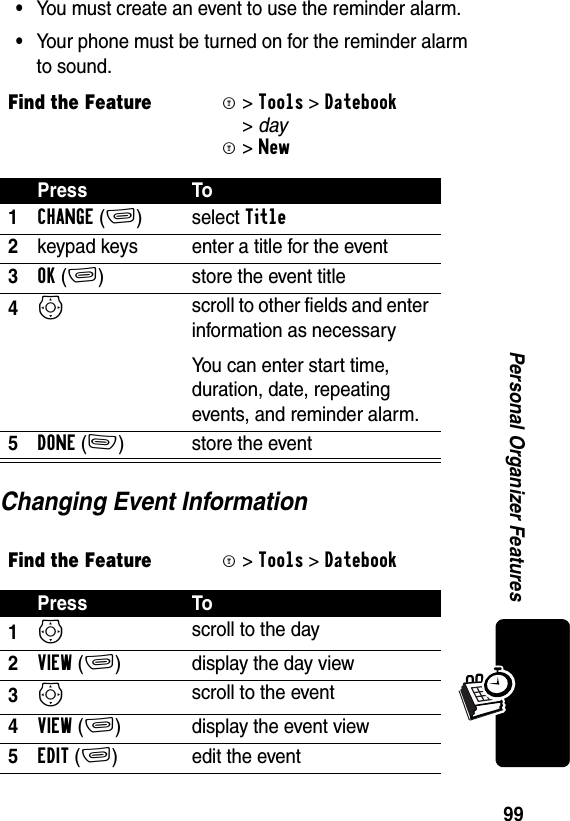
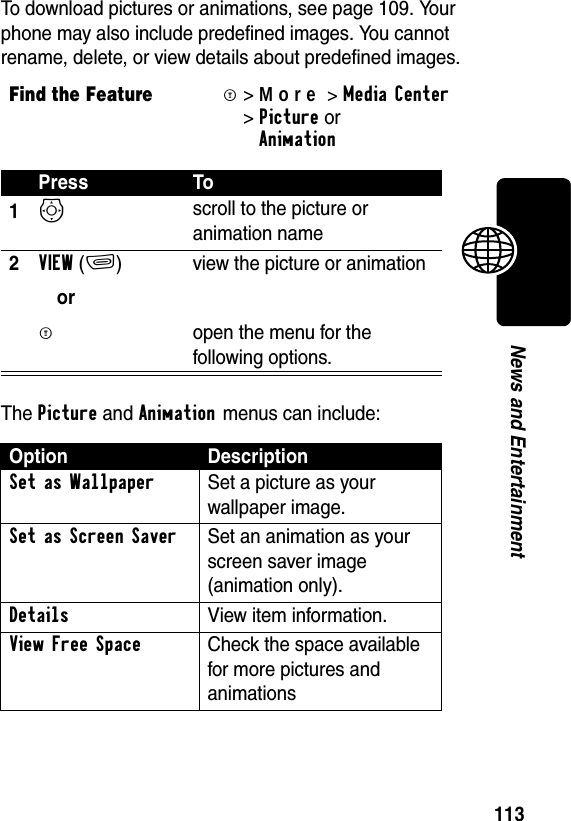
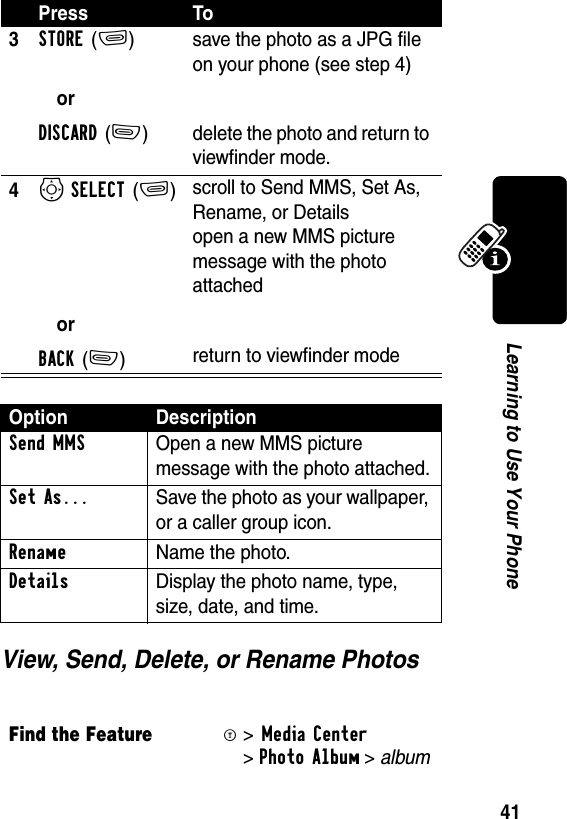
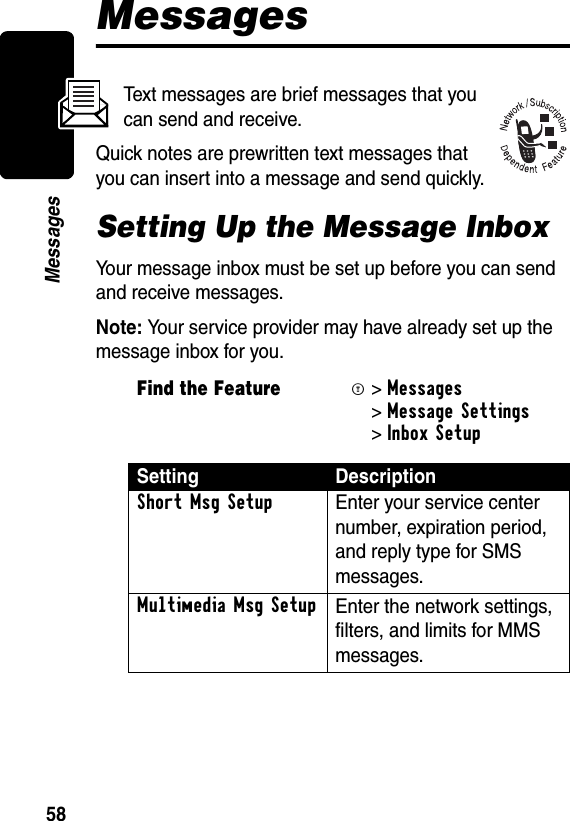
![33Learning to Use Your PhoneNote: This chart may not reflect the exact character set available on your phone.Using the iTAP™ MethodiTAP™ software provides a predictive text entry method that lets you enter a word using one keypress per letter.Press M>iTAP from a text entry screen.Entering Words8 t u v 8 T ü ú ù û9 w x y z 9 [ \0 + - 0 x * / \ [ ] = > < # §Press To1A number key one timeenter the first letter of the wordThe letters associated with the key are shown at the bottom of the display.2Number keys (one per letter)enter the rest of the wordAlternative words and letter combinations are shown at the bottom of the display. The word choices are updated with each keypress.3S right or left highlight the word you want](https://usermanual.wiki/Motorola-Mobility/T56DS1.Exhibit-8-Users-Manual/User-Guide-364143-Page-35.png)

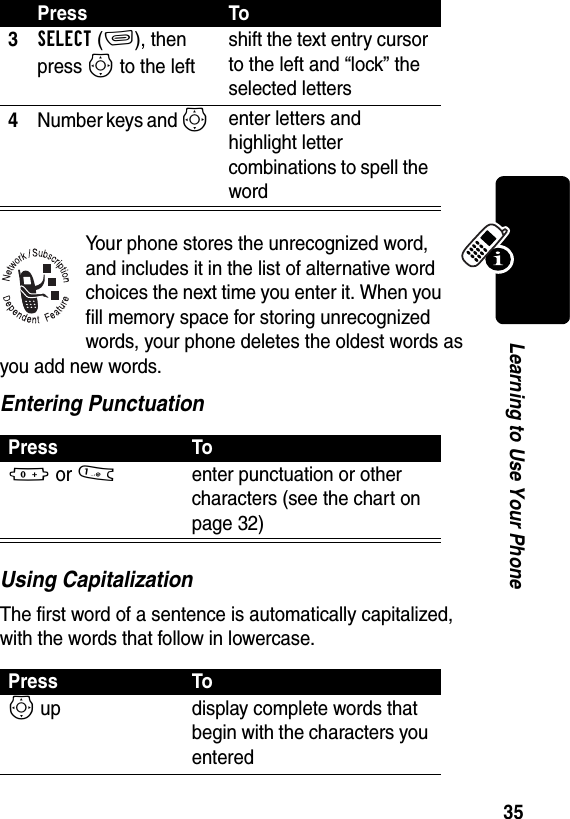


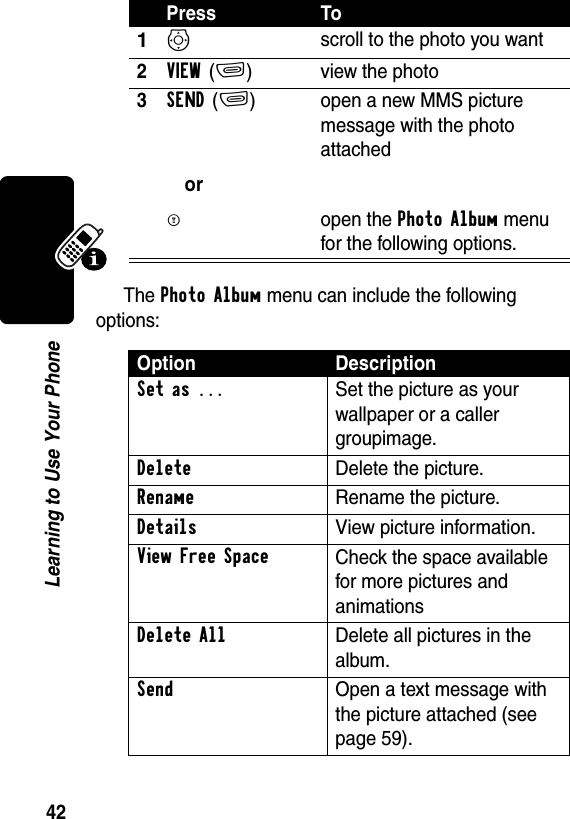


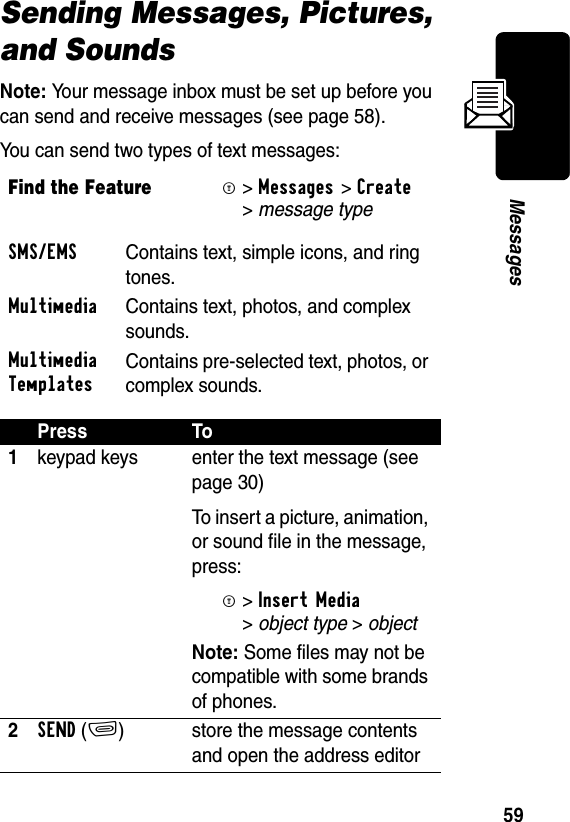
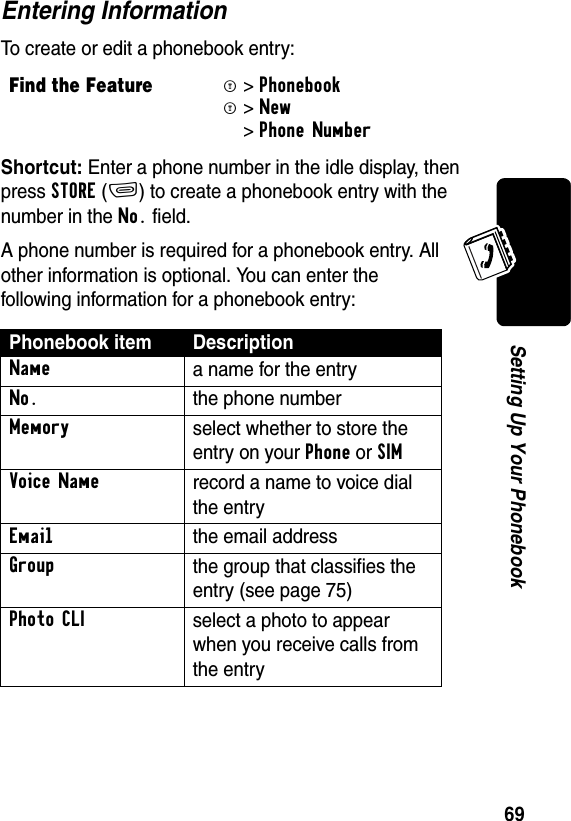
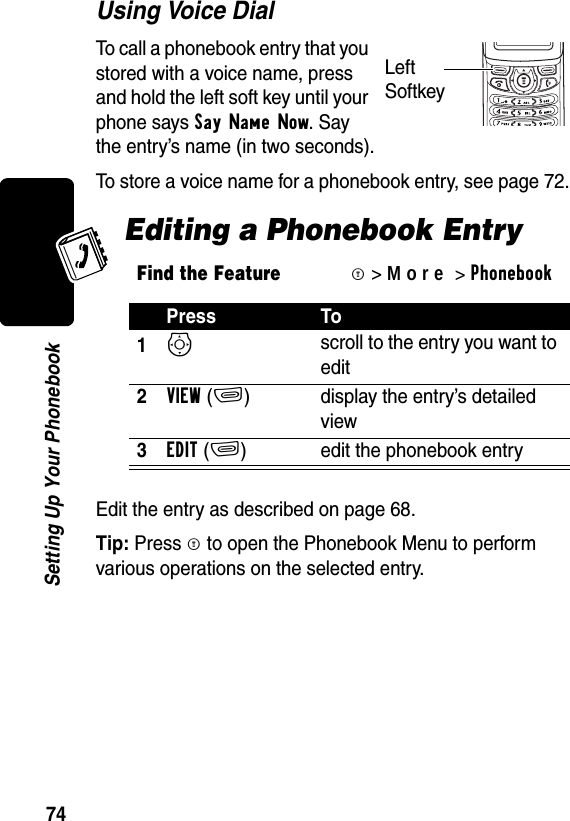
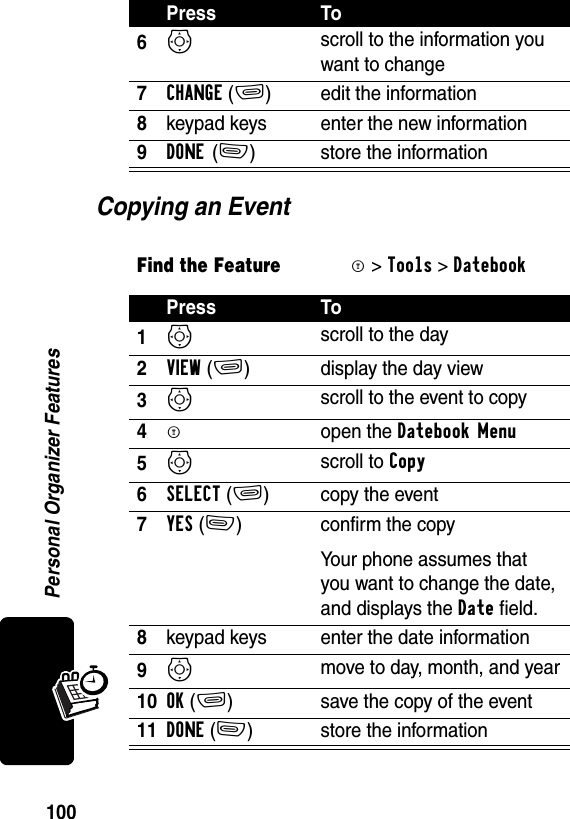
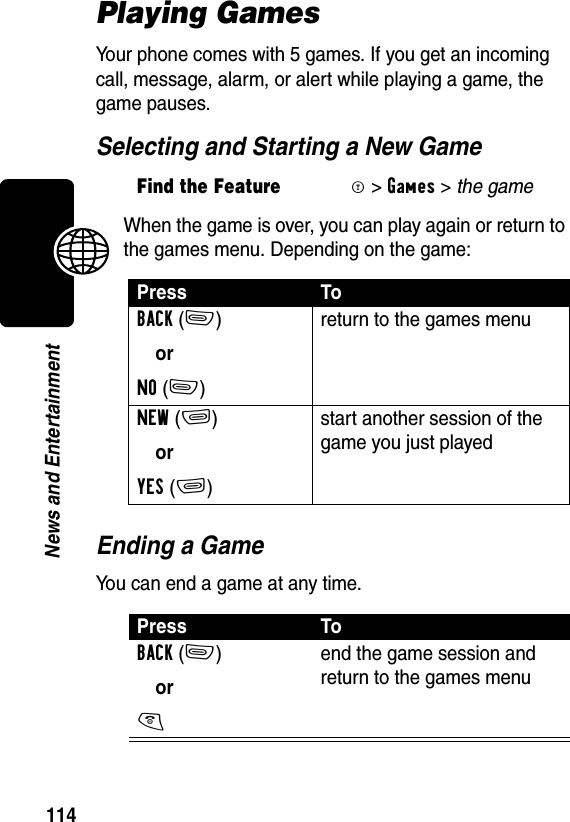
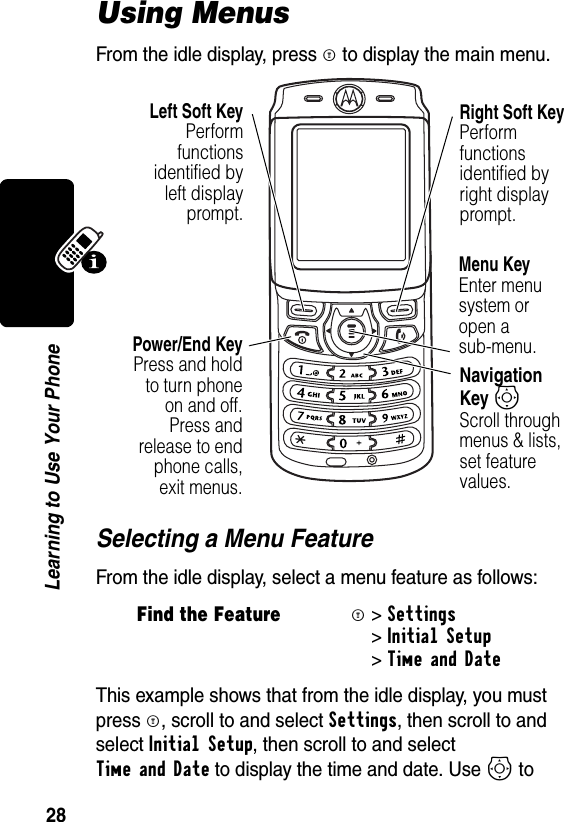
![60MessagesSending a Quick Note Text MessageQuick notes are prewritten text messages that you can insert into a message and send quickly (for example, Meet me at ...). You can also create new quick notes.3SELECT(+) select [New Entry] 4keypad keys enter a phone number where you want to send the messageorM>Phonebook select one or more phone numbers from the phonebook5SEND(+) send the messageorM>Save to Draftssave the message as a draft6OK(-) confirm the send Find the FeatureM>Messages >Templates >Quick Notes Press To1S scroll to the quick notePress To](https://usermanual.wiki/Motorola-Mobility/T56DS1.Exhibit-8-Users-Manual/User-Guide-364143-Page-62.png)