Motorola Mobility T56EJ1 Portable Cellular/PCS Transceiver (GSM/WCDMA) User Manual UG C330 GSM
Motorola Mobility LLC Portable Cellular/PCS Transceiver (GSM/WCDMA) UG C330 GSM
UserManual.wiki
>
Motorola Mobility
>
T56EJ1 User Manual
Exhibit 8 Users Manual
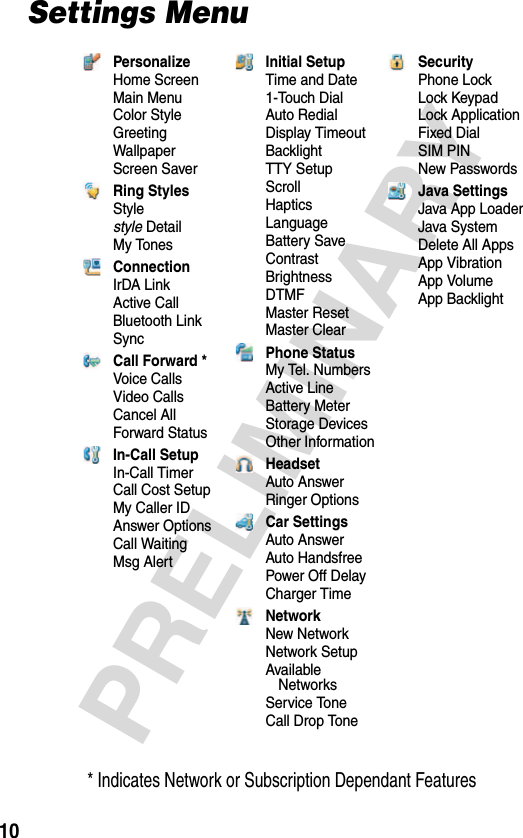
Navigation menu
Upload a User Manual
Namespaces
Wiki Guide
HTML
PDF
Info
Views
User Manual
Discussion / Help
Navigation


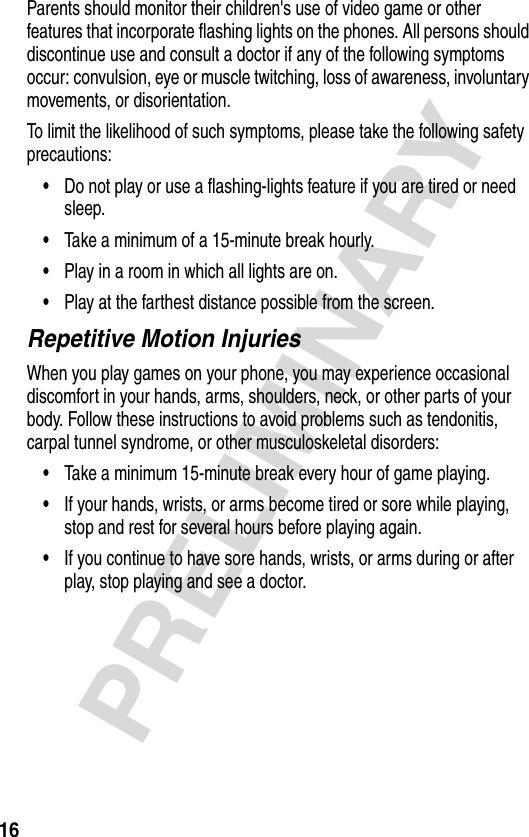


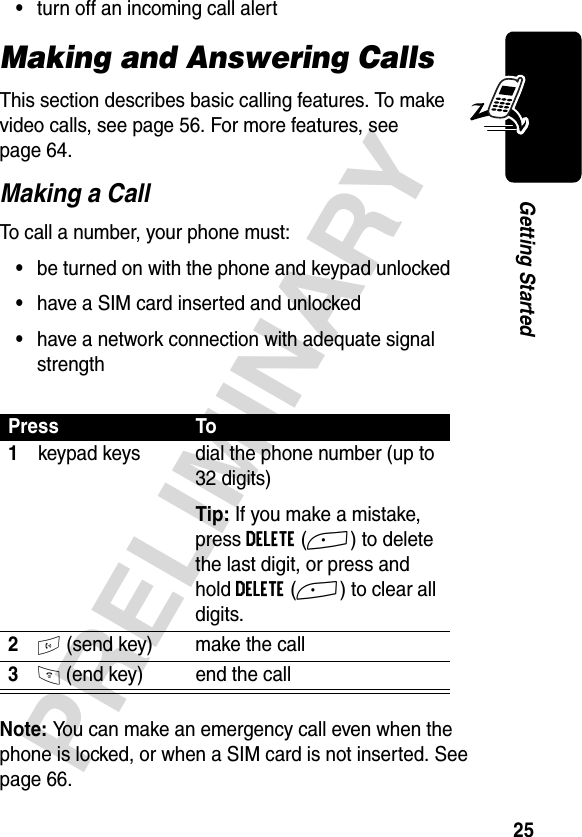


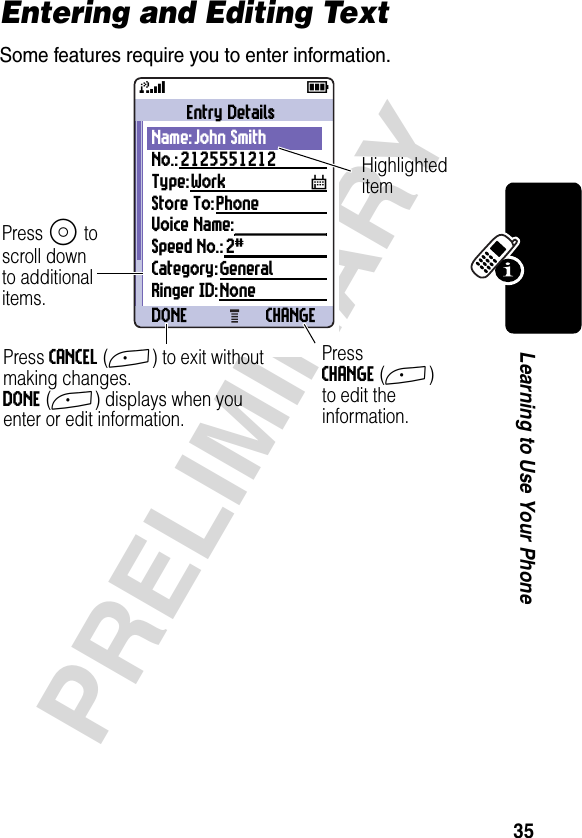


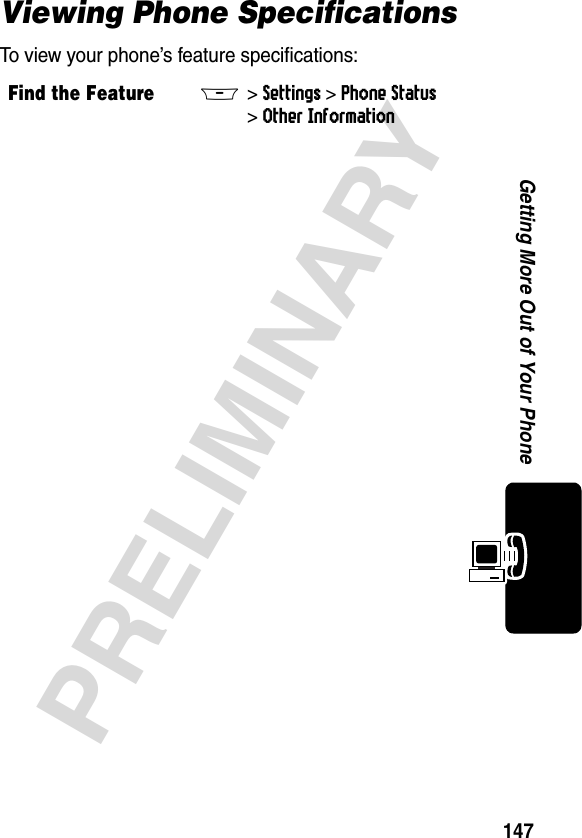
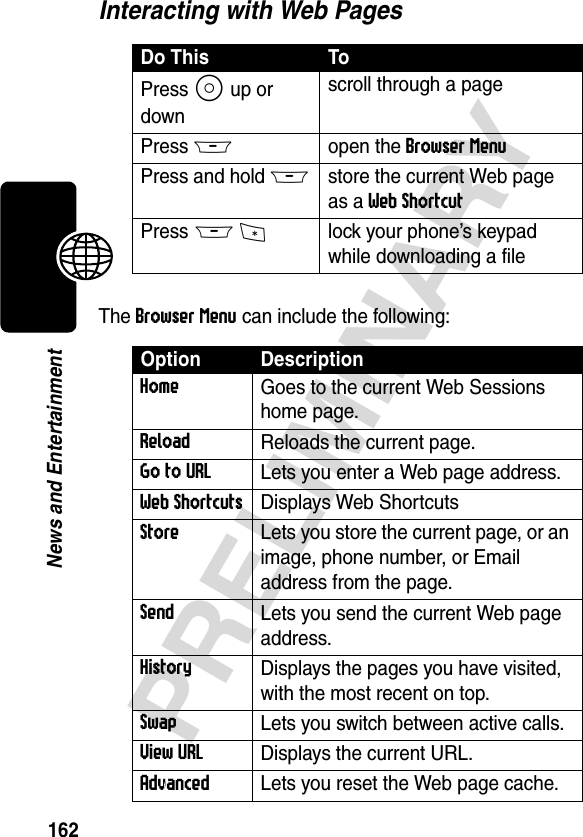
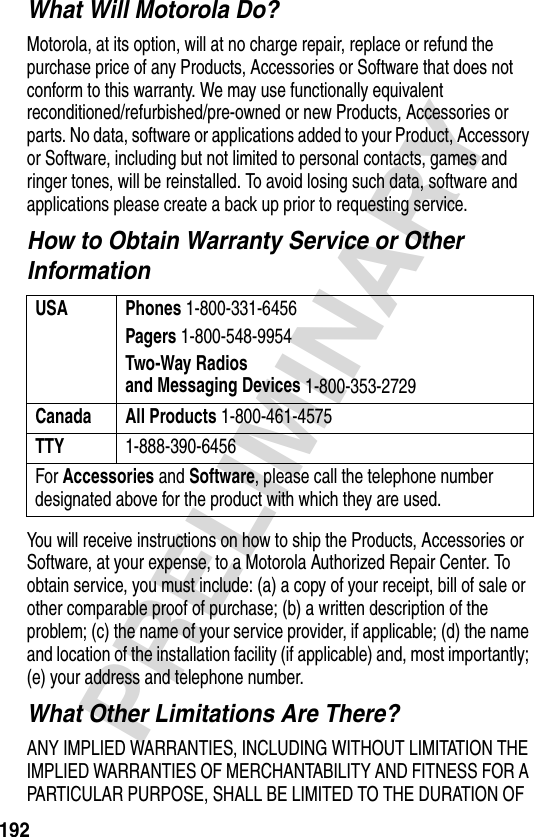
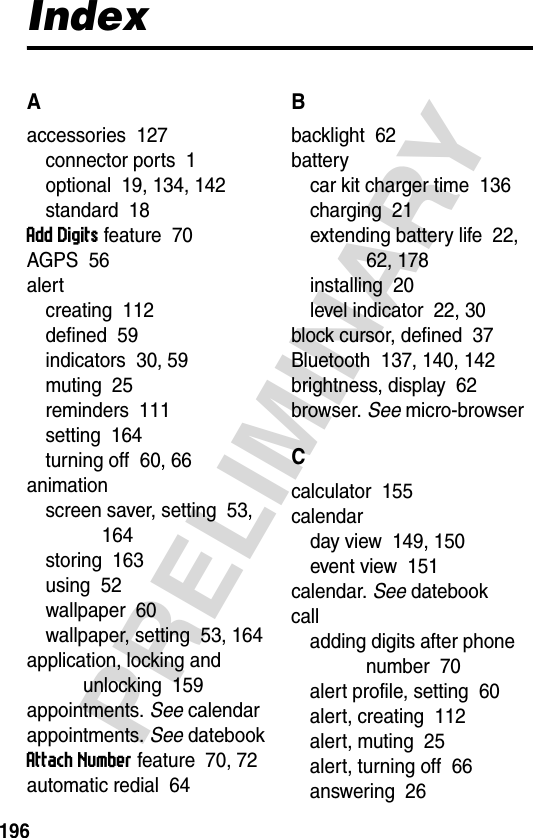
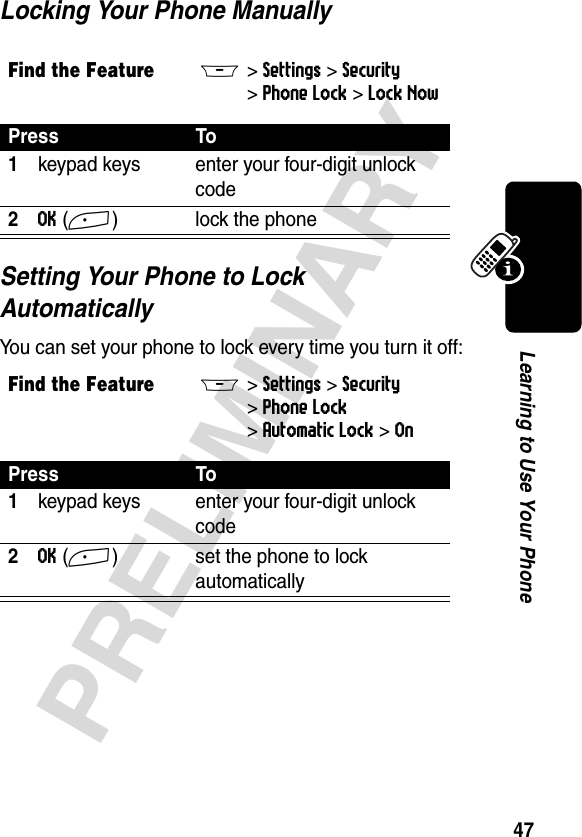
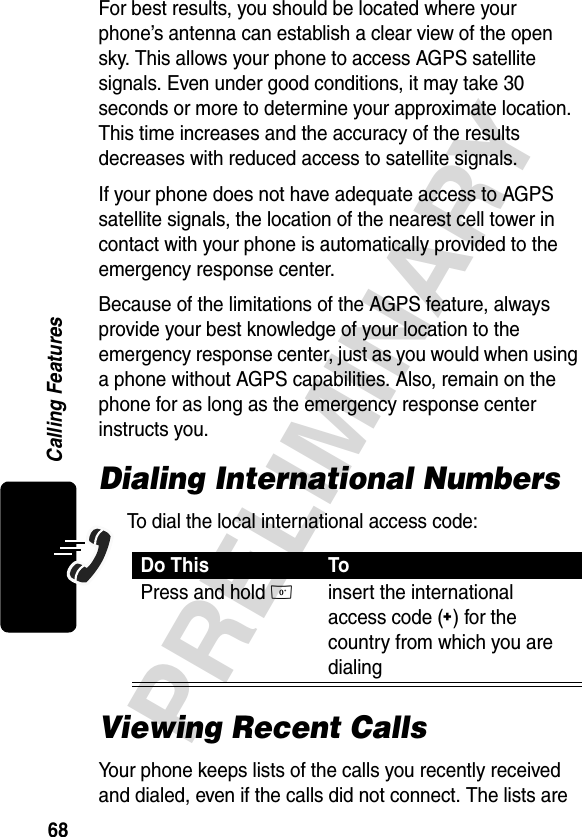
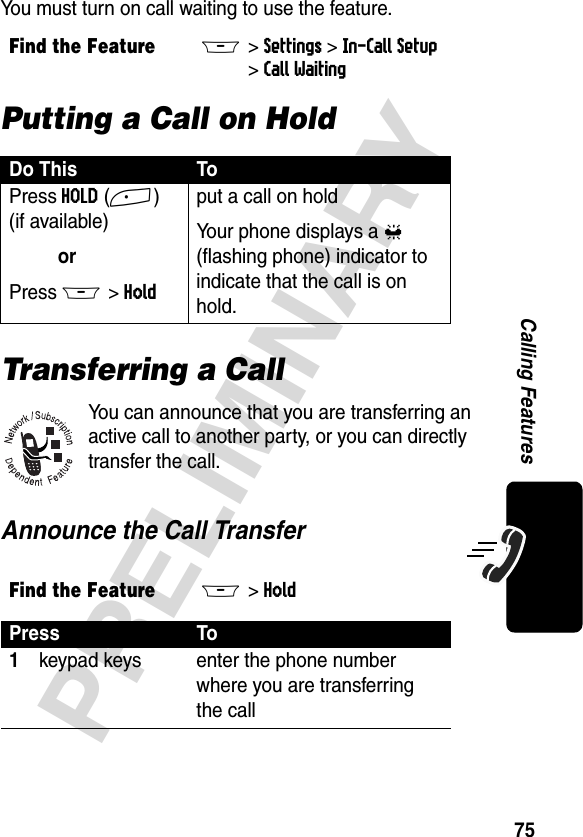
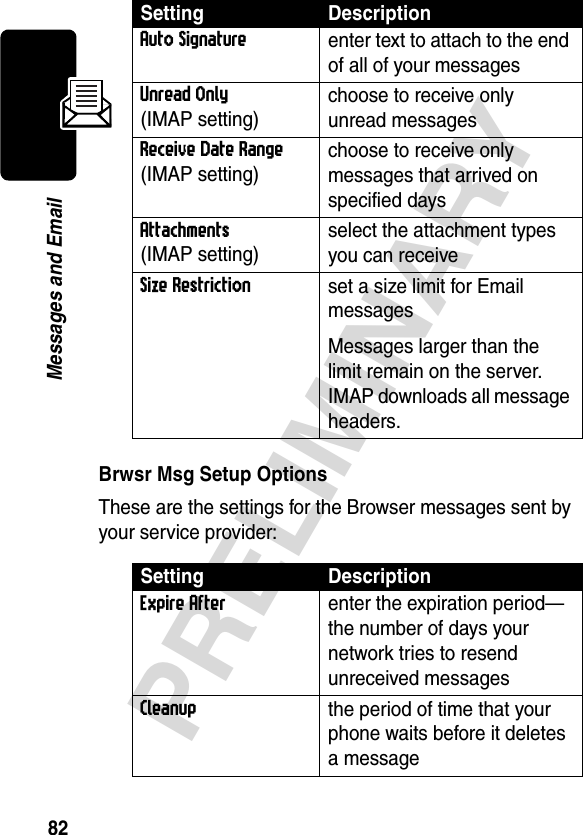
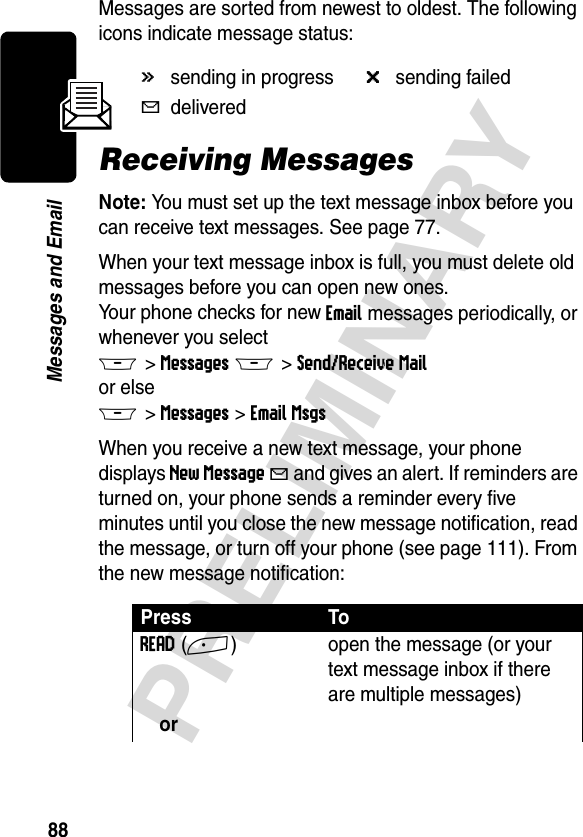
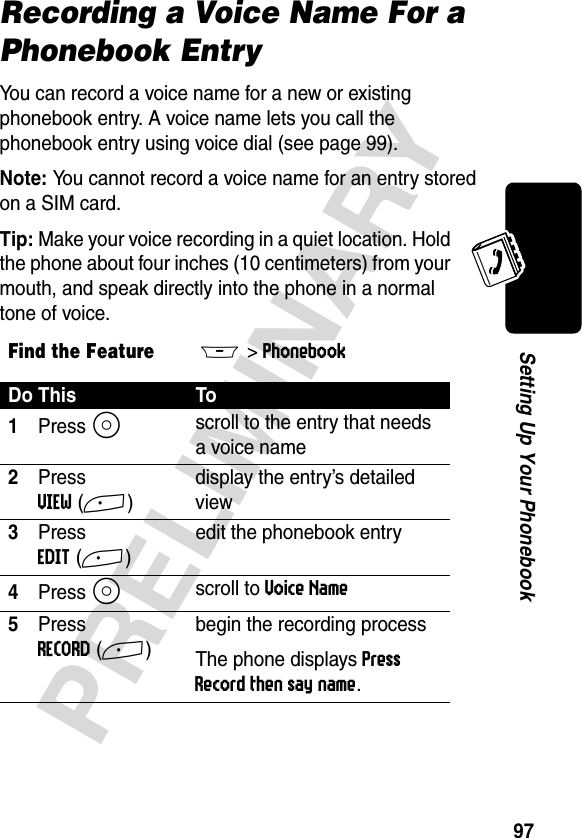
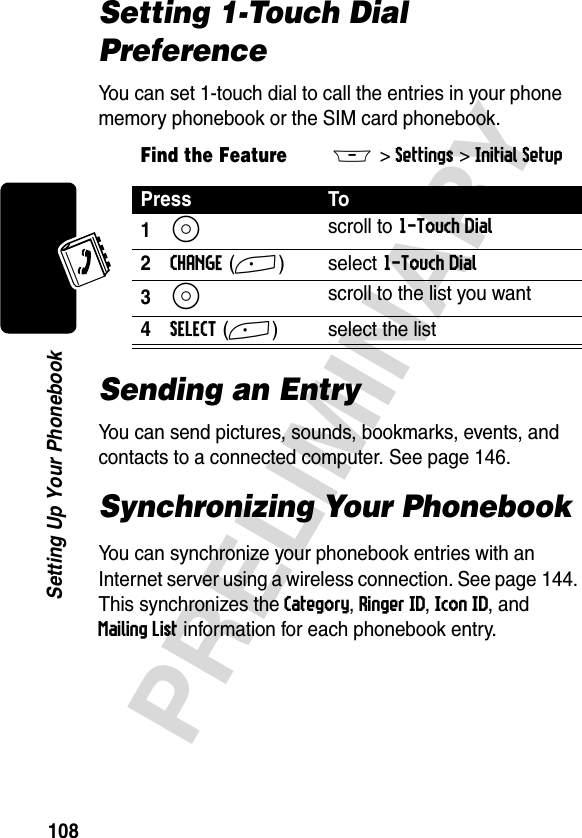
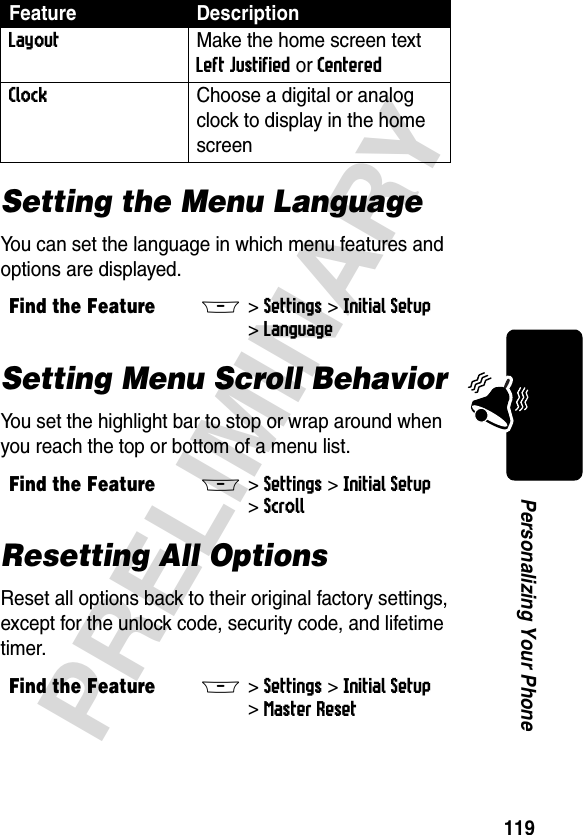
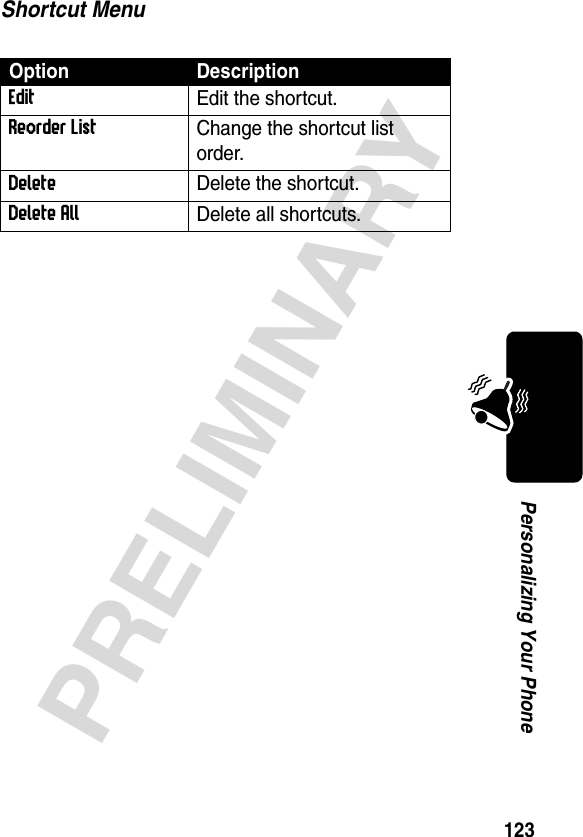
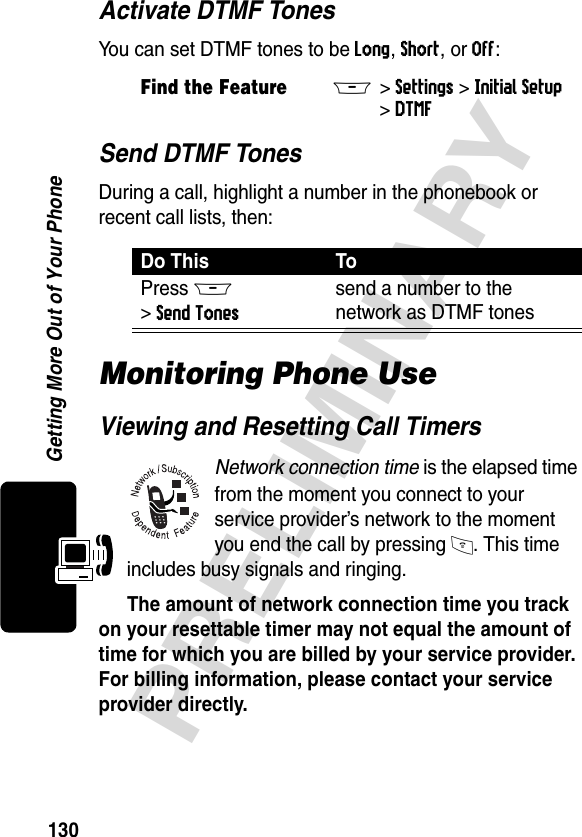
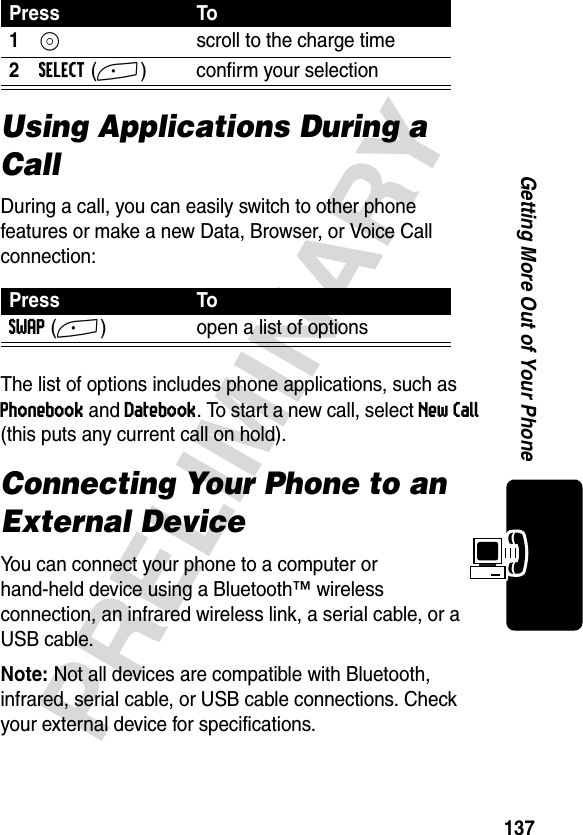
![38PRELIMINARYLearning to Use Your PhoneWhen you enter 3 or more characters in a row, your phone may guess the rest of the word. For example, if you enter prog you might see:If you want a different word, such as progress, continue pressing number keys to enter the remaining characters.Character ChartUse this chart as a guide for entering spaces, numbers, letters, symbols, and other characters with the Tap method.1 . ? ! @ ' - : ; ( ) & 1 _ ~ , " 0 ¿ ¡% £ $ ¥ ¤ £ + x * / \ [ ] = > < # § 2 a b c 2 ä å á à â ã æ α β ç3 d e f 3 δ ë é è ê ε ϕ4 g h i 4 ï í î γ η ι 5 j k l 5 κ λ6 m n o 6 ñ ö ø ó ò ô õ µ ν ω7 p q r s 7 π ß σ03 28443Prog ramDELETE OK59Flashing cursor indicates insertion point.In Tap, press S right to accept the word, or press * to reject it and enter a space after prog.Üô Msg:](https://usermanual.wiki/Motorola-Mobility/T56EJ1/User-Guide-420164-Page-41.png)
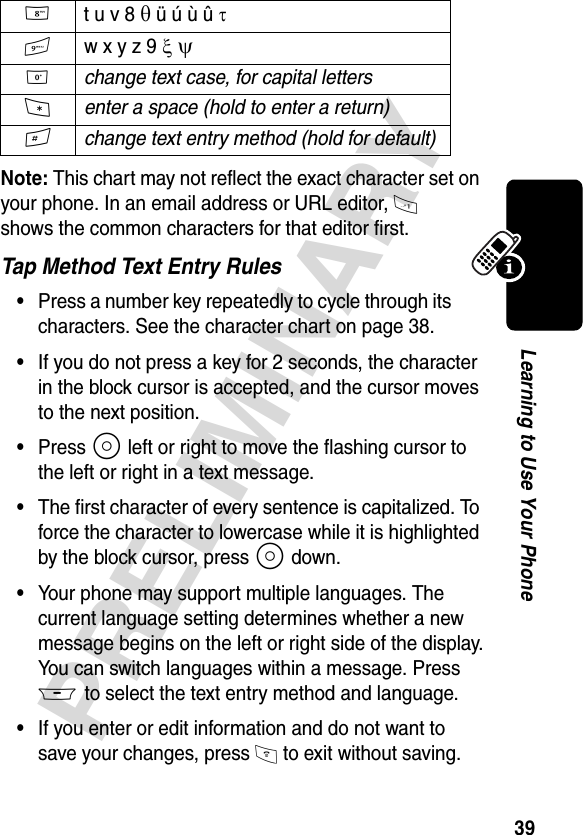

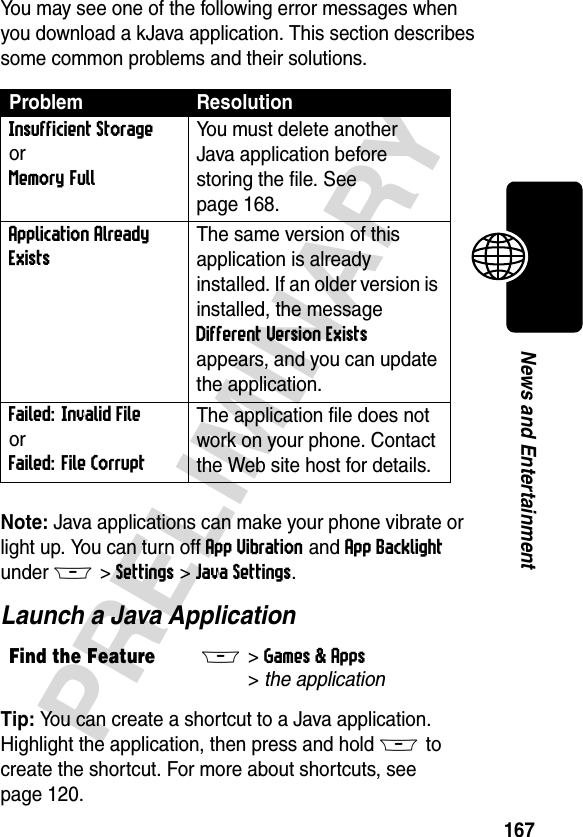
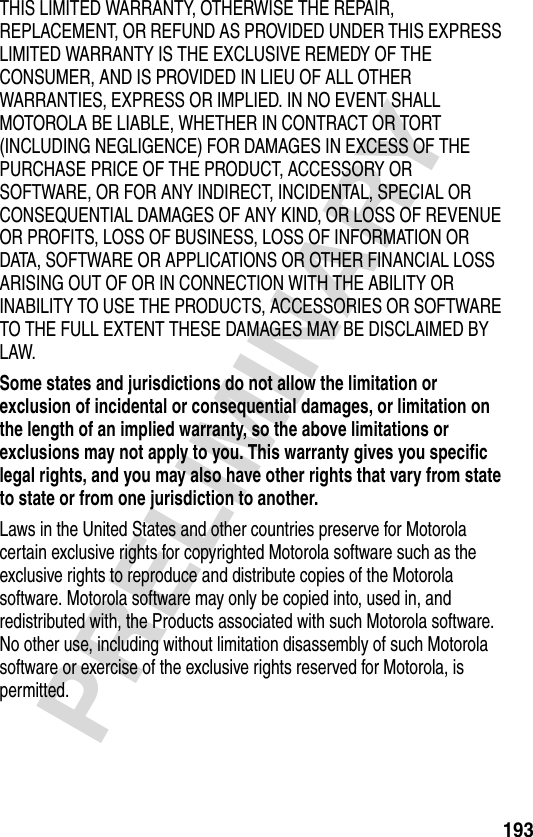
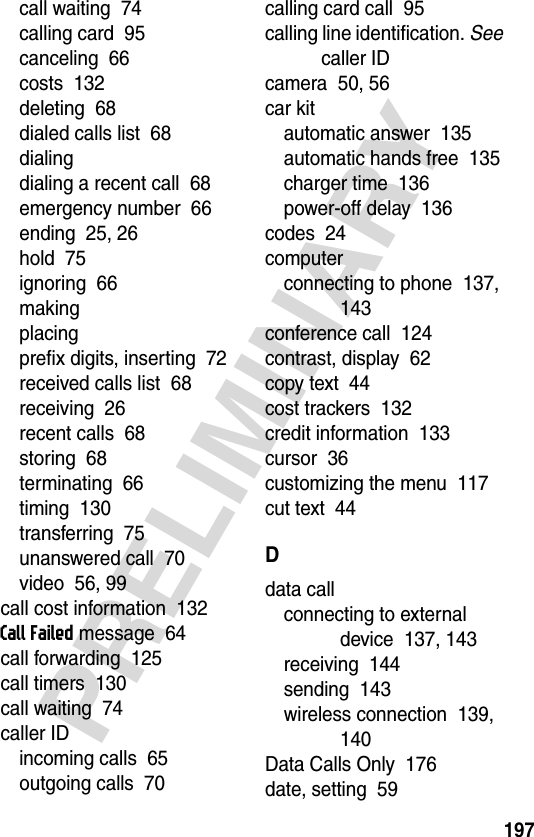
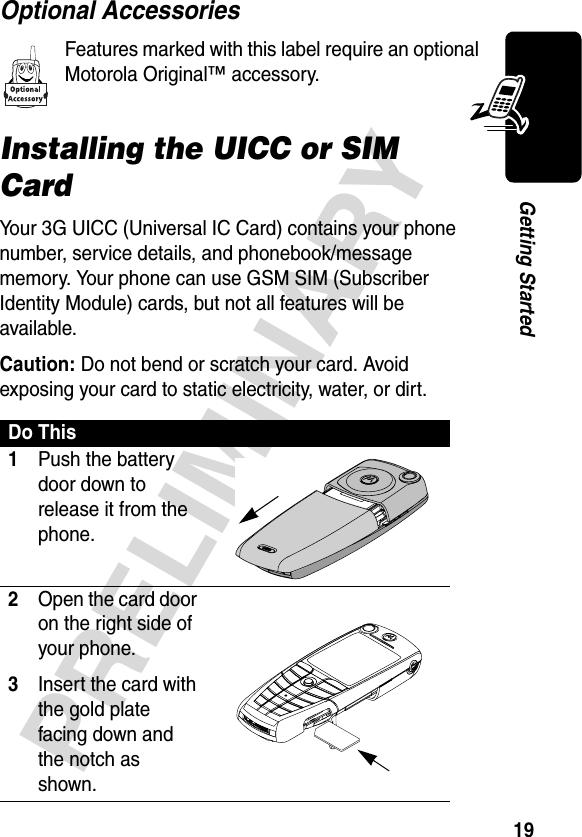
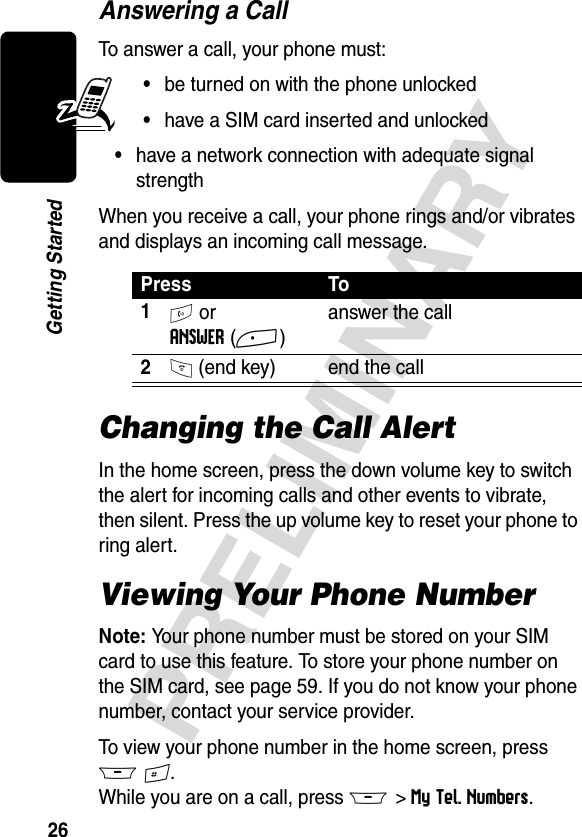
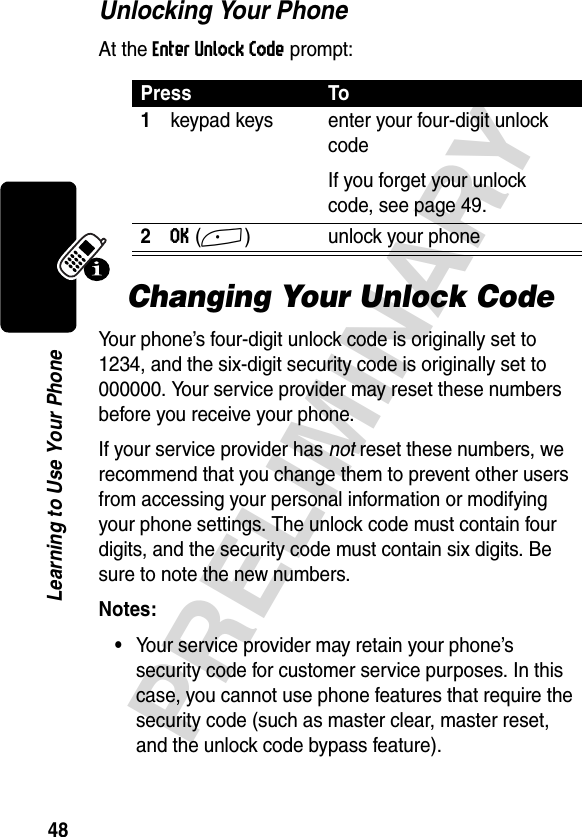
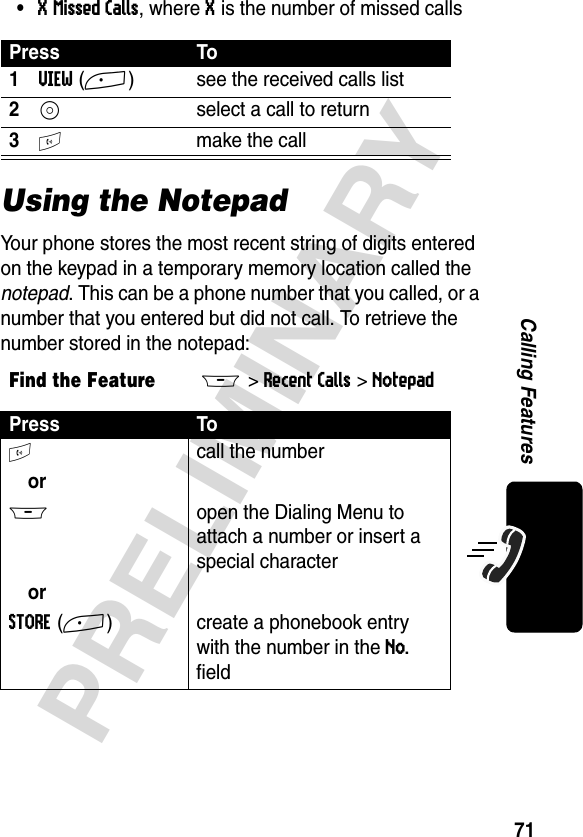
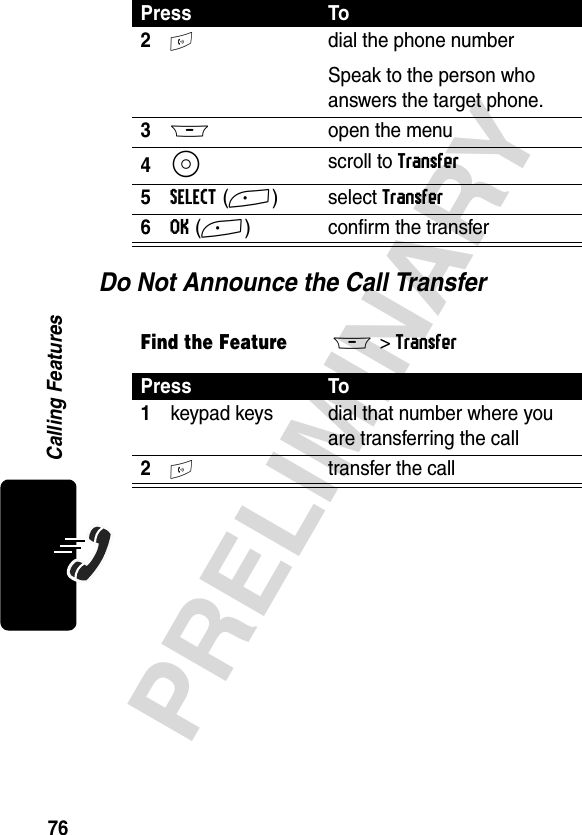
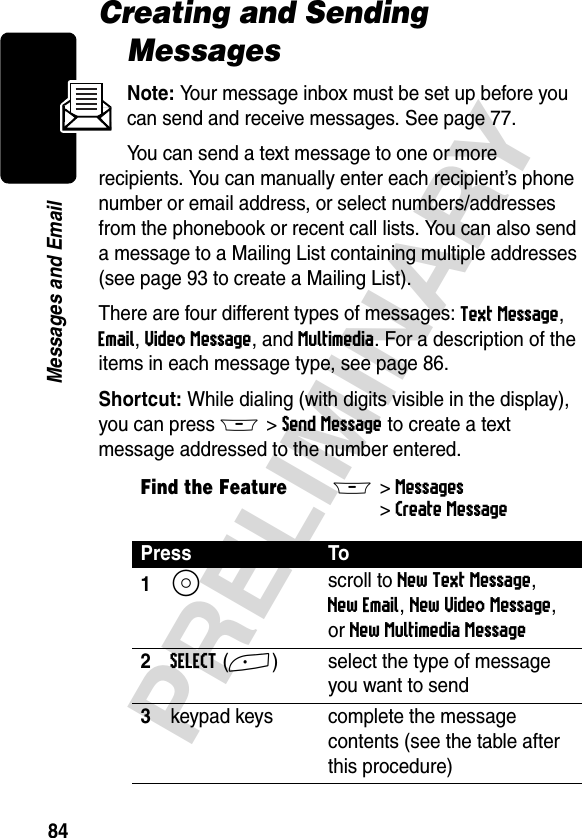
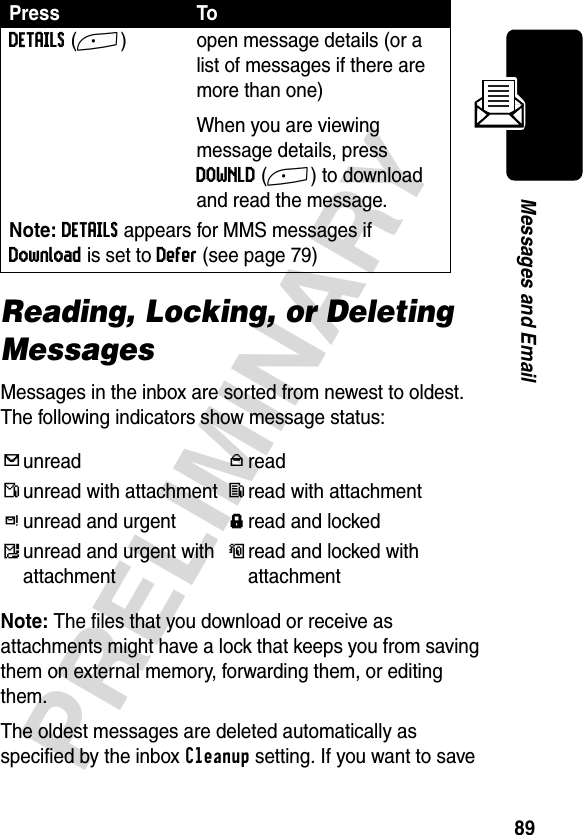
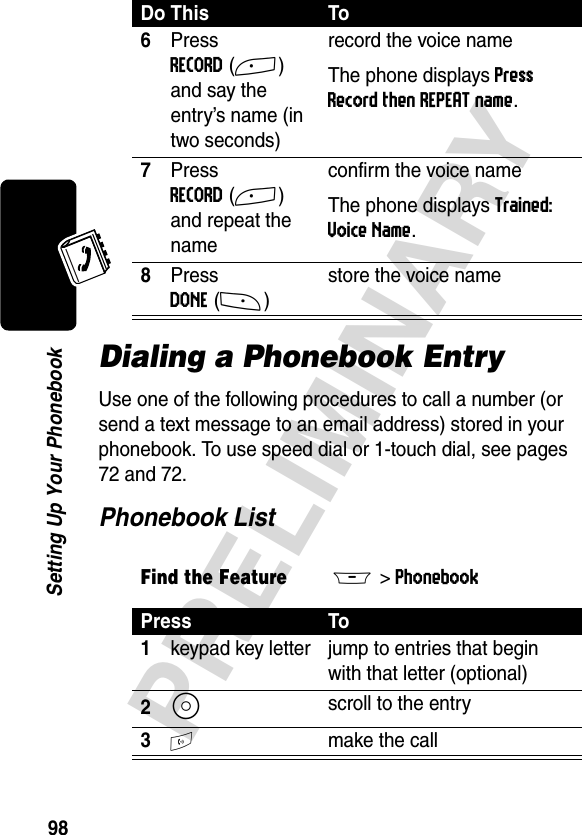
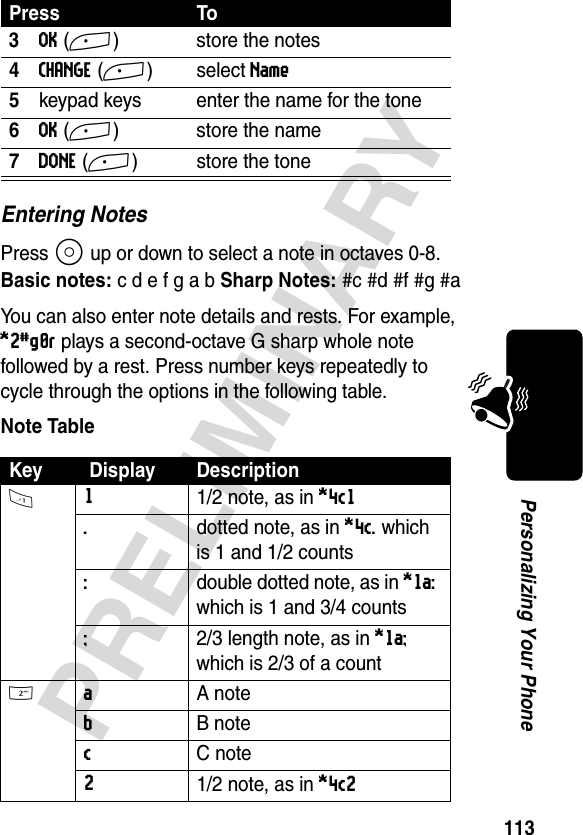
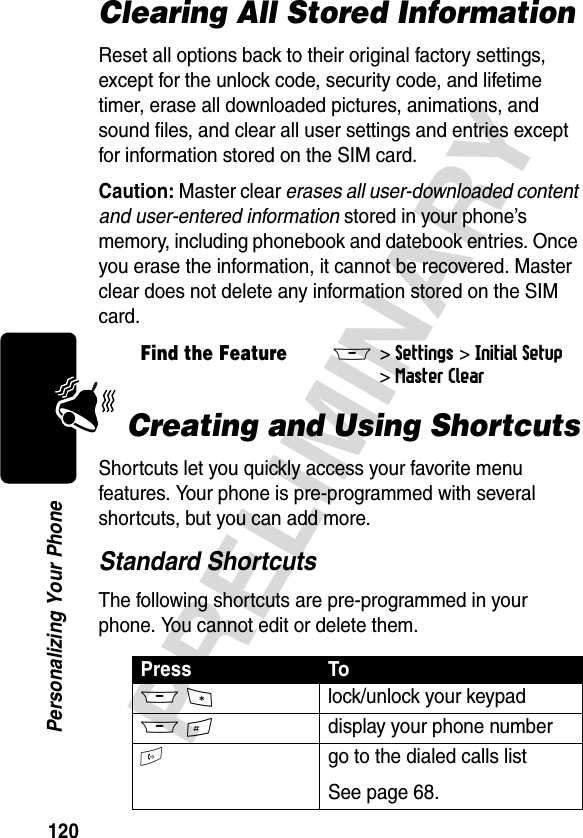
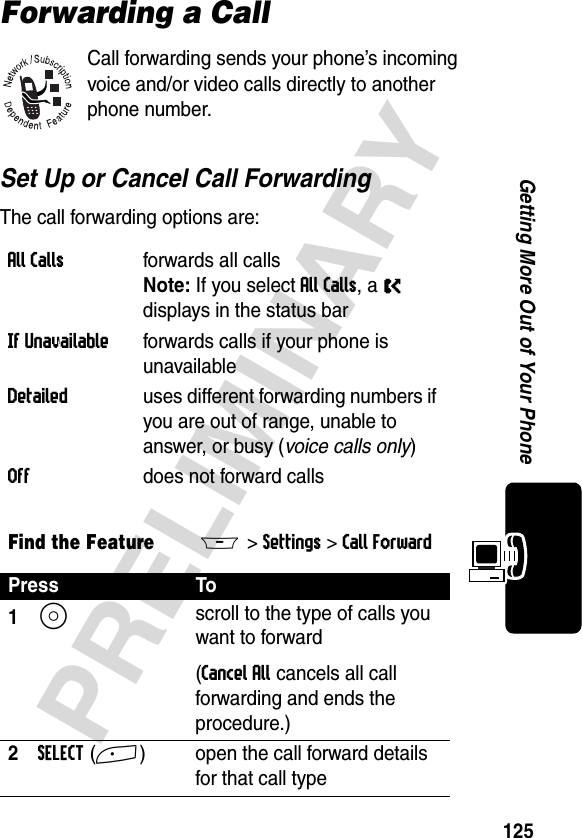
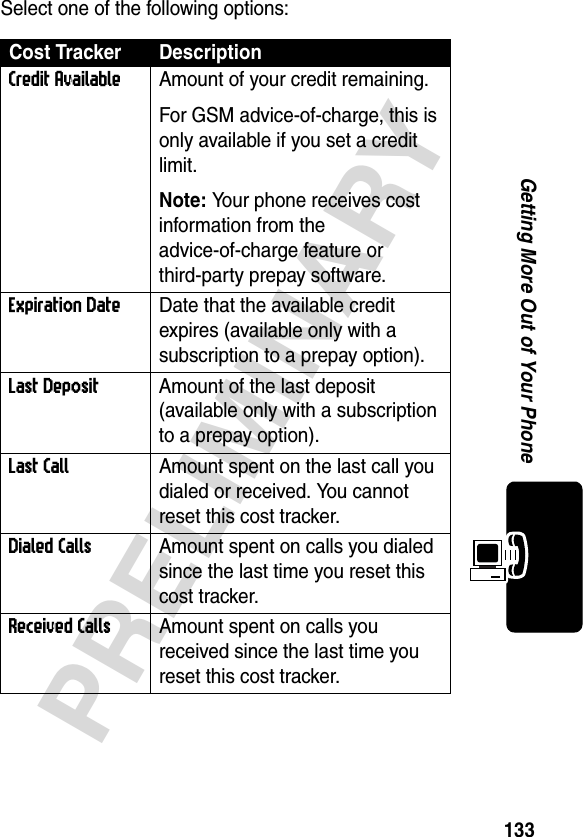
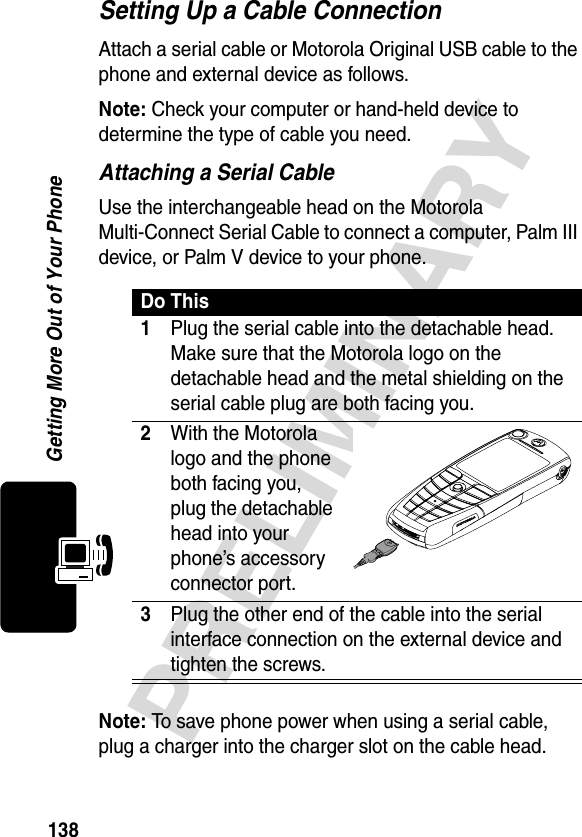
![42PRELIMINARYLearning to Use Your PhoneUsing the Symbol Entry MethodIn a text-entry screen, press # to switch entry methods until you see the Symbol icon (å) in the status bar.Symbol ChartUse this chart as a guide for entering symbols in symbol method.Press To1Number keys (one press per symbol)show possible symbol combinations at the bottom of the display2S right or left highlight the combination you want3SELECT(+) lock a highlighted combinationYou can press number keys to add more symbols to the end of the combinationor* enter the highlighted combinationA space appears after the combination.1 . ! ' : ( ) 1 ~ " ¿ % $ ¤ + * \ = # § < > ] [ / x £ ¥ £ ¡ 0 , _ & ; - @ ? 2 @ _ \3 / : ;](https://usermanual.wiki/Motorola-Mobility/T56EJ1/User-Guide-420164-Page-45.png)
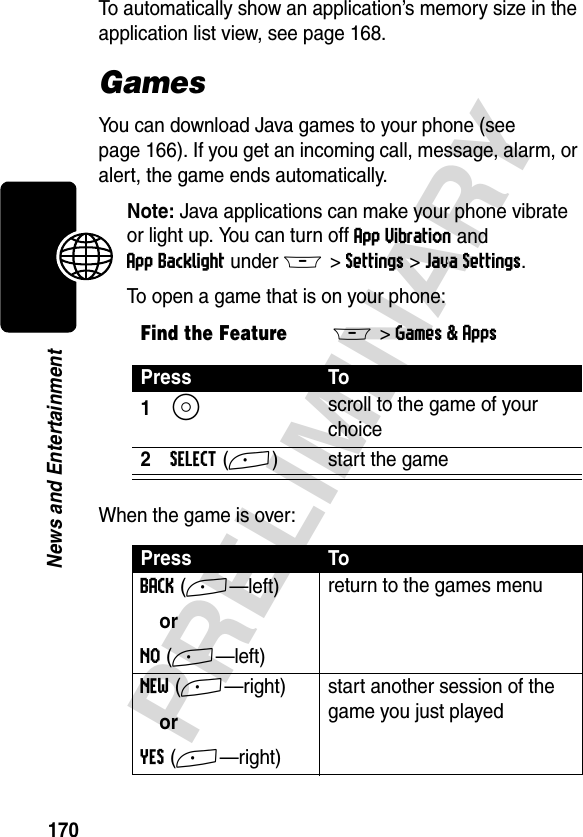
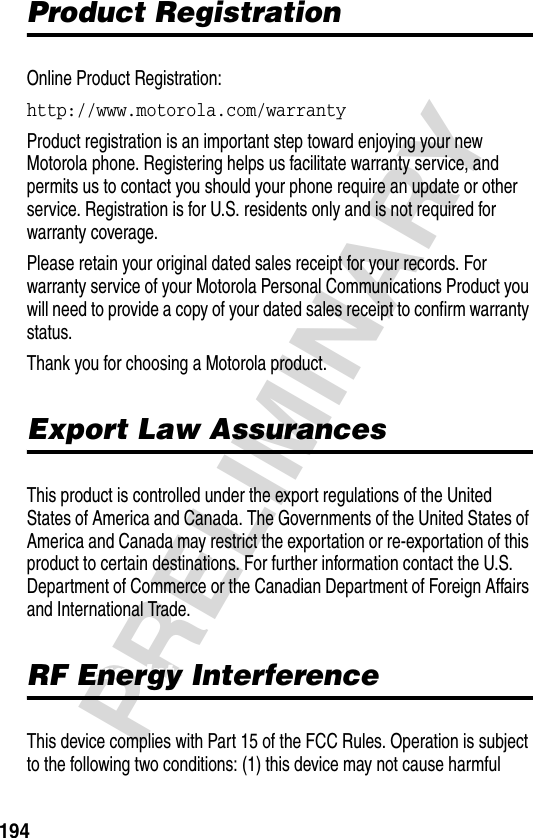
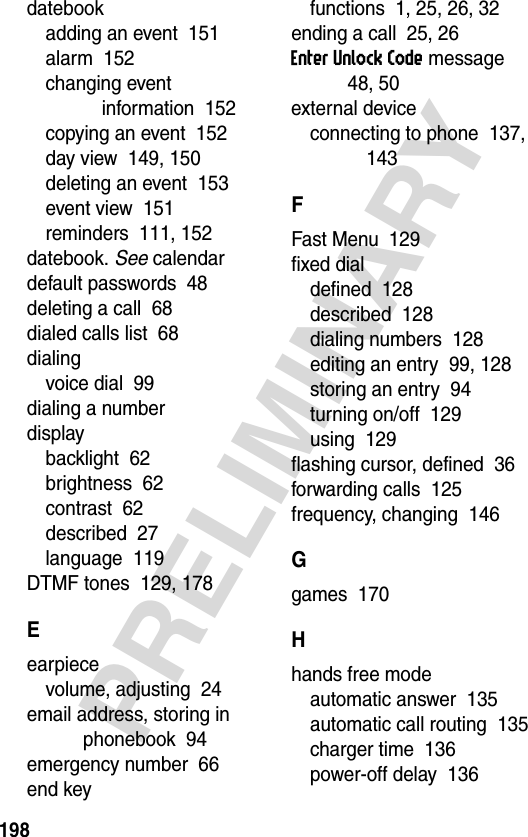
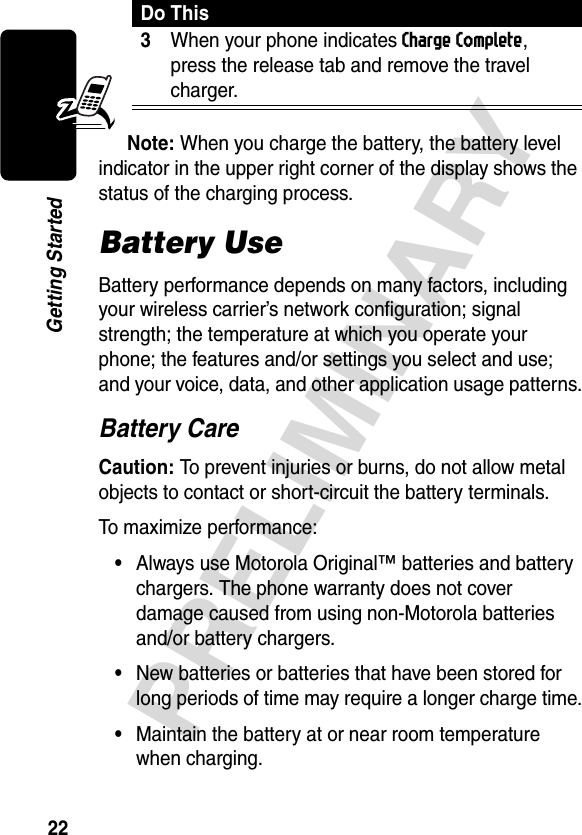
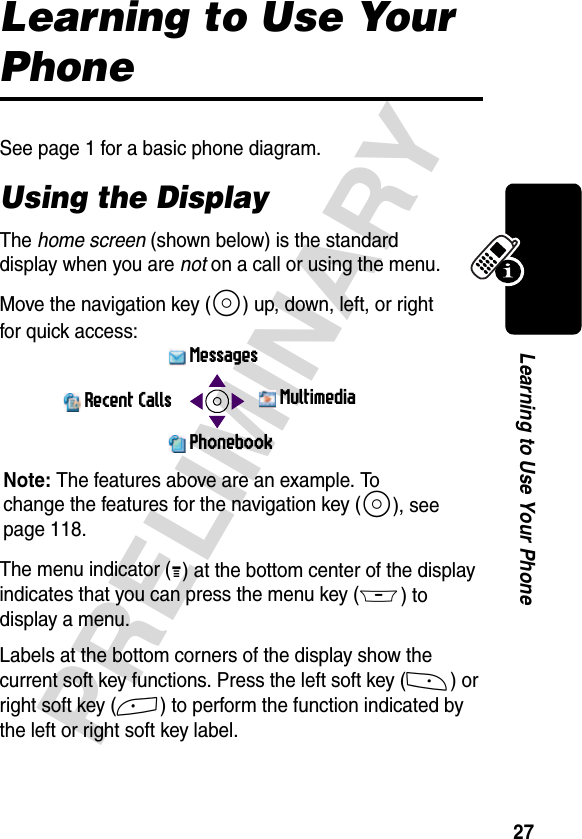
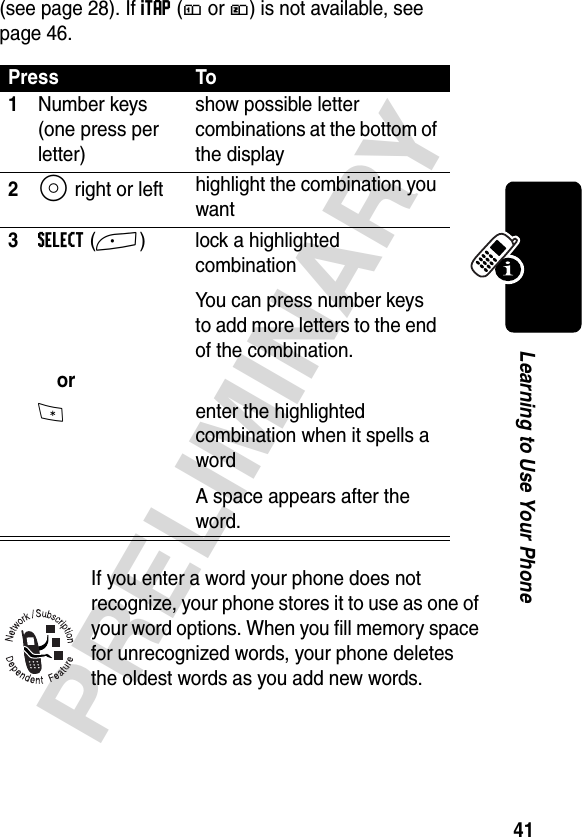
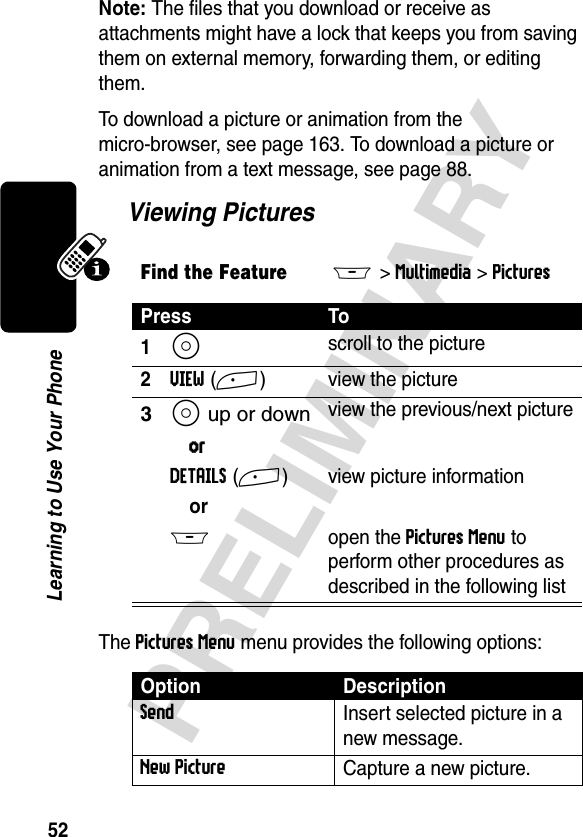
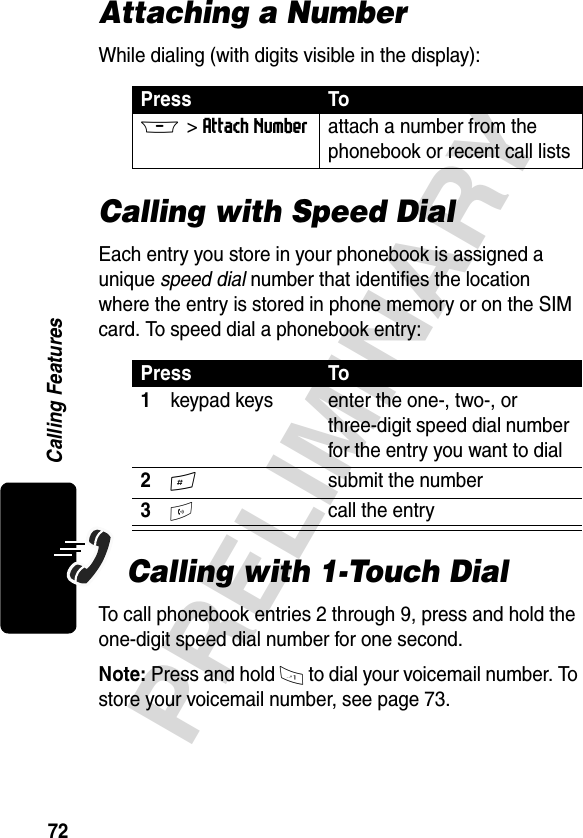
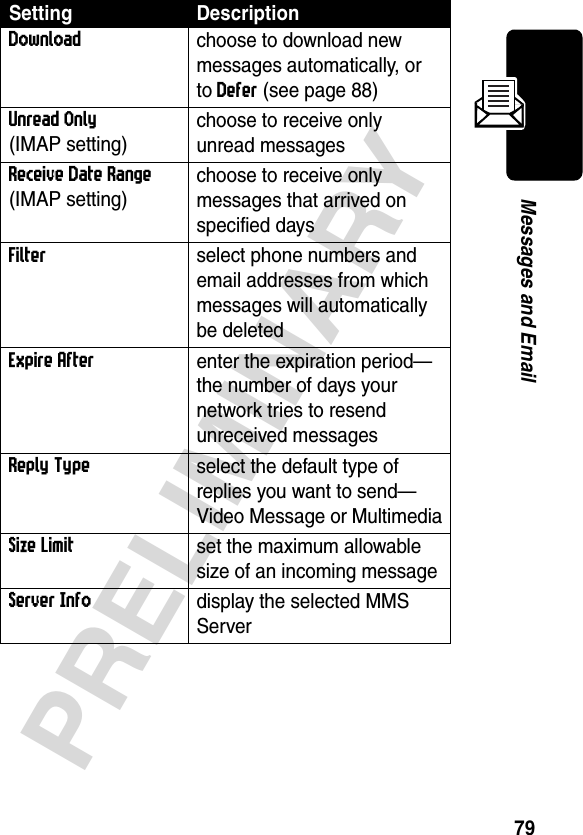
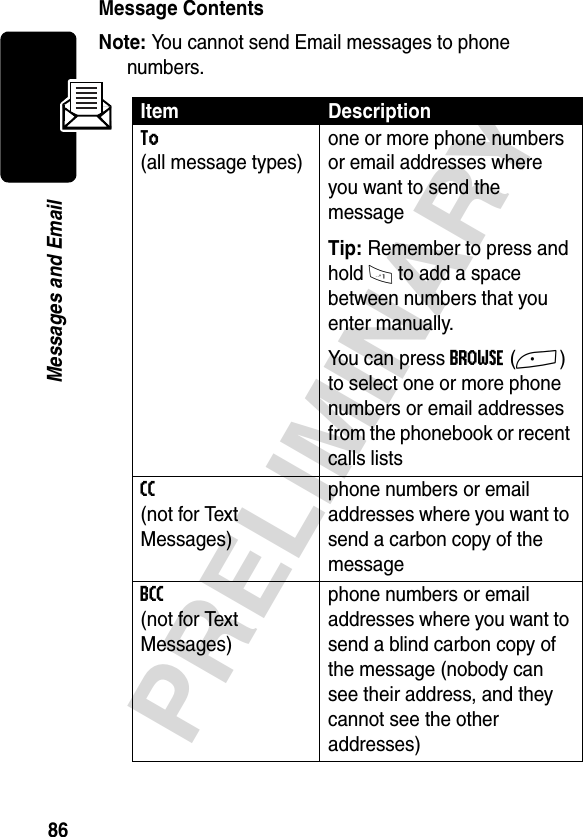
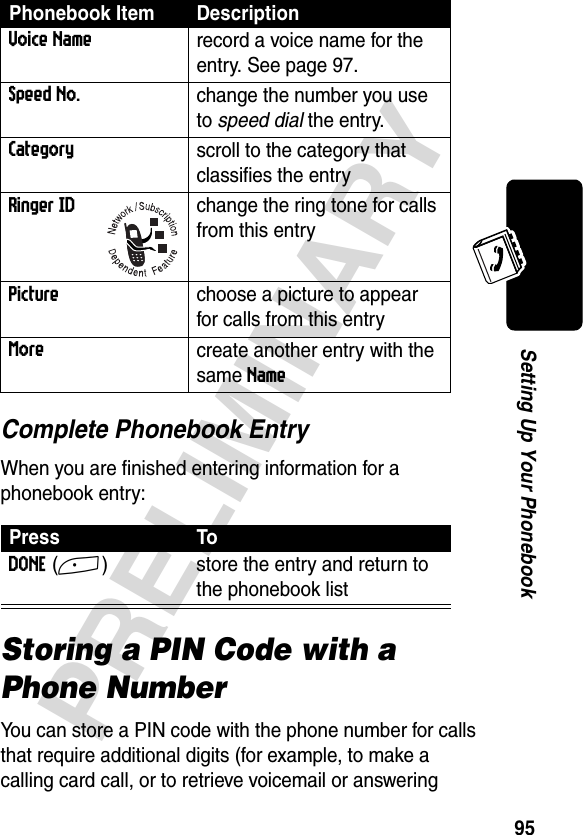
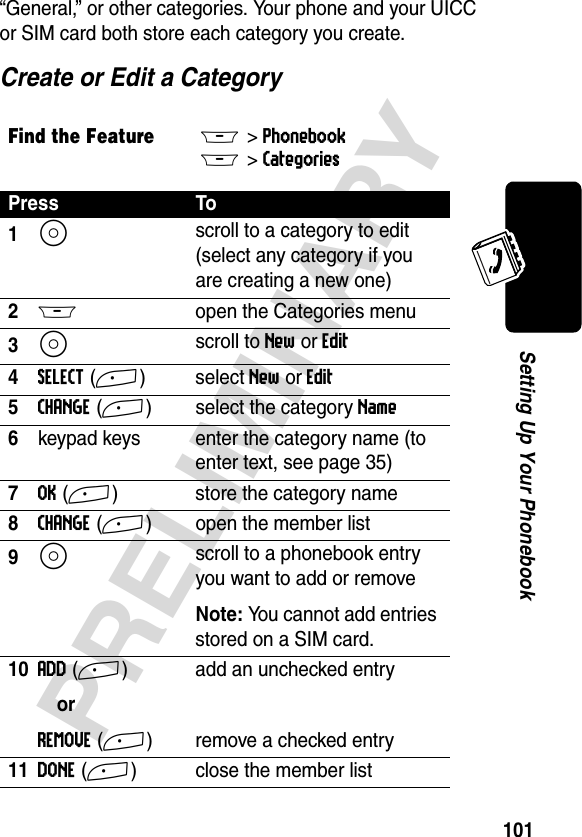
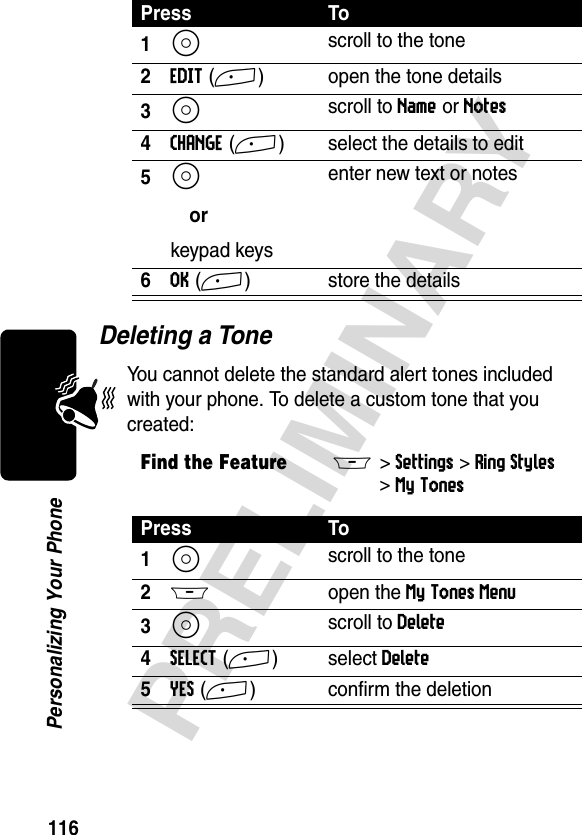
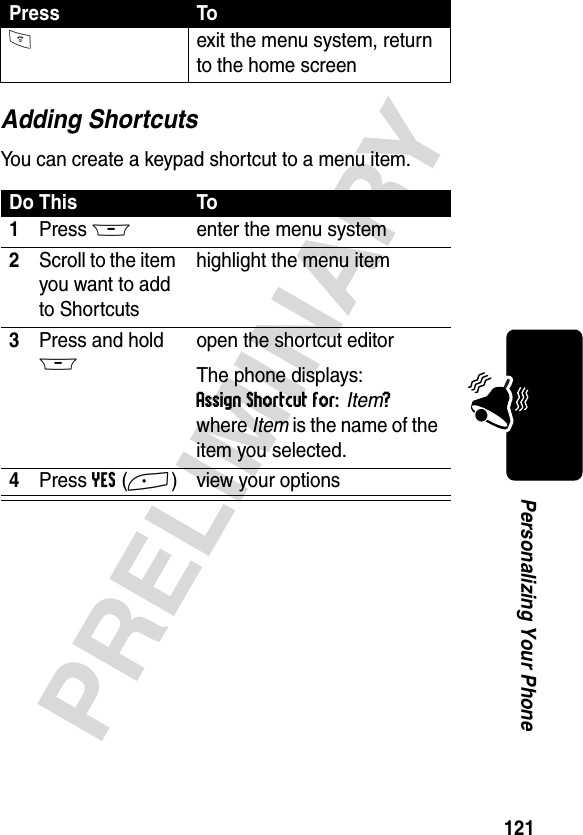
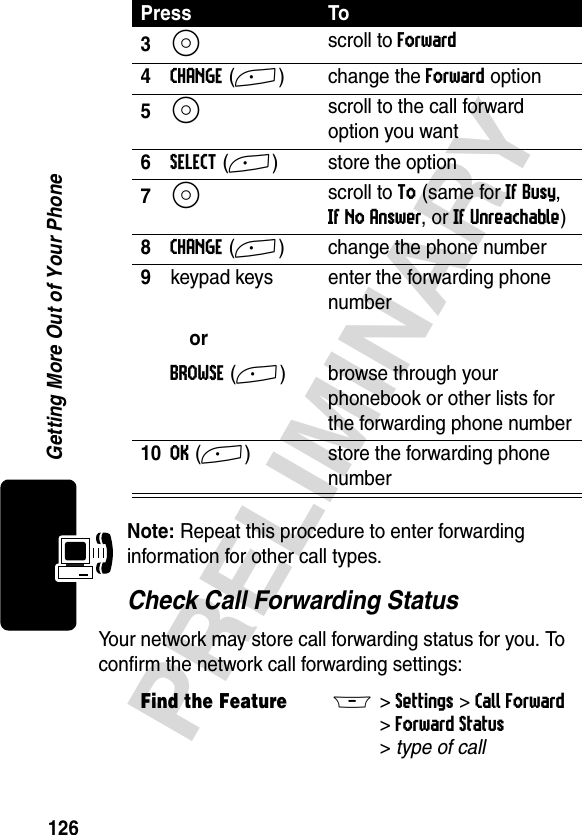
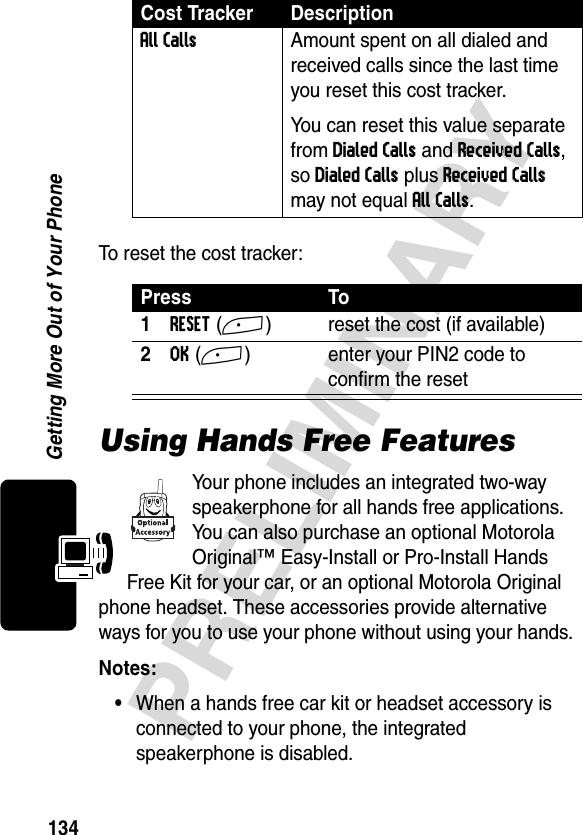
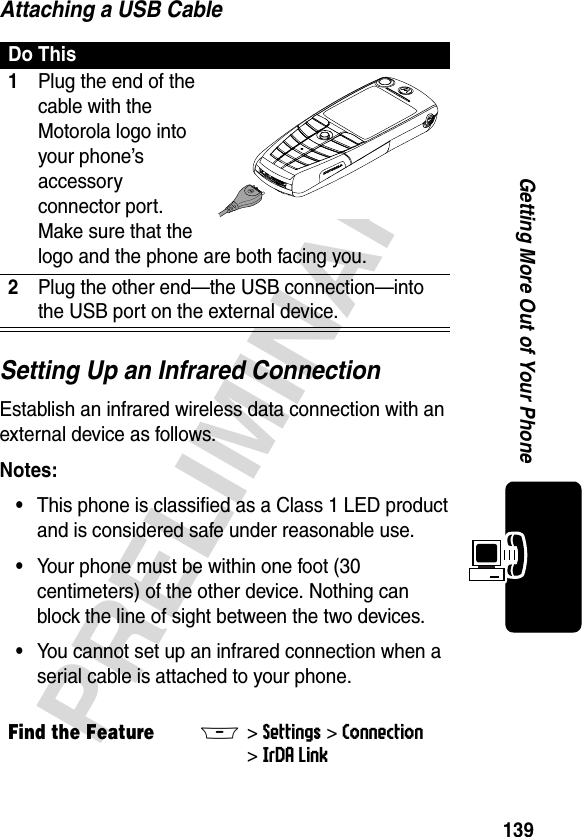
![43PRELIMINARYLearning to Use Your PhoneNote: In an email address or URL editor, 1 shows the common characters for that editor first. Using the Numeric MethodIn a text entry screen, press # to switch entry methods until you see the Numeric icon (á) in the status bar.Press keypad keys to enter the numbers you want. When you finish entering numbers, press # to switch to another entry method.Deleting Letters and WordsPlace the cursor to the right of the text you want to delete, and then:4 " & '5 ( ) [ ] { }6 ¿ ¡ ~7 < > =8 $ £ ¥ ¤ £9 # % *0 + - x * / \ [ ] = > < # §*enter a space (hold to enter a return)#change text entry method (hold for default)Do This ToPress DELETE(+) delete one letter at a timeHold DELETE(+) delete the entire message](https://usermanual.wiki/Motorola-Mobility/T56EJ1/User-Guide-420164-Page-46.png)


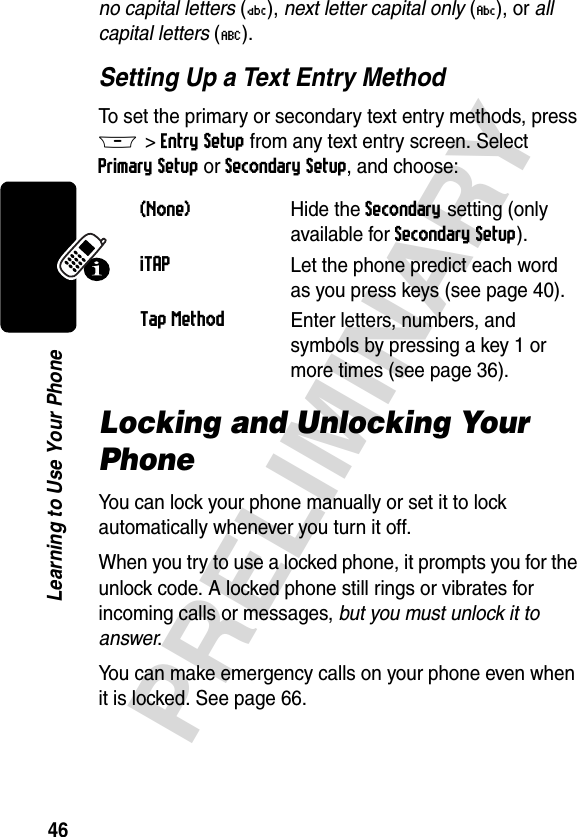


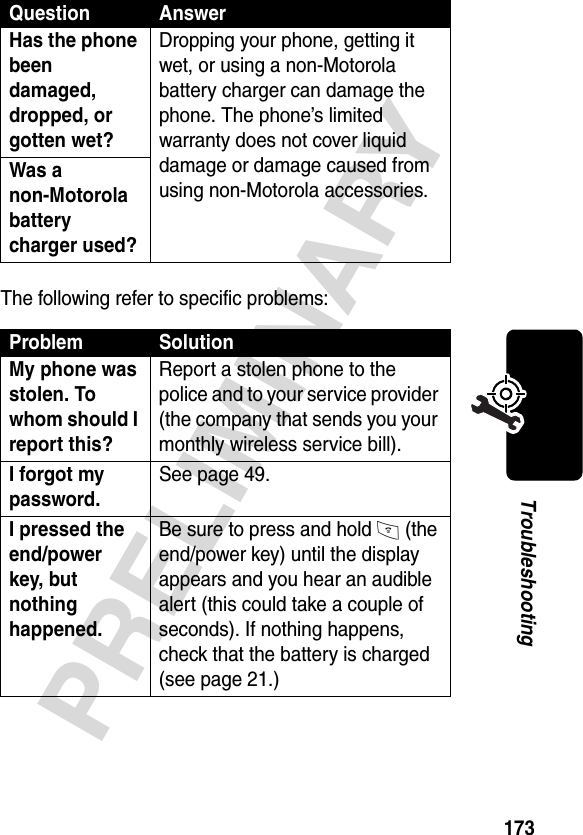
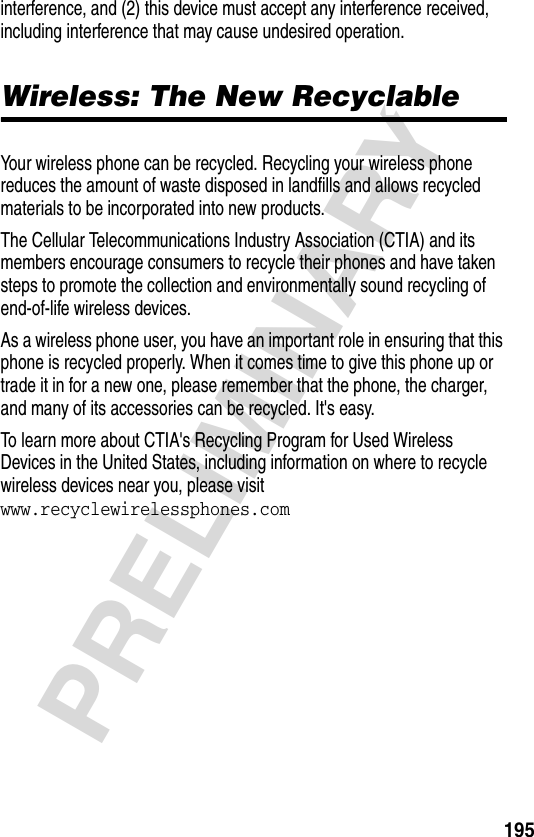
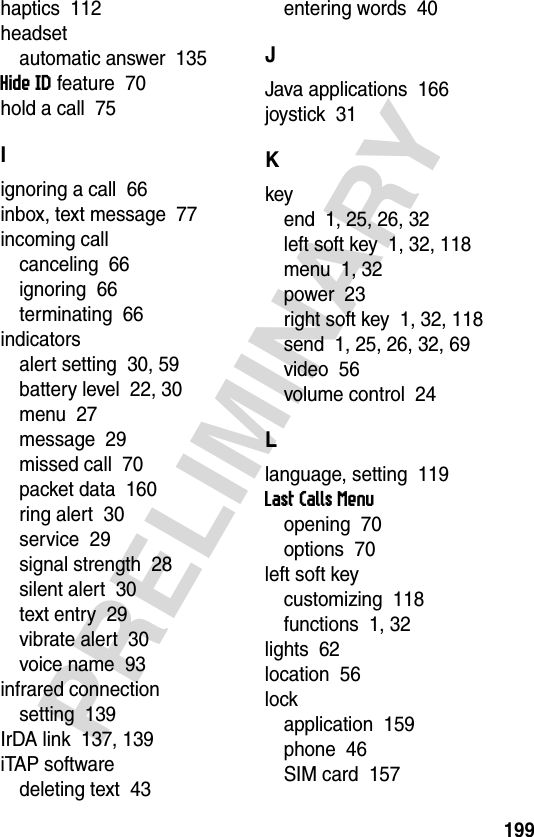
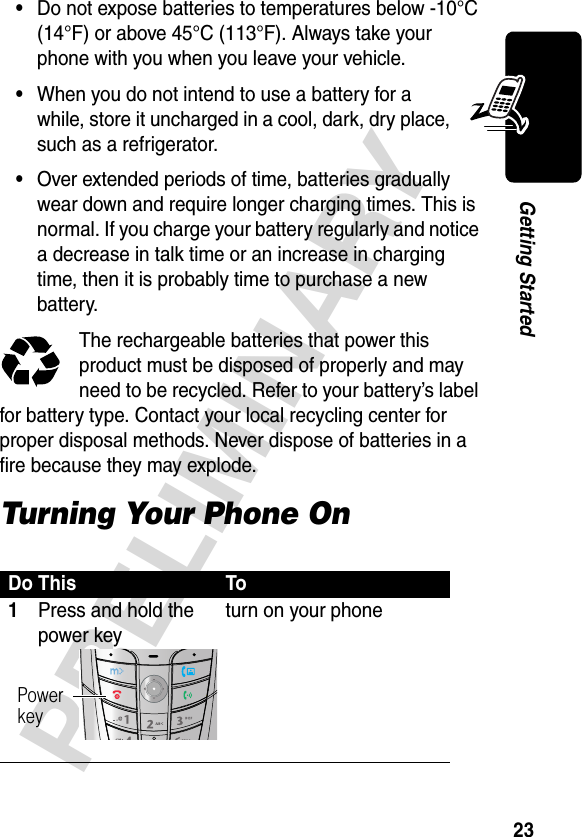
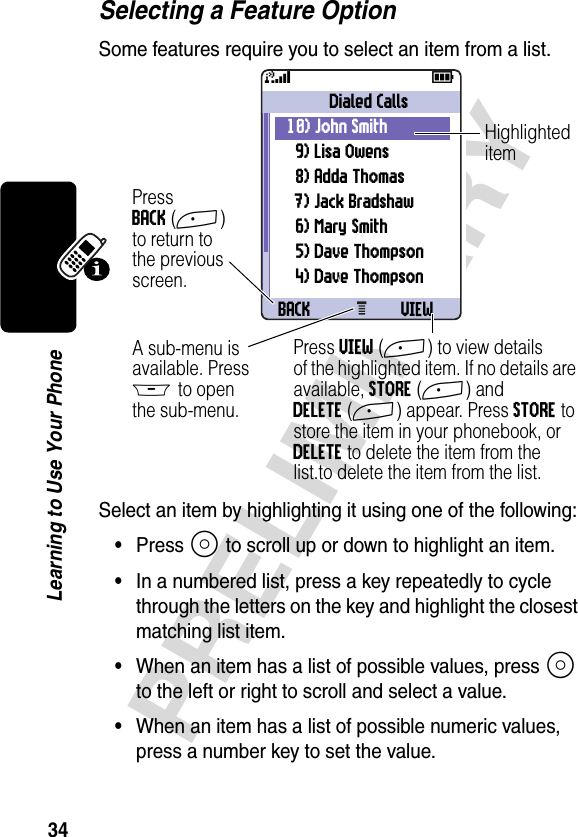
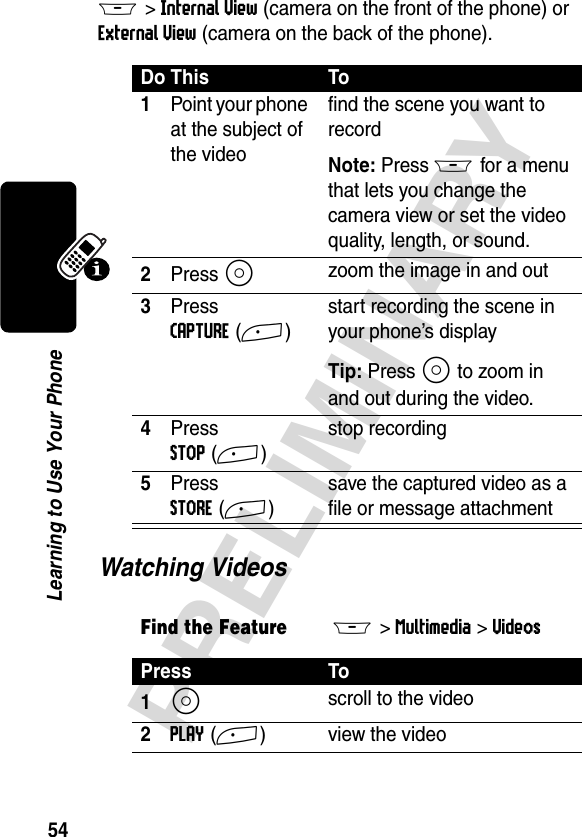
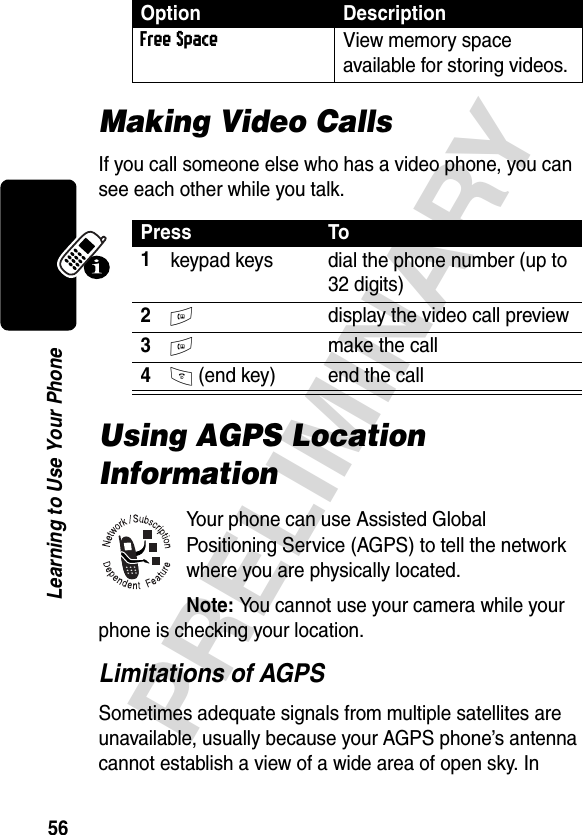
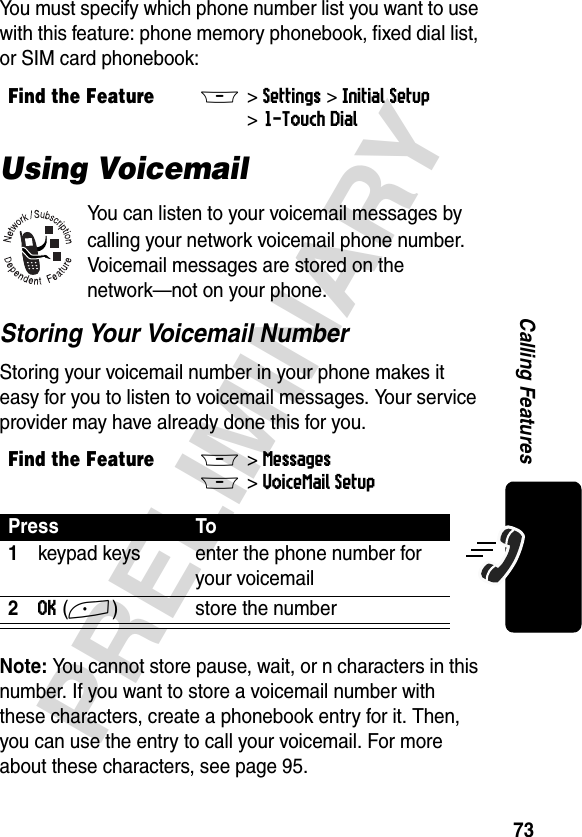
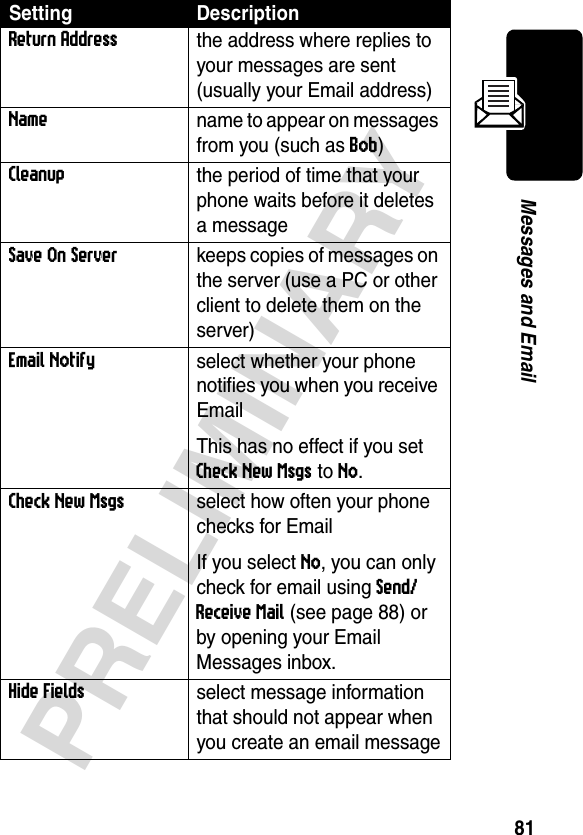
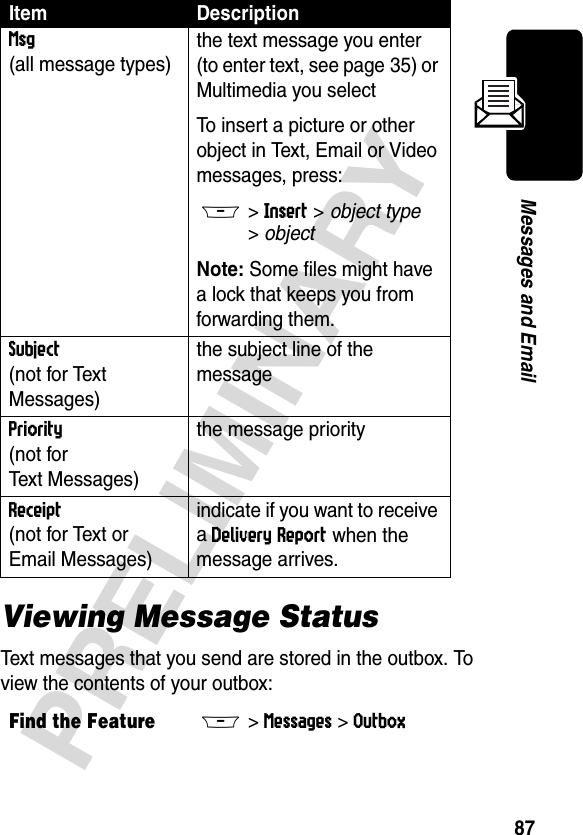
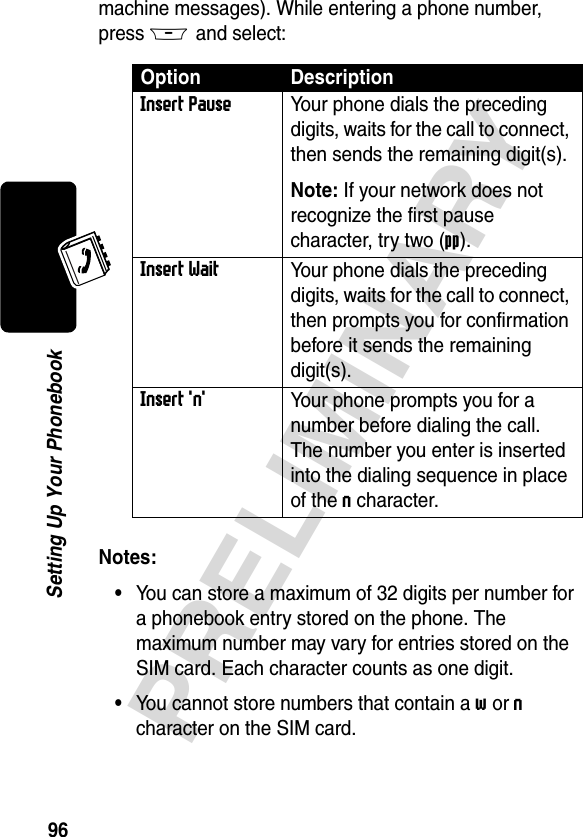
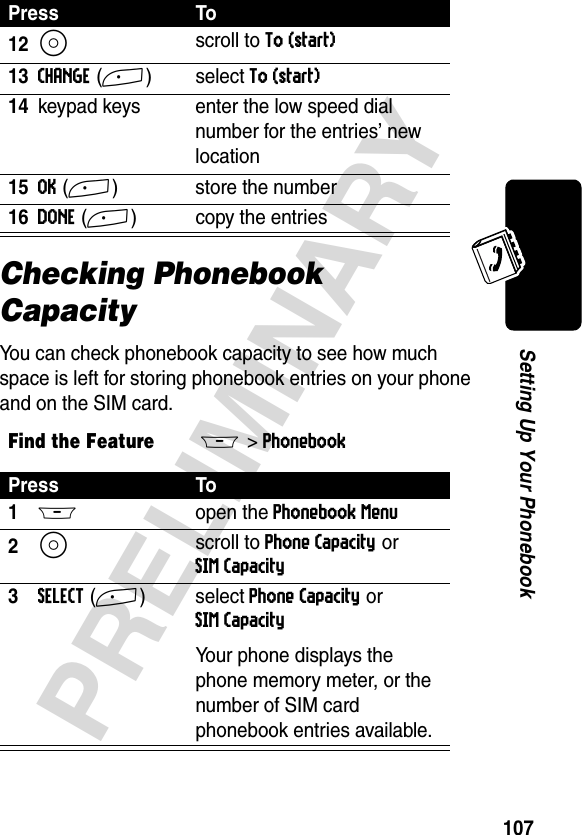
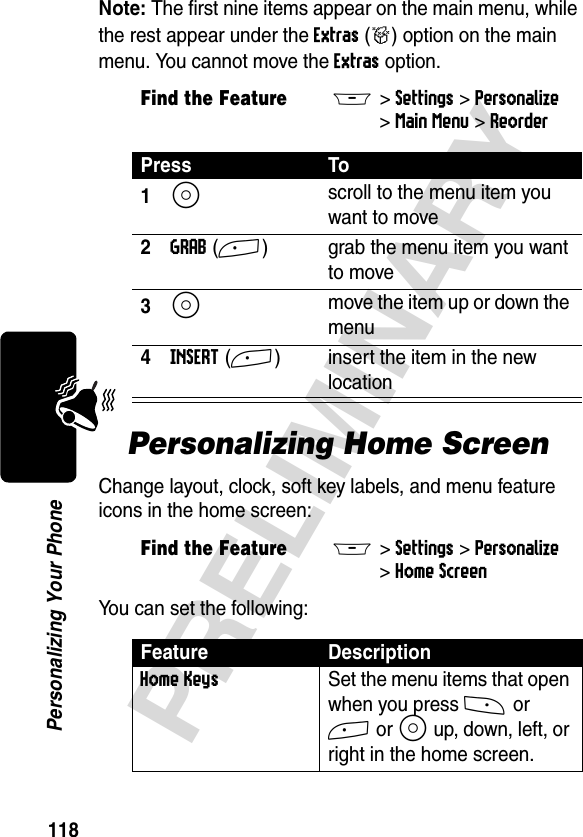
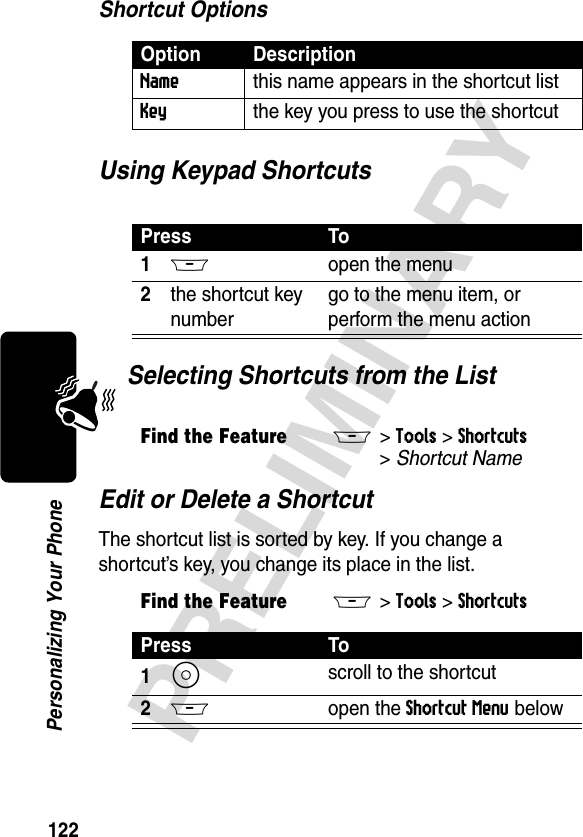
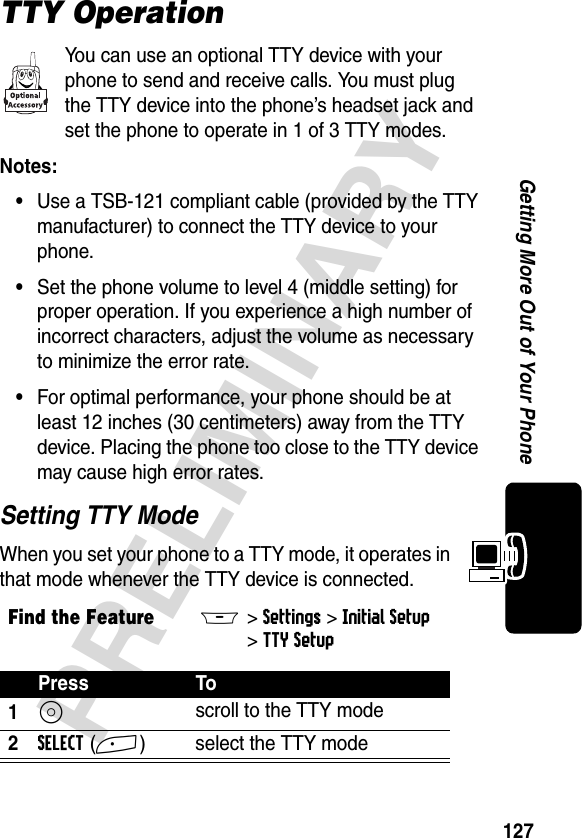
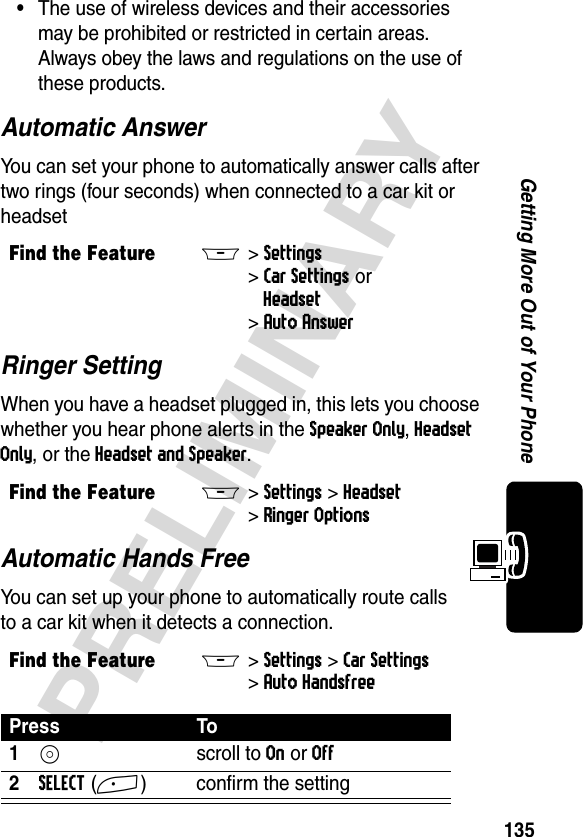
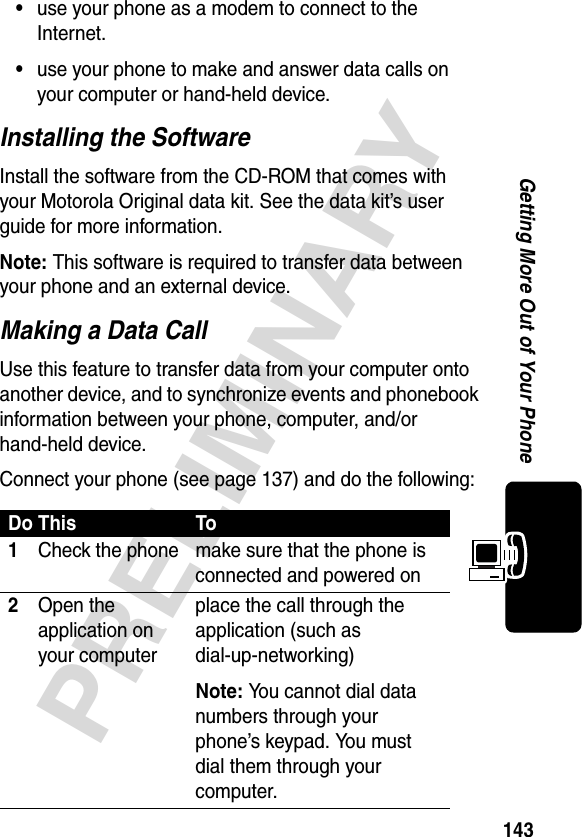
![53PRELIMINARYLearning to Use Your PhoneTo adjust your phone’s wallpaper and screen saver images, see page 60.Recording and Viewing VideosRecording VideosThe image in the camera’s viewfinder appears on your phone’s display. To change cameras, press New SlideshowCreate a slideshow from a series of stored pictures.Set as Wallpaper Set the picture as your phone’s wallpaper image.Set as Screen Saver Set the picture as your phone’s screen saver image.Details View picture information.RenameRename the picture.DeleteDelete the selected picture.Delete AllDelete all pictures.SetupOpen the setup menu to adjust picture settings.Free SpaceView memory space available for storing pictures.Find the FeatureM>Multimedia >Videos >[New Video]Option Description](https://usermanual.wiki/Motorola-Mobility/T56EJ1/User-Guide-420164-Page-56.png)


![112PRELIMINARYPersonalizing Your PhoneActivating Haptic VibrationsSome ring tones include vibrations. You can turn these vibrations on or off for your phone.If you turn on Haptics, your phone vibrates for some ring tones even when the ring style is not set to Vibrate or Vibe&Ring.Note: Java applications can make your phone vibrate or light up. You can turn off App Vibration and App Backlight under M>Settings>Java Settings.Creating and Editing Alert TonesYou can create and store custom alert tones on your phone. The tones appear in the list of available alerts.Creating a ToneFind the FeatureM>Settings >Initial Setup >Haptics >On or OffFind the FeatureM>Settings >Ring Styles >My Tones >[New Tone] Press To1CHANGE(+) select Notes2S orkeypad keysenter notes for the tone (see the following section)](https://usermanual.wiki/Motorola-Mobility/T56EJ1/User-Guide-420164-Page-115.png)


![141PRELIMINARYGetting More Out of Your Phone•You cannot set up a connection when a serial cable is attached to your phone.Connecting a Computer for a Data CallPrepare your computer to set up the Bluetooth connection, then make your phone available for the connection:You have 60 seconds to start the connection from your computer while your phone is available.Tip: After the first connection with a device, you do not need to select Find Me to re-connect.Connecting and Disconnecting a HeadsetTo connect an available Bluetooth headset device:Your phone returns to the home screen, where a Bluetooth status bar icon indicates that you have a connection. Tip: After the first connection with a headset, you can just open the headset to re-connect.Find the FeatureM>Settings >Connection >Bluetooth Link >Setup >Find MeFind the FeatureM>Settings >Connection >Bluetooth Link >Handsfree >adevicename or[Look For Devices]](https://usermanual.wiki/Motorola-Mobility/T56EJ1/User-Guide-420164-Page-144.png)

![145PRELIMINARYGetting More Out of Your PhoneCreating an Internet Sync PartnerTo enter a computer as a Sync partner for your phone:Your phone opens a Partner Details list:Using an Internet Sync PartnerTo start synchronizing with a Sync partner:Your phone attempts a Sync connection with the URL, user name, and password you entered for the partner. This might take several minutes, if there are many entries to synchronize.Find the FeatureM>Settings >Connection >Sync >[New Entry] Detail DescriptionPartner NameA common name you assign to the computer (such as “Work server”)Server URLThe URL for the server (you can omit “http://”)User NameYour user name for logging into the serverPasswordYour password for logging into the server(data) PathThe name of the folder, beneath the URL path, where your data is storedFind the FeatureM>Settings >Connection >Sync > partner name](https://usermanual.wiki/Motorola-Mobility/T56EJ1/User-Guide-420164-Page-148.png)