Motorola Mobility T56EZ1 Portable Cellular / PCS GSM Transceiver User Manual UG C330 GSM
Motorola Mobility LLC Portable Cellular / PCS GSM Transceiver UG C330 GSM
Contents
- 1. Exhibit 8 Users Manual
- 2. Supplemental Response to TC4396 and 4397
Exhibit 8 Users Manual

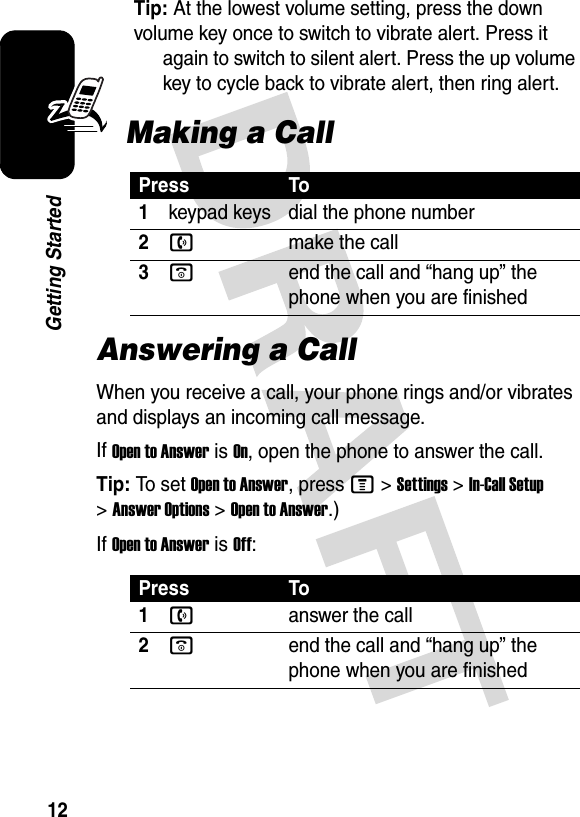

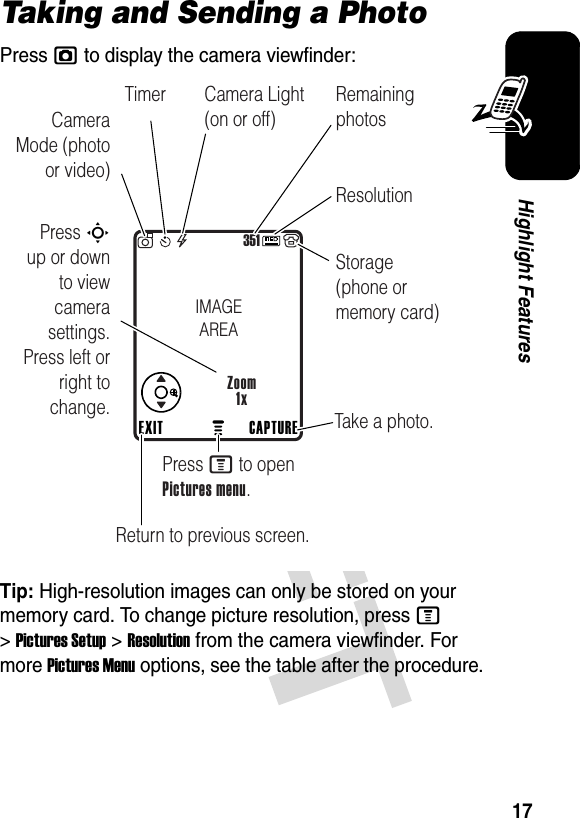
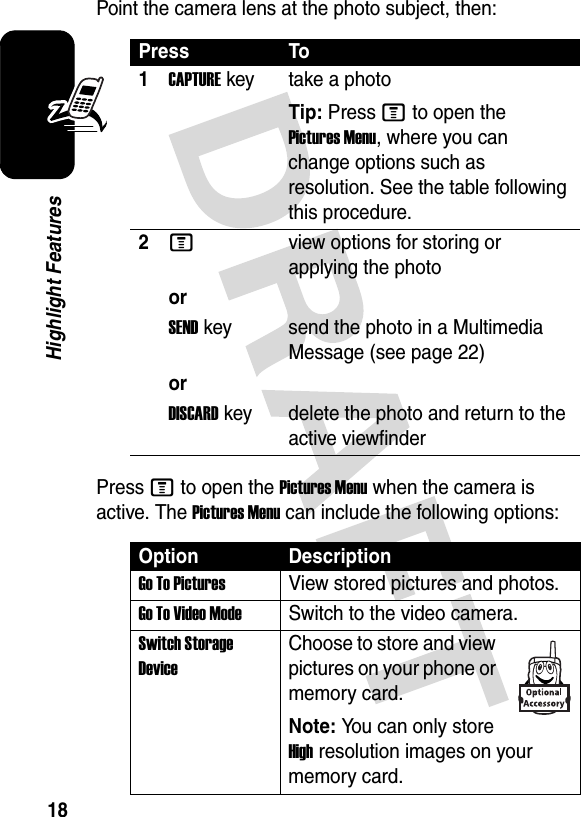
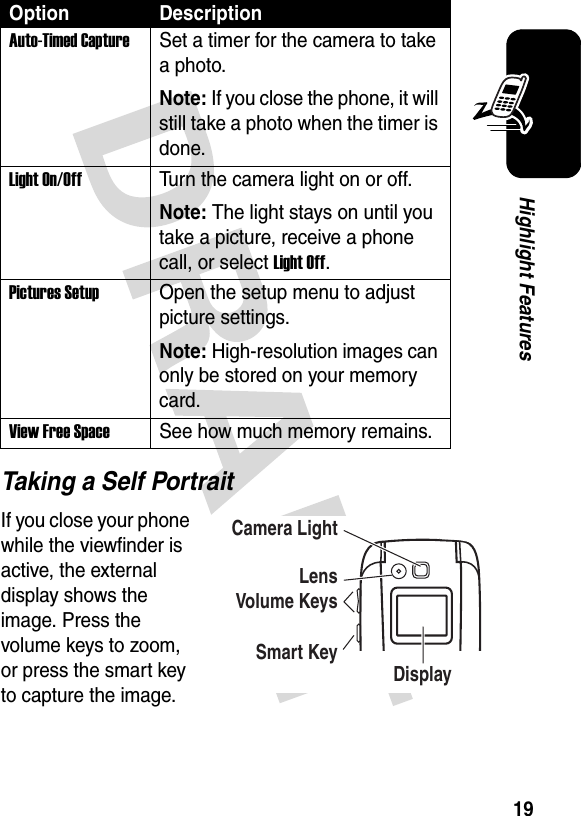
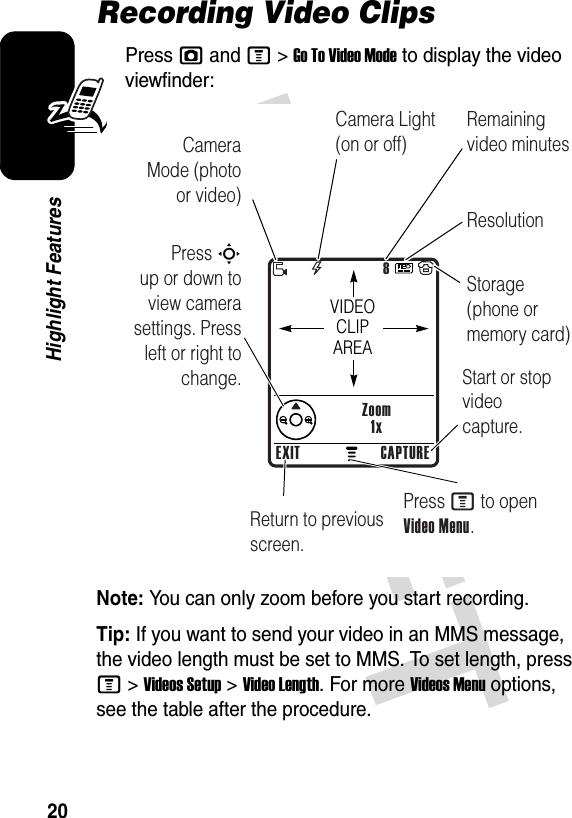

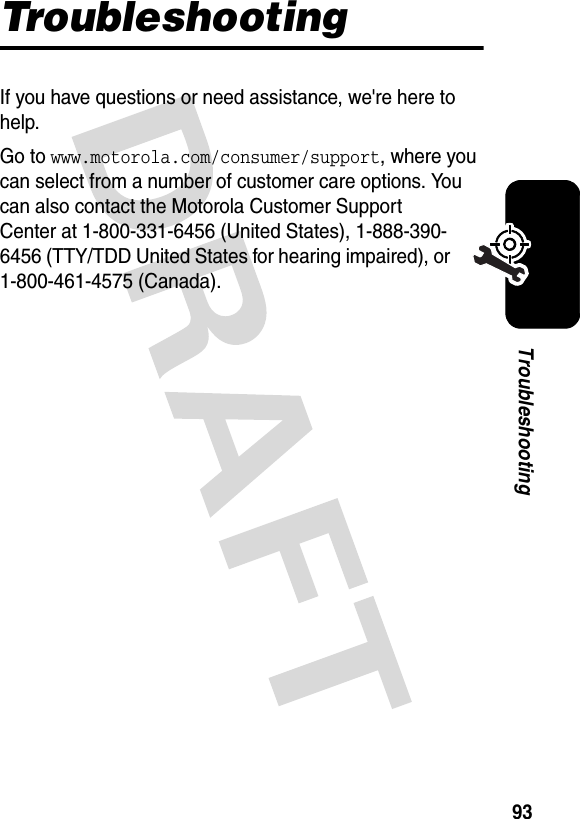
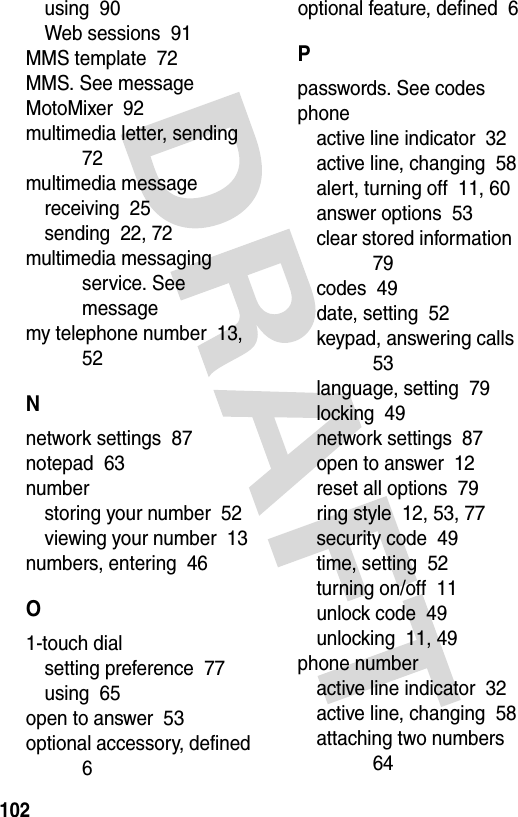
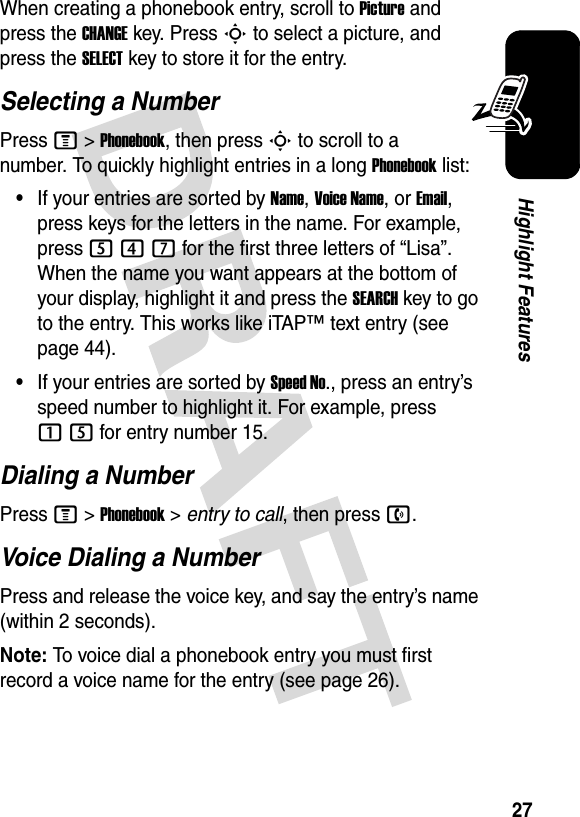
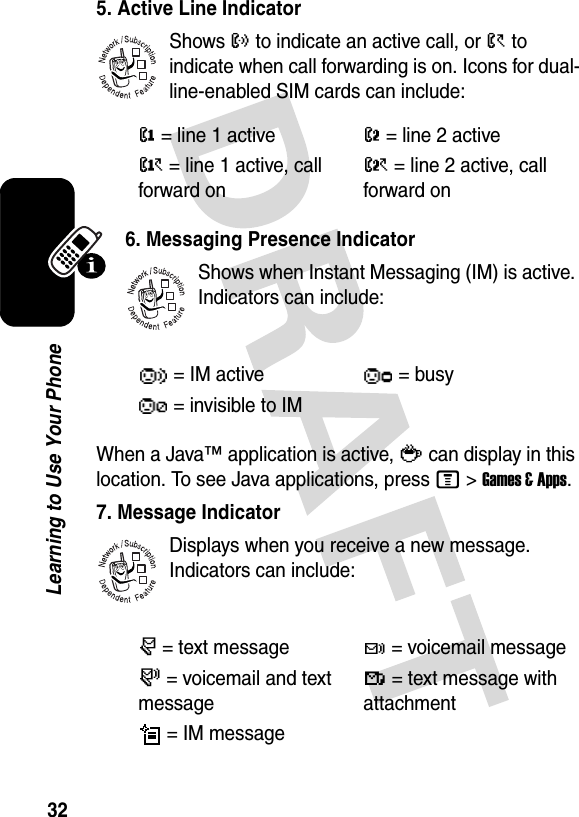
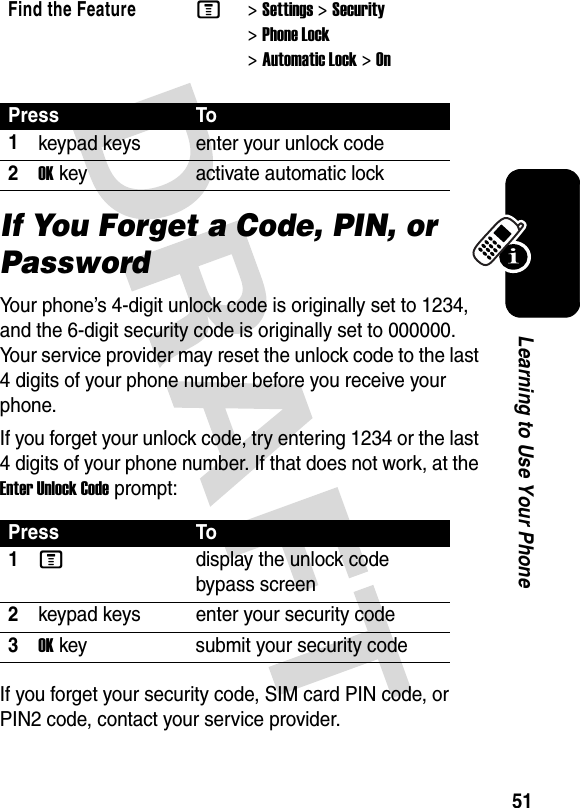
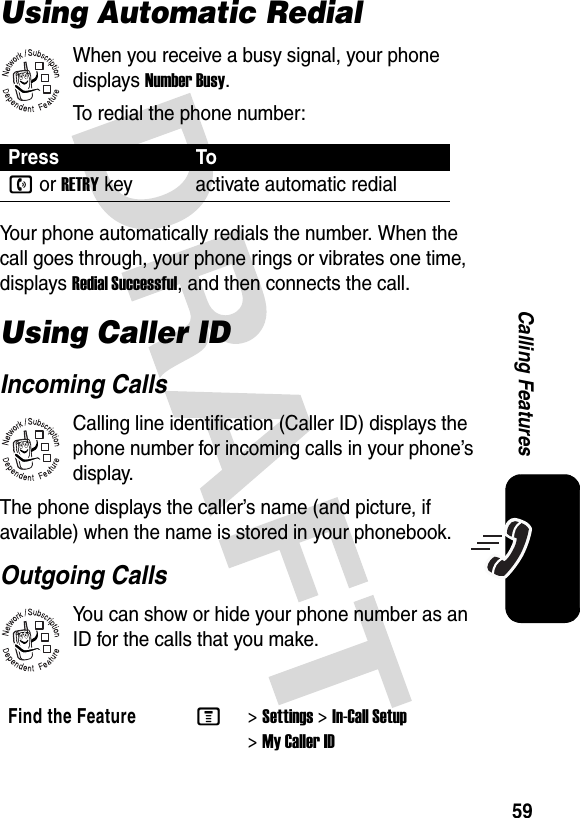
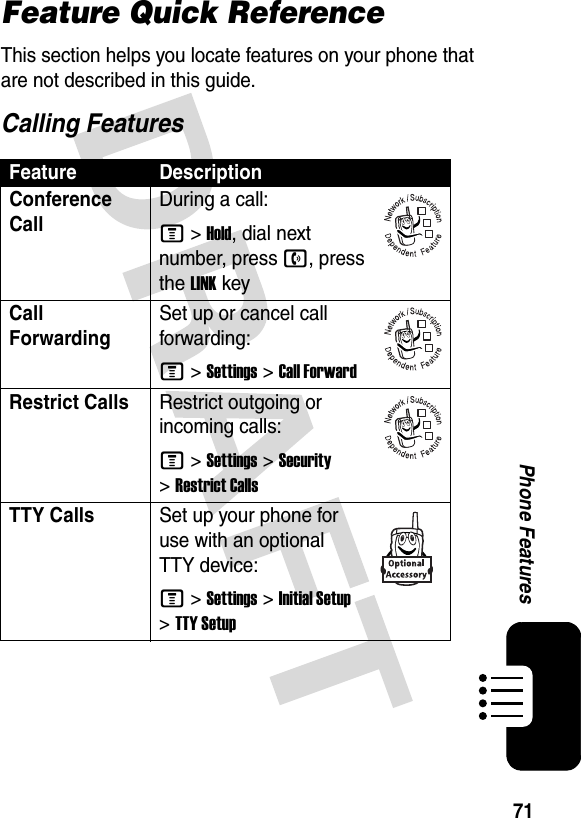
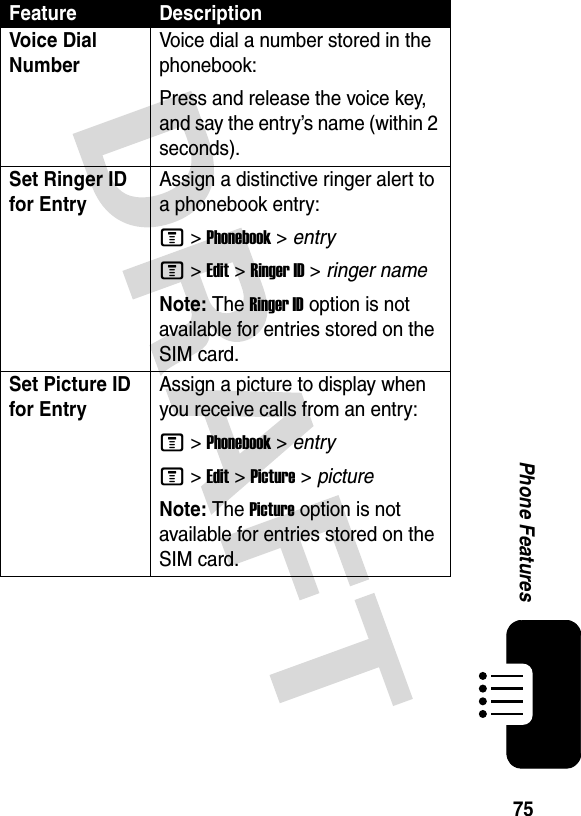
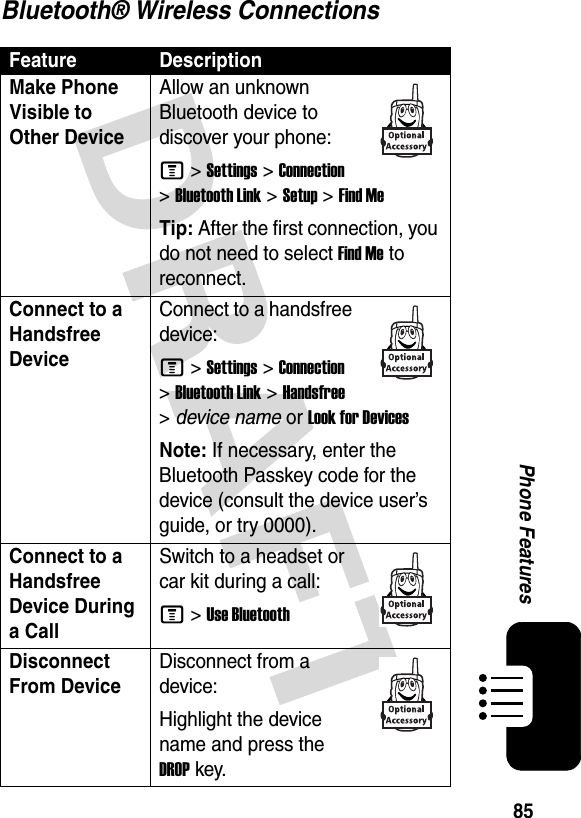
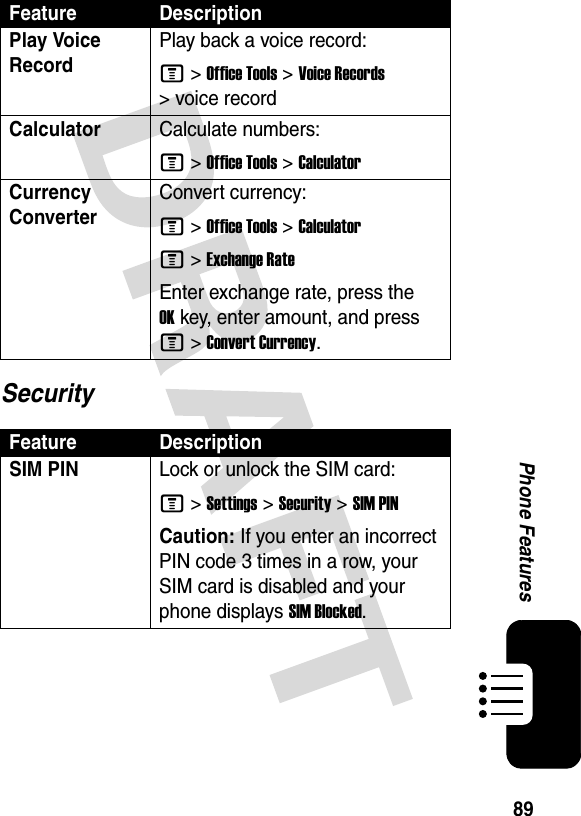
![24Highlight Features15Sscroll to a Send To option:•Highlight [One Time Entry] to enter one or more phone numbers and/or email addresses.•Highlight [New Phonebook Entry] to enter a number/address and add it to the phonebook.•Or highlight an existing phonebook entry.16SELECTkey select [One Time Entry] or [New Phonebook Entry] and enter a number/addressorADDkey add a phonebook entry to the list of recipients17DONEkey store the numbers/addresses18Sscroll to Subject19CHANGEkey select Subject20keypad keys enter the subject21OKkey store the subject22SENDkey send the messagePress To032380o](https://usermanual.wiki/Motorola-Mobility/T56EZ1.Exhibit-8-Users-Manual/User-Guide-500700-Page-25.png)
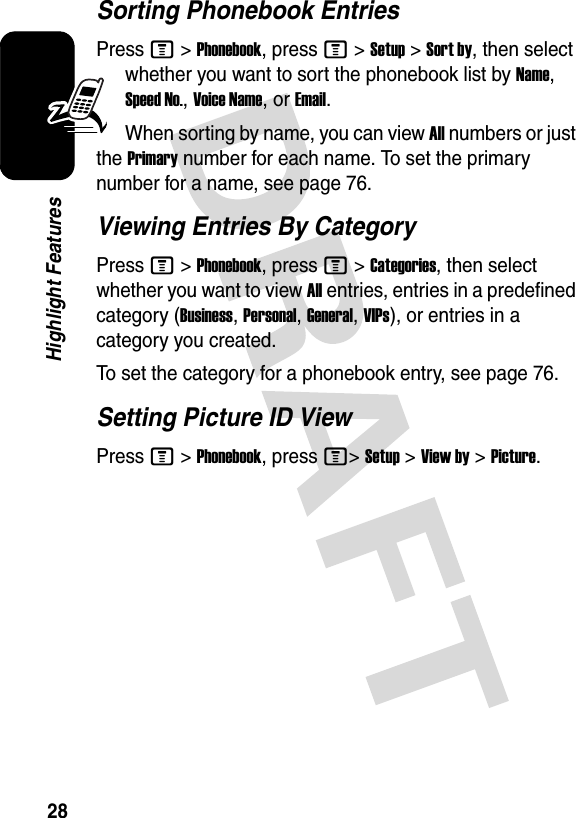

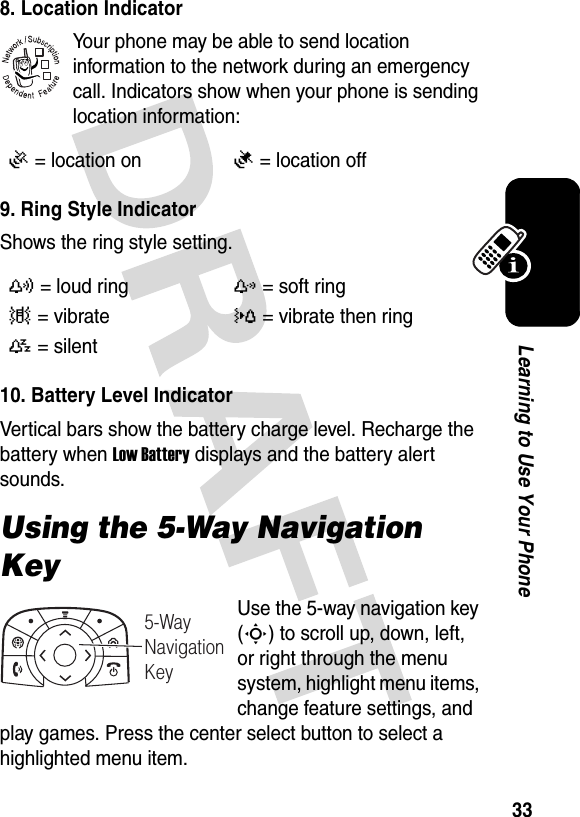

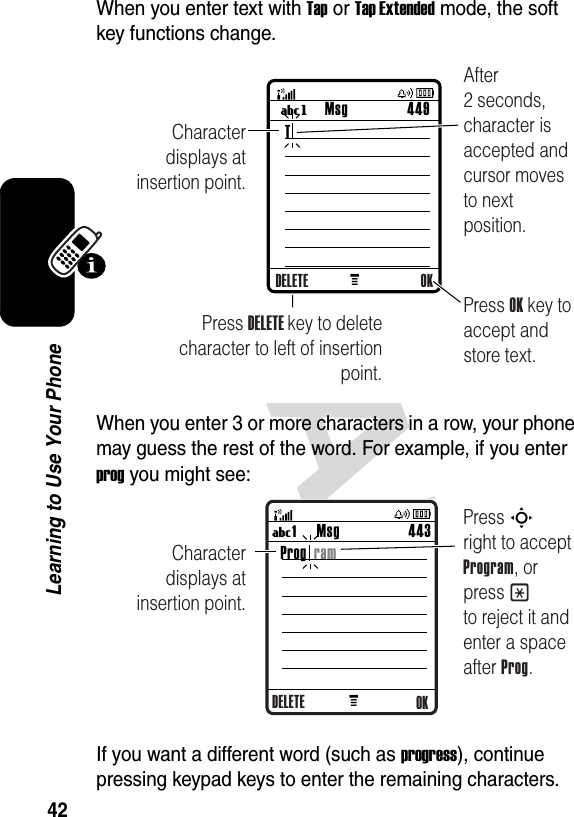
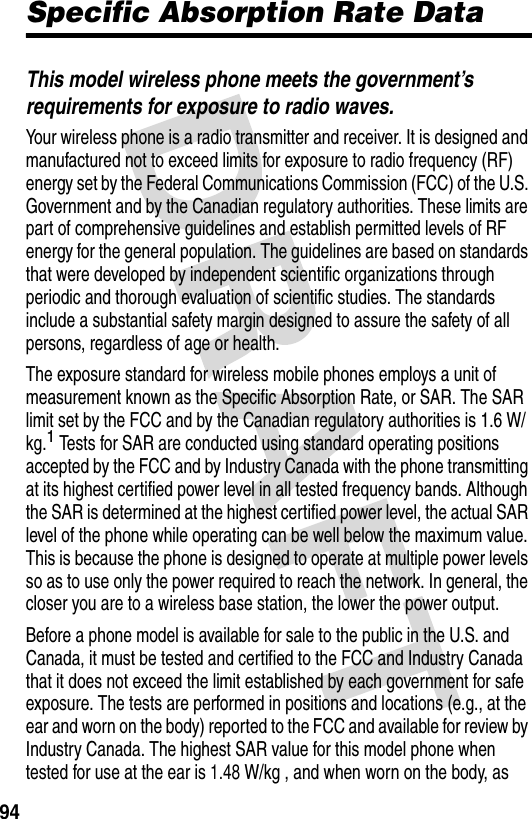
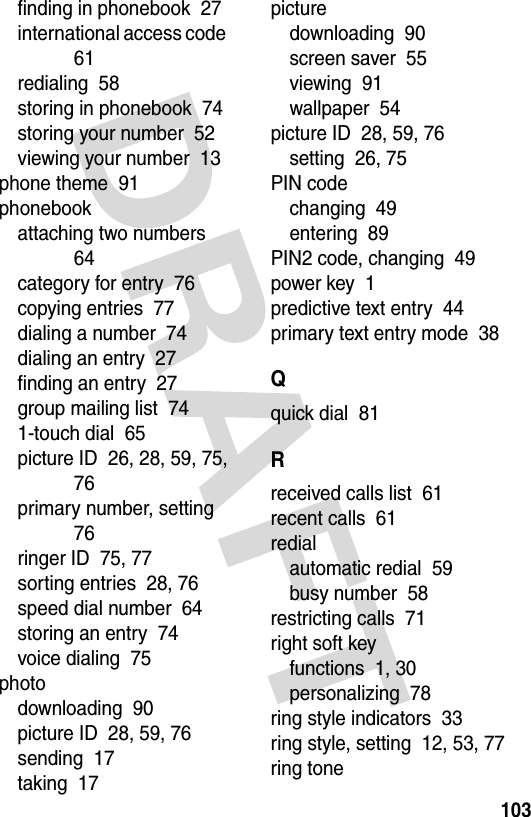
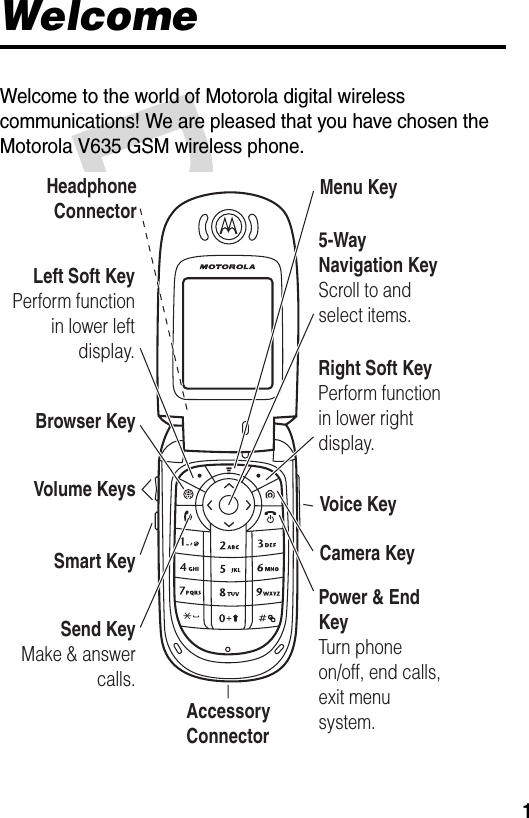
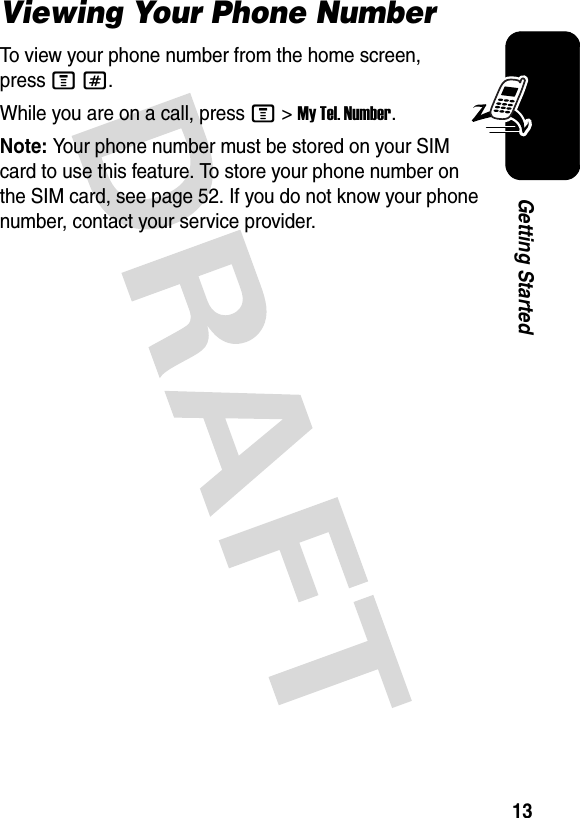
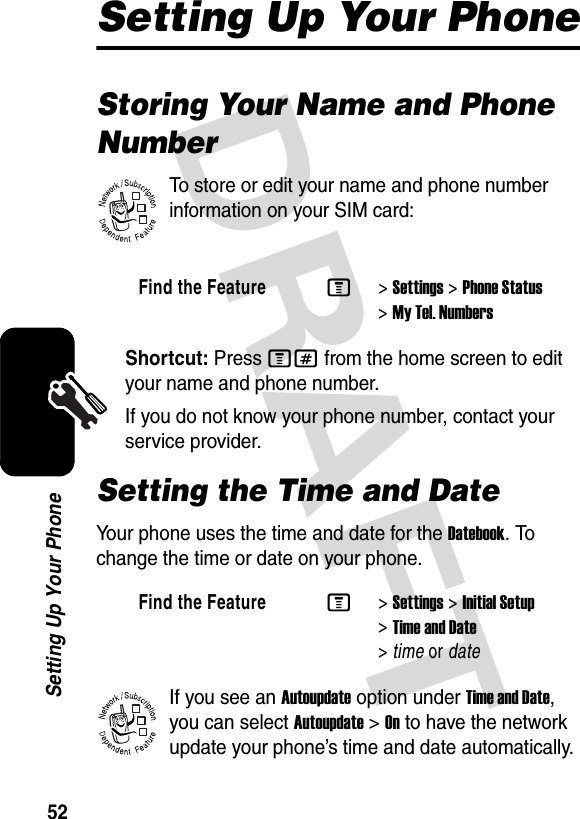
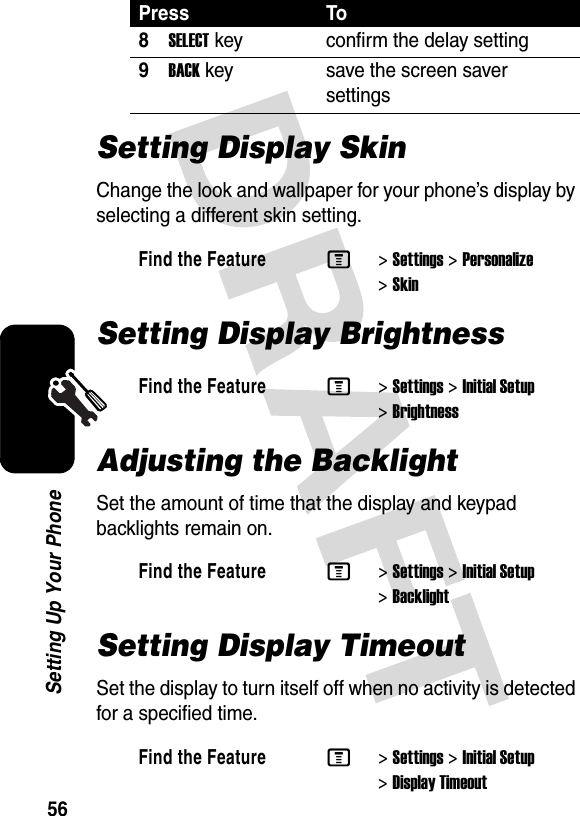
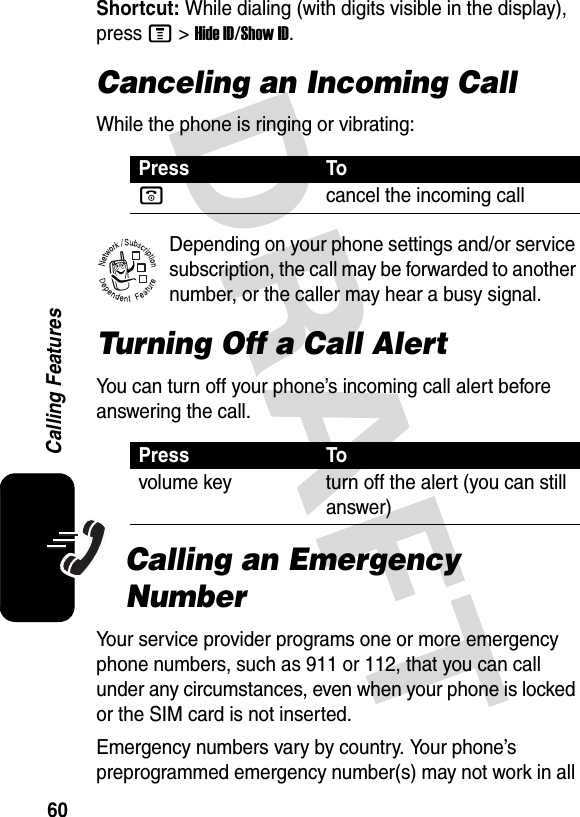
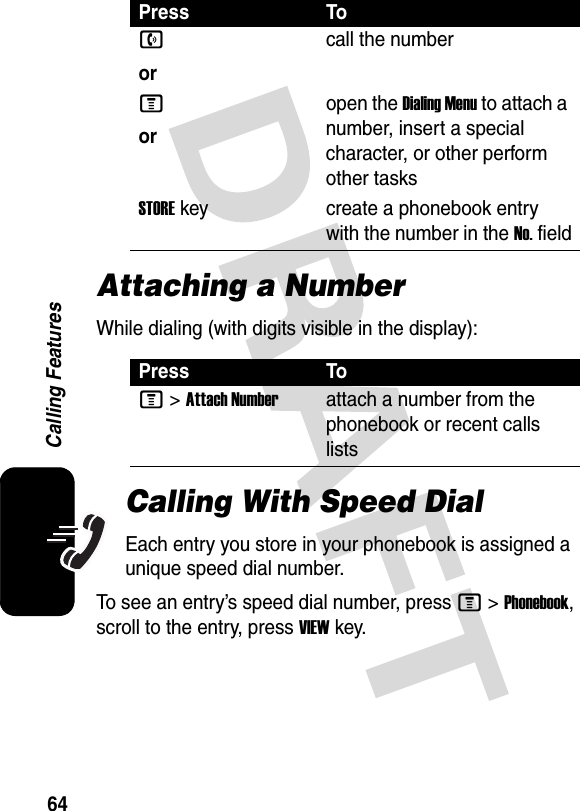
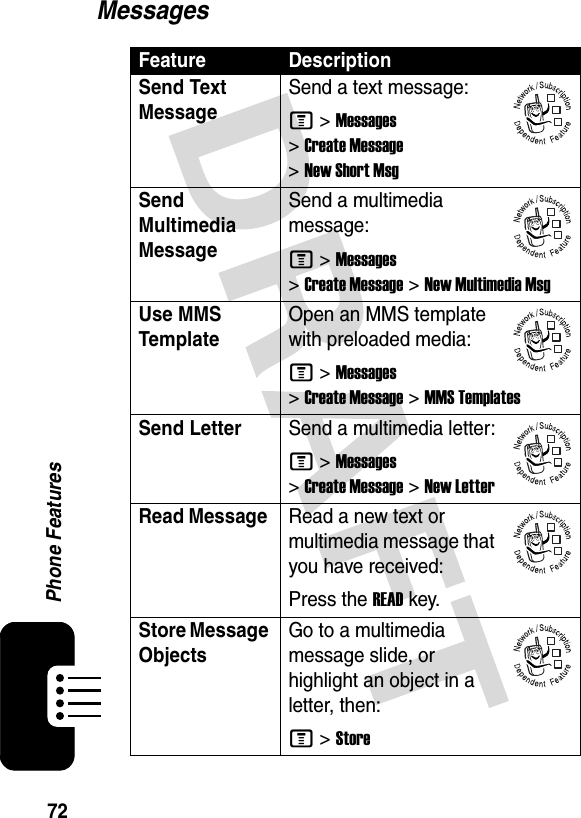
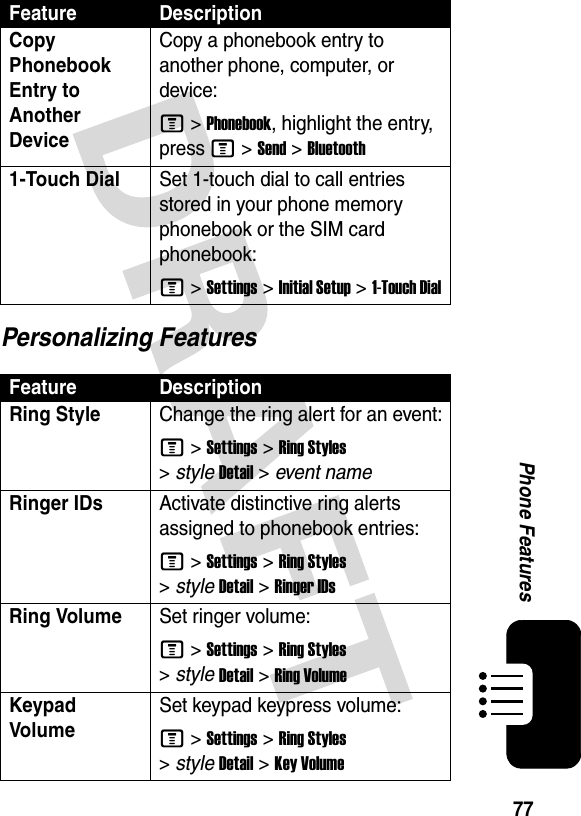
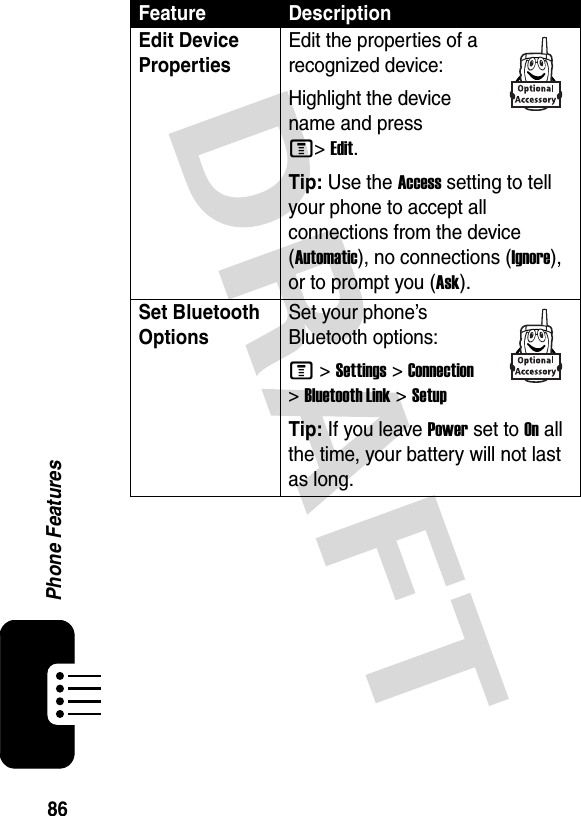
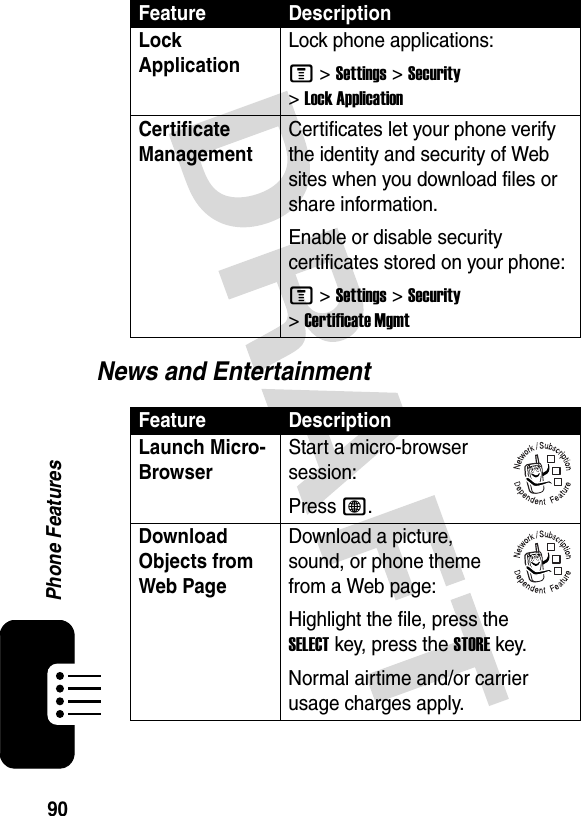
![43Learning to Use Your PhoneCharacter ChartUse this chart as a guide for entering characters with Tap Extended mode.Note: This chart may not reflect the exact character set available on your phone. In an email address or URL editor, 1 first shows common characters for that editor.Tap Mode Text Entry Rules•Press a keypad key repeatedly to cycle through its characters.•Press S left or right to move the flashing cursor to the left or right in a text message.1. ? ! , @ ' - _ : ; ( ) & " ~ 1 0 ¿ ¡ % £ $ ¥ ¤ £+ x * / \ [ ] = > < # § 2a b c 2 á à â ã ç æ3d e f 3 é è ê ë4g h i 4 í î ï 5j k l 5 6m n o 6 ñ ó ò ô õ œ 7p q r s 7 8t u v 8 ú ù û ü9w x y z 9 0change text case, for capital letters*enter a space (hold to enter a return)#change text entry mode (hold for default)](https://usermanual.wiki/Motorola-Mobility/T56EZ1.Exhibit-8-Users-Manual/User-Guide-500700-Page-44.png)
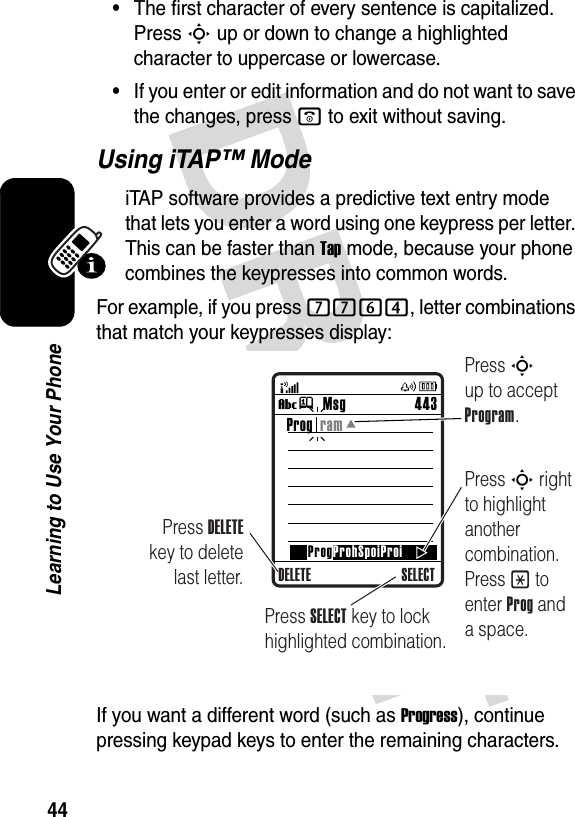
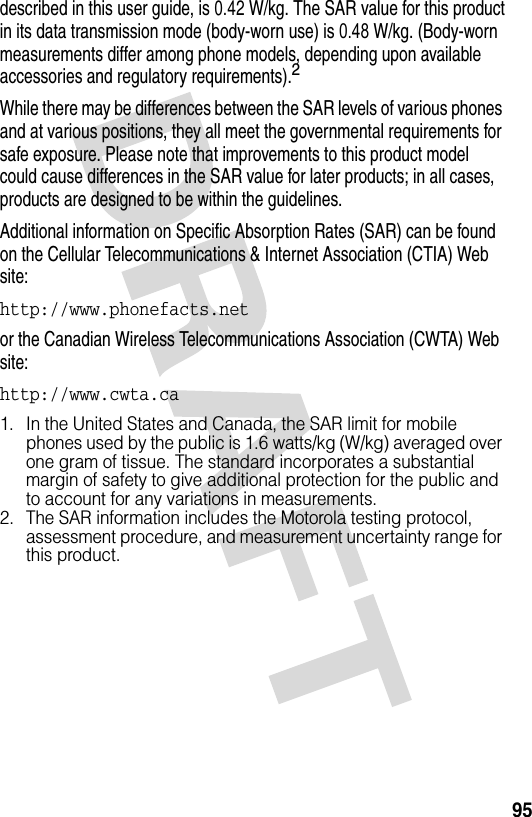
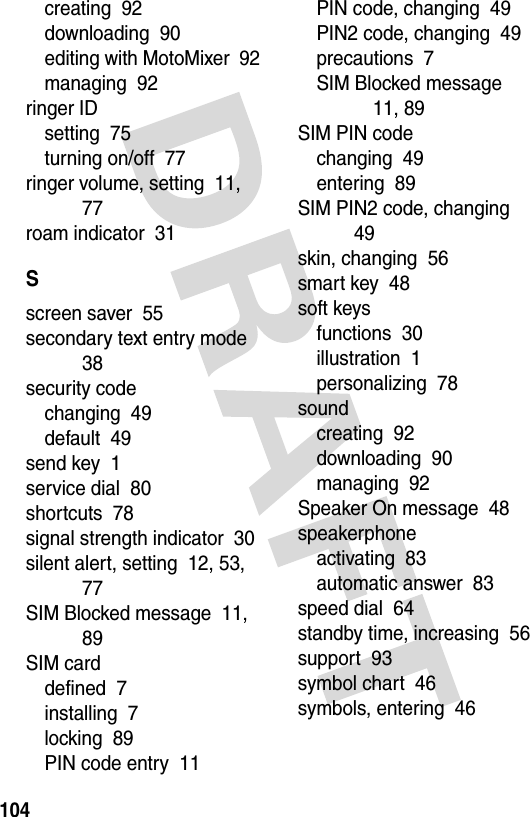
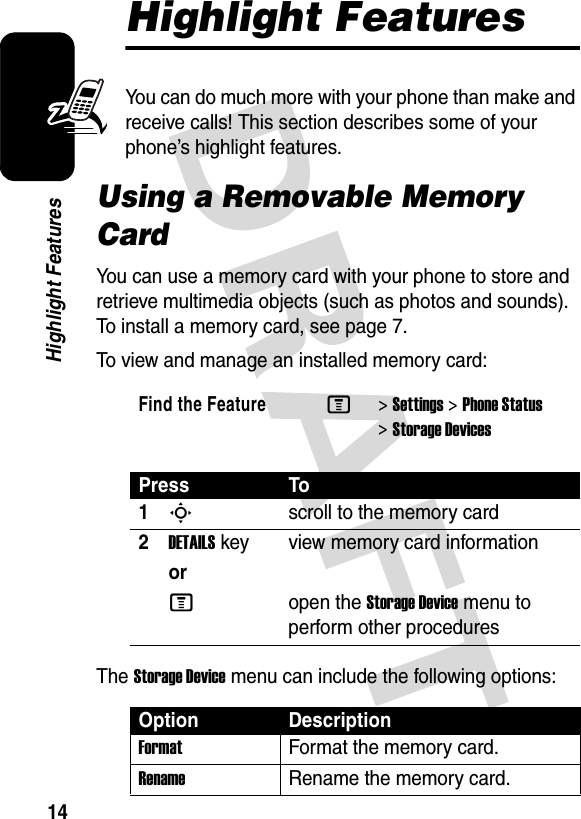
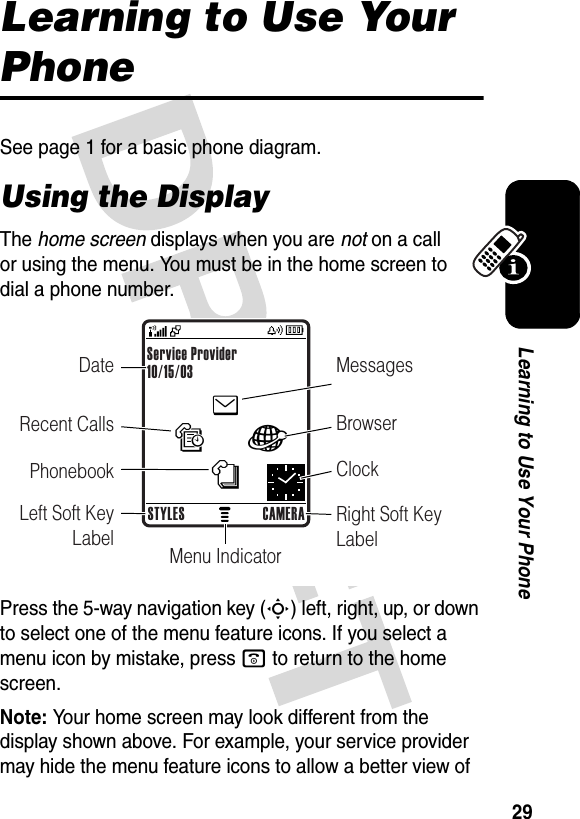
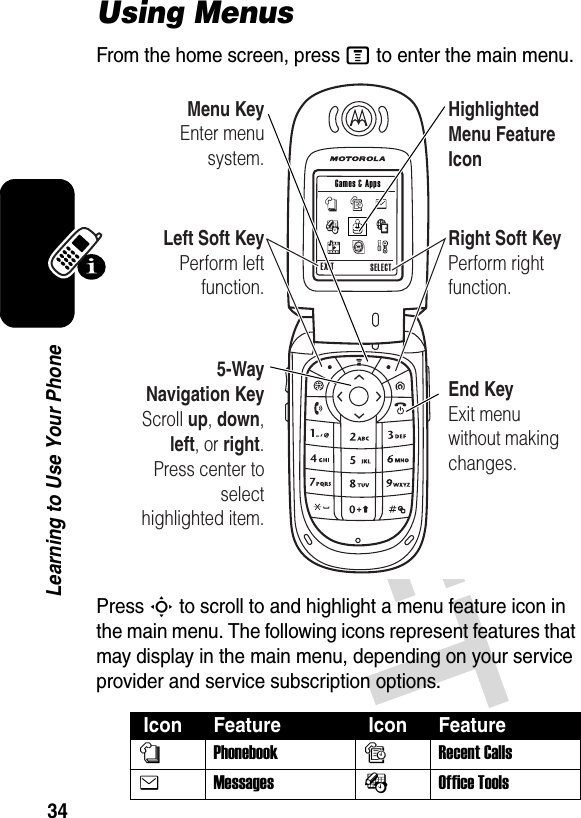
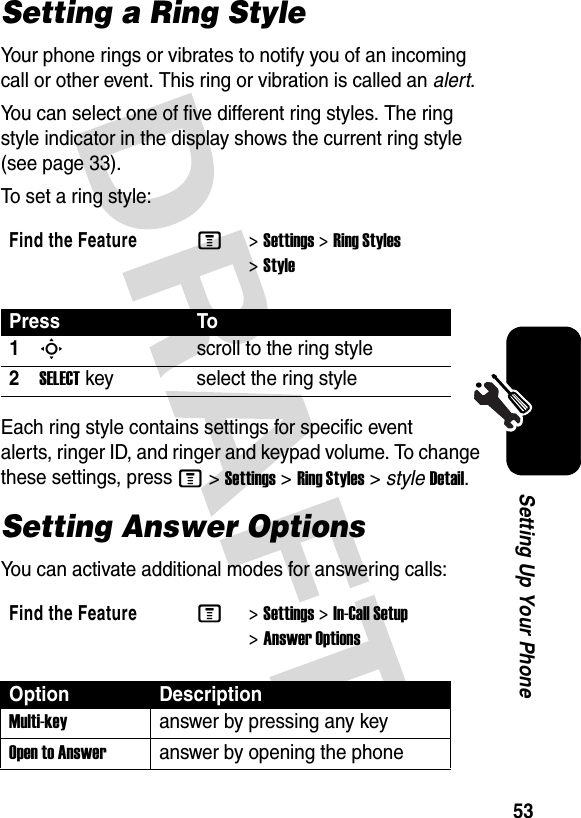
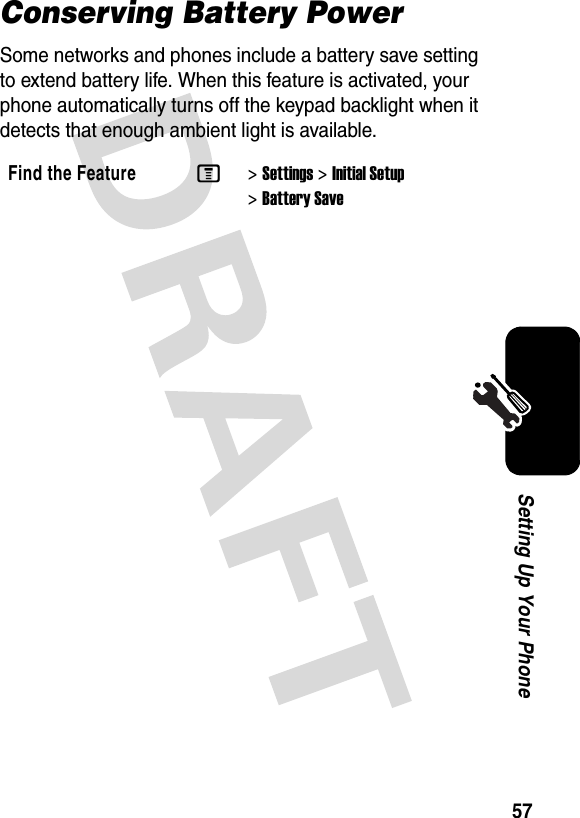
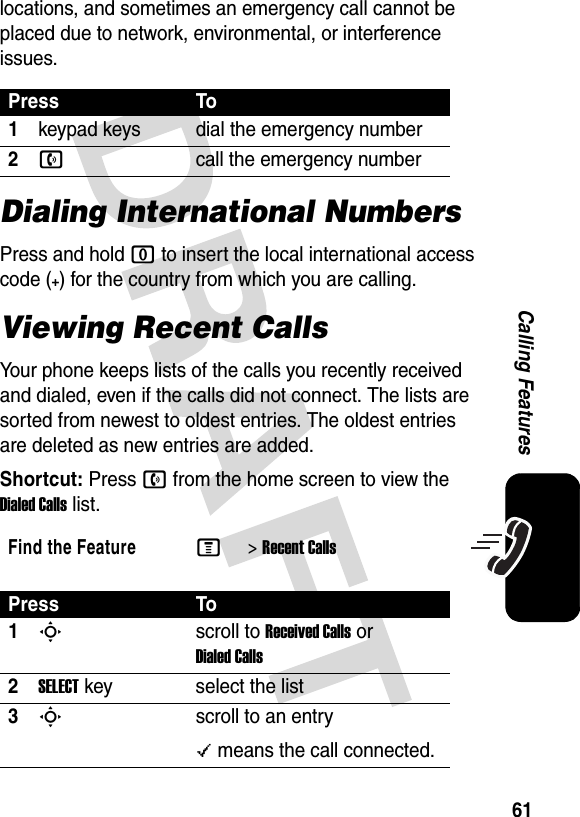
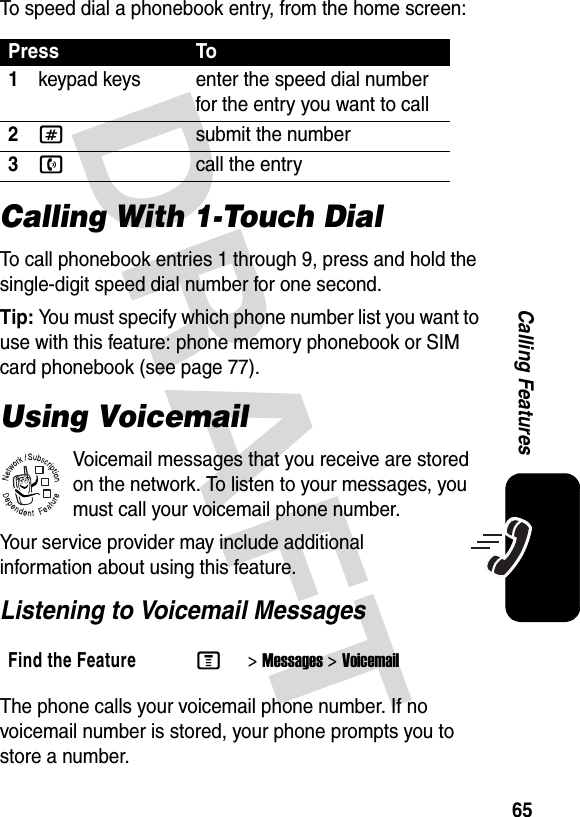
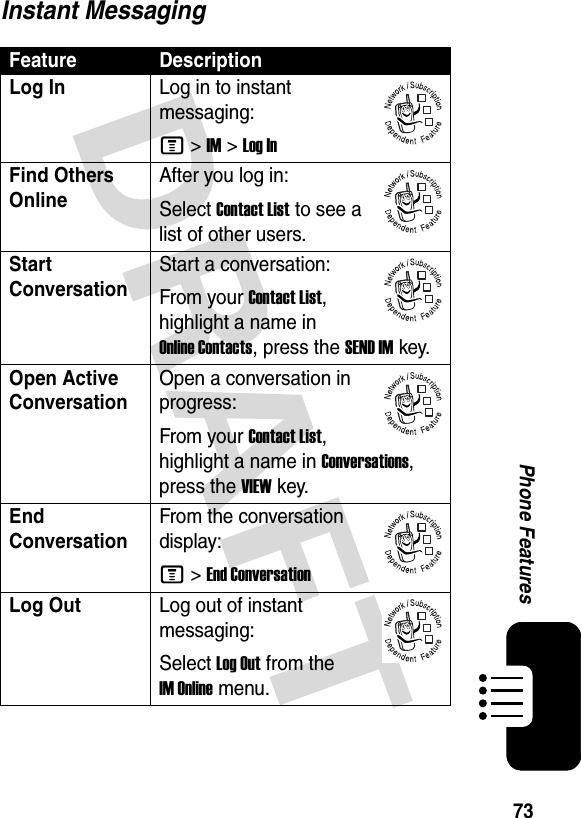
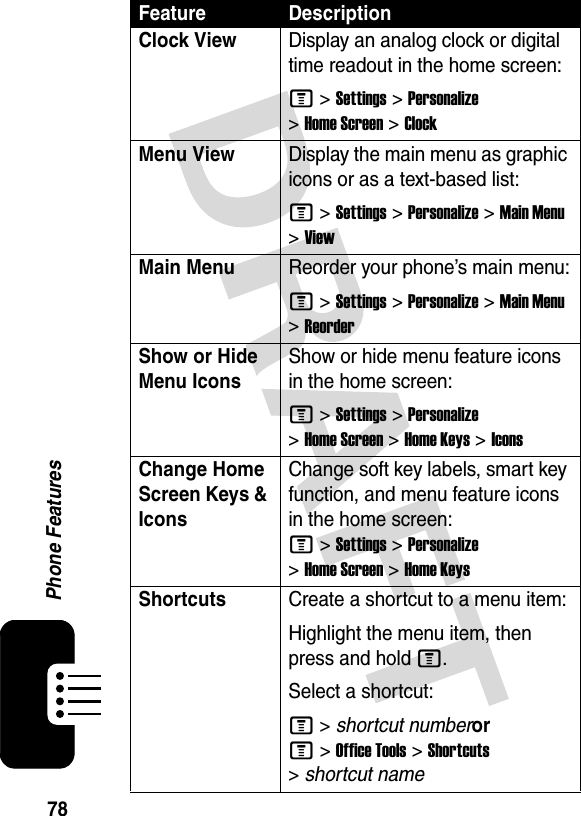
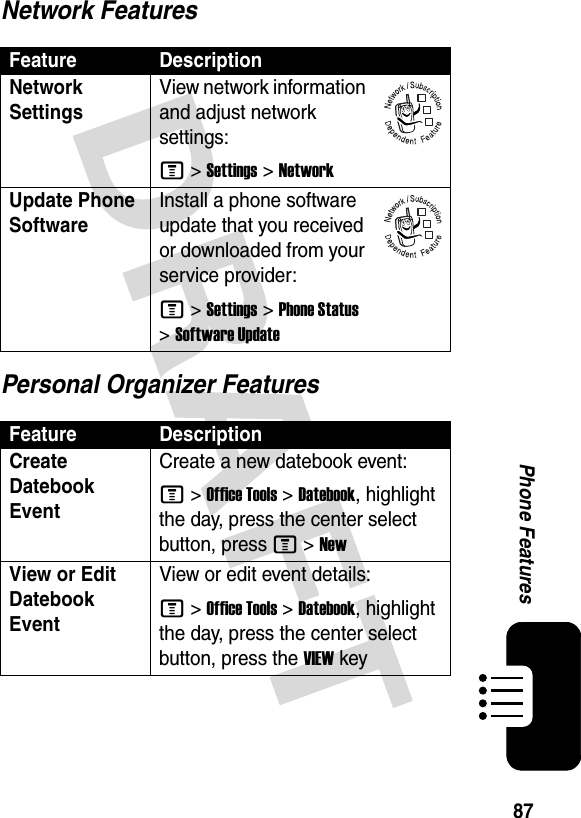
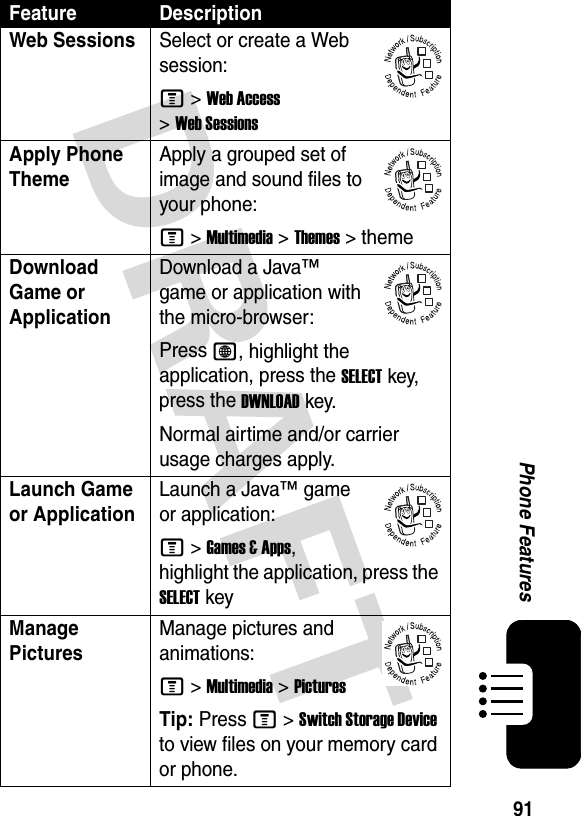
![47Learning to Use Your PhoneNote: This chart may not reflect the exact character set available on your phone. In an email address or URL editor, 1 first shows common characters for that editor.Deleting Letters and WordsPlace the cursor to the right of the text you want to delete, and then:1. ? ! , @ ' - _ : ; ( ) & " ~ 1 0 ¿ ¡ % £ $ ¥ ¤ £+ x * / \ [ ] = > < # § 2@ _ \ a ß3/ : ; d D e j F4" & ' g G h i5( ) [ ] { } k l L 6¿ ¡ ~ m n w W7< > = p P r s S8$ £ ¥ ¤ £ q Q t u9# % * z x X c y Y0+ - x * / = > < # § *enter a space (hold to enter a return)#change text entry mode (hold for default)ActionPress the DELETEkey to delete one letter at a time.Hold the DELETEkey to delete all the text.](https://usermanual.wiki/Motorola-Mobility/T56EZ1.Exhibit-8-Users-Manual/User-Guide-500700-Page-48.png)
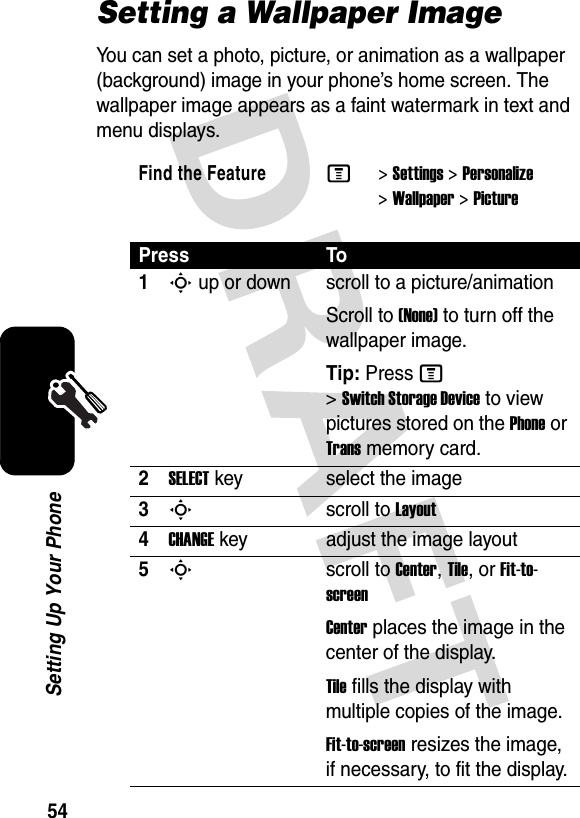
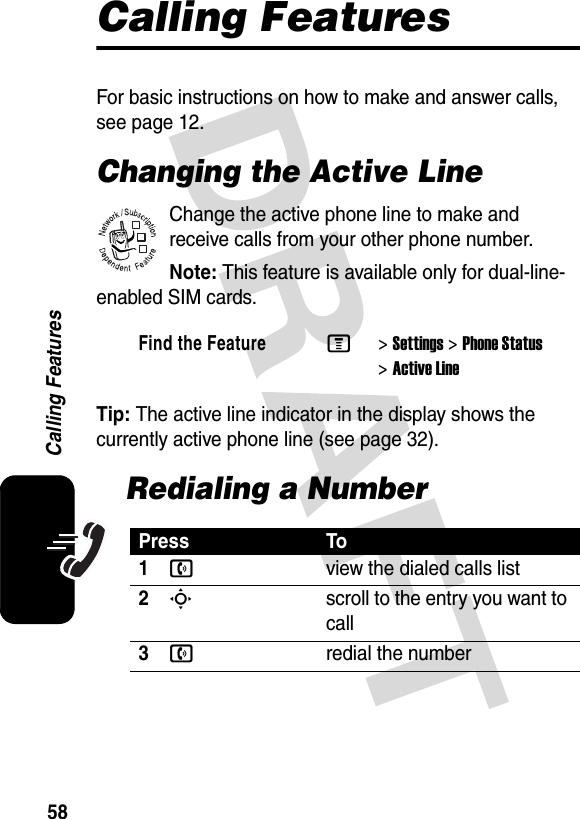
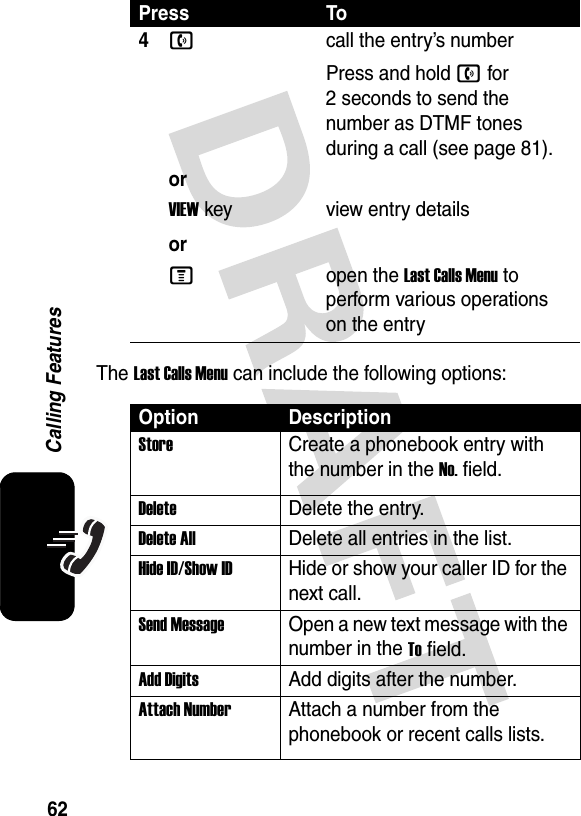
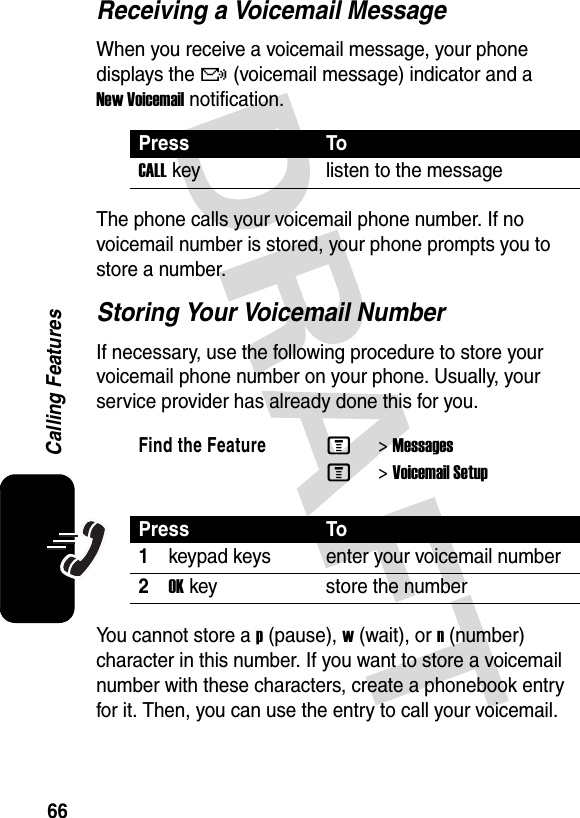
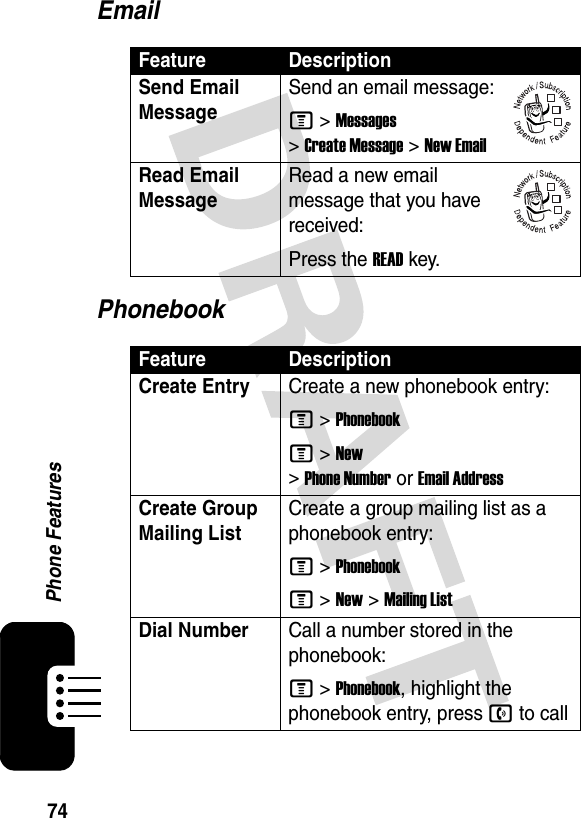

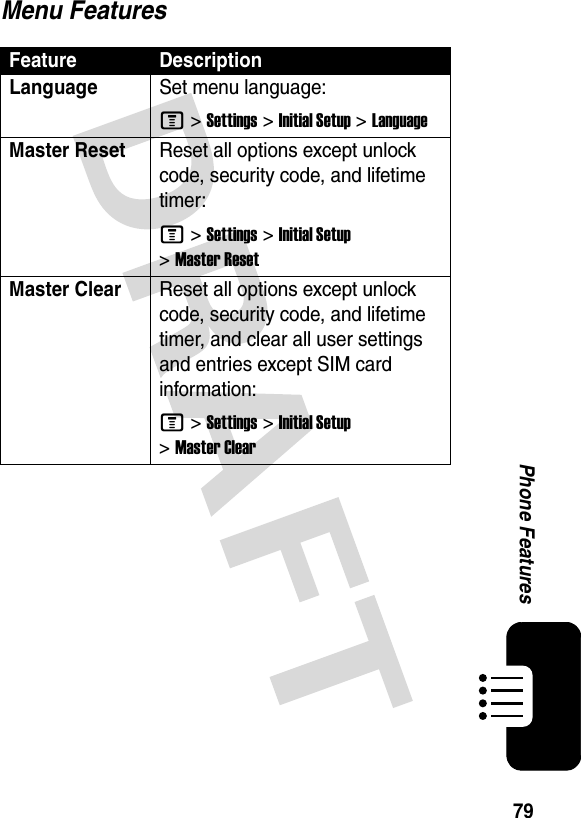

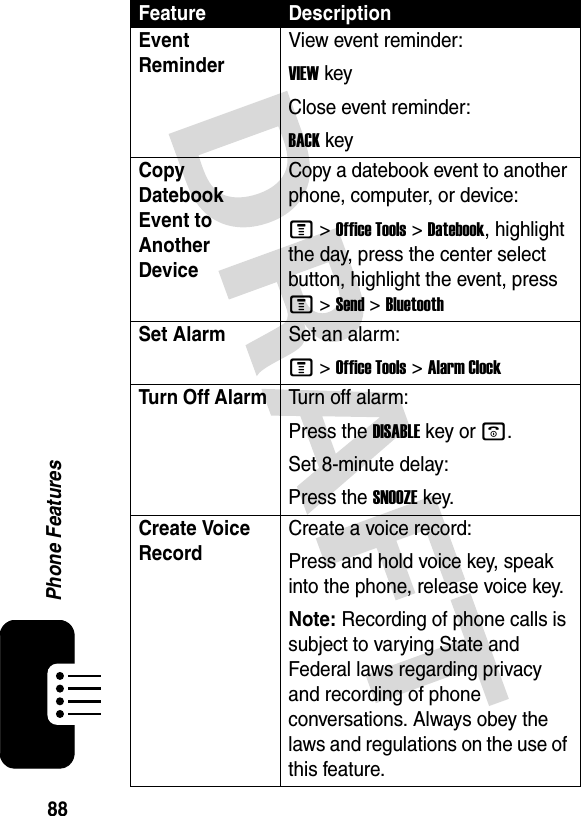
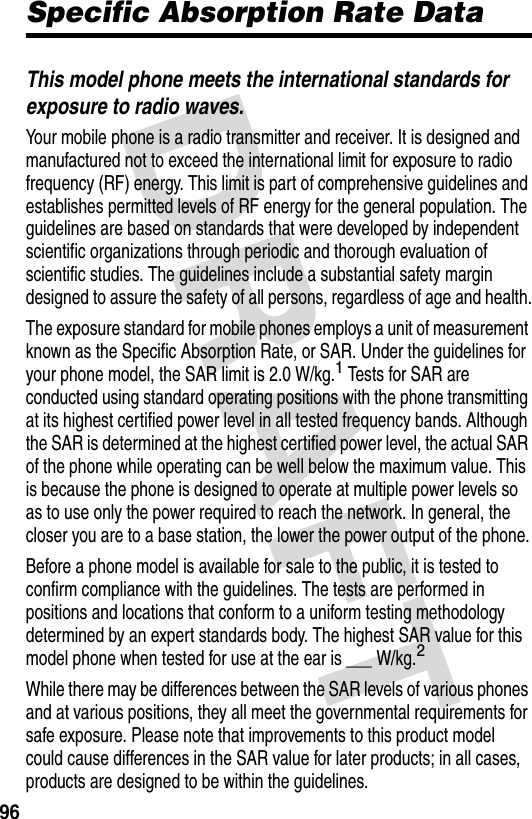
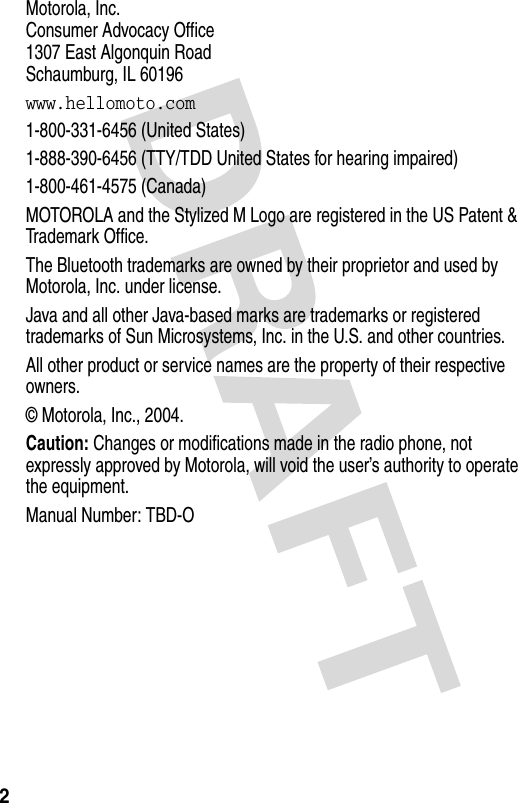
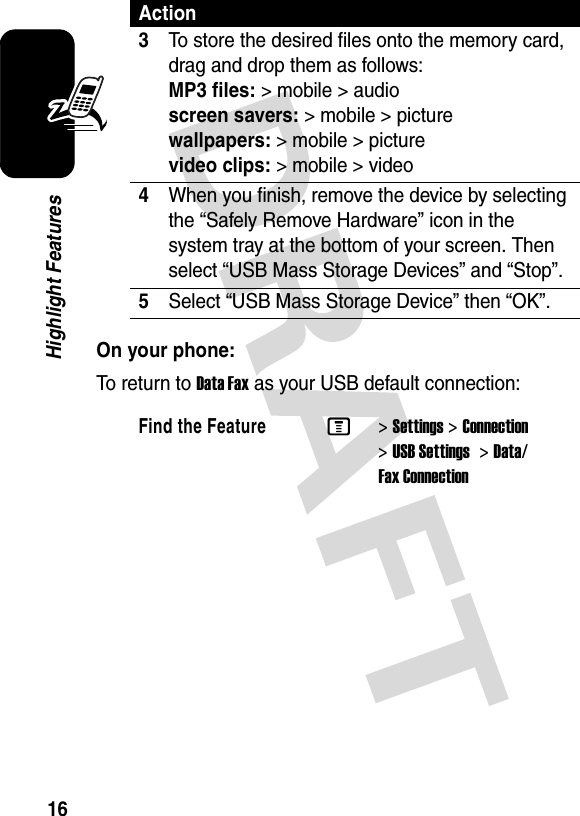
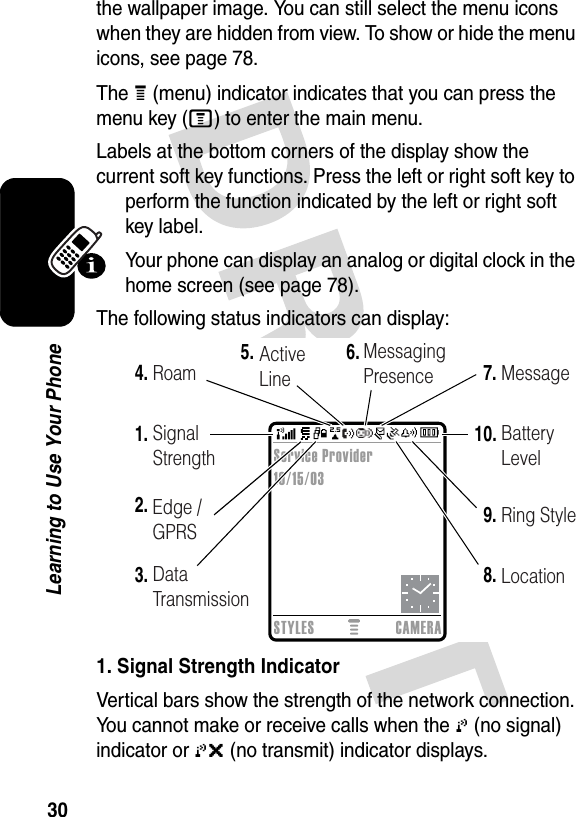
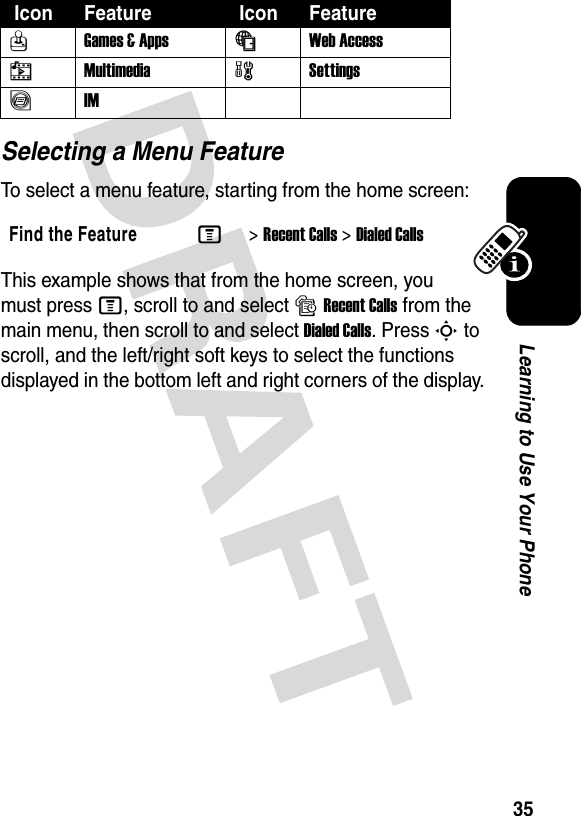
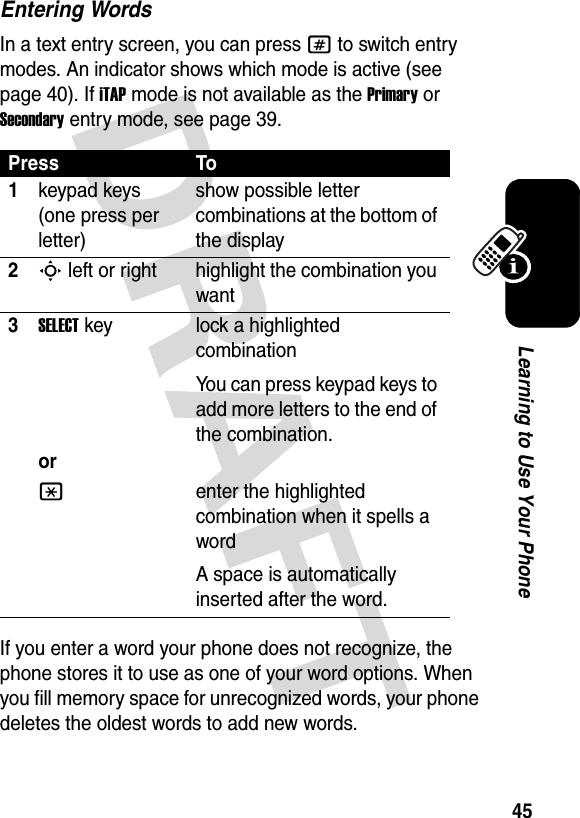
![92Phone FeaturesManage Sounds Manage ring tones, sounds that you have composed or downloaded:M >Multimedia >SoundsTip: Press M>Switch Storage Device to view files on your memory card or phone.Manage Video ClipsManage video clips:M >Multimedia >VideosTip: Press M>Switch Storage Device to view files on your memory card or phone.Edit Sounds With MotoMixerEdit MIDI-based sound files that you can use with your phone:M >Multimedia >MotoMixer >[New MotoMixer] or mix file nameCreate Ring Tones Create ring tones that you can use with your phone:M >Multimedia >Sounds >[New iMelody]Camera Adjust light level and other settings for the built-in camera:jM>Pictures SetupFeature Description](https://usermanual.wiki/Motorola-Mobility/T56EZ1.Exhibit-8-Users-Manual/User-Guide-500700-Page-93.png)