Motorola Mobility T56HA1 Portable Cellular/ PCS CDMA Transceiver with BT User Manual Z6tv CDMA
Motorola Mobility LLC Portable Cellular/ PCS CDMA Transceiver with BT Z6tv CDMA
UserManual.wiki
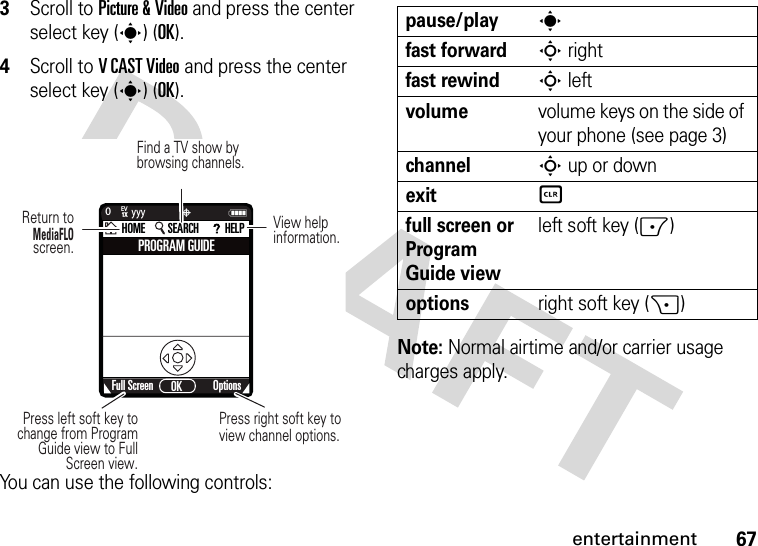
>
Motorola Mobility
>
T56HA1 User Manual
Exhibit 8 Users Manual
Navigation menu
Upload a User Manual
Namespaces
Wiki Guide
HTML
PDF
Info
Views
User Manual
Discussion / Help
Navigation

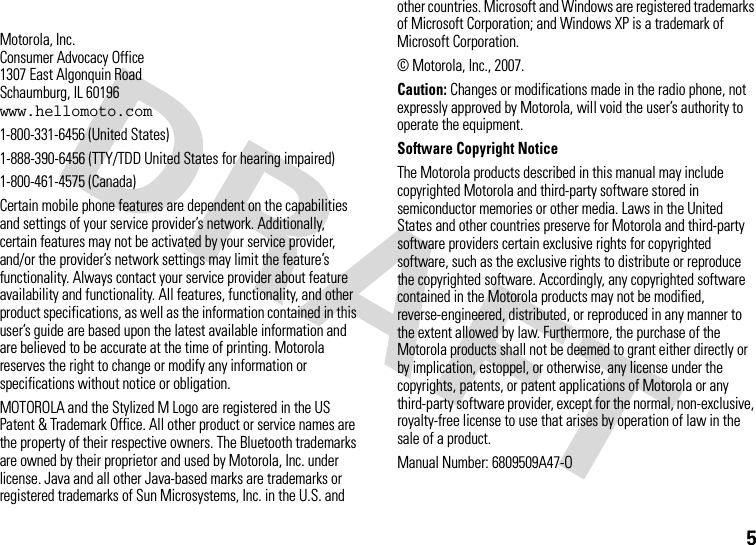


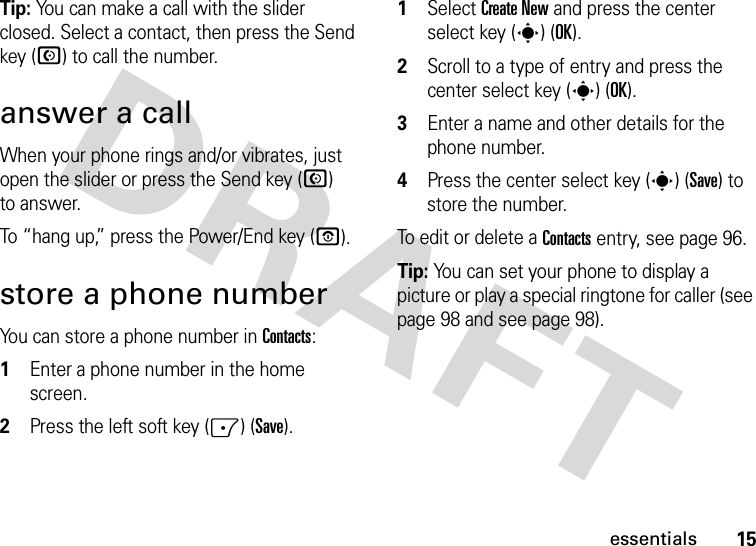

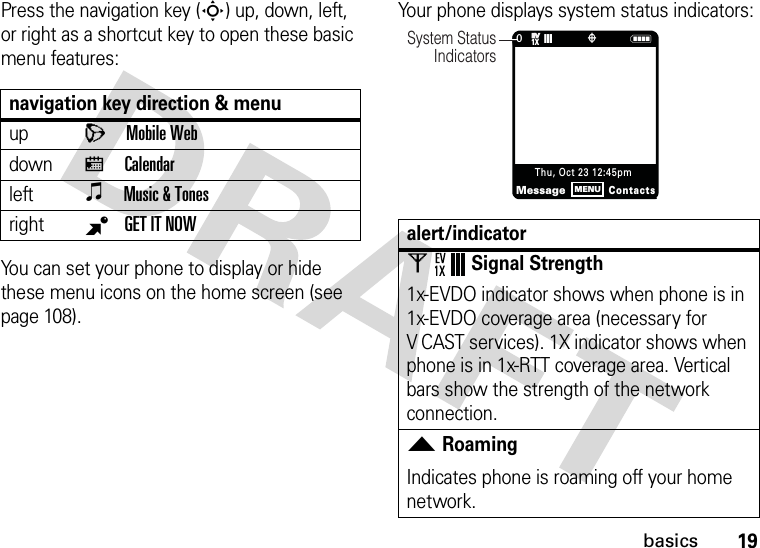


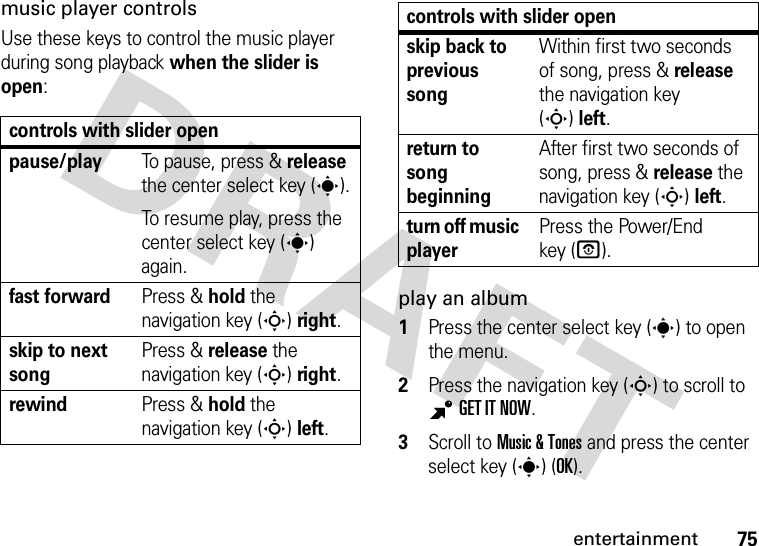
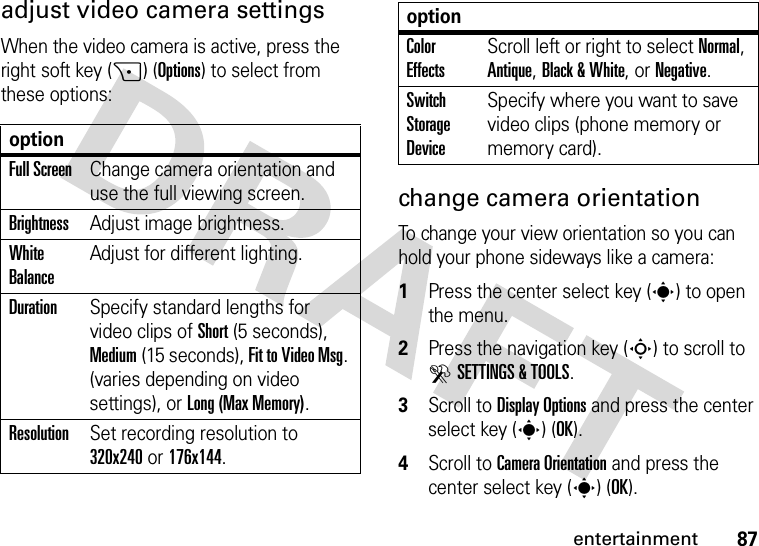
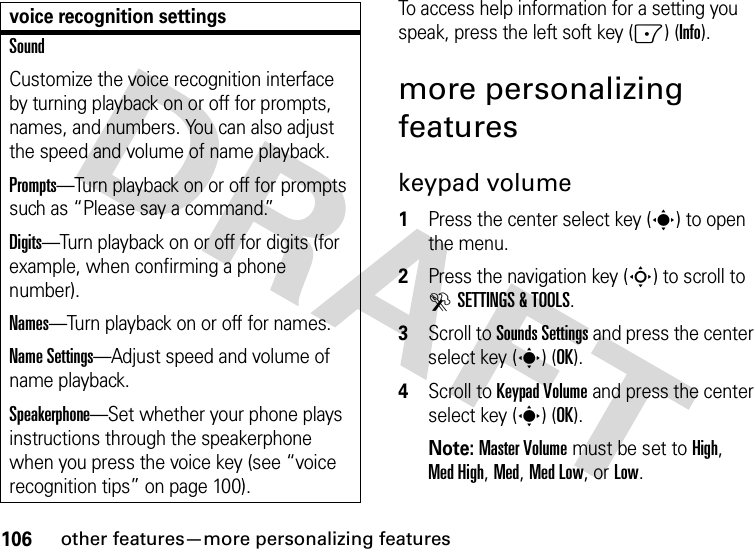
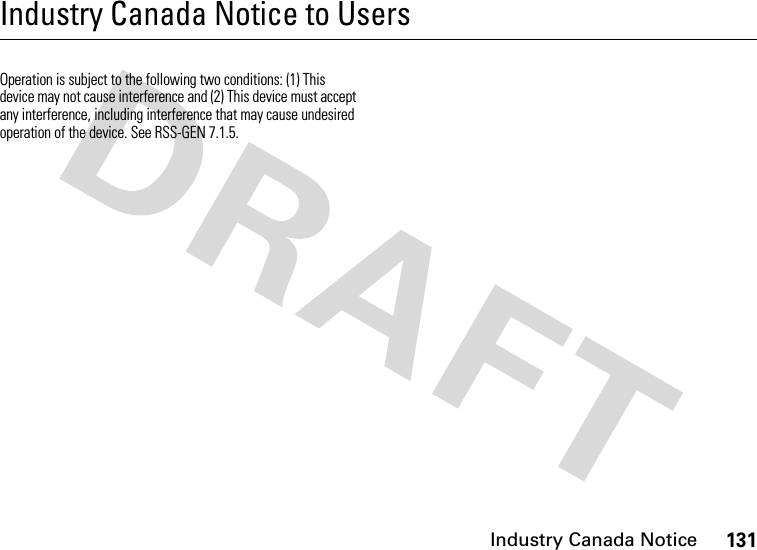
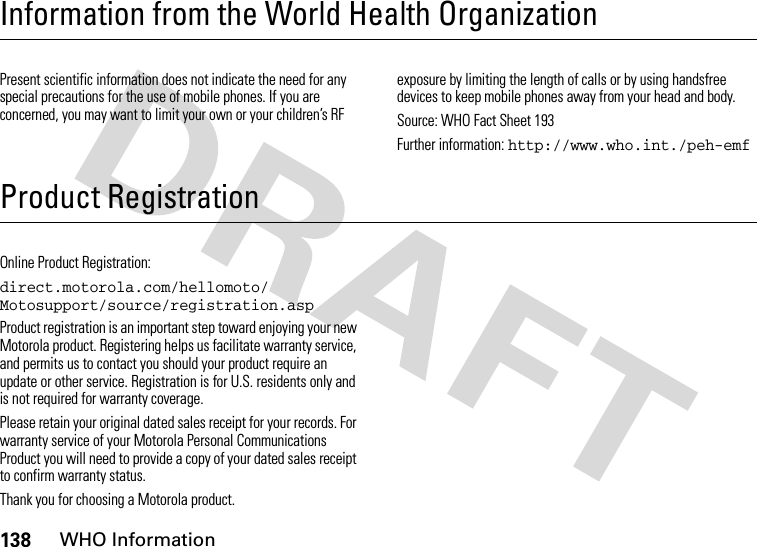
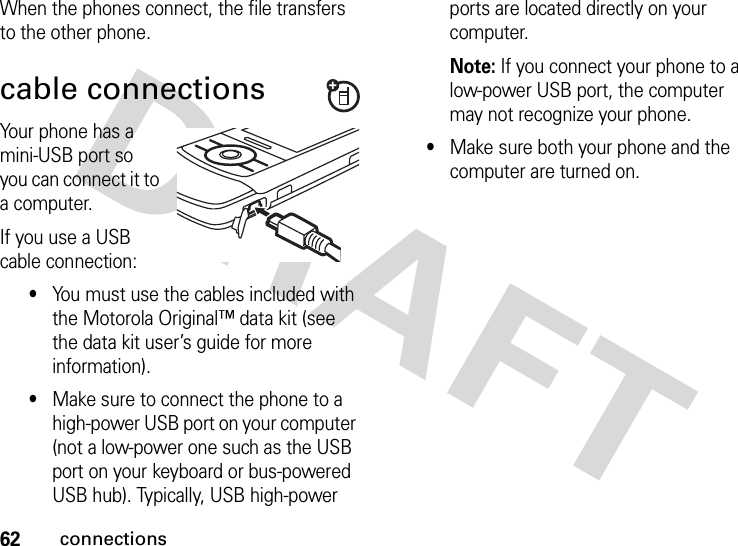
![61connections2Scroll to Contact List and press the center select key (s). 3Scroll to the entry you want to transfer and press the right soft key (+) (Options).4Scroll to Send Name Card and press the center select key (s) (OK).5Scroll to Bluetooth and press the center select key (s) (OK).Note: If your phone does not already have Bluetooth power turned on, it prompts you to turn it on.6Select [Look for Devices] and select the destination phone.7When prompted, enter the default PIN code 0000.When the phones connect, the entry transfers to the other phone. To transfer a file to another phone:Note: Make sure the phone receiving the entry has Bluetooth power on and is in Find Me mode. 1On your phone, select the file (such as a picture, video, or sound) you want to transfer and press the right soft key (+)(Options).2Scroll to Send and press the center select key (s) (OK).3Scroll to Bluetooth and press the center select key (s) (OK).Note: If your phone does not already have Bluetooth power turned on, it prompts you to turn it on.4Select [Look for Devices] and select the destination phone.5When prompted, enter the default PIN code 0000.](https://usermanual.wiki/Motorola-Mobility/T56HA1/User-Guide-777887-Page-62.png)
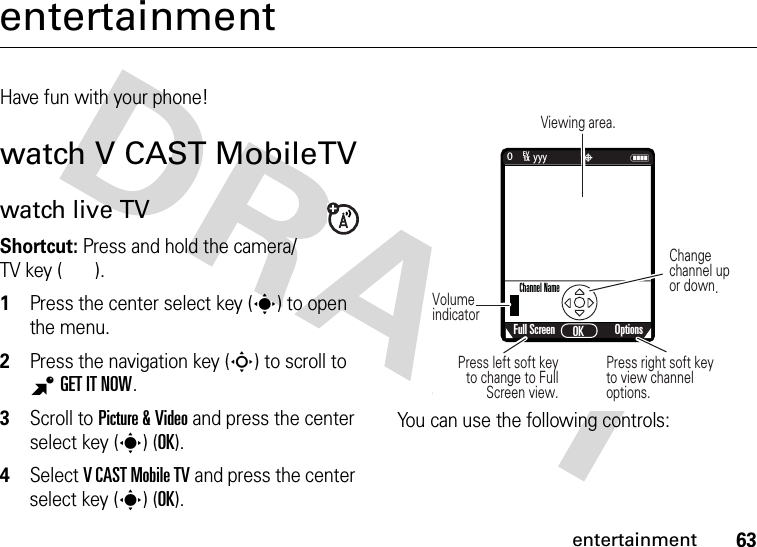
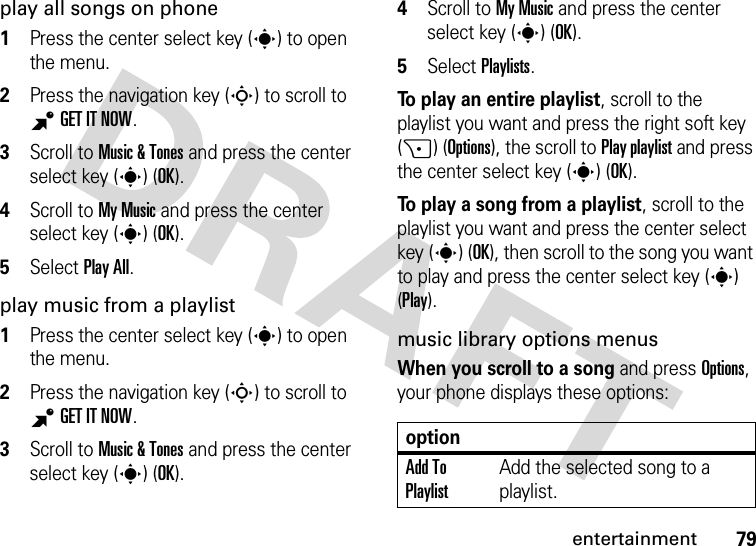
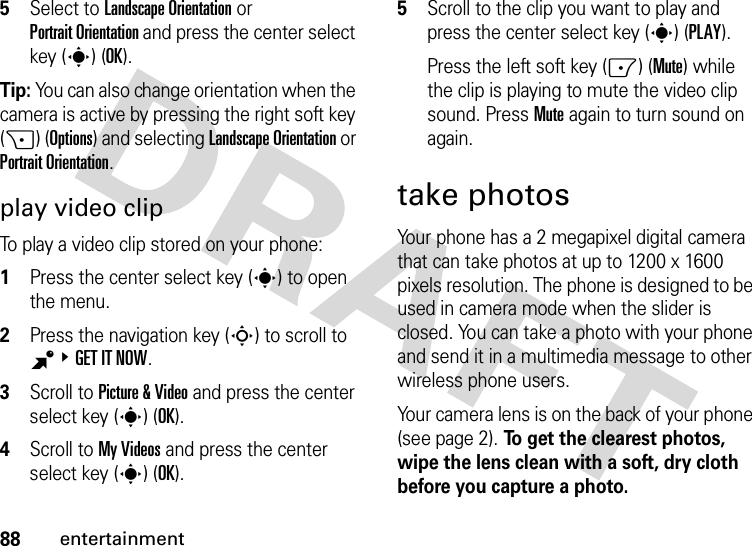
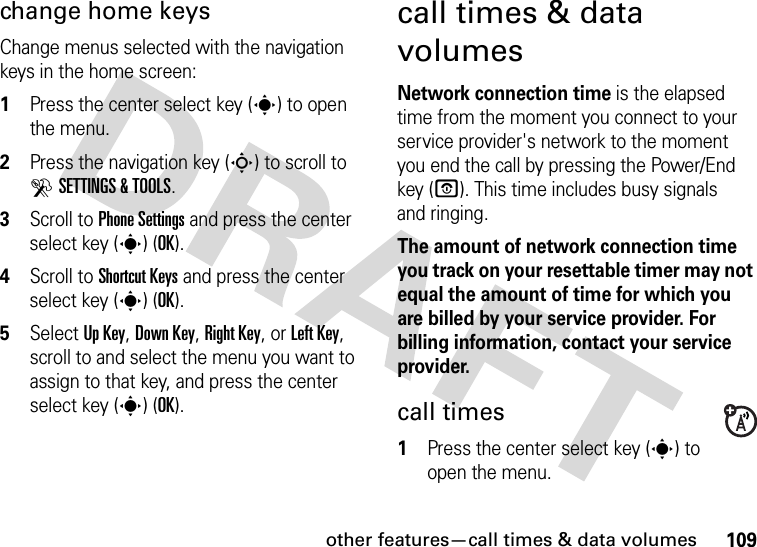
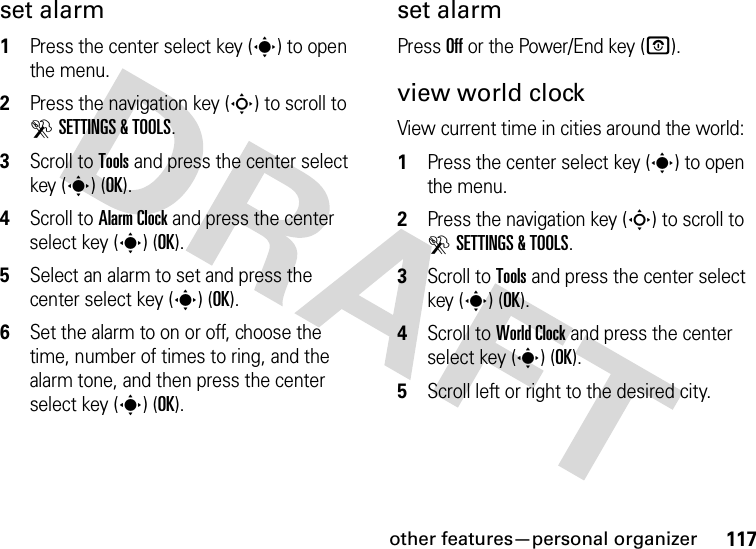
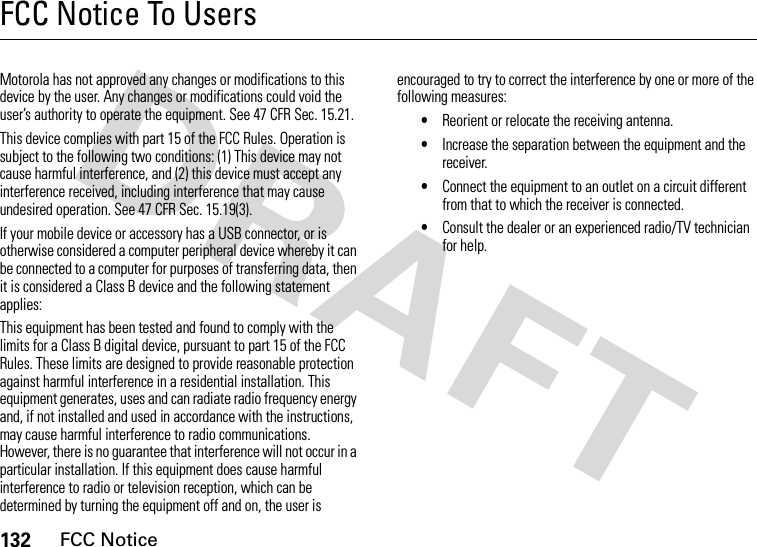
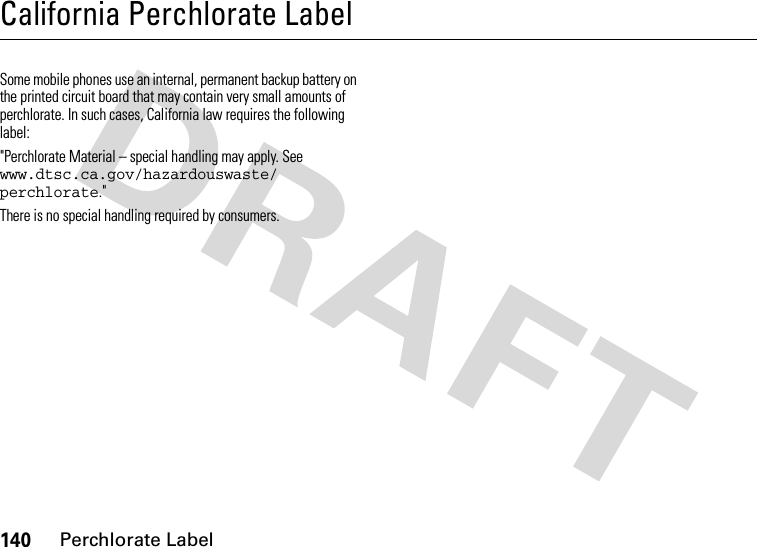
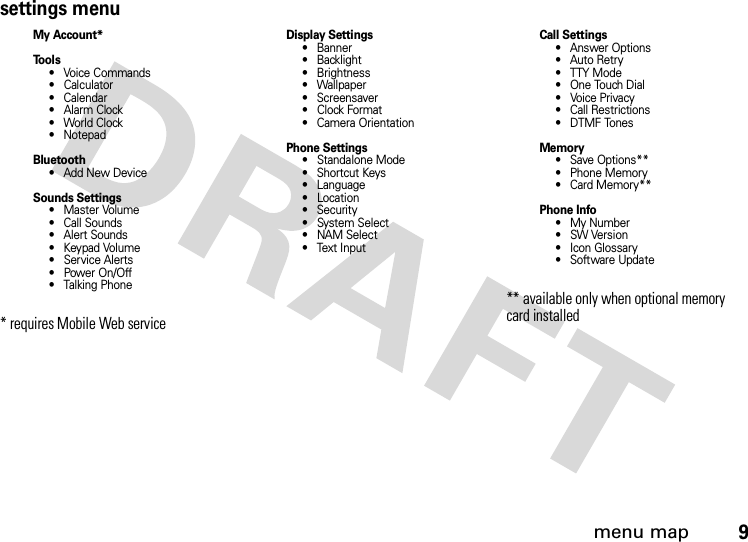
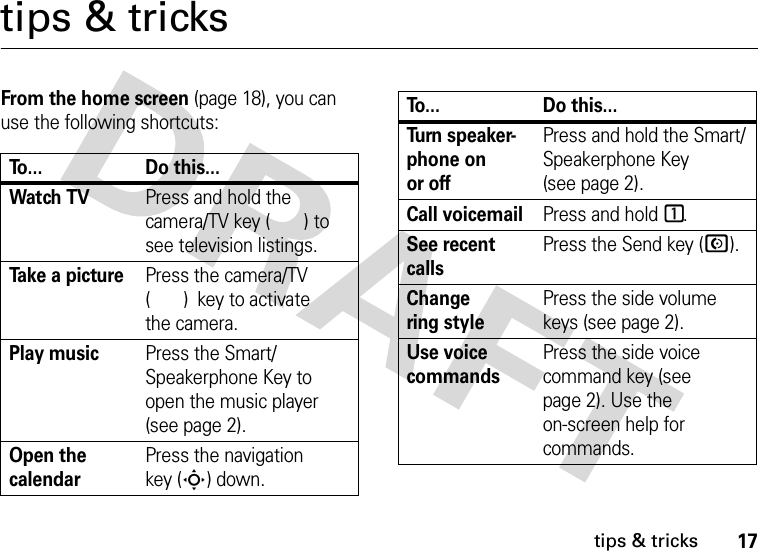
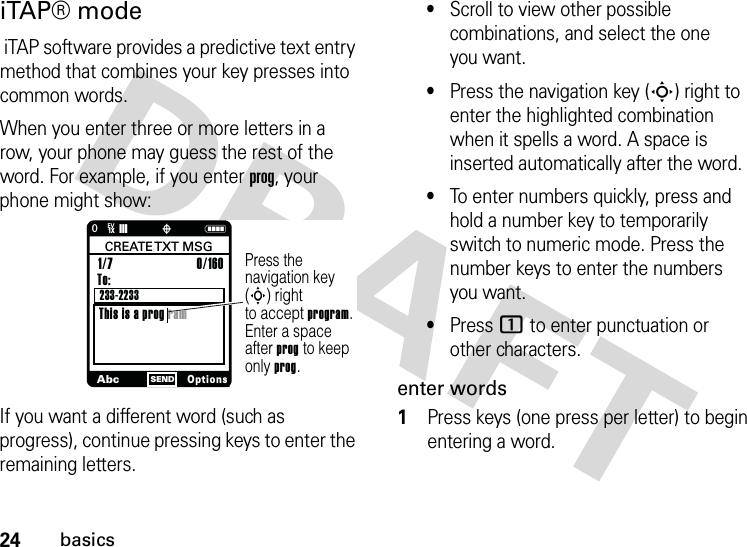
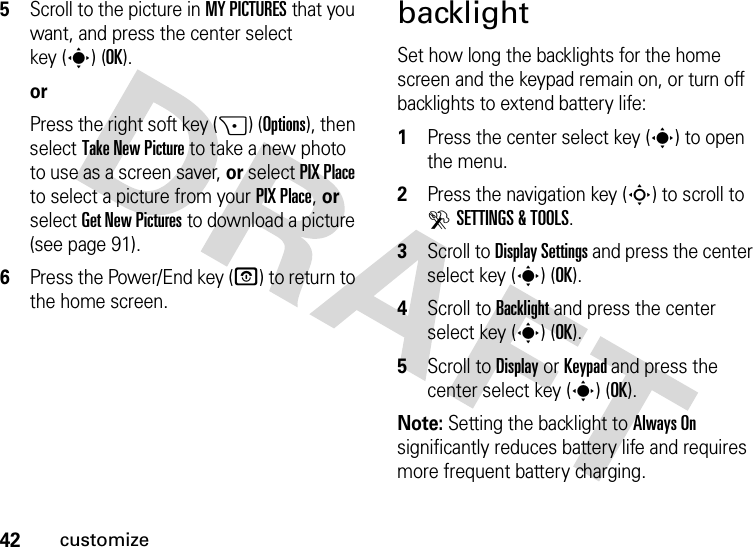
![65entertainment2Press the navigation key (S) to scroll to BGETITNOW.3Scroll to Picture & Video and press the center select key (s) (OK).4Scroll to V CAST Mobile TV and press the center select key (s) (OK).5[To Be Determined].Note: Occasionally when you pick a show to watch, you might see the message Program Blacked Out. This might happens based on market availability of the show, for example when a sporting event does not sell out and is not shown on TV.manage your subscriptionSelect a basic or premium package, press Submit and selectSubscribe, and then press Confirm to agree to the end user license agreement. 1Press the center select key (s) to open the menu.2Press the navigation key (S) to scroll to BGET IT NOW.3Scroll to Picture & Video and press the center select key (s) (OK).4Scroll to V CAST Mobile TV press the center select key (s) (OK).PROGRAM GUIDEPlay OptionsOKNP0yyyPress right soft key to view channel options.1XEV7:00pm 7:30pmCNNESPN](https://usermanual.wiki/Motorola-Mobility/T56HA1/User-Guide-777887-Page-66.png)
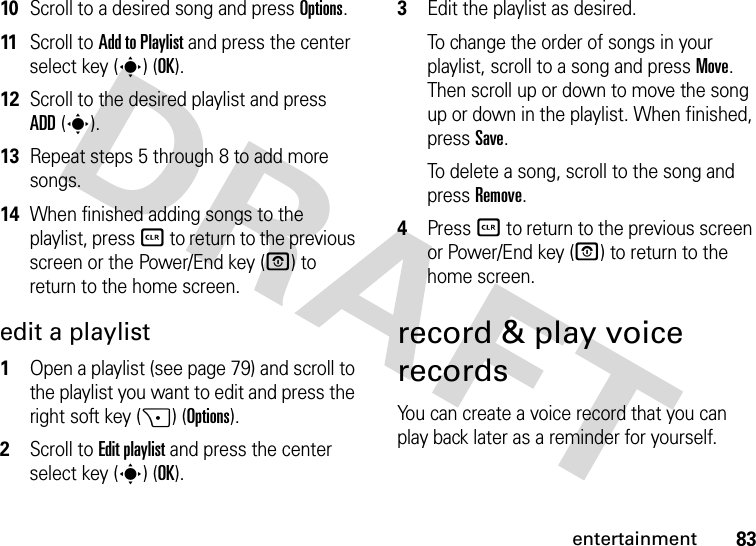
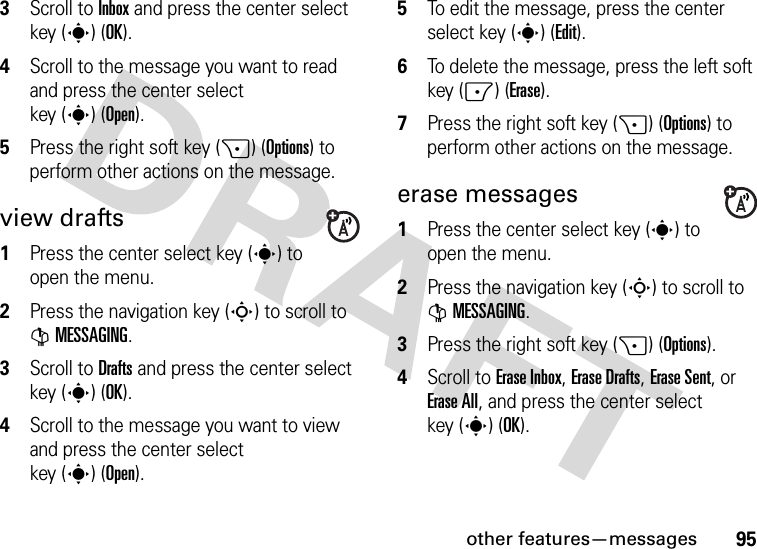
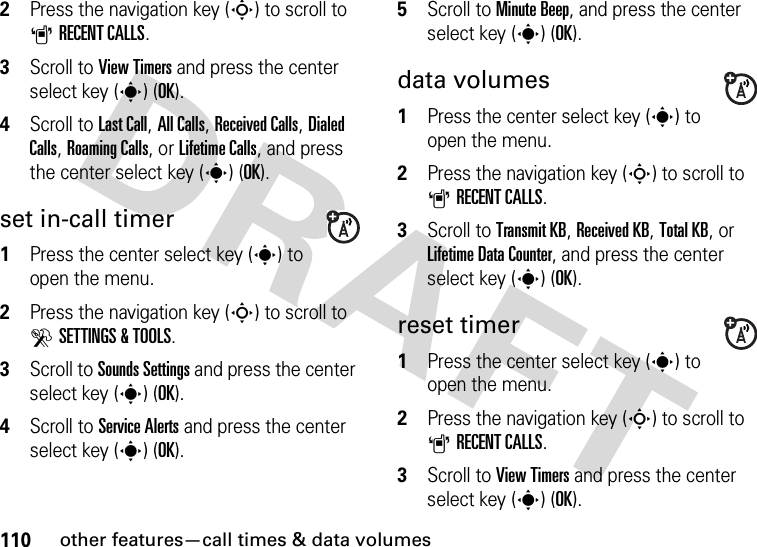
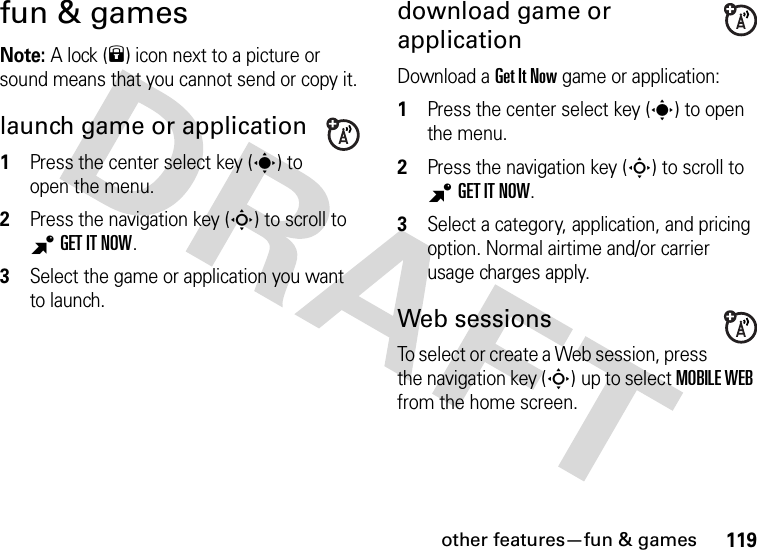
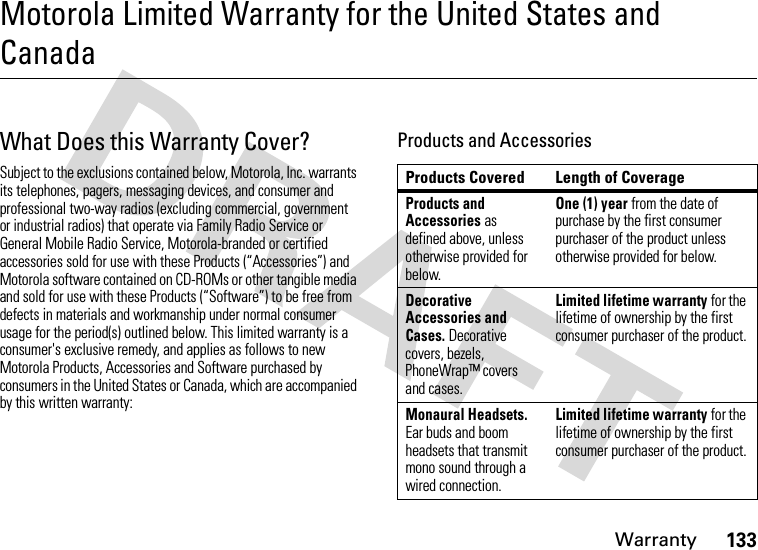
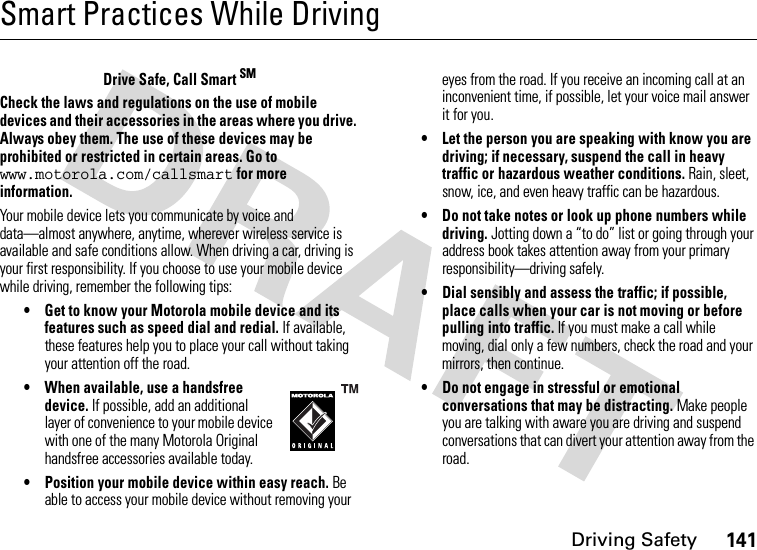
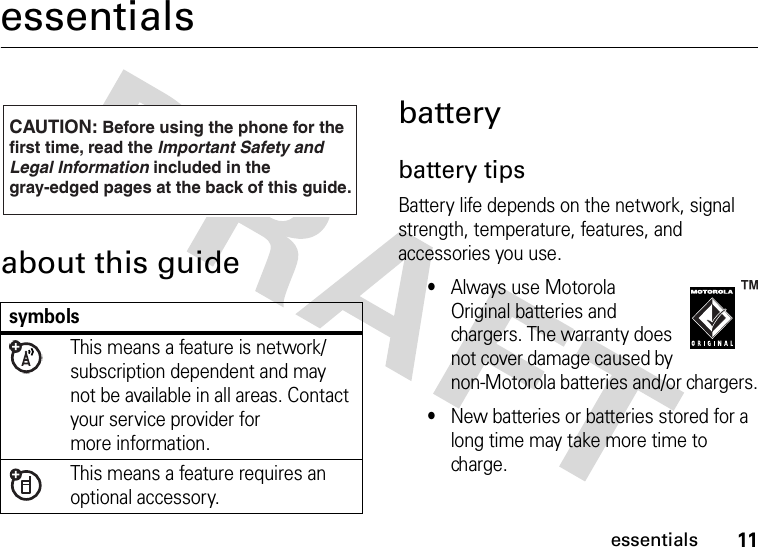
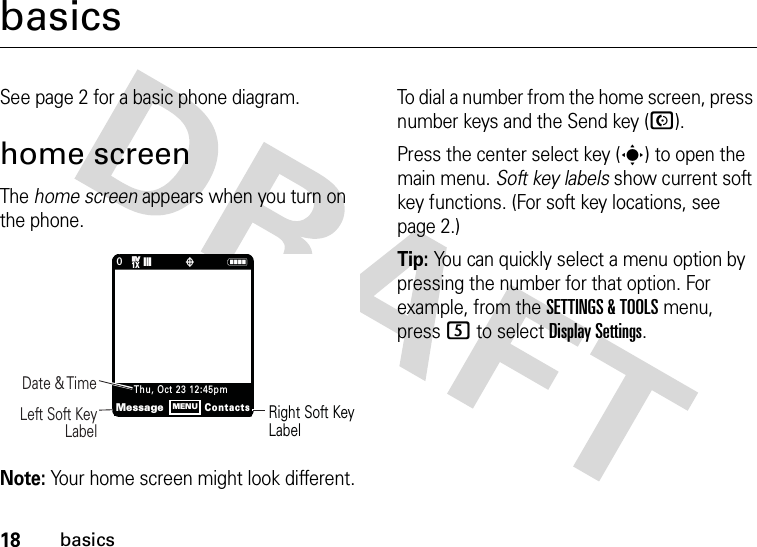
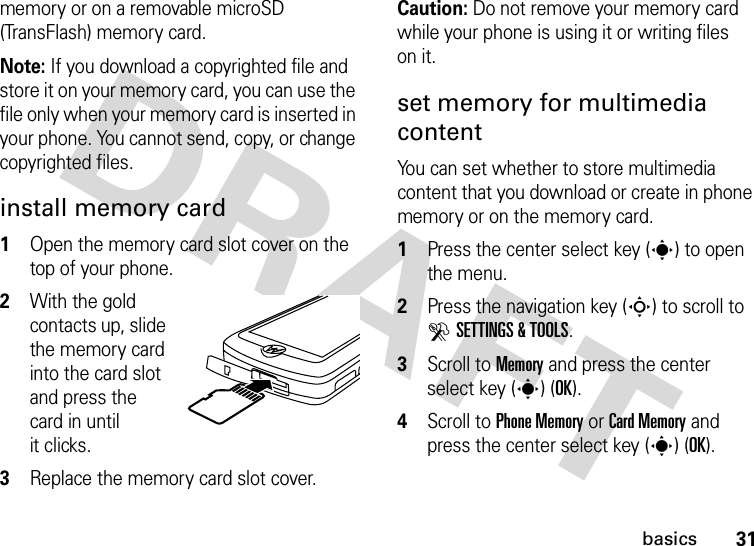
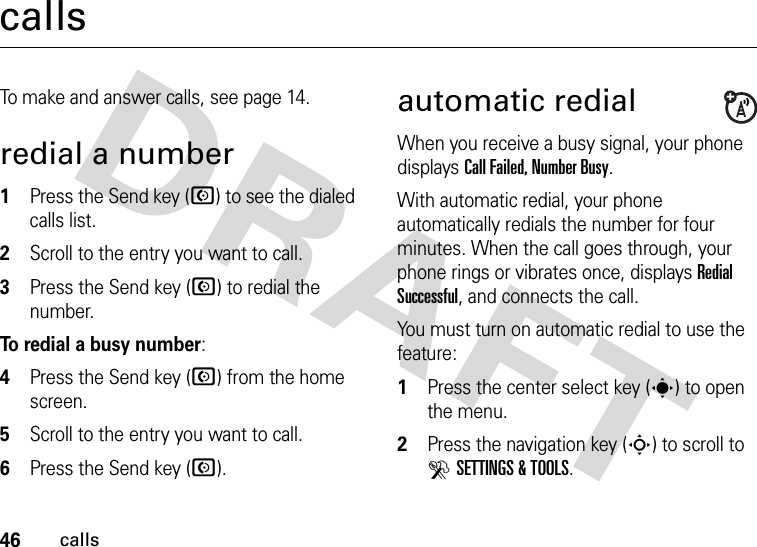
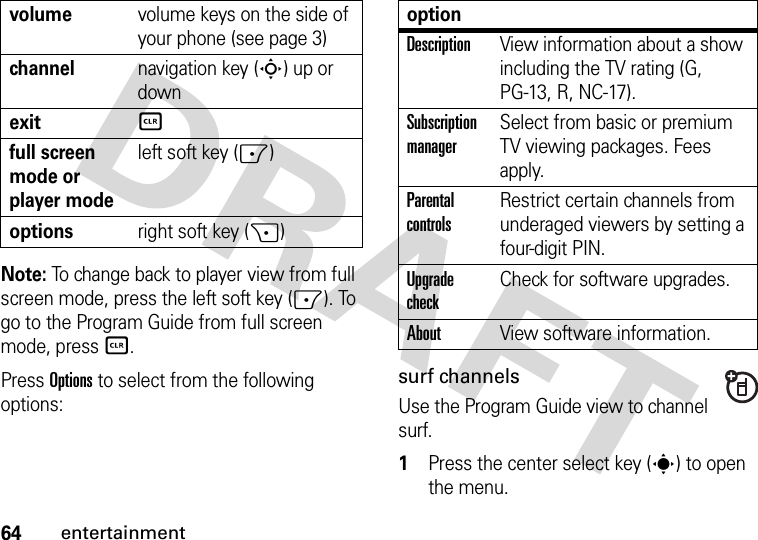
![66entertainment5[To Be Determined].Note: Normal airtime and/or carrier usage charges apply.restrict channel accessYou can stop certain channels from being viewed by what they are rated by the MPAA (such as NC-17 or R ratings). You can specify a PIN for these channels. 1Press the center select key (s) to open the menu.2Press the navigation key (S) to scroll to BGETITNOW.3Scroll to Picture & Video and press the center select key (s) (OK).4Scroll to V CAST Mobile TV press the center select key (s) (OK).5[To Be Determined].Note: If you forget your PIN, you must return to the place where you bought your phone for help.download V CAST videos 1Press the center select key (s) to open the menu.2Press the navigation key (S) to scroll to BGETITNOW.SUBSCRIPTION MANAGEROptionsOKHOME SEARCH HELPNP0yyyPress right soft key to view channel options.Return toMediaFLO screen.View helpinformation.1XEVBasic PackagePremium PackagesV CAST live! Basic You are currently subscribed to the following packages:](https://usermanual.wiki/Motorola-Mobility/T56HA1/User-Guide-777887-Page-67.png)