Motorola Mobility T5CK1 Single Mode CDMA Cellular Phone User Manual Exhibit 8 Preliminary Users Manual
Motorola Mobility LLC Single Mode CDMA Cellular Phone Exhibit 8 Preliminary Users Manual
UserManual.wiki
>
Motorola Mobility
>
T5CK1 User Manual
Exhibit 8 Preliminary Users Manual
Navigation menu
Upload a User Manual
Namespaces
Wiki Guide
HTML
PDF
Info
Views
User Manual
Discussion / Help
Navigation
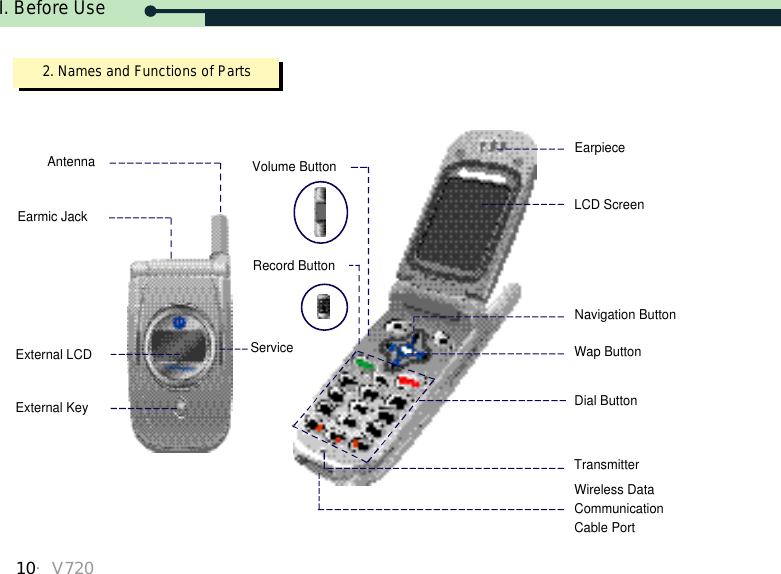
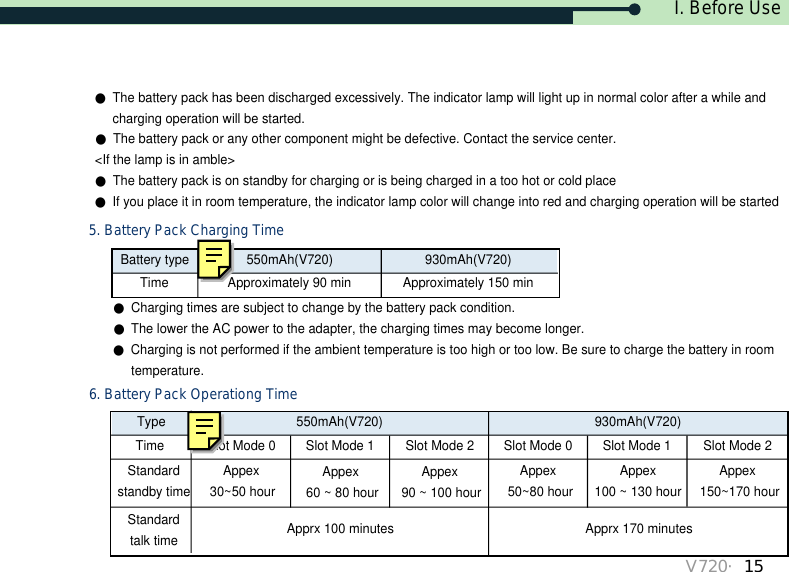
![I. Before UseV720・11●Makes a call●Displays the list of calling numbers●Switches on/off power, and ends the call●Ends the function and returns to the mainmenu●At standby mode :Left : UnansCall List Right : Phonebook Quick SearchUp : Download ManagerDown : Alarm Setting●At menu mode - Used to search for menua●Searches for list, or adjusts volume during the call ●Dial Button ? Enters figures and characters●International call speed dialing●Menu SerchEtiquette mode setup/releaseOne-touch lock setup/release●Moves to the top menu from the standby mode●Functions as the [Option] key at menu and Msg mode●Moves to Msg mode from the standbymode●Functions as the [Back] key at menu andMsg mode●Retrieves voice and short Msg●Connects a call when using the earmic.●Deletes characters and figuresPress : Deletes a character or a figure at a timePress and hold : Deletes all●Moves to upper menu or previous screen●Accesses WAP(See P.93)●Function as [OK] at menu mode](https://usermanual.wiki/Motorola-Mobility/T5CK1/User-Guide-257048-Page-11.png)

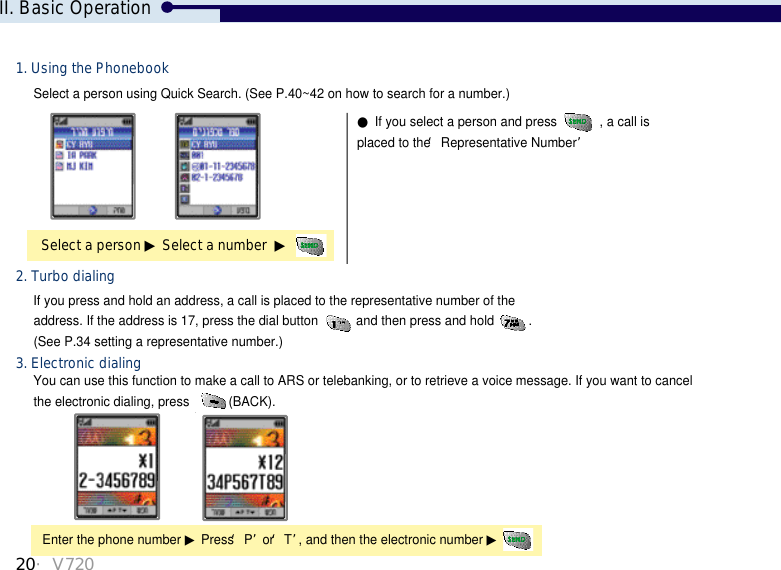
![V720・21KeyPTOperationYou should press or [Next] to send the number after ‘P’. The number after ‘T’ is send after a while.You can make a call to the emergency number even when the phone is locked.Enter the emergency number ▶[TopM.] ▶Select MENU ▶Select Lock/Secure, and then enter the Lock Code ▶Select Emergency ▶Select EmergencyNum1, 2 or 3 ▶Enter the number.4. Emergency dialing1. Saving Emergency NumberII. Basic Operation](https://usermanual.wiki/Motorola-Mobility/T5CK1/User-Guide-257048-Page-21.png)
![22・V720●Press and hold in idle mode to use voice dialing. The name must have been stored on the voice dialing list.●There can be a mistake in recognizing the voice.●You can’t use voice dialing if the phone is locked. Unlock the phone before using the voice dialing. (See P.69~70 on how to clear Lock.)[TopM.] ▶Select Shortcut ▶Voice Dialing ▶Select an optionYou can make a call by saying the stored name. If you have set the voice dialing function, it starts automaticallwhen you open the lid. 5. Voice dialingSay the name. II. Basic Operation](https://usermanual.wiki/Motorola-Mobility/T5CK1/User-Guide-257048-Page-22.png)
![V720・23Select Storing ▶Say the name (Twice) ▶Enter the number1. StoringIf you activate this option, ‘Voice Dialing’is running automatically. ●You can switch the phone to idle mode by pressing or .Select View List ▶The number is displayed.2. View List●You can hear the stored voice and view the number on the screen.●To view the next stored number, press [Next]. Select Auto Dialing ▶Select value3. Auto DialingII. Basic Operation](https://usermanual.wiki/Motorola-Mobility/T5CK1/User-Guide-257048-Page-23.png)
![24・V720If the earmic is connected, press and hold , , or the earmic button. If the lid is closed, press or the earmic button to receive a call. To finish the call, press or the earmic button.1. Using Earmic3. Receiving a CallOpen the lid to receive a call.●You can select the ringer style and answer mode (Ring/Vib, Graphic). (See P.47 for selecting ringer style / P.48 for selecting Ring/Vib/ P.67 for setting graphic)●If you have registered to the ‘Calling Line Identification Presentation’service,the caller number is displayed on the Main LCD and the Sub LCD.●You can download a graphic from GoNext, and change the display in ‘Set Graphic’in ‘Shortcut’. It may take time to display the graphic on the phonedepending on the downloaded graphic size. (See P.67 for setting the graphic.)If you select this option, all the contents stored in voice dialing list are deleted.●To delete an individual item, press [DEL] when the item to delete is displayed in ‘View List’. Select Delete All ▶Select value4. Delete AllII. Basic Operation](https://usermanual.wiki/Motorola-Mobility/T5CK1/User-Guide-257048-Page-24.png)
![V720・25[TopM.] ▶Menu ▶Phone Option ▶Call Answer ▶Select an answer mode2. Setting answer mode1. Open to Answer2. Auto AnswerYes : Opne the lid to answer the call.No : Open the lid, and press any key except the button to answer the call.If the lid is open or the earmic is connected, the call is automatically connected after the ringer tone for the designated time. If the lid is closed, you cannot use this Auto Answer function unless the earmic is connected. In case you cannot answer a call, you can connect the call to auto answering function. You can also use this function temporarily by pressing and holding .3. Using Auto AnsweringII. Basic Operation](https://usermanual.wiki/Motorola-Mobility/T5CK1/User-Guide-257048-Page-25.png)
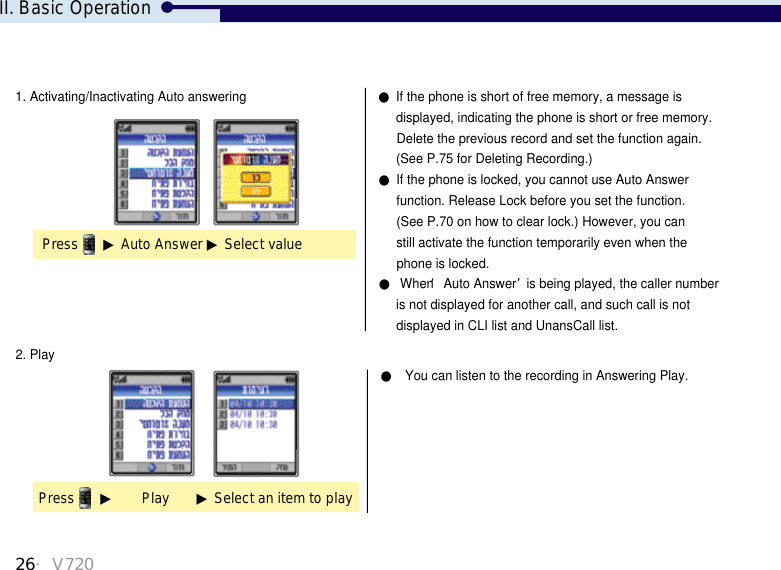
![V720・27●Stop recording : [END]●You can listen to the recorded ment in Answering Play.●To delete the recorded ment, press [DEL] in Answering Play. You cannot delete the default mentthough. 3. Answer Ment Select4. Answer Ment SelectPress ▶Answer Ment Sel ▶Select a mentPress ▶Answering Rec. ▶Record a ment Default Ment : This ment is stored in the phone in default.User Rec. Ment : You can record your own ment.II. Basic Operation](https://usermanual.wiki/Motorola-Mobility/T5CK1/User-Guide-257048-Page-27.png)
![4. Unanswered CallIf you missed a call, it is displayed on the screen as below.●If you have registered to the ‘Calling Number Identification Presentation’service, press [OK] to display the UnansCall List. If the lid is closed, press to view the UnansCall List on the Sub LCD. (See P.43 for viewing UnansCall List.) If the number is in CallRestrict, the message ‘No Caller Information’is displayed.●Press [BACK], to return to idle mode. II. Basic Operation28・V720](https://usermanual.wiki/Motorola-Mobility/T5CK1/User-Guide-257048-Page-28.png)
![IV. Phone Book1. Saving Phone Number1. Saving phone number in the number2. Saving phone number in the idle Mode[TopM.] ▶Select Save Phone Number ▶Select the item ▶Type the content ▶[DONE]Enter phone number ▶[STO] ▶Select an icon ▶Select the additional item ▶[DONE] after entering the content●You can save up to 9 items. You can save other items once the content is saved for an item. Press [DONE] to finish saving.Name Location Cell Phone house Office E-mail Other GroupV720・33](https://usermanual.wiki/Motorola-Mobility/T5CK1/User-Guide-257048-Page-33.png)
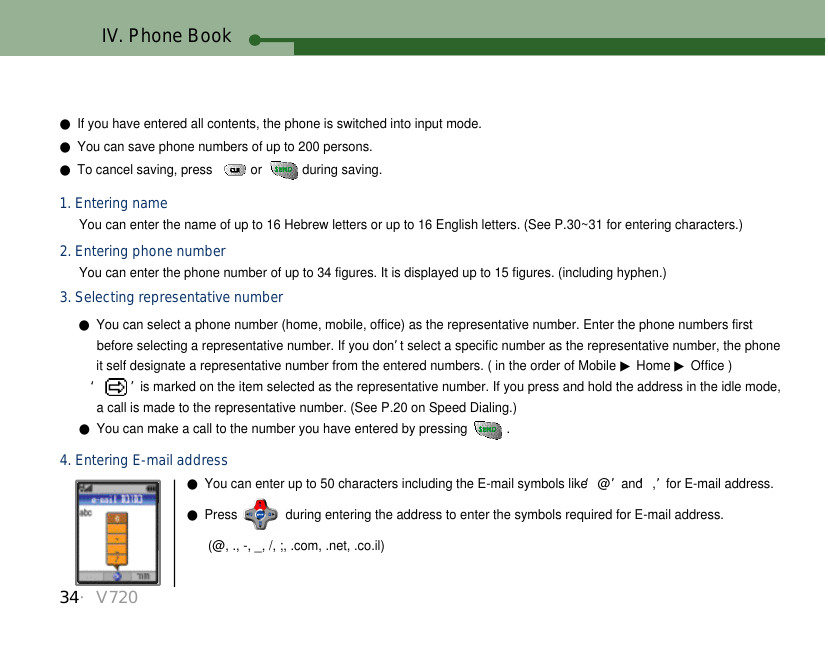
![V720・35IV. Phone BookSelect the mobile number ▶[Option] ▶Select Pop-up menu value ▶Enter the receiver number●See P.86~87 on Sending a message.Select the E-mail address ▶[Option] ▶Select Pop-up menu value ▶Enter the receiver address[When selecting the mobile number][When selecting the E-mail address]●After sending a message or a mail, the phone returns to the phone number saving mode.●Press [DONE] to finish saving.5. Using [Option] while saving phone numberIf you enter a mobile number of an E-mail address, [Option] is displayed on the screen. If you press [Option],you can send a message or a mail to the mobile number or the E-mail address.](https://usermanual.wiki/Motorola-Mobility/T5CK1/User-Guide-257048-Page-35.png)
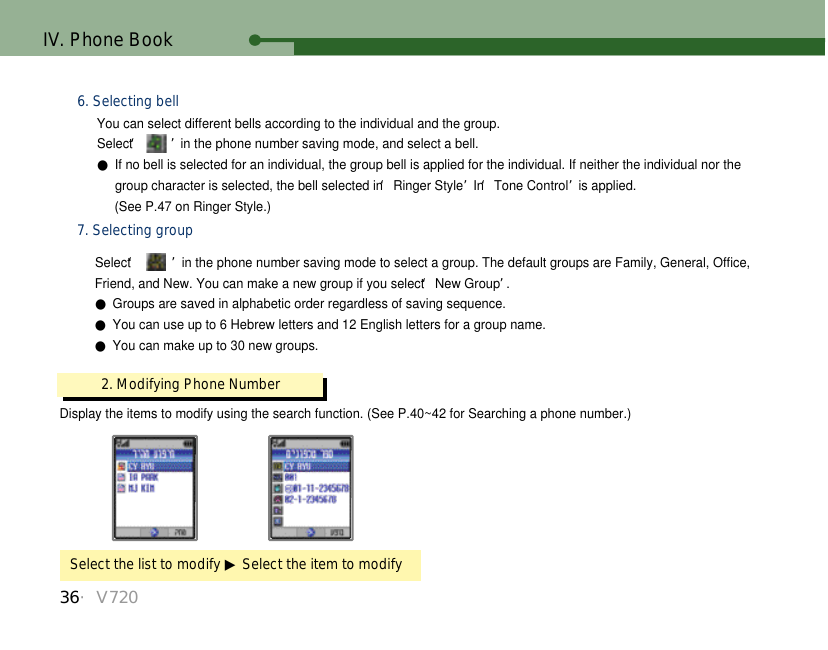
![V720・37IV. Phone Book1. Modifying phone number●See ‘Editing Character’(See P.31)Select a phone number list to modify ▶Modify the number ▶[DONE] 2. Modifying name and E-mail addressSelect the item (Name/E-mail) to modify ▶Modify contents ▶[DONE] 3. Modifying group2. Changing group name 1. Changing the group in an entrySelect an entry, using the phone number search function, of which group name is to be changed. (See P.40~42 for searching for phone number.)Select a group to change using Recall by Group’. (See P.41 for Recall by Group.)Select the group to change ▶[Option] ▶Select the value to change name ▶Change the name‘ ’Select a group ▶Select a group to save ▶[DONE] ●Press to delete the existing name before entering a new group name.●You can use up to 6 Hebrew letters and 12 English letters.](https://usermanual.wiki/Motorola-Mobility/T5CK1/User-Guide-257048-Page-37.png)
![38・V720IV. Phone Book3. Deleting Phone Number[TopM.] ▶Select Menu ▶Select Lock/Secure and enter the password ▶Select Clear List ▶Select PhoneBook ▶Select the valueUse the phone number search function to select the entry to delete. (See P.40~42 for searching for phone number.)1. Deleting Entire PhoneBookSelect the list to delete, and then select [DEL] ▶Select the value2. Deleting an entry●You cannot enter the same group name with the existing group. ●All the group names in the entries in the changed group list are automatically changed.●You cannot change the group name ‘General’.](https://usermanual.wiki/Motorola-Mobility/T5CK1/User-Guide-257048-Page-38.png)
![V720・39IV. Phone Book[DEL] ▶Select the value4. Deleting group●If you select a group, all information in the group is moved to theGeneral group. The ‘General’group is not deleted.Select the entry to delete with the search function. (See P.40~42 for Searching Phone Number.)Delete the group to delete. (See P.41 for Recall by Group)Select the entry ▶Select the item to delete ▶Press to delete ▶[DONE]3. Deleting individual item](https://usermanual.wiki/Motorola-Mobility/T5CK1/User-Guide-257048-Page-39.png)
![40・V720IV. Phone BookSelect Quick Search ▶Select the entry ▶Display information1. Quick SearchThe names are listed in alphabetic order on the PhoneBook.4. Searching for phone number[TopM.] ▶Select Menu ▶PhoneBook ▶Select a search method●If you type the first character of the name in ‘Quick Search’and ‘Recall by Group’, the names and group namesstarting with the character are displayed. ●Any entry without name is placed in the bottom of the list. ●Press in the idle mode to move directly to ‘Quick Search’.](https://usermanual.wiki/Motorola-Mobility/T5CK1/User-Guide-257048-Page-40.png)
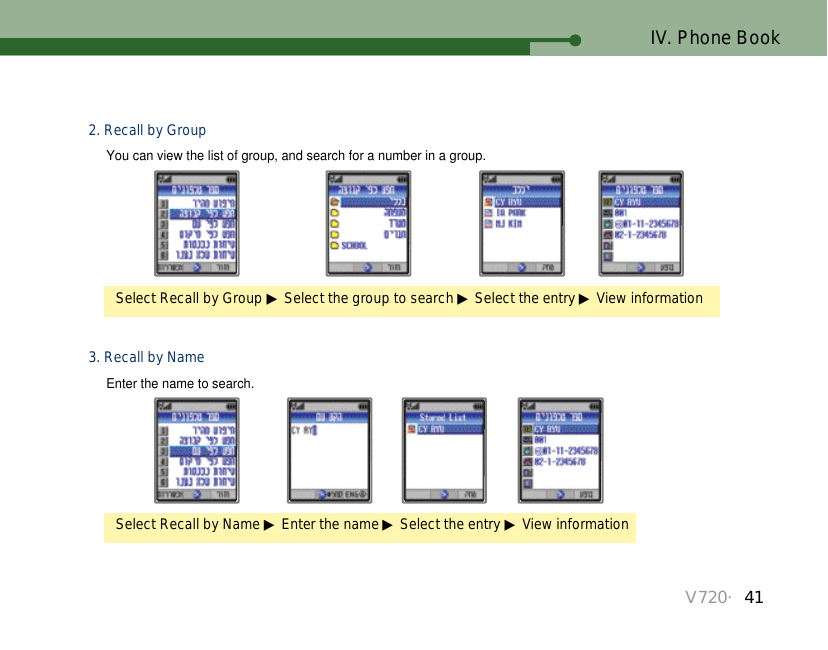
![42・V720IV. Phone BookSelect Recall by Address ▶Enter the address ▶View information4. Recall by addressYou can select address which you ward to find with input address.5. Viewing Phone Book information[TopM.] ▶Select Menu ▶Phone Book ▶Select a menu●To return to the previous screen, press [Back] and .](https://usermanual.wiki/Motorola-Mobility/T5CK1/User-Guide-257048-Page-42.png)
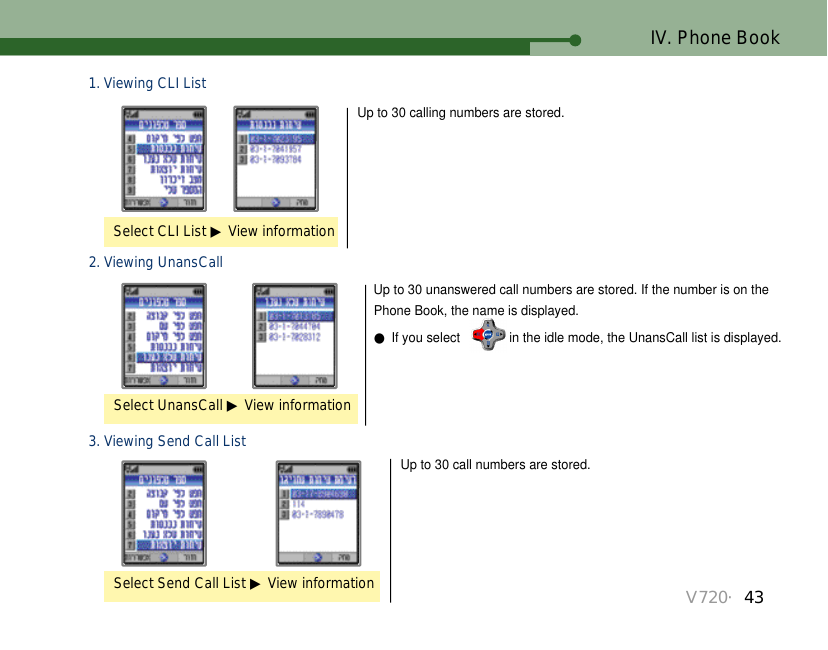
![44・V720IV. Phone BookSelect the item to delete, and then press [DEL].4. Deleting CLI List/ UnansCall / Send Call list1. Deleting entire list2. Deleting individual item[TopM.] ▶Select Menu ▶Select Lock/Secure, and then, enter the password. ▶Select Clear List ▶Select the list to clear ▶Select the value5. Viewing CLI List / UnansCall / Send Call List on the Sub LCDPress twice ▶Search with , and the press ▶ ▶ View call details●To make a call to the searched phone number, select ‘Send’and press .It is available only when you use the earmic.](https://usermanual.wiki/Motorola-Mobility/T5CK1/User-Guide-257048-Page-44.png)
![V720・471. Selecting Ringer [TopM.] ▶Select Menu ▶Tone Control ▶Ringer Style ▶Select the ringer type ▶Select a ringer You can select the ringer by downloading various melodies from the service provider in addition to the defaultmelodies. ●Ringer Tone : 1 ~ 10●Melody : 1 ~ 20●Natural Sound : 1 ~ 4●Voice Bell : 1 ~ 4V. Tone Control](https://usermanual.wiki/Motorola-Mobility/T5CK1/User-Guide-257048-Page-47.png)
![V. Tone Control●Ring, Vib (‘ ’is displayed on the LCD), VbThenBell (‘ ’is displayed on the LCD), LampYou can change the tone from ring mode to vibration or lamp.1. Setting etiquette modePress and hold 1. Setting●A message ‘Etiquette mode is on’is displayed, and then, with vibration, the LCD is switched into idle mode. Press and hold 2. Releasing●A message ‘Etiquette mode is off’is displayed, and then, the LCD is switched into idle mode.2. Ring / Vibration[TopM.] ▶Select Menu ▶Tone Control ▶Ring/Vb ▶Select a modeYou can select ring or vibration for incoming call or message.48・V720](https://usermanual.wiki/Motorola-Mobility/T5CK1/User-Guide-257048-Page-48.png)
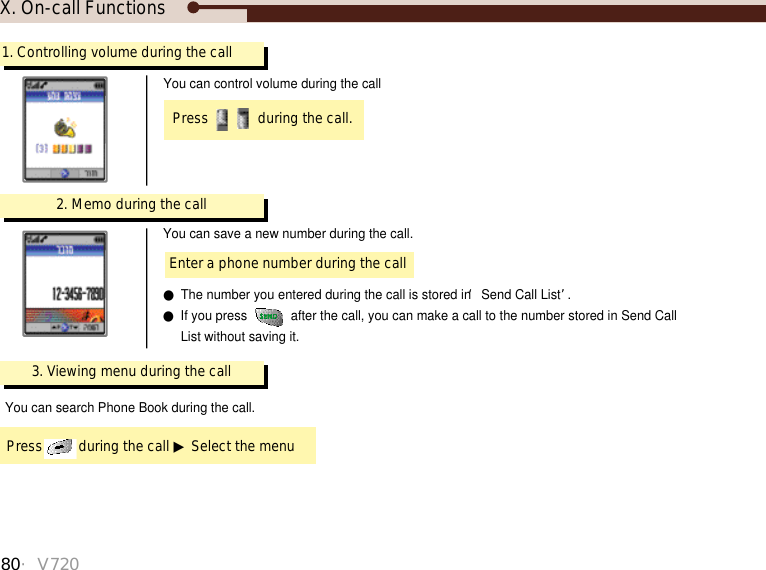
![V720・49V. Tone ControlIf the etiquette mode is on ●Ringer : Vibration with lamp●Key tone : Mute●Alarm : Vibration with lamp●Connect tone : Mute●1 Min Timer : Mute●Reminder tone : Vibration with lamp(For ‘Reminder tone’, if ‘Alarm Off’is set, the lamp blinks. See P.88 for details.)3. Ring Volume[TopM.] ▶Select Menu ▶Tone Control ▶Ring Volume ▶Set the volumeYou can control ring volume. (5 Steps)●Control the volume with](https://usermanual.wiki/Motorola-Mobility/T5CK1/User-Guide-257048-Page-49.png)
![50・V720V. Tone Control4. Ringer Option[TopM.] ▶Select Menu ▶Tone Control ▶Ringer Option ▶Select an optionYou can select the ringer option. To Set Volume : As set in Ring Volume.Low to High : Ring volume increases from Stage 1 to Stage 5, and keeps Stage 5.High to Low : Ring volume decreases from Stage 5 to Stage 1, and keeps Stage 1.5. Connect Tone[TopM.] ▶Select Menu ▶Tone Control ▶Connect Tone ▶Select a valueThe connect tone informs you that the call you have placed is being connected.](https://usermanual.wiki/Motorola-Mobility/T5CK1/User-Guide-257048-Page-50.png)
![V720・51V. Tone Control6. Sound Effect[TopM.] ▶Select Menu ▶Tone Control ▶Sound Effect ▶Select a valueYou can select the sound effect for Power On/Off.](https://usermanual.wiki/Motorola-Mobility/T5CK1/User-Guide-257048-Page-51.png)
![V720・53VI. Alarm and Timer1. Alarm[TopM.] ▶Select Menu ▶Alarm/Timer ▶AlarmSelect Alarm Setting ▶Select an alarm setting option1. Alarm setting●You can display the ‘Alarm Setting’menu by pressing in the idle mode.●To turn off alarm, open/close the lid, or press a keypad. ●‘ ’is displayed on the LCD if alarm is set.●10 Min later / 30 Min later / 1 Hour later / 3 Hour laterSelect Choose Time ▶select time1. Choose TimeYou can set the alarm to go off at some time later (as you require), instead of a certain time.](https://usermanual.wiki/Motorola-Mobility/T5CK1/User-Guide-257048-Page-53.png)
![54・V720VI. Alarm and Timer●Alarm Cycle Once : Alarm is on once at the designated timeEveryday : Alarm is on at the designated time every daySelect Set Time ▶Enter time ▶Select cycle2. Set TimeYou can set the time and alarm cycle.Select Setting Bell ▶Select Ringer Style ▶Select a ringer3. Setting BellYou can select a ring for alarm.- Entering time ?●Enter Hour ▶[OK] ▶Enter Min ▶[OK] ▶am/pm●To move to the next field, press . ●If you enter Hour and Min with the keypad, the cursor automatically moves to the next field.●If you don’t select a ringer, the alarm is on with the default alarm tone. (Default tone : Bell 1)●If the phone is set to ‘Vibration’or ‘Etiquette mode’, the alarm is on with vibration.●Alarm volume increases regardless of the ringer option. (Increases from Stage 1 to Stage 5. See P.50 forRinger Option.)](https://usermanual.wiki/Motorola-Mobility/T5CK1/User-Guide-257048-Page-54.png)
![V720・55Select Alarm Off ▶Select the alarm to clear ▶Select value2. Alarm OffYou can clear alarm as below. Clearing Choose Time : Clears ‘Choose Time’Clearing Set Time : Clears ‘Set Time’●‘ ’disappears from LCD if the alarm is off. 2. World Time[TopM.] ▶Select Menu ▶Alarm/Timer ▶World Time ▶Search with ●To return to the previous LCD display, press [Back] or . VI. Alarm and Timer●Seoul, Tokyo ●Guam, Sydney ●Samoa ●Honolulu ●Anchorage ●San Francisco ●Seattle ●LA ●Denver, Phoenix ●Mexico City ●Chicago, Dallas ●Detroit, Miami ●Washington ●Montreal, NewYork ●Boston ●Rio de Janeiro ●Lisbon, Madrid ●London ●Paris, Amsterdam ●Rome, Berlin, Vin●Athens, Helsinki ●Jerusalem ●Moscow, Baghdad ●Tehran, Abu Dhabi](https://usermanual.wiki/Motorola-Mobility/T5CK1/User-Guide-257048-Page-55.png)
![56・V7203. Timer[TopM.] ▶Select Menu ▶Alarm/Timer ▶Select Timer ▶Select an option1. IndividualShows the time taken for the latest call.2. CumulativeShows the total time of the calls you have made from service start to now. You cannot reset the Cumulative time.(See P71). 3. Roam Timer Shows the time you have made a call using other service Provider.VI. Alarm and Timer●Athens, Helsinki ●Jerusalem ●Moscow, Baghdad ●Tehran, Abu Dhabi●Calcutta ●Bangkok, Jakarta ●Singapore ●Beijing, Hong Kong ●Taipei](https://usermanual.wiki/Motorola-Mobility/T5CK1/User-Guide-257048-Page-56.png)
![V720・57[Top Menu] ▶Select Menu ▶Alarm/Timer ▶Select Reset Timer ▶Reset 4. Reset TimerShows the accumulative time after the reset. ‘ Resetting Reset Timer’When the Reset Timer is displayed ▶[Reset] ▶Select value●The call time displayed on LCD does not match to the charged call time.VI. Alarm and TimerYou can check the call timer during a call. The phone gives you alarm at 10 seconds prior to every minute. 4. 1 Min Timer[TopM.] ▶Select Menu ▶Alarm/Timer ▶1 Min Timer ▶Select value](https://usermanual.wiki/Motorola-Mobility/T5CK1/User-Guide-257048-Page-57.png)
![V720・59VII. PIMSIf you select schedules, the alarm is on the designated day and displays the content. 1. Schedule[TopM.] ▶Select Menu ▶PIMS ▶ScheduleSelect Enter Schedule ▶Enter date ▶Enter time ▶Select alarm time ▶Enter content1. Entering Schedule●When entering date, switch input mode with . The input mode changes ‘Day ▶Month ▶Year’. Press at each mode to enter date, month and year.●You can enter numbers of schedules in a day.●You can save up to 20 schedules. ●You can enter up to 96 Hebrew letters and up to 96 English letters for content.](https://usermanual.wiki/Motorola-Mobility/T5CK1/User-Guide-257048-Page-59.png)
![60・V720Select Check Schedule ▶Select the date ▶View content2. Checking Schedule●The next scheduled date is highlighted, and other scheduled dates are outlined. ●If numbers of schedules are stored on a day, select the day and display the schedule list. ●When alarm is on, press or [OK] to return to the initial screen. 3. Deleting Schedule1. Deleting checked scheduleWhen a schedule is displayed, press [DEL]. 2. Deleting entire schedule [TopM.] ▶Select Menu ▶Select Lock / Secure and enter the password ▶Clear List ▶Schedule ▶Select a valueVII. PIMS](https://usermanual.wiki/Motorola-Mobility/T5CK1/User-Guide-257048-Page-60.png)
![V720・61VII. PIMSYou can store the to do list on the phone.2. To do list[TopM.] ▶Select Menu ▶PIMS ▶To do listSelect an event ▶Enter content1. Entering To do list●You can save up to 20 events.●You can use up to 96 Hebrew letters or 96 English letters for an event.●‘ ’is displayed on the event.Select the event to display ▶Display the event2. Checking To do list●If you press [End] after checking the event, ‘ ’is displayed, indicating that the event is completed. ●To delete ‘ ’, press [UNLOC] when the event is displayed.](https://usermanual.wiki/Motorola-Mobility/T5CK1/User-Guide-257048-Page-61.png)
![62・V720VII. PIMS3. Deleting To do list1. Deleting the checked event2. Deleting allPress [DEL] when an event is displayed.[TopM.] ▶Select Menu ▶Select Lock/Secure and enter password ▶Clear List ▶To Do List▶Select a value.You can view the calendar.3. Calendar[TopM.] ▶Select Menu ▶PIMS ▶Calendar ▶Search Date](https://usermanual.wiki/Motorola-Mobility/T5CK1/User-Guide-257048-Page-62.png)
![VIII. Phone Option1. LCD Environment1. Selecting backlitYou can set the time for LCD backlit onafter the lid is open.You can set the time for keypad backlit on. 1. Selecting LCD backlitSelect LCD backlit ▶Select a value2. Selecting Key backlitSelect Keypad backlit ▶Select a value[TopM.] ▶Select Menu ▶Phone Option ▶Light Select ▶Select a backlitV720・65](https://usermanual.wiki/Motorola-Mobility/T5CK1/User-Guide-257048-Page-65.png)
![66・V720VIII. Phone Option[TopM.] ▶Select Menu ▶Phone Option ▶Contrast Ctrl ▶Select an LCD ▶Adjust the contrast3. Controlling ContrastYou can adjust the luminosity of screen.[TopM.] ▶Select Menu ▶Phone Option ▶Change Banner ▶Enter a new banner ▶Display on the LCD in idle mode2. Changing banner●You can enter up to 18 Hebrew Korean letters or 18 English letters.●If you don’t change the banner, the ‘MOTOROLA’logo is displayed.](https://usermanual.wiki/Motorola-Mobility/T5CK1/User-Guide-257048-Page-66.png)
![V720・67VIII. Phone Option[TopM.] ▶Select Shortcut ▶Graphic Mode ▶Select a screen ▶Select a graphic4. Setting GraphicThis is the function to let the user change graphic which appears according to the condition of phone.1. Changing menu background colorYou can select the color for LCD screen.●Light / DarkSelect Menu BG Color ▶Select a color2. Deleting Graphic Select a downloaded graphic and press [DEL].](https://usermanual.wiki/Motorola-Mobility/T5CK1/User-Guide-257048-Page-67.png)
![68・V720VIII. Phone Option[TopM.] ▶Select Menu ▶Phone Option ▶Service Light ▶Select value5. Service lightYou can view the service status in color in idle mode.LightPhone statusBlueavailableRedunavailableCall status (always displayed)SpectrumIncoming callPurpleCall is connectedIdle mode (Service light is set)[TopM.] ▶Select Menu ▶Phone Option ▶ChangeLanguage ▶Select a language6. LanguageYou can select the language to be displayed on the phone.●Hebrew / English](https://usermanual.wiki/Motorola-Mobility/T5CK1/User-Guide-257048-Page-68.png)
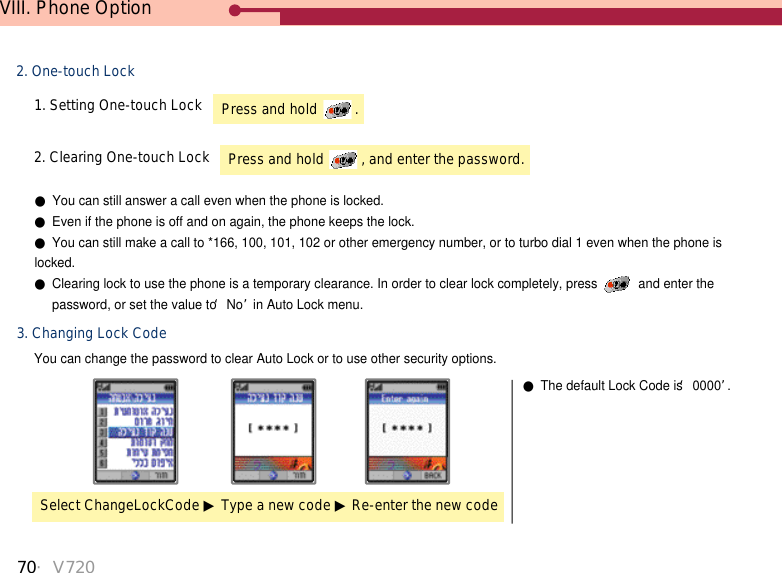
![V720・69VIII. Phone Option2. Phone Environment (Security)[TopM.] ▶Select Menu ▶Select Lock/Secure and enter the password ▶Select a sub menu1. Auto LockYou can lock the phone so that it is not used by others.1. Setting Auto LockAuto Lock ▶Select a value2. Clearing Auto LockAuto Lock ▶Select a value](https://usermanual.wiki/Motorola-Mobility/T5CK1/User-Guide-257048-Page-69.png)
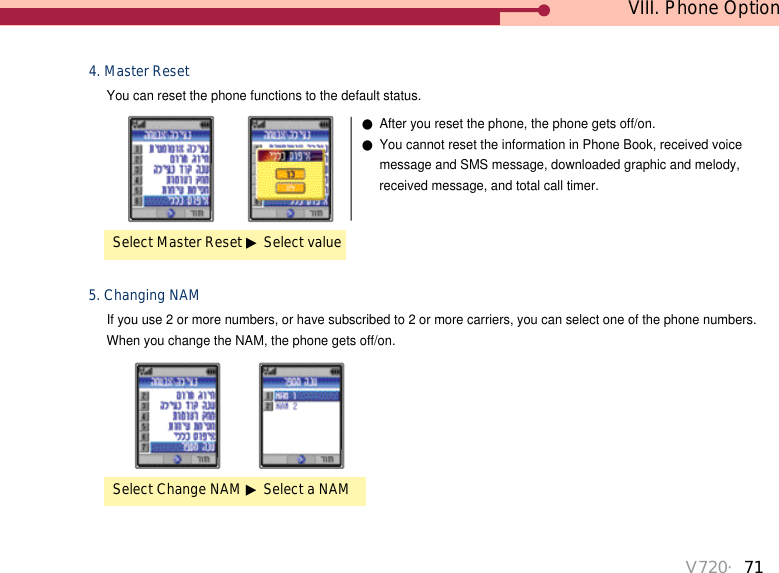
![72・V720VIII. Phone Option6. S/W VersionYou can view the S/W version of the phone. Select S/W Version●Press [OK] or to return to the previous screen.](https://usermanual.wiki/Motorola-Mobility/T5CK1/User-Guide-257048-Page-72.png)
![1. Calculator[TopM.] ▶Shortcut ▶Calculator ▶Enter figures ▶Enter operator with ▶Enter figures ▶Press or to view the result ●Press to reset the calculator.●Press to enter a decimal point2. RecordingYou can record conversation during the call or in idle mode. 1. Recording During the call : Press and hold ‘ ’during the call. You can record the voice of the other party only. In idle mode : Open the lid and press and hold ‘ ’. The phone starts recording with ‘beep’.2. Finishing recordingPress [End].IX. Supplementary Functions74・V720](https://usermanual.wiki/Motorola-Mobility/T5CK1/User-Guide-257048-Page-74.png)
![V720・75IX. Supplementary Functions●If the call is disconnected, the recording is stopped automatically. ●If a call is incoming, recording stops at that point.●You can cancel recording if you press [Back].●You can record up to 10 times with 10 min per a record.Press ▶Select Play ▶Select the item to play3. Playing●You can use to display the recording list. Press [DEL] when the record is displayed ▶Select value4. Deleting1. Deleting individual recordPress ▶Delete All ▶Select value2. Deleting all](https://usermanual.wiki/Motorola-Mobility/T5CK1/User-Guide-257048-Page-75.png)
![76・V7203. Editing the phoneSelect a menu ▶[Option] ▶Select value ▶Select the location inShortcut Copy to CharacterYou can move the most frequently used menus to Shortcut. If ‘Option’key is activated for some menus, you can press [Option] to move the function to Shortcut.●You cannot use edit function for the menus in Lock /Secure.●The menus in Shortcut are available to move within the folder.●The menus are remained in the existing folder, even though they are moved to Shortcut.●To delete a menu from Shortcut, select the menu to delete, press [Option], and then select Delete option.IX. Supplementary Functions](https://usermanual.wiki/Motorola-Mobility/T5CK1/User-Guide-257048-Page-76.png)
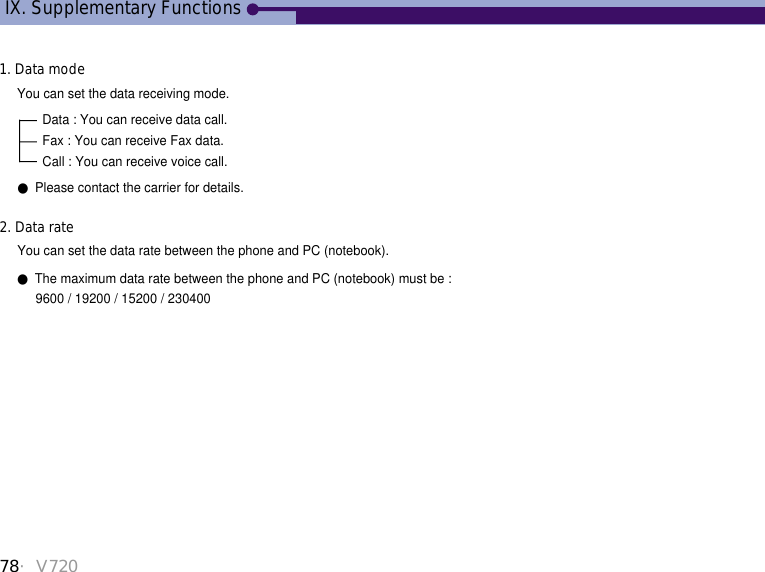
![V720・774. Wireless Data Communication Service[TopM.] ▶Select Menu ▶Data ▶Select Data Mode / Data RateYou can use internet and E-mail on the phone without additional modem, if you can connect your phone to a notebook or a PC over the wireless data cable. ●You should purchase a data communication cable from the nearest Motorola service center or the accessorydealer.●See User’s Guide of the data communication cable for PC environment and other details.●Please contact the carrier for details. 1. Data settingIX. Supplementary Functions](https://usermanual.wiki/Motorola-Mobility/T5CK1/User-Guide-257048-Page-77.png)

![XI. SMS1. Reading Message Confirm message ▶[Msg] ▶Text Msgs ▶Select a message ▶[OK]1. Text Message1. Reading a messagV720・83●The phone makes alert when a new text message is received. (See P.88 for Alert Method)●The latest received message is on the top of the list.●In case of repeated message, the latest message is displayed.●Press to read the next message.●To make a call to the caller’s number, press .](https://usermanual.wiki/Motorola-Mobility/T5CK1/User-Guide-257048-Page-83.png)
![84・V720XI. SMSReply : You can send reply to the sender.Fwd : You can forward the message to other person.●When you enter the receiver, the sender’s phone number is automatically displayed.●If you send the message to another person, press or to move to the next line, and then enter the number. You can search for the number on the Phone Book by pressing . You can set Lock to a message to protect it from being deleted. Clear Message Lock first to delete the message.[Option] ▶Select Lock ▶Select value3. Message Lock●Press [Option] and select ‘Clear’to clear Message Lock.[Option] ▶Select Reply/Fwd ▶Enter the sender ▶Enter text ▶Select value ▶Enter the receiver 2. Replying/Relaying a message](https://usermanual.wiki/Motorola-Mobility/T5CK1/User-Guide-257048-Page-84.png)
![V720・85If the lid is closed, a message receiving is displayed on the Sub LCDConfirm message ▶Press ▶Read message with 3. Reading Message on the Sub LCDConfirm message ▶[Msg] ▶Voice Msg ▶[OK]2. Voice Message●To access the voice mailbox, press ‘*151’ and , or press and hold .●If numbers of voice messages are received, the latest voice message is displayed. ●If you have select View Msg in Alert Method, you can read the message on the Sub LCD. (See P.88~89 for Alert Method.)1. Reading a text messageXI. SMS](https://usermanual.wiki/Motorola-Mobility/T5CK1/User-Guide-257048-Page-85.png)
![86・V7202. Sending Message[Msg] ▶Send a MsgSelect New Msg ▶Enter receiver ▶Enter text ▶Set Msg storing option ▶Enter sender1. Sending a new messageTo access the voice mailbox, select ‘Voice mailbox’, and press . If the call back number is displayed, select‘Call’and press . It is available only when you use the earmic.2. Retrieving voice message●If a message is received, press , and then press to read the message.If there is a message you have not read,you can continue reading the message with .●You can make a call to the sender if you select ‘Call’and press . It is available only when you use the earmic.XI. SMS](https://usermanual.wiki/Motorola-Mobility/T5CK1/User-Guide-257048-Page-86.png)
![V720・87Select Stored Msg ▶Select the message to send ▶Check and enter content ▶SetMsg storing option ▶Enter receiver ▶Enter sender 2. Sending a stored message●You can send a message to numbers of receivers. After you enter the receiver, move the cursor to the next line with press [OK]. You can send a message to up to 6 receivers.●Press [Option] to recall a mobile number from the Phone Book.●If you type the first character, the phone displays the names starting with the character. Press [OK] to move to quick search. Search for the number with , and then press [OK].●If you save the message, you can select the saved message and send it. ●You can save up to 30 messages.●For the receiver who failed to receive the message, a fail list is made, displaying the resend message. ●If you receive a call while you entering message, the message is saved automatically. 1. Selecting receiverXI. SMS](https://usermanual.wiki/Motorola-Mobility/T5CK1/User-Guide-257048-Page-87.png)
![88・V7203. Alert Method[Msg] ▶Alert Method ▶Select a sub menu1. Reminder ToneReminder Tone ▶Select an optionYou can select the reminder tone. Once : One reminder tone for a messageEvery 2 Min : Every 2 minutes before you read the messageOff : No reminder tone but flickering lamp.2. View MsgView MsgYou can select the way how the message is noticed on the LCD.Full : The initial text line is displayed on the LCD. You can read the full text with . Title : The type and caller number is displayed.Off : Only the message icon ‘ ’is displayed. XI. SMS](https://usermanual.wiki/Motorola-Mobility/T5CK1/User-Guide-257048-Page-88.png)
![V720・893. Msg SoundMsg SoundYou can select the alert tone. ●SMS sound 1~54. Deleting Message[Msg] ▶Select the message type (Voice/Text) ▶Select the message to delete ▶[DEL] ▶Select value1. Deleting individual messageYou can delete the received message or the stored message.XI. SMS](https://usermanual.wiki/Motorola-Mobility/T5CK1/User-Guide-257048-Page-89.png)
![90・V7202. Delete All●The ‘Locked’message is not deleted. You need to clear Message Lock first. (See P.84 for Message Lock.)●Voice messages must be deleted from the voice mailbox.[Msg] ▶Delete Msgs ▶Select the message type ▶Select valueXI. SMS](https://usermanual.wiki/Motorola-Mobility/T5CK1/User-Guide-257048-Page-90.png)

![V720・93XII. WAP1. Accessing GoNext1. Accessing GoNextGoNext is an interactive information service that enables you to search internet on your mobile phone.Press [WWW] in the idle mode.2. GoNext MenuconnetingRefresh : You can update the current site. New URL : You can enter the site address to visit. Phone mode : You can go into the phone mode temporarily to us Phone Book, Tone Control,Alarm/Timer, and PIMS. TOP URL : You can move to the top site. Press and hold .●‘ ’and ‘ ’are displayed on the LCD while you are connected to GoNext.](https://usermanual.wiki/Motorola-Mobility/T5CK1/User-Guide-257048-Page-93.png)