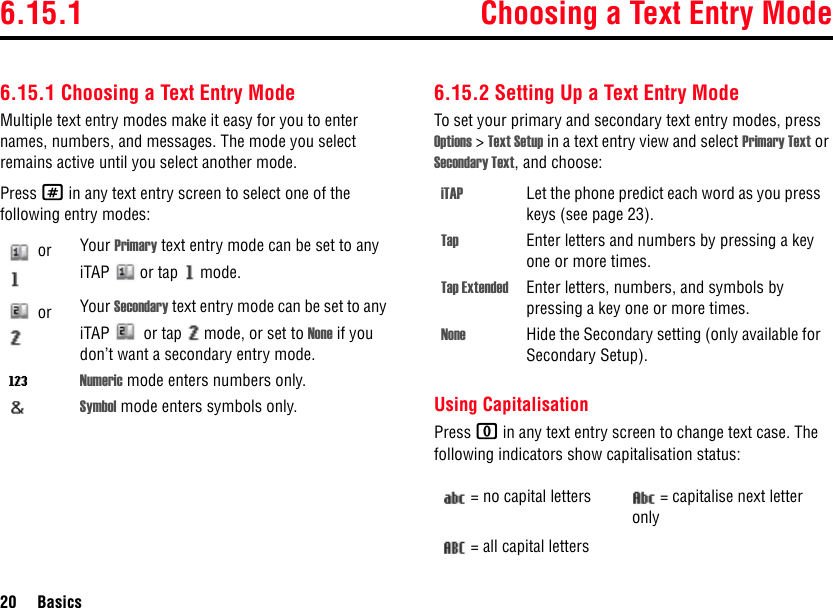
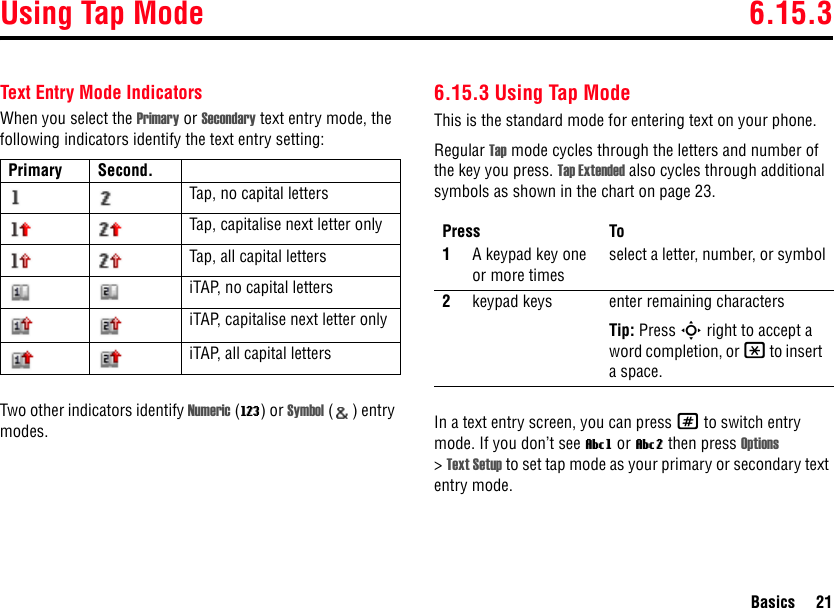
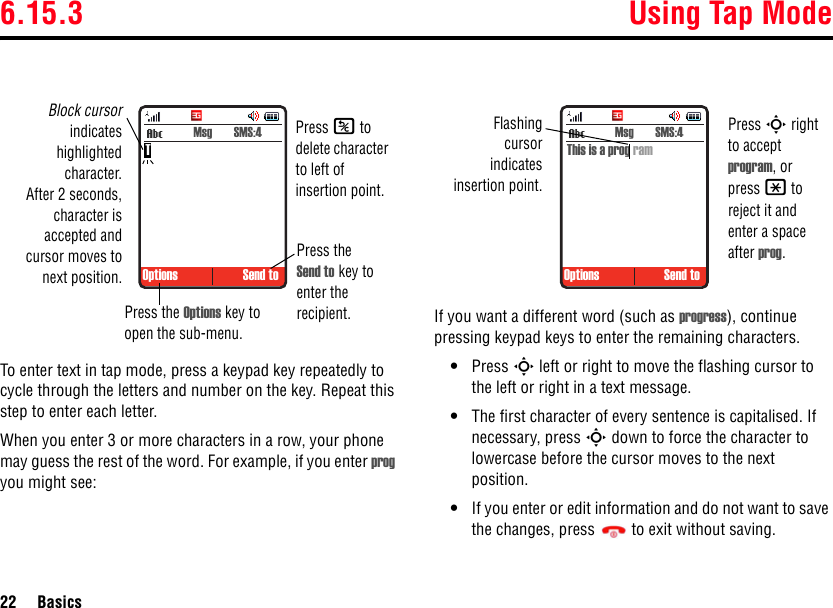
Motorola Mobility T6FJ1 Portable PCS GSM Transceiver with Bluetooth User Manual E770V 3G UG
Motorola Mobility LLC Portable PCS GSM Transceiver with Bluetooth E770V 3G UG
UserManual.wiki
>
Motorola Mobility
>
T6FJ1 User Manual
Exhibit 8 Users Manual
Navigation menu
Upload a User Manual
Namespaces
Wiki Guide
HTML
PDF
Info
Views
User Manual
Discussion / Help
Navigation

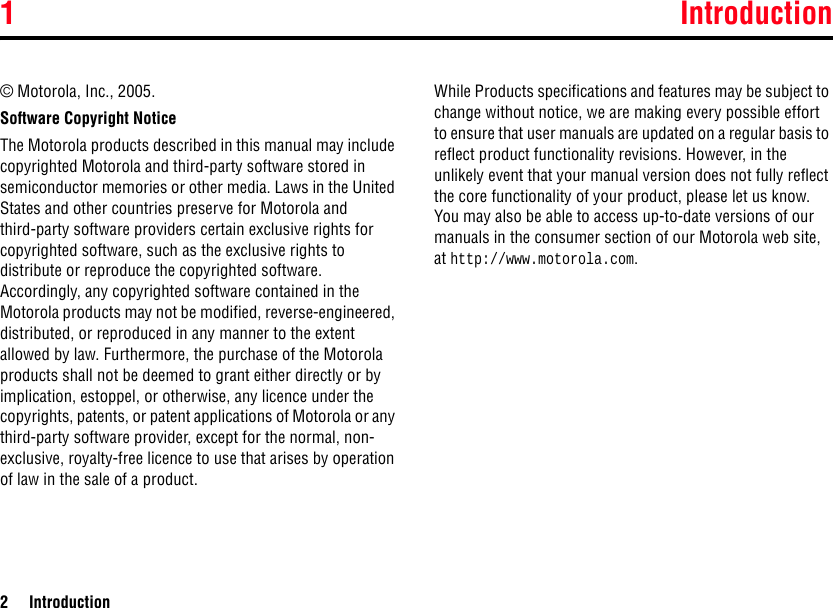


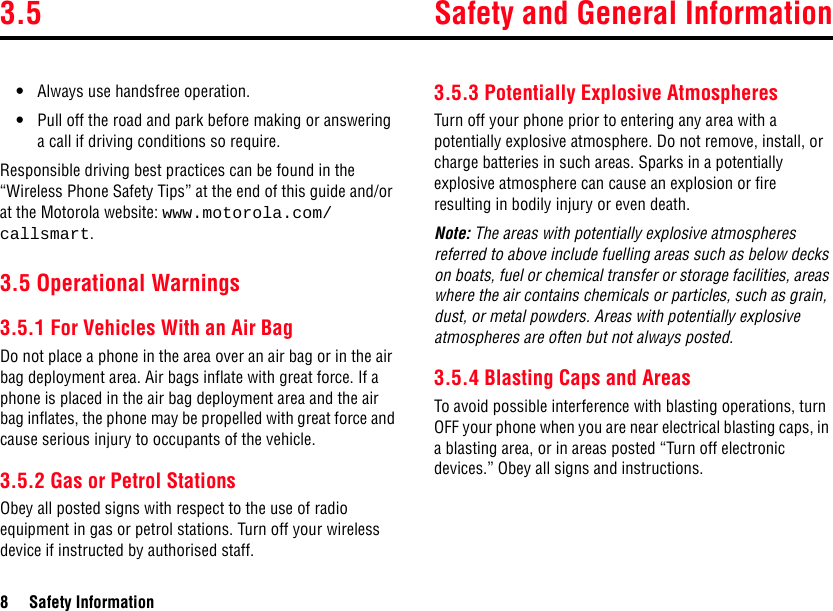


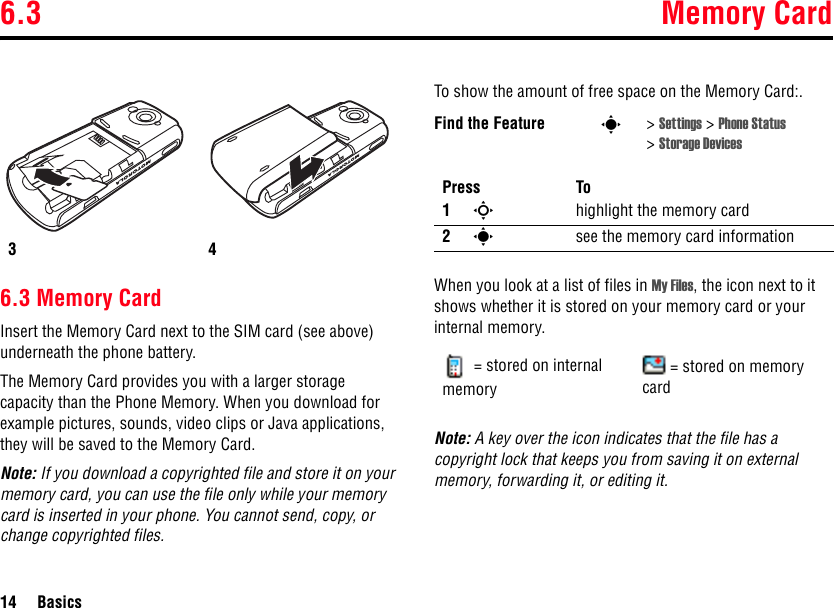
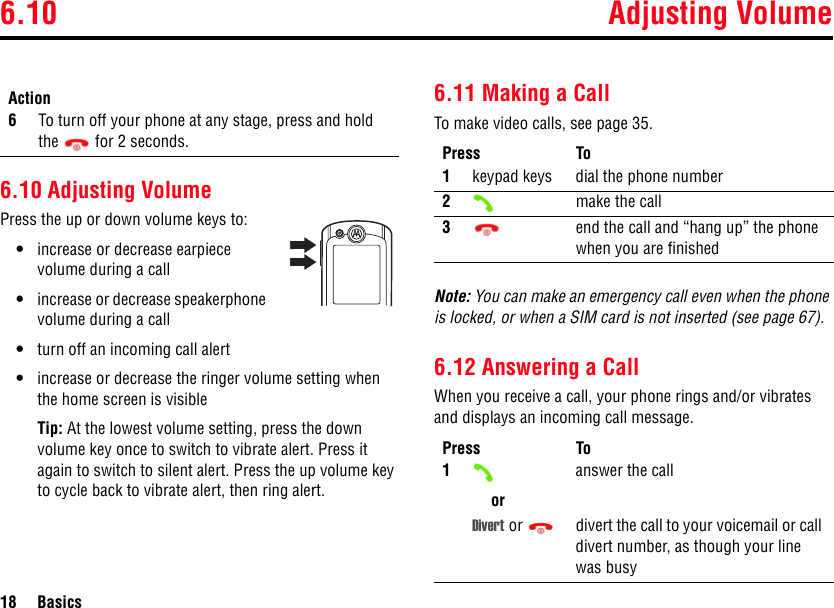

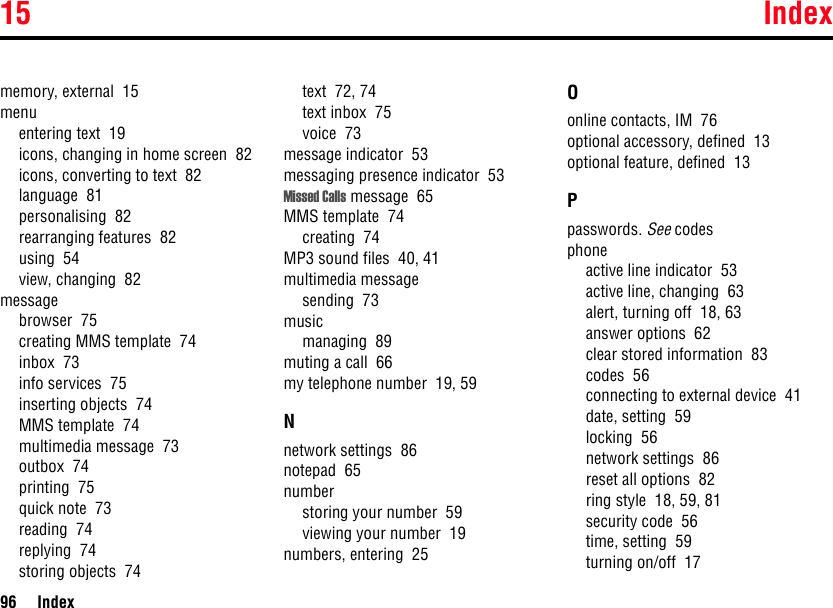
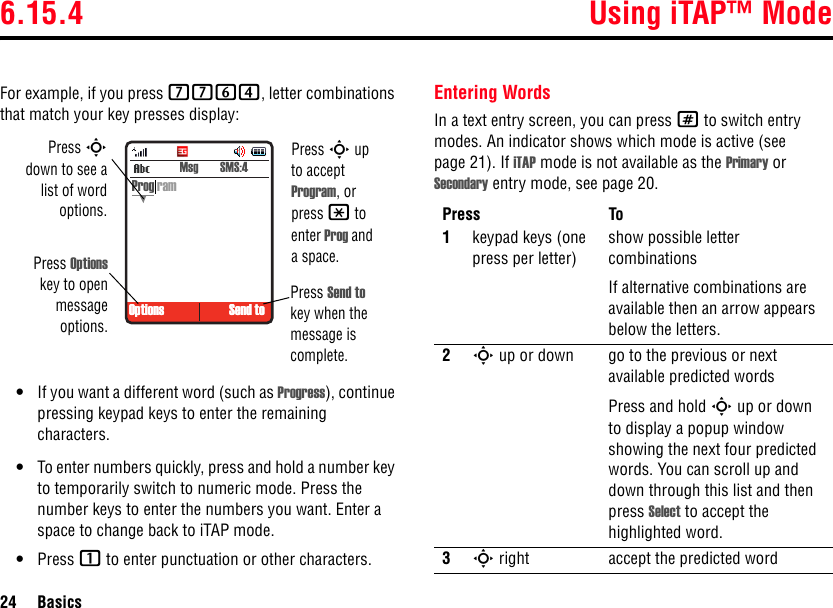
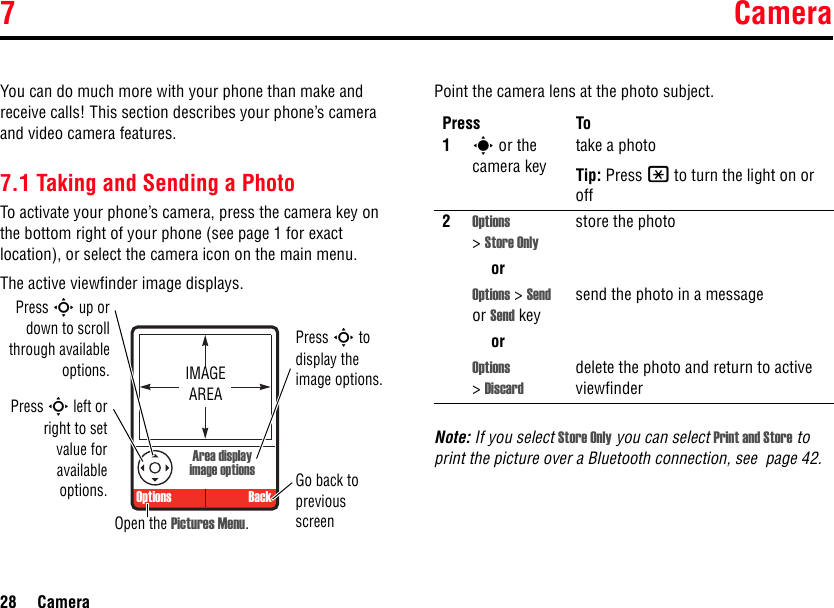
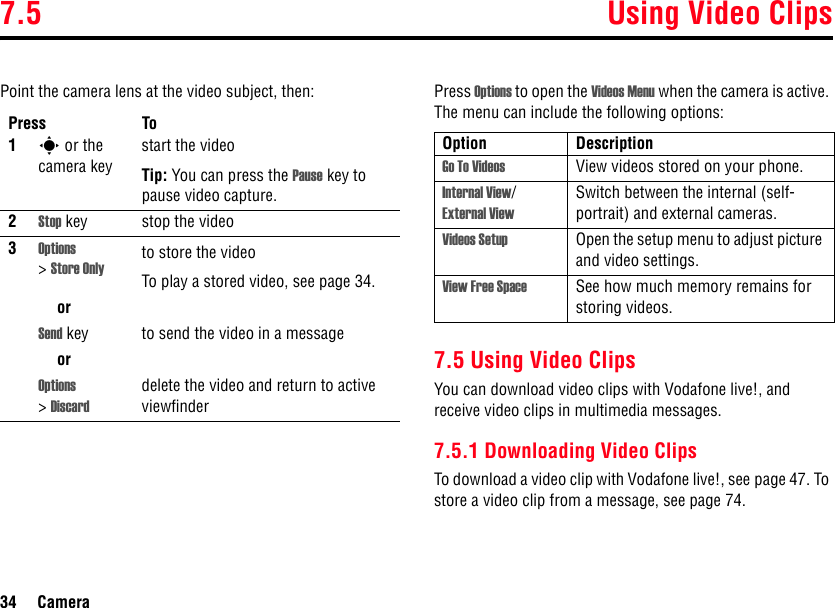
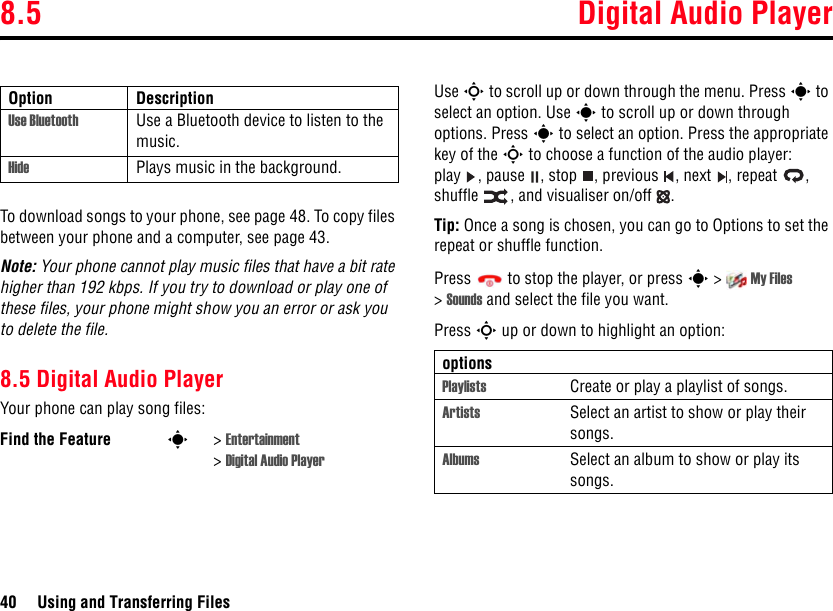
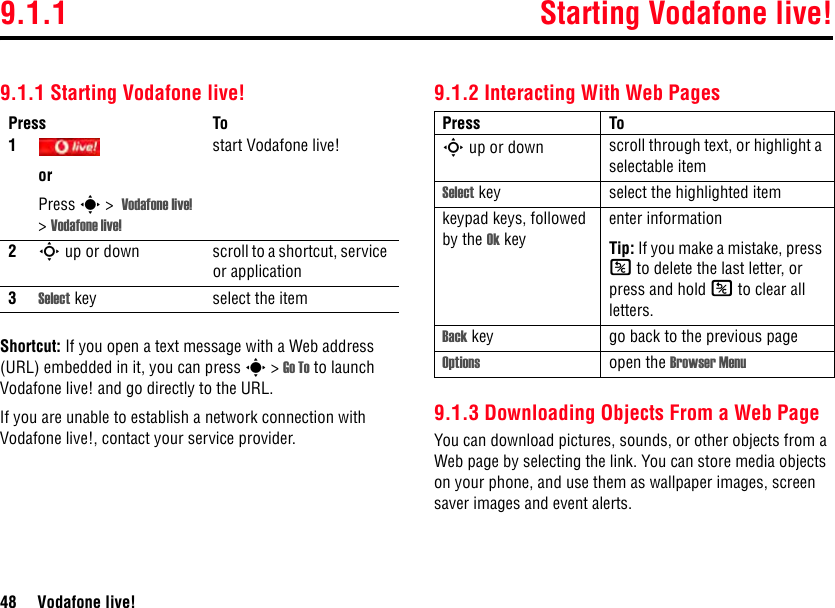
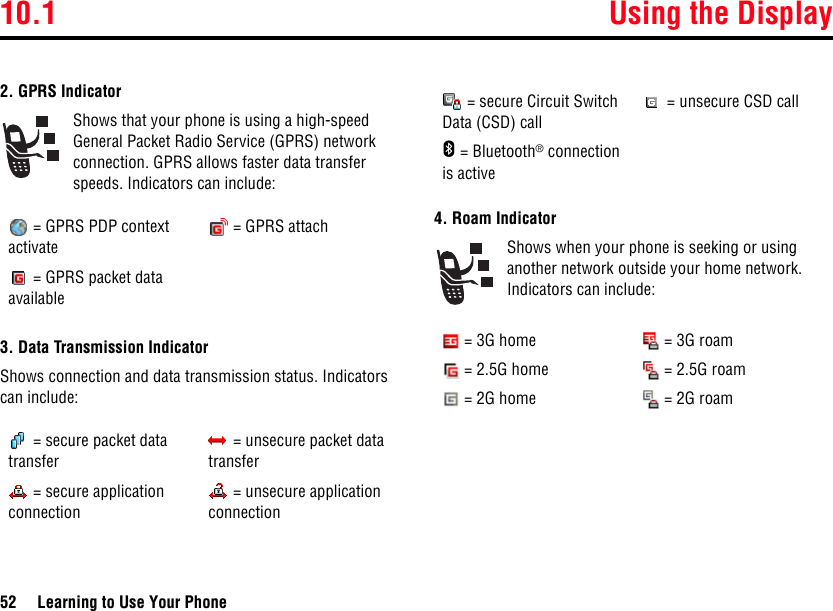
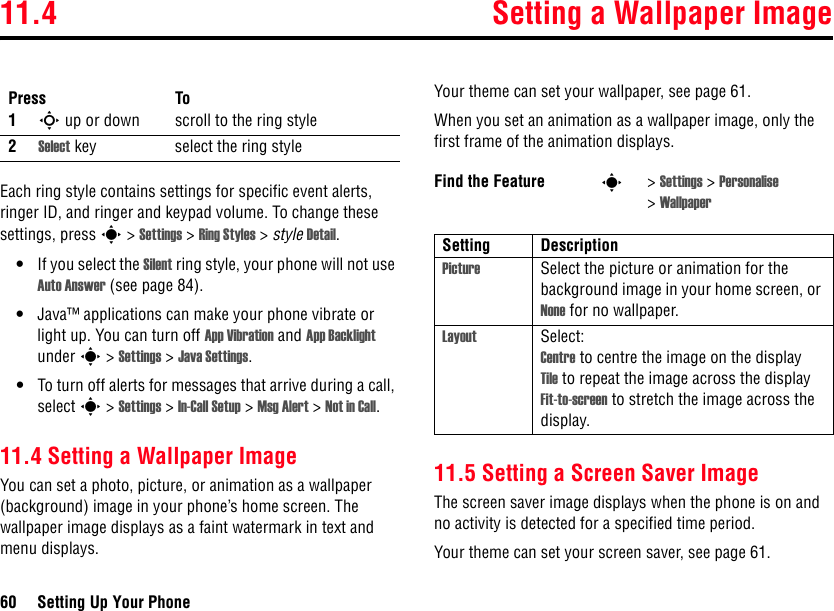
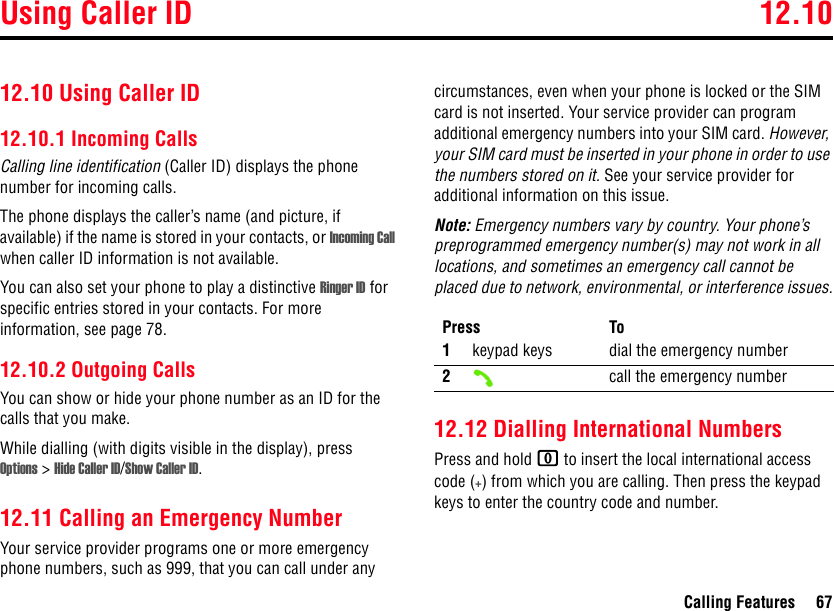
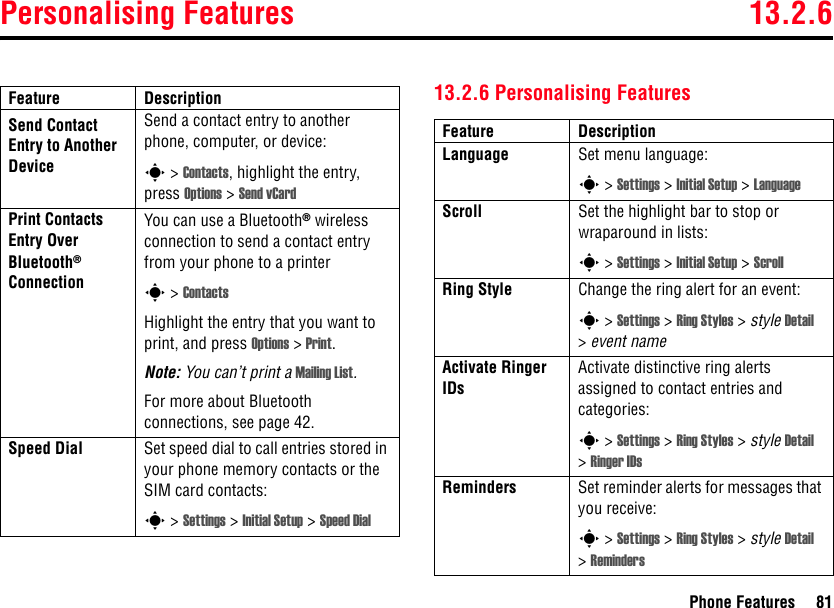
![Using iTAP™ Mode 6.15.4Basics 23Character ChartUse this chart as a guide for entering characters with Tap Extended.Note: This chart may not reflect the exact character set available on your phone. In an email address or URL editor, 1 first shows common characters for that editor.6.15.4 Using iTAP™ ModePress # in a text entry view to switch to iTAP mode. If you don’t see or , press Options > Text Setup to set iTAP mode as your primary or secondary text entry mode.iTAP™ software provides a predictive text entry mode that lets you enter a word using one keypress per letter. This can be faster than Tap, because your phone combines the keypresses into common words.Tip: Your phone has a text tutorial which should help you with any problems..1. ? ! , @ ' - _ : ; ( ) & ` " ~ 1 0 ¿ ¡ ^ % £ $ ¥ ¤ £ + x * / \ | [ ] = > < # § 2a b c 2 á à â ä ã ç3d e f 3 é è ê ë4g h i 4 í î ï 5j k l 5 6m n o 6 ñ ó ò ô ö õ œ 7p q r s 7 8t u v 8 ú ù û ü9w x y z 9 0change text case, for capital letters*enter a space (hold to enter a return)#change text entry mode (hold for default)Find the Feature Options >Text Setup > Text Tutorial](https://usermanual.wiki/Motorola-Mobility/T6FJ1/User-Guide-594610-Page-24.png)
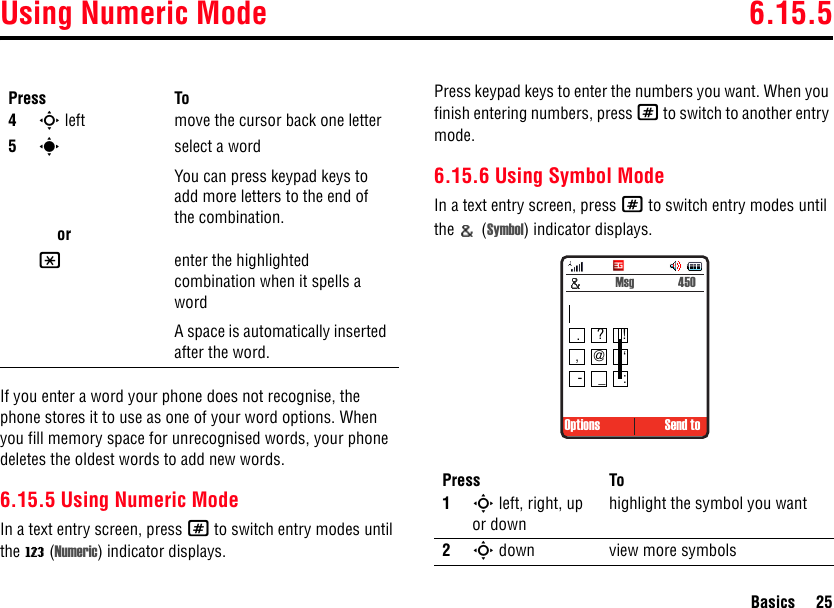
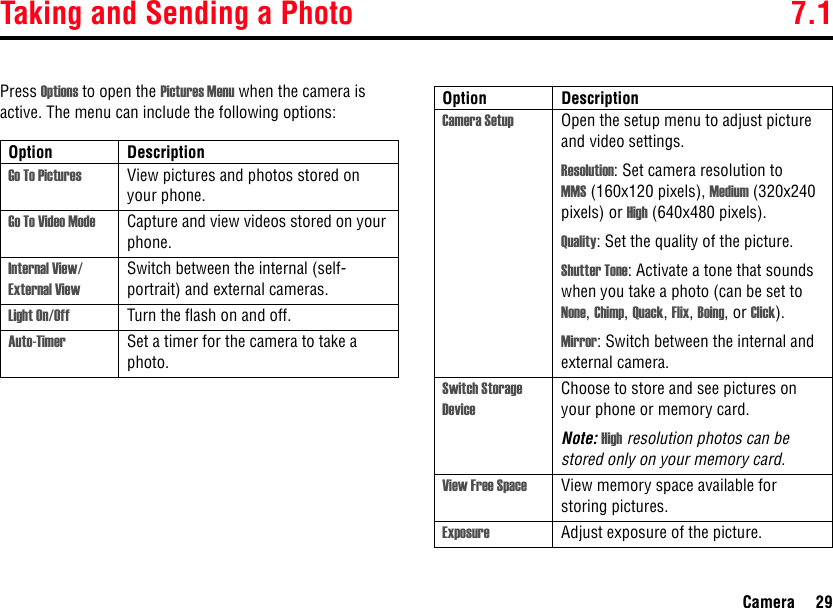


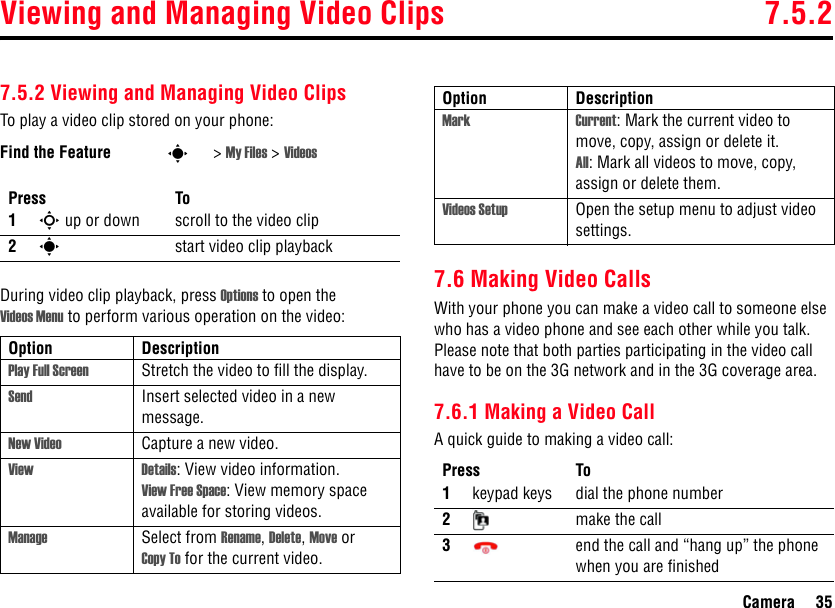


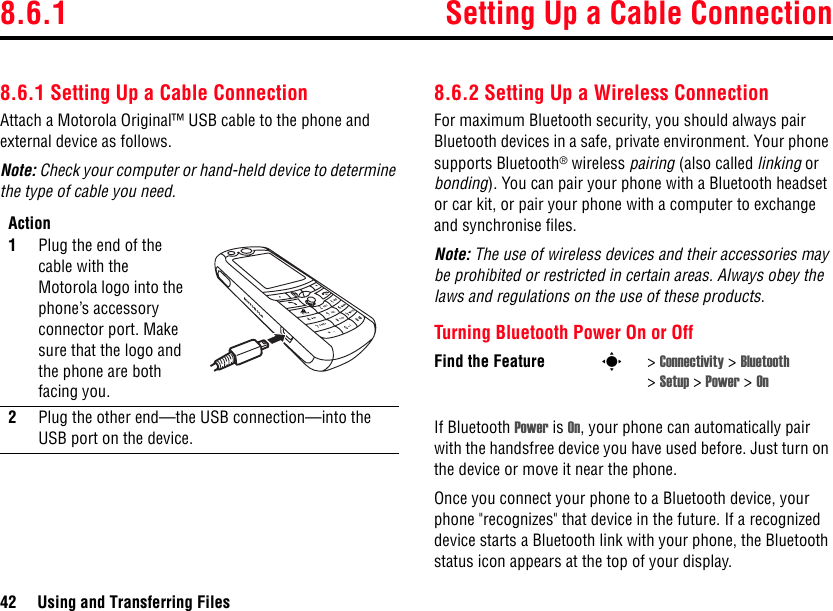
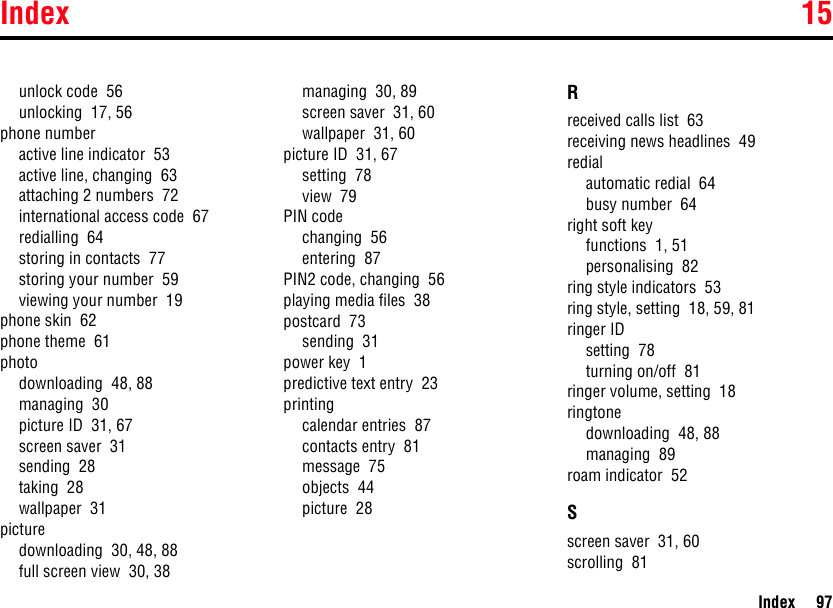
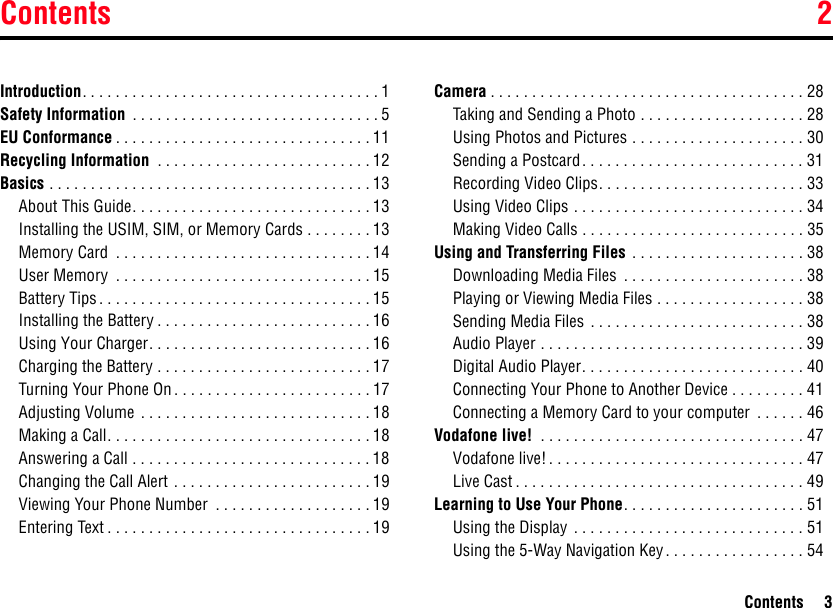
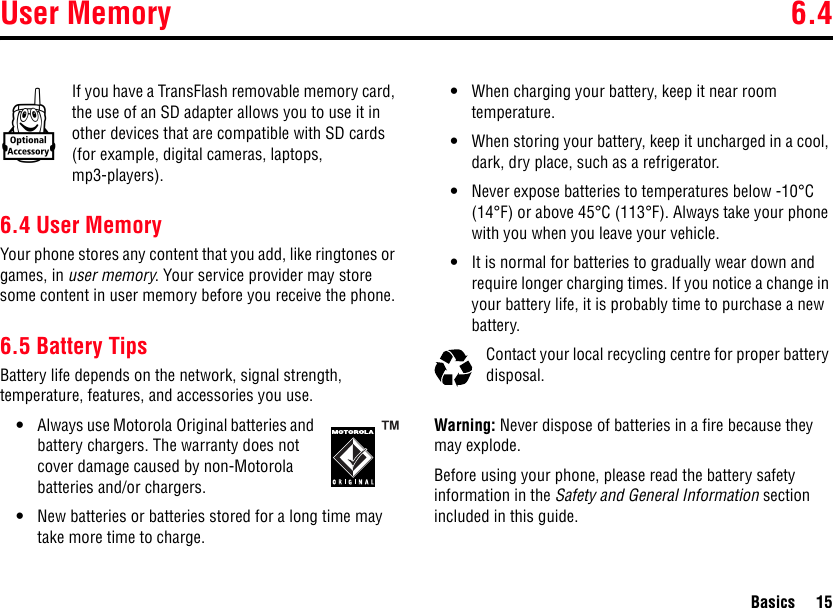
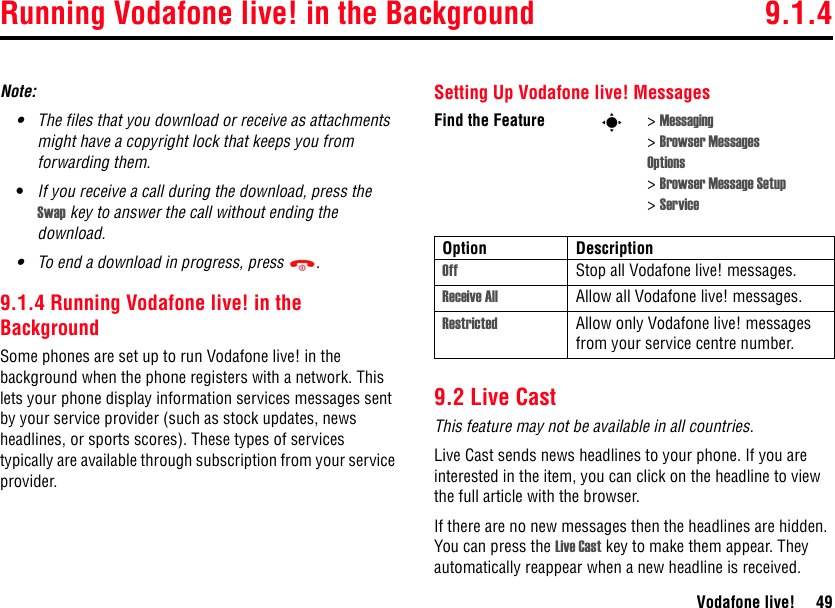
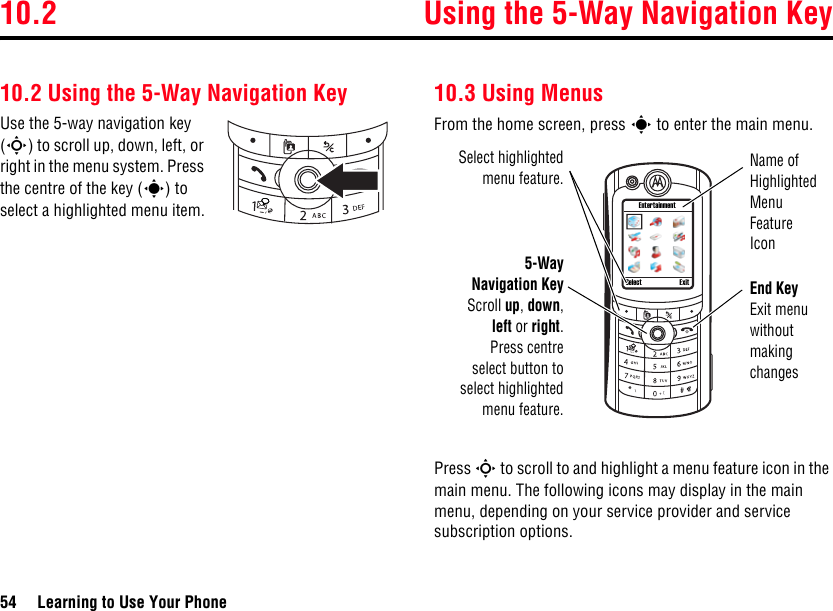
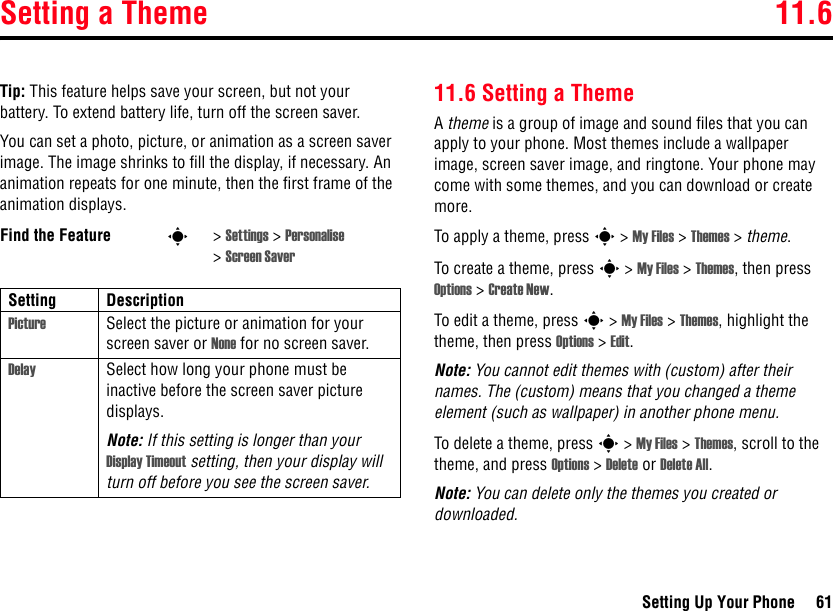
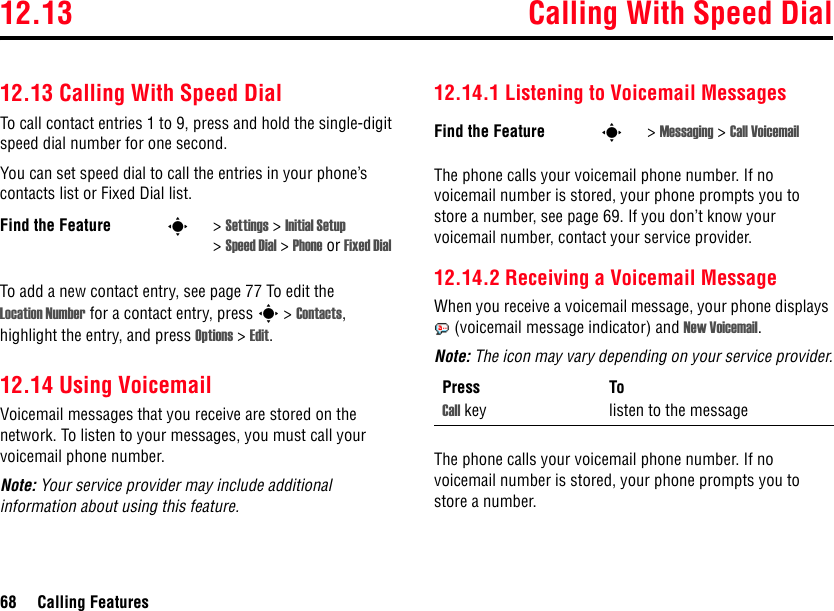
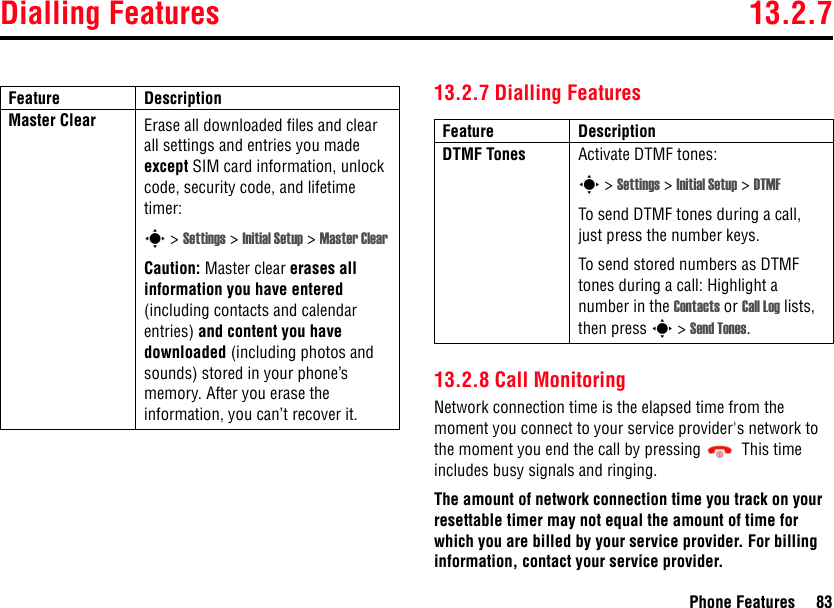
![Setting Up a Wireless Connection 8.6.2Using and Transferring Files 43Note: To extend battery life, use the above procedure and set Bluetooth Power to Off when not in use. Your phone will not pair with devices until you set Bluetooth Power back to On and pair your phone with the devices again.Pairing With a Headset or Handsfree DeviceBefore you try to pair your phone with a device, make sure the device is on and ready in pairing or bonding mode (see the user’s guide for the device).Your phone lists the devices it finds within range. Highlight a device in the list and:When your phone is paired, the Bluetooth indicator E shows in the home screen.Shortcut: After you paired with a device, you can pair with it again by pressing Options > Use Bluetooth during a phone call or while playing a sound file.Note: You can’t play some copyrighted files over a Bluetooth connection.Tip: We can’t see the device you’re holding. For specific information about a device, refer to the instructions that came with it.Copying Objects to Another DeviceYou can use Bluetooth pairing to copy a media object, contact entry, calendar event, or bookmark from your phone to a computer or other device.Note: You cannot copy a copyrighted object.1Highlight the object on your phone that you want to copy to the other device.2Press Options and select Copy (for media objects), Send (for calendar events), or Share Contact Entry (for contact entries).Find the Feature s> Connectivity > Bluetooth >Audio Devices >[Look For Devices]Press To1Select select the device2Yes or Ok pair with the device3keypad keys enter the device passkey (such as 0000) if necessary, and then press the Ok keyk](https://usermanual.wiki/Motorola-Mobility/T6FJ1/User-Guide-594610-Page-44.png)
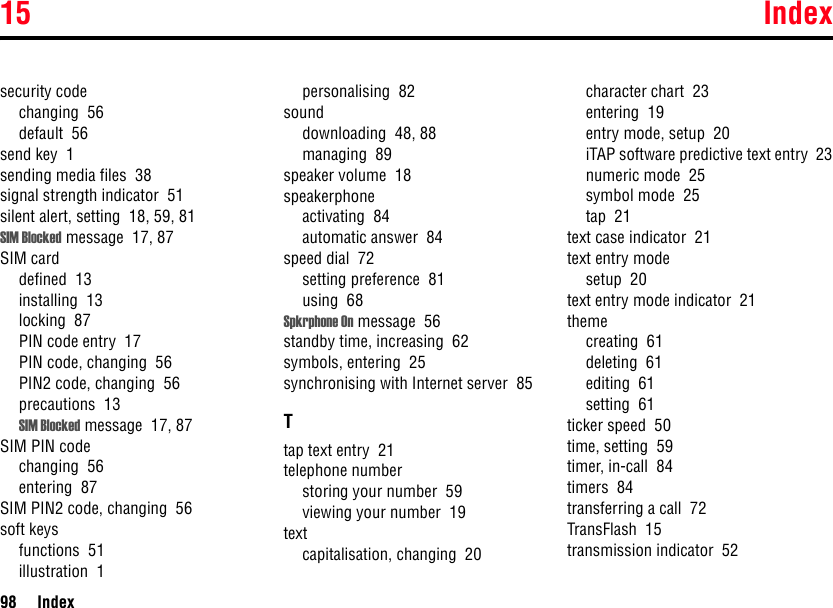
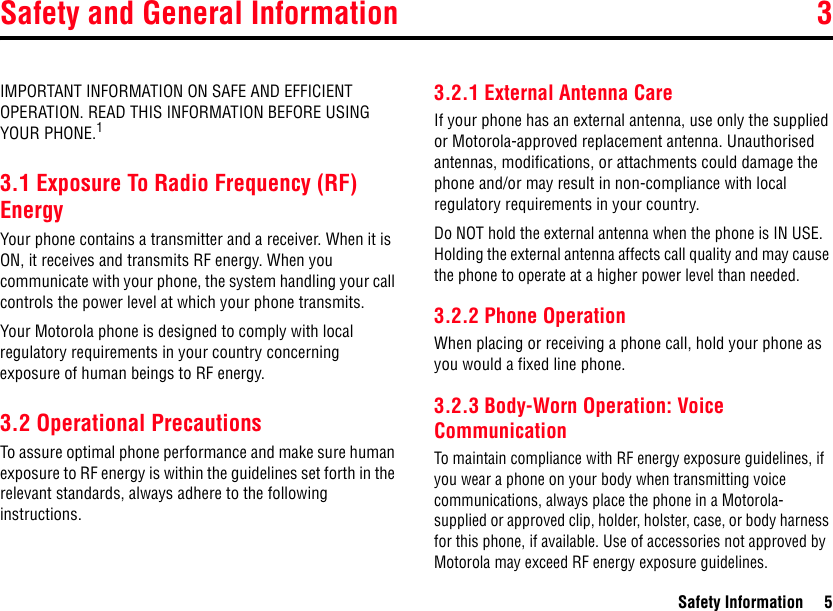
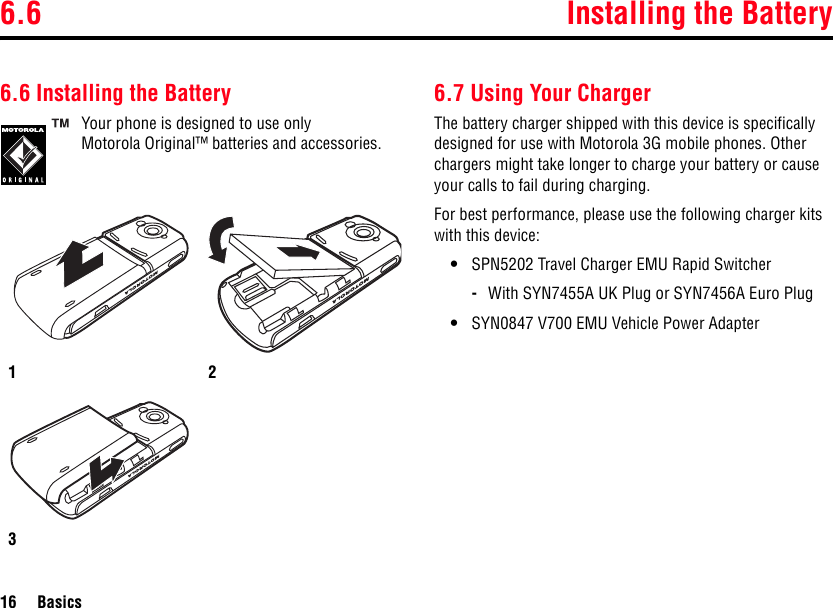
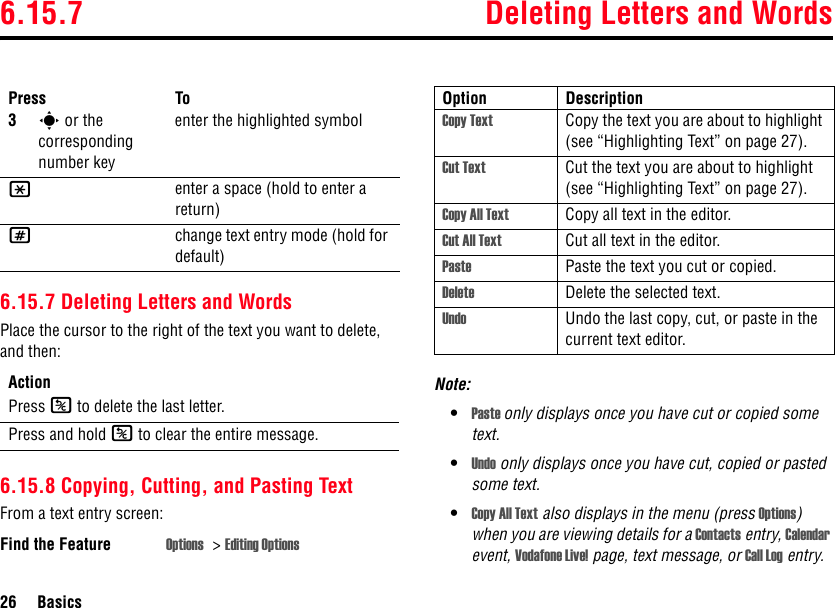
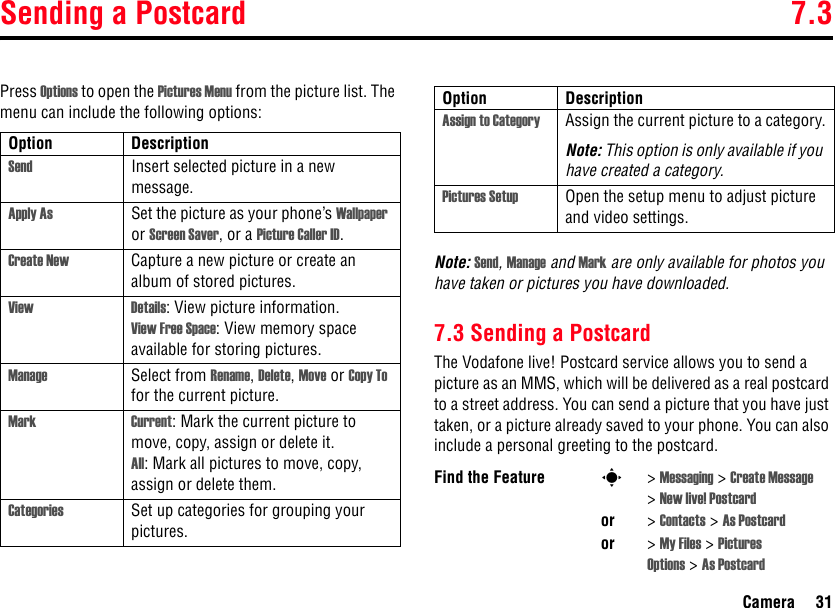
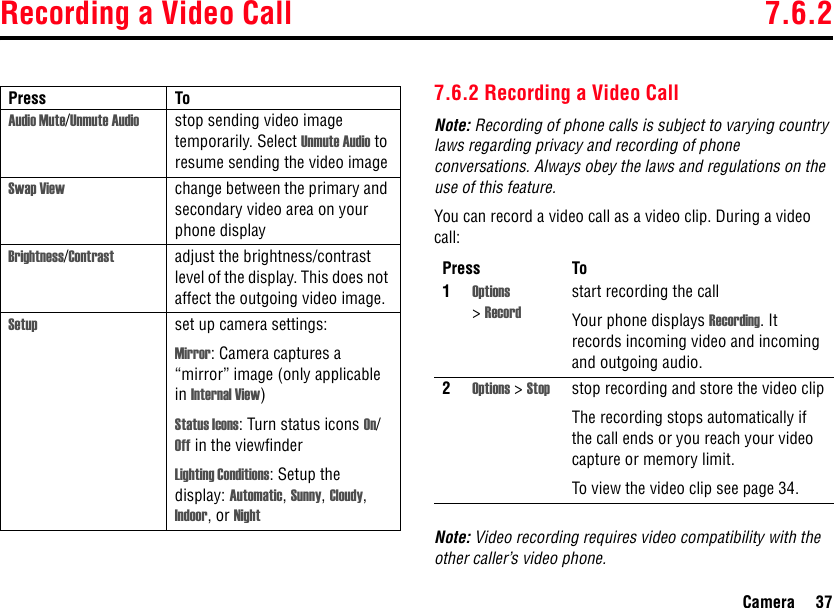
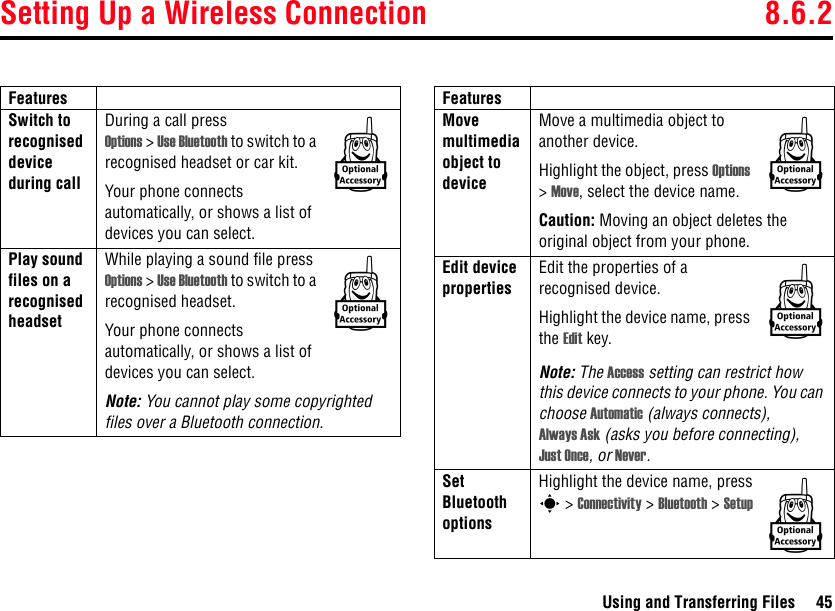
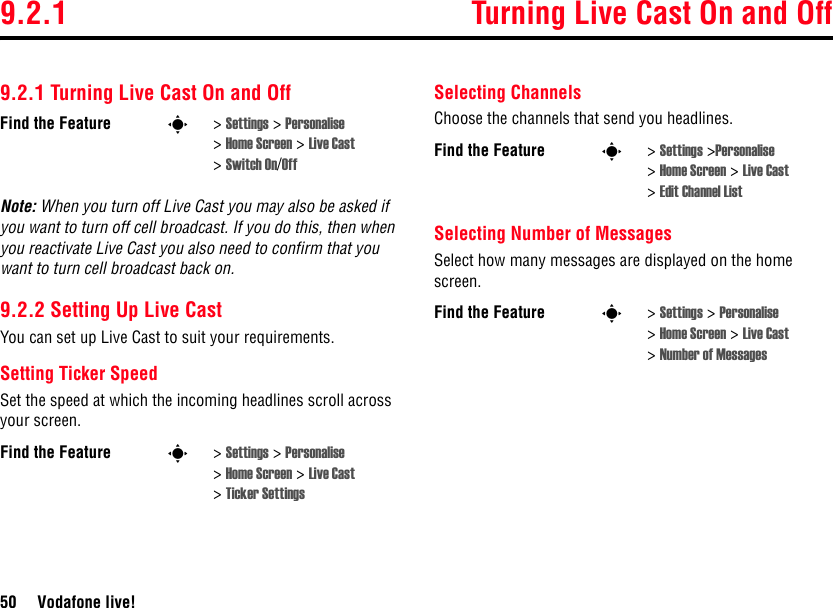
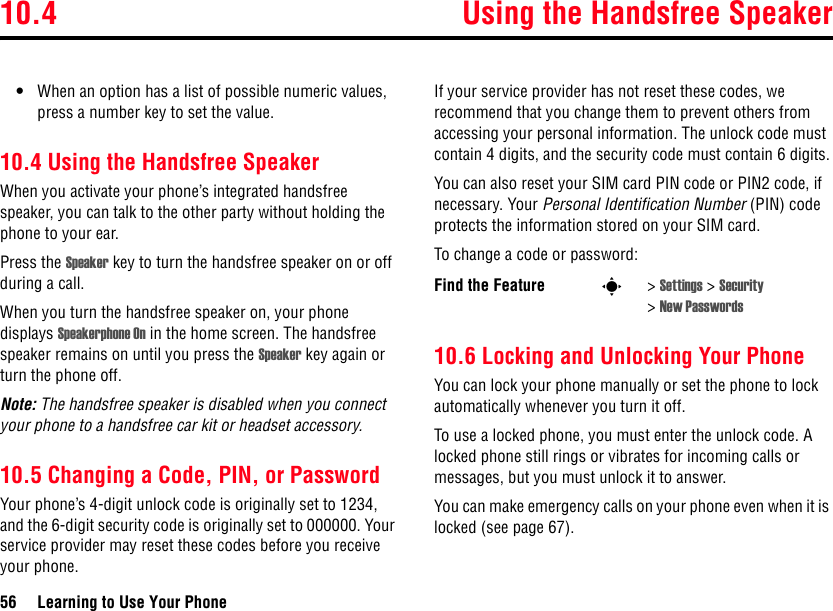
![8.6.2 Setting Up a Wireless Connection44 Using and Transferring Files3Select a recognised device name, or [Look For Devices] to search for the device where you want to copy the object.Sending Objects to a PrinterYou can use Bluetooth pairing to send a picture, message, phonebook entry or datebook view from your phone to a printer.Note: You can print A4 or US Letter size pages. To print another size, copy the object to a linked computer and print it from there. You can’t print Quick Notes, MMS Templates, or a phonebook Mailing List.Tip: After you capture a picture in the camera, you can press the Store key and select Print and Store.1Highlight the object on your phone that you want to print2Press Options > Print. In the Calendar, you can print the month, week or day.3If available, choose additional objects or print options.4Select a recognised printer name listed in the Printers menu, or [Look For Devices] to search for the device to which you want to send the object.Advanced Bluetooth FeaturesA device is recognised after you pair with it once (see page 42).kFeaturesMake phone visible to other deviceAllow another Bluetooth device to discover your phone:s > Connectivity > Bluetooth >Find MePair with recognised devicePair your phone with a recognised handsfree device:s > Connectivity > Bluetooth >Audio Devices > device nameDrop pairing with deviceHighlight the device name and press the Drop key.kkk](https://usermanual.wiki/Motorola-Mobility/T6FJ1/User-Guide-594610-Page-45.png)
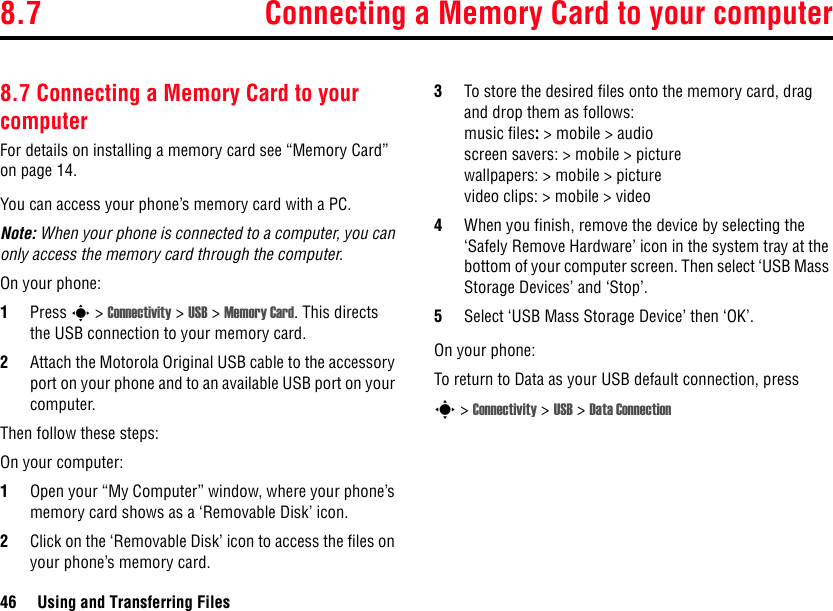

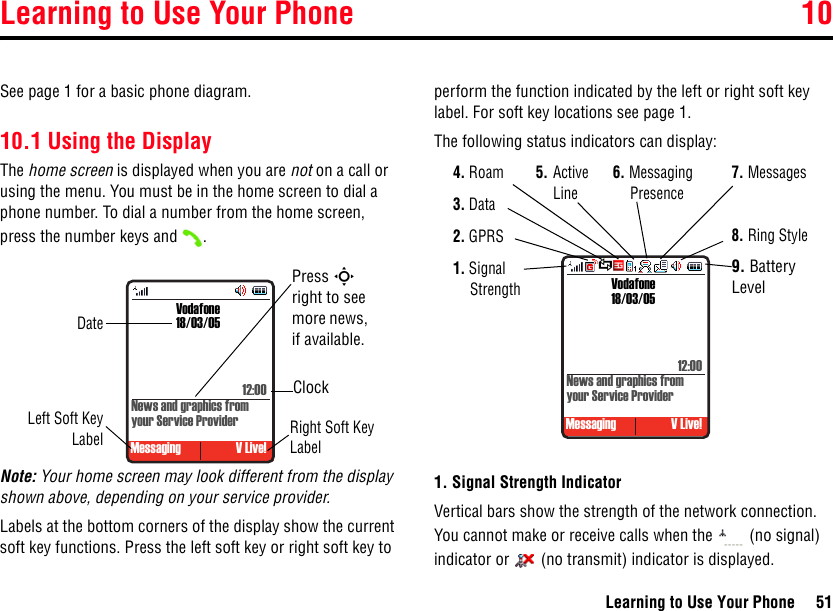

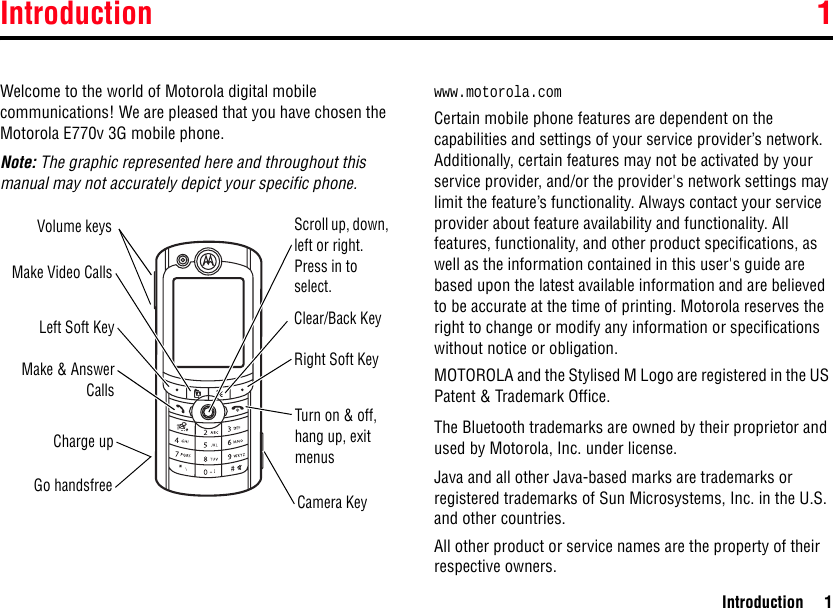
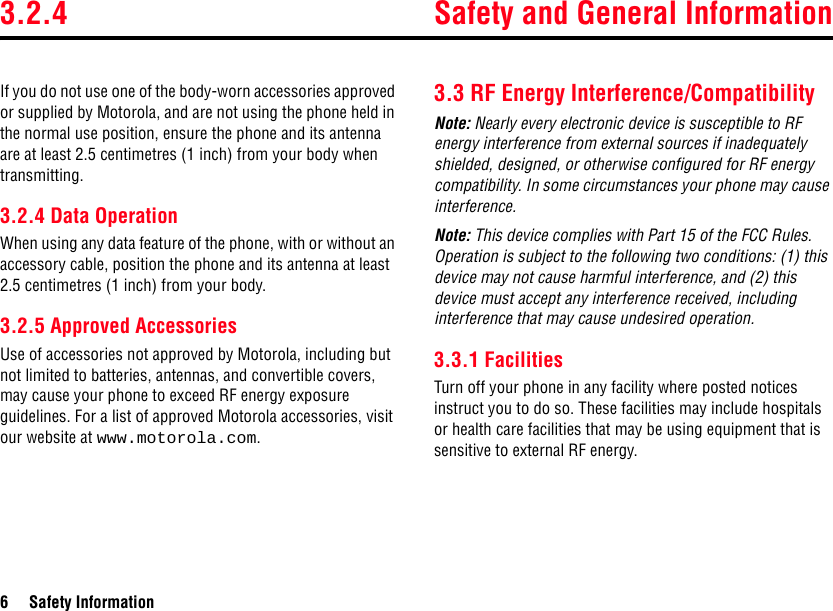
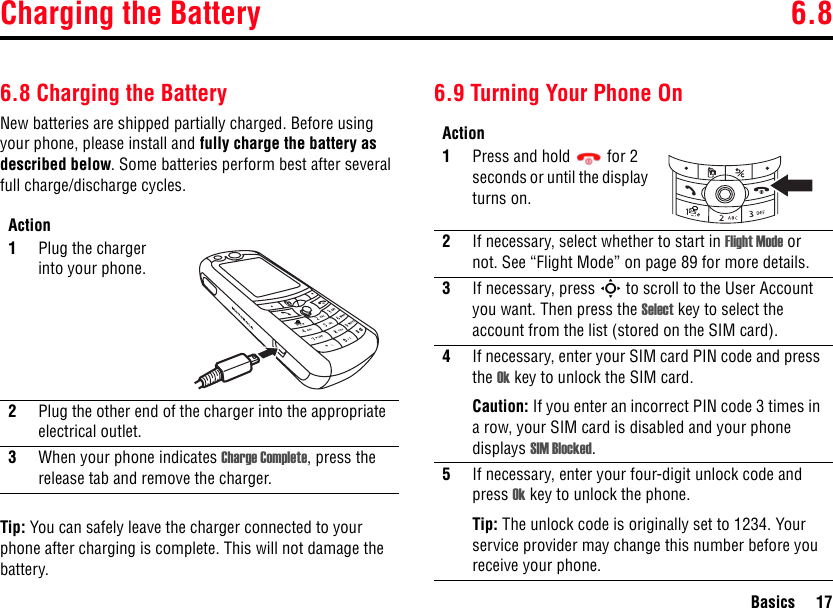
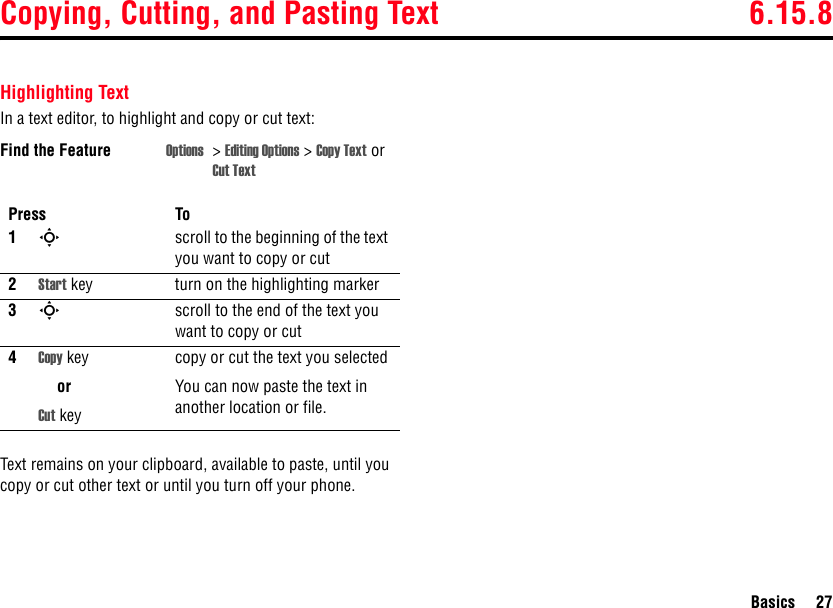
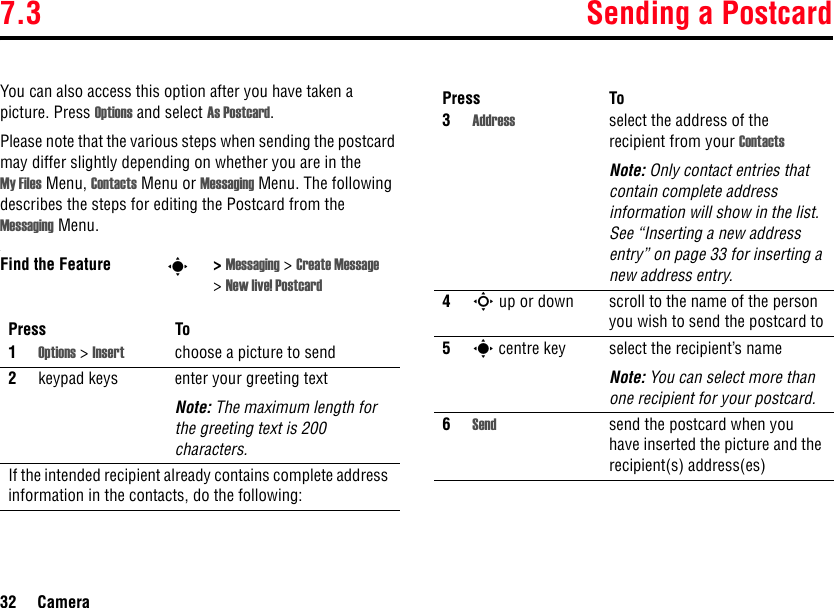
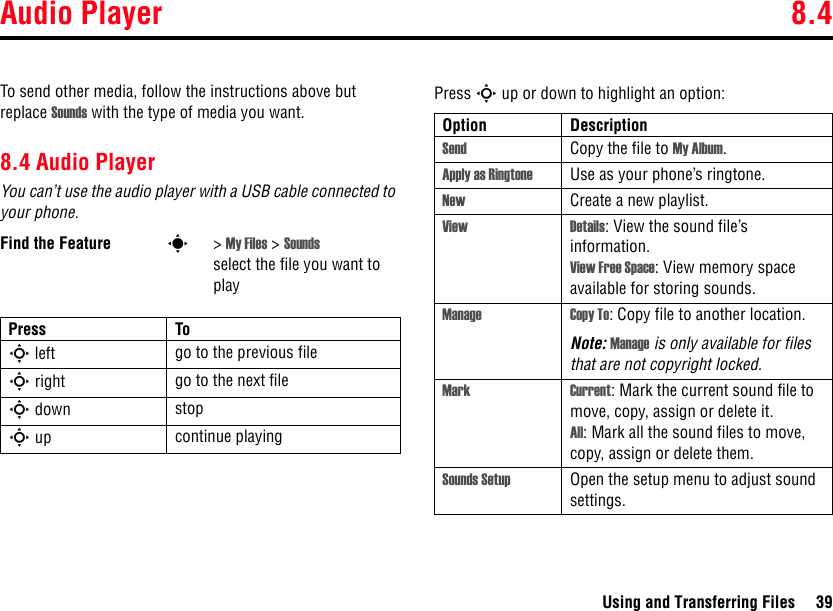
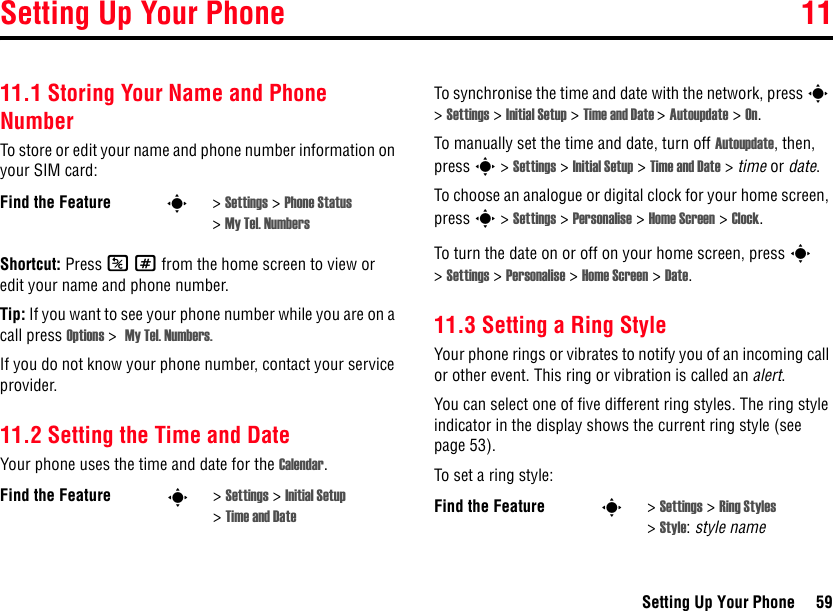
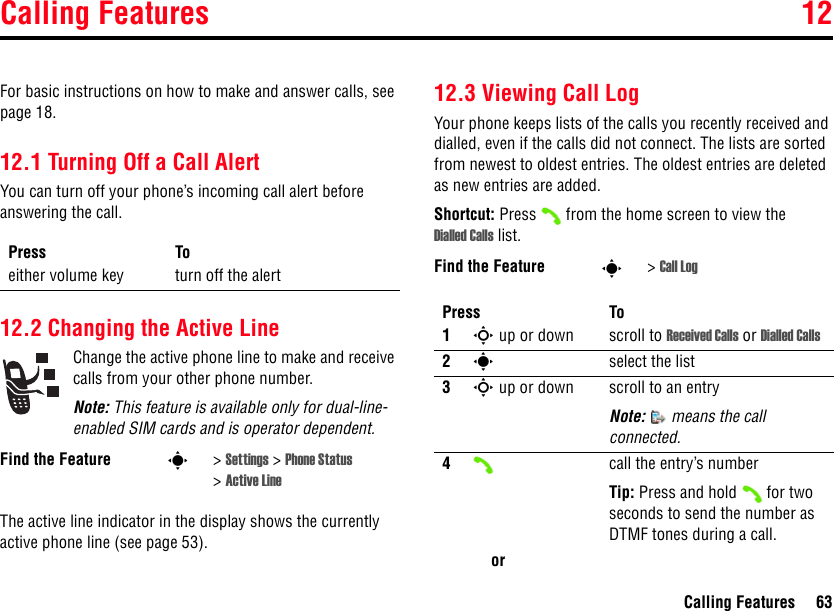
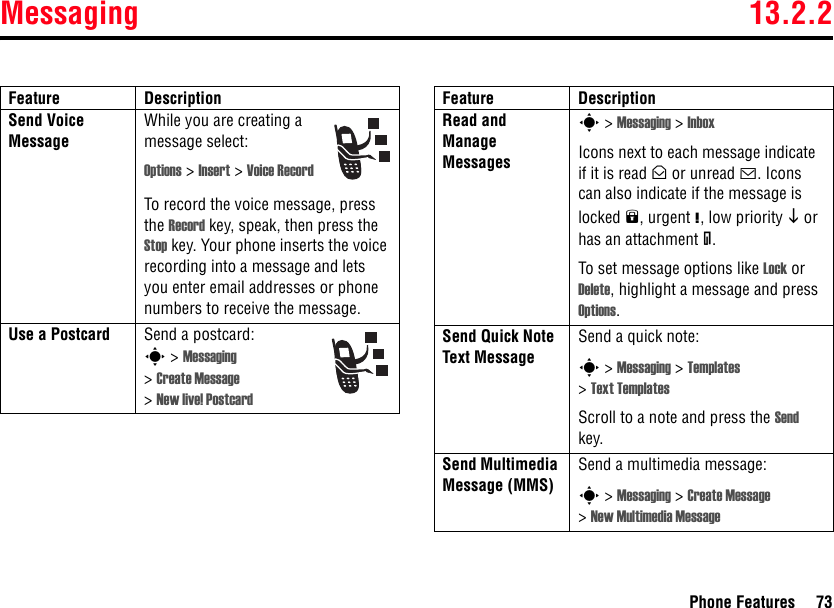
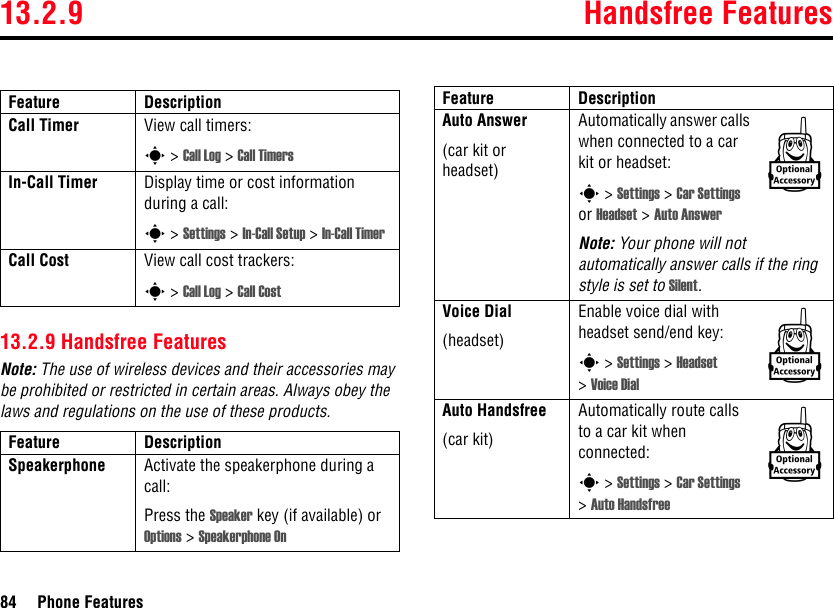
![Selecting a Menu Feature 10.3.1Learning to Use Your Phone 5510.3.1 Selecting a Menu FeatureTo select a menu feature, starting from the home screen:This example shows that from the home screen, you must press s to open the menu, highlight and select Call Log, then highlight and select Dialled Calls. Press the navigation key (S) up, down, left or right to highlight items, and press it in (s) to select items. Press the left/right soft keys to select the functions listed in the bottom left and right corners of the display.10.3.2 Selecting a Feature OptionSome features require you to select an option from a list:•Press S to scroll up or down to highlight the option you want.•In a numbered list, press a number key to highlight the option.•In an alphabetised list, press a key repeatedly to cycle through the letters on the key and highlight the closest matching list option.•When an option has a list of possible values, press S left or right to scroll through and select a value. Icon Feature Icon FeatureEntertainment Digital Audio Player/SIM Tool KitVodafone live! ContactsCamera VideoCall Log Organiser & ToolsMessaging ConnectivityMy Files SettingsFind the Feature s>Call Log > Dialled Calls Press theOptions key tosee thesub-menuOptions BackDialled CallsHighlightedOptionPress S to scroll down to other options.10] John Smith9] Lisa Owns8] Adda Thomas7] Jack Bradshaw6] Dave Thompson5] John Smith4] John Smith3] John Smith](https://usermanual.wiki/Motorola-Mobility/T6FJ1/User-Guide-594610-Page-56.png)


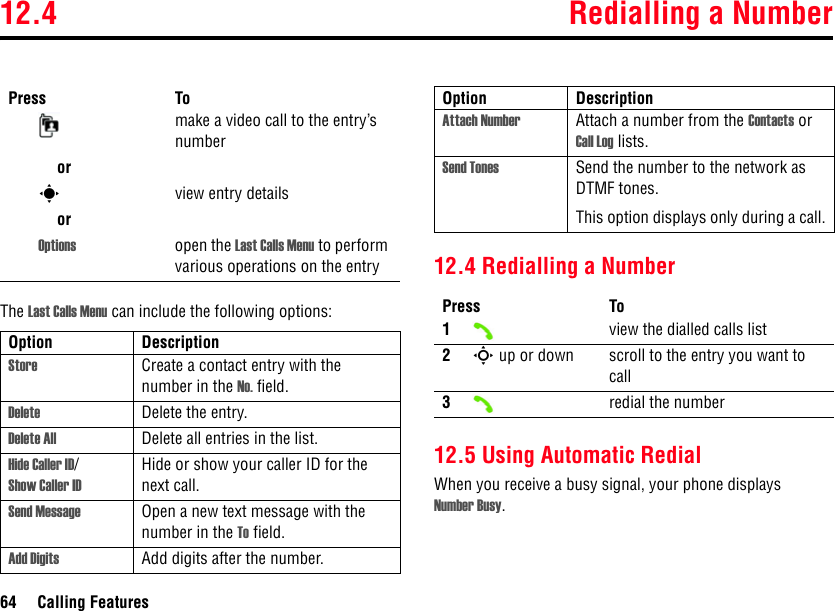


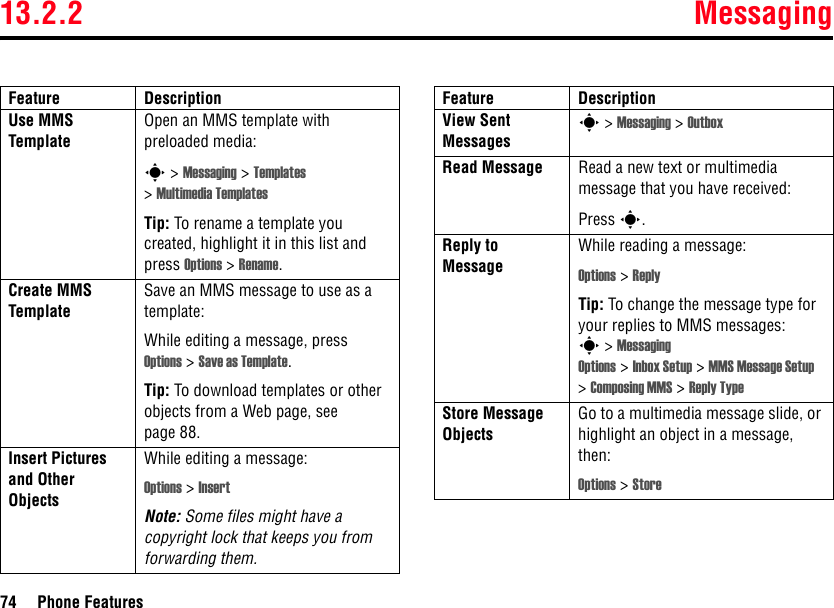
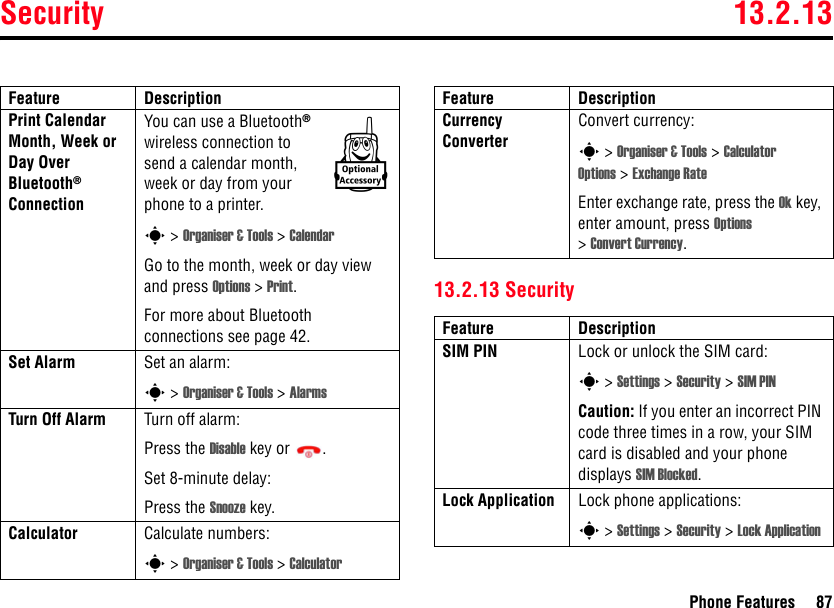
![13 Phone Features70 Phone Features13Phone Features13.1 Navigation GuideMain MenuEntertainment• More Games•Game1•Game2•Game3• [Install New]Vodafone live!• Vodafone live!• Enter URL• Bookmarks• Saved Pages•History•BrowserSettings•What'sNew• Games• Ringtones•Pictures•News•SportsCameraThis is the standard main menu layout. Menu organisation and feature names may vary on your phone. Not all features may be available on your phone.Call Log• Received Calls• Dialled Calls•Notepad•CallTimers•CallCostMessaging• Create Message•CallVoicemail• Inbox• Email Inbox•BrowserMsgs• Info Services• Outbox•Drafts• Templates• Vodafone Messenger•VodafoneMailMy Files•Pictures• Sounds•Videos•Themes• GamesDigital Audio Player/SIM Tool Kit *ContactsVideoOrganiser & Tools•SIMToolkit•Alarms• Calendar• Calculator• Bar Code ReaderConnectivity• Bluetooth•USB•SyncSettings(see next page)* optional features](https://usermanual.wiki/Motorola-Mobility/T6FJ1/User-Guide-594610-Page-71.png)


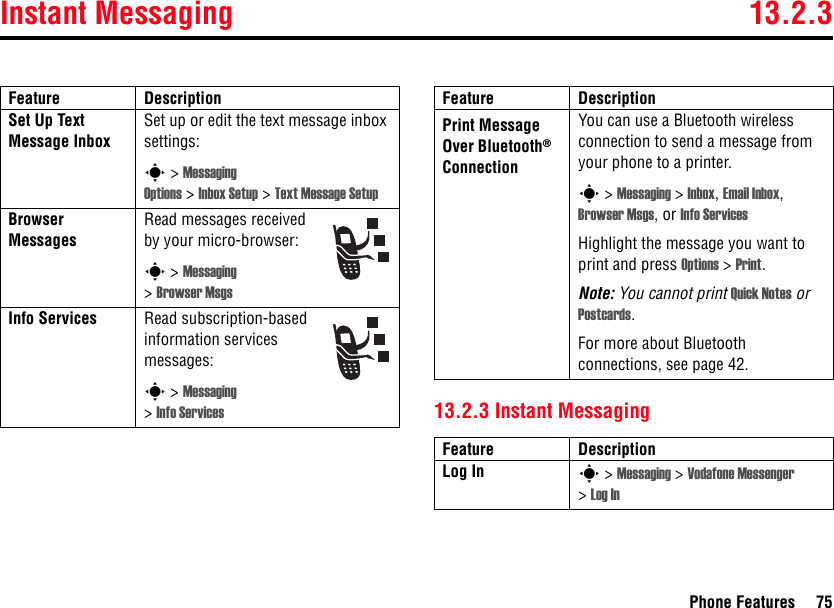
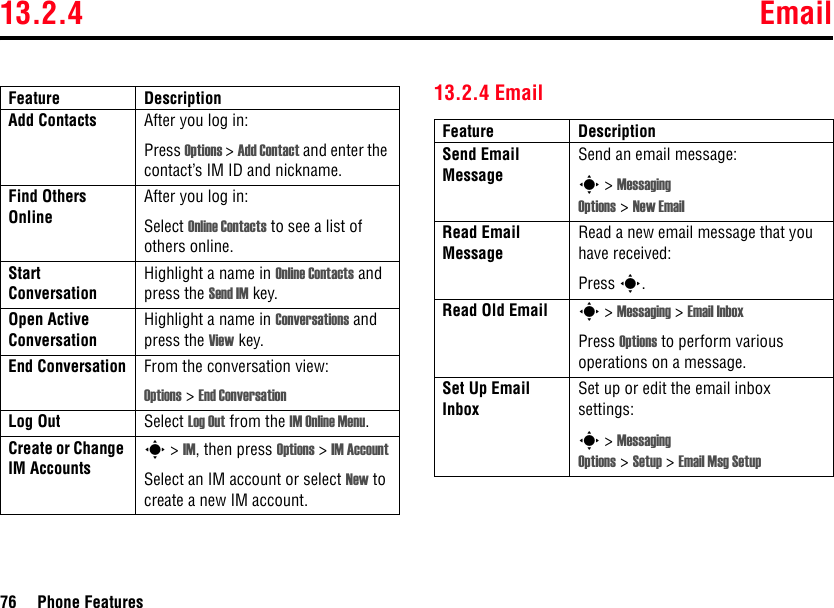
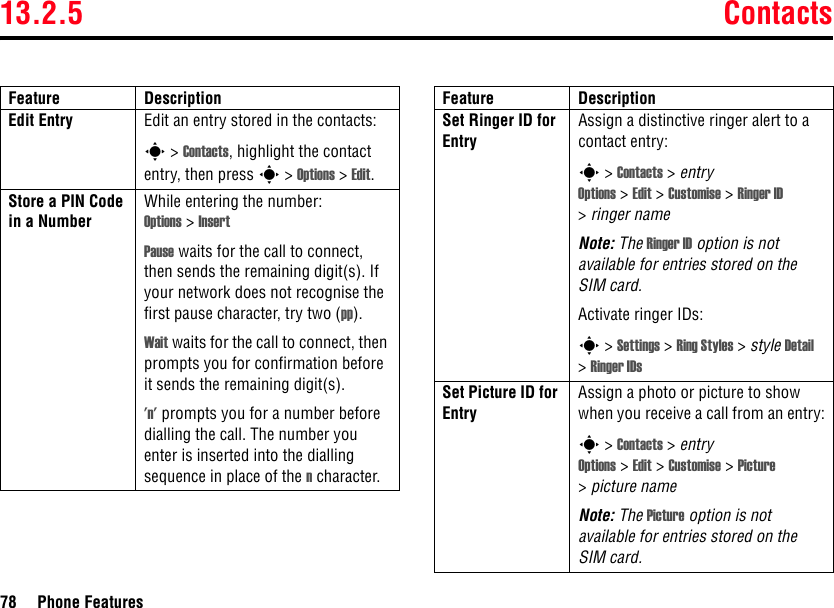
![Contacts 13.2.5Phone Features 7713.2.5 ContactsFeature DescriptionCreate Entry Create a new contact entry:s > Contacts > [New Entry] or Options > Create New > Phone Contact, SIM Contact, Mailing List or Email ListShortcut: Enter a phone number in the home screen then press the Store key to create an entry for that number.Tip: Some of your contacts may have more than one phone number, email address or URL. When creating a contact entry select Add More to store additional items for the same name.To enter a Ringer ID, Picture or Birthday press Customise.Note: If you enter a Birthday, the Zodiac sign is entered. You can’t manually enter the Zodiac sign.View All Entry DetailsView all the phone numbers, email addresses or URLs associated with a contact.s > Contacts, highlight the contact entry, press S left and right to view the other details.Dial Entry Call a number stored in the contacts:s > Contacts, highlight the contact entry, press to callShortcut: In the contacts, enter the first letters of an entry name to jump to the entry. You can also press * and # to see the entries that you use frequently or entries in other categories.Voice Dial Entry To Voice dial a number stored in the contacts:From idle, press and hold then say the command when prompted.Feature Description](https://usermanual.wiki/Motorola-Mobility/T6FJ1/User-Guide-594610-Page-78.png)
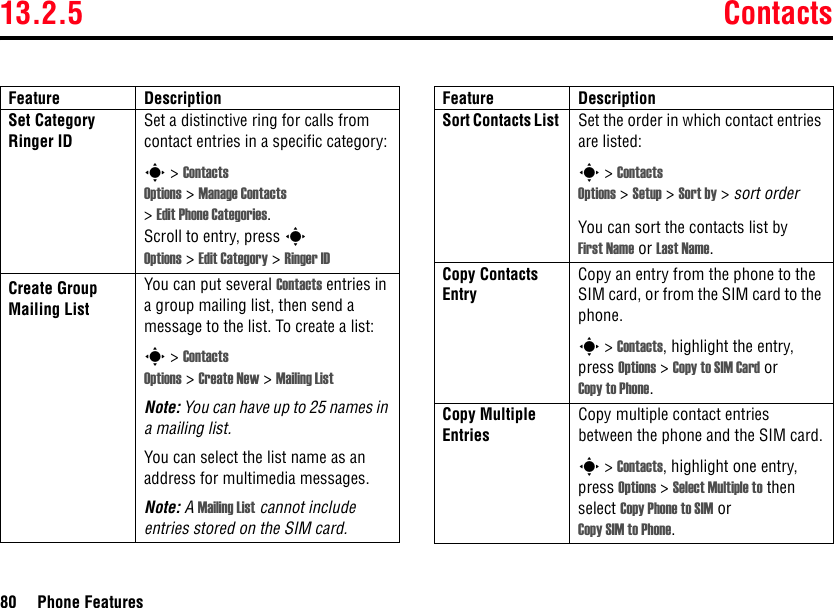
![Contacts 13.2.5Phone Features 79Set Picture ID ViewShow entries as a text list, or with picture caller ID photos:s > Contacts Options > Setup > View by > view nameSet Category for EntrySet the category for a contact entry:s > Contacts > entryOptions > Edit > Category >category nameNote: The Category option is not available for entries stored on the SIM card.Feature DescriptionSet Category ViewSet a contacts category view:s > Contacts Options > Filter By > Category >category viewYou can show entries in a predefined category, or entries in a category you create.Shortcut: To see other categories in Contacts, press * or #.Create Category Create a new category:s > Contacts Options > Manage Contacts >Edit Phone Categories > [New Category]Feature Description](https://usermanual.wiki/Motorola-Mobility/T6FJ1/User-Guide-594610-Page-80.png)

![Data Calls 13.2.10Phone Features 8513.2.10 Data CallsTo connect a device to your phone with a USB cable see page 42.Power-off Delay(car kit)Set the phone to stay on for a specified time after the ignition is switched off:s > Settings > Car Settings >Power-off DelayCharger Time(car kit)Charge the phone for a specified time after the ignition is switched off:s > Settings > Car Settings >Charger TimeFeature DescriptionSend Data Connect your phone to a device, then place a call through the device application.Feature DescriptionkkkReceive Data Connect your phone to a device, then answer a call through the device application.Using Sync You can call an Internet server and synchronise your contacts and calendar entries with the server.To set up an Internet sync partner, press:s > Connectivity > Sync > [New Entry]. Enter the server details, including Server URL (you can omit http:// and Data Path (the folder below the URL where your data is stored).To synchronise files with a partner you set up, select the partner from the list in s > Connectivity > Sync >SyncML.Feature Descriptionkk](https://usermanual.wiki/Motorola-Mobility/T6FJ1/User-Guide-594610-Page-86.png)
![13.2.11 Network Features86 Phone Features13.2.11 Network Features13.2.12 Personal Organiser FeaturesFeature DescriptionNetwork Settings View network information and adjust network settings:s > Settings > NetworkFeature DescriptionCreate Calendar Event Create a new calendar event:s > Organiser & Tools > Calendar, highlight the day, press s, press Options > [New]View Calendar EventView or edit event details:s > Organiser & Tools > Calendar, highlight the day, press s, scroll to the event, and press Options > View.Send Calendar EventSend an event in a Multimedia Message:While viewing an event, press Options >Send > Multimedia Message.Copy Calendar Event to Another DeviceCopy a calendar event to another phone, computer, or device:s > Organiser & Tools > Calendar, highlight the day, press s, highlight the event, press Options >Send >Bluetooth.Feature Description](https://usermanual.wiki/Motorola-Mobility/T6FJ1/User-Guide-594610-Page-87.png)
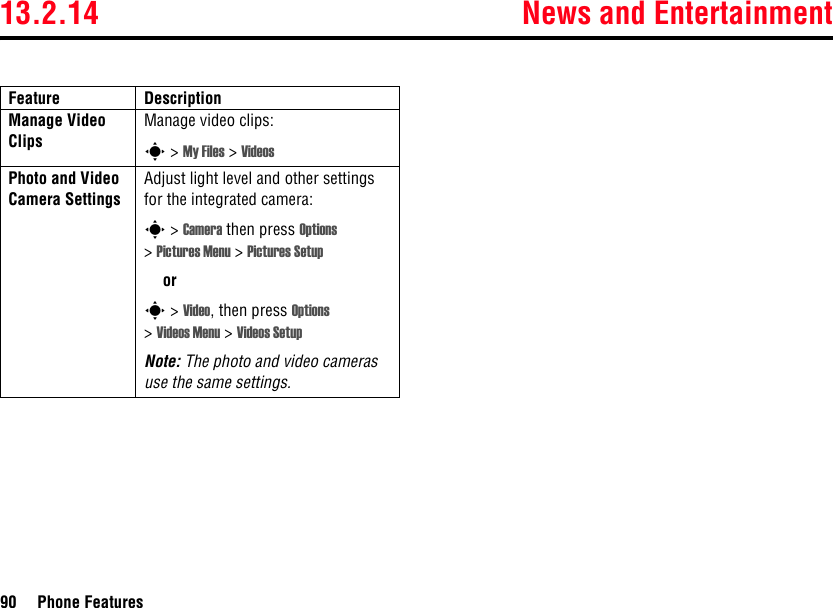
![News and Entertainment 13.2.14Phone Features 89Launch Game or ApplicationLaunch a Java™ game or application:s > Entertainment, highlight the application, press the Select keyNote: To install and run games stored on your memory card, press s>Entertainment > [Install New].Change Game or Application SettingsChange the volume, priority, or other settings for Java™ games or applications:s > Settings > Java SettingsFeature DescriptionFlight Mode You can switch your phone to flight mode to prevent it from communicating with the network. This lets you use games or other applications while you are on an airplane, without interfering with airplane communications.s > Settings > Flight Mode > OnYou can make the flight mode option appear whenever you turn on your phone:s > Settings > Flight Mode >Prompt At Startup > OnManage Pictures Manage photos, pictures, wallpaper backgrounds and animations:s > My Files > PicturesManage Ringtones and MusicManage ringtones and music that you have downloaded:s > My Files > SoundsFeature Description](https://usermanual.wiki/Motorola-Mobility/T6FJ1/User-Guide-594610-Page-90.png)