Motorola Mobility T6FK1 Portable PCS GSM Transceiver with Bluetooth User Manual A732 0819
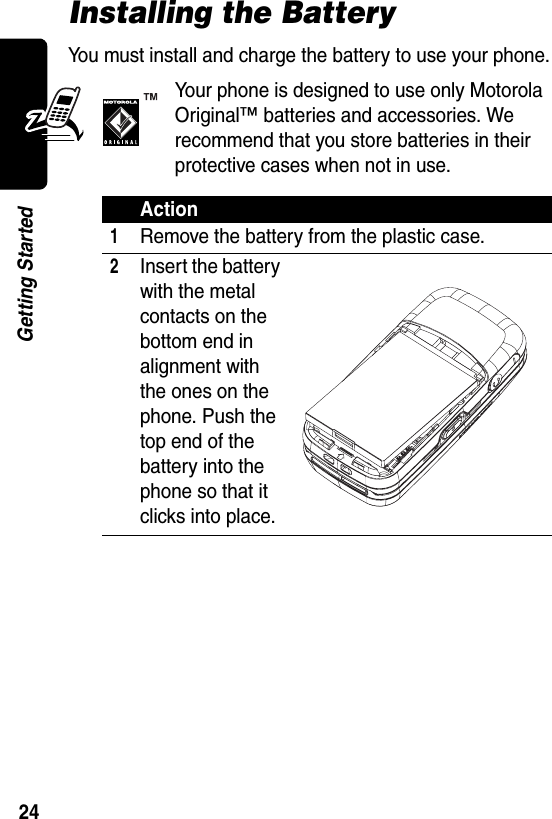
Motorola Mobility LLC Portable PCS GSM Transceiver with Bluetooth A732 0819
Contents
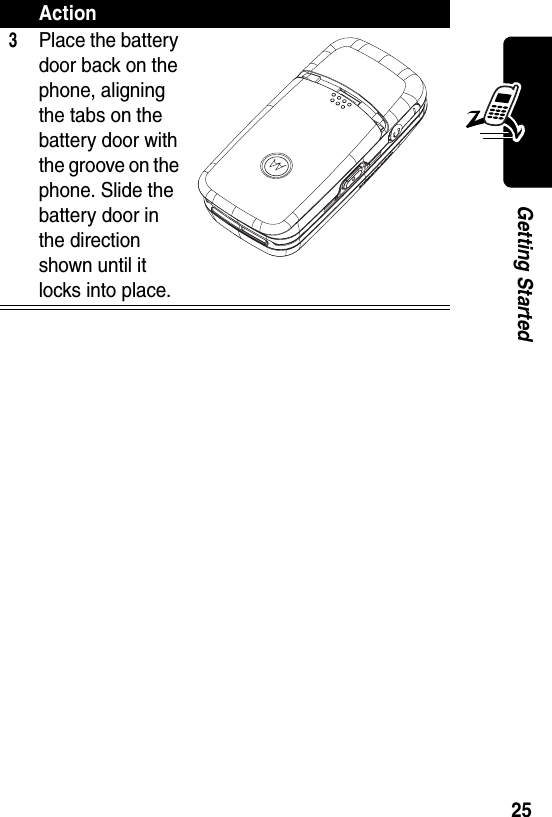
- 1. Exhibit 8 Users Manual 1
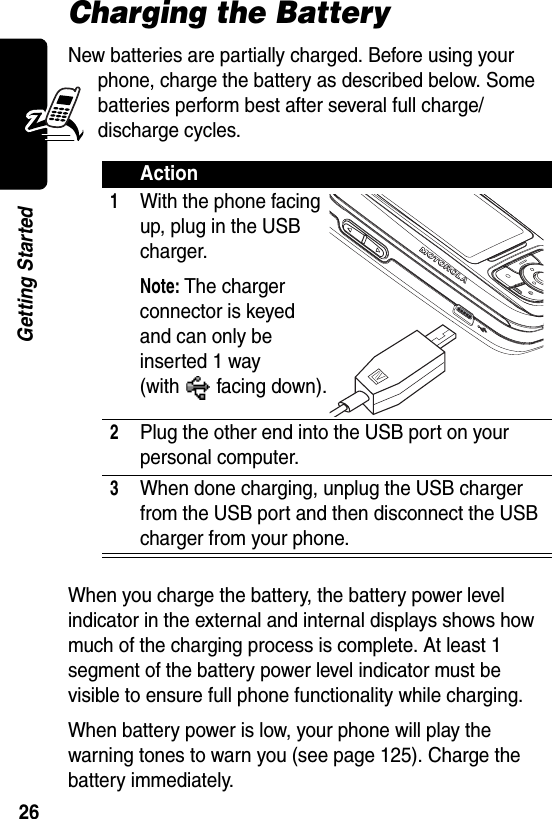
- 2. Exhibit 8 Users Manual 2
- 3. Exhibit 8 Users Manual 3
- 4. Exhibit 8 Users Manual 4
- 5. Exhibit 8 Users Manual 5
Exhibit 8 Users Manual 1


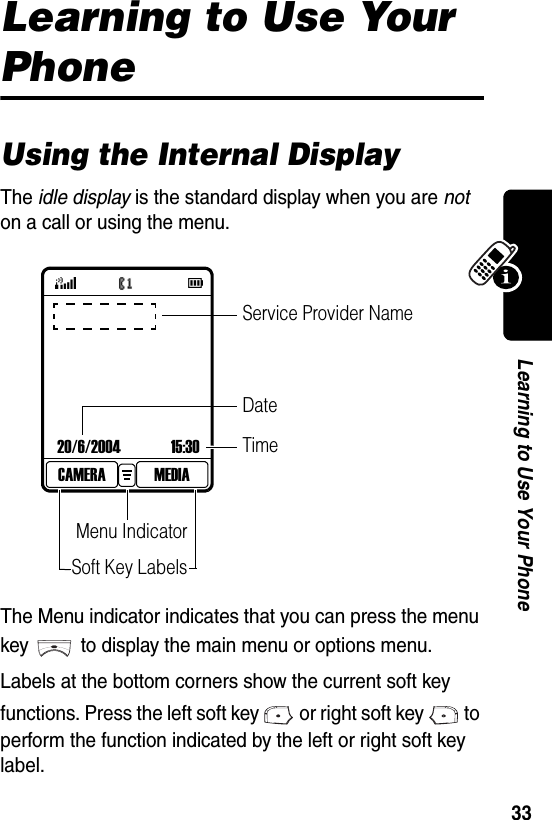

![50Learning to Use Your PhoneG H I 4g h i 4 í ìJ K L 5j k l 5M N O 6 Ñ ö Øm n o 6 ñ ö ø ó ò õP Q R S 7p q r s 7 βT U V 8 Üt u v 8 ü ú ùW X Y Z 9w x y z 90 + - x * / \ [ ] = > < # §](https://usermanual.wiki/Motorola-Mobility/T6FK1.Exhibit-8-Users-Manual-1/User-Guide-583558-Page-51.png)