Motorola Mobility T6GG1 Portable PCS GSM Transceiver with Bluetooth User Manual Brit02 EN
Motorola Mobility LLC Portable PCS GSM Transceiver with Bluetooth Brit02 EN
Contents
- 1. Exhibit 8 Users Manual
- 2. Exhibit 8 Users Manual 1
- 3. Exhibit 8 Users Manual 2
Exhibit 8 Users Manual

motorola.com
Brit02
Brit02_EN.book Page 1 Thursday, February 23, 2006 5:02 PM
2
www.motorola.com
Certain mobile phone features are dependent on the capabilities and settings
of your service provider’s network. Additionally, certain features may not be
activated by your service provider, and/or the provider's network settings may
limit the feature’s functionality. Always contact your service provider about
feature availability and functionality. All features, functionality, and other
product specifications, as well as the information contained in this user's
guide are based upon the latest available information and are believed to be
accurate at the time of printing. Motorola reserves the right to change or
modify any information or specifications without notice or obligation.
MOTOROLA and the Stylised M Logo are registered in the US Patent &
Trademark Office. The Bluetooth trademarks are owned by their proprietor and
used by Motorola, Inc. under licence. Java and all other Java-based marks are
trademarks or registered trademarks of Sun Microsystems, Inc. in the U.S. and
other countries. All other product or service names are the property of their
respective owners.
© Motorola, Inc. 2006.
The information contained in Motorola’s user’s guides is believed to be correct
at the time of printing. Motorola reserves the right to change or modify any
information or specifications without notice. The contents of Motorola’s user’s
guides are provided “as is.” Except as required by applicable law, no
warranties of any kind, either express or implied, including, but not limited to,
the implied warranties of merchantability and fitness for a particular purpose,
are made in relation to the accuracy, reliability, or contents of this guide.
Caution:
Changes or modifications made in the radio phone, not expressly
approved by Motorola, will void the user’s authority to operate the equipment.
While Products specifications and features may be subject to change without
notice, we are making every possible effort to ensure that user manuals are
updated on a regular basis to reflect product functionality revisions. However,
in the unlikely event that your manual version does not fully reflect the core
functionality of your product, please let us know. You may also be able to
access up-to-date versions of our manuals in the consumer section of our
Motorola web site, at http://www.motorola.com.
Brit02_EN.book Page 2 Thursday, February 23, 2006 5:02 PM
3
Contents
Contents
Safety Information . . . . . . . . . . . . . . . . . . . . . . . . . . . . . . 6
Use and Care . . . . . . . . . . . . . . . . . . . . . . . . . . . . . . . . . . 14
EU Conformance . . . . . . . . . . . . . . . . . . . . . . . . . . . . . . . 15
Recycling Information . . . . . . . . . . . . . . . . . . . . . . . . . . . 16
Using this guide . . . . . . . . . . . . . . . . . . . . . . . . . . . . . . . 17
Getting started . . . . . . . . . . . . . . . . . . . . . . . . . . . . . . . . 23
Preparing the phone for operation . . . . . . . . . . . . . . . . . 23
Basic operations . . . . . . . . . . . . . . . . . . . . . . . . . . . . . . 23
Tools . . . . . . . . . . . . . . . . . . . . . . . . . . . . . . . . . . . . . . . . . 28
Diary . . . . . . . . . . . . . . . . . . . . . . . . . . . . . . . . . . . . . . . . 28
Calculator . . . . . . . . . . . . . . . . . . . . . . . . . . . . . . . . . . . . 35
Currency converter . . . . . . . . . . . . . . . . . . . . . . . . . . . . 37
Alarm clock . . . . . . . . . . . . . . . . . . . . . . . . . . . . . . . . . . 38
Bluetooth . . . . . . . . . . . . . . . . . . . . . . . . . . . . . . . . . . . . 40
Using your phone as a modem . . . . . . . . . . . . . . . . . . . 45
Messages . . . . . . . . . . . . . . . . . . . . . . . . . . . . . . . . . . . . . 47
Reading a received SMS message . . . . . . . . . . . . . . . . 47
Reading stored SMS messages . . . . . . . . . . . . . . . . . . 48
Moving messages to SIM . . . . . . . . . . . . . . . . . . . . . . . 48
Forwarding messages . . . . . . . . . . . . . . . . . . . . . . . . . . 49
Activating or deactivating the message alert tone . . . . . 50
Preparing the phone to send SMS messages . . . . . . . . 51
Entering text . . . . . . . . . . . . . . . . . . . . . . . . . . . . . . . . . 52
Creating text models . . . . . . . . . . . . . . . . . . . . . . . . . . . 57
Editing a text model . . . . . . . . . . . . . . . . . . . . . . . . . . . . 58
Sending a new SMS message . . . . . . . . . . . . . . . . . . . . 58
Signature . . . . . . . . . . . . . . . . . . . . . . . . . . . . . . . . . . . . 60
Brit02_EN.book Page 3 Thursday, February 23, 2006 5:02 PM
4
Contents
Outbox and SIM archive emitted messages . . . . . . . . . 60
Status request . . . . . . . . . . . . . . . . . . . . . . . . . . . . . . . . 61
Storage consumption . . . . . . . . . . . . . . . . . . . . . . . . . . . 62
Broadcast - cell broadcast (CB) messages . . . . . . . . . . . 63
Calls & times . . . . . . . . . . . . . . . . . . . . . . . . . . . . . . . . . . 67
Calls log . . . . . . . . . . . . . . . . . . . . . . . . . . . . . . . . . . . . . 67
Call timers . . . . . . . . . . . . . . . . . . . . . . . . . . . . . . . . . . . 68
Call costs - management . . . . . . . . . . . . . . . . . . . . . . . . 71
Recorded call . . . . . . . . . . . . . . . . . . . . . . . . . . . . . . . . . 74
Phonebook . . . . . . . . . . . . . . . . . . . . . . . . . . . . . . . . . . . . 75
Storing names and telephone numbers . . . . . . . . . . . . . 75
Editing a phonebook or a SIM name card . . . . . . . . . . . 80
Viewing and calling phonebook numbers . . . . . . . . . . . . 81
Voice dialling . . . . . . . . . . . . . . . . . . . . . . . . . . . . . . . . . 83
Free space in the phonebook . . . . . . . . . . . . . . . . . . . . . 84
Creating a Category of cards . . . . . . . . . . . . . . . . . . . . . 85
My card . . . . . . . . . . . . . . . . . . . . . . . . . . . . . . . . . . . . . 87
My number(s) display . . . . . . . . . . . . . . . . . . . . . . . . . . . 88
Fixed dialling numbers . . . . . . . . . . . . . . . . . . . . . . . . . . 88
Export . . . . . . . . . . . . . . . . . . . . . . . . . . . . . . . . . . . . . . . 90
Camera . . . . . . . . . . . . . . . . . . . . . . . . . . . . . . . . . . . . . . . 91
Taking a picture . . . . . . . . . . . . . . . . . . . . . . . . . . . . . . . 91
Adjusting your picture . . . . . . . . . . . . . . . . . . . . . . . . . . 94
Storing/erasing your picture . . . . . . . . . . . . . . . . . . . . . . 96
Self timer . . . . . . . . . . . . . . . . . . . . . . . . . . . . . . . . . . . . 96
Fun & media box . . . . . . . . . . . . . . . . . . . . . . . . . . . . . . . 97
Pictures . . . . . . . . . . . . . . . . . . . . . . . . . . . . . . . . . . . . . 97
Melodies . . . . . . . . . . . . . . . . . . . . . . . . . . . . . . . . . . . 101
Games & applications . . . . . . . . . . . . . . . . . . . . . . . . . 104
Speech notes . . . . . . . . . . . . . . . . . . . . . . . . . . . . . . . . 106
Brit02_EN.book Page 4 Thursday, February 23, 2006 5:02 PM
5
Contents
Others . . . . . . . . . . . . . . . . . . . . . . . . . . . . . . . . . . . . . 107
Storage used . . . . . . . . . . . . . . . . . . . . . . . . . . . . . . . . 110
Calendar . . . . . . . . . . . . . . . . . . . . . . . . . . . . . . . . . . . . . 111
Network services . . . . . . . . . . . . . . . . . . . . . . . . . . . . . . 112
i-mode™ . . . . . . . . . . . . . . . . . . . . . . . . . . . . . . . . . . . . . 113
User interface . . . . . . . . . . . . . . . . . . . . . . . . . . . . . . . 113
i-mode menu . . . . . . . . . . . . . . . . . . . . . . . . . . . . . . . . 114
i-mode applications . . . . . . . . . . . . . . . . . . . . . . . . . . . 116
Mail system . . . . . . . . . . . . . . . . . . . . . . . . . . . . . . . . . 122
Mail system settings . . . . . . . . . . . . . . . . . . . . . . . . . . 133
Quick access to i-mode basic features . . . . . . . . . . . . 137
Settings . . . . . . . . . . . . . . . . . . . . . . . . . . . . . . . . . . . . . 141
Tones . . . . . . . . . . . . . . . . . . . . . . . . . . . . . . . . . . . . . . 141
Display . . . . . . . . . . . . . . . . . . . . . . . . . . . . . . . . . . . . . 144
Keypad . . . . . . . . . . . . . . . . . . . . . . . . . . . . . . . . . . . . . 146
Voice mail . . . . . . . . . . . . . . . . . . . . . . . . . . . . . . . . . . 148
Phone settings . . . . . . . . . . . . . . . . . . . . . . . . . . . . . . . 150
GSM services . . . . . . . . . . . . . . . . . . . . . . . . . . . . . . . 154
Security features . . . . . . . . . . . . . . . . . . . . . . . . . . . . . 163
SAR Data . . . . . . . . . . . . . . . . . . . . . . . . . . . . . . . . . . . . 168
WHO Information . . . . . . . . . . . . . . . . . . . . . . . . . . . . . 170
Index . . . . . . . . . . . . . . . . . . . . . . . . . . . . . . . . . . . . . . . . 171
Appendix . . . . . . . . . . . . . . . . . . . . . . . . . . . . . . . . . . . . 174
Glossary . . . . . . . . . . . . . . . . . . . . . . . . . . . . . . . . . . . . 174
Trouble shooting . . . . . . . . . . . . . . . . . . . . . . . . . . . . . 176
Error messages . . . . . . . . . . . . . . . . . . . . . . . . . . . . . . 179
Notes . . . . . . . . . . . . . . . . . . . . . . . . . . . . . . . . . . . . . . . 186
Brit02_EN.book Page 5 Thursday, February 23, 2006 5:02 PM

6
Safety Information
Safety and General Information
Safety Information
IMPORTANT INFORMATION ON SAFE AND EFFICIENT OPERATION. READ
THIS INFORMATION BEFORE USING YOUR PHONE.
1
Exposure To Radio Frequency (RF) Energy
Your phone contains a transmitter and a receiver. When it is ON, it receives
and transmits RF energy. When you communicate with your phone, the
system handling your call controls the power level at which your phone
transmits.
Your Motorola phone is designed to comply with local regulatory
requirements in your country concerning exposure of human beings to RF
energy.
Operational Precautions
To assure optimal phone performance and make sure human exposure to RF
energy is within the guidelines set forth in the relevant standards, always
adhere to the following instructions.
External Antenna Care
If your phone has an external antenna, use only the supplied or
Motorola-approved replacement antenna. Unauthorised antennas,
modifications, or attachments could damage the phone and/or may result
in non-compliance with local regulatory requirements in your country.
Do NOT hold the external antenna when the phone is IN USE. Holding the
external antenna affects call quality and may cause the phone to operate at
a higher power level than needed.
Phone Operation
When placing or receiving a phone call, hold your phone as you would a
wireline phone.
Brit02_EN.book Page 6 Thursday, February 23, 2006 5:02 PM
7
Safety Information
Body-Worn Operation: Voice Communication
To maintain compliance with RF energy exposure guidelines, if you wear a
phone on your body when transmitting voice communications, always place
the phone in a Motorola-supplied or approved clip, holder, holster, case, or
body harness for this phone, if available. Use of accessories not approved
by Motorola may exceed RF energy exposure guidelines.
If you do not use one of the body-worn accessories approved or supplied by
Motorola, and are not using the phone held in the normal use position,
ensure the phone and its antenna are at least 2.5 centimetres (1 inch) from
your body when transmitting.
Data Operation
When using any data feature of the phone, with or without an accessory
cable, position the phone and its antenna at least 2.5 centimetres (1 inch)
from your body.
Approved Accessories
Use of accessories not approved by Motorola, including but not limited to
batteries, antennas, and convertible covers, may cause your phone to
exceed RF energy exposure guidelines. For a list of approved Motorola
accessories, visit our website at
www.motorola.com
.
RF Energy Interference/Compatibility
Note:
Nearly every electronic device is susceptible to RF energy
interference from external sources if inadequately shielded, designed, or
otherwise configured for RF energy compatibility. In some circumstances
your phone may cause interference.
Note:
This device complies with Part 15 of the FCC Rules. Operation is
subject to the following two conditions: (1) this device may not cause
harmful interference, and (2) this device must accept any interference
received, including interference that may cause undesired operation.
Brit02_EN.book Page 7 Thursday, February 23, 2006 5:02 PM
8
Safety Information
Facilities
Turn off your phone in any facility where posted notices instruct you to do
so. These facilities may include hospitals or health care facilities that may
be using equipment that is sensitive to external RF energy.
Aircraft
Turn off your wireless device whenever instructed to do so by airline staff.
If your device offers a flight mode or similar feature, consult airline staff
about use in flight. If your device offers a feature that automatically turns
on the phone, then turn off this feature before boarding an aeroplane or
entering an area where the use of wireless devices is restricted.
Medical Devices
Pacemakers
Pacemaker manufacturers recommend that a minimum separation of
15 centimetres (6 inches) be maintained between a handheld wireless
phone and a pacemaker.
Persons with pacemakers should:
•
ALWAYS keep the phone more than 15 centimetres (6 inches) from
your pacemaker when the phone is turned ON.
•
NOT carry the phone in the breast pocket.
•
Use the ear opposite the pacemaker to minimise the potential for
interference.
•
Turn OFF the phone immediately if you have any reason to suspect
that interference is taking place.
Hearing Aids
Some digital wireless phones may interfere with some hearing aids. In the
event of such interference, you may want to consult your hearing aid
manufacturer to discuss alternatives.
Brit02_EN.book Page 8 Thursday, February 23, 2006 5:02 PM
9
Safety Information
Other Medical Devices
If you use any other personal medical device, consult the manufacturer of
your device to determine if it is adequately shielded from RF energy. Your
doctor may be able to assist you in obtaining this information.
Use While Driving
Check the laws and regulations on the use of phones in the area where you
drive. Always obey them.
When using your phone while driving, please:
•
Give full attention to driving and to the road. Using a phone may be
distracting in certain circumstances. Discontinue a call if you can’t
concentrate on driving.
•
Use handsfree operation, if available.
•
Pull off the road and park before making or answering a call if
driving conditions so require.
Responsible driving best practices can be found in the “Wireless Phone
Safety Tips” at the end of this guide and/or at the Motorola website:
www.motorola.com/callsmart
.
Operational Warnings
For Vehicles With an Air Bag
Do not place a phone in the area over an air bag or in the air bag
deployment area. Air bags inflate with great force. If a phone is placed in
the air bag deployment area and the air bag inflates, the phone may be
propelled with great force and cause serious injury to occupants of the
vehicle.
Brit02_EN.book Page 9 Thursday, February 23, 2006 5:02 PM
10
Safety Information
Gas or Petrol Stations
Obey all posted signs with respect to the use of radio equipment in gas or
petrol stations. Turn off your wireless device if instructed by authorised
staff.
Potentially Explosive Atmospheres
Turn off your phone prior to entering any area with a potentially explosive
atmosphere. Do not remove, install, or charge batteries in such areas.
Sparks in a potentially explosive atmosphere can cause an explosion or fire
resulting in bodily injury or even death.
Note:
The areas with potentially explosive atmospheres referred to above
include fuelling areas such as below decks on boats, fuel or chemical
transfer or storage facilities, areas where the air contains chemicals or
particles, such as grain, dust, or metal powders. Areas with potentially
explosive atmospheres are often but not always posted.
Blasting Caps and Areas
To avoid possible interference with blasting operations, turn OFF your
phone when you are near electrical blasting caps, in a blasting area, or in
areas posted “Turn off electronic devices.” Obey all signs and instructions.
Damaged Products
If your phone or battery has been submerged in water, punctured, or
subjected to a severe fall, do not use it until you take it to a Motorola
Authorised Service Centre to determine if it has been damaged. Do not
attempt to dry it with an external heat source, such as a microwave oven.
Brit02_EN.book Page 10 Thursday, February 23, 2006 5:02 PM

11
Safety Information
Batteries and Chargers
Batteries can cause property damage and/or bodily injury such as burns if a
conductive material such as jewellery, keys, or beaded chains touch
exposed terminals. The conductive material may complete an electrical
circuit (short circuit) and become hot. Take care when handling a charged
battery, particularly when placing it inside a pocket, purse, or other
container with metal objects.
Use only Motorola Original™ batteries
and chargers.
Caution:
To avoid risk of personal injury, do not dispose of your battery in a
fire.
Your battery, charger, or phone may contain symbols, defined as follows:
Choking Hazards
Your phone or its accessories may include detachable parts, which may
present a choking hazard to small children. Keep your phone and its
accessories away from small children.
Symbol Definition
Important safety information will follow.
Your battery or phone should not be disposed of in a
fire.
Your battery or phone may require recycling in
accordance with local laws. Contact your local
regulatory authorities for more information.
Your battery or phone should not be thrown in the trash.
Your phone contains an internal lithium ion battery.
032374o
032376o
032375o
032377o
032378o
Li Ion BATT
Brit02_EN.book Page 11 Thursday, February 23, 2006 5:02 PM
12
Safety Information
Glass parts
Some parts of your mobile device may be made of glass. This glass could
break if the product is dropped on a hard surface or receives a substantial
impact. If glass breaks, do not touch or attempt to remove. Stop using your
mobile device until the glass is replaced by a qualified service centre.
Seizures/Blackouts
Some people may be susceptible to epileptic seizures or blackouts when
exposed to flashing lights, such as when watching television or playing
video games. These seizures or blackouts may occur even if a person never
had a previous seizure or blackout.
If you have experienced seizures or blackouts, or if you have a family
history of such occurrences, please consult your doctor before playing video
games on your phone or enabling a flashing-lights feature on your phone
(the flashing-light feature is not available on all products).
Parents should monitor their children's use of video game or other features
that incorporate flashing lights on the phones. All persons should
discontinue use and consult a doctor if any of the following symptoms
occur: convulsion, eye or muscle twitching, loss of awareness, involuntary
movements, or disorientation.
To limit the likelihood of such symptoms, please take the following safety
precautions:
•
Do not play or use a flashing-lights feature if you are tired or need
sleep.
•
Take a minimum of a 15-minute break hourly.
•
Play in a room in which all lights are on.
•
Play at the farthest distance possible from the screen.
Brit02_EN.book Page 12 Thursday, February 23, 2006 5:02 PM
13
Safety Information
Repetitive Motion Injuries
When you repetitively perform actions such as pressing keys or entering
finger-written characters, you may experience occasional discomfort in
your hands, arms, shoulders, neck, or other parts of your body. Follow these
instructions to avoid problems such as tendonitis, carpal tunnel syndrome,
or other musculoskeletal disorders:
•
Take a minimum 15-minute break every hour of game playing.
•
If your hands, wrists, or arms become tired or sore while playing,
stop and rest for several hours before playing again.
•
If you continue to have sore hands, wrists, or arms during or after
play, stop playing and see a doctor.
1. The information provided in this document supersedes the general safety
information in user’s guides published prior to January 28, 2005.
Brit02_EN.book Page 13 Thursday, February 23, 2006 5:02 PM

14
Use and Care
Use and Care
Use and Care
To care for your Motorola phone, please keep it away from:
liquids of any kind
Do not expose your phone to water, rain, extreme
humidity, sweat, or other moisture.
extreme heat or cold
Avoid temperatures below -10°C/14°F or
above 45°C/113°F.
microwaves
Do not try to dry your phone in a microwave oven.
dust and dirt
Do not expose your phone to dust, dirt, sand, food, or
other inappropriate materials.
cleaning solutions
To clean your phone, use only a dry soft cloth. Do not use
alcohol or other cleaning solutions.
the ground
Do not drop your phone.
Brit02_EN.book Page 14 Thursday, February 23, 2006 5:02 PM
15
EU Conformance
European Union Directives
Conformance Statement
EU Confor mance
Hereby, Motorola declares that this product is in compliance
with:
•
The essential requirements and other relevant provisions of
Directive 1999/5/EC
•
All other relevant EU Directives
The above gives an example of a typical Product Approval Number.
You can view your product’s Declaration of Conformity (DoC) to Directive
1999/5/EC (to R&TTE Directive) at www.motorola.com/rtte. To find your
DoC, enter the product Approval Number from your product’s label in the
“Search” bar on the Web site.
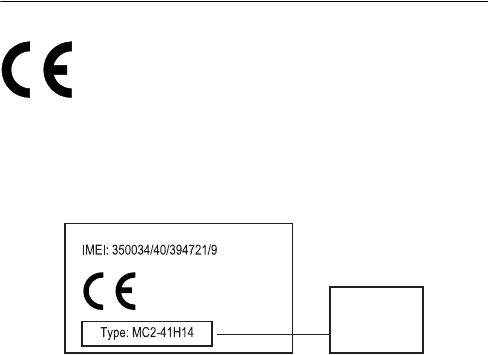
0168
Product
Approval
Number
Brit02_EN.book Page 15 Thursday, February 23, 2006 5:02 PM

16
Recycling Information
Caring for the Environment by
Recycling
Recycling Information
When you see this symbol on a Motorola product, do not dispose
of the product with household waste.
Recycling Mobile Phones and
Accessories
Do not dispose of mobile phones or electrical accessories, such as chargers
or headsets, with your household waste. In some countries or regions,
collection systems are set up to handle electrical and electronic waste
items. Contact your regional authorities for more details. If collection
systems aren’t available, return unwanted mobile phones or electrical
accessories to any Motorola Approved Service Centre in your region.
Brit02_EN.book Page 16 Thursday, February 23, 2006 5:02 PM

17
Using this guide
Using this guide
Please carefully read this user guide. It contains information
about your phone and the way that it operates on the
network. Some of the features described in this user guide
are network dependent. Do not forget to check with your
service provider which of these you can use. You may need
to take out additional subscriptions to activate certain
features.
Key actions
To help you become quickly familiar with your phone, here is
how to use the keypad.
OK
key in the middle of the cursor key (to launch an OK
action when (symbole carré) is displayed and access
the animated Icons menu: see pictures below).
Menu key (to reach the 9 icons menu from the idle
screen or to reach options lists when indicated on the
display).
Left softkey (to validate the item above: usually an
action).
Right softkey (to validate the action above: usually
Exit
).
Right arrow on cursor key.
Left arrow on cursor key.
Up arrow on cursor key.
Down arrow on cursor key.
Send and Call key.
End, On and Off key.
Brit02_EN.book Page 17 Thursday, February 23, 2006 5:02 PM
18
Using this guide
9 icons menu
Note:
The availability of the Calendar or Network services
menu depends on your SIM card.
User guide notation
Here is how to follow the instructions contained in this user
guide and use your phone.
Press
OK
Press the key to select
OK
.
Press the Menu
key. Select
Settings
.
From the standby display press the
key to access the main menu, scroll up,
down, left or right to the
Settings
menu
item and press
OK
to access the sub-
menu.
Select
Read
(item
above left
softkey)
Press the key underneath
Read
.
Select ’
Cancel
’
or ’
Exit
’ (item
above right
softkey)
Press once to return to the previous
screen. Press and hold to return to the
standby screen (except whilst in the i-
mode menu).
Select
Melodies
Use the cursor key to scroll up, down, left
or right to the required menu item and
validate by pressing
OK
.
E.g. ’Select
Melodies
’: scroll to
Melodies
menu item and press the
OK
key to validate
your selection.
View...
The ... indicate that more options or sub-
menus are available when pressing
OK.
Brit02_EN.book Page 18 Thursday, February 23, 2006 5:02 PM

19
Using this guide
Using the dynamic scroll panels
When scrolling the menu, the following scroll panel type al-
lows you to have a clear view of the information to be entered.
Note:
The arrow keys displayed at the bottom of the screen
show the scrolling possibilities.
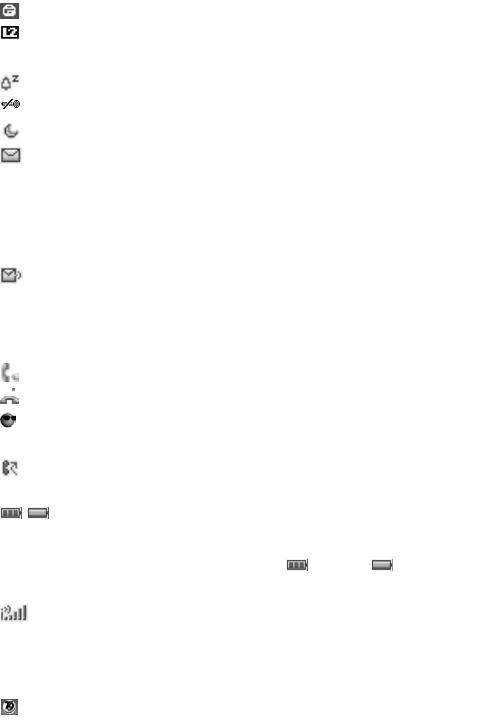
Understanding the graphic display
indicators (icons)
The icons indicate the phone state and operational conditions
when in use.
The following icons may be displayed:
1
The list of elements to be entered is displayed. Scroll
down to the field(s) you want to fill in and press
OK
.
2
Enter the requested information or select the requested
item and select
OK
to validate.
3
Fill in as many fields as necessary and select
Save
to
store all the information entered.
SIM
memory in use
GPRS service
icon. This indicates that data packet
services or connection to the i-mode are available.
GPRS connection
icon. This is displayed when a GPRS
connection is in progress.
Roaming
. This is displayed when the phone is
connected to a network other than its home network.
Call diverting
. This indicates that all incoming calls are
being diverted. Call diverting is network dependent.
Alarm clock.
Vibrator alert.
Brit02_EN.book Page 19 Thursday, February 23, 2006 5:02 PM
20
Using this guide
Keypad lock.
Line 2
. This indicates that the second line is in use
(subscription dependent).
Silent mode on.
Mute.
Auto-switch-off
mode on.
Short message service (SMS)
. This is displayed when
one or more short messages have been received and
not yet read.
A red envelope icon is displayed when
the SMS message box is full and no new message
can be stored. SMS availability is network dependent.
Voice Mail.
This is displayed when a Voice Mail
message has been received and stored by the networks
Voice Mail centre. Voice Mail availability is network
dependent.
Outgoing Call.
Incoming Call.
Withheld number.
This is displayed when the caller
does not wish his identity to be shown.
Unanswered call
. This is displayed when an incoming
has not been answered.
Battery level indicator.
This is permanently displayed to
show the current battery charge level. Three levels
are shown: from full (3 bars) to low (no bar). If
the icon is empty, the phone needs recharging.
Signal strength level
. There are five strength levels.
These show the strength of the received signal. The
more bars, the stronger the signal. If the network
cannot be found, no strength level is displayed.
Tegic edition mode.
Brit02_EN.book Page 20 Thursday, February 23, 2006 5:02 PM
21
Using this guide
Multitap edition mode.
Arrow keys
. These icons are displayed during menu
operation to indicate that more items in the menu can
be access by pressing
or
.
Secured connection
. This icon is displayed when a
secured connection is in progress.
Games & Applications
software in use.
Games & Applications
icon. It is displayed when a game
or an application is running.
Problem with the
Games & Applications
auto-start.
Mail
or
MMS on mobile
Mail
or
MMS box on mobile full
Mail on server
MMS on server
Mailbox on server full
MMS box on server full
Bluetooth active. This icon is displayed when the
Bluetooth service is activated on the mobile phone.
Bluetooth connection with another device active. This
icon is displayed when the phone is connected to
another Bluetooth device, except when connected to
’My car kit’ and ’My headset’.
Bluetooth connection with ’My car kit’ active. This
icon is displayed when the phone is connected to ’My
car kit’.
Bluetooth connection with ’My headset’ active. This
icon is displayed when the phone is connected to ’My
headset’.
Brit02_EN.book Page 21 Thursday, February 23, 2006 5:02 PM
22
Using this guide
Figures on Menu list
When on a menu list, you can select the required item by
scrolling up or down and pressing the OK key.
Or you can dial the matching figure on the keypad.
Brit02_EN.book Page 22 Thursday, February 23, 2006 5:02 PM

23
Getting started
Getting started
Preparing the phone for operation
Please refer to your Quick Start Guide.
Basic operations
Turning the phone on
Note:
Please refer to "Security features", page 163 for more
details on your PIN and lock codes.
If an image is set as a Welcome screen and/or a melody has
been set as a Welcome melody, the phone first requests the
PIN code then shows the selected image/animation and
plays the selected melody before showing the idle screen
(please see "Setting an image as an Idle screen, a Welcome
screen or a Goodbye screen from the pictures folder", page
100 and "Melodies", page 101).
1
Press and hold the On/Off key. A beep sounds at
phone activation. When switching the phone on for
the first time or if the phone has been incorrectly
switched off may be displayed.
2
If your SIM card is PIN protected,
Enter PIN
is displayed.
Enter the PIN code and select
OK
.
3
If prompted, enter the date & time settings or select
Exit
if the settings are correct.
Brit02_EN.book Page 23 Thursday, February 23, 2006 5:02 PM
24
Getting started
Making a call
The phone can make and receive calls only when it is
switched on, when a valid SIM card is inserted and when it is
connected to a GSM, DCS or PCS network service.
If the keypad is locked you can receive calls but you
cannot make any (see "Keypad lock", page 26).
To make a call:
Whilst in conversation an
Options
list (
AutoDTMF, Hold
or
Retrieve, Speaker On
or
Speaker Off, Mute
or
Unmute, End call
and
Record)
The Main menu is available by pressing the Menu
key.
Note:
When using the hands free mode, do not put the phone
to your ear.
Note:
The option
Route to phone
or
Route to headset
may
appear if a bluetooth device is connected.
Answering a call
When receiving a phone call ( is displayed):
1
Dial the phone number or select one from your
phonebook (press the down arrow key from the idle
screen and select one of the available names).
2
Press the Call/Send key ( is displayed).
In compliance with European regulations, you are obliged to
inform your correspondent before recording a phone
conversation.
1
Press the Call/Send key.
Brit02_EN.book Page 24 Thursday, February 23, 2006 5:02 PM

25
Getting started
Note:
If a Bluetooth accessory (headset or car kit) is
connected to the phone and you wish to take the call on the
handset, press
Options
and select
Route to phone
or select
Phone
(Left softkey).
Rejecting a call
When receiving a phone call:
Ending a call
The Idle screen
When switched on, the phone searches for connection with
the network. Once the connection has been established, a
beep sounds and the network and/or service provider name or
logo are displayed together with the time and date, the signal
strength and the battery charge level. If the phone cannot find
a valid network, the signal strength and the operator name are
not displayed.
The four arrows indicate that features can be accessed via the
four arrows on the cursor key.
The symbol in the middle of the cursor key indicates that an
action can be done by pressing the OK key.
Mail
and
i-mode
indicate that you can directly access the
mailer and the i-mode service by pressing the softkeys.
1
Press the On/Off key to reject the call (the call is then
forwarded to your mailbox).
1
Press the On/Off key.
Brit02_EN.book Page 25 Thursday, February 23, 2006 5:02 PM

26
Getting started
indicates that your phone is attached to a GPRS network.
Keypad lock
When activated, the keypad lock feature prevents
accidental action occurrings (e.g. camera activation)
whilst the phone is being carried in a pocket or a bag for
instance. Incoming calls can however be received and
answered. Once the call is over, the keypad lock is
automatically reactivated.
To activate the keypad lock from the idle screen:
To activate the keypad lock from the main menu:
To deactivate the keypad lock:
Turning the phone off
A tone sounds to confirm your action. A Goodbye screen is
displayed whilst the phone switches off (you can set a
Goodbye melody and/or picture to be played/displayed at
phone switch off (please see "Setting an image as an Idle
screen, a Welcome screen or a Goodbye screen from the
pictures folder", page 100 and "Melodies", page 101).
1
Press and hold .
Keypad locked
is displayed.
1
Press the Menu key. Select
Settings
.
2
Select
Keypad
, then select
Keypad lock
.
1
Select
Unlock
and press or press and hold .
Keypad
unlocked
is displayed.
1
Press and hold the On/Off key.
Brit02_EN.book Page 26 Thursday, February 23, 2006 5:02 PM
27
Getting started
Note:
Do not take the battery out of the phone without first
turning the phone off. Data might be lost. Should this happen
a cross symbol is displayed the next time the phone is
activated.
Power saver
To allow you to enjoy optimised use of your phone a
power saver screen is automatically displayed when the
phone has not been used for more than one minute. The
screen becomes fully black.
The power saver does not prevent operation. You can
therefore receive a call, an SMS, etc. whilst the power saver
is on. Pressing any key allows you to return to an active
screen.
Note:
When a PC cable is connected to the phone, discharge
of the battery may occur after a while, if the PC is in idle
mode.
Note:
After having used your PC, and to enjoy optimised use
of your phone standby and talk time, please do not forget to
disconnect the PC cable after use.
Brit02_EN.book Page 27 Thursday, February 23, 2006 5:02 PM
28
Tools
Tools
The
Tools
menu allows access to a diary, a calculator, a cur-
rency converter, an alarm clock and to Bluetooth.
Diary
The Diary is divided into three parts:
•
The Calendar (to manage events),
•
The Tasks list (to manage tasks),
•
The Storage used (to provide the diary memory
information).
An event is a diary entry that has a direct implication on your
timetable (e.g. a meeting).
A task is a diary entry that has no direct implication on your
timetable (e.g. organising a journey).
Calendar
The calendar allows you to store up to 100 events scheduled
to occur either once, daily, weekly, monthly or yearly. Each
entry can contain up to 50 characters plus a reminder alarm.
Events may be viewed on a daily, a weekly or a monthly
basis, and may be sent by SMS.
Brit02_EN.book Page 28 Thursday, February 23, 2006 5:02 PM

29
Tools
To enter an event:
An empty new event card is displayed with the following
fields:
•
Title (up to 10 characters)
•
Description (up to 50 characters)
•
Starting date & time
•
Ending date & time
•
Alarm
•
Location
•
Repetition
1
Press the Menu key.
Select
Tools
.
2
Select
Diary
.
3
Select
Calendar
. A Monthly or Daily view is displayed (the
Daily view is displayed if an event is related to the
current day).
4
Select
Options
.
5
Select
New event
.
6
Enter or select the requested data. Confirm each entry
by pressing
OK
.
7
Select
Save
to confirm data storage.
Brit02_EN.book Page 29 Thursday, February 23, 2006 5:02 PM
30
Tools
To view the current day’s entries:
In the Today view each event is displayed on one line as
follows :
•
A graphic representation ( )
if an alarm has been set,
•
The event starting time,
•
The first part of the event title,
Red events indicated that two or more events clash.
The following actions are available:
An Options list is available. It allows you to change the
current
View...
,
Create
a
new event
or
Modify
an
event
,
Send
it
by
SMS
,
Mail
or
Bluetooth
,
Export...
it,
Delete
one
event
or
Delete all
events
.
1
Press the Menu key.
Select
Tools
.
2
Select
Diary.
3
Select
Calendar
.
4
Select
Options
.
5
Select
View...
and then
Today
to view the current day’s
entries or select
Day view
to view the selected day’s
entries.
actions purpose
To move down to the next event or loop back to
the first one
To move up to the previous event or loop to the
last one
To move to the previous day
To move to the next day
Brit02_EN.book Page 30 Thursday, February 23, 2006 5:02 PM
31
Tools
To view weekly entries:
The week’s events are displayed in chronological order. Each
event is represented as a bar (its length depends on its
duration. Red indicates clashes. Purple indicates that the
alarm has been activated).
The following actions are available:
An Options list is available. It allows you to change the
current
View...
,
Create
an
event
,
Export...
the
Events in
a defined
period
/
All events
or
Delete all events
.
1
Press the Menu key.
Select
Tools
.
2
Select
Diary
.
3
Select
Calendar
.
4
Select
Options
.
5
Select
View...
and then
Week view
.
actions purpose
To move down to the next time interval
To move up to the next time interval
(short press) To move to the previous day
(long press) To scroll to the previous week
(short press) To move to the following day
(long press) To scroll to the following week
Brit02_EN.book Page 31 Thursday, February 23, 2006 5:02 PM

32
Tools
To view monthly entries:
The whole month is displayed.
If the selected month is the current one, the date is ringed in
a different colour. Colours are used to indicated the days (and
alarm activation) of the stored events.The following actions
are available:
An Options list is available. It allows you to change the
current
View...
,
Create
an
event
,
Export...
the
Events in
a defined
period
/
All events
or
Delete all events
.
Tasks list
This feature allows you to store up to 100 tasks to be done
(To do), scheduled with a start and a due date, with or
without a reminder alarm.
1
Press the Menu key.
Select
Tools
.
2
Select
Diary
.
3
Select
Calendar
.
4
Select
Options
.
5
Select
View...
and
Month view
.
actions purpose
To move down within the current display
To move up within the current display
(short press) To move to the previous day
(long press) To scroll to the previous month
(short press) To move to the following day
(long press) To scroll to the following month
Brit02_EN.book Page 32 Thursday, February 23, 2006 5:02 PM

33
Tools
To enter a new task:
An empty task card is displayed with the following fields:
•
A title
•
A description
•
A starting date
•
A due date
•
An audio alarm which can be activated at your specified
time
To display a tasks list:
The tasks are displayed in a list, ordered by date. If an alarm
is activated for a task is displayed.
An Options list is available. It allows you to create a
New task
,
Modify
the current
task
,
Send
a task
by SMS, Mail
or
Bluetooth
,
to
Export
...
Tasks in period
or
All tasks
, to
Delete
the current
task
or to
Delete all tasks period
.
1
Press the Menu key.
Select
Tools
.
2
Select
Diary
.
3
Select
Tasks list
.
4
Select
New task
and enter the required information.
5
Enter or select the requested data. Confirm each entry
by pressing
OK
.
6
Select
Save
to confirm data storage.
1
Press the Menu key.
Select
Tools
.
2
Select
Diary
.
3
Select
Tasks list
.
4
Select
Current tasks
or
Elapsed tasks
.
Brit02_EN.book Page 33 Thursday, February 23, 2006 5:02 PM

34
Tools
Exporting an event/a task
The
Export...
option allows you to create a file so as to
exchange events or tasks with another device such as a PC
or another phone. The created file can contain all the events
or tasks stored in the calendar or in the tasks list (select
All
events/tasks
) or in a time interval (Select
Events/Tasks in
period
).
Note:
The exported calendar or tasks list item is stored as a
.vcs file.
Alarm notification
The alarm notification screen is displayed at the specified
time according to the event or task to which it relates.
If it is not acknowledged, the alarm stops ringing after 60 seconds.
It automatically restarts after a snooze time until it is stopped or up
to the beginning/ending time and date of the event/task. If the
phone is off at alarm time, it automatically switches on.
1
Press
Options
(from the Day, Week or Month view).
Scroll down and select
Export...
2
Select
All events
/
tasks
or select
Events
/
Tasks in period
then
define the time period (Between / And) and select
Export
.
3
The exported file is stored in the
Others
folder of the
Fun
& Media box
menu. You can then send it to another
device (please see "Others", page 107).
Brit02_EN.book Page 34 Thursday, February 23, 2006 5:02 PM

35
Tools
If the phone is locked or if the PIN setting is on, the phone
returns to this locked state after the alarm has rung until you
use it.
Note:
Snooze is only available on an event alarm.
Storage used
This feature displays the number of Diary registered events
and tasks. The following actions are available in the
Options
menu:
Calculator
This feature allows you to make simple calculations using +
(plus), - (minus), * (multiplication), / (division) and %
(percentage) functions.
If the currency converter is activated, numbers can be
converted during calculations.
1
Press
Valid
to acknowledge the alarm or press
Snooze
to
repeat the alarm after the snooze period.
actions purpose
Delete
events
To delete the events of the defined time period.
Delete
tasks
To delete the tasks of the defined time period.
Delete all
events
To delete all the events stored in Calendar.
Delete all
tasks
To delete the tasks stored in the Diary.
Brit02_EN.book Page 35 Thursday, February 23, 2006 5:02 PM

36
Tools
To use the calculator
,
Press keys to to enter numbers. Press the multitap
(for further details on the multitap text entry method please
see "Entering text", page 52) to get
+
,
-
,
*
and
/
symbols. Use
the multitap to enter decimal points or
%
.
Press
Clear
during a calculation to correct an entry. Press
=
to
get the operation result.
In the above example, pressing
=
again calculates 1728 x 12
= 20736
Pressing
Clear
deletes the result.
1
Press the Menu key.
Select
Tools
.
2
Select
Calculator
.
The phone is ready to perform simple calculations.
Example
144 x 12 = 1728
key sequence display
144
Press 3x
*
12
=
1728
Note:
The % function can only be used (entered) as the
last operation during a calculation.
e.g.250 - 10% = 225
Brit02_EN.book Page 36 Thursday, February 23, 2006 5:02 PM
37
Tools
An integrated currency converter facility is also available. See
Currency converter below.
Note:
This example was made on the basis of the following
exchange rate:
1 = £0.61871
Note:
The Currency converter feature can be accessed from
the Calculator and from the Currency converter submenus.
Currency converter
This feature allows currency converting. The currencies and
exchange rates must be entered prior to use. The conversion
is calculated on the per unit exchange rate of the second
selected currency.
Example
using the currency converter
£ - :
154 + 3 = £ 97.1374
key sequence display
Select
Curr.
95.2813
+
1.8561
=
97.1374
Brit02_EN.book Page 37 Thursday, February 23, 2006 5:02 PM

38
Tools
To select the currencies and the exchange rate:
To calculate the conversion between the selected
currencies:
Alarm clock
This feature allows you to set a daily Reminder Alarm.
1
Press the Menu key.
Select
Tools
.
2
Select
Currency converter
.
3
Select
Settings
.
4
Enter the first currency name (e.g. Euro). Press the OK
key.
Enter the second currency name (e.g. Dollar). Press the
OK key.
Enter the exchange rate using to enter a decimal
point.
5
Press the OK key to validate the entry. Press
Save
to
confirm data storage.
1
Press the Menu key.
Select
Tools
.
2
Select
Currency converter
.
3
Select one of the first two options.
4
Enter the amount to be converted. Press to insert a
decimal point if needed.
5
Press the OK key. The converted amount and the
exchange rate information are displayed.
Brit02_EN.book Page 38 Thursday, February 23, 2006 5:02 PM

39
Tools
To set a time and turn the alarm on:
Note:
When 'on', the alarm operates at the same time every
day until turned off.
If the phone is off at alarm time, it automatically switches on.
If the phone is locked or if the PIN setting is on, the phone
returns to this locked state after the alarm has rung until you
use it.
If the alarm is acknowledged but not validated after the 3
rd
(and final) alarm, the alarm indicators remain on the display
for up to 15 minutes (the phone then either goes back to its
'on' or 'off' previous state).
Note:
If a call is in progress at alarm time a
'
Call in progress
'
alert beep sounds and a visual alert is displayed every 3
minutes. Validate or acknowledge the alarm in the usual way.
1
Press the Menu key.
Select
Tools
.
2
Select
Alarm clock
.
3
Select
On
and enter the alarm time or press the
OK
key
to validate the displayed time.
is displayed when reverting to the idle screen.
Brit02_EN.book Page 39 Thursday, February 23, 2006 5:02 PM

40
Tools
To use the alarm as a Reminder or a Snooze Alarm:
To turn the alarm off:
Bluetooth
Bluetooth connections are radio connections. Bluetooth
connections allow to exchange data and to launch wireless
connections between the phone and another phone, a
computer, a headset, a car kit or other devices (provided they
are Bluetooth compatible). You can for instance receive or
send files such as images for your idle screen (see "Pictures",
page 97), send or receive name cards, melodies, use a
Bluetooth headset...
You can send files via Bluetooth from several menus or sub-
menus (e.g. by pressing on the [Options] key
after having
captured a picture, then by selecting Send by... Bluetooth).
To initiate a connection via Bluetooth, your phone must be
close to another Bluetooth compatible device.
1
Press
No ring
, or any other key (except
Valid.
and
OK
) to
snooze the alarm. The alarm icons remain on the display
and the alarm starts ringing again 3 minutes later.
Or press
Valid
or
OK
to acknowledge the alarm and stop
the alarm clock process.
1
Press the Menu key.
Select
Tools
.
2
Select
Alarm clock
.
3
Select
Off
.
Brit02_EN.book Page 40 Thursday, February 23, 2006 5:02 PM

41
Tools
Both ports can be opened, the Bluetooth connection can
then be activated. The requested connection can then be
performed. Files (e.g name cards or pictures) are transferred
one by one.
Caution:
If you activate the Camera or if you initiate a Speech
notes recording while a Bluetooth connection is active, the
connection is automatically closed.
Opening a Bluetooth connection
To launch a connection with another device, the Bluetooth
connection must be open:
Allowing handset detection
This option allows to define whether the handset should be
detected by any device or by paired devices only
:
1
Press the Menu key. Select
Tools
.
2
Select
Bluetooth
then select
Settings
.
3
Select
Bluetooth activation
. Select
On
. The Bluetooth
connection is launched and the phone automatically
acknowledges the state of the other device.
1
Press the Menu key. Select
Tools
.
2
Select
Bluetooth
then select
Settings
.
3
Select
Phone is detectable
. Select
By all devices
or
Only by
paired devices
.
Brit02_EN.book Page 41 Thursday, February 23, 2006 5:02 PM

42
Tools
Naming your handset for other devices
detection
Exporting a file to another device
When on one or several files you wish to export:
Searching Bluetooth connections
You may wish to search connections with surrounding
Bluetooth devices (provided their Bluetooth connection is
open and the connection is allowed):
1
Press the Menu key. Select
Tools
.
2
Select
Bluetooth
then select
Settings
.
3
Select
Phone name
then type the required name into the
edition screen.
1
Press
Options
. Select
Send by
....
Bluetooth
.
2
If the ’Send to’ list is empty, select the type of device to
send the file to (
A phone
,
A computer
,
Other device
).
2’
If the ’Send to’ list bears items, select the required one
or select
Search
to find the Bluetooth connection with
the other device.
3
The Bluetooth connection is automatically launched, and
the file is transferred.
1
Press the [Menu] key. Select
Tools
.
Brit02_EN.book Page 42 Thursday, February 23, 2006 5:02 PM

43
Tools
Note:
A ’Bluetooth passkey’ may be required by one or the
other devices. The connection cannot be established if the
typed code is wrong.
Accessing the list of paired device(s)
The paired devices are other Bluetooth compatible devices
already registered in the phone:
2
Select
Bluetooth
.
2’
Press
Paired devices
and select
Search
.
Select
My headset
,
My car kit
,
A phone
,
A computer
or
Other
device
.
3
The list of the found devices is displayed or the ’No peer
found’ message is displayed if no Bluetooth device was
found.
1
Press the [Menu] key. Select
Tools
.
2
Select
Bluetooth
.
3
Select
Paired devices
. The list of registered paired devices
is displayed. The following option menu is available if
devices names are registered into the list:
option description
Edit
To view/modify informations on the
selected device.
Connect
To connect the phone to the selected
device.
Disconnect
To disconnect the phone from the selected
device.
Brit02_EN.book Page 43 Thursday, February 23, 2006 5:02 PM

44
Tools
When on a paired device name, pressing OK allows you to
change the device name but also to define a security level:
Connection with audio accessories
You can establish a wireless connection between your
mobile phone and a Bluetooth headset or car kit. You can
then make or receive calls from the connected accessory,
without handling your phone.
To establish a wireless connection with an audio accessory,
please proceed as described above ("Opening a Bluetooth
connection", page 41).
When the Bluetooth bearer is activated, Press
Paired devices
and select
Connect
from the Options menu.
Search new
To search a new Bluetooth compatible
device.
Delete
To delete the selected device from the list.
Delete all
To delete all the device(s) from the list.
option description
Accept them
To accept connection requests from
selected device.
Always ask me
A message is displayed on each
connection request from selected device
so that you can accept or reject the
connection.
option description
Brit02_EN.book Page 44 Thursday, February 23, 2006 5:02 PM

45
Tools
Using your phone as a modem
You can use your phone as a modem for other devices (PC,
PDA,...) via a PC cable or Bluetooth. In order to activate a
connection, a standard modem driver must already be
installed in the other appliance:
Note:
The PC cable may not be supplied with your phone.
Please ask your retailer for an XXXXX compatible PC cable.
Note:
The compatibility between GPRS and i-mode features is
operator dependent.
Your phone:
1
Install the PC cable on your PC or PDA or open a
Bluetooth connection.
2
Install the modem driver.
3
Configure the PC according to the instructions given
with the modem driver.
Please enter the following parameters:
•
Flow control: Hardware
•
Data Bits: 8
•
Parity: No parity
•
Stop Bit: 1 stop Bit
•
Speed: 115200b/s.
1
Plug in the PC cable or open a Bluetooth connection
(please refer to your Quick Start Guide).
Brit02_EN.book Page 45 Thursday, February 23, 2006 5:02 PM
46
Tools
Once both devices are ready, the Internet connection can be
activated (without any action being performed on your
phone).
Brit02_EN.book Page 46 Thursday, February 23, 2006 5:02 PM
47
Messages
Messages
This section describes the contents of the Messages menu
and contains full information on the Short Message Service.
Other types of messages can be sent and received via your
phone. Please refer to the i-mode section (page 113) for full in-
formation on E-mail and MMS.
The Short Message Service (SMS) allows to send or receive
text messages to or from other mobile phones. You can store,
edit and forward messages as well as save any of the num-
bers they may contain.
These SMS are stored on the phone memory; they may also
be stored in the SIM card if they are sent by a service provider.
You can access the Messages menu via the 9 icons menu or
by pressing and holding the Mail softkey from the standby
display.
Reading a received SMS message
When the phone receives an SMS message, an information
about the message sender is displayed on the idle screen.
The message is automatically stored in the phone or in the
Brit02_EN.book Page 47 Thursday, February 23, 2006 5:02 PM

48
Messages
SIM card. A flashing indicates that the SIM or the phone
memory are full and cannot store any further messages.
Delete messages to allow new messages to be delivered.
Reading stored SMS messages
Unread messages are indicated by the icon. Messages
that have already been read are indicated by .
Moving messages to SIM
It is possible to move a message from the Inbox or the
Outbox to the SIM memory. However, according to the
message size, the message may be truncated (the 160
first characters only are moved to the SIM memory).
The sending date (for sent messages) and the 'Copy to'
addressees are lost when moving the message to the
SIM memory.
1
Press
Read
to read new messages (from the standby
display only).
2
Press
Options
to
View
,
Reply
,
Reply (+text)
,
Delete
,
Delete
all
,
Forward
,
Send as mail
,
Move to SIM
or
Numbers
(to store
or call the number(s) contained in the SMS header or
text).
1
Press the Menu key
.
Select
Messages
.Or press and hold
the
Mail
softkey.
2
Select
Inbox
or
SIM archive
then select
Received messages
to display the message list. Use the arrow key to scroll
up and down and access the message you want to read.
3
Select
OK
or
Options
/
View
to read the message text.
Brit02_EN.book Page 48 Thursday, February 23, 2006 5:02 PM

49
Messages
To move a message to the SIM memory:
Forwarding messages
You can forward a received message to other people/
number(s):
1
Press the Menu key. Select
Messages
.
2
Select
Inbox
or
Outbox
.
3
Choose the message to be moved and select
Options
.
4
Select
Move to SIM
.
1
Press the Menu key. Select
Messages
.
2
Select
Inbox
or
SIM archive
/
Received messages
.
3
Select the message to be forwarded and select
Options
.
4
Select
Forward
.
5
Press
OK
. Select the
To
field and select one of the
displayed names or select
More...
if you want to send
your message to another mobile number (directly enter
the number). Press
OK
to validate.
6
In the
Text
field enter the message text (see "Entering
text", page 52) or select one of the models (
Models
) and
press
OK
.
7
If you want to send the message to several
addressees, enter one or several phone numbers/
names in the
Copy to
list (up to 4 more addressees)
and press
OK
then
Valid
to return to the previous
screen.
Brit02_EN.book Page 49 Thursday, February 23, 2006 5:02 PM

50
Messages
Activating or deactivating the
message alert tone
Each time a message is received, a new SMS alert tone
sounds. To activate or deactivate this tone:
You can choose an alert melody for your SMS:
8
Select
Options
.
9
Select
Send
,
Send without storing
or
Store
.
10
A warning information displays the number of SMS
needed to send the message if it is more than one.
Select
Go on
if you want to send the message or select
Cancel
if you do not want to send it or if you want to
amend your message.
1
Press the Menu key. Select
Messages
.
2
Select
Settings
.
3
Select
Reception Alert
. Select
On
or
Off
.
1
Press the Menu key. Select
Messages
.
2
Select
Settings
.
3
Select
Reception alert
.
4
Select
Alert
and select
On
.
5
Select
Melody
and select one of the available ringtones.
Brit02_EN.book Page 50 Thursday, February 23, 2006 5:02 PM
51
Messages
Preparing the phone to send SMS
messages
Before sending your first SMS or if you want to register a
new profile, the network SMS centre number (obtainable
from your service provider) must be stored:
Note:
You may not be allowed to change your sending profile
(format and validity period). Please contact your service
provider for further details.
fields description default
Name
To enter the profile name. Profile1
Message
centre
To enter the centre number. Empty
Format
To set the message format: text,
voice, fax or paging.
Text
Validity
period
Time the message remains at the
message centre until delivered.
Maximum
1
Press the Menu key. Select
Messages
.
2
Select
Settings
.
3
Select
Sending profile
.
4
Enter the message centre number or select a template
(if several available) then enter the following fields
(operator dependent).
5
Select
Save
to validate.
Brit02_EN.book Page 51 Thursday, February 23, 2006 5:02 PM

52
Messages
The SMS centre number may already be available in your SIM
card and may be automatically displayed. If you want to
select a Sending profile for your message:
Entering text
Some features and functions (storing names in the
phonebook or typing SMS text messages, Tools, Settings,...)
require you to know how to enter and edit text in the display.
Three modes are available. They are indicated by in lower
case mode, by in upper case mode and by in numeric
mode. Text, figures and alphabet characters can then be
entered or edited directly from the keypad. Press to
switch from one mode to another.
There are two methods of entering text characters: the
Multitap or Multipress key method, and the quicker intuitive
method, called T9 text input.
Press the down arrow key to swap between the T9 and the
Multitap methods. When on T9 mode, is displayed on the
upper part of the display to indicate that T9 is the current
mode. is displayed on the lower part of the screen to
indicate that the Multitap text method can be accessed by
pressing the down arrow key. When on Multitap mode, is
displayed on the upper part of the display to indicate that
1
Press the Menu key. Select
Messages
.
2
Select
Settings
.
3
Select
Sending profile
and select the profile you want to
use. Select
Options
.
4
Select
Select
.
Brit02_EN.book Page 52 Thursday, February 23, 2006 5:02 PM

53
Messages
Multitap is the current mode. is displayed on the lower
part of the screen to indicate that the T9 method can be
accessed by pressing the down arrow key.
The multitap/multipress method
A brief press on a key displays the first character associated
with the key and shows the other available characters at the
top of the display. Here is the list of the available characters
(the available characters list is language dependent):
key character
Lower case Upper case
. , - ' @ : ?/_1
a b c 2 A B C 2
d e f 3 D E F 3
g h i 4 G H I 4
j k l 5 JK L 5
m n o 6 M N O 6
p q r s 7 P Q R S 7
t u v 8 T U V 8
w x y z 9 W X Y Z 9
0 0
Short press : to switch mode (T9 or multitap) to
lower case, upper case or numeric mode.
Long press : to switch from lower case to upper
case. Only the first letter entered is upper case,
the following ones are lower case (e.g.: to write a
surname).
Brit02_EN.book Page 53 Thursday, February 23, 2006 5:02 PM
54
Messages
To enter text, press the key bearing the required character
until it appears in the display. Holding the key displays the
number corresponding to the key. If you need to use two
characters from the same key, wait for a few seconds after
entering the first character (until the key characters on the
upper part of the screen are cleared) or press the right arrow
key before pressing the key again.
Correct mistakes by a short press on
Clear
.
Holding the
Clear
key deletes all the text. Use the left or right
arrow keys to move the cursor in the text. Holding allows
you access to 25 special characters:
To select and insert a character into the text:
Note:
The
↵
symbol is only displayed when on SMS and
i mode. It allows you to go to the following line.
Short press: to enter a space.
Long press: to access special characters.
Short press: moves the cursor through the text
one place to the left or to the right. Long press:
moves the cursor to the text beginning or end.
Swap between the Multitap/Multipress method
and the T9 text input
1
Move the cursor to the required character.
2
Select
OK
.
key character
Brit02_EN.book Page 54 Thursday, February 23, 2006 5:02 PM
55
Messages
Multitap method:
The T9 method
A press on the down arrow key allows you to swap between
T9 text entry and the Multitap method.
Example
To type
Card
:
Press the Menu key and select
Messages
.
Select
Write new
.
Fill in the
To
field (see "Sending a new SMS message", page
58).
In the Te x t field, press the key until is displayed. Press
briefly three times,
C
is displayed.
Press until is displayed. Press once,
a
is displayed
Press three times,
r
is displayed
Press once,
d
is displayed. The word
Card
is now
displayed.
1
Press the key bearing the required letter once only (the
requested character may not be displayed first).
2
The active word changes as you enter text. Enter all the
word characters up to the end of the word.
3
If the right word is not displayed when all the characters
have been entered, press until you get the required
word.
4
If the requested word does not correspond to the one
displayed, press the down arrow key to swap to the
multitap method and enter the correct letters.
5
Use the left or right arrow keys to move the cursor
around the text to insert or delete characters.
Brit02_EN.book Page 55 Thursday, February 23, 2006 5:02 PM
56
Messages
Note:
To insert a text symbol such as :) or :-) or press two or
three times. Press as many times as necessary to change
the symbol to :( or :-( etc.
Tips and Operation
key action
Short press : to switch mode (T9 or multitap) to
lower case, upper case or numeric mode.
Long press : to switch from lower case to upper
case. Only the first letter entered is upper case,
the following ones are lower case (e.g.: to write a
surname).
Clear Clear or backspace
Short press: to enter a space.
Long press: to access special characters.
Another matching word
Smart punctuation
Short press: moves the cursor to each word
beginning or end .
Long press: moves the cursor to the text
beginning or end .
Swap between the T9 and the Multitap method
Brit02_EN.book Page 56 Thursday, February 23, 2006 5:02 PM
57
Messages
Creating text models
You can create a set of messages to be used as models.
These texts can contain up to 50 characters and allows you
to add text when you want to use them. These templates are
stored in the phone memory.
To create text models:
Example
to write
card
:
Press the Menu key and select
Messages
.
Select
Write new.
Fill in the
To
field (see "Sending a new SMS message", page
58).
In the Te x t field, press the down arrow key until is
displayed.
Press ,
a
appears.
Press ,
cc
appears.
Press ,
car
appears.
Press ,
case
appears.
If the displayed word is not the one you want, press as
many times as necessary to view
card
.
1
Press the Menu key. Select
Messages
.
2
Select
Text models
.
3
Choose any blank template (
[...]
) and press
OK
.
4
Enter the template text and press
OK
.
Brit02_EN.book Page 57 Thursday, February 23, 2006 5:02 PM

58
Messages
Editing a text model
Sending a new SMS message
You can send message texts (up to 918 characters). The
standard size for an SMS is 160 characters (your service
provider charges you according to the number of SMS used
to send your message). The icon (1 = number of SMS
used - it is updated while writing your message and shows
the number of SMS needed to send your message) is
displayed on the left corner of the screen.
To send SMS from the Menu:
1
Press the Menu key. Select
Messages
.
2
Select
Text models
.
3
Select the text model to be modified and press
OK
.
4
Edit the text and press
OK
.
1
Press the Menu key. Select
Messages
.
2
Select
Write new
.
3
Press
OK
. Select the
To
field and choose one of the
displayed names or select
More...
if you want to send
your message to another mobile number (directly enter
the number). Press
OK
to validate.
4
In the
Text
field, enter the message text (see "Entering
text", page 52) or select one of the models (
Models
) and
press
OK
.
5
If you want to send the message to several addressees,
enter one or several phone numbers/names in the
Copy
to
list (up to 4 more addressees) and press
OK
then
Valid
to return to the previous screen.
Brit02_EN.book Page 58 Thursday, February 23, 2006 5:02 PM

59
Messages
Note:
The message is automatically stored in the Outbox,
except if you have selected Send without storing.
Note:
If you have registered an automatic signature, the
number of characters used is automatically added to the
message length.
To send SMS from the standby display:
or:
or:
6
Select
Options.
7
Select
Send
,
Send without storing
or
Store
.
8
A warning information displays the number of SMS
needed to send the message if it is more than one.
Select
Go on
if you want to send the message or select
Cancel
if you do not want to send it or if you want to
amend your message.
1
Press the up arrow key, then proceed as described above.
1
Press the down arrow key to access the phonebook. Select
one of the available names or numbers.
2
Select
Options
.
3
Scroll down and select
Send SMS to
, then proceed as
described above.
1
Press and hold the softkey underneath Mail.
2
Select
Write new
, then proceed as described above.
Brit02_EN.book Page 59 Thursday, February 23, 2006 5:02 PM

60
Messages
Signature
You can register a signature to be automatically added to
your text messages. The signature is not displayed when
typing the message text but it is displayed on message
reception by the addressee. The maximum size for the
signature is 30 characters. If the message text to be sent
already 918 characters, the signature cannot be added.
To register a signature:
Outbox and SIM archive emitted
messages
The Outbox and SIM archive emitted messages contain
unsent draft messages and stored sent messages (delivered
or undelivered). These messages can be selected from the
outbox or SIM archive menu and can be modified and resent
as new SMS messages.
1
Press the Menu key. Select
Messages
.
2
Select
Settings
.
3
Select
Signature
.
4
Select
Insert in message
. Select
Yes
.
5
Select
Text
and enter your signature text.
6
Select
Save
to store your signature.
Brit02_EN.book Page 60 Thursday, February 23, 2006 5:02 PM

61
Messages
To select one of these messages:
Status request
If a status is requested on a sent message, a status request
is sent to the network (must be network supported). If the
status is requested on a delivered message the date and
time of delivery may be shown.The network then answers by
sending a status report (SR) back to the phone. Press
OK
to
acknowledge it.
To activate the status request:
1
Press the Menu key. Select
Messages
.
2
Select
Outbox
or select
SIM archive
then
Emitted messages
and use the up or down arrow keys to scroll to the
required message. Messages are either 'transmitted' or
'to be sent'.
3
Press
Options
to
View
,
Delete
,
Delete all
,
Status
(for sent
messages only)
Send
,
Send as mail
,
Modify
,
Move to SIM
(for outbox messages only),
Numbers
(to store or call the
number(s) contained in the SMS header or text) or
Details
.
1
Press the Menu key. Select
Messages
.
2
Select
Settings
.
3
Select
Message config.
4
Select
Delivery report
and select
On
.
5
Select
Save
.
Brit02_EN.book Page 61 Thursday, February 23, 2006 5:02 PM

62
Messages
To request a reply:
A reply to your message can be requested from your
correspondent. If you activate this feature, you will be
charged for the cost of the reply message.
The availability of this feature is operator dependent.
To read the sent message, delete or re-send it when
receiving the status:
Storage consumption
The storage status for SMS messages can be consulted.
To view the number of messages stored, the total available
space on the Phone memory and on the SIM card:
1
Press the Menu key. Select
Messages
.
2
Select
Settings
.
3
Select
Message config.
4
Select
Reply requested
and select
On
.
5
Select
Save
.
1
Press
Options
.
Send again, Clear, Associated message
or
Delete message
is displayed.
2
Select the required action.
1
Press the Menu key. Select
Messages
.
2
Select
Storage used
. The
SMS memory used
is displayed.
Scroll down to access the
SIM archive.
3
Select
Details
for more information on the Phone and
SIM stored messages (use up and down arrow keys to
scroll to the required information).
Brit02_EN.book Page 62 Thursday, February 23, 2006 5:02 PM
63
Messages
Broadcast - cell broadcast (CB)
messages
These messages are broadcast by the networks to GSM
users and may provide general information about local
area dialling codes, weather reports, traffic, news, etc.
Each type of message is numbered, allowing you to
select the type of information you wish to receive.
Up to 5 types of messages can be programmed into the
selection list.
16 standard message types are pre-programmed into the
phone for your selection. New message types can be
programmed into the selection list using the 3 digit cell
broadcast type number. Contact your service provider for
details about the type of messages they broadcast.
Before you activate the broadcast message service, you
must enter at least one message type in the selection list.
Brit02_EN.book Page 63 Thursday, February 23, 2006 5:02 PM

64
Messages
Entering a message type in the selection
list
Activating / deactivating the broadcast
service
Reading broadcast messages
Broadcast messages are displayed whilst the phone is on
standby. If a broadcast message is received whilst in
conversation or operating the menu, it only become visible once
the phone revert to the standby display. A message can contain
up to 93 characters and may be displayed on several pages.
1
Press the Menu key. Select
Messages
.
2
Select
Settings
.
3
Select
Broadcast
.
4
Select
Message types
and select one of the empty types
(
[...]
). Select
OK
.
5
Select
Modify by list
(or
Modify by code
if the type number
is known).
6
Select the message type(s) you wish to receive and
select
Valid.
7
Select
Save
to store your setting.
1
Press the Menu key. Select
Messages
.
2
Select
Settings
.
3
Select
Broadcast
.
4
Select
Reception
and select
On
or
Off
.
5
Select
Save
to store your setting.
Brit02_EN.book Page 64 Thursday, February 23, 2006 5:02 PM
65
Messages
Options on message display
Press
Exit
to clear the CB message displayed. Press the call
key to dial the number contained in the message.
Press
Options
to display the following menu:
Activating/deactivating the alert tone
An alert tone can be set to beep every time a new or updated
broadcast message is received.
Broadcast language
All the broadcast messages can be displayed in several
languages.
option action
Delete
To delete the current message
Delete All
To delete all the received CB messages
Numbers
To display all phone numbers contained in the
message text and dial or store them in the
phonebook if required.
Broadcast
Off
To deactivate cell broadcast.
1
Press the Menu key. Select
Messages
.
2
Select
Settings
.
3
Select
Broadcast
.
4
Select
Reception alert
and select
On
or
Off
.
5
Select
Save
to store your setting.
Brit02_EN.book Page 65 Thursday, February 23, 2006 5:02 PM

66
Messages
To select a language:
Note:
The availability of this feature is network dependent.
1
Press the Menu key. Select
Messages
.
2
Select
Settings
.
3
Select
Broadcast
.
4
Select
Language
and select
one of the available
languages.
5
Select
Save
to store your setting.
Brit02_EN.book Page 66 Thursday, February 23, 2006 5:02 PM

67
Calls & times
Calls & times
Access the
Calls & Times
menu to check the details of individ-
ual incoming and outgoing calls, the duration of the last call,
the total call time for all sent and received calls or to play the
recorded calls.
Calls log
This feature stores details (identity, time and date and call
duration) about the last 10 numbers dialled, the last 10
unanswered calls and the last 10 received calls. The calls log
can be activated for Line 1 and Line 2 (Line 1 is your main line.
Line 2 availability is subscription dependent).
The last number dialled or received is displayed first. The
caller’s name is displayed if it is registered in one of the
phonebooks (if not the phone number is displayed). If your
subscription does not have Caller Line Identification (CLI)
’Unknown number’ is displayed. If the caller has withheld his
number, ’Withheld number’ is displayed.
Press the call key to call the selected number.
1
Press the Menu key.
Select
Calls & Times
.
2
Select
Calls log
.
3
Select
Last dial
,
Unanswered calls
or
Received calls
.
4
Use the up or down arrow keys to scroll through the
calls list.
Brit02_EN.book Page 67 Thursday, February 23, 2006 5:02 PM

68
Calls & times
Press
Options
to access the following menu:
Use the up or down arrow keys to select the required option
and follow the instructions displayed.
Note:
Press the call key from the standby display to access
the last dialled numbers.
Call timers
The voice, Modem and GPRS call information for Line 1 and
Line 2 is stored in the
Call timers
menu.
The
Details
sub-menu stores time information on calls
made and received via the home network and whilst
roaming (national and international networks).
item action
Store
To store the number in the phonebook.
Delete
To delete the entry.
Delete all
To delete all entries.
Edit
To edit the displayed number.
Details
To view the name, number, time and date and call
duration (for answered calls only) of the selected
number.
Call
To call the selected number.
Send SMS
To send an SMS message to the selected phone
number.
Brit02_EN.book Page 68 Thursday, February 23, 2006 5:02 PM

69
Calls & times
Note:
If the call timers have been reset (see "Call timer -
reset", page 70) the date of the latest counter reset is
displayed
The call type and the accumulated times of outgoing and in-
coming calls are displayed.
Selecting
Details
displays information on calls made on your
home network, on National roaming and on International
roaming.
Note:
If Line 2 is active too, 'All Calls' for Line 1 and Line 2 are
displayed separately.
Balance information (subscription
dependent)
This service may be supplied by your service provider. It
allows you to view the remaining airtime balance on your
phone line.
Please contact your service provider for more information. If
your subscription allows access to this information:
1
Press the Menu key.
Select
Calls & Times
.
2
Select
Call timers
.
3
Select
Show
.
4
Use the up or down arrow keys to view all the timer
information.
1
Press the Menu key. Select
Calls & Times
.
Brit02_EN.book Page 69 Thursday, February 23, 2006 5:02 PM

70
Calls & times
When selecting
Call
, if the balance information number is
already stored, a call is sent to the balance information
centre. If no number is stored, select
Set number
and enter it.
Press
OK
to store the number, then select
Call
to call the
information centre number.
Reminder - call duration
You can set a duration reminder to beep regularly to remind
you of the time spent on your call. The frequency can be any
multiple of 1 minute (up to 59 minutes).
Call timer - reset
This feature allows you to reset the call timers. The 4 digit
lock code is required to reset the call timers (default lock
code: '0000').
2
Select
Call timers
.
3
Select
Balance information
.
4
Select
Call
or
Set number
.
1
Press the Menu key.
Select
Calls & Times
.
2
Select
Call timers
.
3
Select
Reminder
.
4
Select
On
to activate the Call timer.
5
Enter the call timer interval (e.g.: 2 = a beep sounds
every 2 minutes whilst in conversation).
6
Press
OK
to validate the entry.
1
Press the Menu key.
Select
Calls & Times
.
2
Select
Call timers
.
Brit02_EN.book Page 70 Thursday, February 23, 2006 5:02 PM

71
Calls & times
Call costs - management
Some service providers offer an Advice of Charge (AoC)
subscription service allowing you to view the cost of the last
call cost, the total calls cost and the remaining balance on
your account (once a 'credit limit' has been set ).
To display these, you must first set a currency value and
enter an average cost per unit (only calls units are displayed if
the cost information is not stored).
To set a currency value per unit:
To set call cost type to units:
3
Select
Reset
.
4
Select
Yes
.
5
Enter the phone lock code and press
OK
.
1
Press the Menu key.
Select
Calls & Times
.
2
Select
Call costs
.
3
Select
Display cost type
.
4
Select
Currency
. The current currency unit value is
displayed.
5
Select
Modify
. Enter your PIN 2 code and press
OK
.
6
Enter the currency name (up to 3 letters). Press
OK
to
validate.
7
Enter the unit cost (e.g.: 0.15 Euro per minute). And
press
OK
to validate.
1
Press the Menu key.
Select
Calls & Times
.
Brit02_EN.book Page 71 Thursday, February 23, 2006 5:02 PM

72
Calls & times
Note:
When the cost type is set to units, the credit limit and
the remaining credit are shown in units.
Setting the credit limit (subscription
dependent)
You may also be able to set a credit limit to your calls.
Once the credit limit has been reached, no more
chargeable outgoing or incoming calls are allowed. You
can however still make emergency calls.
The PIN2 code is required to set the credit limit.
Note:
When a credit limit has been set, the selection from the
'Credit limit' display is Edit or Set no limit.
Show costs
2
Select
Call costs
.
3
Select
Display cost type
.
4
Select
Units
.
1
Press the Menu key.
Select
Calls & Times
.
2
Select
Call costs
.
3
Select
Credit limit
. The display indicates the current credit
limit set.
4
Select
Edit
. Enter your PIN 2 code and press
OK
.
5
Enter the credit limit (use to enter a decimal point for
currencies). Press
OK
to validate.
1
Press the Menu key.
Select
Calls & Times
.
Brit02_EN.book Page 72 Thursday, February 23, 2006 5:02 PM

73
Calls & times
Note:
The remaining credit is shown in either units or
currency, as set by Cost Type menu above.
Call costs - resetting all costs to zero
To reset all call costs to zero:
Alternate line service - selecting line 2
(subscription dependent)
Some operators support the use of a second line. You may
then have two mobile phone numbers (e.g. a business line
plus a personal line). To use them you need to select the line to
be used.
2
Select
Call costs
.
3
Select
Show
.
4
Use up and down arrow keys to display the
Last Call
and
All Calls
or show the
Remaining credits
.
1
Press the Menu key.
Select
Calls & Times
.
2
Select
Call costs
.
3
Select
Reset
.
4
Select
Yes
.
5
Enter the PIN 2 number and press
OK
.
1
Press the Menu key.
Select
Calls & Times
.
2
Select
Line selection
.
The current line selection is displayed.
3
Use up and down arrow keys to scroll to the required
line. Press
OK
to validate.
Brit02_EN.book Page 73 Thursday, February 23, 2006 5:02 PM

74
Calls & times
Note:
The Line selection sub-menu may not be available on
your phone. Please contact your service provider for further
details about this service.
Note:
Line 1 and Line 2 can be named (Office and Home for
instance). Refer to My number menu (see "My number(s)
display", page 88). Whichever line is selected to send calls,
incoming calls can still be received on either line.
Recorded call
This submenu allows you to play the recorded phone calls. If
several phone conversations have been recorded, they are
played one after another.
In compliance with European regulations, you are obliged to
inform your correspondent before recording a phone
conversation.
1
Select
Calls & Times
, select
Recorded call.
Brit02_EN.book Page 74 Thursday, February 23, 2006 5:02 PM
75
Phonebook
Phonebook
Phone numbers can be stored in the phone and in the SIM
card memories (= phonebook). The phone memory can store
up to 255 'extended' cards (called 'phonebook cards'). These
cards allow you to store different types of information: family
name, first name, home number, mobile number, two E-mail
addresses, postal address, business information, voice tag,
category and a related icon or picture. The SIM card memory
capacity may vary according to your operator or service provid-
er. The SIM memory allows you to store one name, one
phone number and one voice tag per card.
Both the SIM and the phone memories are searched when
reading the Phonebook contents.
Note:
Press the down arrow to access the phonebook from
the idle screen.
Storing names and telephone
numbers
Names and numbers can be stored directly in the phonebook
or copied from different sources such as SMS messages,
last dialled number list, etc.
There are several ways to store numbers in the phonebooks:
Brit02_EN.book Page 75 Thursday, February 23, 2006 5:02 PM

76
Phonebook
Phone names card
From the idle screen:
Via the menu:
Note:
The categories field allows you to identify the caller’s
type according to entries you have previously set (see
"Creating a Category of cards", page 85).
Note:
If you do not set pictures for your phonebook cards,
a default icon is displayed on incoming call.
1
Enter the number. Select
Store
.
2
Select
Phone names
.
3
The
Home number
,
Work number
,
Mobile number
or
FAX
number
list is displayed, thereby allowing you to select a
number type.
4
Enter the card requested data and select
Save
to store
the information.
1
Press the Menu key.
Select
Phonebook
.
2
Select
Add name
.
3
Select
Phone names
.
4
Enter the card requested data and select
Save
to store
the information.
Brit02_EN.book Page 76 Thursday, February 23, 2006 5:02 PM

77
Phonebook
You can also link melodies to your phonebook cards. The
melody is then played when a call is received from one of the
card numbers.
SIM names card
From the idle screen:
Via the menu:
1
Press the down arrow key (from the idle screen) to
access the phonebook.
2
Scroll down to the card you want to access and select
OK
or select
Options
then select
View
.
3
Scroll down to the
Ringtones
field and select
OK
.
No
sound
is the default selection. Scroll down the list of
available melodies and select one. Press
OK
to
confirm your selection.
1
Enter the number. Select
Store
.
2
Select
SIM names
.
3
Fill in the available fields and select
OK
to validate your
entries.
4
Select
Save
to store the card.
1
Press the Menu key. Select
Phonebook
.
2
Select
Add name
.
3
Select
SIM names
.
4
Enter the name and select
OK
.
5
Enter the number and select
OK
.
6
Select
Save
to store the card.
Brit02_EN.book Page 77 Thursday, February 23, 2006 5:02 PM

78
Phonebook
Storing a received number
Numbers stored in the last dialled, received, unanswered call
information and SMS message locations can also be stored
in the phonebook:
Note:
While entering a number, selecting Clear once deletes
the last character. Holding the Clear key deletes the whole
number.
Note:
The *, +, p (pause) and _ characters- which are
accessible by pressing and holding the key when
registering a number - can be stored as part of numbers.
Note:
You can use _ (wild card spaces) to store numbers (wild
card spaces cannot be obtained when registering a number
from the idle screen).
Note:
When calling a number containing wild card spaces,
select the number from the phonebook, select Options or
press on the Call/Send key and enter the number
corresponding to the wild card spaces (=missing figures).
1
With a received call, unanswered call or SMS message
select
Options
.
2
For an SMS message, select
Numbers
if the number is
contained in an SMS. The message number(s) is/are
displayed. Select one if several numbers are available.
2’
For received and unanswered calls, select
Store
.
3
Follow the above mentioned procedure to create a
phone name or a SIM name card then select
Save
to
store the card.
Brit02_EN.book Page 78 Thursday, February 23, 2006 5:02 PM

79
Phonebook
Note:
If the SIM card or phone memory are full, a warning
message is displayed on the phonebook selection.
Copying all names and numbers
When consulting your phonebook for the first time the ’Copy
all SIM names to phone?’ message is displayed. Select Yes.
You can copy all the names cards: from the Phone to the SIM
card and from the SIM card to the Phone.
Note:
If your Phonebook cards bear more than one number
(home, mobile, work, fax numbers), the first available number
from the list is copied to the corresponding SIM card entry.
1
Press the Menu key. Select
Phonebook
.
2
Select
Read
.
3
Select
Options
.
4
Select
Copy all names
.
5
Select
Phone to SIM
or
SIM to phone
.
All the names are copied unless the SIM card memory
does not bear enough free space when copying the
Phone entries to the SIM card. A warning message is then
displayed.
Brit02_EN.book Page 79 Thursday, February 23, 2006 5:02 PM

80
Phonebook
Editing a phonebook or a SIM
name card
From the idle screen:
Via the menu:
Note:
You can choose one melody per Phonebook card.
You can create a voice dialling pattern on phonebook cards.
This voice dialling pattern can only be recorded in edition
mode.
1
Press the down arrow to access the phonebook.
2
Scroll down to the card you want to access and select
OK
.
3
Scroll down to the field(s) you want to modify and
amend it/them. Select
Save
to store the changes.
1
Press the Menu key. Select
Phonebook
.
2
Select
Read
.
3
Select one of the stored cards.
4
Select
Options
.
5
Select
View
.
6
Scroll down to the field(s) you want to modify and amend it/
them. Select
Save
to store the changes.
Brit02_EN.book Page 80 Thursday, February 23, 2006 5:02 PM

81
Phonebook
Recording a Voice dialling pattern:
Note:
You may have to select the number, the voice dialling
pattern has to be attached if several numbers are stored on
the card. Select Home number, Mobile number or Work
number if you have registered several numbers on a
phonebook card.
Viewing and calling phonebook
numbers
There are two ways of viewing and calling entries stored in
the phonebook:
1
Press the down arrow key (from the idle screen) to
access the phonebook.
2
Scroll down to the card you want to access and select
OK
or select
Options
then select
View
.
3
Scroll down to the
Voice dialling
field and select
OK
.
Select
New
to record the voice pattern or select
Options
then
Record
if a voice pattern is already
recorded and you want to change it.
Repeat the name until it is stored (minimum = twice).
Pronounce it as clearly as possible and in a quiet
environment. When the voice patterns match,
Stored
is
displayed.
Brit02_EN.book Page 81 Thursday, February 23, 2006 5:02 PM

82
Phonebook
Directly from the idle screen:
Via the menu:
The list of phonebook entries is displayed in alphabetical
order.
Note:
Selecting a category from the Category selection
displays the names/phone numbers of the corresponding
category. This category is then displayed when next reading
the Phonebook contents.
Note:
Selecting Options displays the following menu choice:
View, Call, Add name, Delete, Delete all (Phone names or
SIM names), Copy, Copy all names, Move, Category
selection (to select All names, the Phone names only, the
SIM names only or the categories members), Send by... SMS
or Bluetooth, Send SMS to.
1
Press the down arrow key to display the phonebook list.
2
To access the required name, either scroll up or down
using the up and down arrows or press a numeric key to
access the different letters associated with the key. E.g:
press twice to reach the names starting with letter ’B’.
3
Press the call key or select
Options
then select Call.
1
Press the Menu key. Select
Phonebook
.
2
Select
Read
to display the phonebook list, then scroll up
and down to the required name
or press a numeric key
to access the different letters associated with the
key. E.g: press twice to access the names starting
with letter 'B'.
3
Press the call key or select
Options
then select Call.
Brit02_EN.book Page 82 Thursday, February 23, 2006 5:02 PM

83
Phonebook
Note:
If several phone numbers are stored on a Phone name
card, scroll down to the required number and select it before
activating the call.
Voice dialling
You can make a call by using your voice.
To create a voice pattern:
Note:
If the voice patterns do not match, Failed is displayed.
Note:
Repeat the whole voice registration procedure again.
To view the voice dialling numbers list:
1
Press the Menu key
.
Select
Phonebook
.
2
Select
Voice dialling
.
3
Select
New entry
. All name entries are displayed.
4
Use the up and down arrow keys to select the card you
want to use and press
OK
.
If several phone numbers are registered on a card (e.g.
Home number
,
Mobile number
or
Work number
) select one
by pressing
OK
.
5
You are then prompted to pronounce the name at least
twice (pronounce it as clearly as possible).
Stored
is
displayed when both voice patterns match.
1
Press the Menu key
.
Select
Phonebook
.
2
Select
Voice dialling
.
Brit02_EN.book Page 83 Thursday, February 23, 2006 5:02 PM

84
Phonebook
To remove all phone numbers from the voice dialling list:
To call a phone number using the voice recognition:
Free space in the phonebook
To view the remaining capacity in the phonebook:
Note:
If available, the free memories in the FDN list are also
displayed. Please see "Fixed dialling numbers", page 88 for
more information on FDN numbers.
3
Select
List
.
4
Use the up and down arrow keys to view the requested
entry.
5
Press
Options
to play the voice pattern, select
Play Back
,
select
Erase
to remove a voice tag from the voice dialling
list, or select
Record
to create a new voice pattern.
1
Press the Menu key
.
Select
Phonebook
.
2
Select
Voice dialling
.
3
Select
Delete all
.
1
From the idle screen, press and hold the call key.
2
Pronounce the name as clearly as possible.
3
The name called as well as an animated icon are then
displayed and the call proceeds as normal.
1
Press the Menu key. Select
Phonebook
.
2
Select
Storage used
to get to the Phone names Storage
used; press the down arrow key to get to the SIM card
Storage used.
Brit02_EN.book Page 84 Thursday, February 23, 2006 5:02 PM

85
Phonebook
Creating a Category of cards
Categories of cards can be defined for the phonebook. This
feature allows you to group certain cards and to play a specific
melody on receiving an incoming call from one of the category
members.
To create a Category:
Categories characteristics can be modified or deleted (when
in the Categories menu, select
OK
to amend the settings or
select Delete to erase the category).
To modify a category:
1
Press the Menu key. Select
Phonebook
.
2
Select
Categories
.
3
Select any blank template
[...]
and select
OK
. The
following items are displayed:
item function
Category name
To enter and store a category name.
Melody
To select a melody to be used as a ringtone
on Category member calls.
4
Enter or select the requested data. Press
OK
to validate.
5
Press
Save
to store the defined category.
1
Press the Menu key. Select
Phonebook
.
2
Select
Categories
.
3
Select the category to be modified and select
OK
then select the category name and/or the melody.
Select the new parameters (name/melody).
4
Select
Save
to store your settings.
Brit02_EN.book Page 85 Thursday, February 23, 2006 5:02 PM

86
Phonebook
To select a category when storing a number:
Note:
Categories can only be set for the Phone names cards
(not for the SIM names cards).
1
Repeat the Phone names storage procedure (see
"Storing names and telephone numbers", page 75) and
fill in the Phone names card.
2
Scroll down to
Categories
and select
OK
.
3
Select one of the displayed categories from the list.
4
Select
Save
to store your settings.
Brit02_EN.book Page 86 Thursday, February 23, 2006 5:02 PM

87
Phonebook
My card
My Card is a specific storage location where you can
enter personal data. You can easily access My card and
send its contents to another device via SMS or
Bluetooth.
My Card contents is identical to the phone cards
contents except for the Categories and Voice dialling
fields.
To enter My Card data set:
To send My Card by SMS or by Bluetooth:
Note:
Press and hold the up arrow key from the idle screen to
access Send my card by SMS.
1
Press the Menu key.
Select
Phonebook
.
2
Select
My Card
.
3
Select
View
and enter the requested information as for a
phonebook card (validate each entry by selecting
OK
).
4
Select
Save
to store your card.
1
Press the Menu key.
Select
Phonebook
2
Select
My Card
.
3
Select
Send by
...
SMS
or
Bluetooth
, then enter the mobile
number tosend the card to or select it from the
Names
list (SMS sending) or launch the connection with the
required device (Bluetooth sending) and press
OK
.
Brit02_EN.book Page 87 Thursday, February 23, 2006 5:02 PM

88
Phonebook
My number(s) display
The phone can display your main line (Line 1) mobile number,
the mobile number for Line 2 (Alternate Line Service) and
your data and fax numbers (these are SIM card dependent).
These numbers may be stored in the SIM card. You can also
enter them manually.
To view, name and edit your own number(s),
Note:
Line 2, data and fax numbers can only be accessed if
your SIM card has these subscriptions.
Note:
My numbers availability depends on your service
provider.
Fixed dialling numbers
Fixed dialling is a feature that restricts outgoing calls to
'fixed' numbers or 'prefixes' contained in SIM cards
that support this feature. When the Fixed Dialling
Numbers (FDN) feature is activated, dialling numbers,
diverting calls and sending SMS to numbers not
registered in the FDN list is forbidden. The number of
FDN entries to be stored depends on the SIM card
1
Press the Menu key
.
Select
Phonebook
.
2
Select
My numbers
. The mobile number for Line 1 is
displayed if it is stored in the SIM card. If not, select
Edit
and enter your number and your name in (select
OK
to
save the entered information).
3
Scroll down to view or enter Line 2, your fax and data
numbers.
Brit02_EN.book Page 88 Thursday, February 23, 2006 5:02 PM

89
Phonebook
capacity. Activating the FDN feature or registering
numbers in the FDN list is PIN 2 protected (contact your
service provider to get the PIN 2 number).
The following menu (Fixed dialling) and operations are only
available on your phone if your SIM card allows fixed dialling.
To activate or deactivate FDN operation:
Note:
The Fixed dialling sub-menu may not be available on
your phone. Please contact your service provider for
further details.
To view the numbers stored in the FDN list:
To add a new number to the FDN list:
1
Press the Menu key
.
Select
Phonebook
.
2
Select
Fixed dialling
. Select
Status
.
3
Select
On
or
Off
. Enter the PIN2 number.
4
Select
OK
to validate.
1
Press the Menu key
.
Select
Phonebook
.
2
Select
Fixed Dialling
.
3
Select
View
to view the FDN list entries. Pressing
Options
allows you to view, call, add a name, delete, copy or
move numbers to the phone or SIM card memory, but
also to send these numbers by SMS, or send a SMS.
1
Press the Menu key
.
Select
Phonebook
.
2
Select
Fixed dialling
.
3
Select
Add new
.
4
Enter you PIN2 code and press
OK
;
5
Fill in the displayed fields as in any SIM name card then
select
Save
to store your settings.
Brit02_EN.book Page 89 Thursday, February 23, 2006 5:02 PM

90
Phonebook
Note:
Wild card spaces can be used with the numbers stored
in the FDN list. E.g. number +441707 278_ _ 9 allows calls to
all numbers from 278009 to 278999 to be dialled. The
number can be edited and dialled from the idle screen.
Note:
You may be asked to enter your PIN2 code.
Export
The purpose of the Export feature is to allow you to send the
phonebook contents to another device (e.g. a pc). You first
need to export the card(s) to the Fun & Media box Others
sub-menu (see "Others", page 107).
Note:
When exporting a Vcard file you can directly send it by
Bluetooth or by SMS.
1
Press the Menu key. Select
Phonebook
.
2
Select
Export...
, then select
Yes.
The entire contents of
the phonebook are exported and grouped together in a
Vcard file and stored in
Fun & Media box/Others
.
Brit02_EN.book Page 90 Thursday, February 23, 2006 5:02 PM

91
Camera
Camera
The camera application allows you to take pictures with your
phone.
These pictures can then be used to:
•
personalise your idle screen, your Welcome or your
Goodbye screen (please see "Setting an image as an Idle
screen, a Welcome screen or a Goodbye screen from
the pictures folder", page 100),
•
be sent to other devices (mobile phones, pc) by E-mail
(see "Mail system", page 53), MMS (see "Composing an
MMS", page 54) or Bluetooth (see "Bluetooth", page 40).
•
match your phone cards (see "Phone names card", page
76).
You can take pictures in 3 sizes: large (VGA: 640x480 pixels),
normal (160x120 pixels) or portrait (60x80 pixels).
Taking a picture
The use of the camera and the sending, forwarding and
reproducing of the pictures taken are subject to property and
privacy rights. Do not take a picture unless authorised.
1
Press the Menu key.
Select
Camera.
2
Press
OK
to take your picture.
Brit02_EN.book Page 91 Thursday, February 23, 2006 5:02 PM

92
Camera
Once it has been captured, the picture is displayed. You can
then access the following options sub menu:
From another application:
The Camera application can be activated from the Options
menu whilst using other applications on the phone. The
resolution types available vary according to the application.
The camera-accessible applications are the following:
options description
Store
To store the picture.
Send by...
To send the picture by Mail, MMS or by
Bluetooth.
Rename
To change the name of the picture.
Set as...
To set the picture as an idle screen, a Welcome or
a Goodbye screen image.
Details
To view information about the name, resolution,
size, date and file protection status.
Delete
To delete the current picture.
Camera
To go back to the preview screen.
Full view
To see the picture on full screen.
Zoom +/-
To change the full view mode to a Smaller,
Medium and Larger size.
applications available resolution
Phonebook
Portrait.
Settings (idle,
welcome or
goodbye screen)
Portrait and normal.
i-mode mail and
MMS
All.
Brit02_EN.book Page 92 Thursday, February 23, 2006 5:02 PM

93
Camera
To access the camera application from the Phonebook:
To access the camera application from the Settings menu:
To access the camera application from the Mail menu:
Note:
If a call is in progress, access to the camera is not
possible.
1
Press the Menu key. Select
Phonebook
.
2
Select
Add name
, then
Phone names
.
3
Once in the phone card, select
Picture
.
4
From the picture browser, select
Options
.
5
Select
Camera
.
1
Press the Menu key. Select
Settings
.
2
Select
Display
, then
Idle screen,
Welcome screen
or
Goodbye
screen
.
3
Scroll down to
My Picture
and select
Pictures
(left soft
key).
4
From the picture browser, select
Options
.
5
Select
Camera
.
1
From the idle screen, select
Mail
(left softkey) or select
i-
mode
then
Mail
.
2
Select
Compose mail,
scroll down to the
Attachment
field,
press
OK
and select
Pictures
.
2’
Or select
Compose MMS
, select
SMIL
, select
Compose
MMS
and then
Add image
.
3
From the pictures browser, select
Options
.
4
Select
Camera.
Brit02_EN.book Page 93 Thursday, February 23, 2006 5:02 PM

94
Camera
Adjusting your picture
You can adjust 4 types of settings before taking a picture:
Resolution, Exposure, Brightness and Zoom. These settings
must be entered from the preview screen.
To select the picture size:
To select the exposure mode:
These modes allow you to optimise the picture quality
according to the context.
1
Use the left or right arrow keys to select the Large
(VGA), Normal or Portrait mode.
2
Press
OK
or press on the side key to take your picture.
1
Press the up or down arrow key to access the exposure
mode selection.
2
Use the left or right arrow to access and select the
Stnadard, Night, B&W, Antique, Reddish, Greenish or
Bluish modes.
3
Press
OK
or press on the side key to take your picture.
Brit02_EN.book Page 94 Thursday, February 23, 2006 5:02 PM