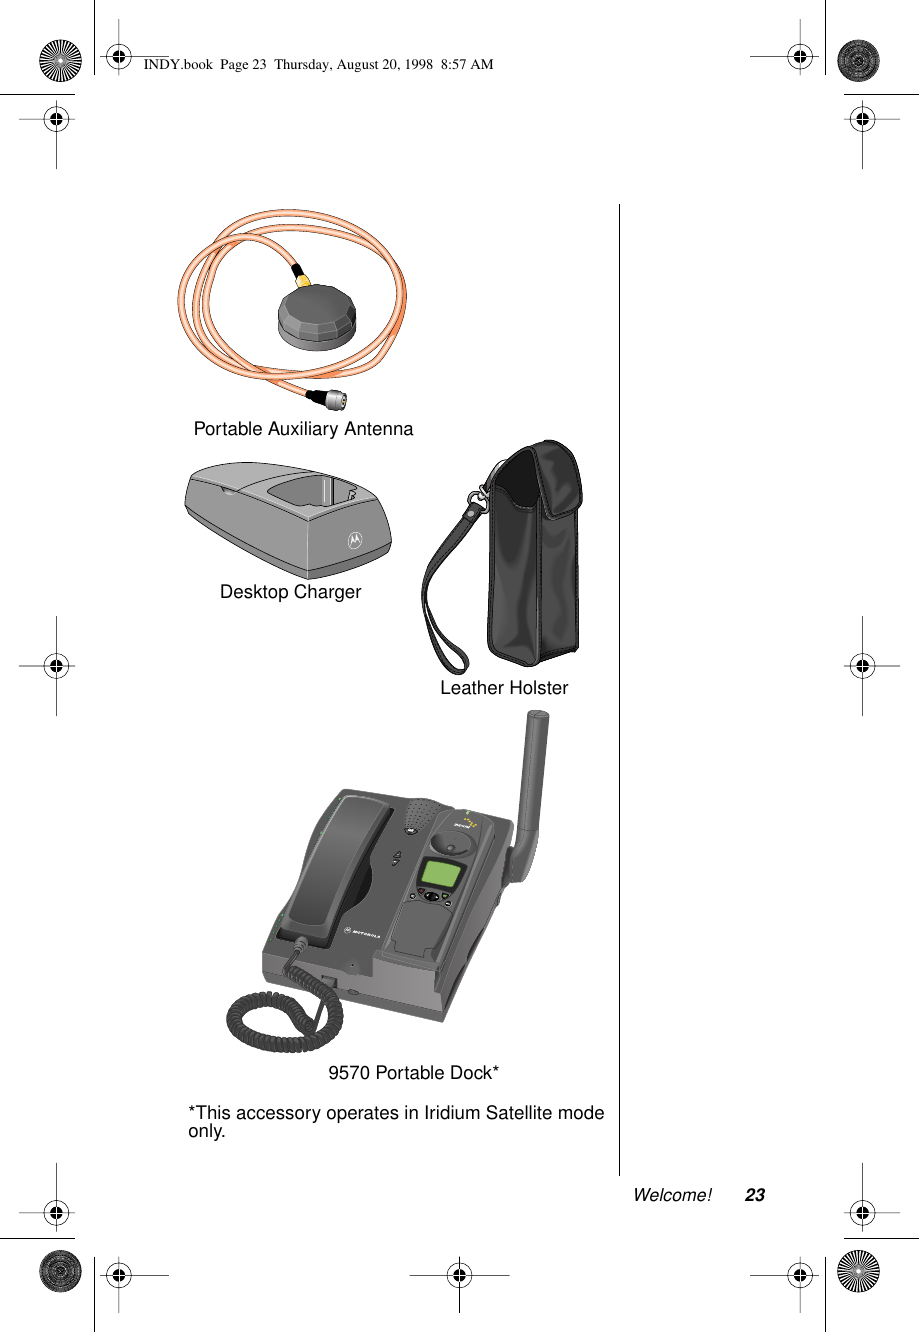
Motorola Mobility T6NB1 Cellular Transceiver Module User Manual INDY
Motorola Mobility LLC Cellular Transceiver Module INDY
UserManual.wiki
>
Motorola Mobility
>
T6NB1 User Manual
Motorola Exhibit 7 Instruction Manual
Navigation menu
Upload a User Manual
Namespaces
Wiki Guide
HTML
PDF
Info
Views
User Manual
Discussion / Help
Navigation


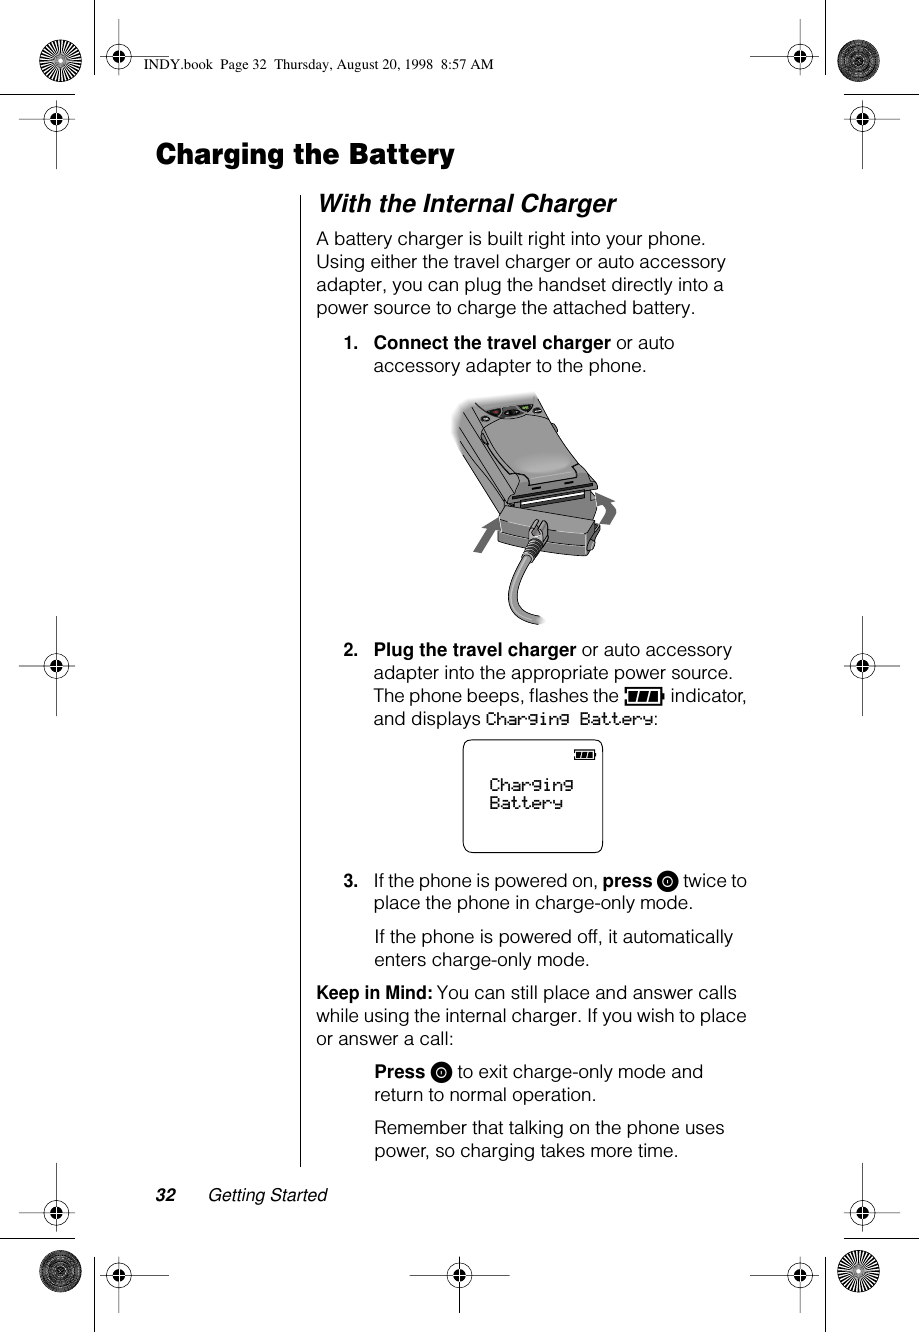


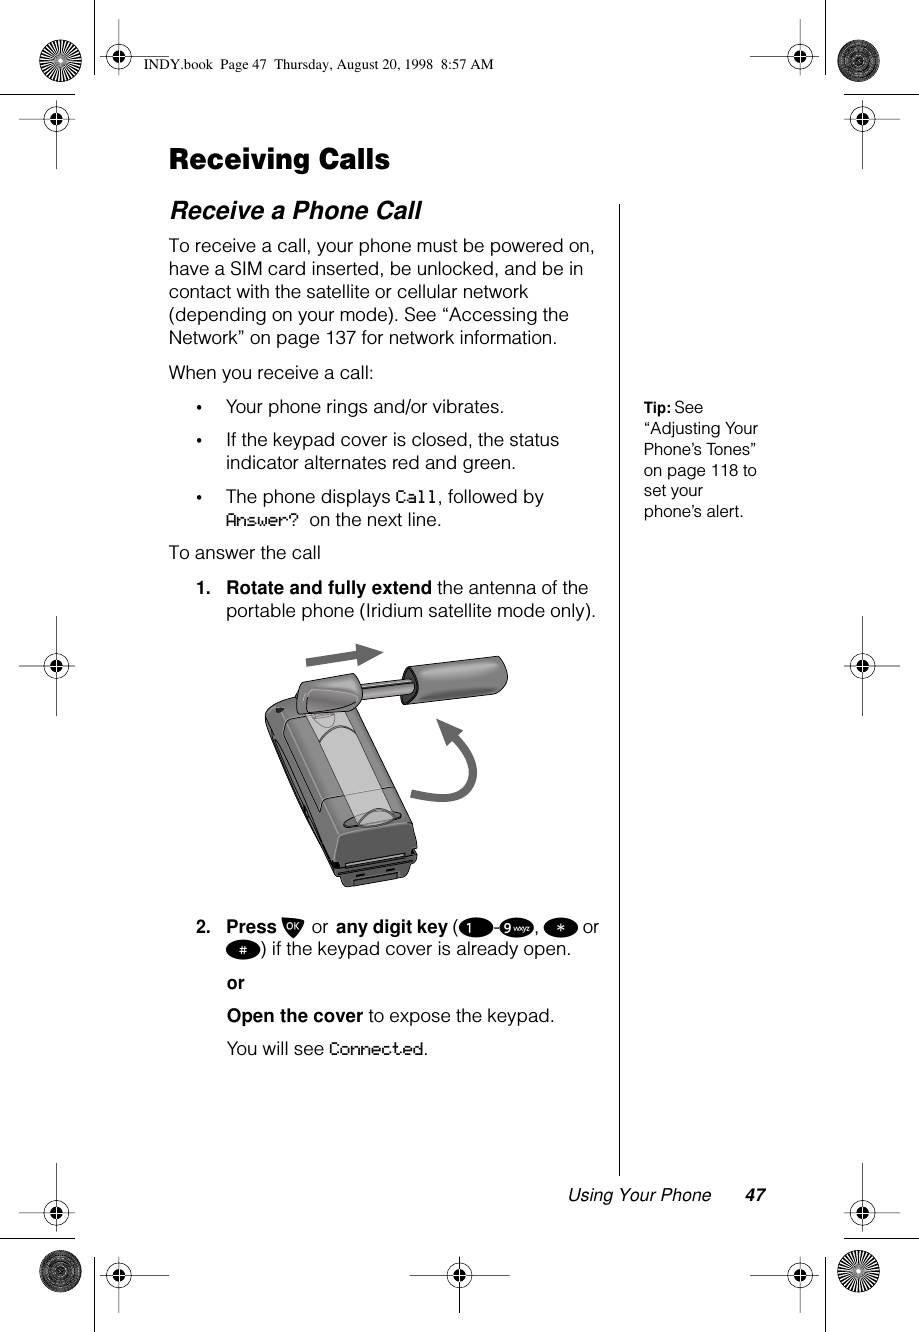
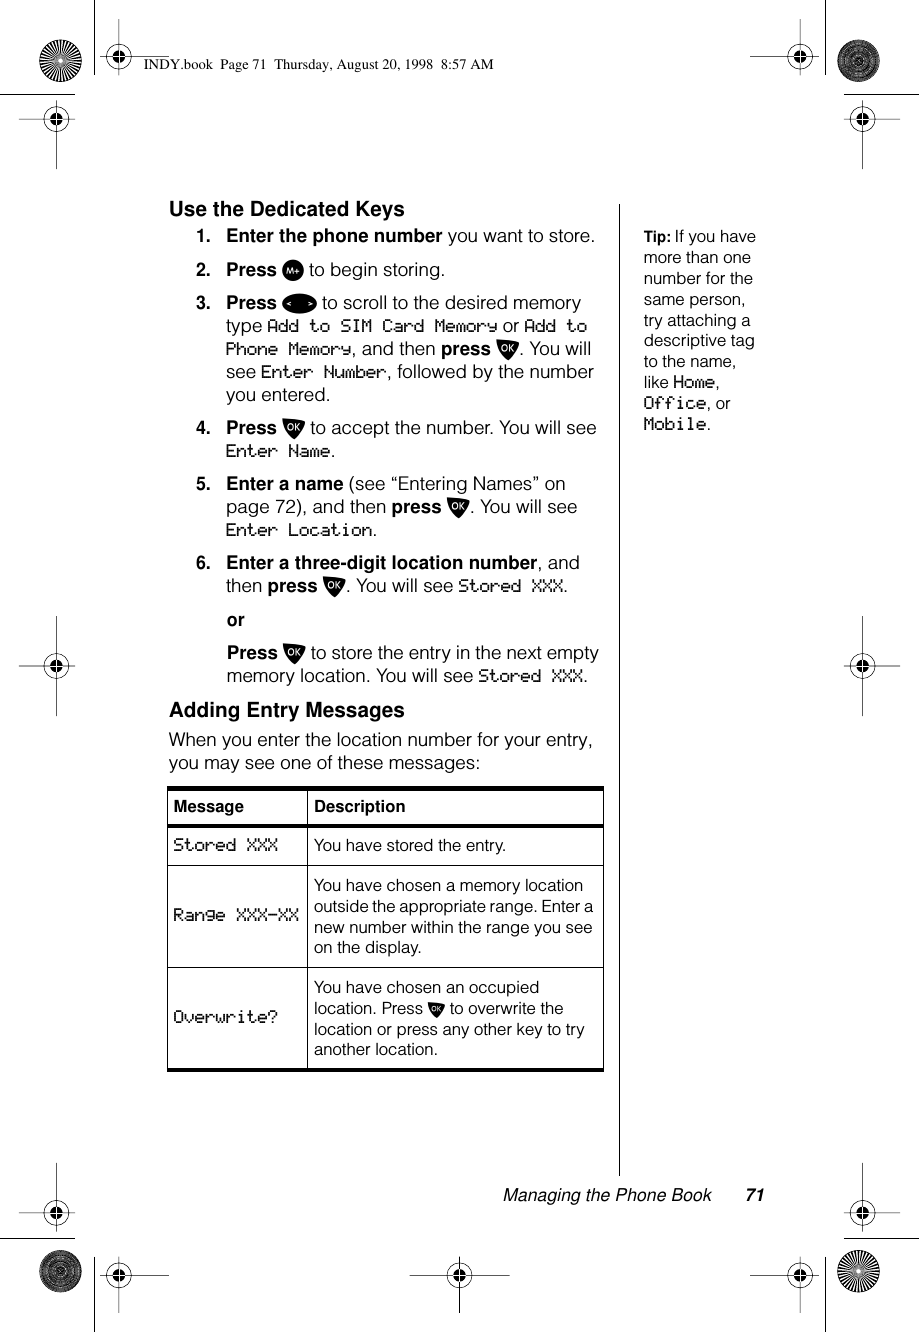
![Using Your Phone 43Placing CallsTo place a call, your phone must be powered on and in contact with the satellite or cellular network (depending on your mode). See “Accessing the Network” on page 137 for network information. Dial a Number1.Rotate and fully extend the antenna of the portable phone. Make sure the antenna has a clear view of the sky (Iridium satellite mode only).Tip: If you make a mistake, press C once to delete the last digit, or press and hold C to clear all digits.2.Open the keypad cover to expose the keypad.3.Enter the number using the digit keys. As soon as you begin entering digits, you will see Call?.When you are in Iridium satellite mode, to dial a number, you must enter the phone number in international format: [international access code or +] [country code] [phone number]4.Press O. You will see Calling +18475551234.Tip: The international access code from the Iridium satellite network is 00 or +.You will see either the flashing message Calling or the flashing messages Calling, followed by Registering, and the phone plays a setup tone.INDY.book Page 43 Thursday, August 20, 1998 8:57 AM](https://usermanual.wiki/Motorola-Mobility/T6NB1/User-Guide-28848-Page-43.png)