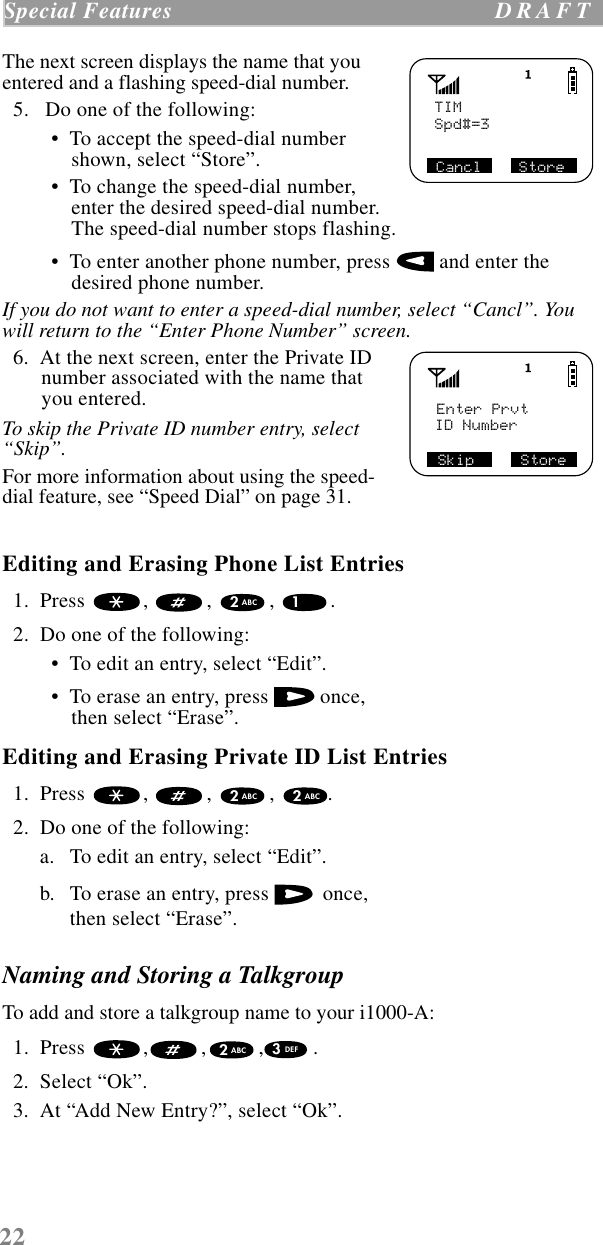
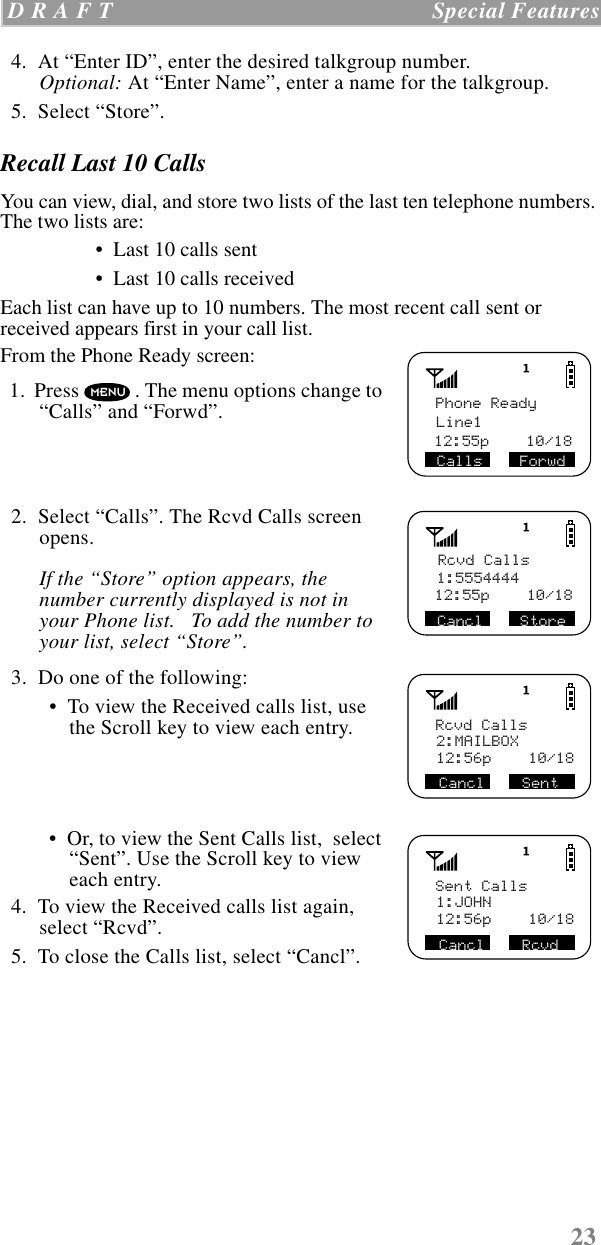
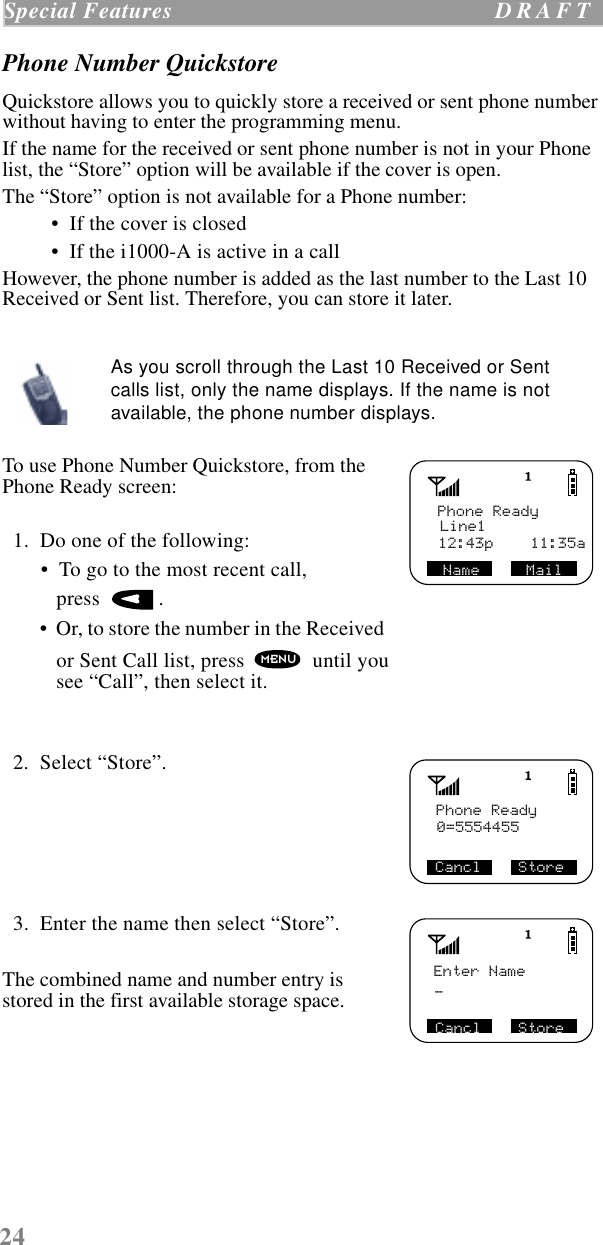
Motorola Solutions 89FT5793 Hand Held Transmitter User Manual i1000 A
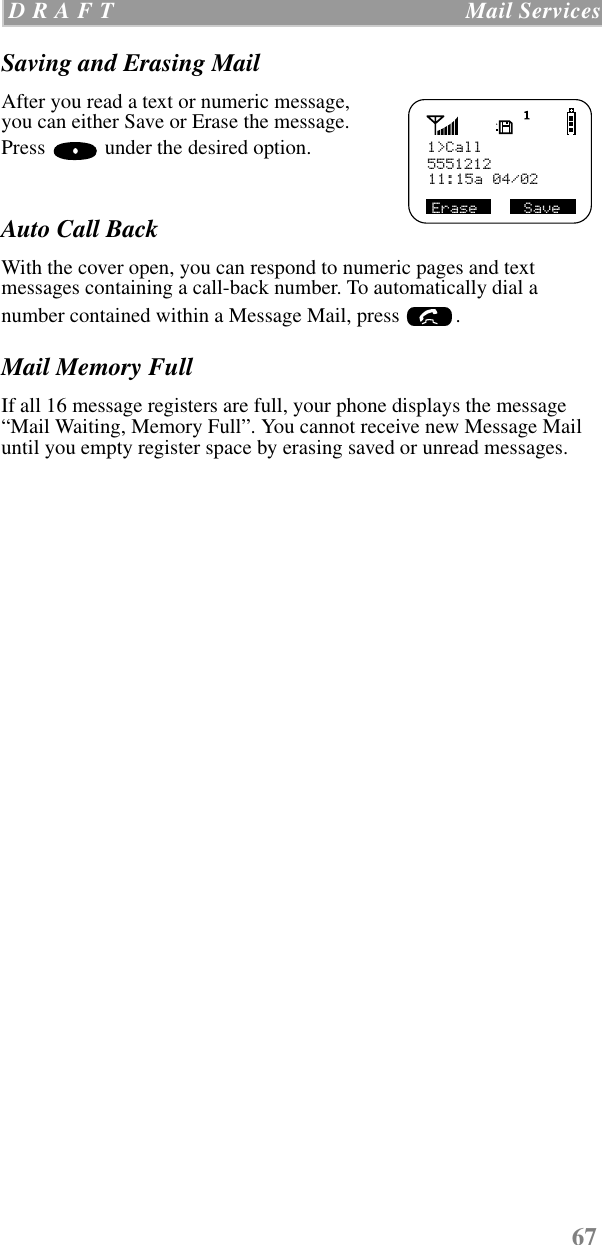
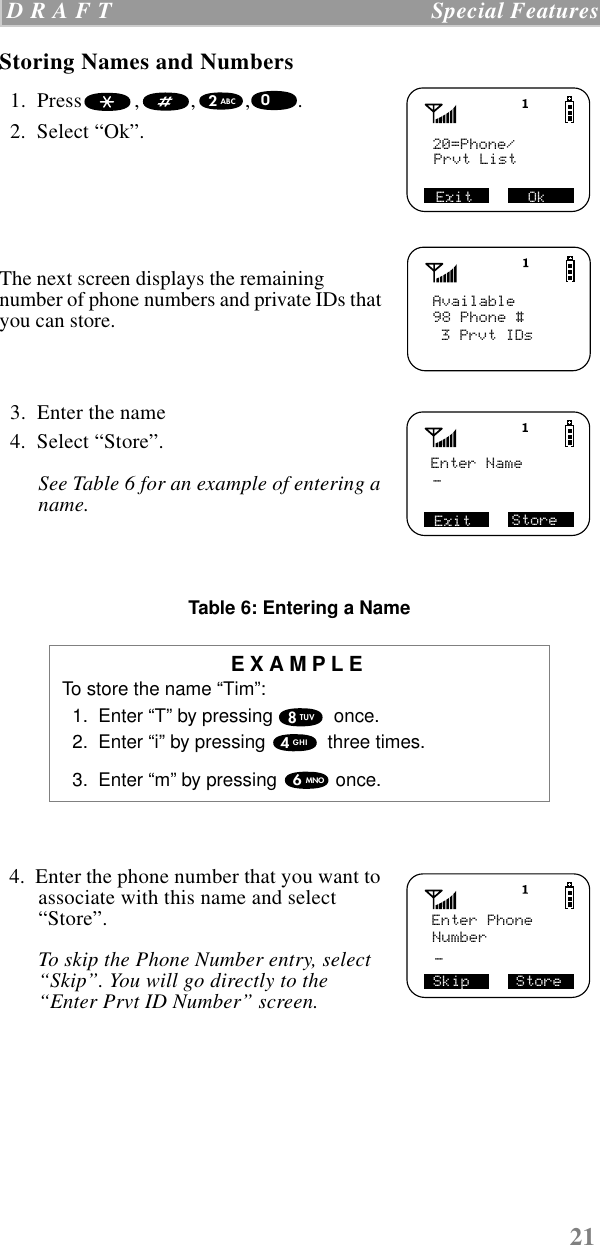
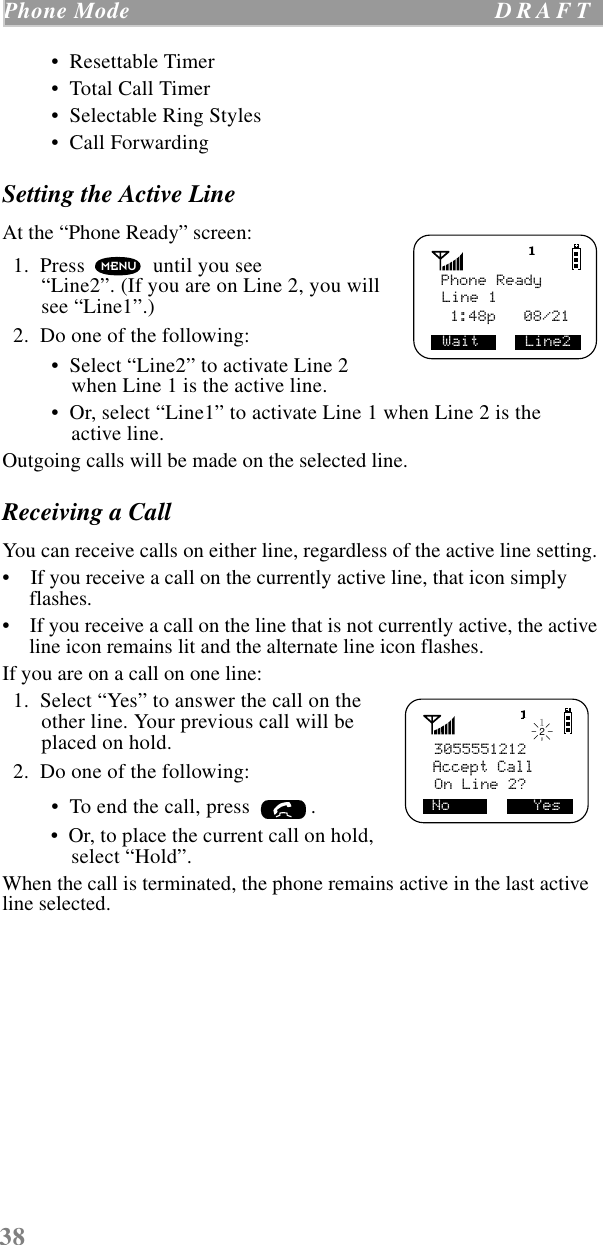
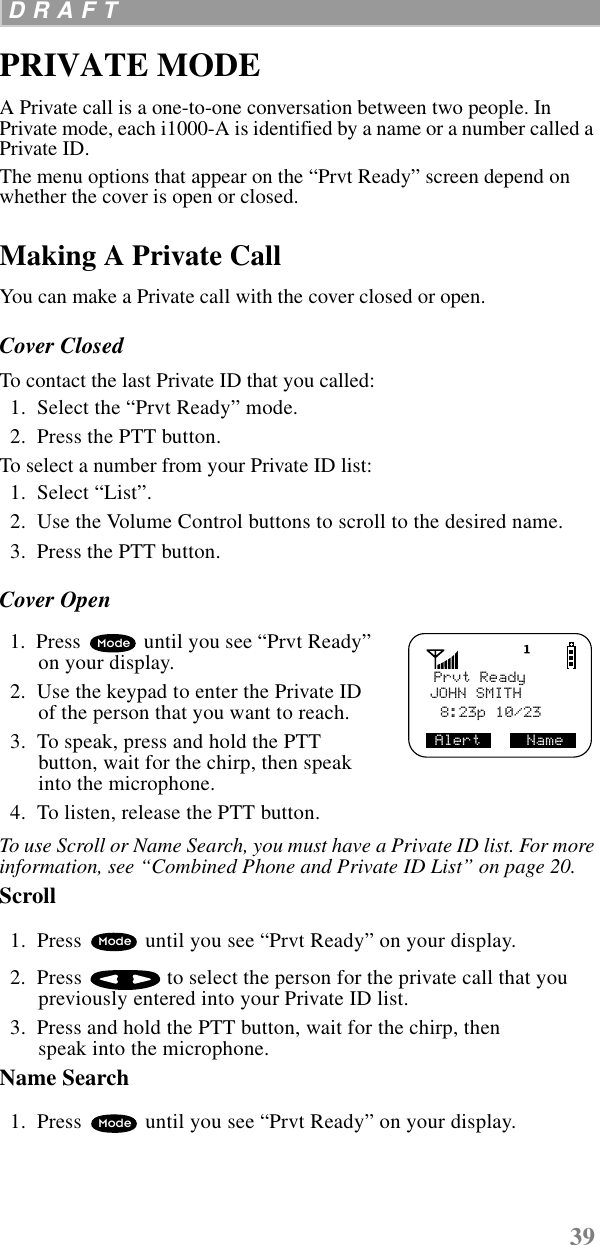
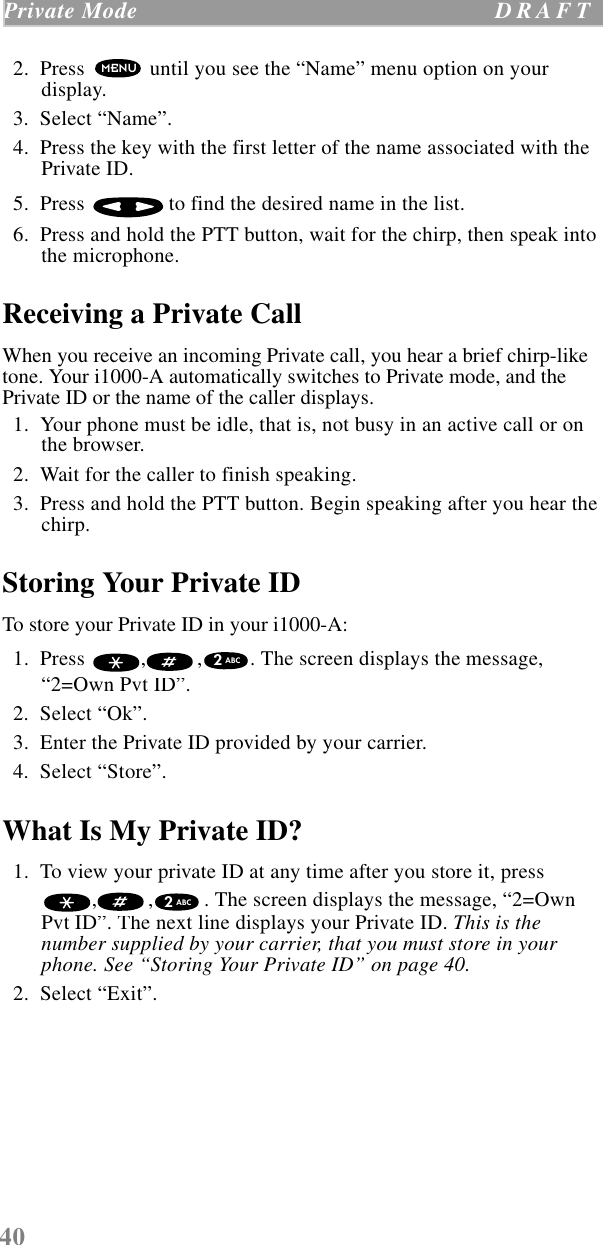
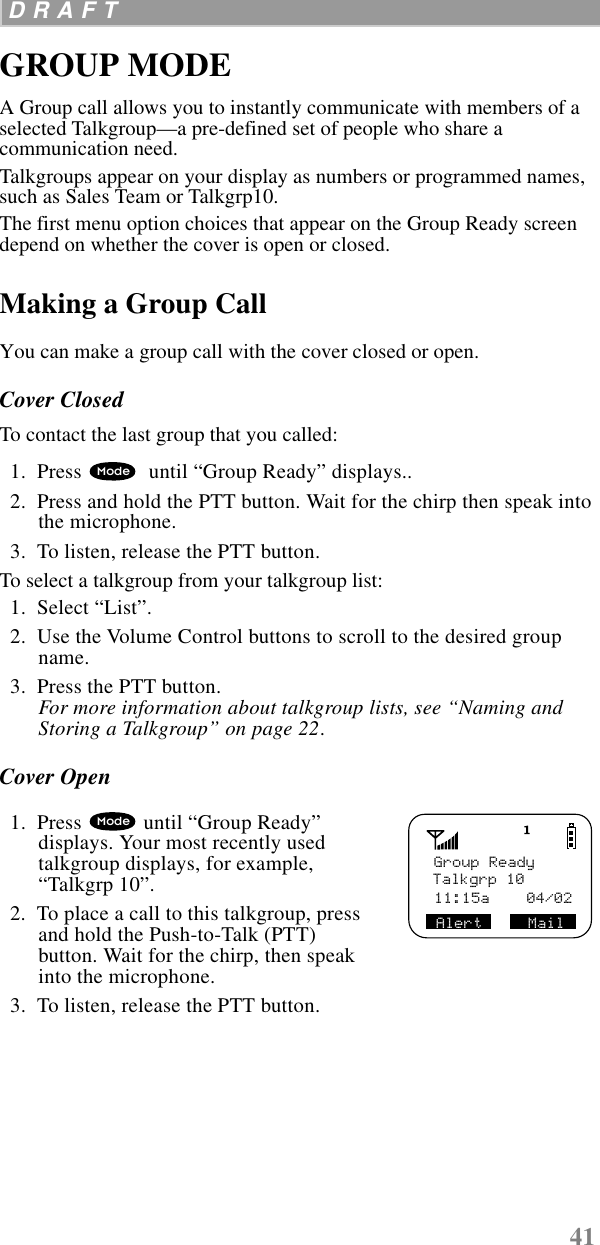
Motorola Solutions, Inc. Hand Held Transmitter i1000 A
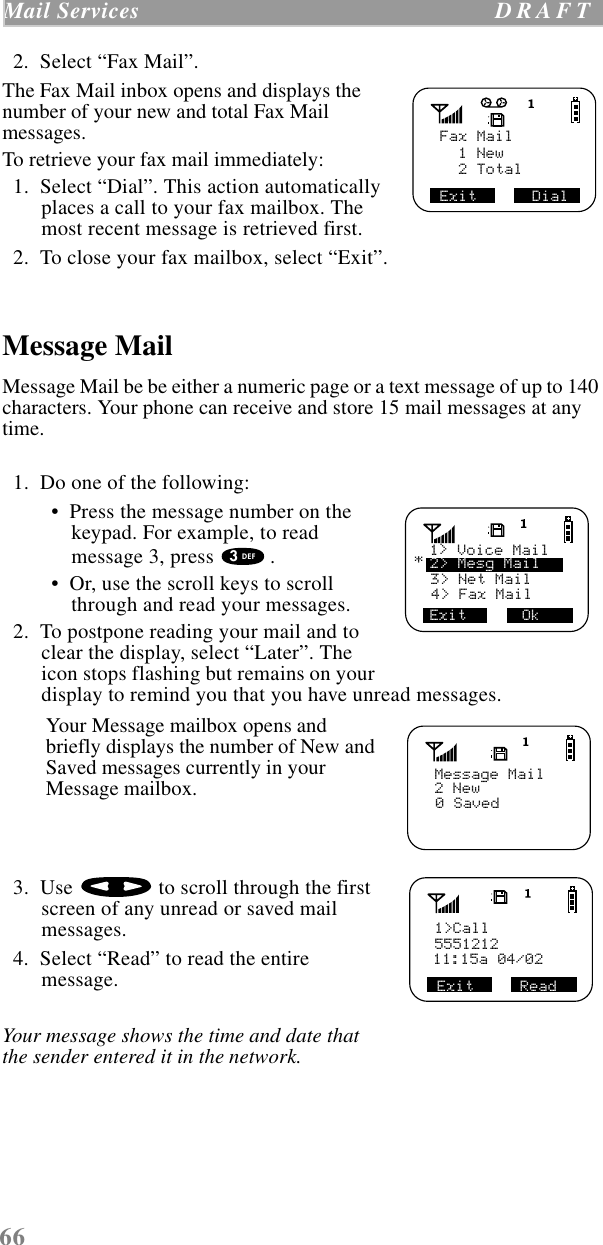
UserManual.wiki
>
Motorola Solutions
>
89FT5793 User Manual
>
Instruction manual
Contents
1.
Instruction manual
2.
Amended Users Manual
Instruction manual
Navigation menu
Upload a User Manual
Namespaces
Wiki Guide
HTML
PDF
Info
Views
User Manual
Discussion / Help
Navigation


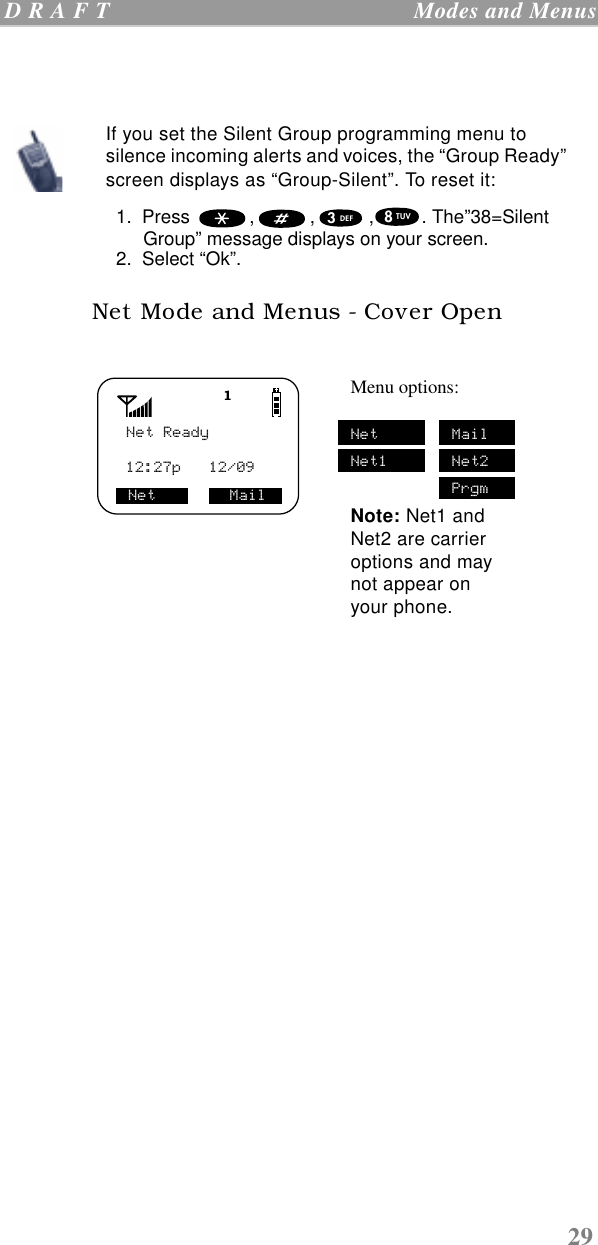

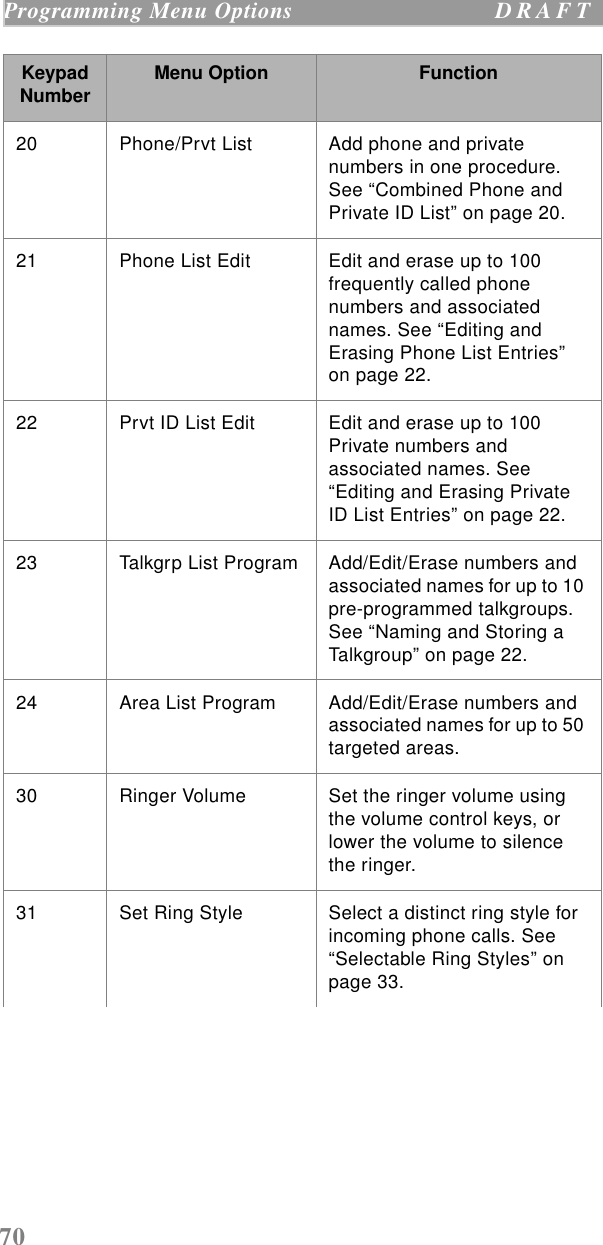
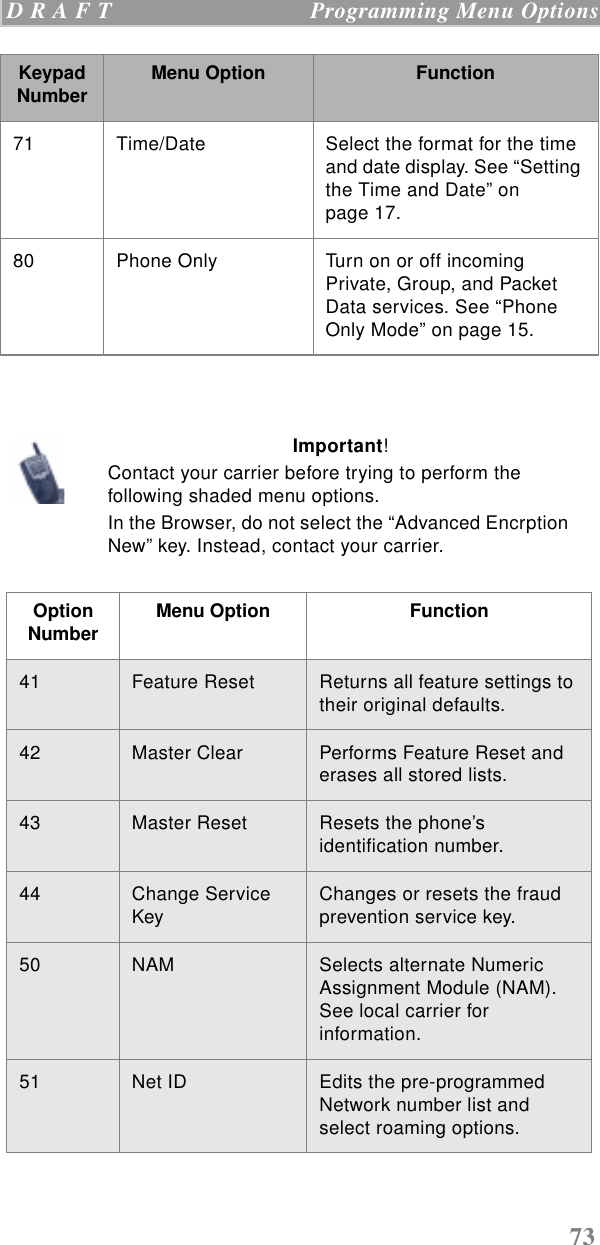
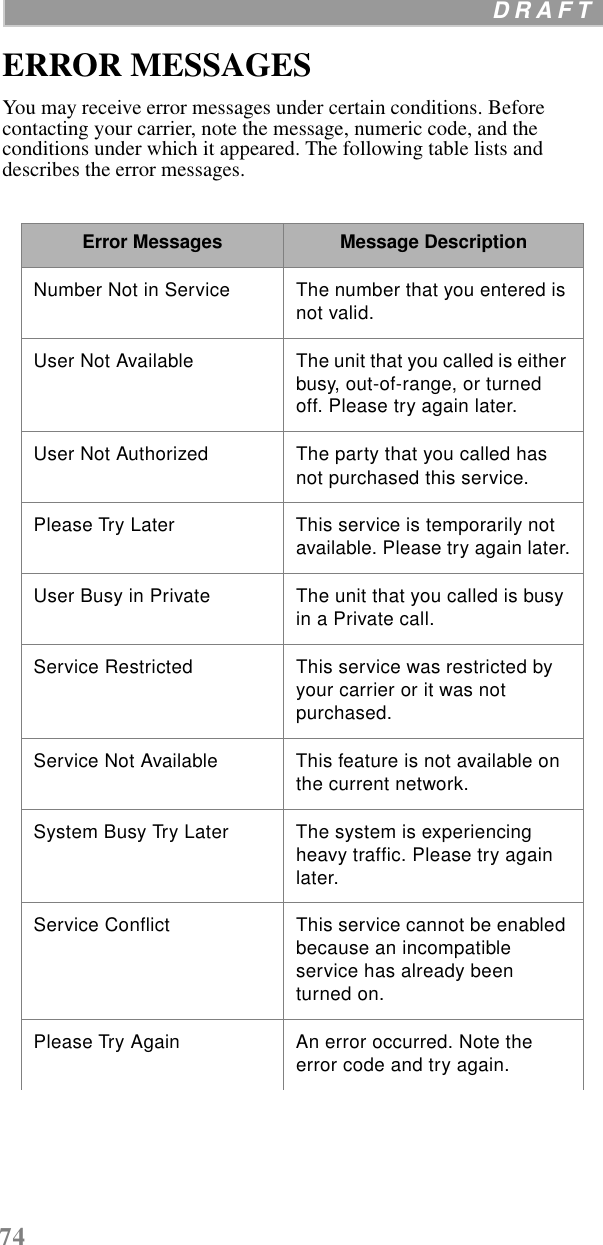
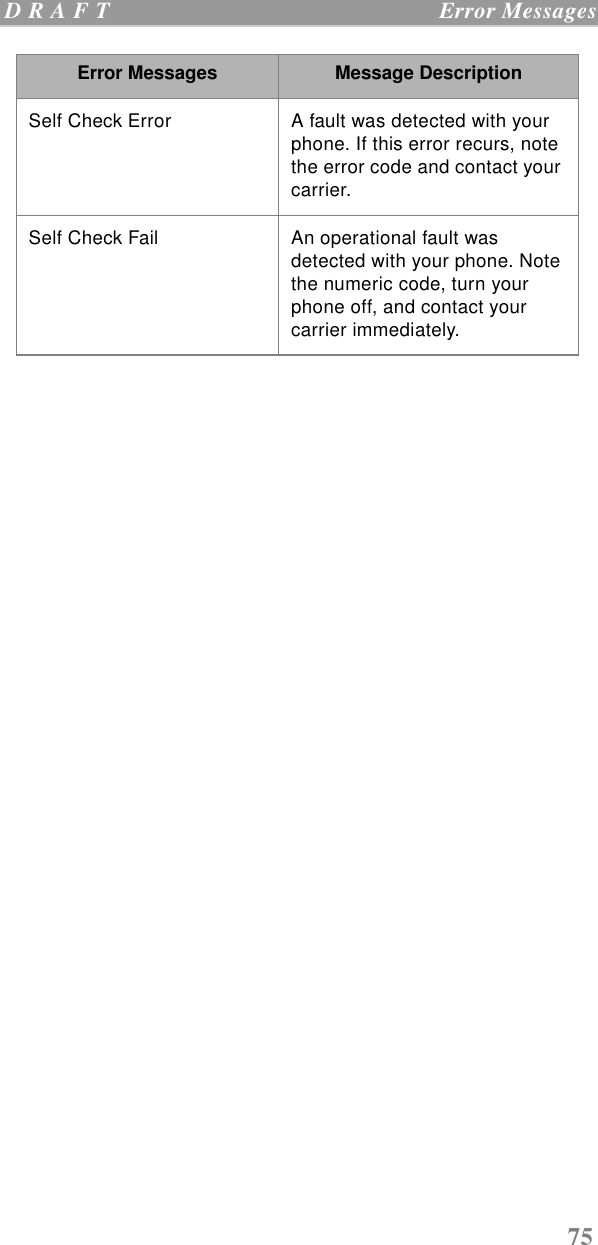
![56Net Mode D R A F T Calendar Your calendar is always available to you through your i1000-A. You can use your i1000-A or your personal web page to store and retrieve appointments and schedules. To open your calendar: 1. From Net mode, select “Net”. This action opens the Home menu. 2. Select “Calendar” then select “Ok”. Your calendar opens. If this is the first time that you are going to the Calendar, it will be empty. You must add your own entries to it. 3. Continue the instructions for Calendar options, such as adding, changing, or deleting appointments and faxing your calendar.• Adding Appointments 4. Select “Act” to see a list of options. 5. Select “New”, then select “Ok”. A list of fields appears. 6. Select “Appt”, then select “Edit”. 7. Enter a description for the appointment, then select “Ok”. The list of fields returns.Entering the Date: 8. Select “Date”, then select “Edit”.If you select “Today” or a day of the week, the date is automatically entered when you select “Ok”.If you select “Other”, you are prompted to insert the date in the MM/DD/YY format (the year is optional). 9. When you enter enough information, the “Back” option changes to “Ok”. When you finish entering the date, select “Ok”.Entering the Time:10. Select “Time”, then select “Edit”.You are prompted to insert the start time in the HH:MM[A/P] format. You can also use your personal web page to update your calendar. For more information, see “Using Your Personal Web Page to Update the Address Book” on page 60.](https://usermanual.wiki/Motorola-Solutions/89FT5793.Instruction-manual/User-Guide-20492-Page-61.png)