Motorola Solutions 89FT5831 iDEN i325 with MOTOtalk User Manual i325ConchProMot
Motorola Solutions, Inc. iDEN i325 with MOTOtalk i325ConchProMot
UserManual.wiki
>
Motorola Solutions
>
89FT5831 User Manual
Exhibit 8 Users Manual
Navigation menu
Upload a User Manual
Namespaces
Wiki Guide
HTML
PDF
Info
Views
User Manual
Discussion / Help
Navigation
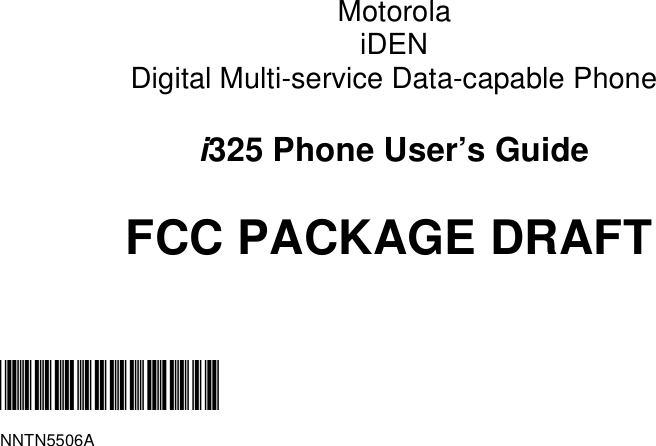
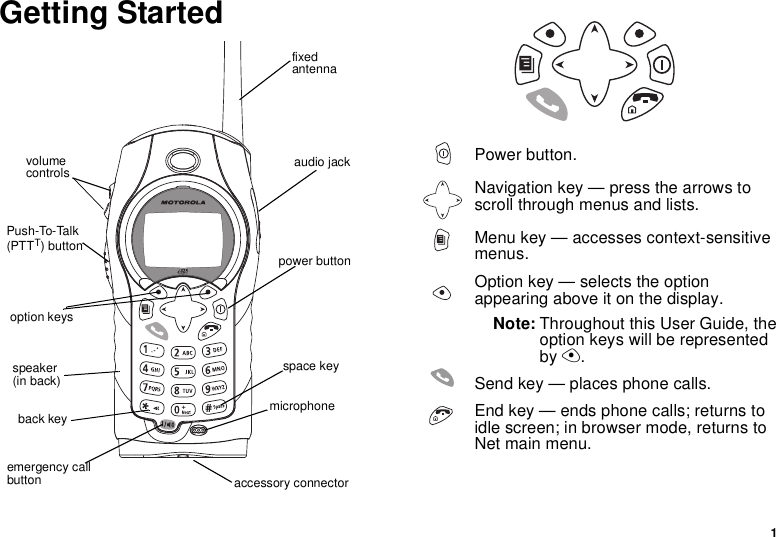
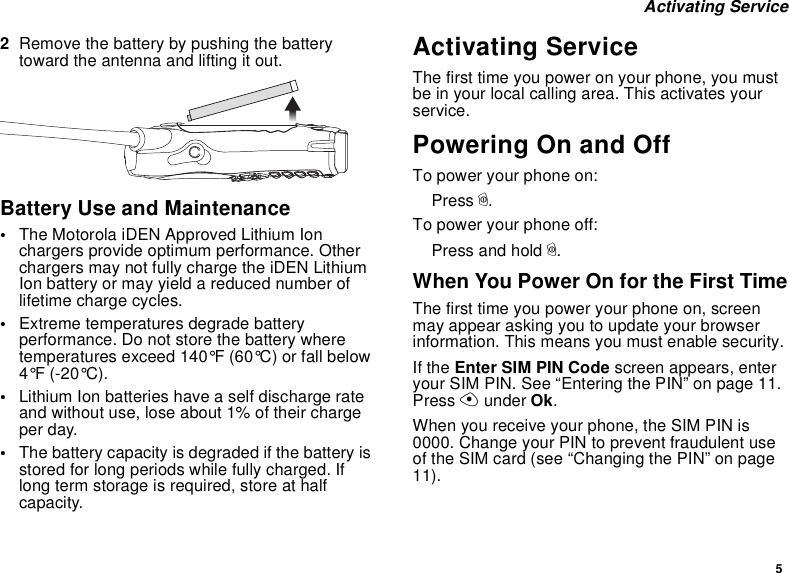
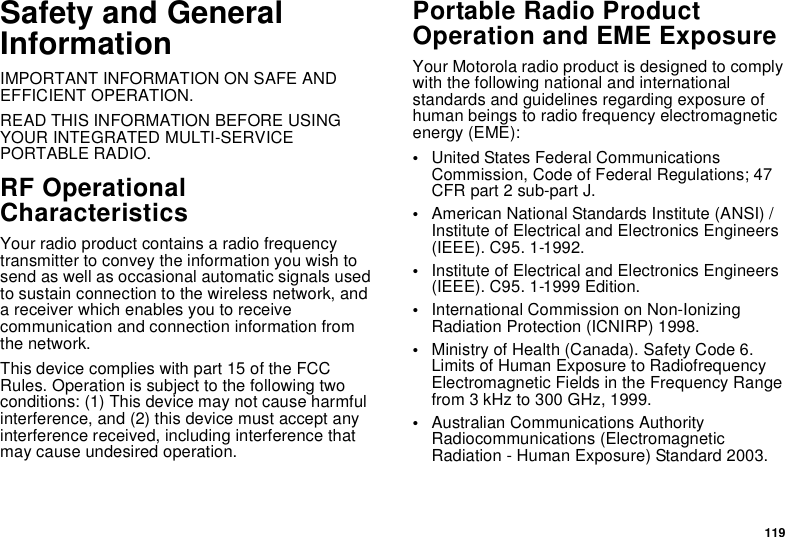
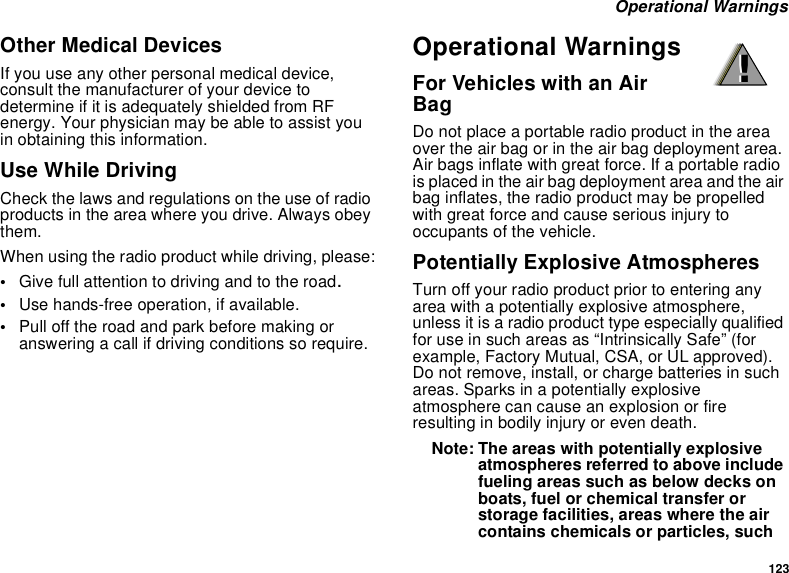
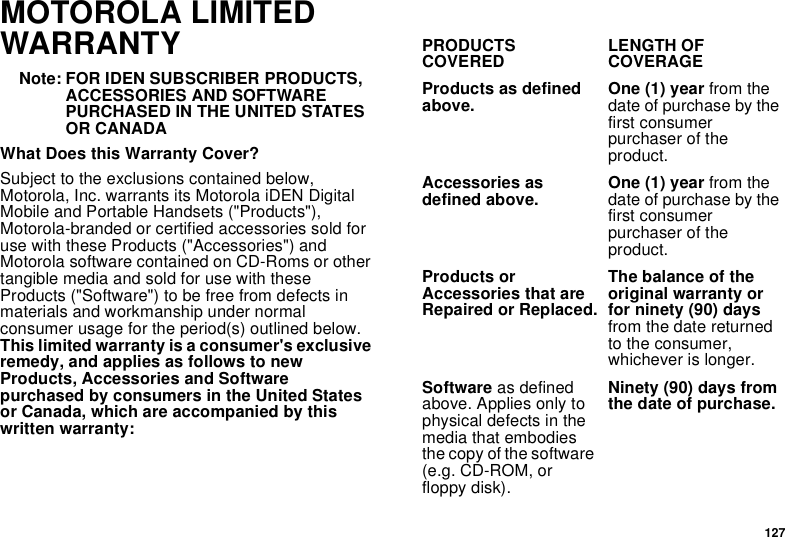
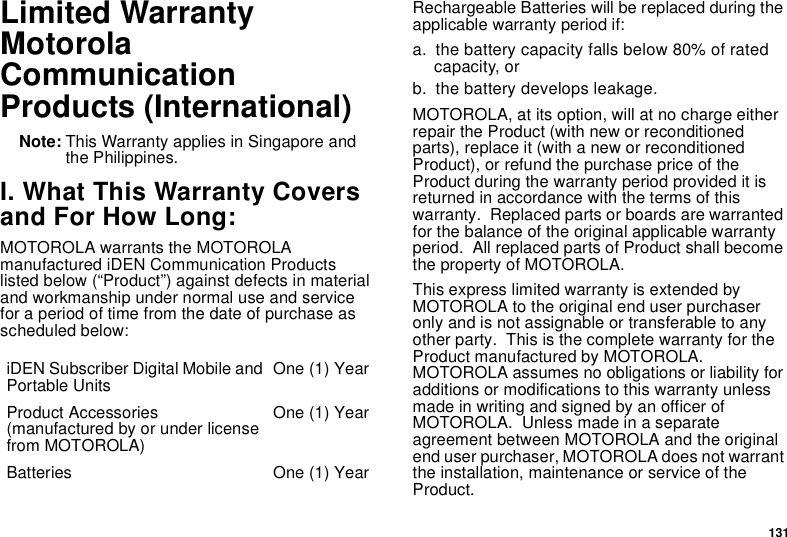
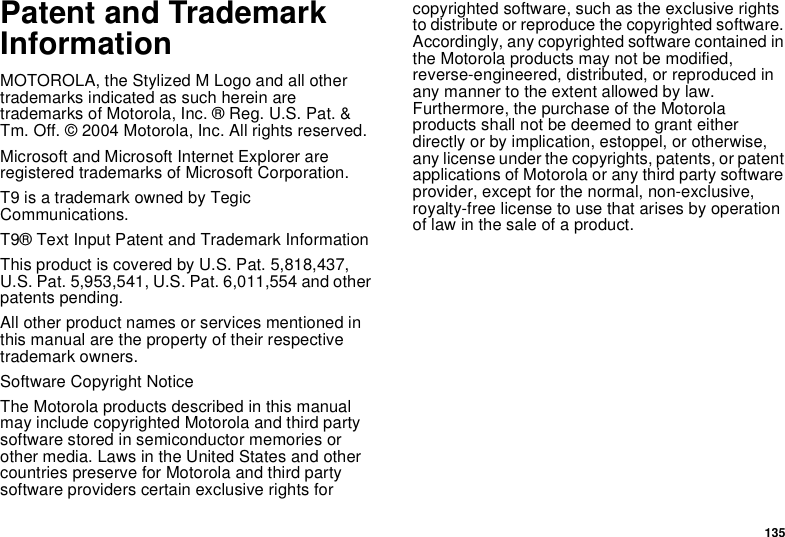
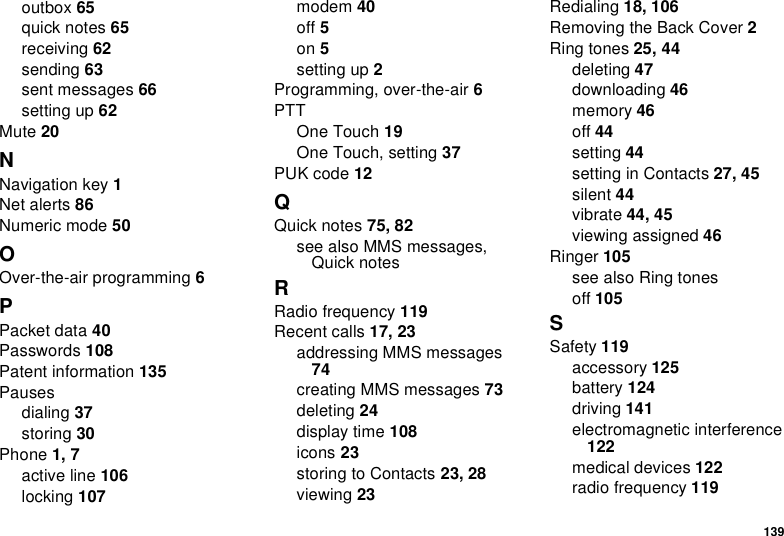
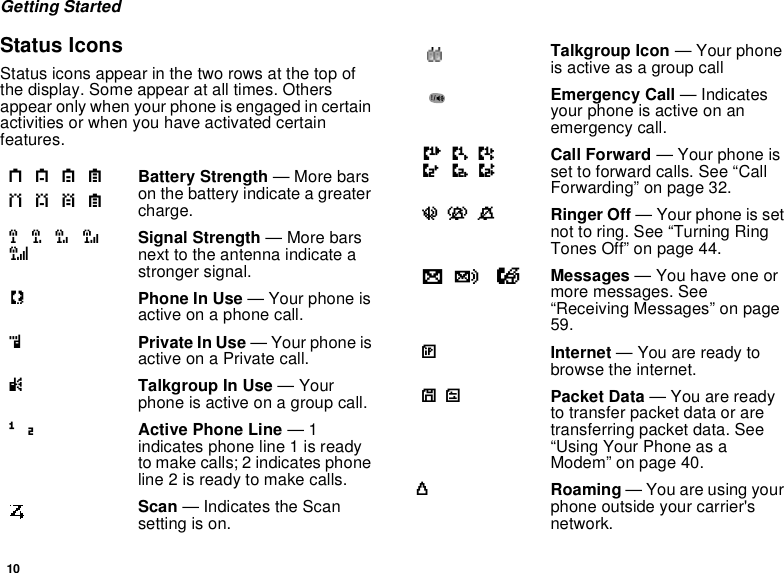
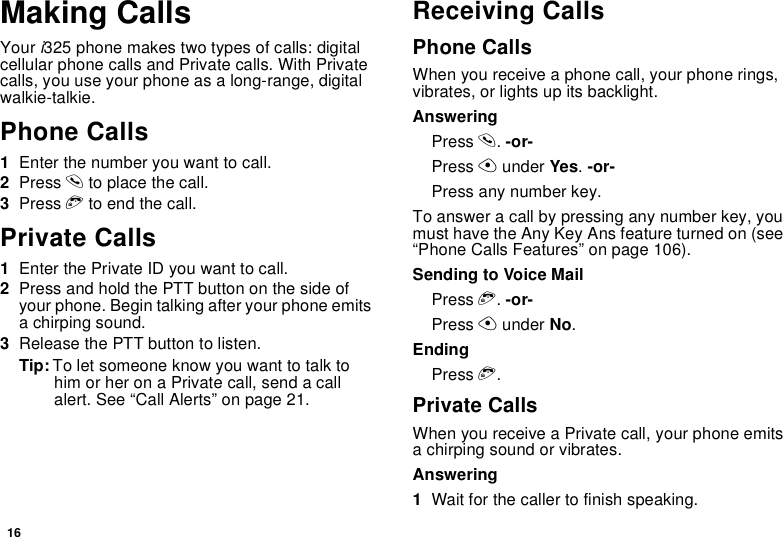
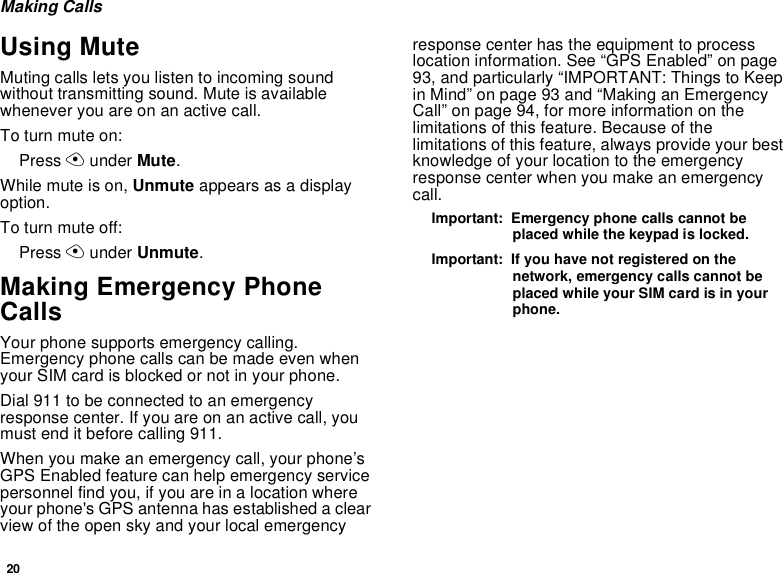
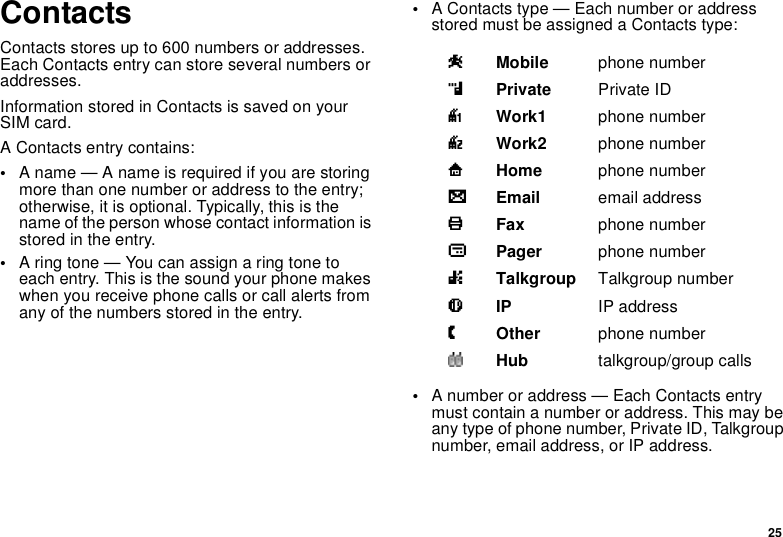
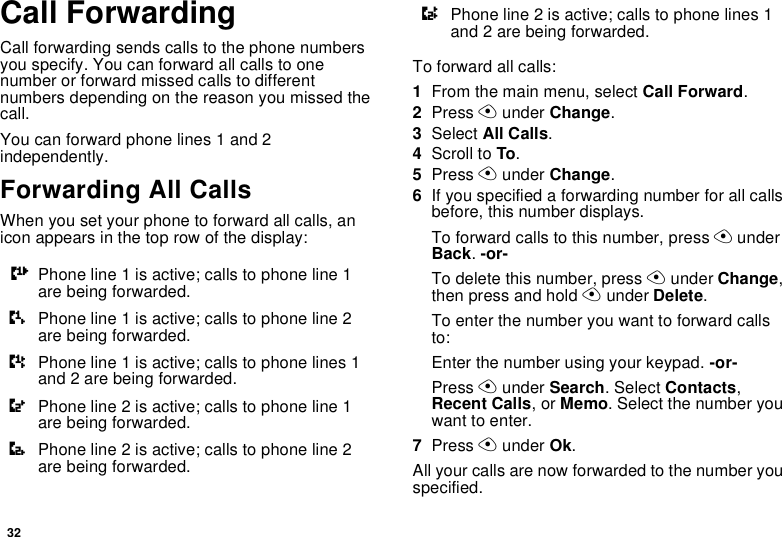
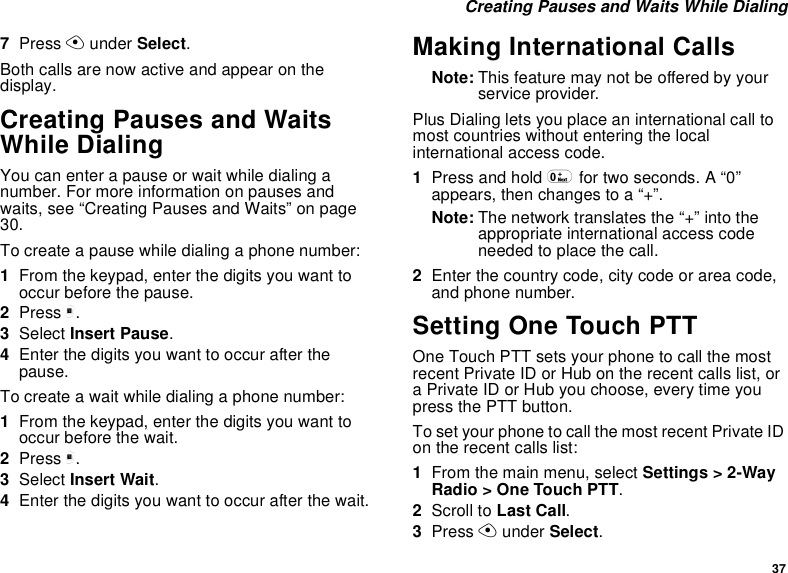
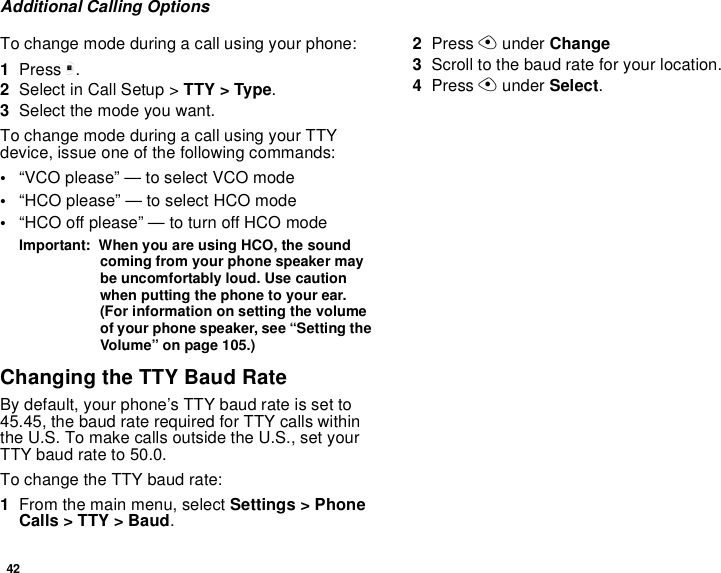
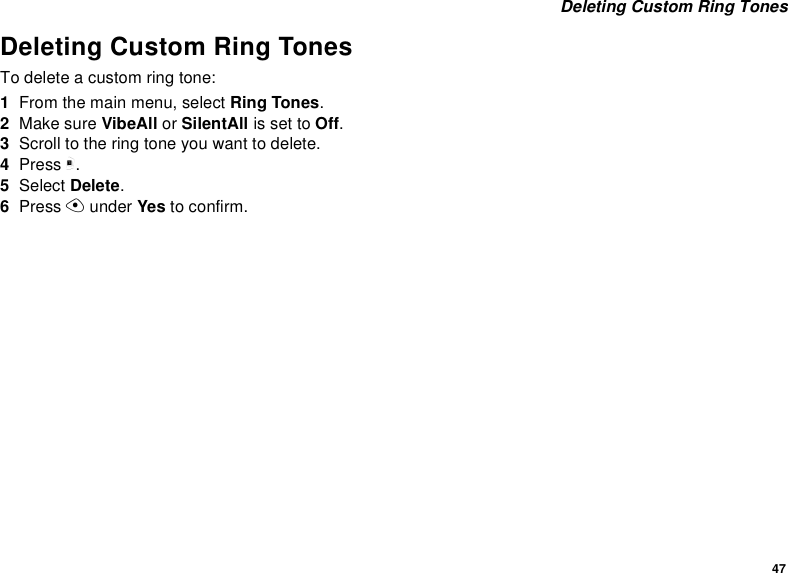
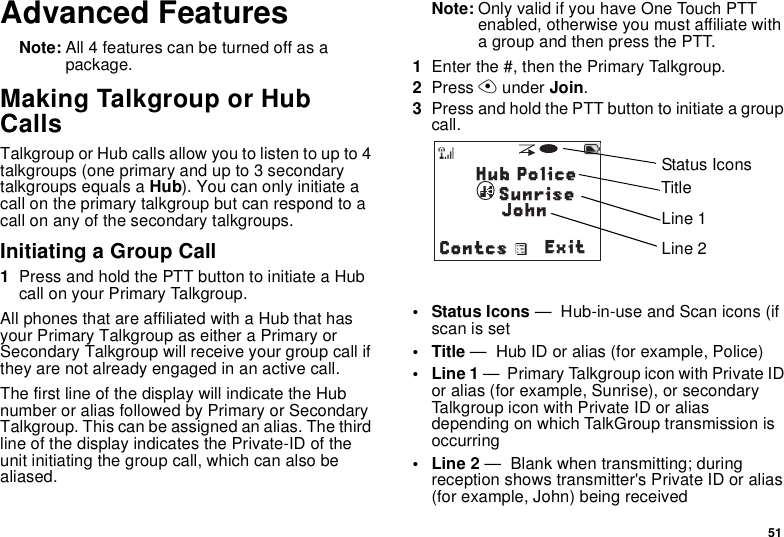
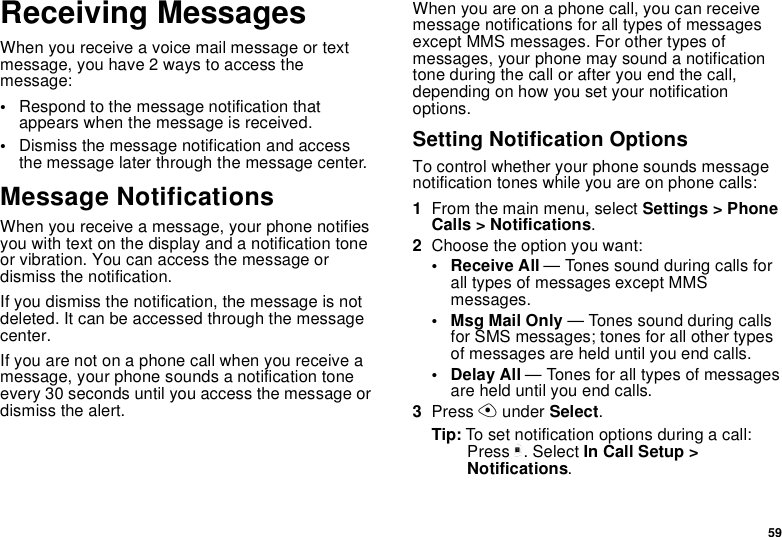
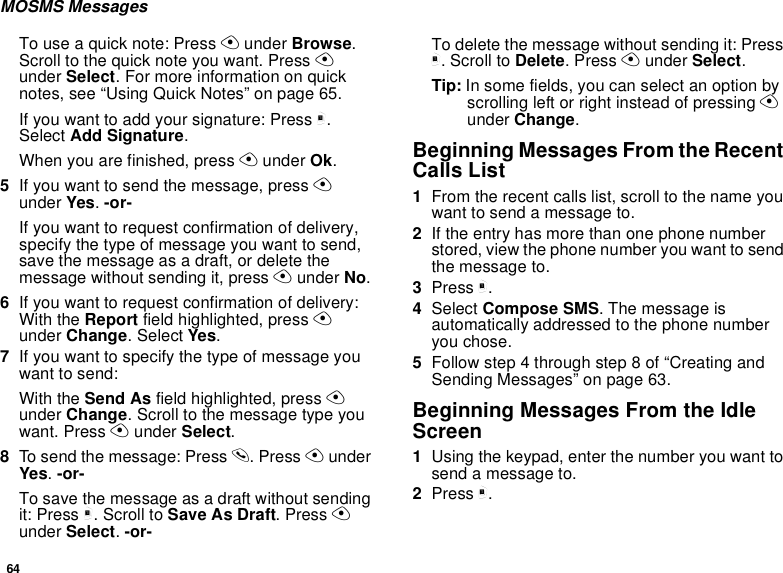
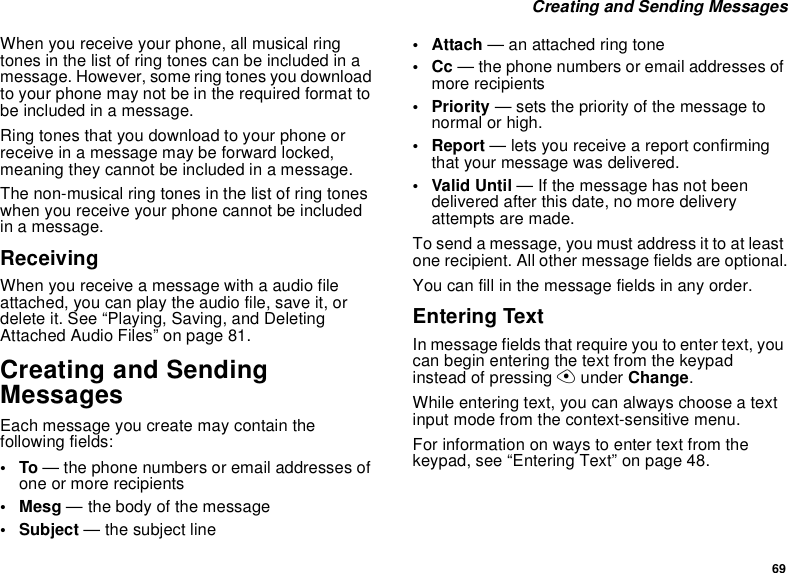
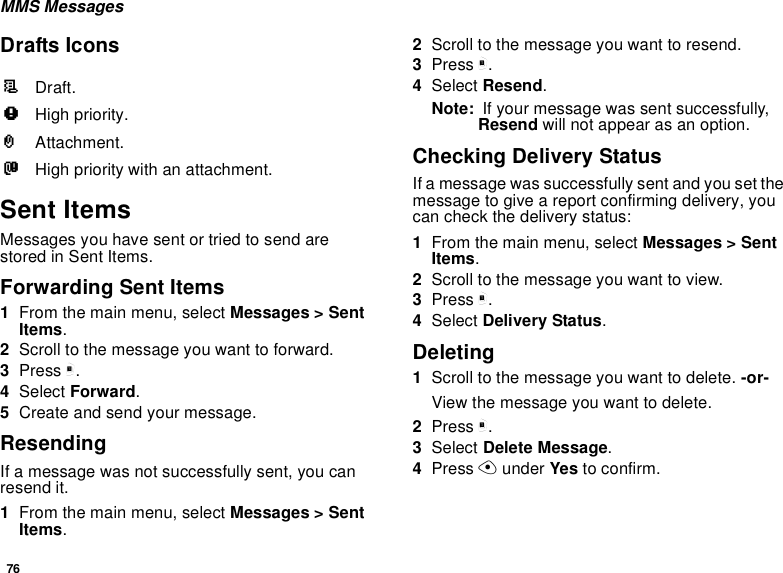
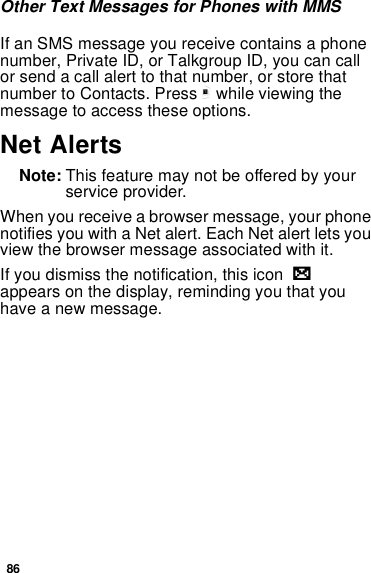
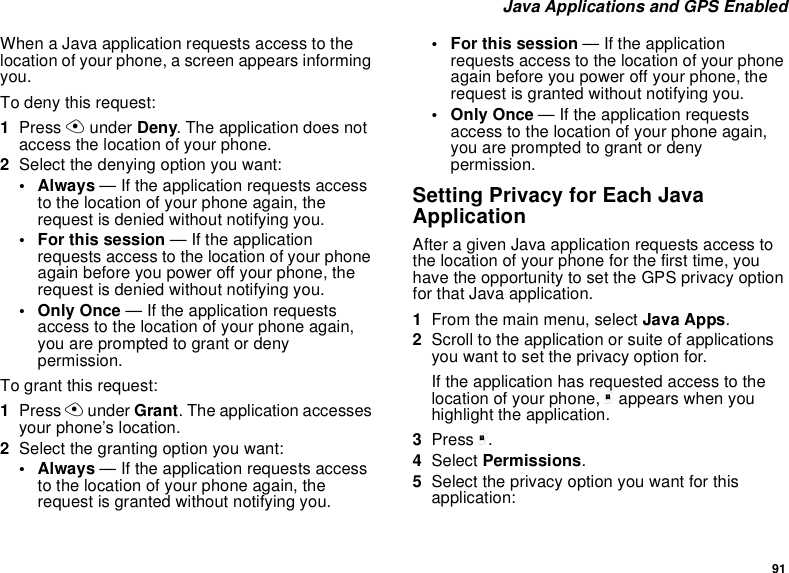
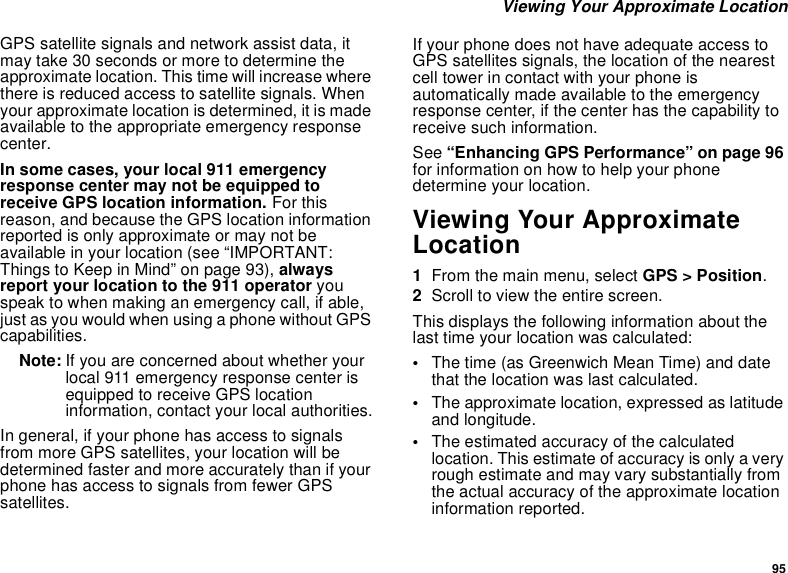
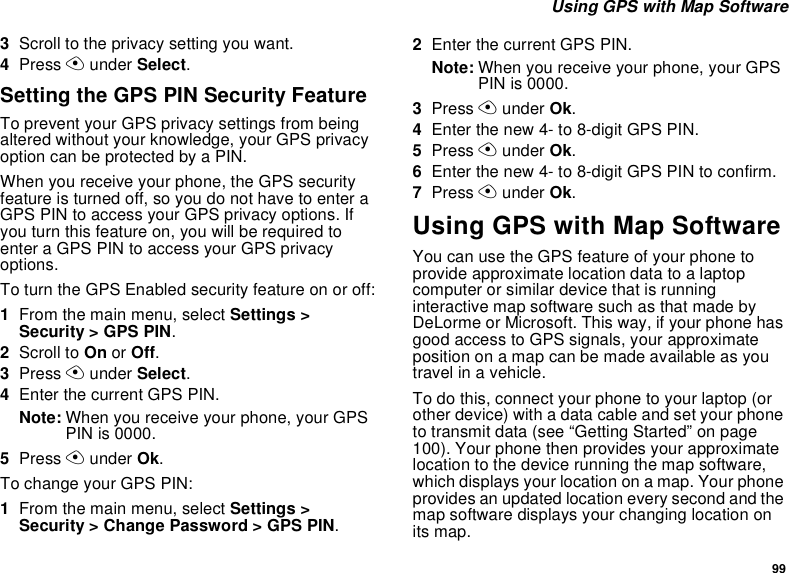
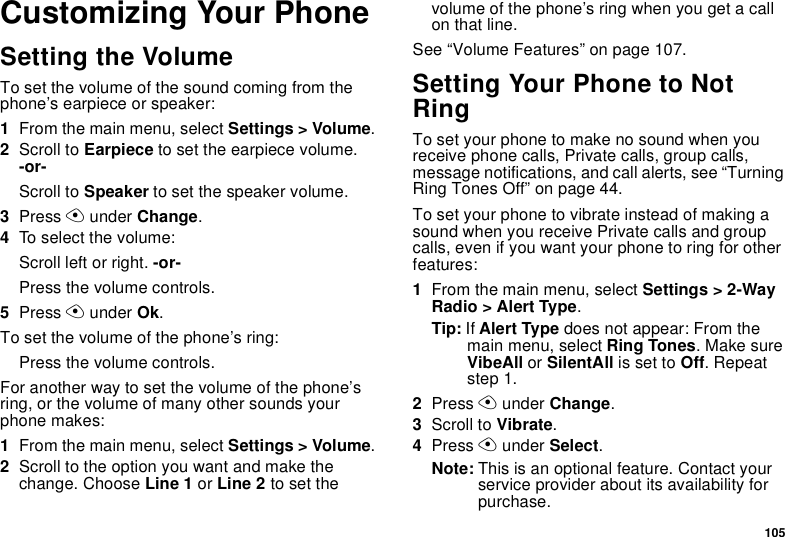
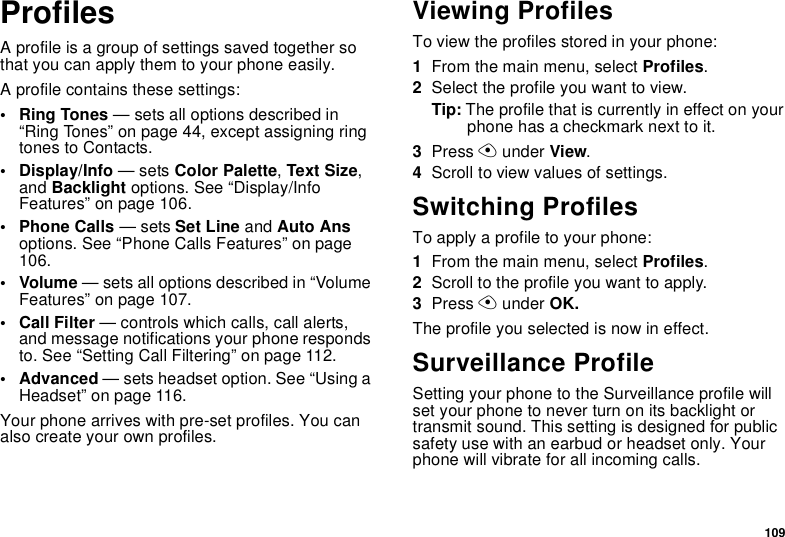
![9 Phone BasicsContactsnew contact formlist of contactsContacts menuView, store, edit contacts. See page 25.eMessages[Compose Message]Voice MailInboxDraftsSent ItemsSMSNet AlertAccess messages. See page 57.fCall Forward Set call forwarding options. See page 32.gMemo Store a number to access later. See page 43.hCall Timers Phone usage information. See page 39.iRecent Callslist of callsrecent calls menuCall Setup menuLists recent calls. See page 23.Shortcuts Create shortcuts to screens. See page 114.Profilesnew profile formlist of profilesGroups of settings you apply together. See page 109.jMy Info View personal phone information, including phone number and Private ID. See page 6.kCall Alertlist of call alertsCall Alerts menuLists call alerts. See page 21.lGPS Find your approximate geographical location. See page 93.mRing TonesVibeAlllist of ring tonesRing Tones menuAssign ring tones and turn ringer off. See page 44.](https://usermanual.wiki/Motorola-Solutions/89FT5831/User-Guide-443309-Page-19.png)

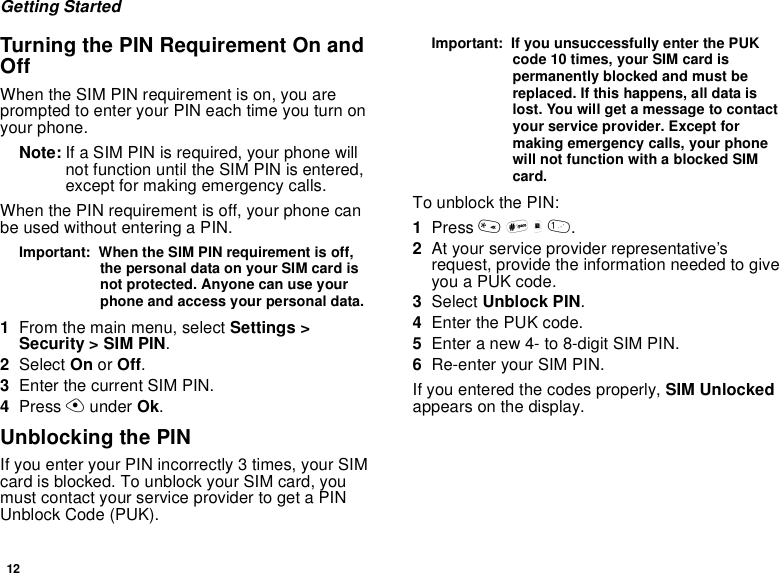

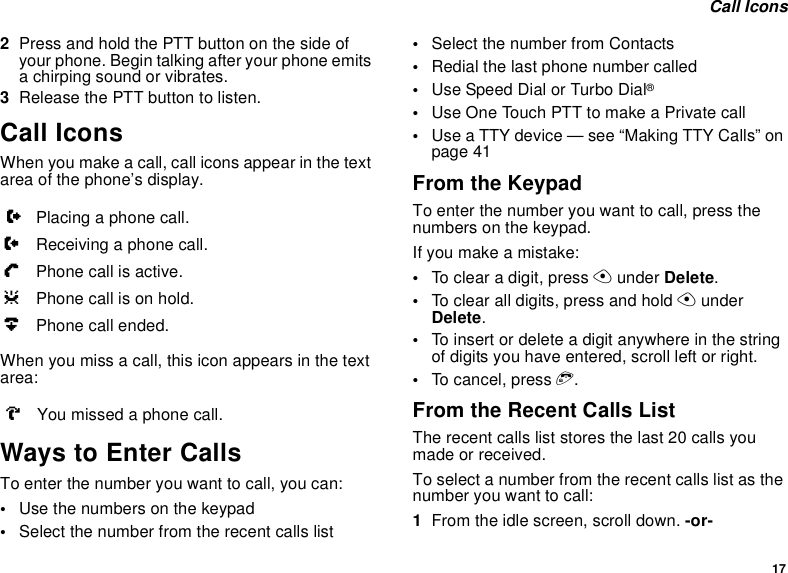
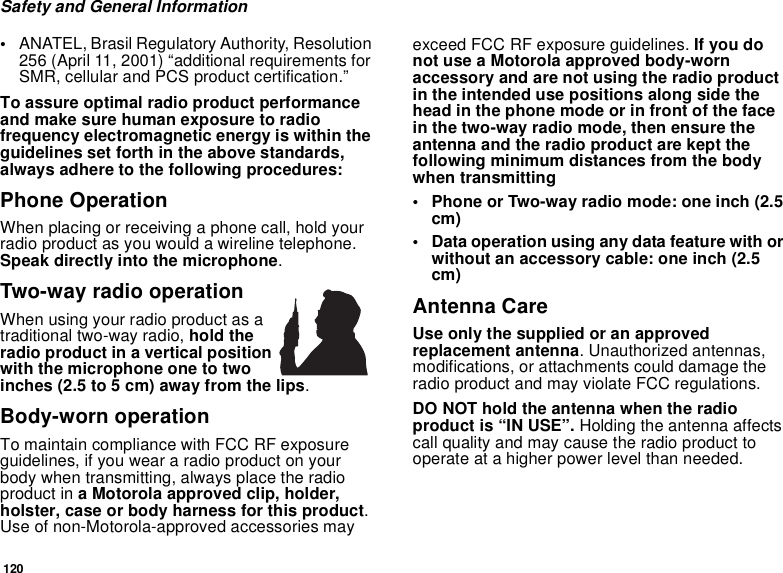
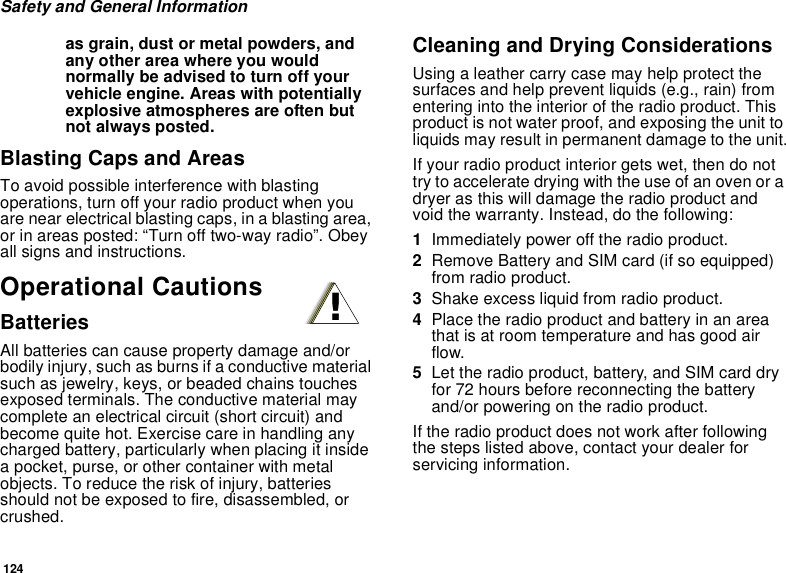
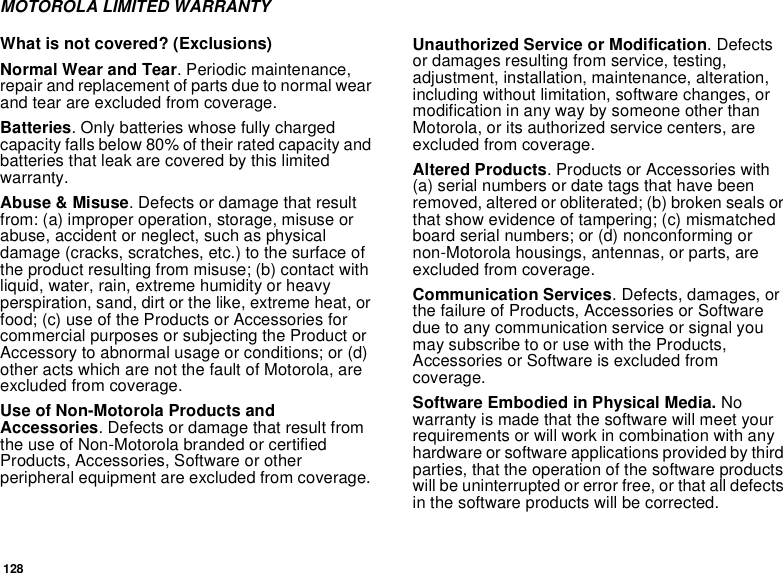
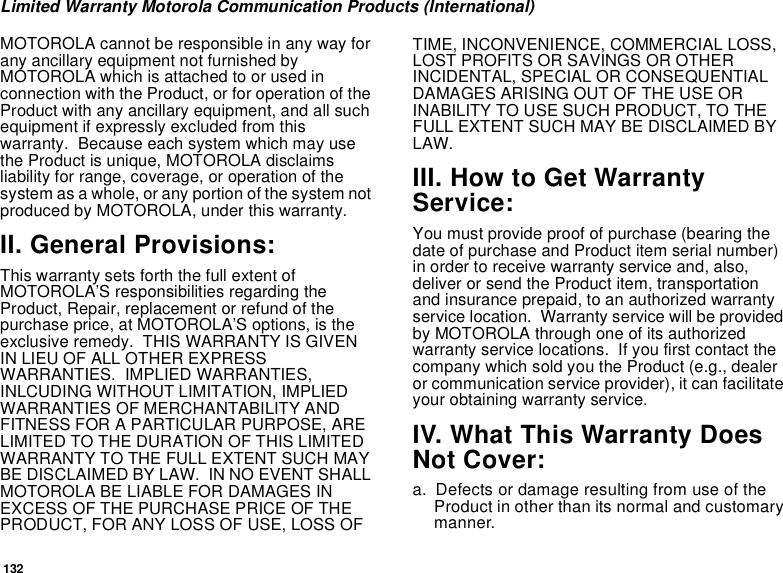
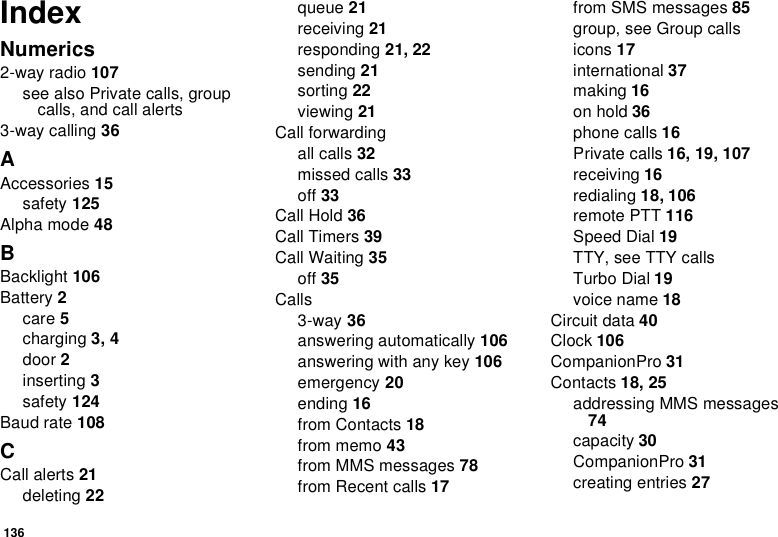
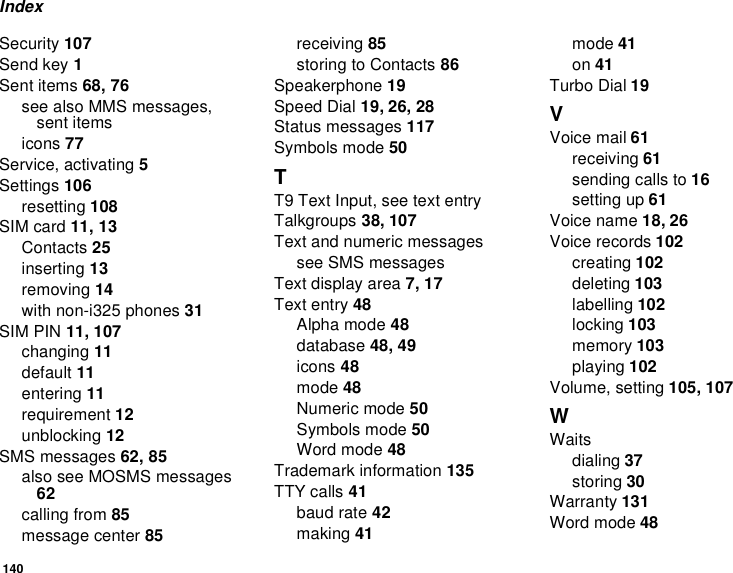
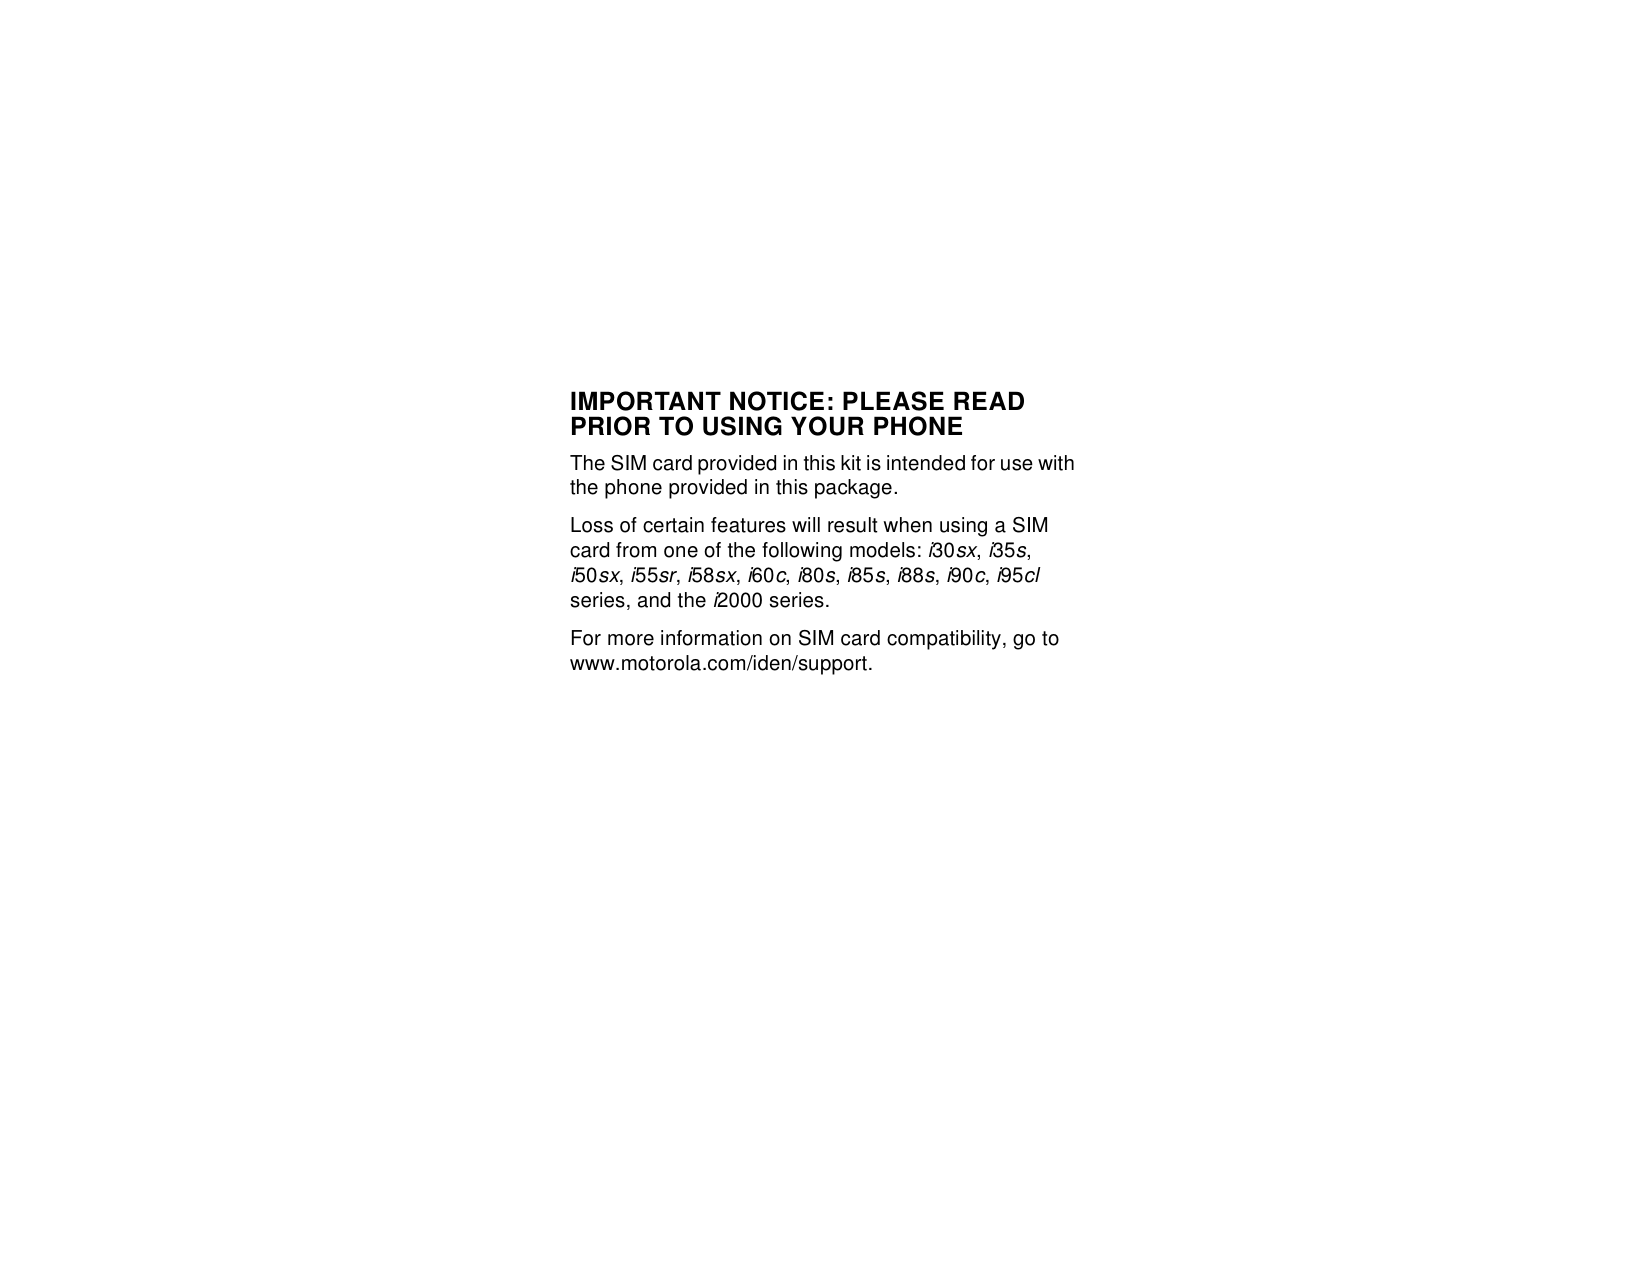
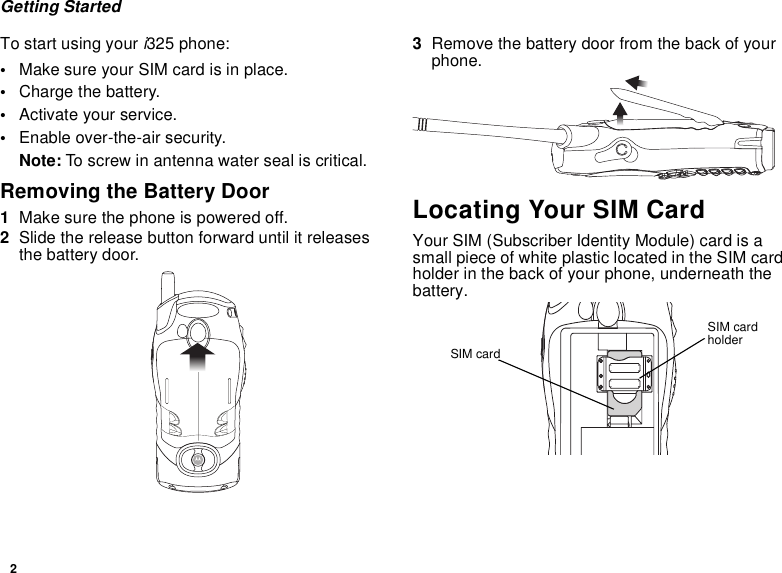
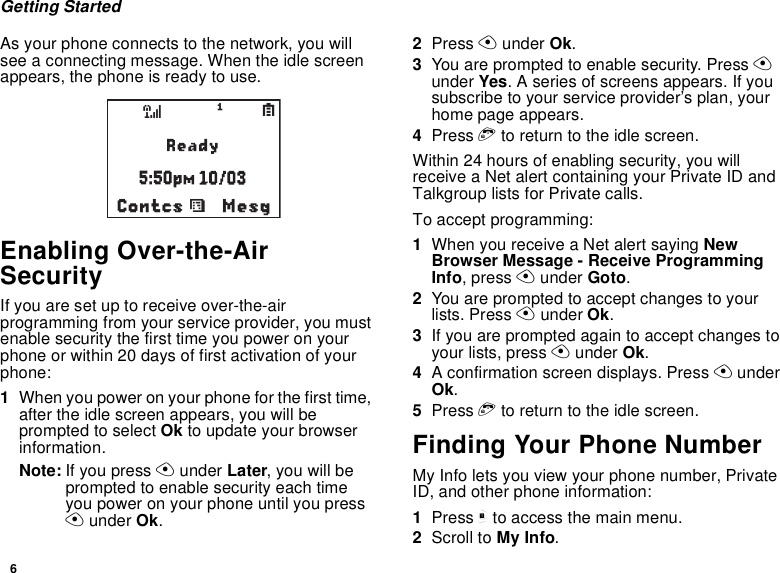
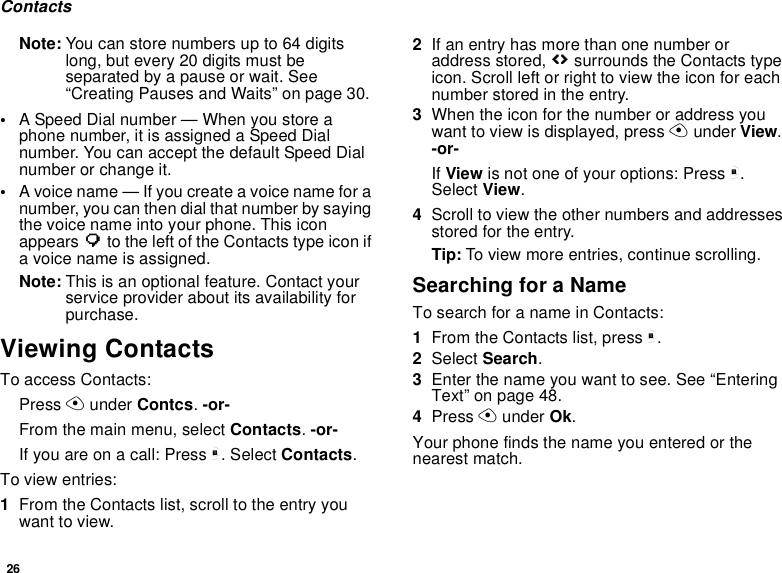
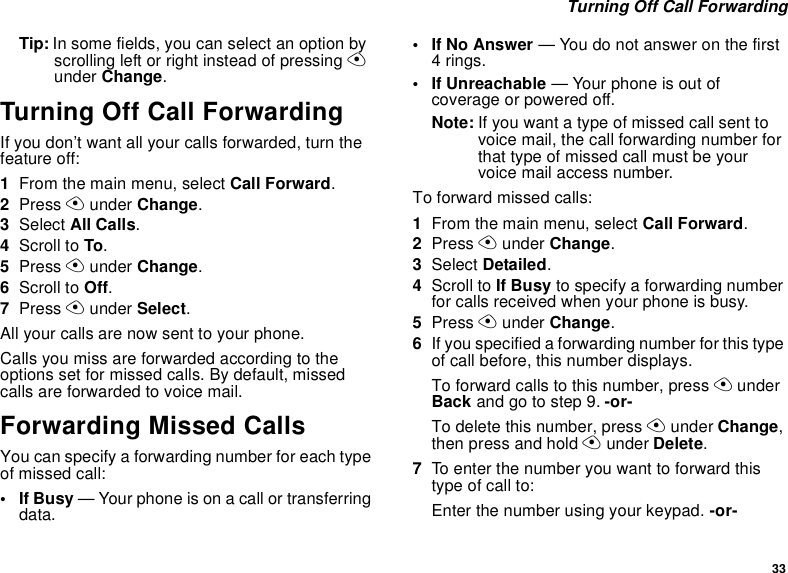
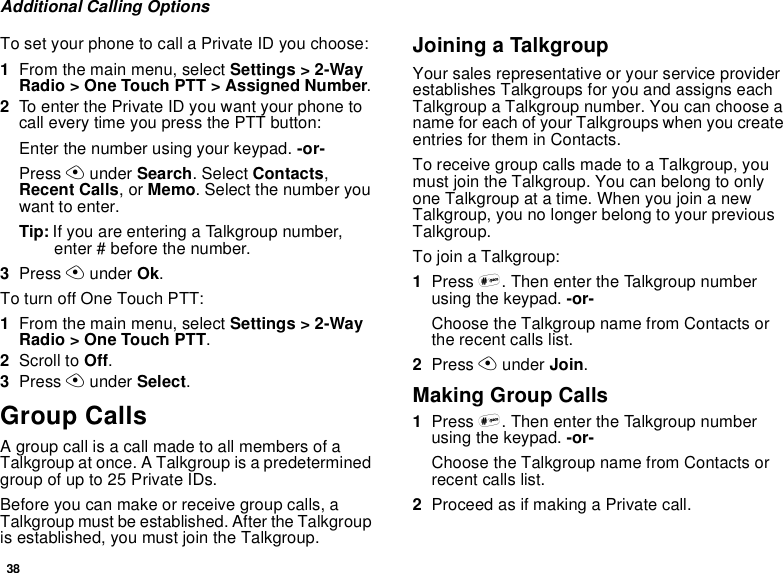
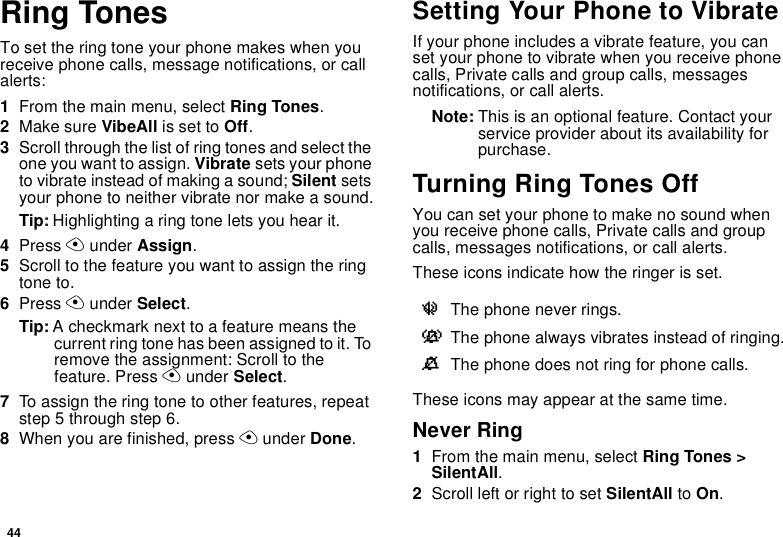
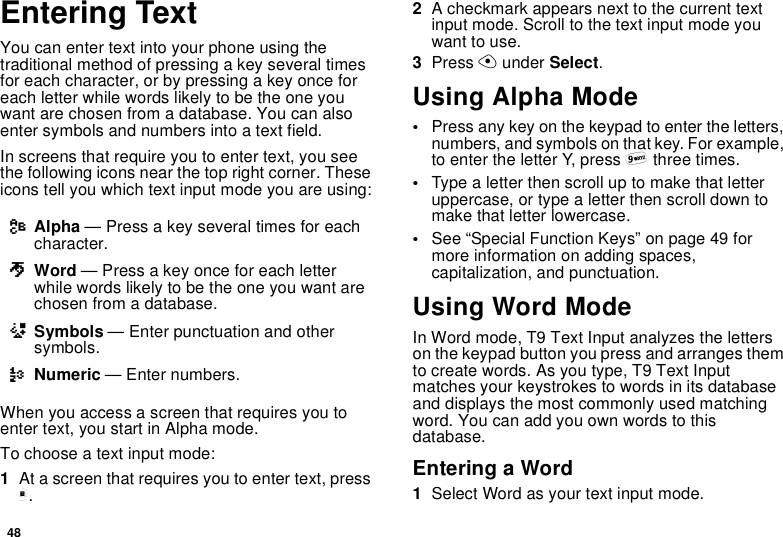
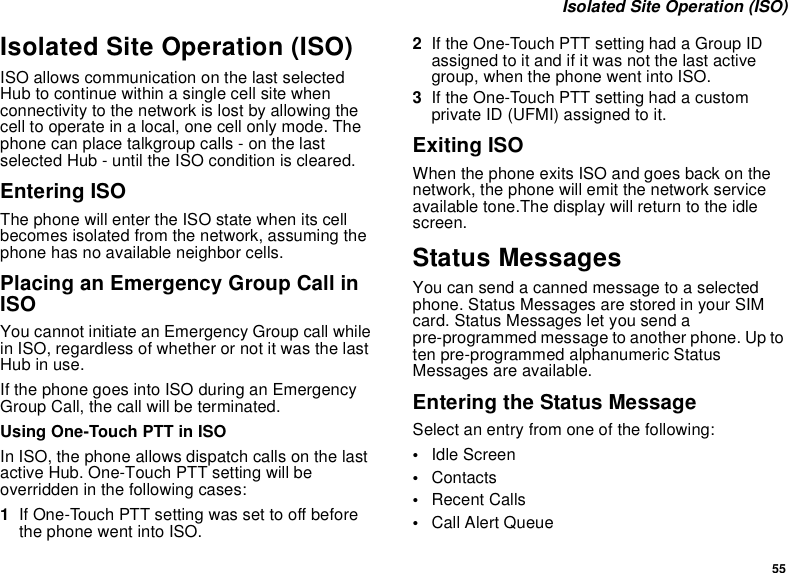
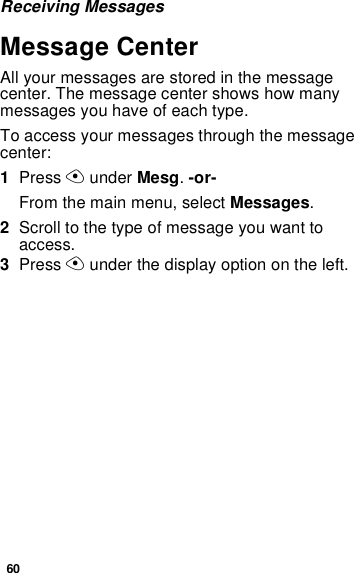
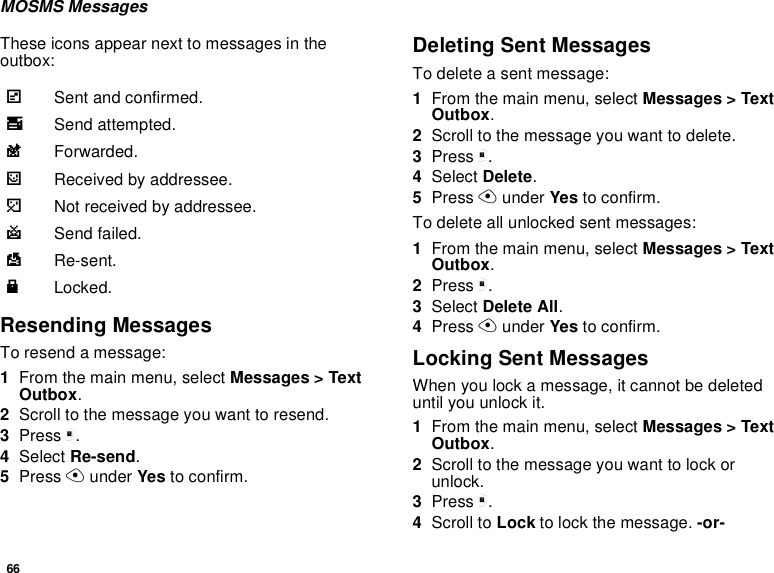
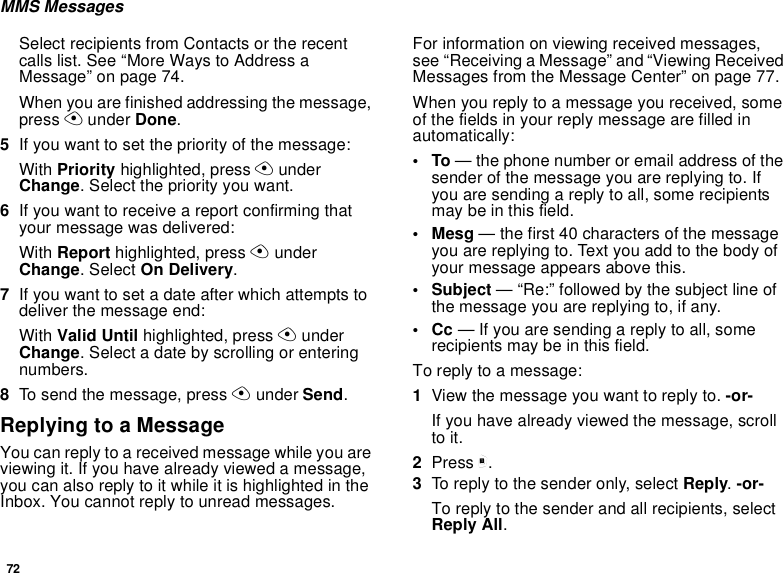
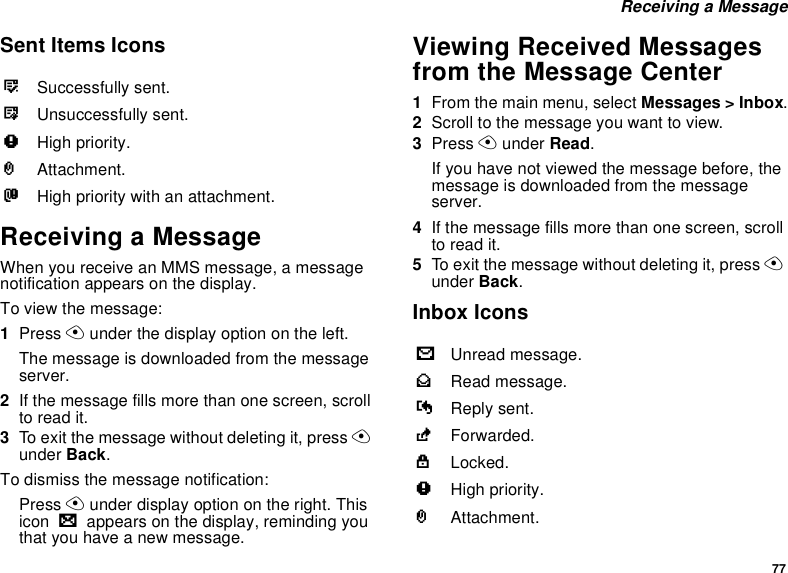
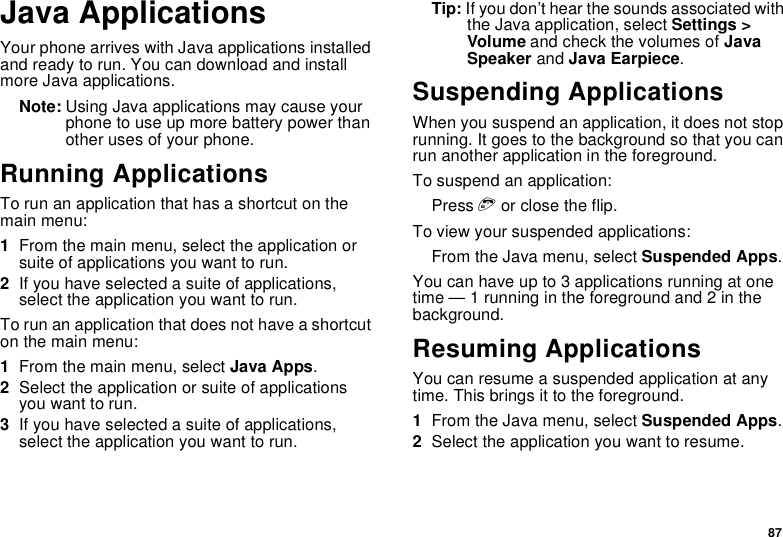
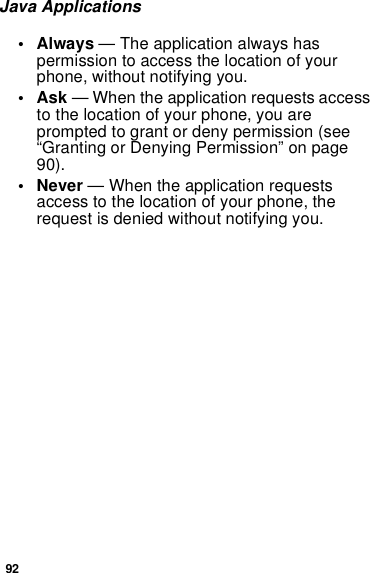
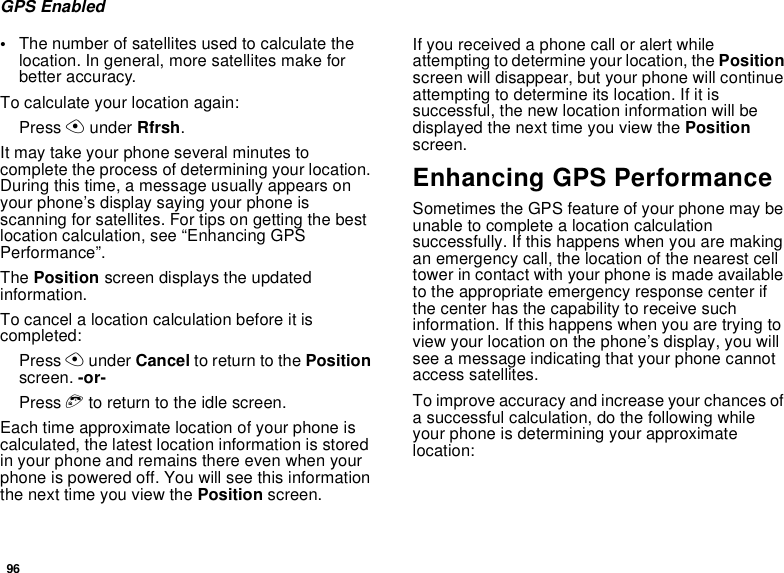
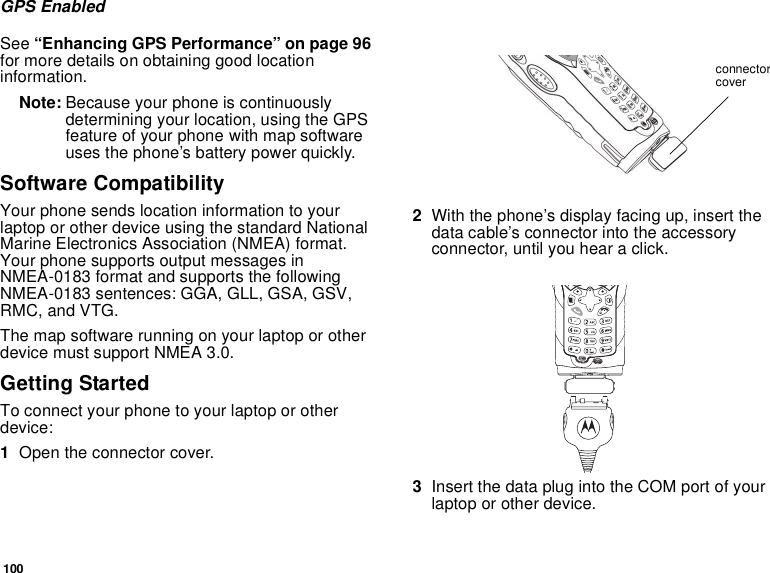
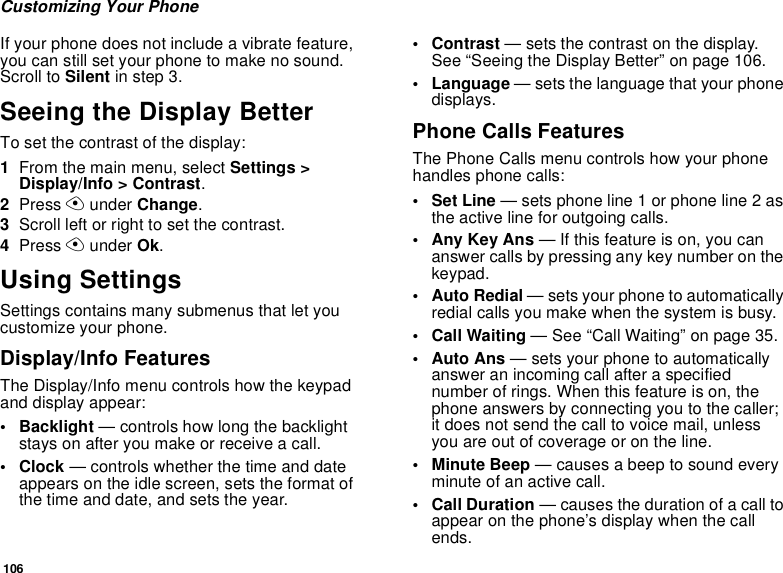
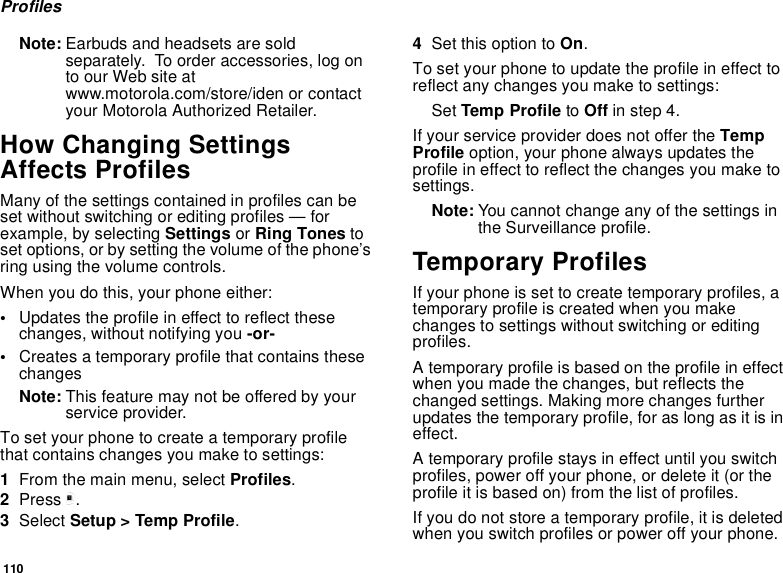
![24Recent Calls3To store the number as a new entry, select [New Contact]. -or-To store the number to an existing entry, select the entry.4With the Contacts type field highlighted, scroll left or right to display the Contacts type you want to assign to the number. For information on Contacts types, see page 25.5If you want to add more information to the entry, follow the applicable instructions in “Creating Entries” on page 27.6Press A under Done.Deleting Recent CallsTo delete a call:1From the recent calls list, scroll to the call you want to delete.2Press m.3Select Delete.4Press A under Yes to confirm.To delete all calls:1From the recent calls list, press m.2Select Delete All.3Press A under Yes to confirm.](https://usermanual.wiki/Motorola-Solutions/89FT5831/User-Guide-443309-Page-34.png)
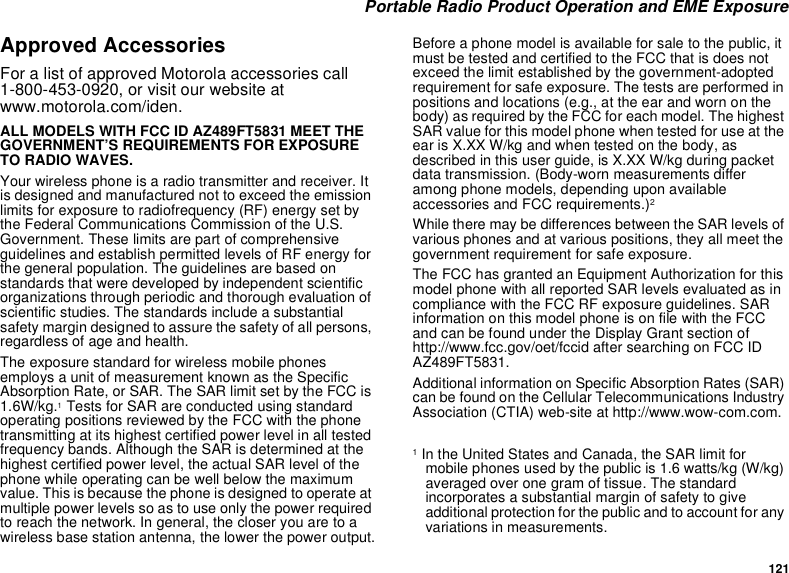
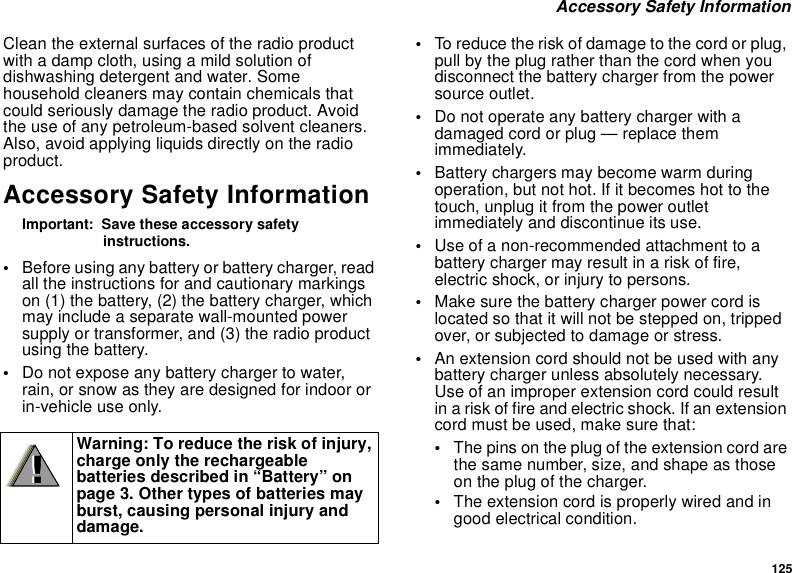
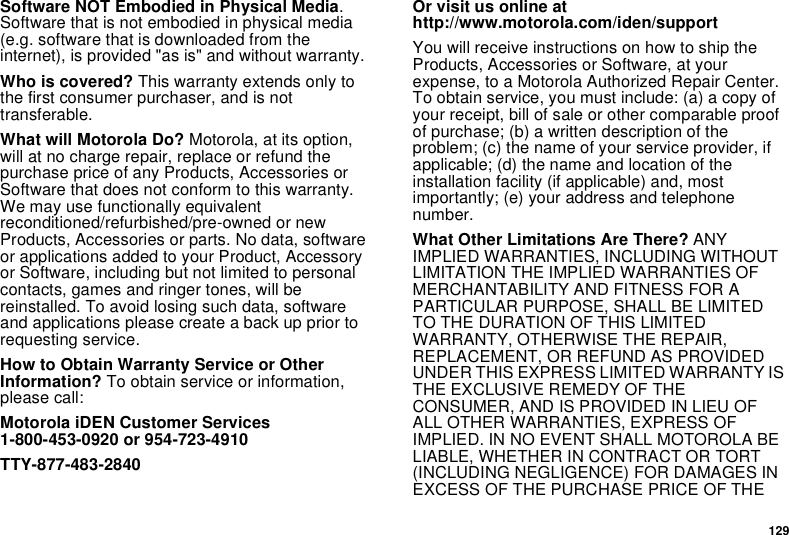
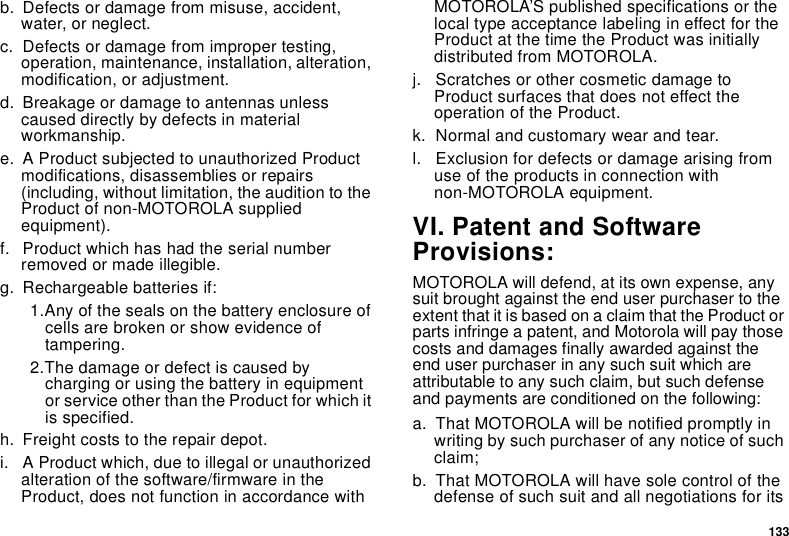
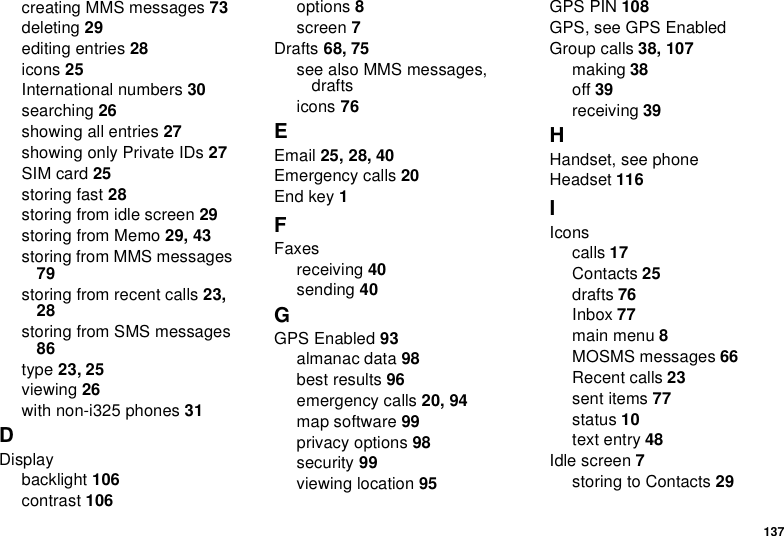
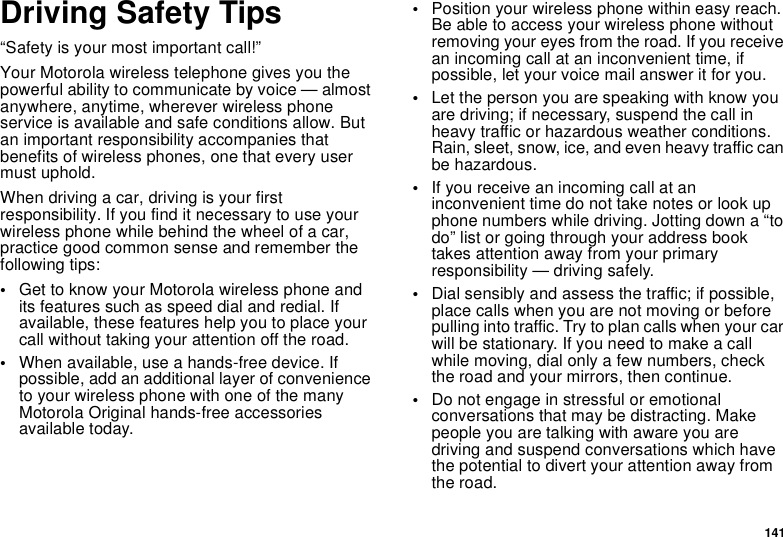
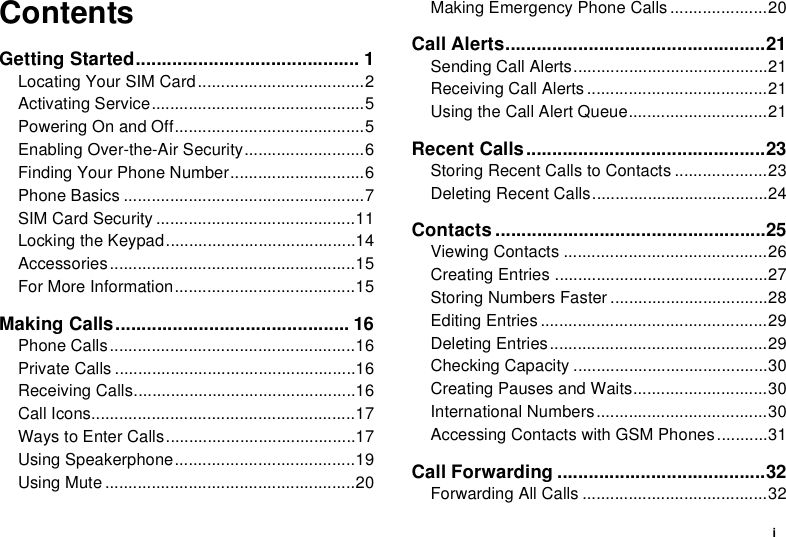
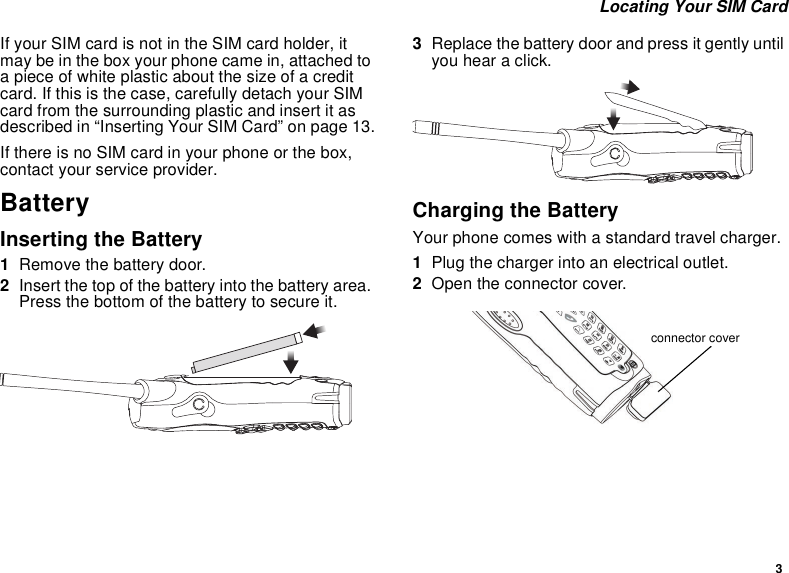
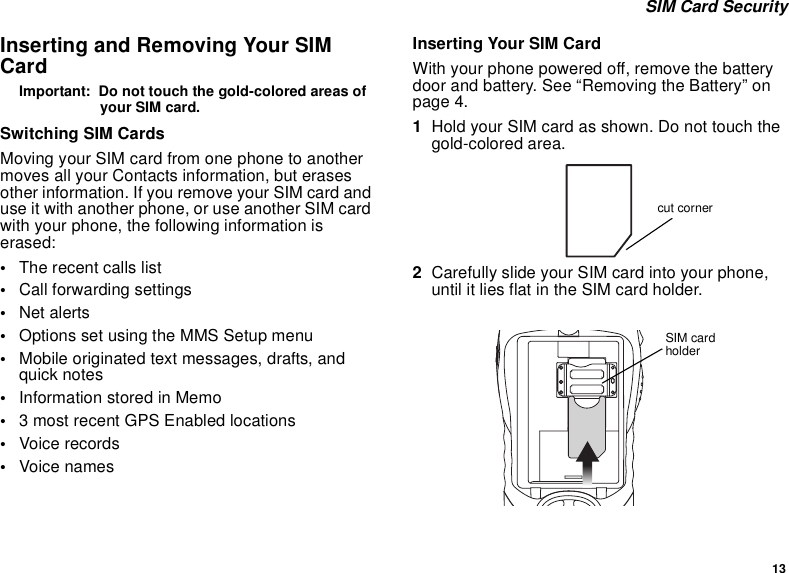
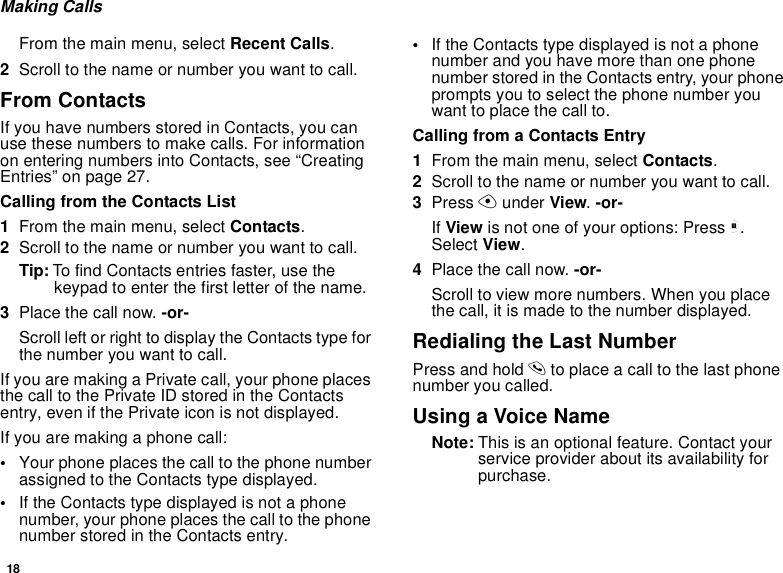
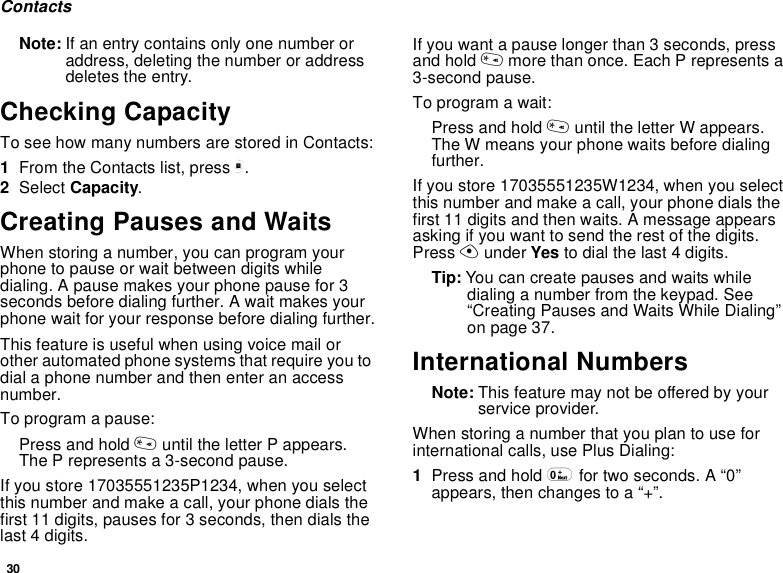
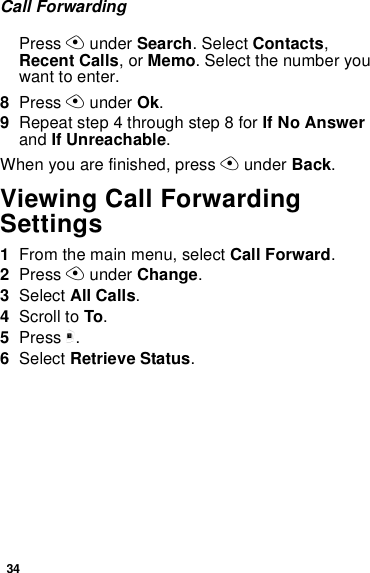
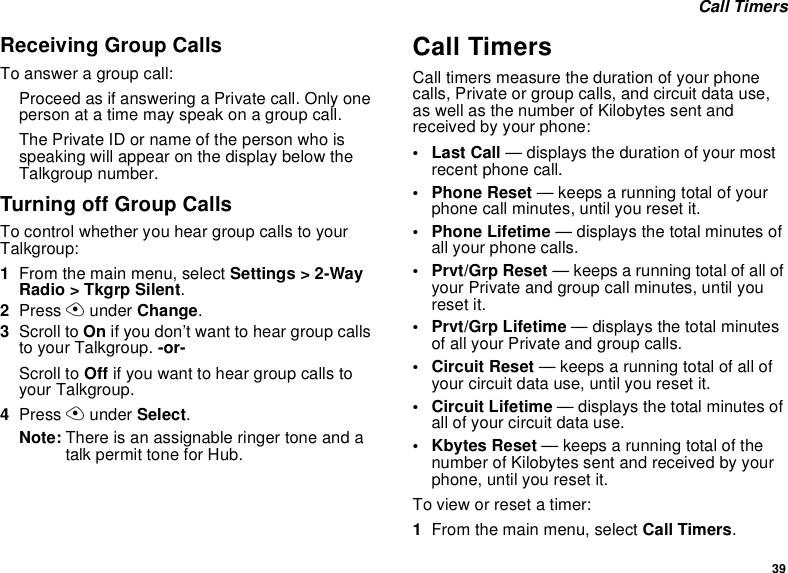
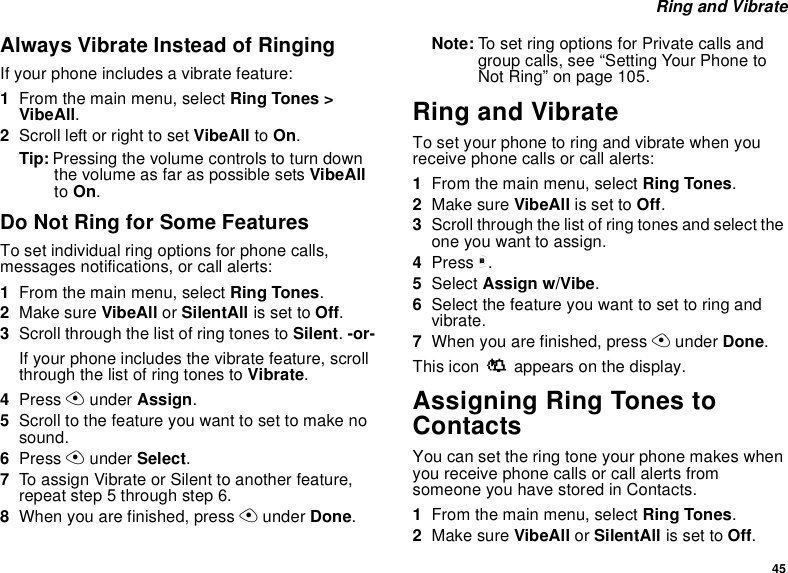
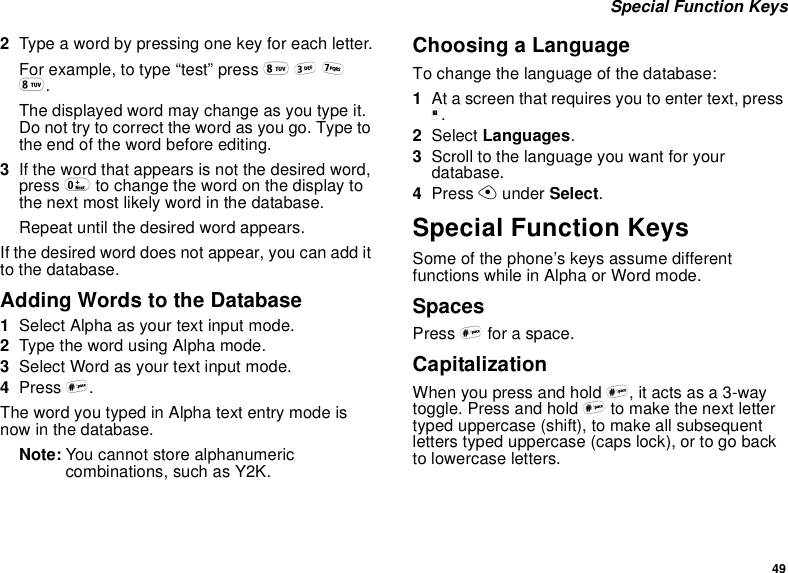
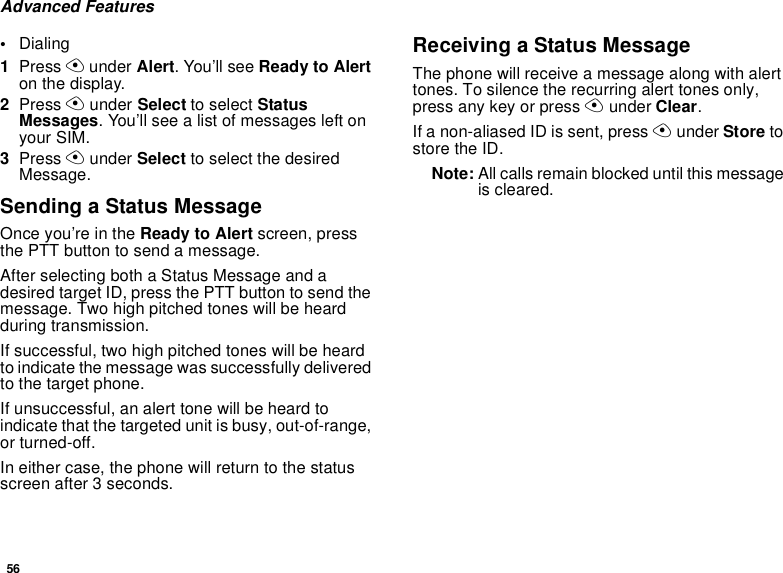
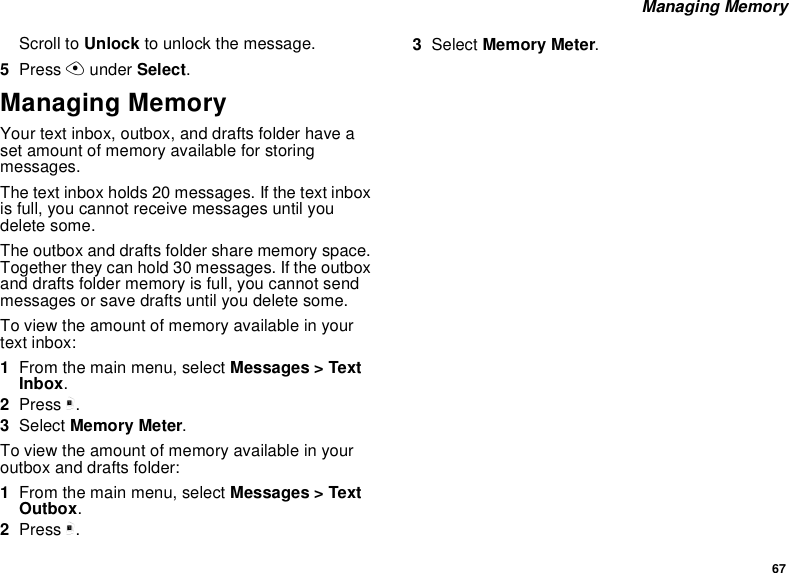
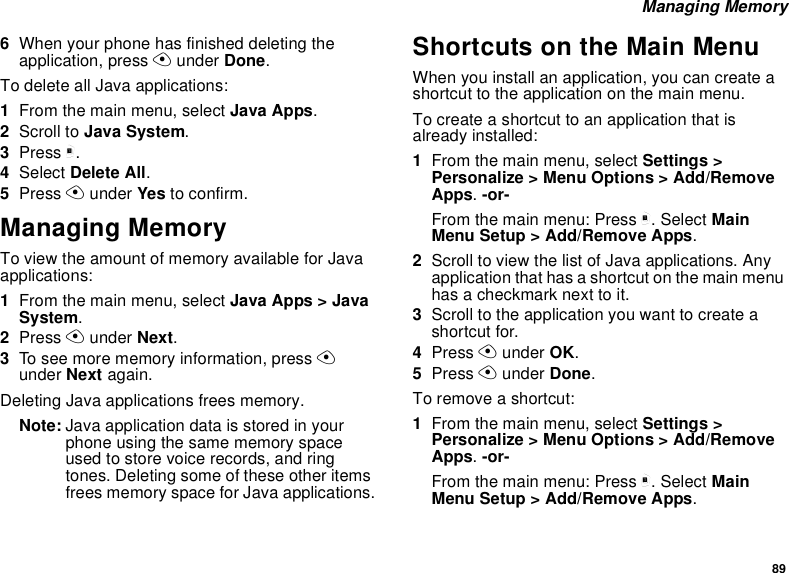
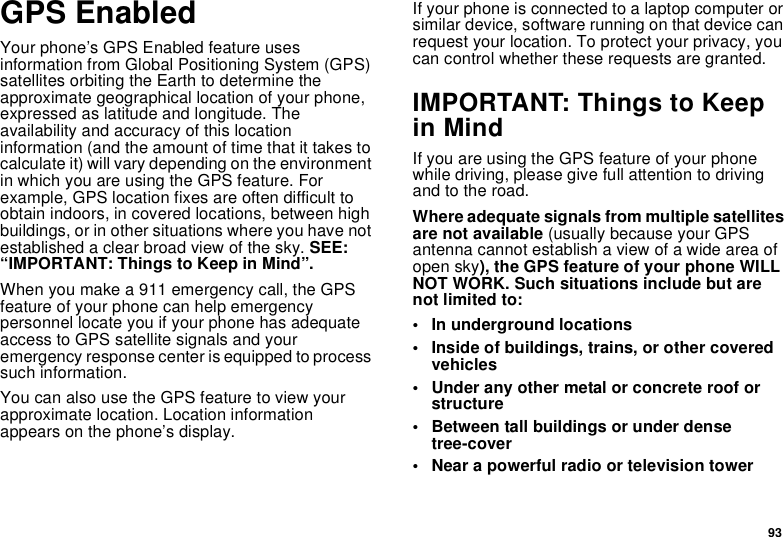
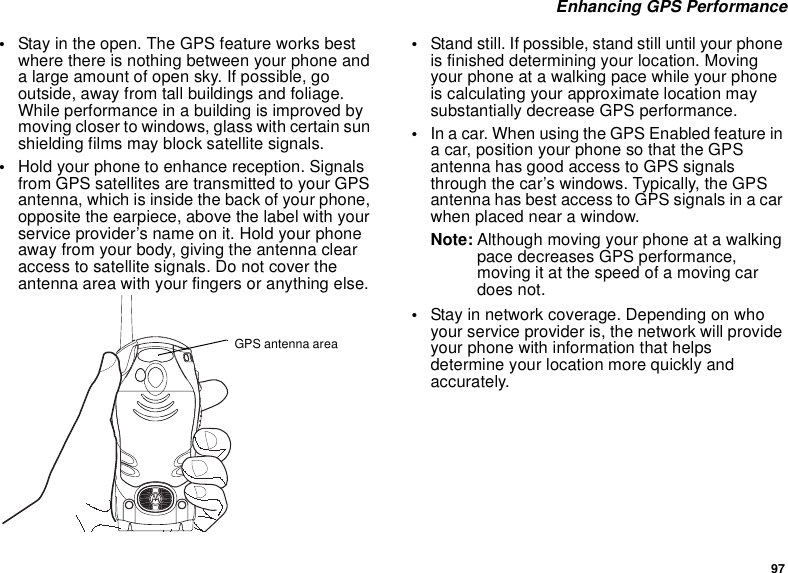
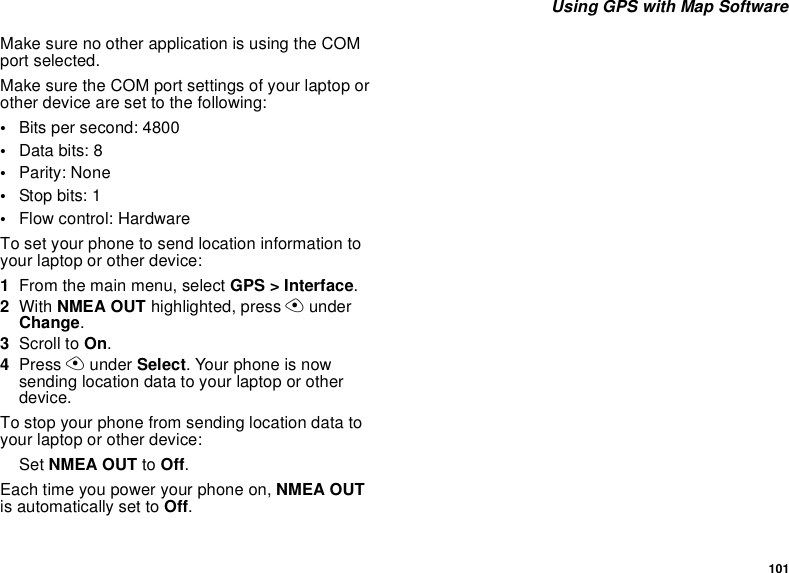
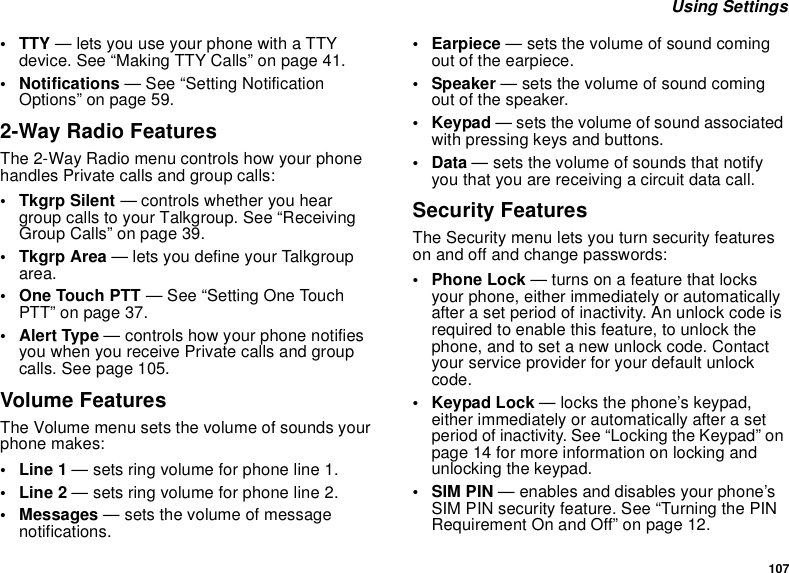
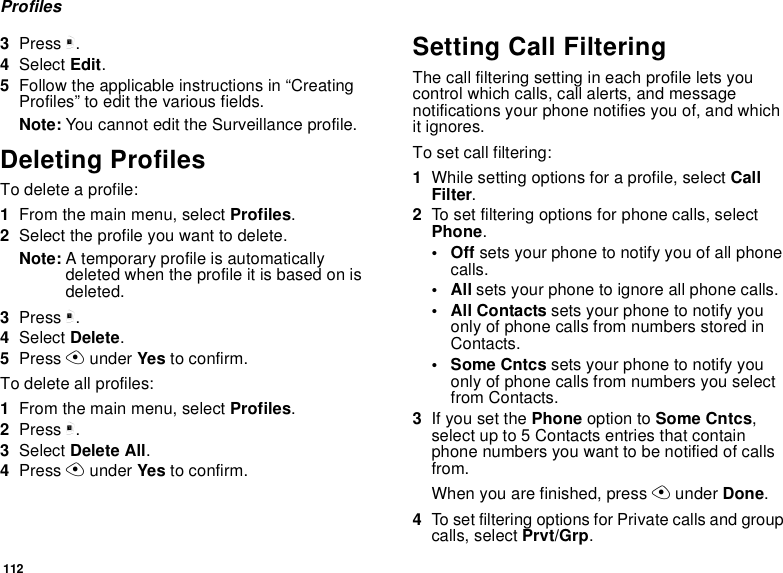
![27 Creating EntriesShowing Only Private IDs and GroupsTo set Contacts to show only entries that contain Private IDs and Group entries:1From the Contacts list, press m.2Select Filter.3With Show Prvt/Grp highlighted, press A under Select.To set Contacts to show all entries:1From the Contacts list, press m.2Select Filter.3With Show All highlighted, press A under Select.Creating EntriesA number or address and a Contacts type are required for all Contacts entries. Other information is optional. You may enter the information in any order by scrolling through the entry details.After you have entered the number or address, Contacts type, and any other information you want, you can press A under Done to save the entry to Contacts.To cancel a Contacts entry at any time press, e to return to the idle screen.Tip: In some fields that require you to enter information, you can begin entering the information from the keypad instead of pressing A under Change.To create a Contacts entry:1To access the entry details screen:Select Contacts > [New Contact]. -or-From the Contacts list, press m. Scroll to New. Press A under Select.2If you want to assign a name to the entry:With the Name field highlighted, press A under Change.Enter the name. See “Entering Text” on page 48. When you are finished, press A under Ok.3If you want to assign a ring tone to the name:With the Ringer field highlighted, press A under Change.Scroll to the ring tone you want to assign. Press A under Select.4To assign a Contacts type to the number or address being stored:With the Contacts type field highlighted, press A under Change.](https://usermanual.wiki/Motorola-Solutions/89FT5831/User-Guide-443309-Page-37.png)
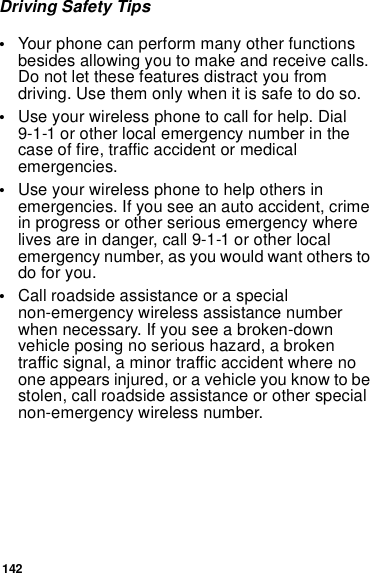
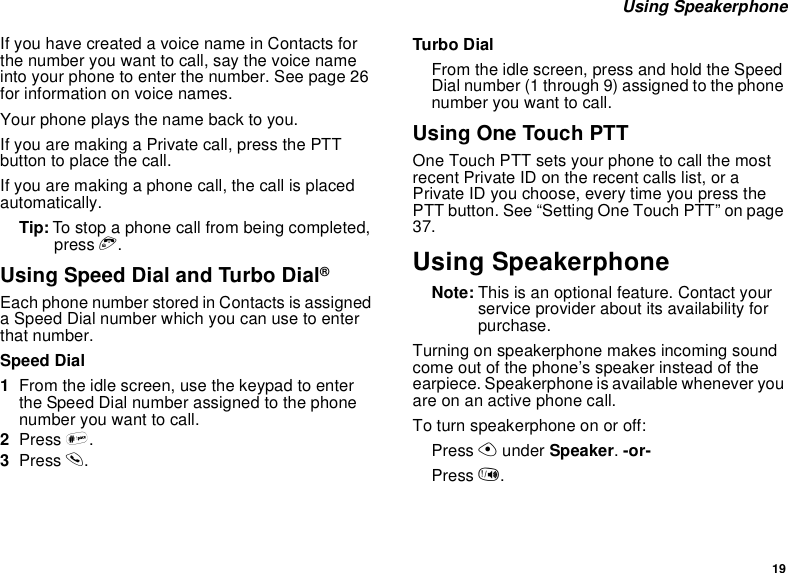
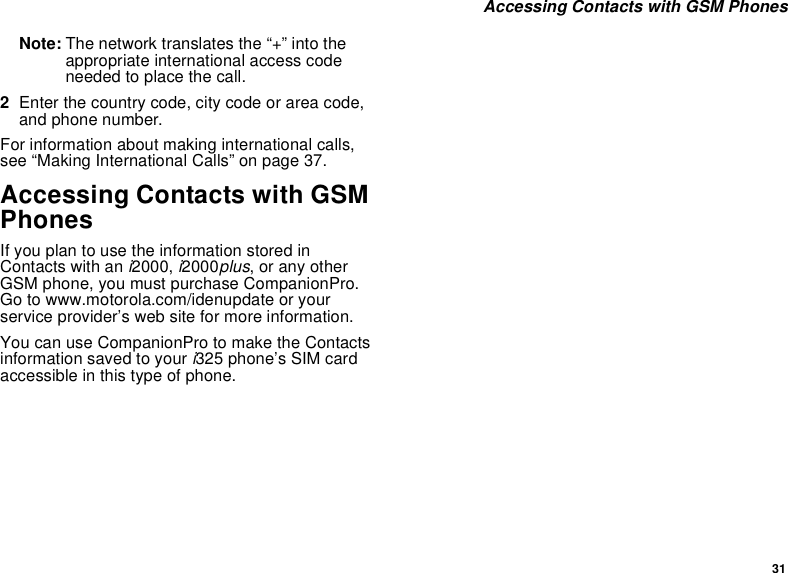
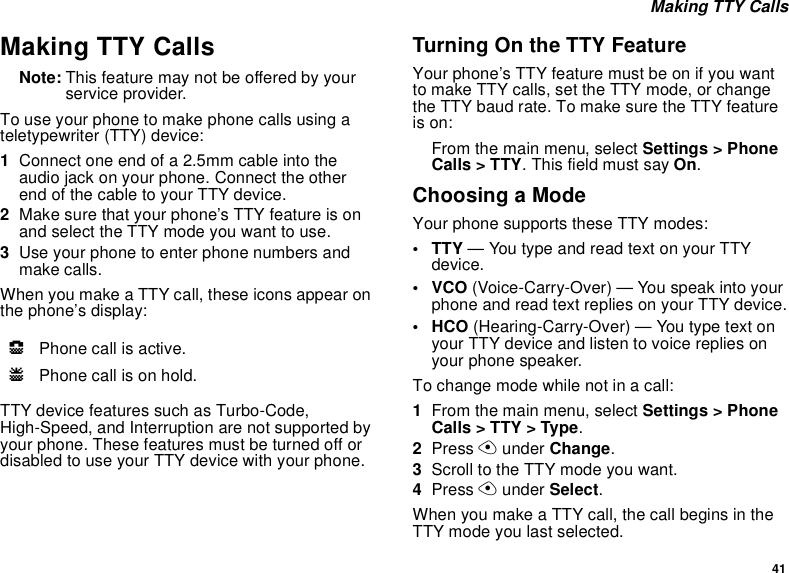
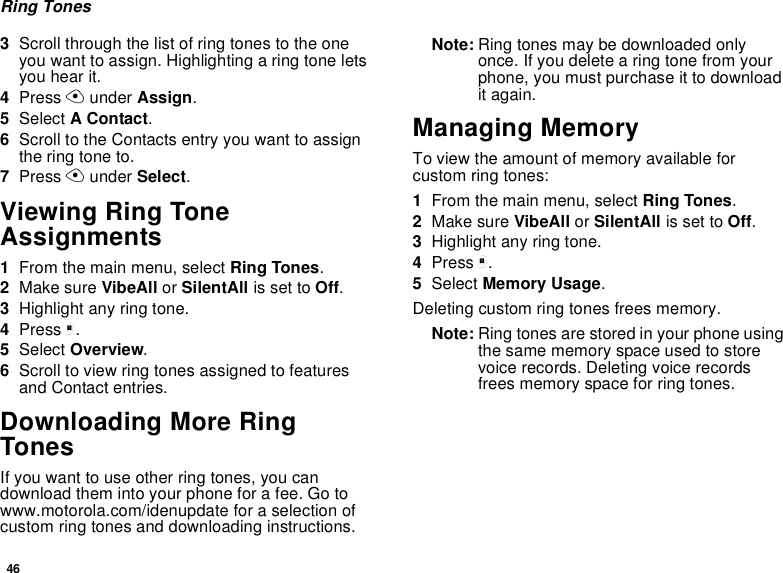
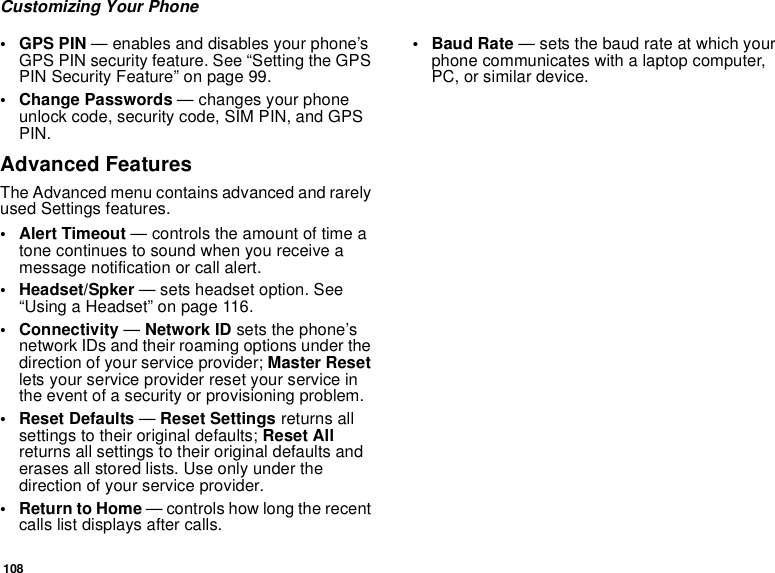
![28ContactsScroll to the Contacts type you want to assign. Press A under Select.5To store a number or address:With the # field (or ID for an email address, or IP for an IP address) highlighted, press A under Change.Enter the number or address. For phone numbers, use the 10-digit format. For email addresses, see “Entering Text” on page 48. Tip: Press A under Browse to select a number or address from Contacts, the recent calls list, or Memo.When you are finished, press A under Ok.6If you want to assign more options to the number, press A under Change with the [Options] field highlighted. See “Assigning Options”.7If you want to add more numbers or addresses to the entry:Scroll past the information you already entered.Enter the additional information for the entry using step 2 through step 6. You must assign a name to the entry, if you have not already.8Press A under Done.Note: You can only alias a Hub, not create it. This is provisioned by your service provider.Assigning Options1If you have not already, press A under Change with the [Options] field highlighted2The default Speed Dial number assigned to a phone number is displayed in the Speed # field. This is always the next available Speed Dial location.If you want to assign the phone number to a different Speed Dial location:With the Speed # field highlighted, press A under Change.Press and hold A under Delete to delete the current Speed Dial number.Enter the new Speed Dial number using the keypad.When you are finished, press A under Ok.3When you are finished, press A under Back.Storing Numbers FasterTo store numbers to Contacts from the recent call list, see “Storing Recent Calls to Contacts” on page 23.](https://usermanual.wiki/Motorola-Solutions/89FT5831/User-Guide-443309-Page-38.png)
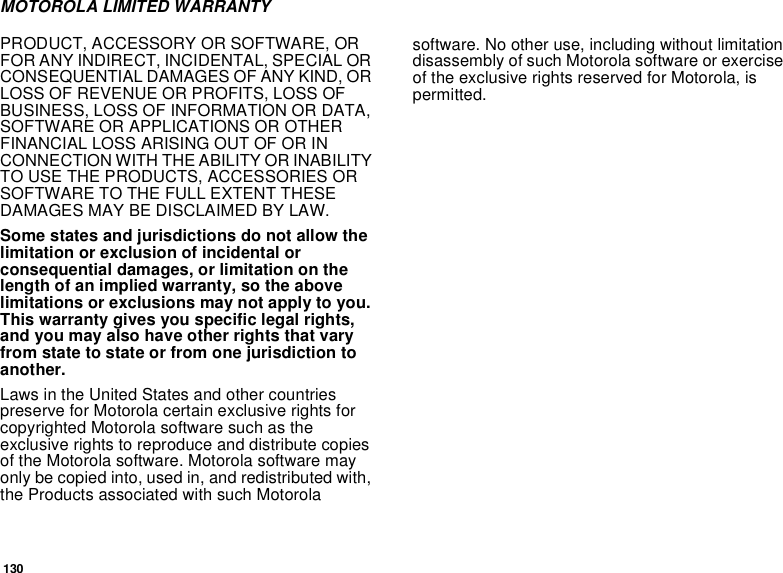
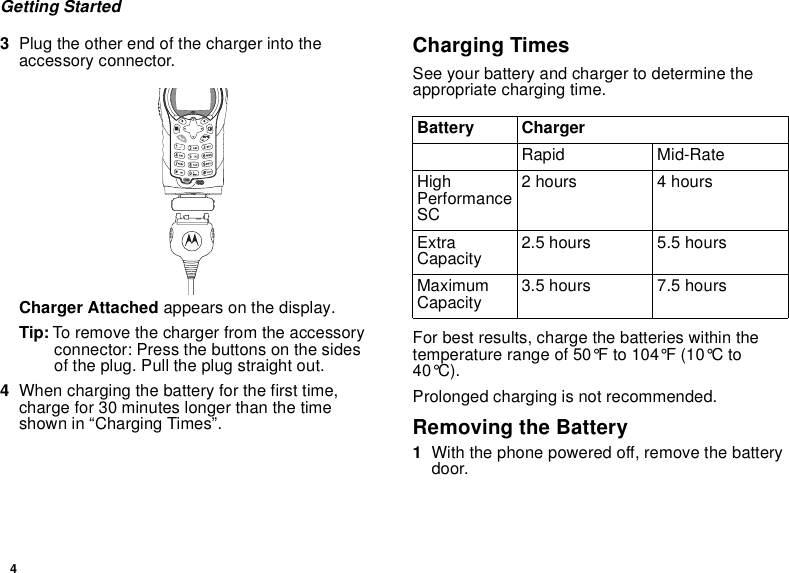
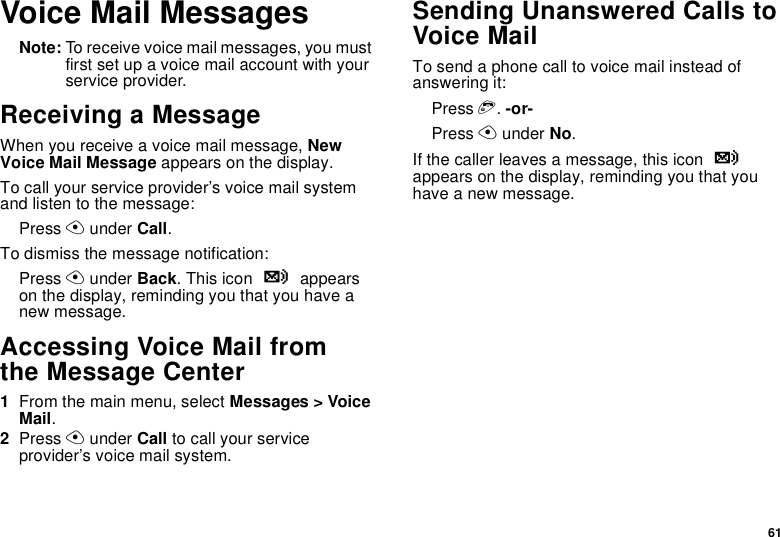
![29 Editing EntriesTo store numbers to Contacts from Memo, see “Memo” on page 43.To store numbers to Contacts from the idle screen:1Use the keypad to enter the number you want to store.2Press m.3Select Store Number.4To store the number as a new entry, select [New Contact]. -or-To store the number to an existing entry, select the entry.5With the Contacts type field highlighted, scroll left or right to display the Contacts type you want to assign to the number.6If you want to add more information to the entry, follow the applicable instructions in “Creating Entries” on page 27.7Press A under Done.Editing Entries1From the Contacts list, scroll to the entry you want to edit.2Press m.3Select Edit. The entry details screen displays.4Follow the applicable instructions in “Creating Entries” on page 27 to edit the various fields.Deleting EntriesDelete an Entry1From the Contacts list, scroll to the entry you want to delete.2Press m.3To delete the entire entry, scroll to Delete Contact.4Press A under Select.5Press A under Yes to confirm.Delete a Number or Address1From the Contacts list, scroll to the entry that contains the number or address you want to delete.2Scroll left or right to display the Contacts type for the number you want to delete.3Press m.4Scroll to Delete Number.5Press A under Select.6Press A under Yes to confirm.](https://usermanual.wiki/Motorola-Solutions/89FT5831/User-Guide-443309-Page-39.png)
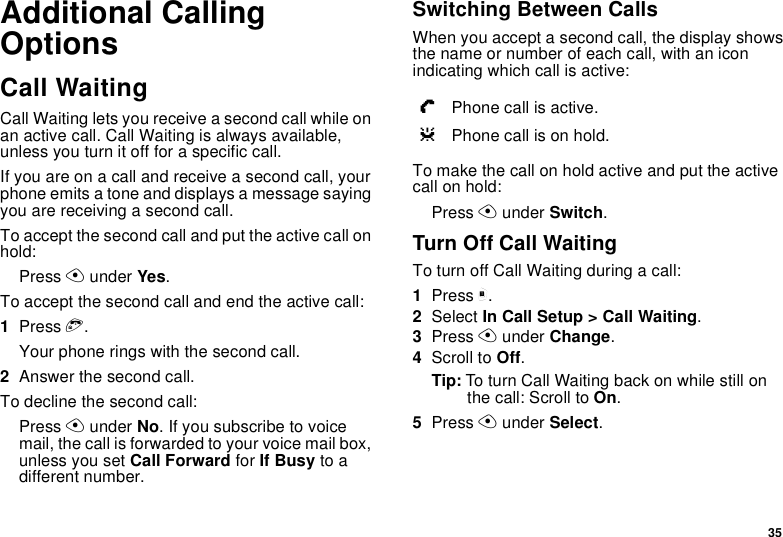


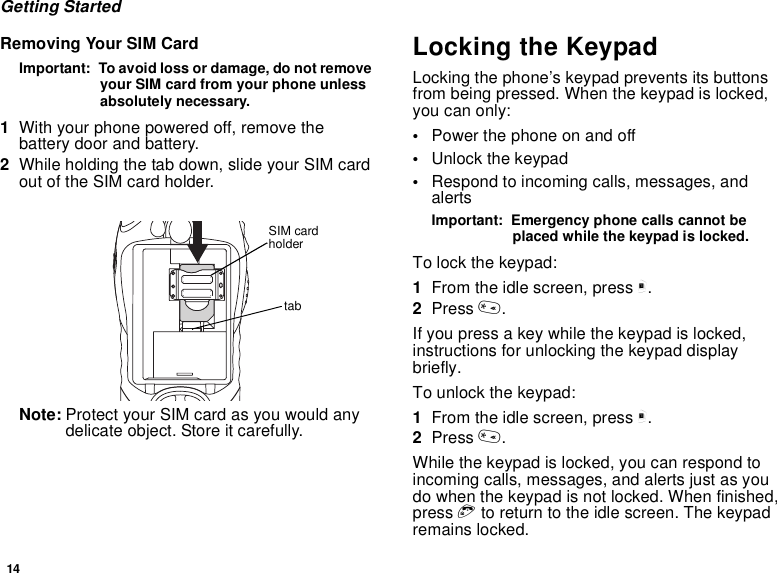
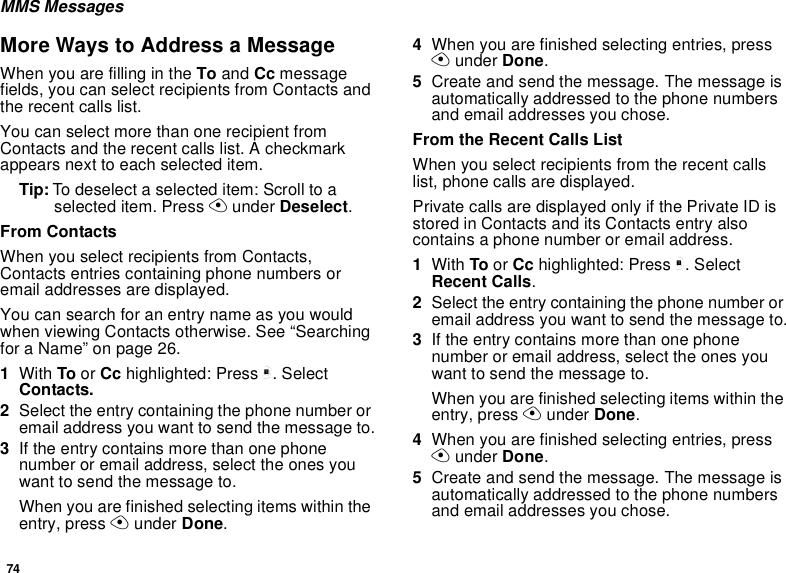
![43MemoMemo lets you store a number, make a call to that number, and save it to Contacts.To create a memo:1From the main menu, select Memo.2Enter the number using your keypad.3Press A under Store.To view the memo later:1From the main menu, select Memo.To delete the memo:1From the main menu, select Memo.2Press and hold A under Delete.3Press A under Store.To edit the memo:1From the main menu, select Memo.2Enter the new number.3Press A under Store.To make a call to the memo number:1From the main menu, select Memo.2Press s -or-Press the PTT button.3To store the memo number to Contacts:1From the main menu, select Memo.2Press m.3Press A under Select.4To store the number as a new entry, select [New Contact]. -or-To store the number to an existing entry, select the entry.5With the Contacts type field highlighted, scroll left or right to display the Contacts type you want to assign the number.6If you want to add more information to the entry, follow the applicable instructions in “Creating Entries” on page 27.7Press A under Done.](https://usermanual.wiki/Motorola-Solutions/89FT5831/User-Guide-443309-Page-53.png)
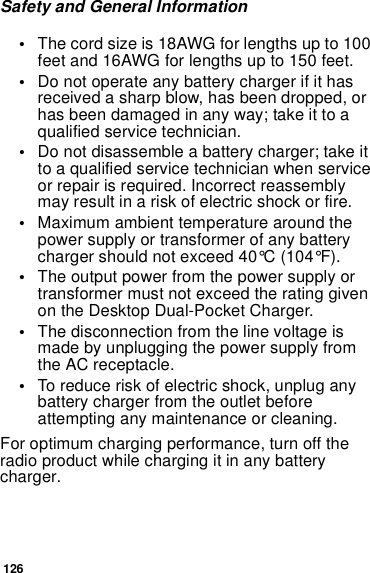
![52Advanced FeaturesResponding to a Secondary Talkgroup1To respond to a call on a Secondary Talkgroup, press the PTT button.Turning Scan On and Off1From Settings select DC/GC Options. Select Scan under On or Off. -orPress A to disable Scan.Note: When Scan is disabled, you will not be able to make or receive calls on your Secondary Talkgroups.Storing a Talkgroup or Hub in ContactsAlthough your service provider establishes the members of a Hub, you can store a Group or Hub in your Contacts. Emergency Group CallYou can prioritize access to a specified Hub. This specific Hub is stored on the phone’s SIM card.The emergency Group call shall be initiated on the primary talkgroup of a pre-programmed Group when the [SPEAKER KEY GRAPHIC] is pressed and held for 3 seconds:When the emergency button is pressed, the phone shall immediately provide access to the designated emergency Group. If the emergency button is pressed when the phone is transmitting or receiving (Private calls, including E911 calls or data transmit or receive, etc.), it shall immediately terminate or clear any ongoing activity or screen and provide access to the designated emergency Group.](https://usermanual.wiki/Motorola-Solutions/89FT5831/User-Guide-443309-Page-62.png)
![53 Emergency Group CallPlacing an Emergency Group CallYou can prioritize access to your Hub by pressing and holding the emergency button. This will provide other members in the Hub visual and audible indications and convey that you are in an emergency.1Press and hold the [SPEAKER KEY GRAPHIC] for 3 seconds. The phone will emit an emergency start to indicate that you have successfully requested an emergency call.2Press the PTT button to talk. The current Hub will be selected unless your Service Provider pre-programmed an emergency Hub number. If this is the case, the pre-programmed Emergency Hub will appear in the display. The Primary Talkgroup appears in the second line of the display. The third line is the PTT ID.Ending an Emergency Group CallPress and hold [SPEAKER KEY GRAPHIC] for 3 seconds. The phone will return to the last selected hub. The initiator cannot exit the emergency call without first cancelling the emergency call.Canceling an Emergency Group CallPress the [SPEAKER KEY GRAPHIC] until the phone generates an Emergency Call Cancel tone. The display will return to the non-emergency state.An emergency call will be cancelled if no talkgroup activity occurs for 30 seconds. The dispatcher, or any other person provisioned to cancel an emergency call can also cancel the emergency call. -orPress A to end.Receiving an Emergency Group CallWhen an emergency call is initiated, other members that have the Primary Talkgroup of the Emergency Hub as either a Primary or Secondary Talkgroup or their current affiliated Hub will be notified of an emergency condition.Other members of the Emergency Group Call can leave the emergency call while involved in the call.While listening to the emergency call, the Recipient’s phone will not receive phone calls, Call Alerts, Messages, Status Messages, Private Calls or other group calls for the duration of the emergency call.](https://usermanual.wiki/Motorola-Solutions/89FT5831/User-Guide-443309-Page-63.png)
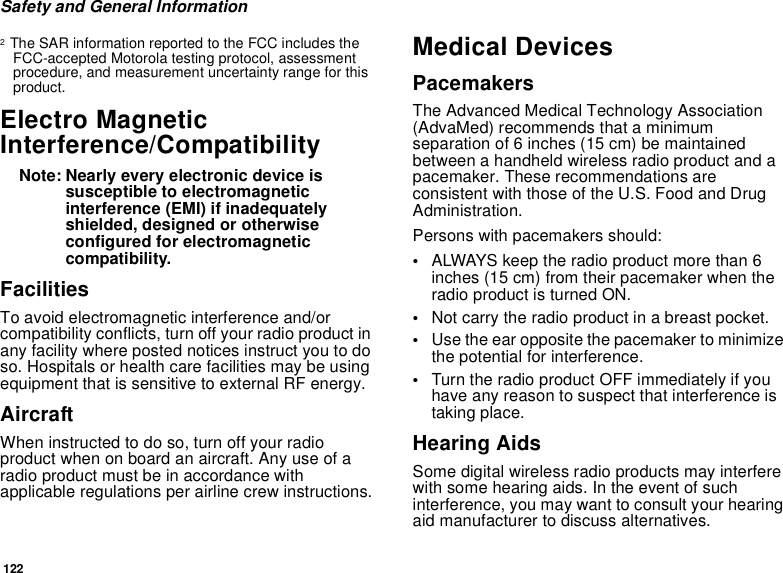
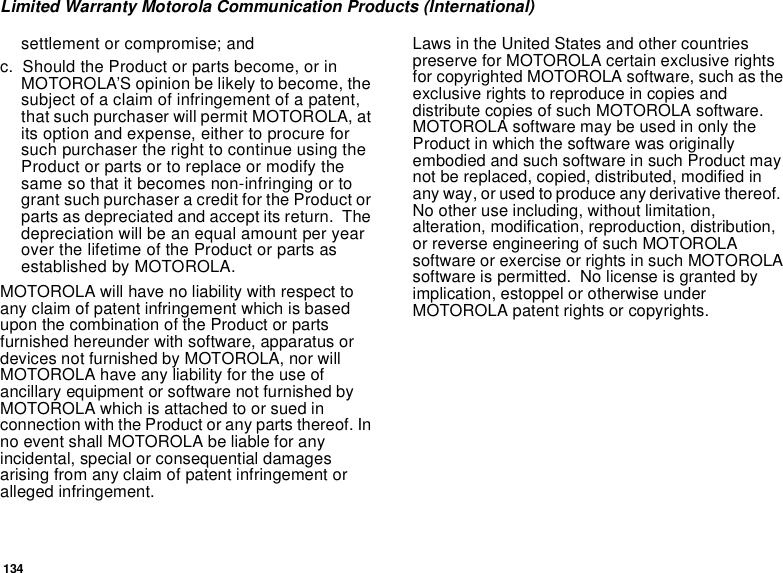
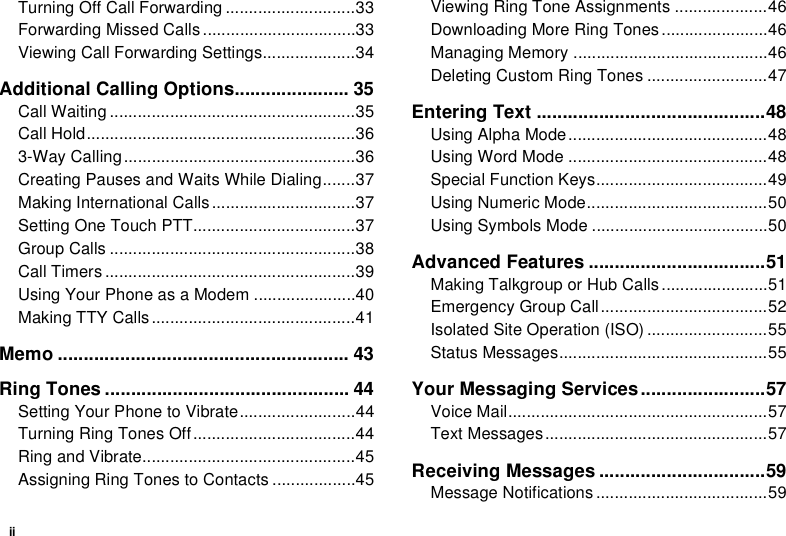
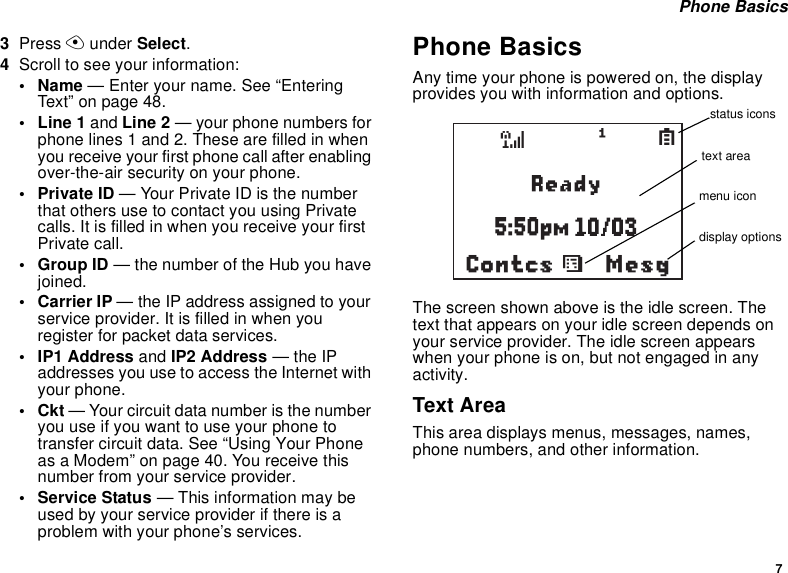
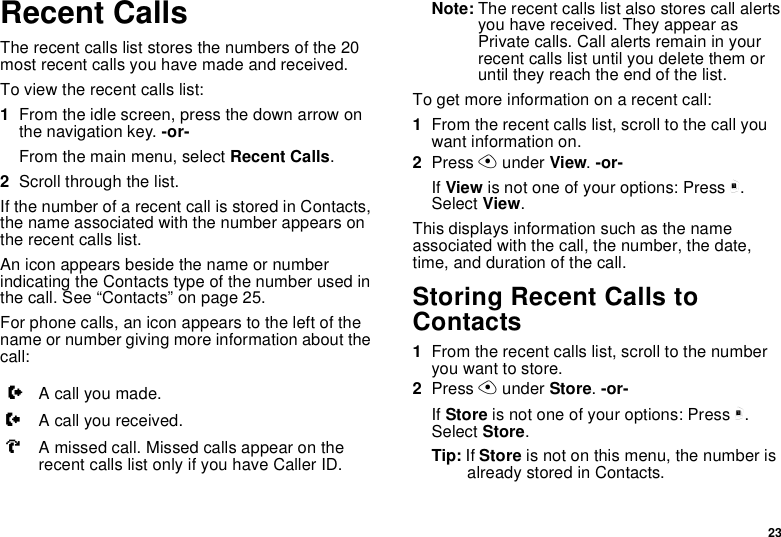
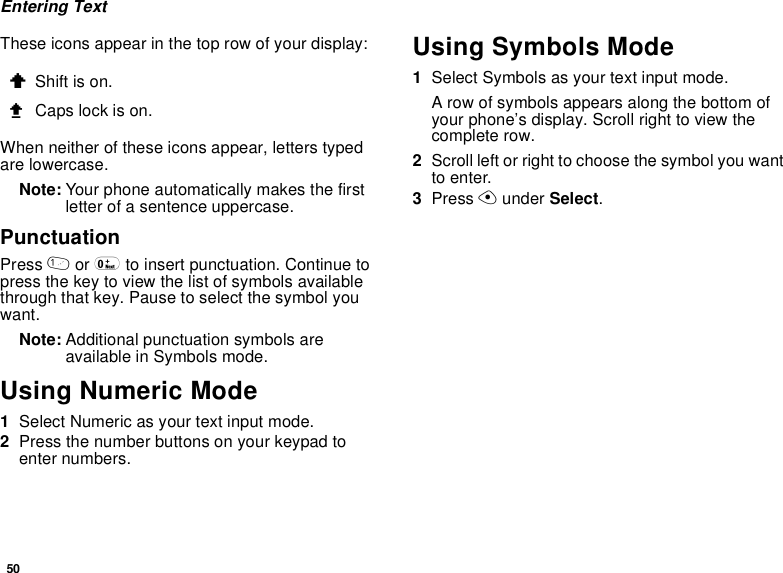
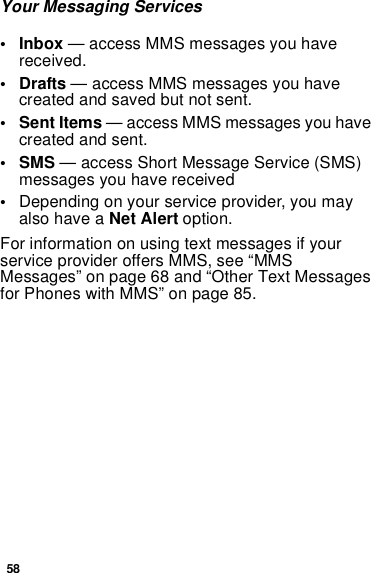
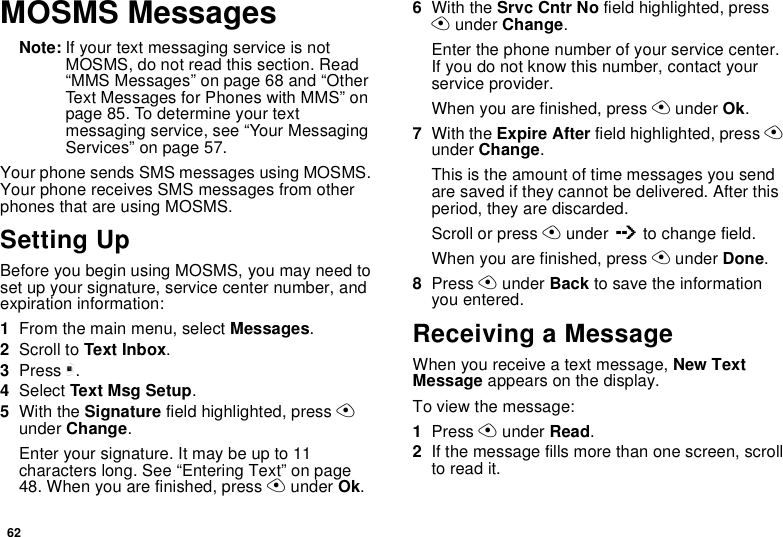
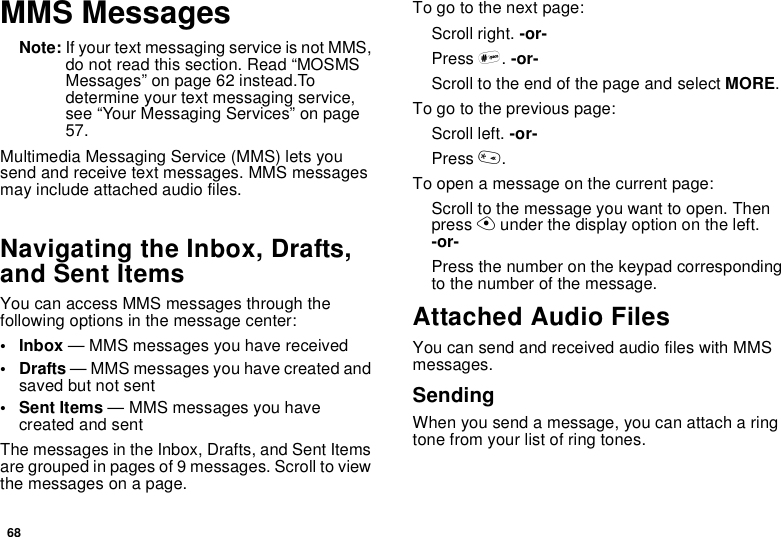
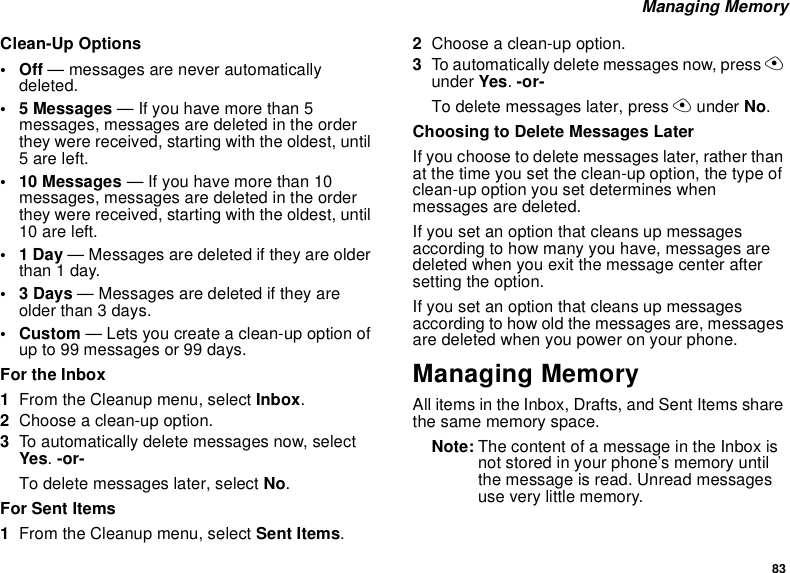
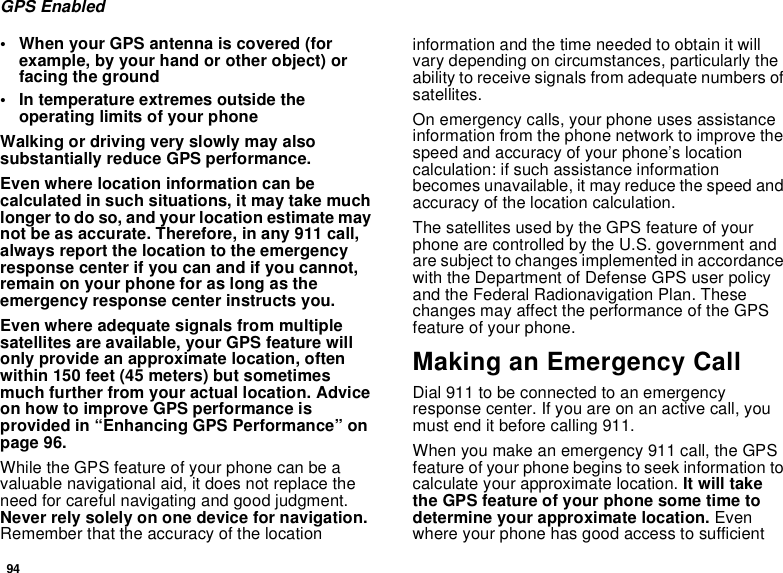
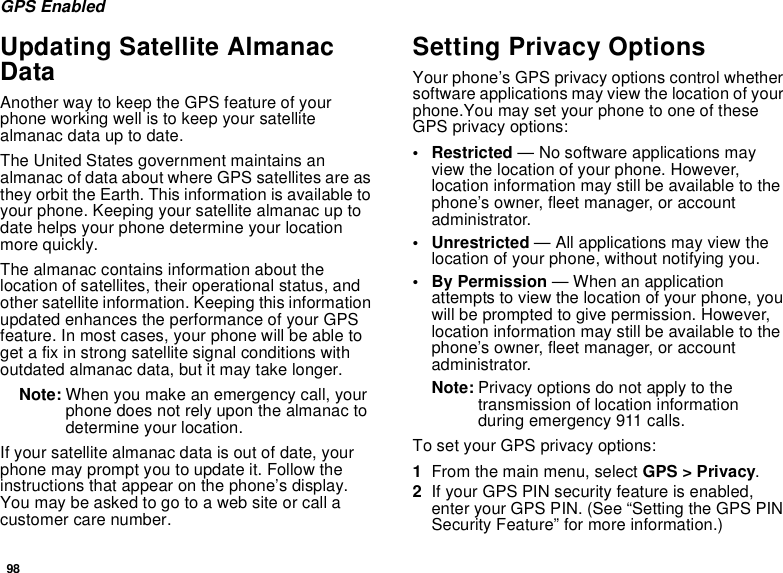
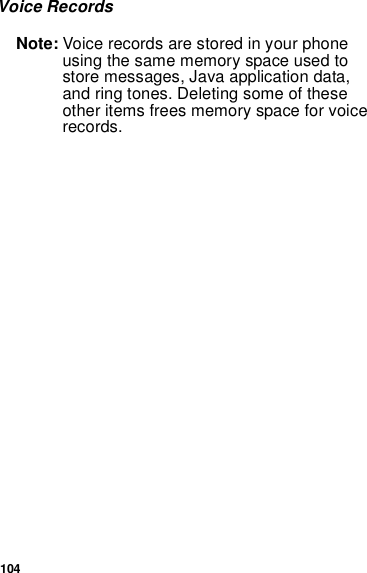
![54Advanced Features• Title — Emergency Hub icon with either Hub ID or alias (for example, Emergency) •Line 1 — Talkgroup on which call was received: If Primary Talkgroup, display icon with Talkgroup ID or alias; if secondary just display Private ID or alias•Line 2 — Emergency hub call initiator icon with initiator's alias or Private ID • Line 3 — Blank when transmitting; shows transmitter's Private ID or alias when receiving. When the transmitter is the emergency hub call initiator, the emergency hub call initiator icon shall appear before the nameDisplaying Emergency Group Call in Recent CallsEmergency group calls will not display in Recent Calls either on the transmitting or the receiving phone. Displaying Emergency Group in ContactsThe emergency Hub is programmed into your SIM card and when it is inserted in the phone it links the emergency Hub to the [SPEAKER KEY GRAPHIC]. The emergency Hub information will not display in Contacts by default. However, you can provide an alias and store it as a Hub in Contacts if the ID is known. Editing or deleting the emergency Hub stored in Contacts will have no effect on the information programmed in the SIM card.Emergency Group Call IconsAn Emergency Group icon displays in front of the group alias or ID on the title line.An Emergency Initiator Icon displays next to the emergency group call initiator’s ID on phones receiving the emergency group call. ! Contcs ExitJohnEmergencyElectriciansAdamTitleLine 1Line 2Line 3](https://usermanual.wiki/Motorola-Solutions/89FT5831/User-Guide-443309-Page-64.png)
![57Your Messaging ServicesYour phone lets you send and receive a variety of messages. Messaging services available to you depend on your service provider.Voice MailAll service providers offer voice mail message service. For information on accessing your voice mail messages, see “Voice Mail Messages” on page 61.Text MessagesYour service provider may offer either of 2 options for sending text messages:•mobile originated text messages (MOSMS)•Multimedia Messaging Service (MMS)To determine which text messaging option you have, view the message center:Press A under Mesg. -or-From the main menu, select Messages.Message Center Options for Phones with MOSMSIf your service provider offers MOSMS, the following options appear in you message center:• Voice Mail — access voice mail messages you have received.• Text Inbox — access messages you have received.•Quick Notes — access short, pre-written messages.• Text Outbox — access messages you have created and sent.For information on using text messages if your service provider offers MOSMS, see “MOSMS Messages” on page 62.Message Center Options for Phones with MMSIf your service provider offers MMS, the following options appear in you message center:•[Create Mesg] — begin creating an MMS message.• Voice Mail — access voice mail messages you have received.](https://usermanual.wiki/Motorola-Solutions/89FT5831/User-Guide-443309-Page-67.png)
![63 Reading from the Message Center3To keep the message, scroll to the end of the message and press A under Save. -or-To delete the message, scroll to the end of the message and press A under Delete.To dismiss the message notification:Press A under Exit. This icon w appears on the display, reminding you that you have a new message.If your phone is powered off when you receive a text message, your phone notifies you the next time you power it on. If you are out of your coverage area, your phone alerts you when you return to your coverage area.Tip: While reading a text and numeric message that contains a phone number, you can press s to call that number.Reading from the Message Center1From the main menu, select Message > Text Inbox.2Scroll to the message you want to read.3Press A under Read.4If the message fills more than one screen, scroll to read it.5To keep the message, press A under Save. -or-To delete the message, scroll to the end of the message and press A under Delete.Tip: To see more choices, including replying to the message, press m.Creating and Sending Messages1From the main menu, select Messages > Text Inbox > [Create Msg]. -or-From the main menu, select Messages > Text Outbox > [Create Msg].2Press A under Create.3To address the message:Use the keypad to enter the phone number of the person you want to send the message to. -or-Press A under Browse. Select Contacts, Recent Calls, or Memo. Enter the number from Contacts, the recent calls list, or Memo, as you would when making a call.When you are finished, press A under Ok.4Enter the text of the message. See “Entering Text” on page 48. -or-](https://usermanual.wiki/Motorola-Solutions/89FT5831/User-Guide-443309-Page-73.png)
![65 Creating and Sending Messages3Select Compose SMS. The message is automatically addressed to the phone number you chose.4Follow step 4 through step 8 of “Creating and Sending Messages” on page 63.Using Quick NotesQuick notes are short, pre-written text messages that you can create, edit, and send. You can store up to 20 quick notes. A quick note may be up to 30 characters long.To create a quick note:1From the main menu, select Messages > Quick Notes > [New Quick Note].2Press A under Create.Enter text. See “Entering Text” on page 48. -or-To choose from pre-installed notes: Press A under Browse. Scroll to the note you want. Press A under Select.3Press A under Store.Tip: For more options, including sending the quick note, press m.Using DraftsWhen you save a message as a draft, it is saved in the drafts folder. You must have a draft saved to have a drafts folder.To edit a draft:1From the main menu, select Messages > Drafts Folder.2Press A under Change.3To edit the fields you want to change, follow step 3 through step 8 in “Creating and Sending Messages” on page 63.If you have a draft saved, you can create more drafts in the drafts folder:1From the main menu, select Messages > Drafts Folder > [Create Msg].2Press A under Create.3Follow step 3 through step 7 in “Creating and Sending Messages” on page 63.4Scroll to Save As Draft.Using the OutboxMessages you have sent are stored in the outbox.](https://usermanual.wiki/Motorola-Solutions/89FT5831/User-Guide-443309-Page-75.png)
![70MMS MessagesMessage SizeYou can create and send messages of up to 2 KB, not including an attached audio recording. An attached audio recording may be up to 10 KB.To see the size of a message you are creating:1Scroll to any field in the message.2Press m.3Select Message Size.Sending or CancelingTo send the message at any time after it has been addressed:Press A under Send. -or-If Send is not one of your options: Press m. Select Send.To cancel the message at any time:At the message screen, press A under Cancel. -or-Press e to cancel the message and save it in Drafts.Sending a Basic Message1To begin creating a message:From the main menu, select Messages. With [Create Mesg] highlighted, press A under Create. -or-Select Inbox, Drafts, or Sent Items. With [Create Mesg] highlighted, press A under Create. -or-Begin creating a message from Contacts, the recent calls list, or the idle screen. See “More Ways to Begin a Message” on page 73. -or-Reply to a received message. See “Replying to a Message” on page 72.2To address the message:With To highlighted, press A under Change.Enter the phone number or email address from the keypad and press A under Done. Repeat this action to enter more phone numbers or email addresses. -or-Select recipients from Contacts or the recent calls list. See “More Ways to Address a Message” on page 74.](https://usermanual.wiki/Motorola-Solutions/89FT5831/User-Guide-443309-Page-80.png)
![71 Creating and Sending MessagesTip: To remove a phone number or email address from the list of message recipients: Scroll to phone number or email address you want to remove. Press m. Select Remove.When you are finished addressing the message, press A under Done.3To enter or edit the body of the message:With Mesg highlighted, press A under Change.Note: If you have created a signature, the signature automatically appears in this field. Text you enter appears before your signature. See “Customizing MMS” on page 81.Enter text from the keypad. -or-Use a Quick Note. See “Quick Notes” on page 75.When you are finished, press A under Done.4If you want to send the message now, press A under Send. -or-Continue creating your message. See “Adding More Message Options”.Adding More Message Options1To view more message fields, select MORE.2If you want to create or edit the subject line:With Subject highlighted, press A under Change.Enter text from the keypad. -or-Select a Quick Note. See “Quick Notes” on page 75.When you are finished, press A under Done.3If you want to attach a ring tone:With Attach highlighted, press A under Change.A list of ring tones that can be included in a message appears. Select the ring tone you want to attach.Tip: To remove a ring tone you attached, select [No Ring Tone]. 4If you want to add more recipients in addition to those in the To field:With Cc highlighted, press A under Change.Enter the phone number or email address from the keypad and press A under Done. Repeat this action to enter more phone numbers or email addresses. -or-](https://usermanual.wiki/Motorola-Solutions/89FT5831/User-Guide-443309-Page-81.png)
![73 Creating and Sending Messages4A list of words and short phrases is displayed. Select any of these phrases to add it to the body of your messages. -or-Select [Create Reply] to begin the body of your message without using any of these phrases.5Edit any message fields you want to change.6Send the message.Tip: To create new reply phrases to use in later reply messages, see “Customizing MMS” on page 81.More Ways to Begin a MessageIn addition to beginning a message from the message center, you can begin a message from Contacts, the recent calls list, or the idle screen.From Contacts1From the Contacts list, scroll to the entry containing the phone number or email address you want to send the message to.2Scroll left or right to view the Contacts types until you see the icon for the phone number or email address you want to send the message to.3Press A under Create. -or-If Create is not one of your options: Press m. Select Create Mesg.4Create and send the message. The message is automatically addressed to the phone number or email address you chose.From the Recent Calls List1From the recent calls list, scroll to the entry you want to send a message to.2If the entry has more than one phone number stored, view the phone number you want to send the message to.3Press A under Create. -or-If Create is not one of your options: Press m. Select Create Mesg.4Create and send the message. The message is automatically addressed to the phone number you chose.From the Idle Screen1Using the keypad, enter the number you want to send a message to.2Press m.3Select Create Mesg. The message is automatically addressed to the phone number you chose.](https://usermanual.wiki/Motorola-Solutions/89FT5831/User-Guide-443309-Page-83.png)
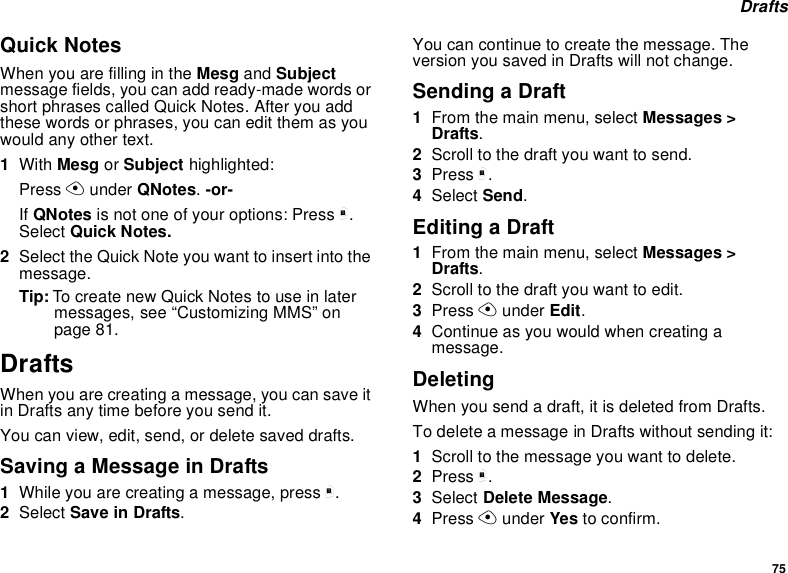
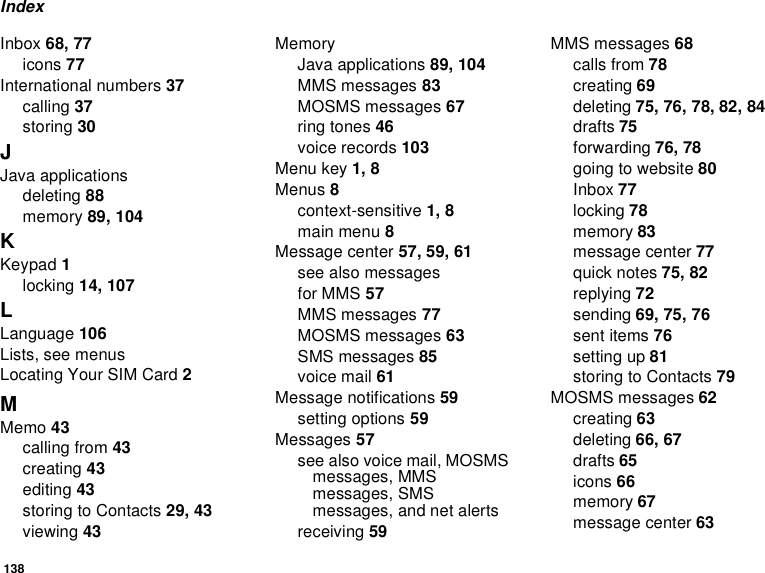
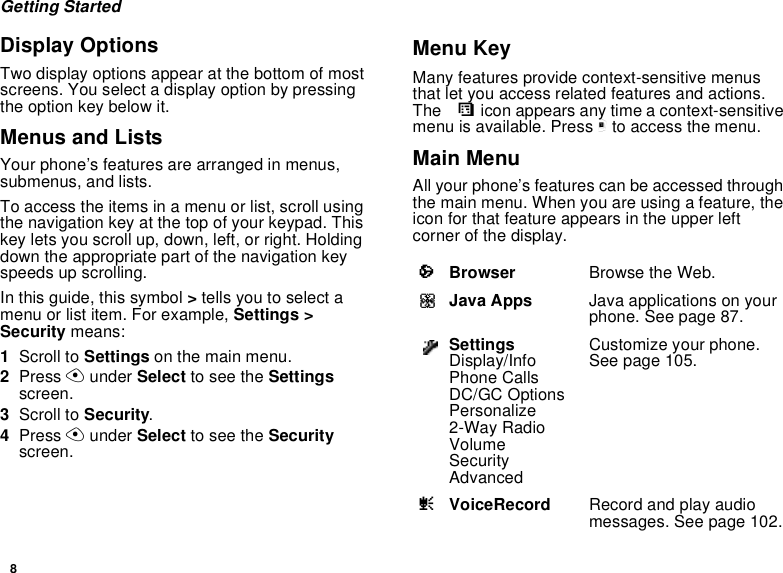
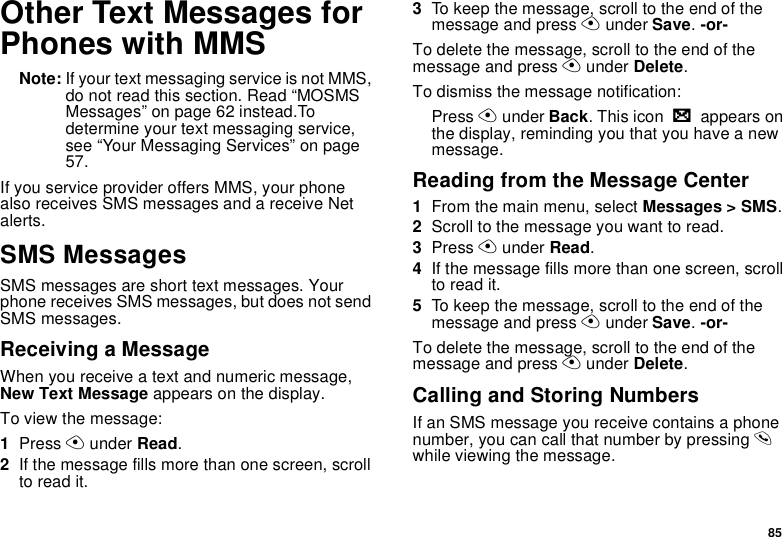
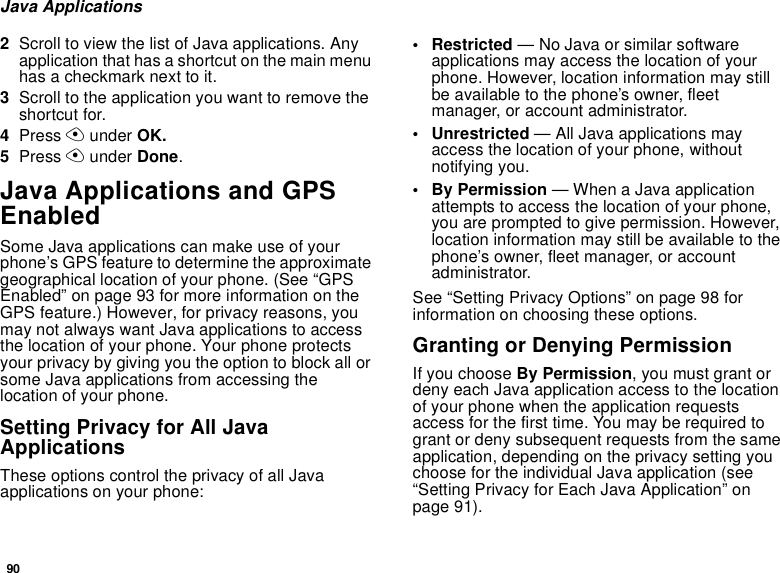
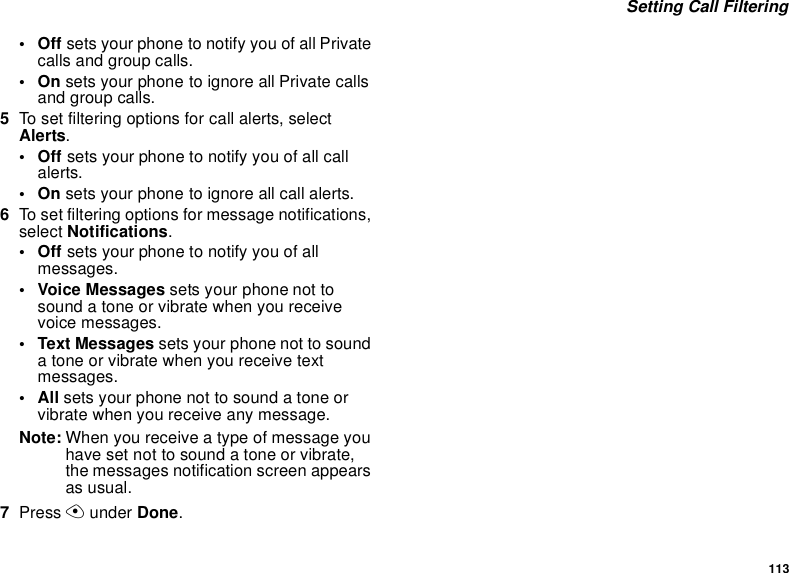
![78MMS MessagesActions for Received MessagesDeleting1Scroll to the message you want to delete. -or-View the message you want to delete.2Press m.3Select Delete Message.4Press A under Yes to confirm.ReplyingSee “Replying to a Message” on page 72.Forwarding1View the message you want to forward. -or-If you have already viewed the message, scroll to it.2Press m.3Select Forward.4Create and send your message.Locking and UnlockingWhen you lock a message, it cannot be deleted until you unlock it.1View the message you want to lock or unlock. -or-If you have already viewed the message, scroll to it.2Press m.3Select Lock Message or Unlock Message.Calling a Number in a MessageIf a message you receive contains a phone number, Private ID, or Talkgroup ID, you can call or send a call alert to that number.Making a Phone Call1View the message.2Press m.3Select Call # In Message.4If the message contains more than one phone number, scroll to the number you want to call.5Press s.%Locked, with an attachment.LHigh priority and locked.yHigh priority with an attachment.]High priority and locked, with an attachment.](https://usermanual.wiki/Motorola-Solutions/89FT5831/User-Guide-443309-Page-88.png)
![79 Actions for Received MessagesMaking a Private Call1View the message.2Highlight the Private ID you want to call.3If the message contains more than one Private ID, scroll to the Private ID you want to call.4Press the PTT button.Sending a Call Alert1View the message.2Press m.3Select Alert.4If the message contains more than one Private ID, scroll to the Private ID you want to alert.5Press the PTT button.Making a Group Call1View the message.2Press m.3Select Talkgroup.4If the message contains more than one Talkgroup number, scroll to the Talkgroup number you want to call.5Press the PTT button.Storing Message Information To ContactsYou can save sender information and information contained in the message to Contacts.Saving Sender InformationIf the message was sent from a phone, you can save the sender’s phone number to Contacts. If the message was sent using email, you can save the sender’s email address to Contacts. 1View the message.2Press m.3Select Save Sender # or Save Sender Email.4To store the number as a new entry, select [New Contact]. -or-To store the number to an existing entry, select the entry.5If you are saving a phone number:Scroll to the Contacts type field.Scroll left or right to display the Contacts type you want to assign the number.6If you want to add more information to the entry, follow the applicable instructions in “Creating Entries” on page 27.7Press A under Done.](https://usermanual.wiki/Motorola-Solutions/89FT5831/User-Guide-443309-Page-89.png)
![80MMS MessagesStoring Numbers from the MessageIf a message you receive contains a phone number, Private ID, or Talkgroup ID, you can store these numbers to Contacts.1View the message.2Press m.3Select Save Number in Message.4If the message contains more than one number, scroll to the number you want to store.5To store the number as a new entry, select [New Contact]. -or-To store the number to an existing entry, select the entry.6With the Contacts type field highlighted, scroll left or right to display the Contacts type you want to assign the number.7If you want to add more information to the entry, follow the applicable instructions in “Creating Entries” on page 27.8Press A under Done.Storing Email Addresses from the MessageIf a message you receive contains one or more email addresses, you can store these addresses to Contacts.1View the message.2Press m.3Select Save Email in Message.4If the message contains more than one email address, scroll to the address you want to store.5To store the number as a new entry, select [New Contact]. -or-To store the number to an existing entry, select the entry.6If you want to add more information to the entry, follow the applicable instructions in “Creating Entries” on page 27.7Press A under Done.Going to a WebsiteIf a message contains one or more website URLs, you can go to the website.1View the message.2Press m.3Select Go to Website.4If the message contains more than one website URL, scroll to the website URL you want to go to.](https://usermanual.wiki/Motorola-Solutions/89FT5831/User-Guide-443309-Page-90.png)
![81 Customizing MMSPlaying, Saving, and Deleting Attached Audio FilesPlayingTo play an audio file attached to a message:1View the message.2Press m.3Select Play Audio.Audio files in messages do not play if VibeAll is set to On.SavingTo save an attached audio file to the list of ring tones:1View the message.2Press m.3Select Save Audio.DeletingTo delete an audio file from a message:1View the message.2Press m.3Select Delete Audio.4Press A under Yes to confirm.Customizing MMSThe Setup menu lets you customize MMS for your phone:•Friendly Name — Enter text here to create a friendly name. Your friendly name is the name displayed in the From field on other iDEN phones when they receive messages from you.•Signature — Enter text here to create a signature. Your signature is text that is automatically inserted at the end of all messages you create. You can edit the text before sending the message.•Quick Notes — lets you create new Quick Notes and edit or delete Quick Notes you have created. See “New Quick Notes and Reply Phrases” on page 82.• Replies — lets you create new reply phrases and edit or delete reply phrases you have created. See “New Quick Notes and Reply Phrases” on page 82.•Cleanup — controls how long messages remain in the Inbox and Sent Items before they are deleted. See “Setting the Clean-up Option”To access the Setup menu:1From the main menu, select Messages.2With [Create Mesg] highlighted, press m.](https://usermanual.wiki/Motorola-Solutions/89FT5831/User-Guide-443309-Page-91.png)
![82MMS Messages3Select Setup.Tip: This option is available from many context-sensitive menus when you are using MMS.New Quick Notes and Reply PhrasesCreating1From the Setup menu, select Quick Notes or Replies.2Select [New QNote] or [New Reply].3Entry text from the keypad.4When you are finished, press A under Ok.EditingYou can edit only Quick Notes and reply phrases you have created.1From the Setup menu, select Quick Notes or Replies.2Scroll to the Quick Note or reply phrase you want to edit.3Edit the text.4When you are finished, press A under Ok.DeletingYou can delete only Quick Notes and reply phrases you have created.To delete a Quick Note or reply phrase:1From the Setup menu, select Quick Notes or Replies.2Scroll to the Quick Note or reply phrase you want to delete.3Press m.4Select Delete.5Press A under Yes to confirm.To delete all Quick Note or all reply phrase:1From the Setup menu, select Quick Notes or Replies.2Press m.3Select Delete All.4Press A under Yes to confirm.Setting the Clean-up OptionThe clean-up option controls how long messages remain in the Inbox and Sent Items before they are deleted. You set the clean-up option for the Inbox and Sent Items separately.The clean-up option deletes only read, unlocked messages.](https://usermanual.wiki/Motorola-Solutions/89FT5831/User-Guide-443309-Page-92.png)
![84MMS MessagesTo view your used memory, free memory, and memory capacity:1From the main menu, select Messages.2With [Create Mesg] highlighted, press m.3Select Setup > Memory Size.Tip: This option is available from many context-sensitive menus when you are using MMS.To free more memory, delete messages.To delete all messages at once, see “Deleting All Messages”.To set messages to be deleted automatically, see “Setting the Clean-up Option” on page 82.Deleting All MessagesTo delete all read, unlocked messages from the Inbox, all messages in Drafts, or all successfully sent messages in Sent Items:1Scroll to Inbox, Draft, or Sent Items.2Press m.3Select Delete All.4Press A under Yes to confirm.Tip: This option is available from many context-sensitive menus when you are using MMS.](https://usermanual.wiki/Motorola-Solutions/89FT5831/User-Guide-443309-Page-94.png)

![102Voice RecordsNote: This is an optional feature. Contact your service provider about its availability for purchase.A voice record is a recording you make with your phone and can play back. You can record notes to yourself or phone calls.Your phone can store up to 20 voice records.Creating Voice RecordsTo record a note to yourself:1From the main menu, select VoiceRecd > [New VoiceRec].2Say the message you want to record into the microphone.Tip: To stop recording before you are finished, press A under Pause. To start recording again, press A under Resume.3When you are finished recording, press A.To add to the end of voice record:1From the main menu, select VoiceRecd.2Scroll to the voice record you want to add to.3Press m.4Scroll to Add To.5When you are finished recording, press A.To record a phone call:1While on an active call, press m.2Scroll to Record.3When you are finished recording, press A.Note: Recording of phone calls is subject to applicable laws regarding privacy and recording of phone conversations.Playing Voice Records1From the main menu, select VoiceRecd.2Select the voice record you want to play.3To stop the voice record while it is playing, press A.Tip: To fast forward, scroll right. To rewind, scroll left. To pause or resume, press any number key.Labelling Voice RecordsWhen you create a voice record, it is labeled with the time and date it was recorded. You can then rename it with a custom label.1From the main menu, select VoiceRecd.2Scroll to the voice record you want to label.3Press m under Label.](https://usermanual.wiki/Motorola-Solutions/89FT5831/User-Guide-443309-Page-112.png)
![103 Deleting Voice Records4Enter the label you want to assign. See “Entering Text” on page 29.5Press A.Deleting Voice RecordsTo delete a voice record:1From the main menu, select VoiceRecord.2Scroll to the unlocked voice record you want to delete.3Press m.4Select Delete.5Press A under Yes to confirm.To delete all voice records:1From the main menu, select VoiceRecord.2Scroll to any voice record.3Press m.4Select Delete All.5Press A under Yes to confirm.Locking Voice RecordsWhen you lock a message, it cannot be deleted until you unlock it.1From the main menu, select VoiceRecd.2Scroll to the message you want to lock or unlock.3Press m.4Scroll to Lock to lock the message. -or-Scroll to Unlock to unlock the message.When a voice record is locked, this icon R appears next to it.Managing MemoryTo view the amount of memory available for voice records:1From the main menu, select VoiceRecord.2With [New VoiceRec] highlighted, press A under Memory. -or-With any voice record highlighted, press m. Select Memory.To free more memory by deleting all unlocked voice records:1From the voice records memory screen, press A under Delete.2Press A under Yes to confirm.](https://usermanual.wiki/Motorola-Solutions/89FT5831/User-Guide-443309-Page-113.png)
![111 Creating ProfilesA temporary profile is automatically given the same name as the profile it is based on, but with an asterisk (*) in front of it.When you view a temporary profile’s settings, the options that differ from the profile it is based on have an asterisk in front of them.Storing a Temporary ProfileTo store a temporary profile as a new profile:1From the main menu, select Profiles.2Scroll to the temporary profile.3Press m.4Select Store As New.5Enter the name you want to give the profile. See “Entering Text” on page 48.When you are finished, press A under OK.To overwrite the profile that temporary profile is based on:1From the main menu, select Profiles.2Scroll to the temporary profile.3Press m.4Select Store Changes.The temporary profile is stored with the name of the profile it is based on. The profile it is based on, as it existed before you made changes to settings, is gone.Creating Profiles1From the main menu, select Profiles.2Select [New Profile]. -or-Scroll to any profile. Press m. Select New.3Enter the name you want to give the profile. See “Entering Text” on page 48.When you are finished, press A under OK.4If you want to base this profile on an existing profile: Select Copy From. Select the profile you want to base this profile on. If you do not choose a profile to copy from, the new profile is based on a default profile.5Press A under Create.6Scroll through the list of options and set their values.7Press A under Done.Editing Profiles1From the main menu, select Profiles.2Scroll to the profile you want to edit.](https://usermanual.wiki/Motorola-Solutions/89FT5831/User-Guide-443309-Page-121.png)
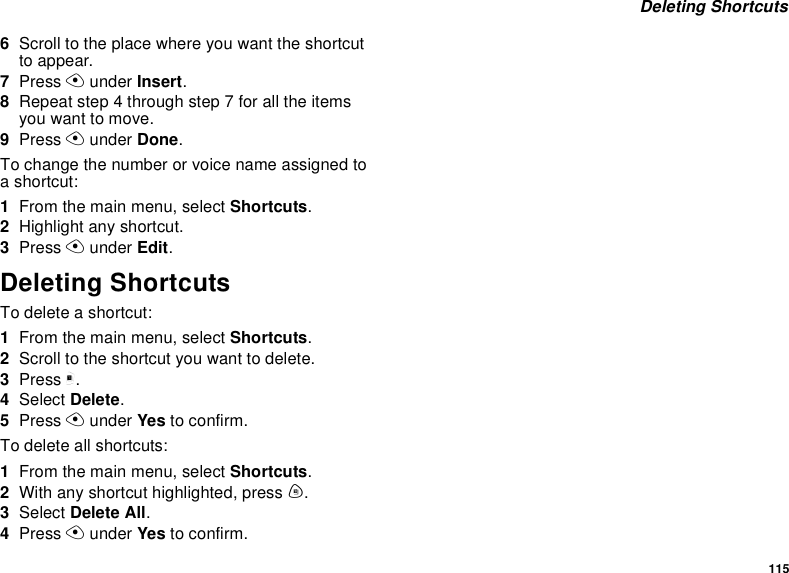
![114ShortcutsShortcuts lets you access most menu options by pressing a number on your keypad or saying the voice name of the shortcut. You create the shortcut and then use it to take you to that screen any time.Creating a Shortcut1Go to the menu item you want to create a shortcut for.For example, if you want to create a shortcut to the screen for creating a new Contacts entry: From the main menu, select Contacts, then highlight [New Contact].2Press and hold m until a confirmation screen appears.3Press A under Yes.4Select Key.5Press the number key you want to assign to the shortcut.6Press A under OK.7If you want to record a voice name for the shortcut: Select Voice. As directed by the screen prompts, say and repeat the name you want to assign to the number. Speak clearly into the microphone.8Press A under Done.Using a ShortcutIf you know the shortcut number:1From the idle screen, press m.2On your keypad, press the number assigned to the shortcut.If you do not know the shortcut number:1From the main menu, select Shortcuts.2Scroll to the shortcut you want to use. -or-If you assigned a voice name to the shortcut: Press and hold t. Say the voice name into your phone. The shortcut with that voice name is then highlighted.3Press A under OK.Editing a ShortcutTo change the number assigned to a shortcut:1From the main menu, select Shortcuts.2With any shortcut highlighted, press m.3Select Reorder.4Scroll to the shortcut you want to move.5Press A under Grab.](https://usermanual.wiki/Motorola-Solutions/89FT5831/User-Guide-443309-Page-124.png)