Motorola Solutions 89FT5852 DTR510, 550, 610, 650-MOTOtalk User Manual DTR 550 DTR650 Radios
Motorola Solutions, Inc. DTR510, 550, 610, 650-MOTOtalk DTR 550 DTR650 Radios
UserManual.wiki
>
Motorola Solutions
>
89FT5852 User Manual
>
DRAFT USERS MANUAL
Contents
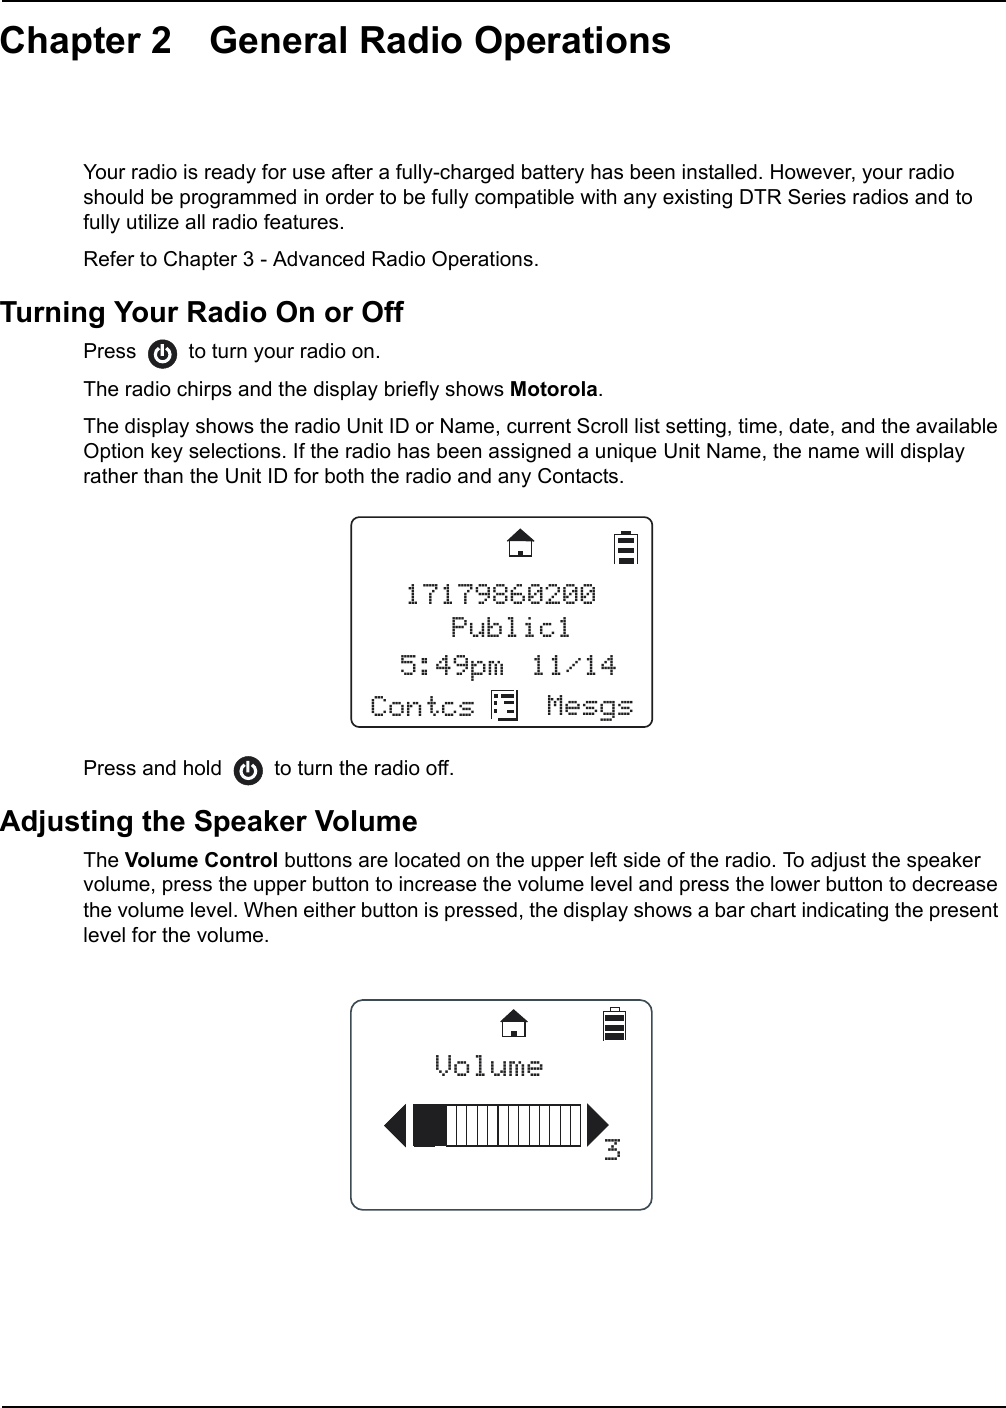
1.
DRAFT USERS MANUAL
2.
RF SAFETY BOOKLET
DRAFT USERS MANUAL
Navigation menu
Upload a User Manual
Namespaces
Wiki Guide
HTML
PDF
Info
Views
User Manual
Discussion / Help
Navigation
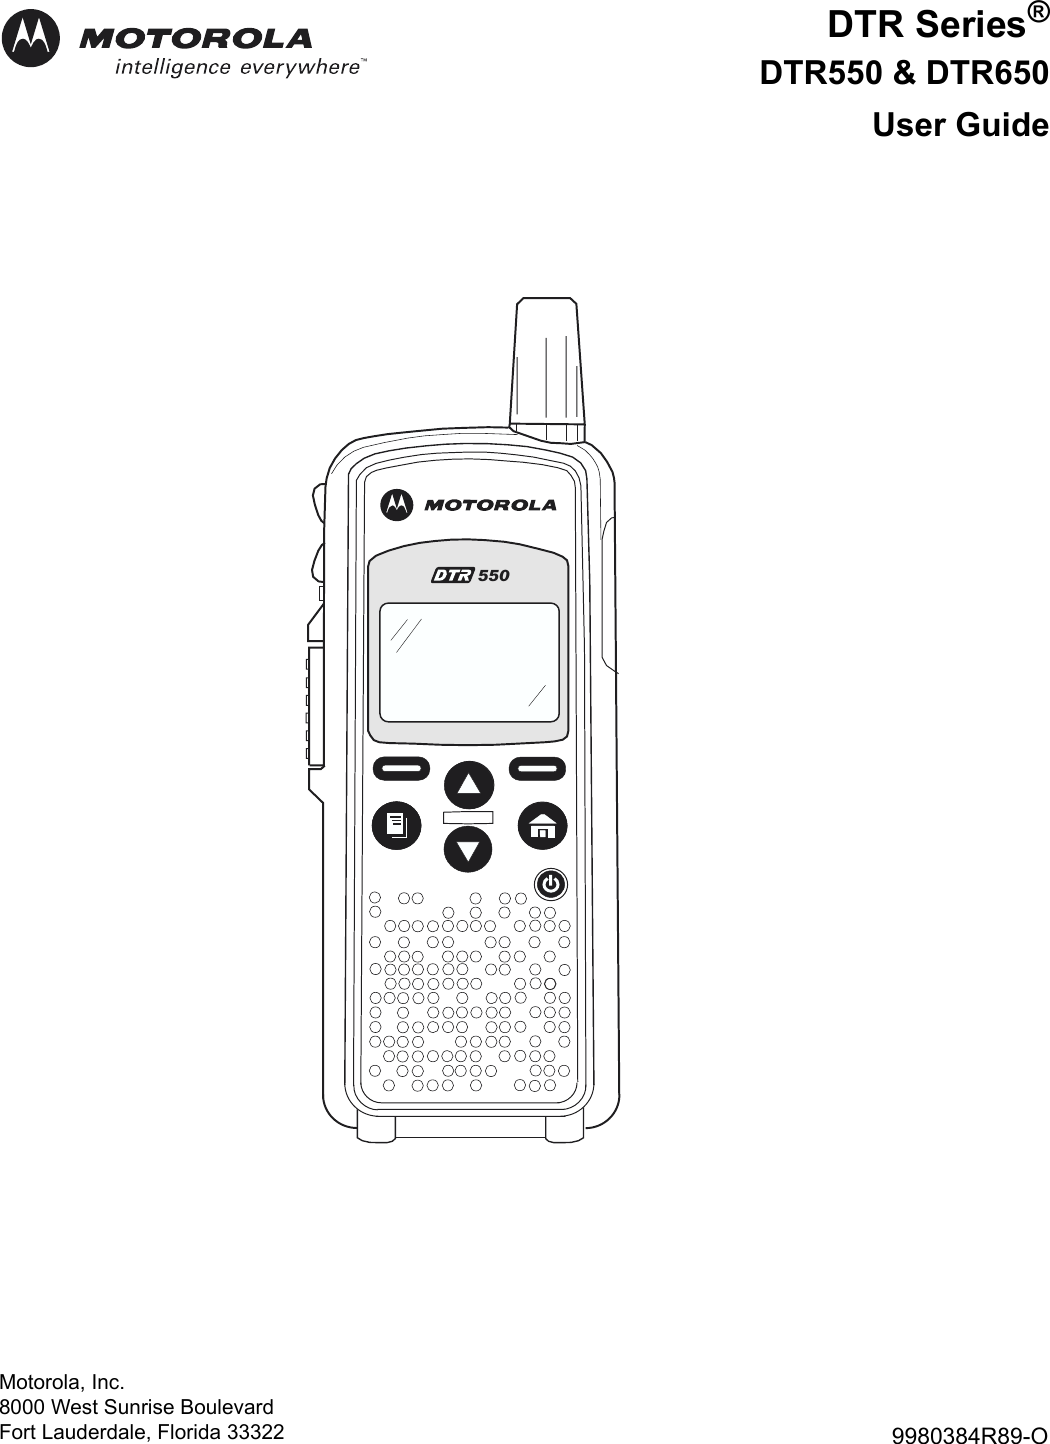

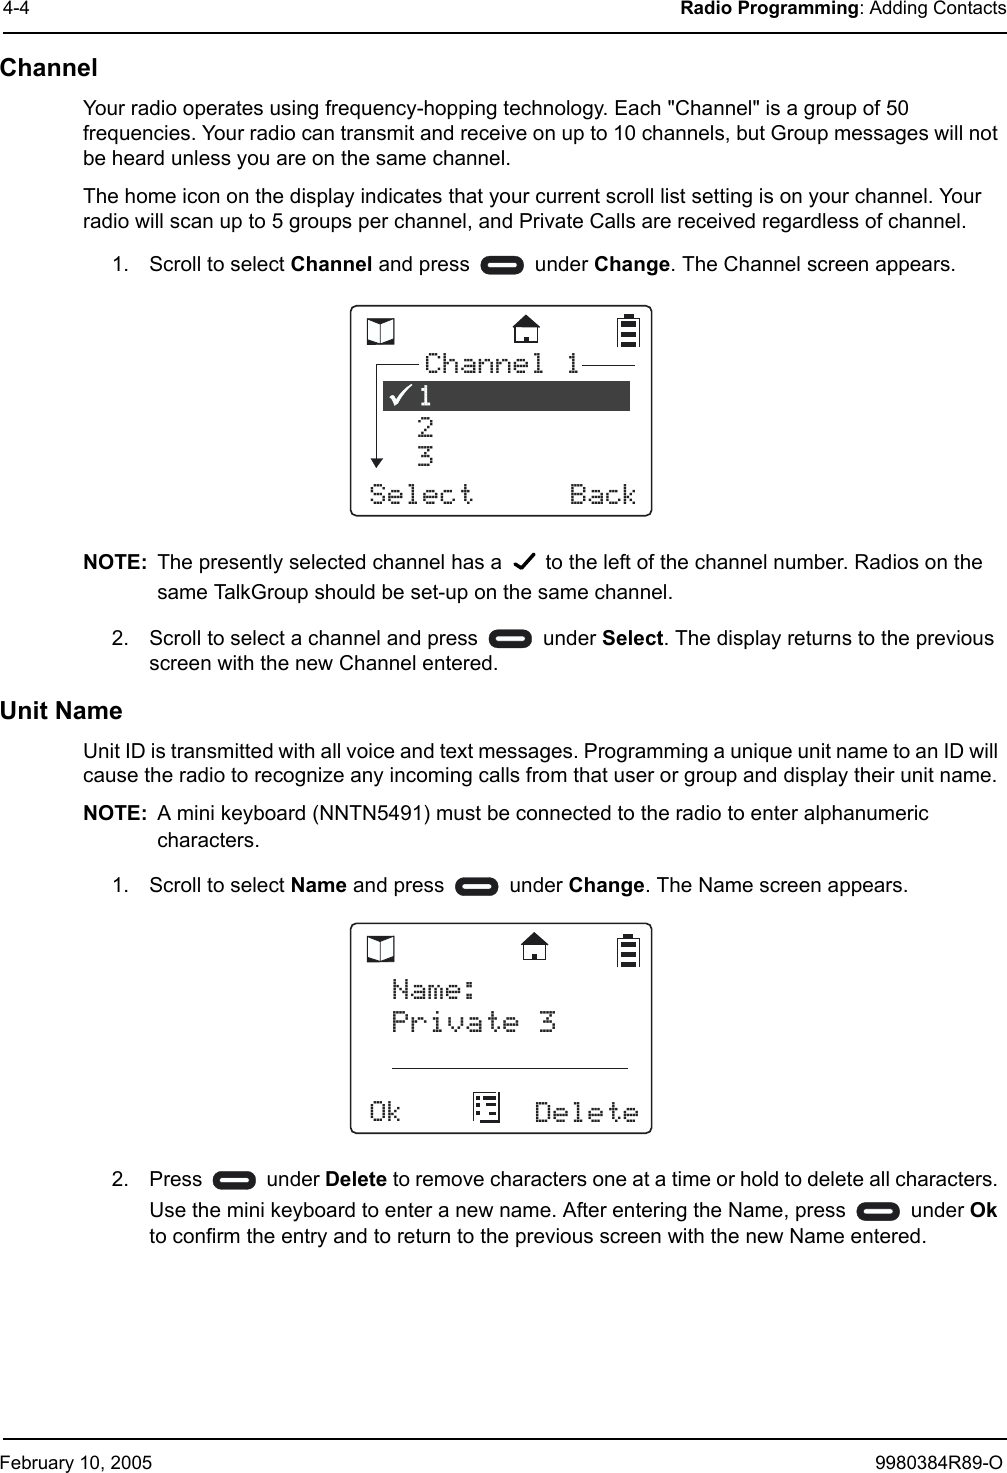
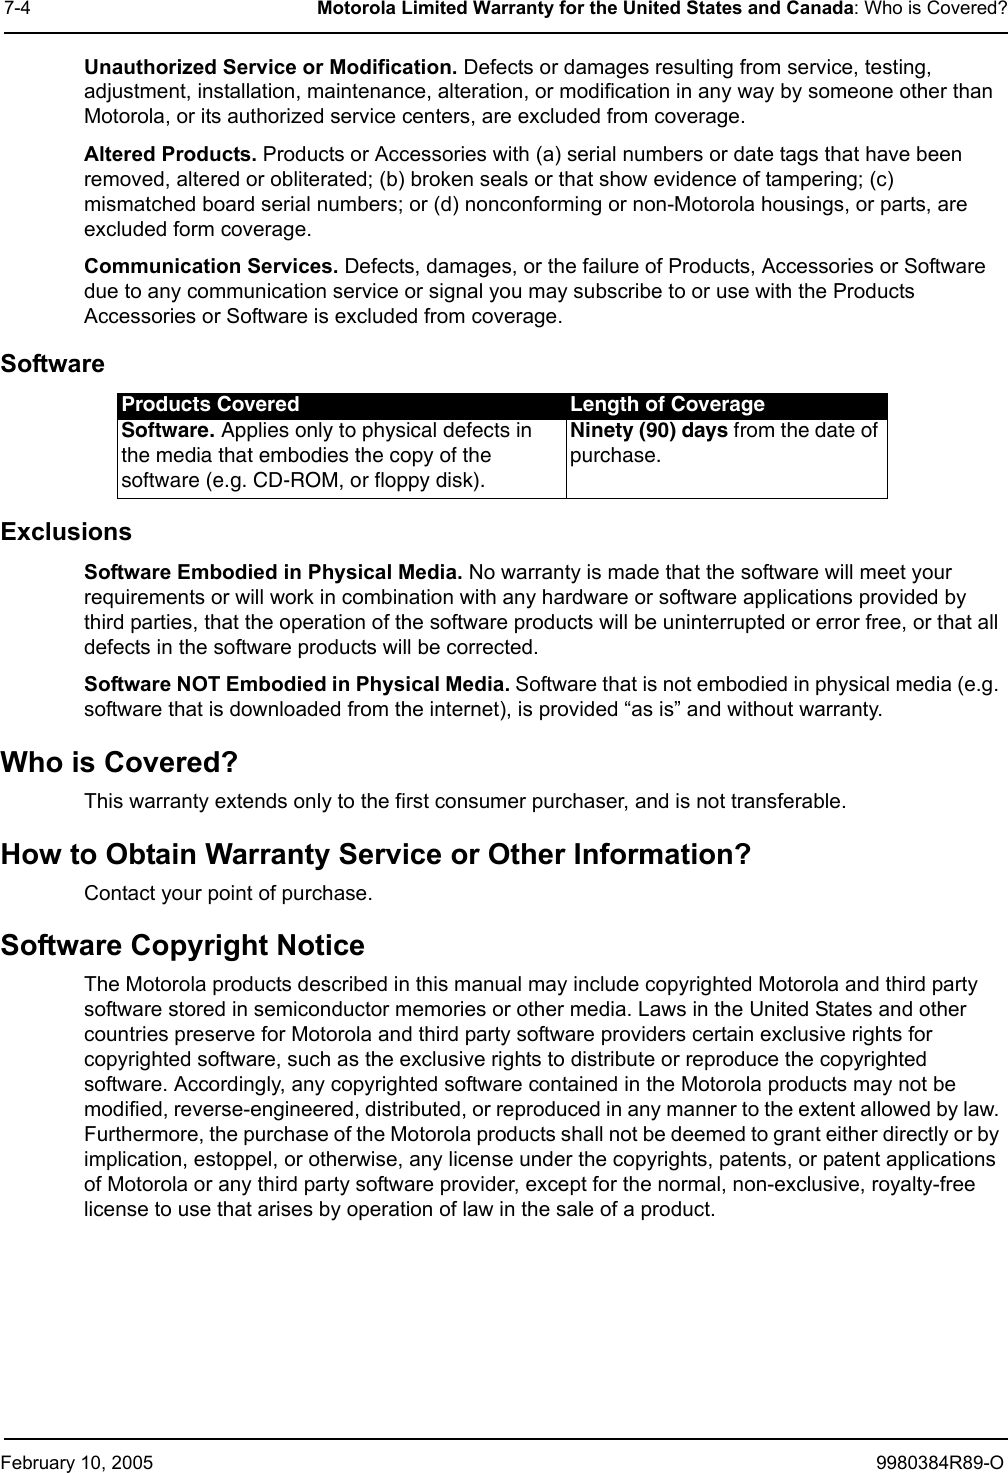
![9980384R89-O February 10, 2005Introduction: Battery 1-5Text AreaThis area displays menus, messages, unit names or IDs, and other information.Display OptionsTwo display options appear at the bottom of most screens. You select a display option by pressing the below it.Menu KeyMany features provide context-sensitive menus that let you access related features and actions. the icon appears any time a context-sensitive menu is available. Press to access the menu.Menus and ListsYour radio’s features are arranged in menus, submenus, and lists. To access the items in a menu or list, scroll using either the or keys.BatteryWARNING: To avoid a possible explosion: DO NOT replace the battery in any area labeled“hazardous atmosphere.” DO NOT discard batteries in a fire. Battery LifeYour radio uses a rechargeable Lithium Ion (Li-Ion) battery.Based on 5% transmit, 5% receive, 90% standby (standard duty cycle):• NNTN4655 Li-Ion; Up to 19 Hours• SNN5706 Li-Ion; Up to 14 HoursBattery life is determined by several factors. Among the more critical are the regular overcharge of batteries and the average depth of discharge with each cycle. Typically, the greater the overcharge and the deeper the average discharge, the fewer cycles a battery will last.For example, a battery which is overcharged and discharged 100% several times a day, lasts fewer cycles than a battery that receives less of an overcharge and is discharged to 50% per day. Further, a battery which receives minimal overcharging and averages only 25% discharge, lasts even longer.WARNING: Care should be taken to avoid external short circuiting of the battery. Asustained high-rate discharge (for example, a paper clip placed accidentallyacross the battery contacts) may permanently damage the battery, void thebattery warranty, and create a burn or fire hazard.Motorola batteries are designed specifically to be used with a Motorola charger and vice versa. Charging in non-Motorola equipment may lead to battery damage and void the battery warranty. The battery should be at about 77°F (25°C) (room temperature), whenever possible. Charging a cold battery (below 50° F [10°C]) may result in leakage of electrolyte and ultimately in failure of the battery.Charging a hot battery (above 95°F [35°C]) results in reduced discharge capacity, affecting the performance of the radio. Motorola rapid-rate battery chargers contain a temperature-sensing circuit to ensure that batteries are charged within the temperature limits stated above.WARNING: Do not attempt to change or charge the battery in a hazardous atmosphere.To charge the battery, place the battery (with or without the radio) in a Motorola-approved charger.](https://usermanual.wiki/Motorola-Solutions/89FT5852.DRAFT-USERS-MANUAL/User-Guide-611183-Page-13.png)
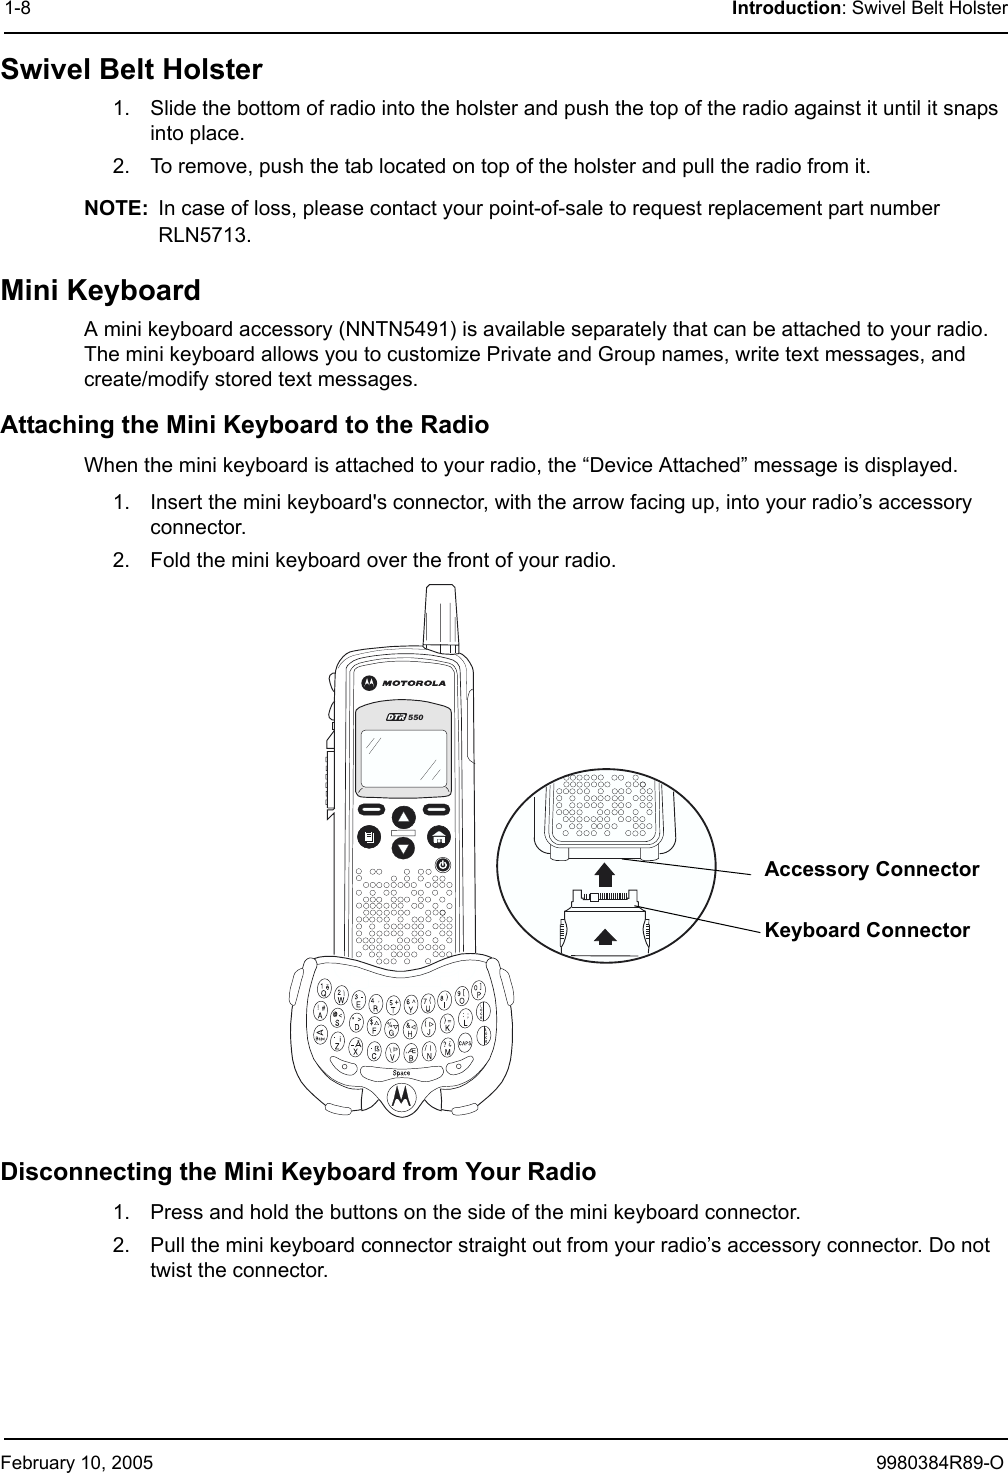
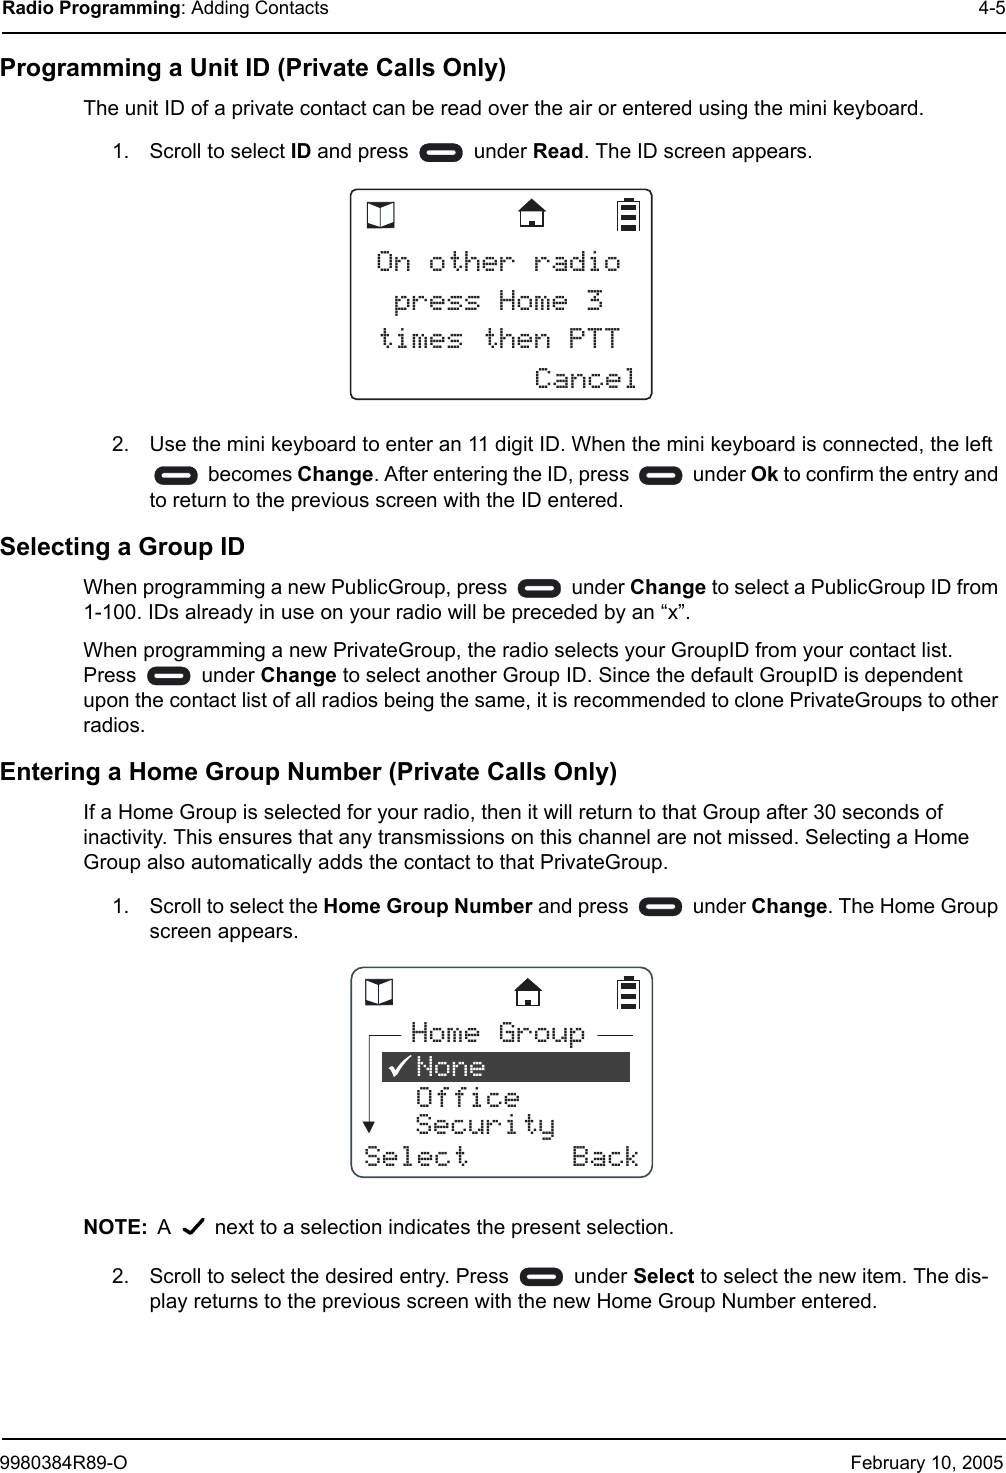
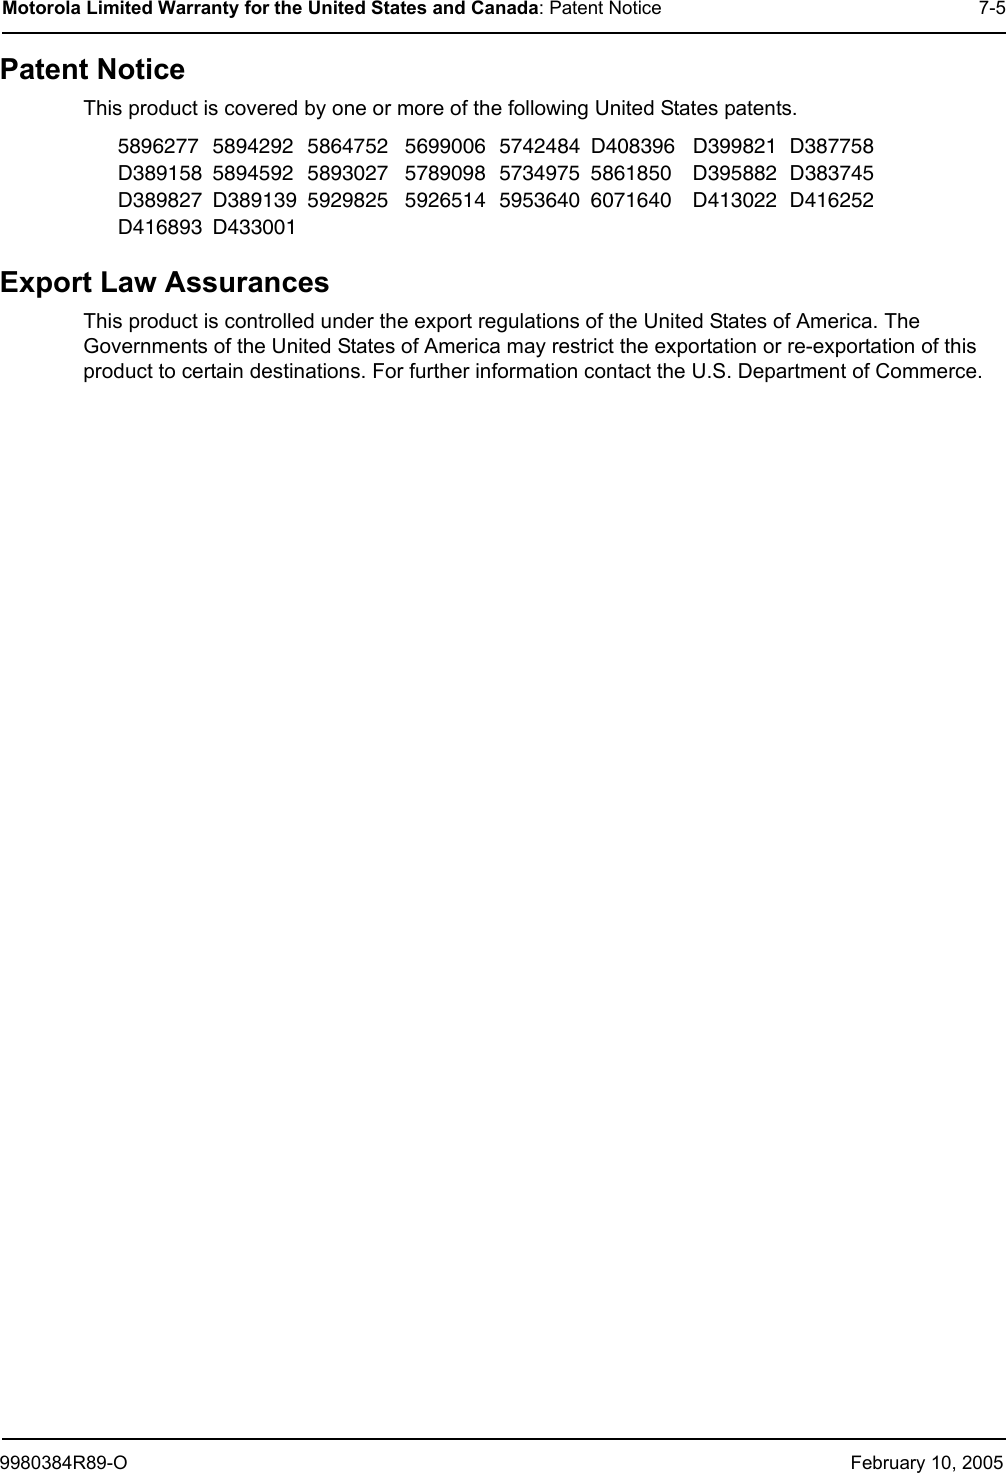
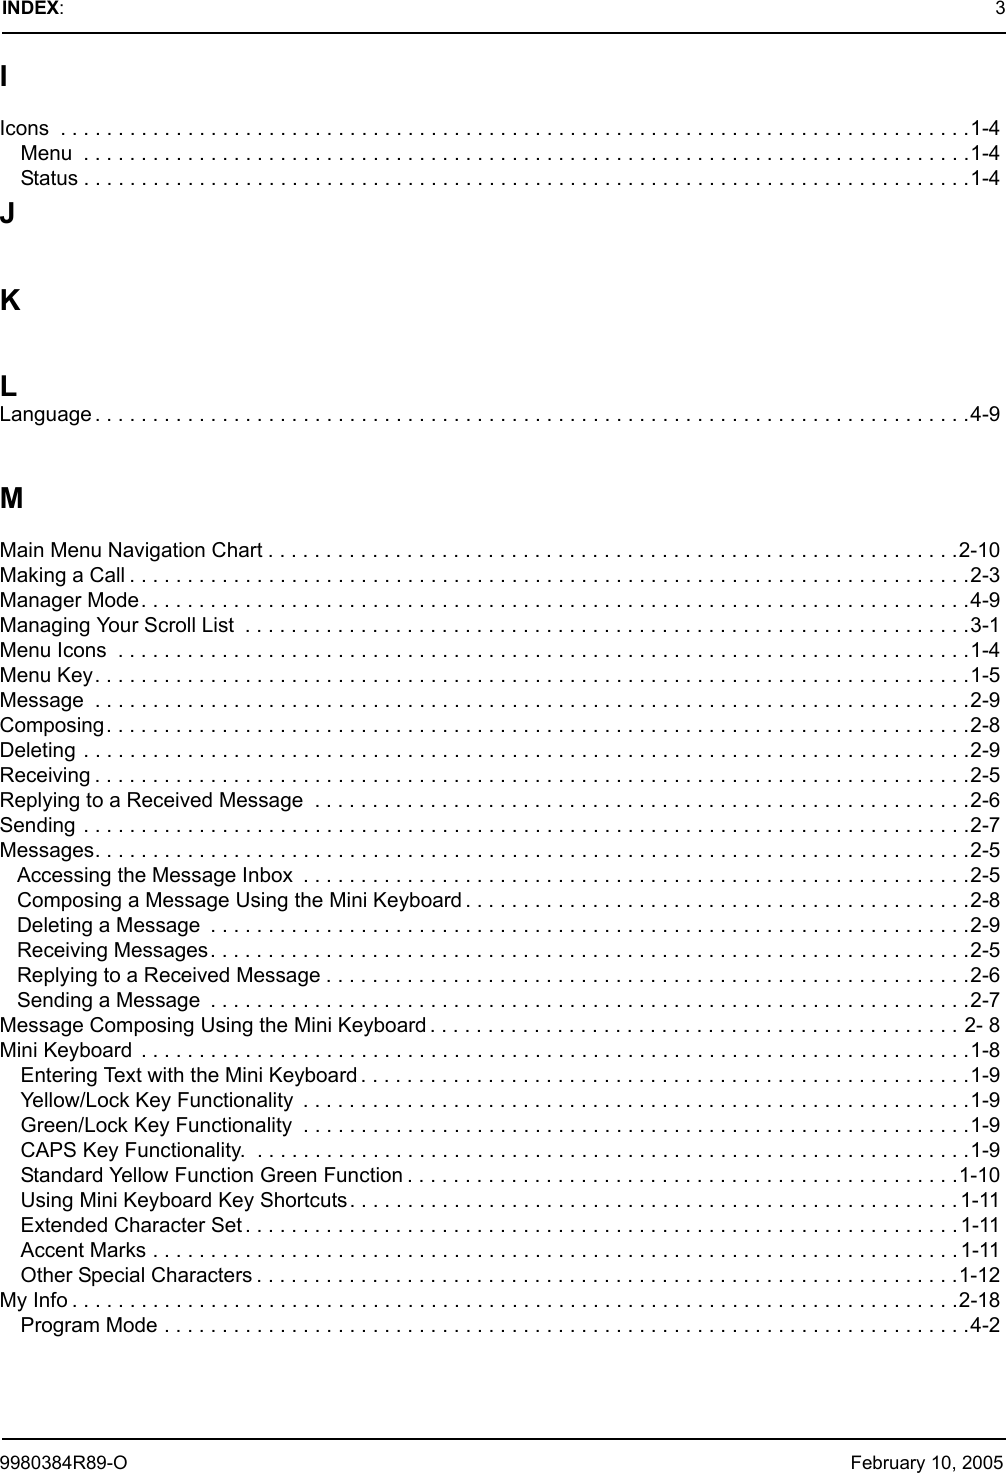
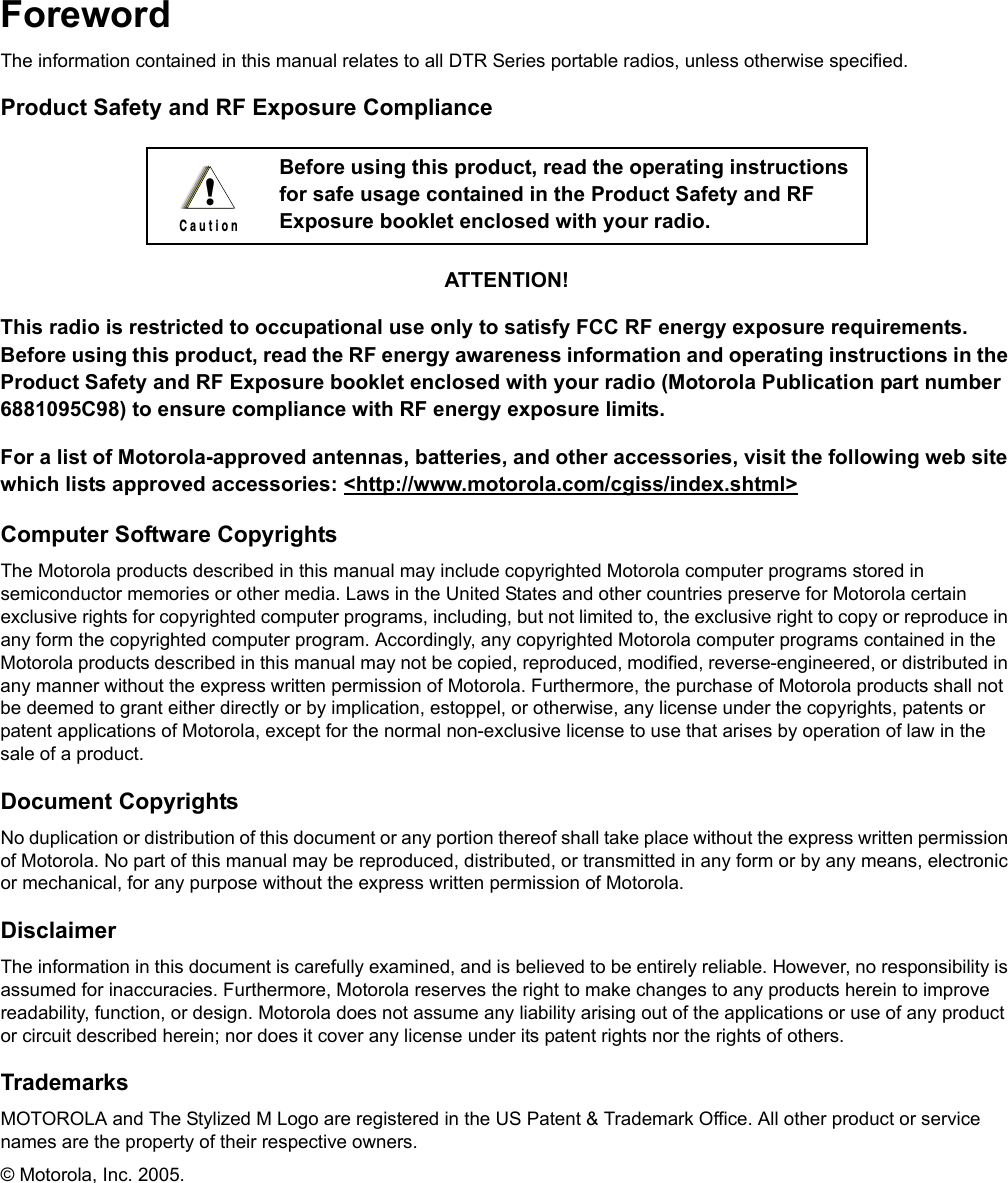
![February 10, 2005 9980384R89-O1-10 Introduction: Mini KeyboardStandard Yellow Function Green FunctionStandard Yellow Function Green FunctionQ1APOSTROPHEW2 "E3~R 4 ACCENTT5+Y6^U7 {I8}O9 [P0 ]A!#S@<D*>F $ UP ARROWG % DOWN ARROWH&LEFT ARROWJ ( RIGHT ARROWK)=L:;Z- ¡X_ÅC.ßV\ÞB,ÆN/ IM?¿](https://usermanual.wiki/Motorola-Solutions/89FT5852.DRAFT-USERS-MANUAL/User-Guide-611183-Page-18.png)
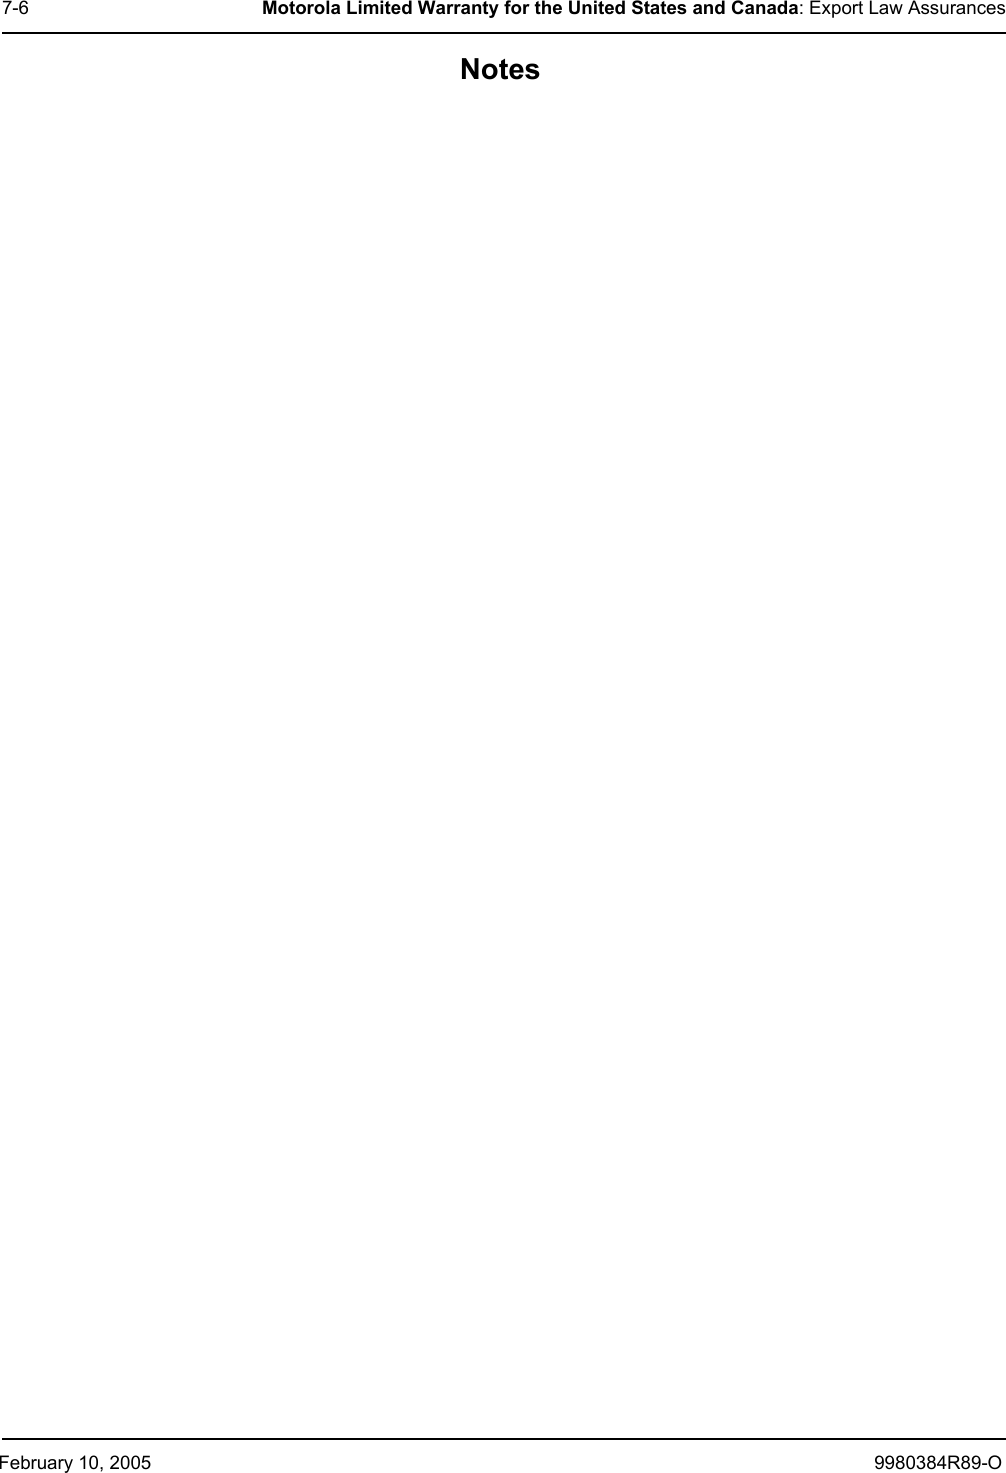
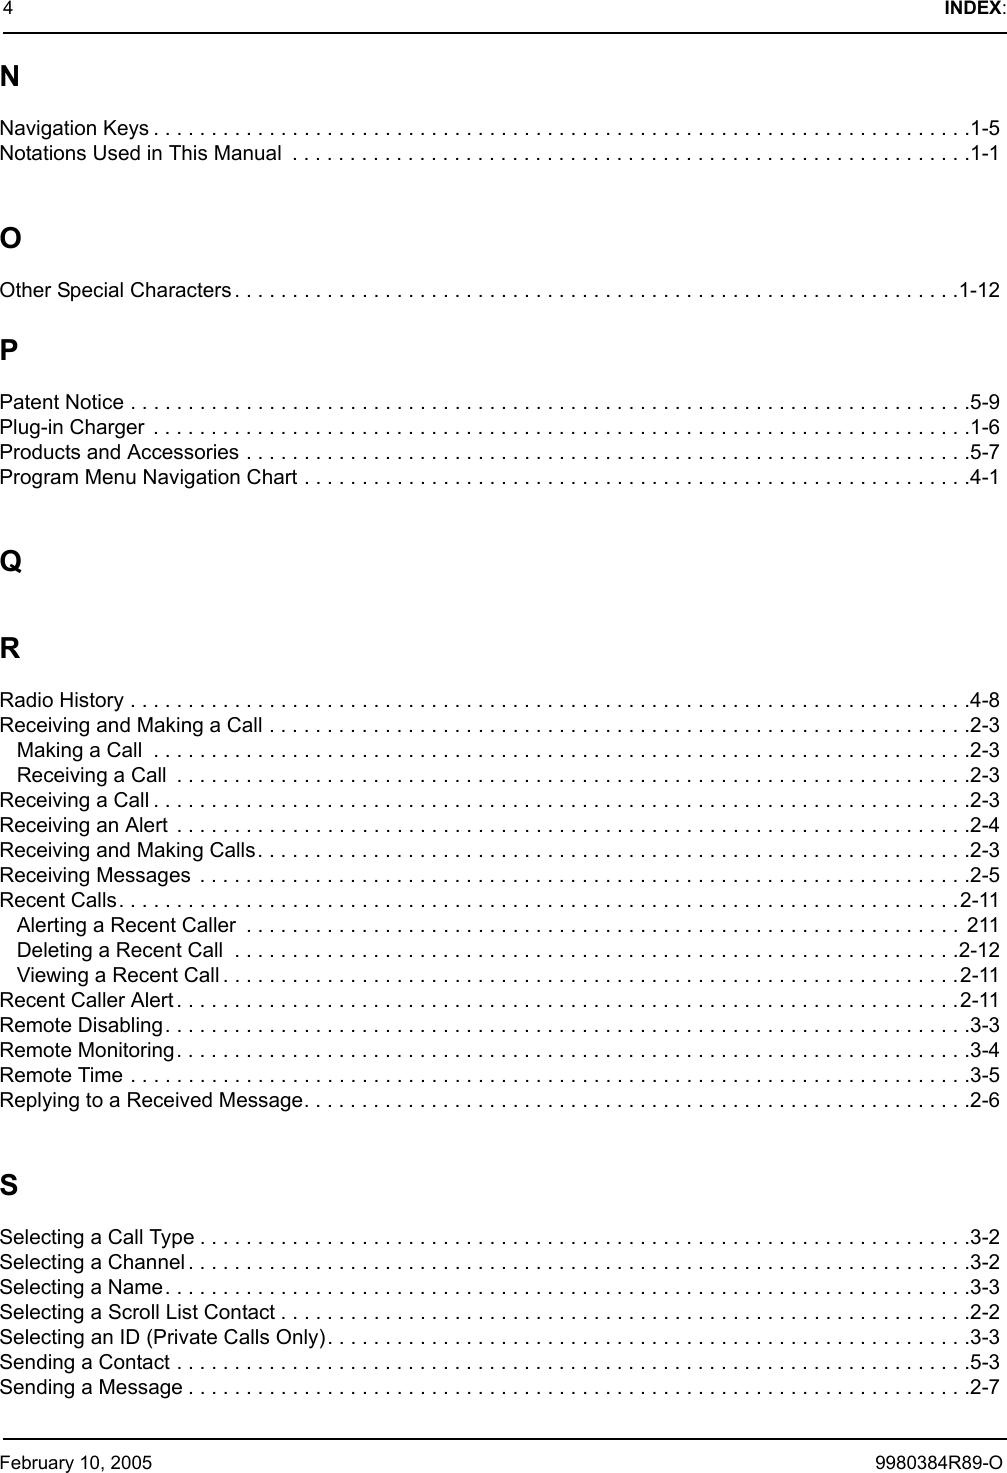
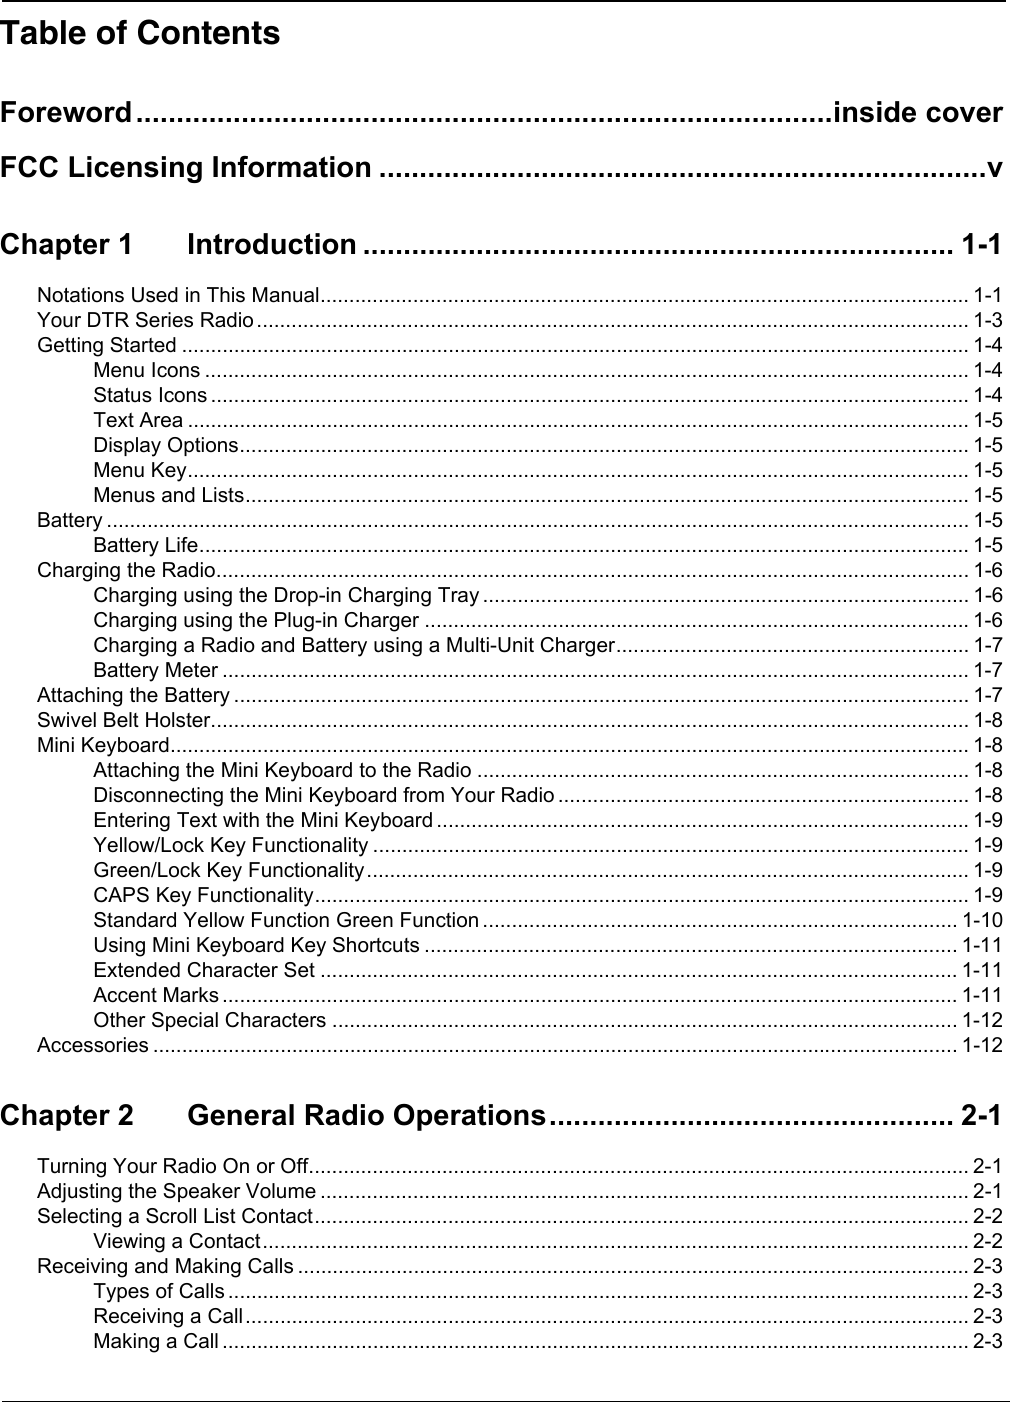
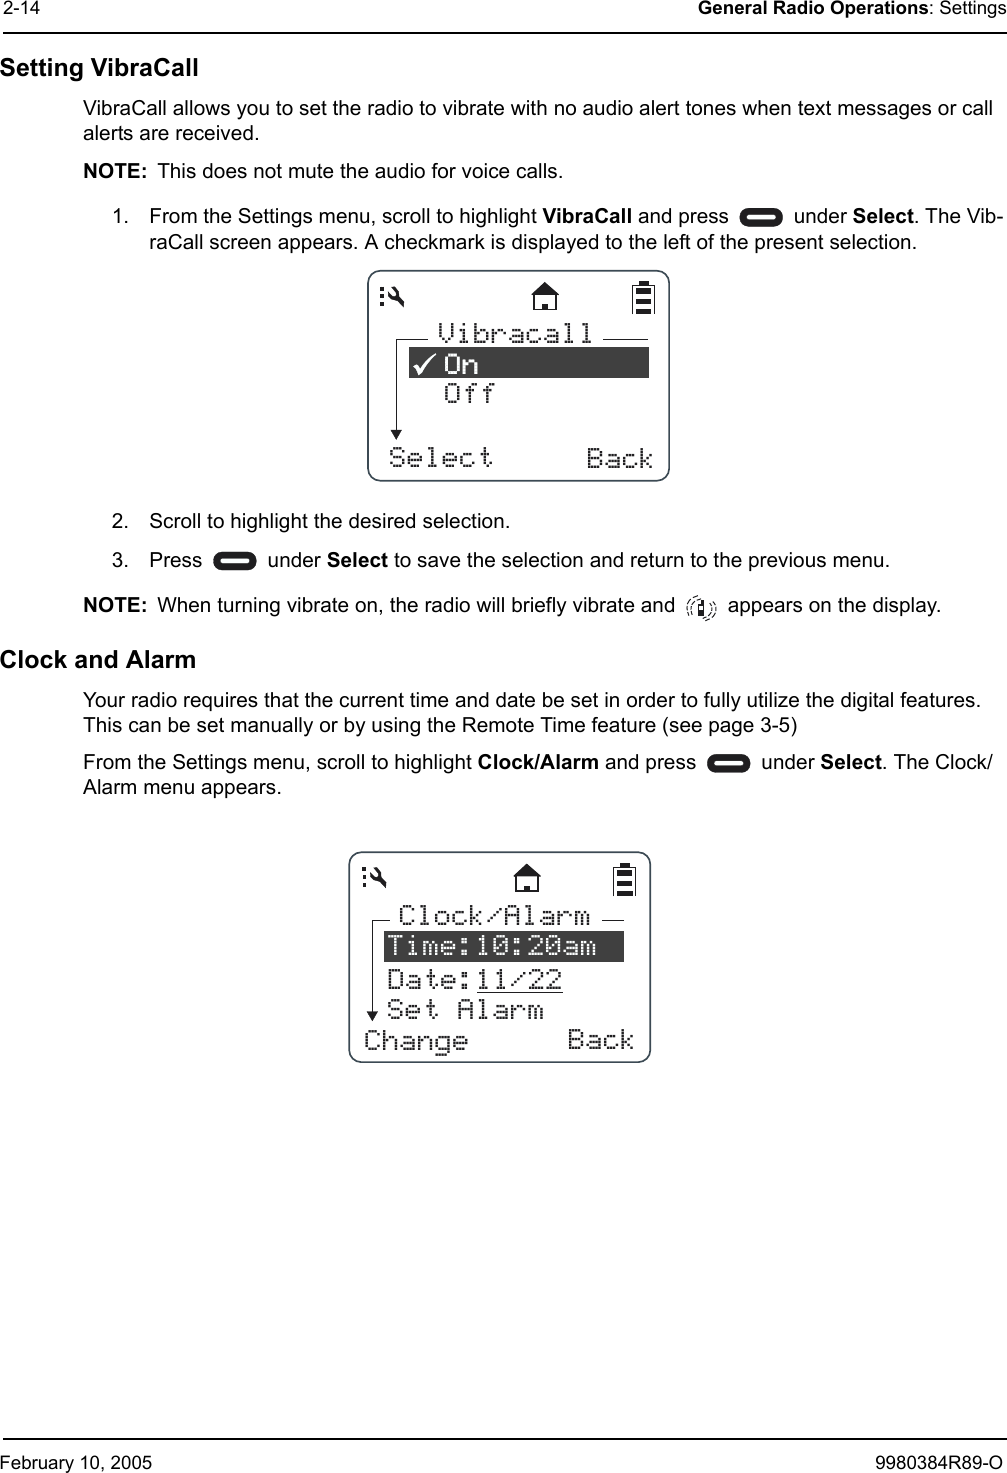
![9980384R89-O February 10, 2005General Radio Operations: Text Messaging 2-5Text MessagingYour radio can send and receive short text messages to Private or Group contacts. Your radio must be on and within range to receive text messages. Receiving a MessageWhen you receive a text message, “New Message Received” appears on the display. The sender and group (if applicable) are also indicated.To View the Message1. Press under Read to read the message.NOTE: If you are in a menu when the message is received, you will need to exit and read it from the Inbox.2. If the message fills more than one screen, scroll to read the entire message.3. To delete the message, press and press under Delete.To Dismiss the Message NotificationPress under Back to read the message at a later time. This icon appears on the display, reminding you that you have an unread message.Reading from the Inbox1. Press under Mesgs.2. Scroll to the message you want to read.3. Press under Read.4. If the message fills more than one screen, scroll to read it.New MessageReceivedFrom JonesRead BackInbox[Send Mesg]Read BackAre you atNo](https://usermanual.wiki/Motorola-Solutions/89FT5852.DRAFT-USERS-MANUAL/User-Guide-611183-Page-25.png)
![February 10, 2005 9980384R89-O2-6 General Radio Operations: Text MessagingReplying to a Received MessageYour radio has a number of pre-programmed Quick Notes available, or the mini keyboard can be used to create a response. Additional Quick Notes can be created and the existing ones modified/deleted with the mini keyboard by selecting Text Messaging while in Programming Mode.1. To reply to the message, press under Reply.2. The Send Message screen appears.NOTE: If the mini keyboard is connected to the radio, the [Write Mesg] option appears on the display. Refer to Composing a Message Using the mini keyboard.3. Scroll to highlight a reply message and press under Select to select the reply mes-sage. The Compose Msg. screen appears.4. To change the Contact you are sending to, press under Change. This will return you to the Contact List. Scroll to select the correct Contact and press under Select.5. To view the text messages in the list, scroll to select the message and press under View.6. Press under Send to send the reply.Detailed ViewFrom:JonesAre you at wo..Reply BackSend MessageAre you at wor..Can you meet...I can’t take y..Select BackCompose MsgTo:JonesView SendMesg:Can you mee](https://usermanual.wiki/Motorola-Solutions/89FT5852.DRAFT-USERS-MANUAL/User-Guide-611183-Page-26.png)
![9980384R89-O February 10, 2005General Radio Operations: Text Messaging 2-7Sending a Text MessageYour radio can send and receive short text messages to Private or Group contacts, and has several pre-programmed Quick Notes available. The mini keyboard can be used to change, add additional, or delete these messages while in Programming Mode. This accessory can also be used to write new messages from User Mode.1. Press under Mesgs. The message inbox is displayed. 2. Highlight [Send Mesg] and press under Select.3. The Send Message screen appears.NOTE: If the mini keyboard is connected to the radio, the [Write Mesg] option appears on the display. Refer to Composing a Message Using the mini keyboard.4. Scroll to select the message you want to send.JOE SMITHSecurity5:49pm 11/14Contcs MesgsInbox[Send Mesg]Select BackSend MessageAre you at wor..Can you meet...I can’t take y..Select Back](https://usermanual.wiki/Motorola-Solutions/89FT5852.DRAFT-USERS-MANUAL/User-Guide-611183-Page-27.png)
![February 10, 2005 9980384R89-O2-8 General Radio Operations: Text Messaging5. Press under Select to choose the message. The display shows the Contact and the message you want to send6. To change the Contact you are sending to, press under Change. This returns you to the Contact List. Scroll to select the correct Contact and press under Select.7. To view the text messages in the list, scroll to select the message and press under View. If the message fills more than one screen, scroll to read it.8. Press under Send to send the message.Composing a Message Using the Mini KeyboardThe mini keyboard can be used to type either new messages or replies.1. From the Send Message screen, highlight the [Write Mesg] option and press under Select .2. The Compose Msg screen appears.3. To change the Contact you are sending to, press under Change. This returns you to the Contact List. Scroll to select the correct Contact and press under Select.Compose MsgTo:JonesView SendMesg:Can you meeSend MessageSelect Back[Write Mesg]Compose MsgTo:JonesChange SendMesg:(Empty)](https://usermanual.wiki/Motorola-Solutions/89FT5852.DRAFT-USERS-MANUAL/User-Guide-611183-Page-28.png)
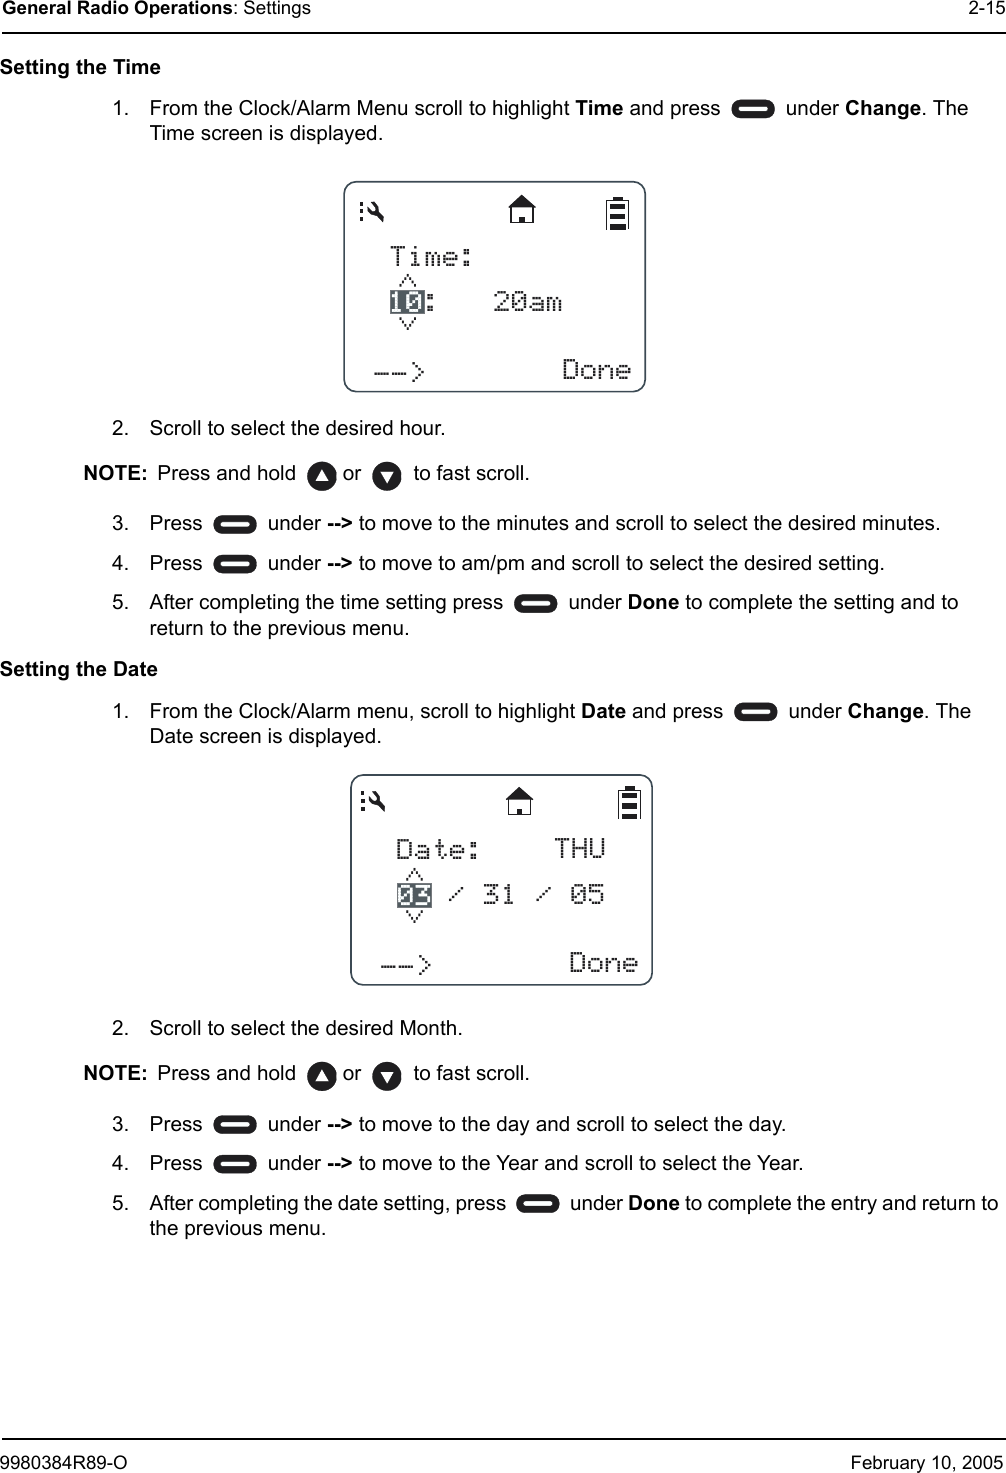
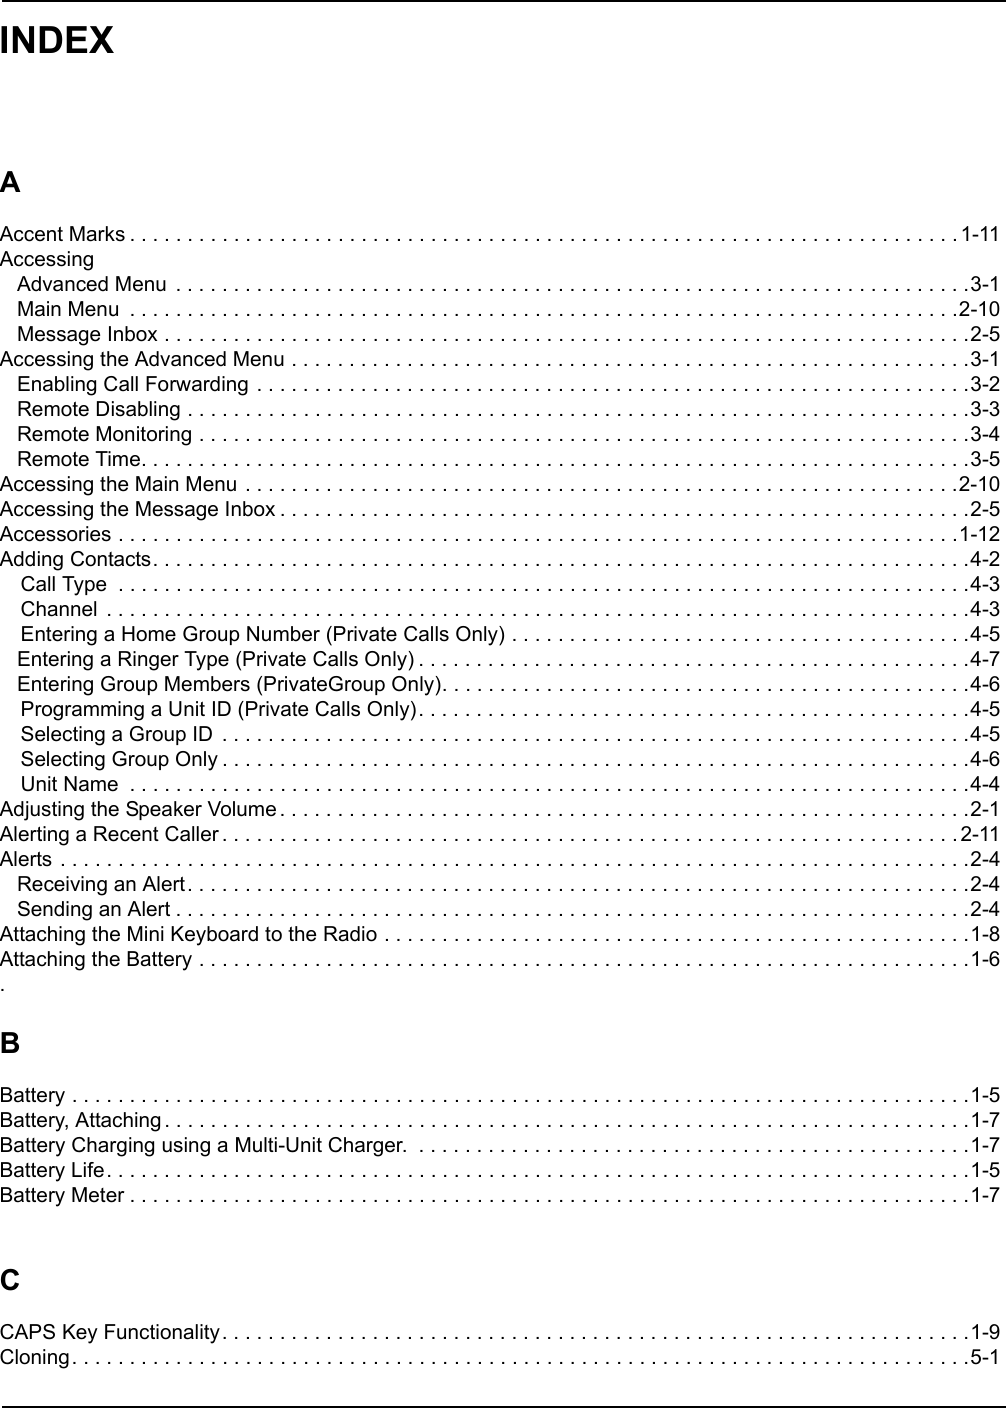
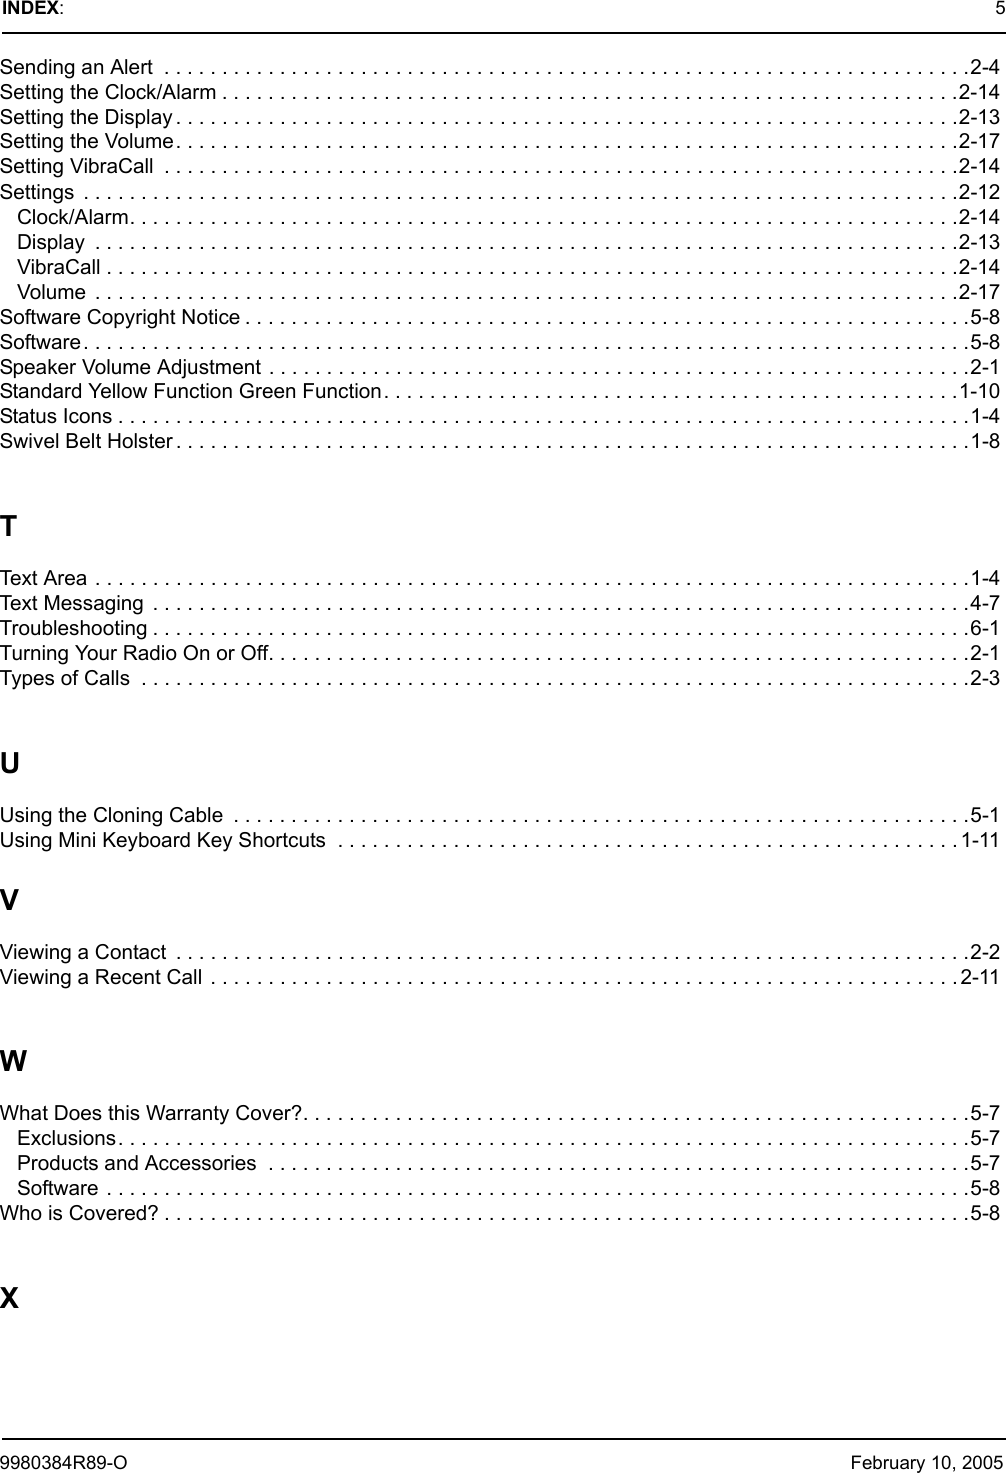
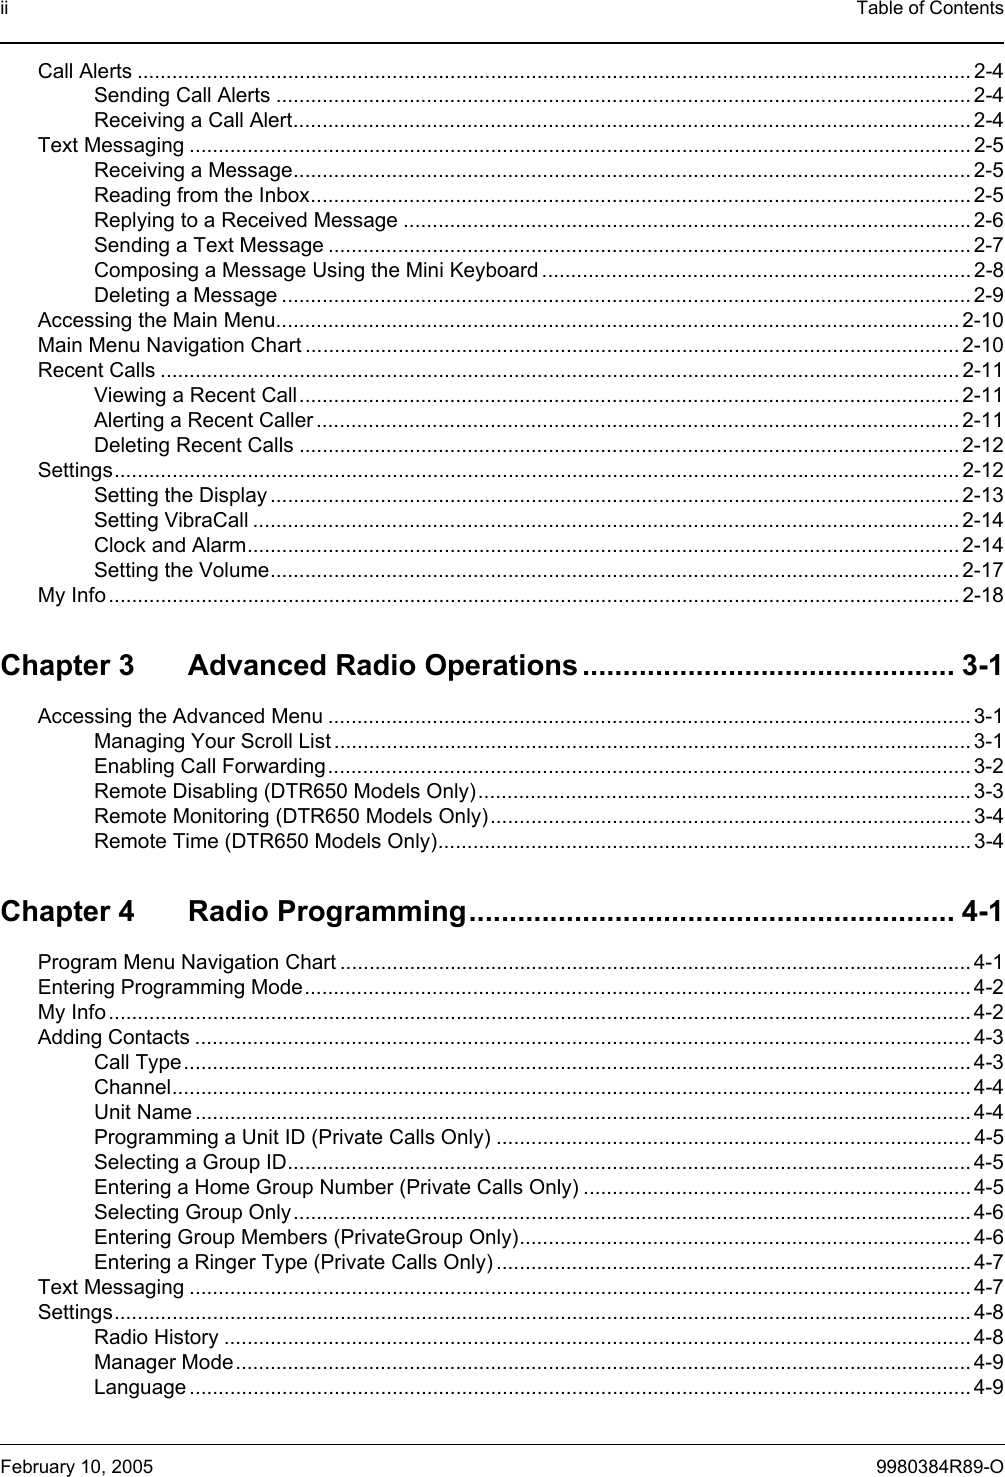
![9980384R89-O February 10, 2005Radio Programming: Adding Contacts 4-3Adding Contacts1. From the Program Menu, scroll to select Contacts and press under Select. The Con-tacts screen appears.2. Scroll to select [New Contact] and press under Select. The Private screen appears.Call Type1. From the Private screen, scroll to select Type and press under Change. The Type screen appears.NOTE: A next to an selection indicates the present selection.2. Scroll to select either a Private call type, PrivateGroup call type, or PublicGroup call type to add to the Contact List. Press under Select.3. The display returns to the previous screen with the new call Type entered.OfficeSecuritySelect BackContacts[New Contact]Channel:1Name:Private1Change CancelPrivate 1Type:PrivatePrivatePrv GroupSelect BackType!Public Grp](https://usermanual.wiki/Motorola-Solutions/89FT5852.DRAFT-USERS-MANUAL/User-Guide-611183-Page-45.png)