Motorola Solutions 89FT7085 2-Way Portable Radio with Bluetooth, Bluetooth LE and WiFi User Manual APX TWO WAY RADIOS
Motorola Solutions, Inc. 2-Way Portable Radio with Bluetooth, Bluetooth LE and WiFi APX TWO WAY RADIOS
Contents
- 1. Manual
- 2. RF Safety Manual
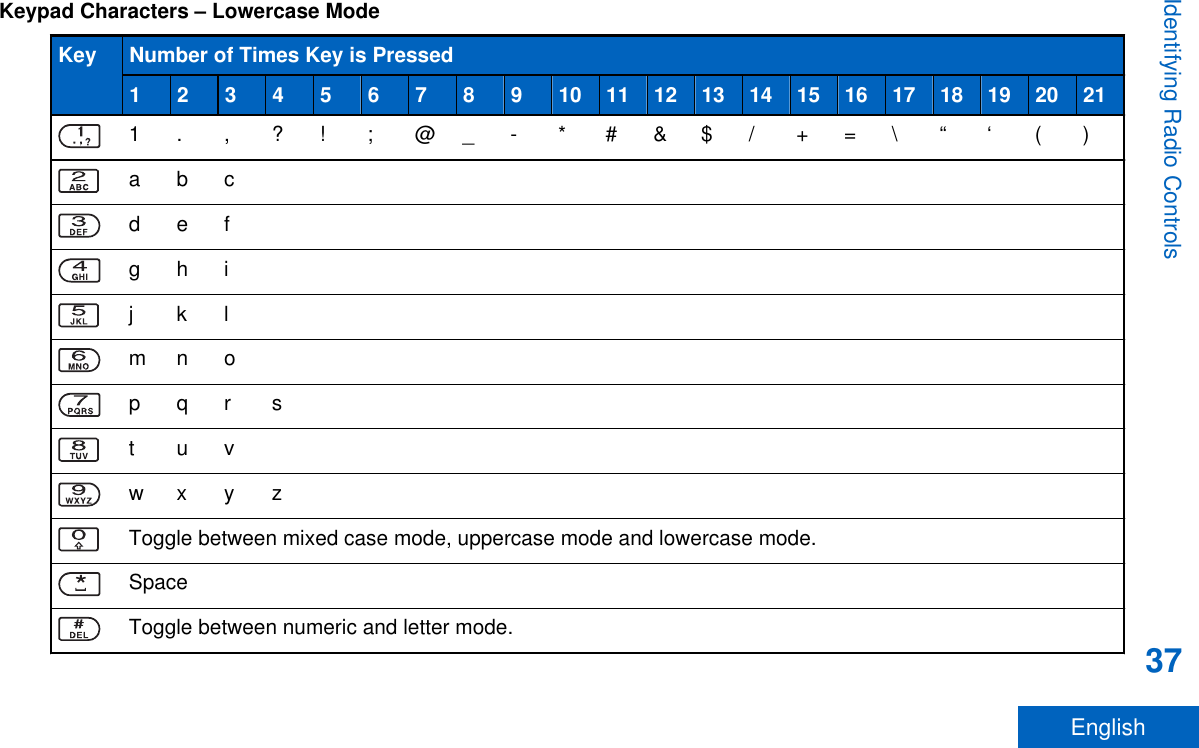
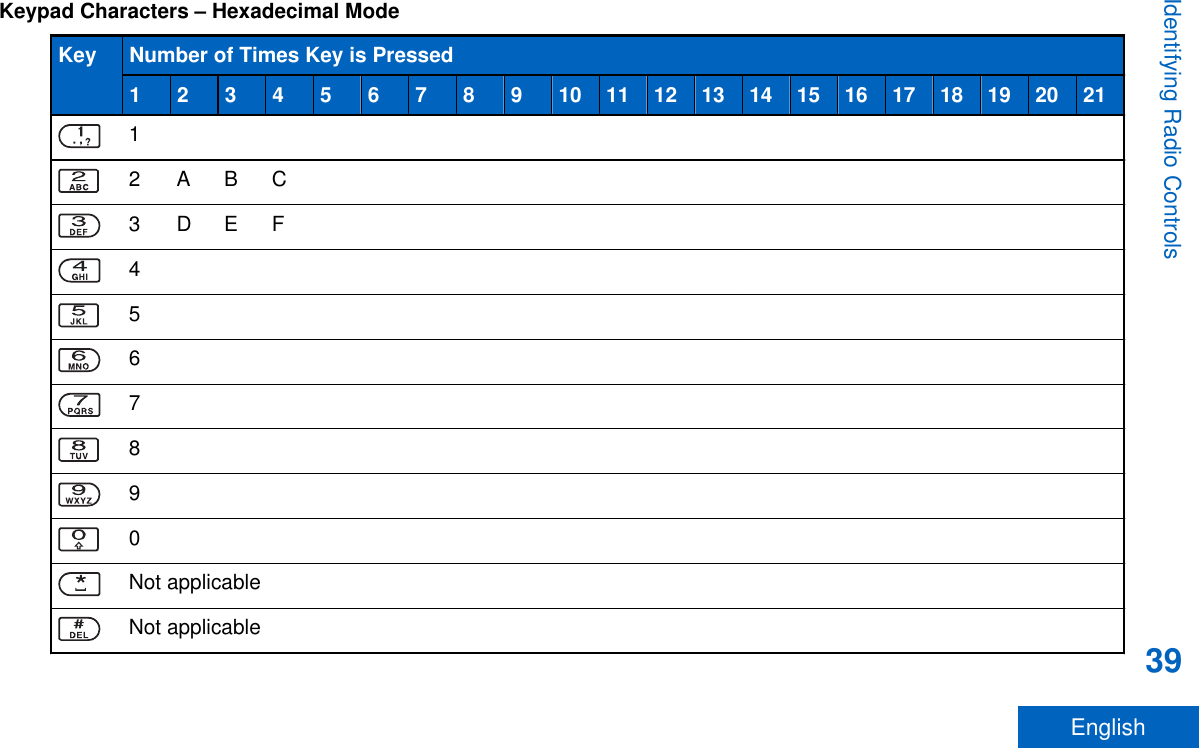
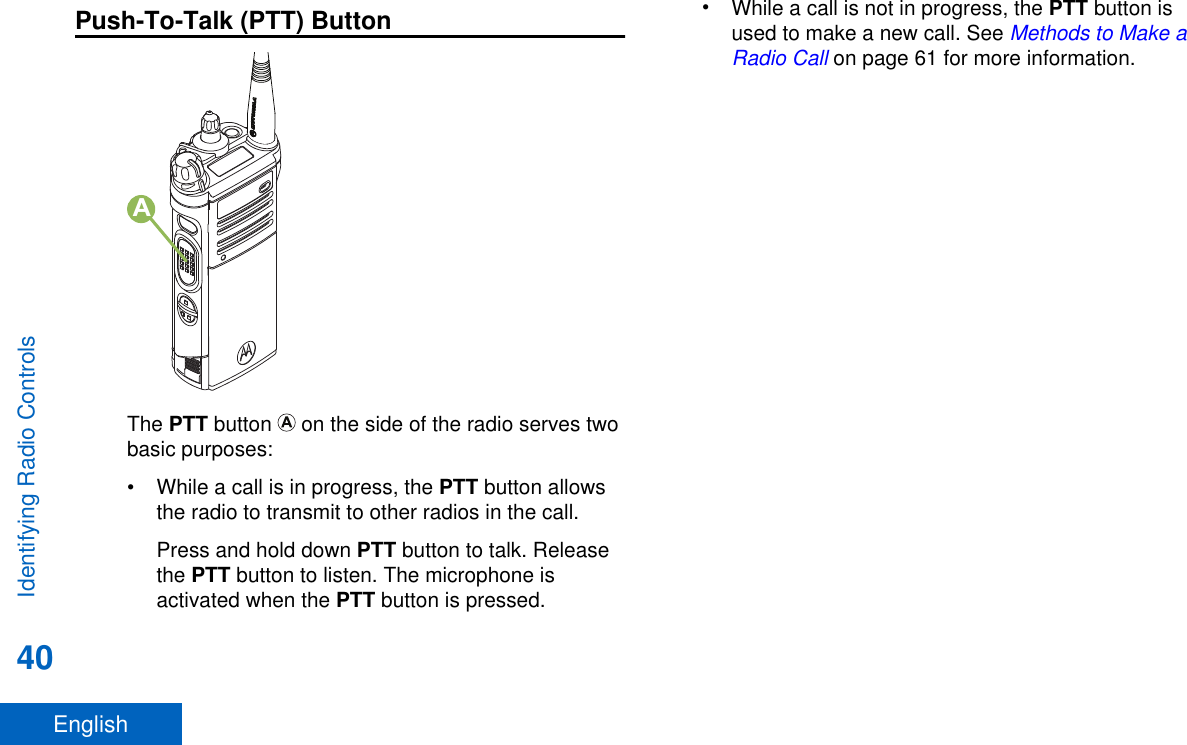
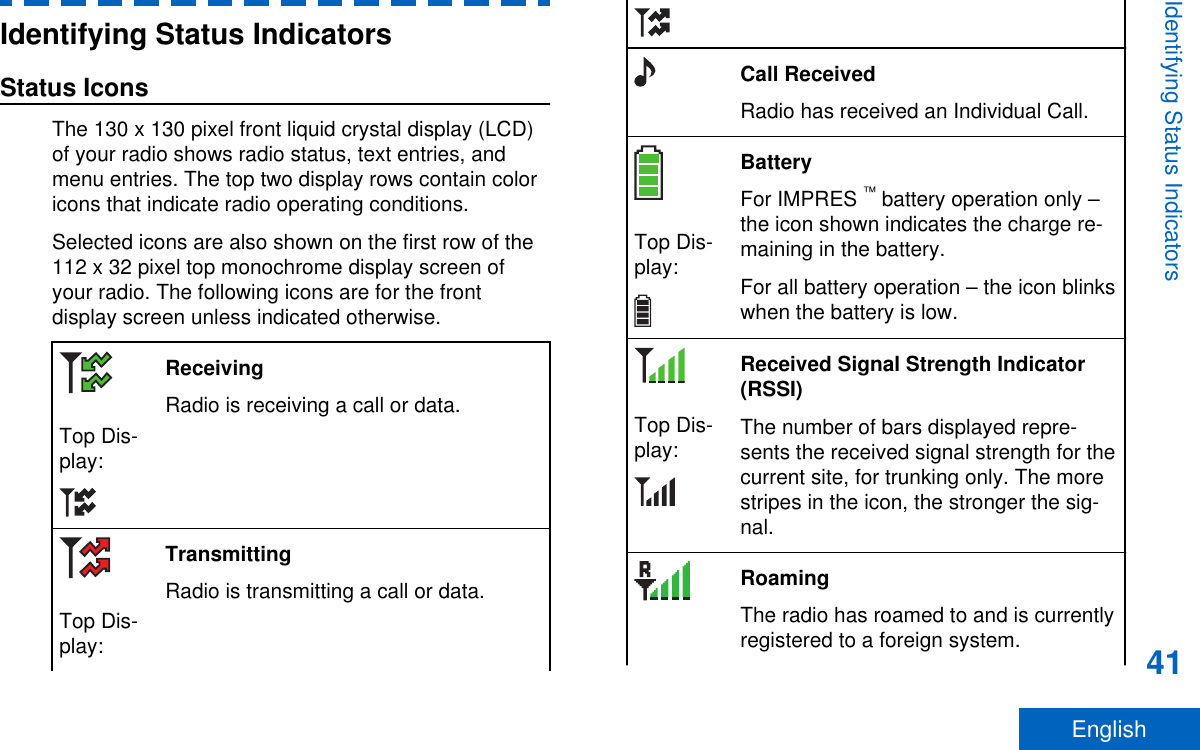
Manual
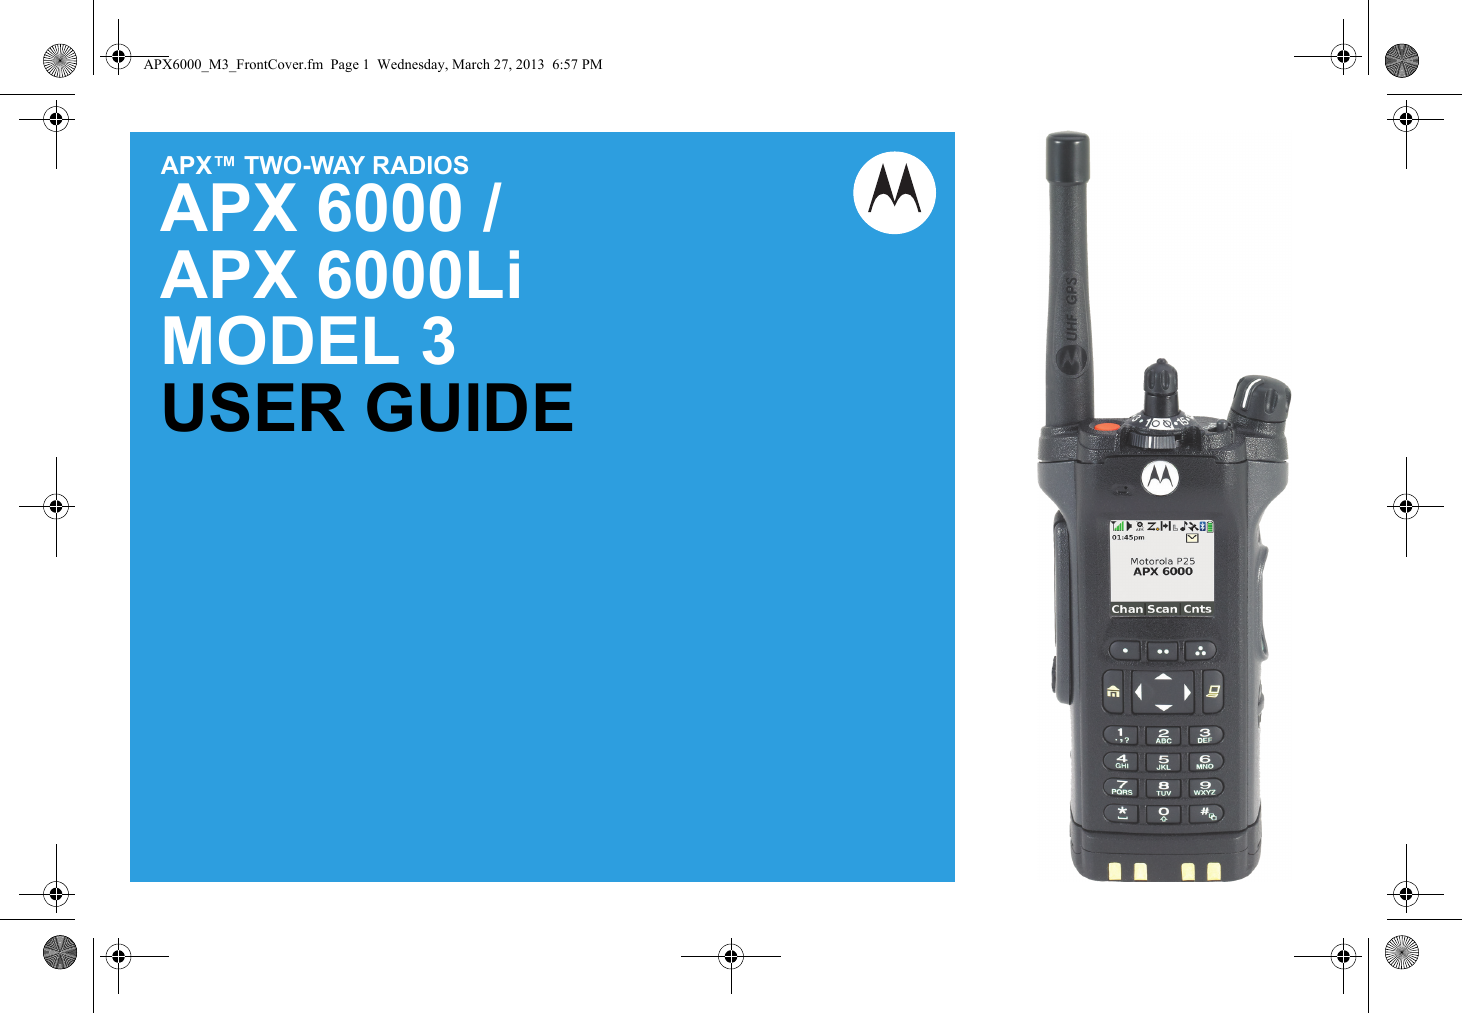


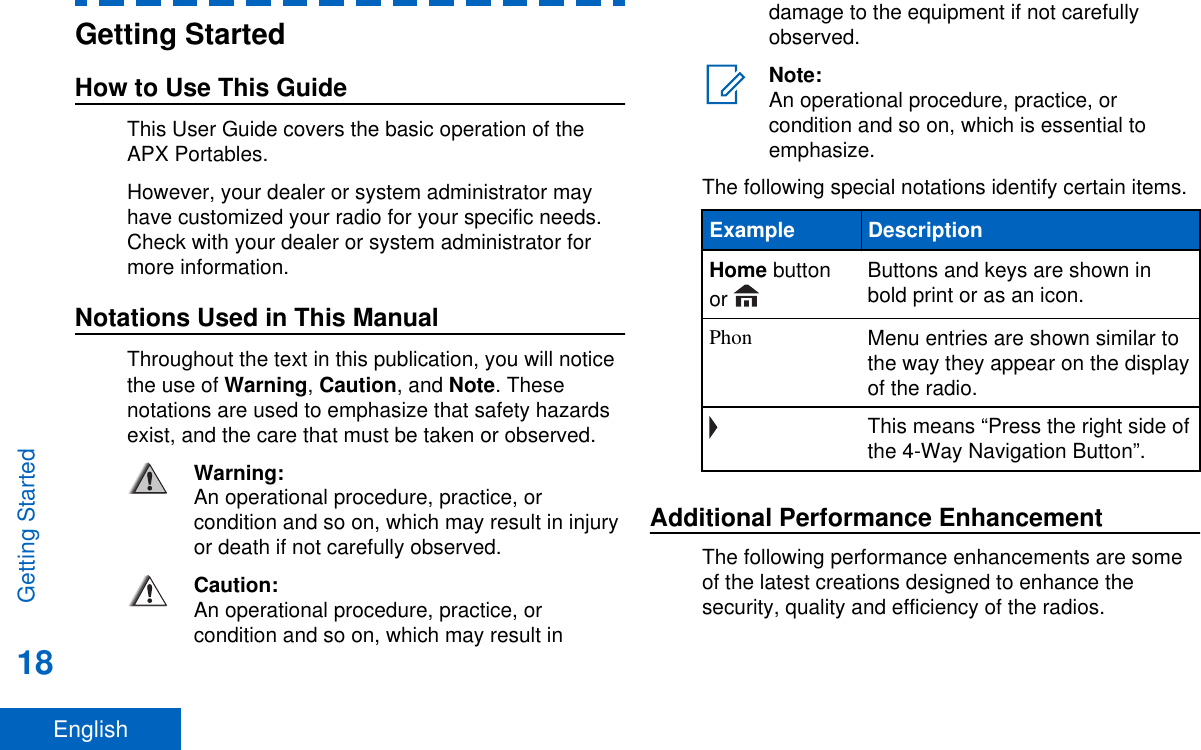
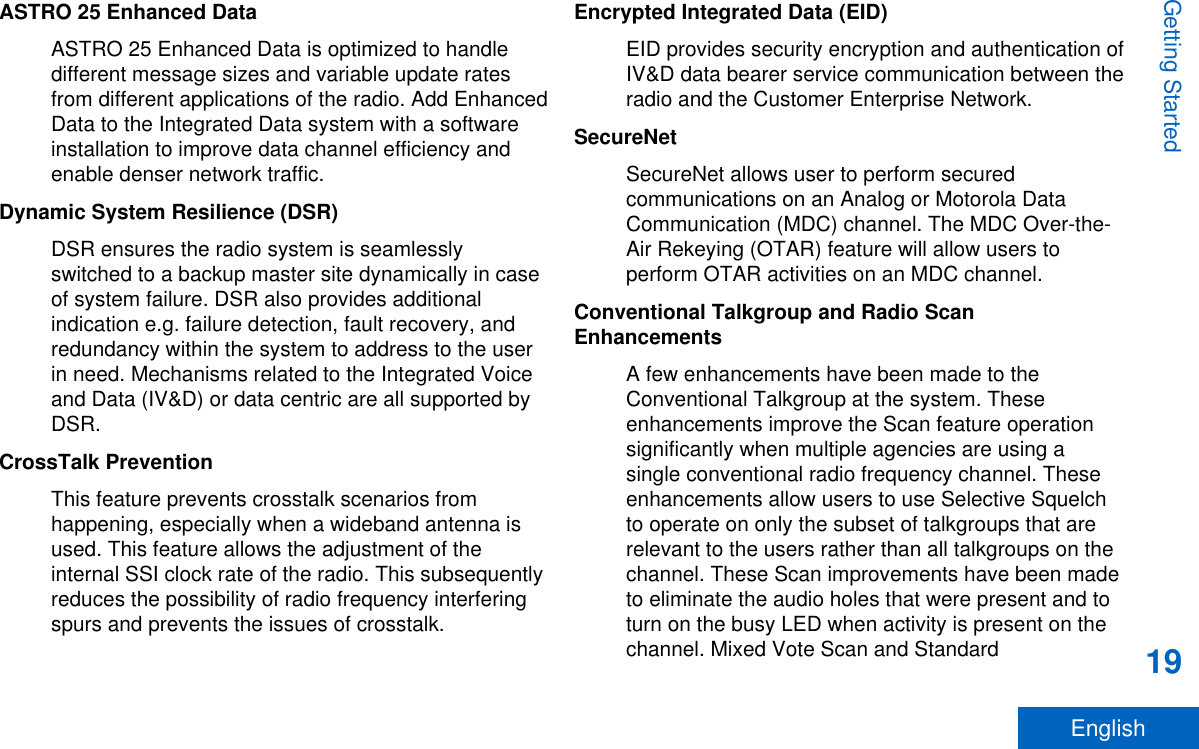

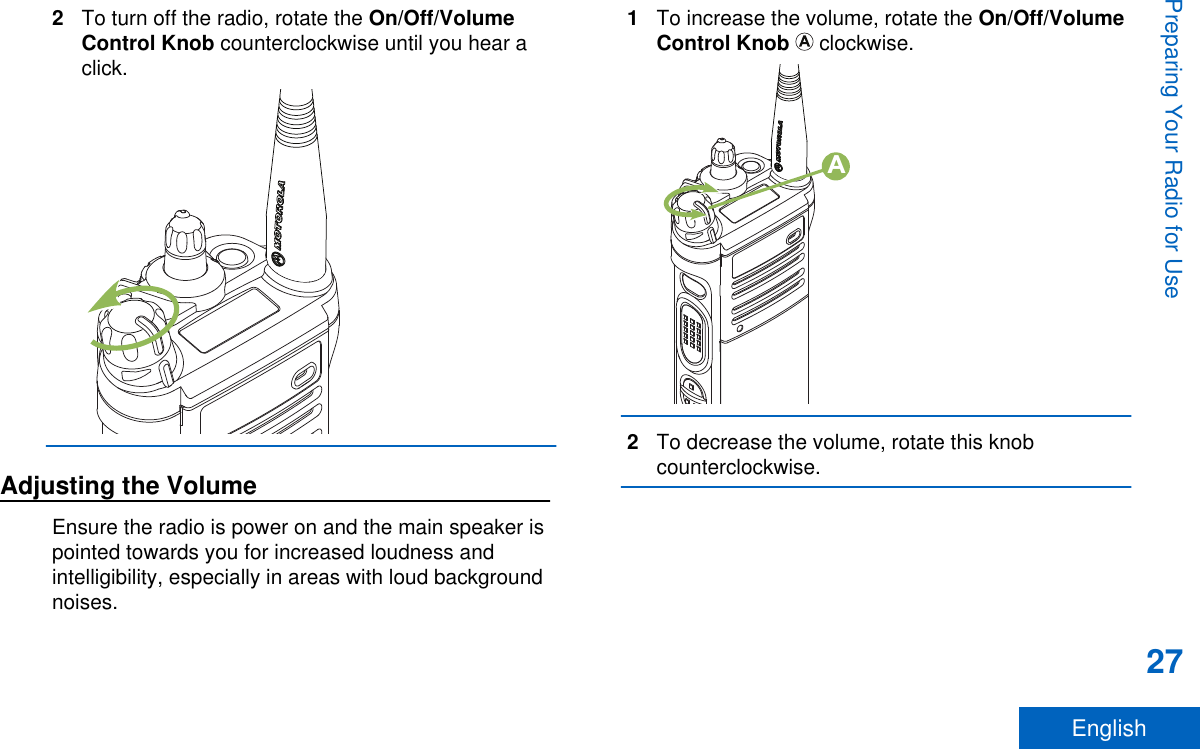
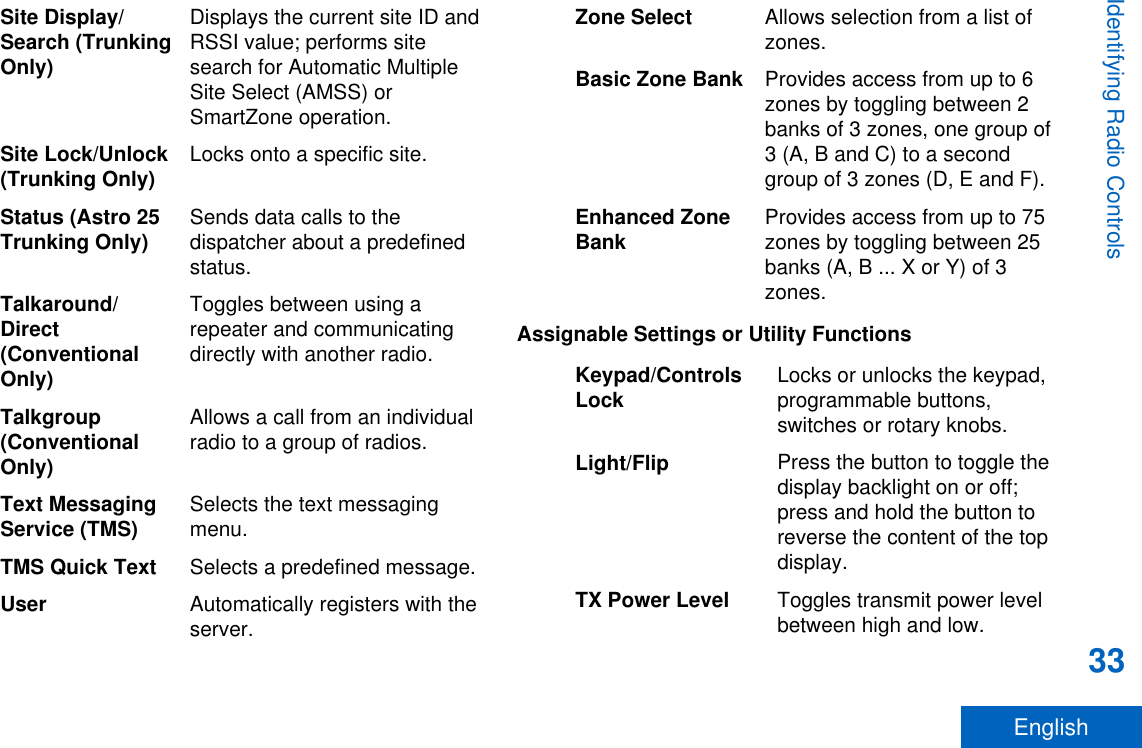
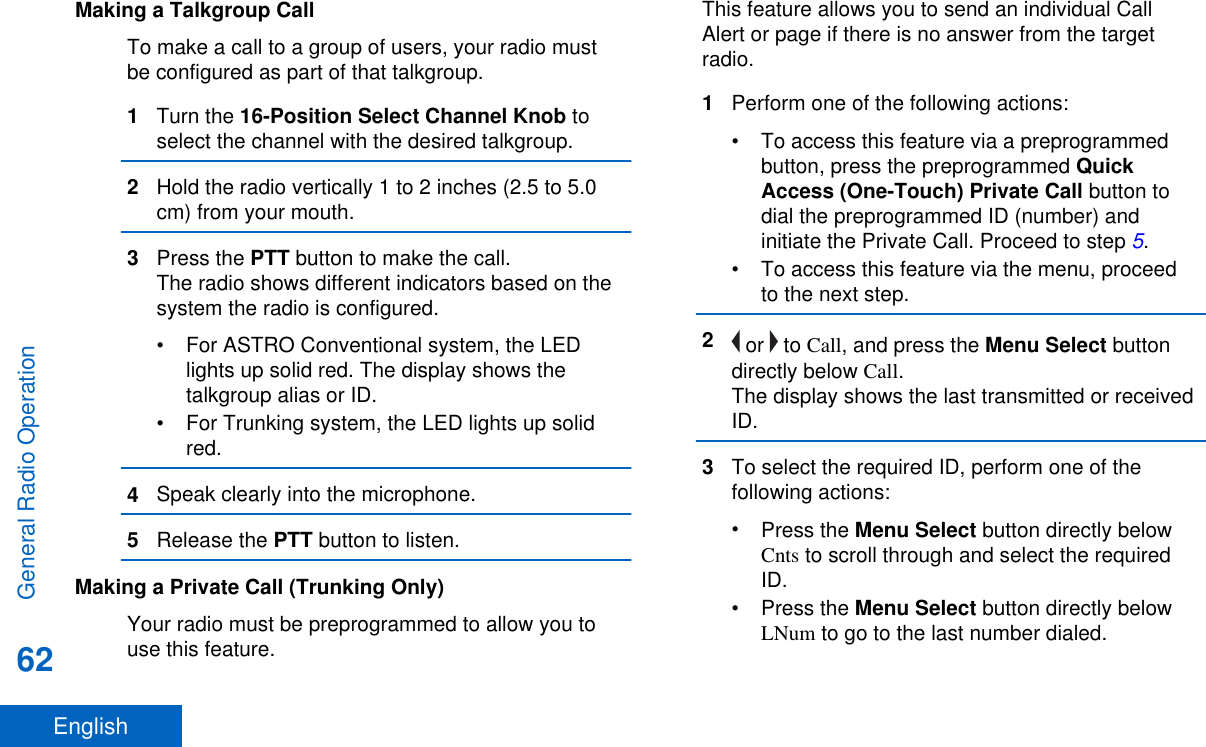
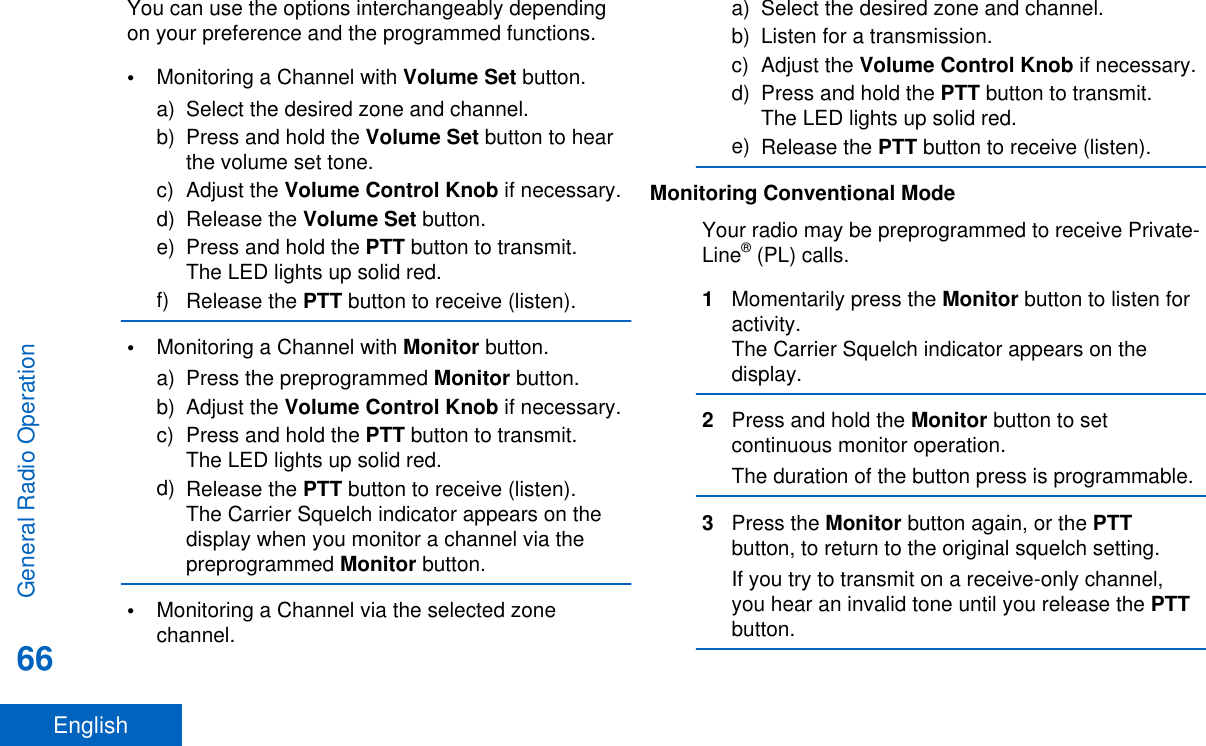
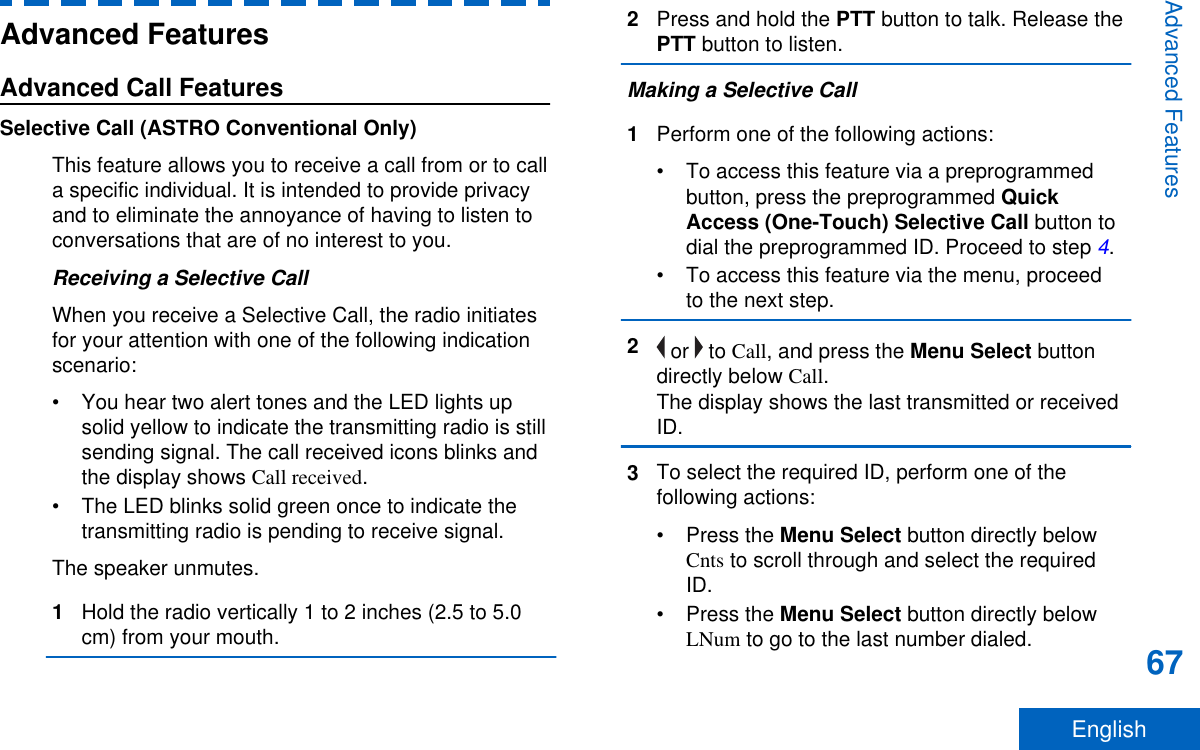
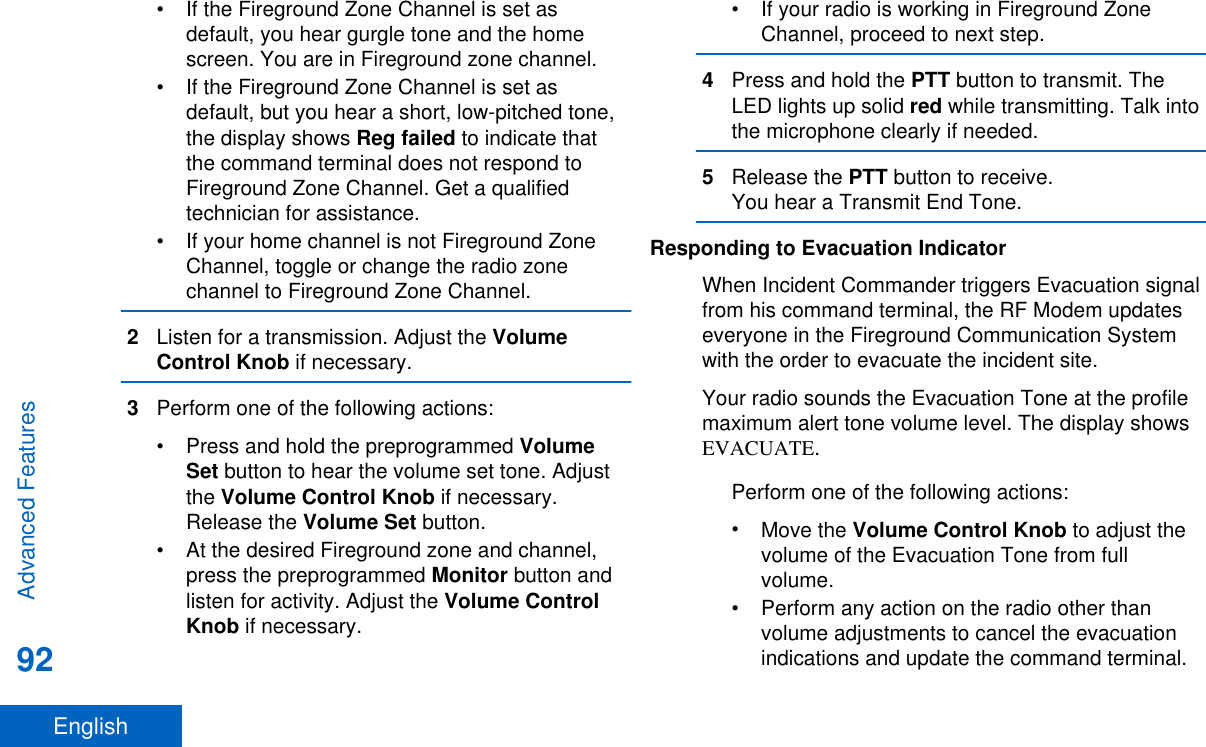
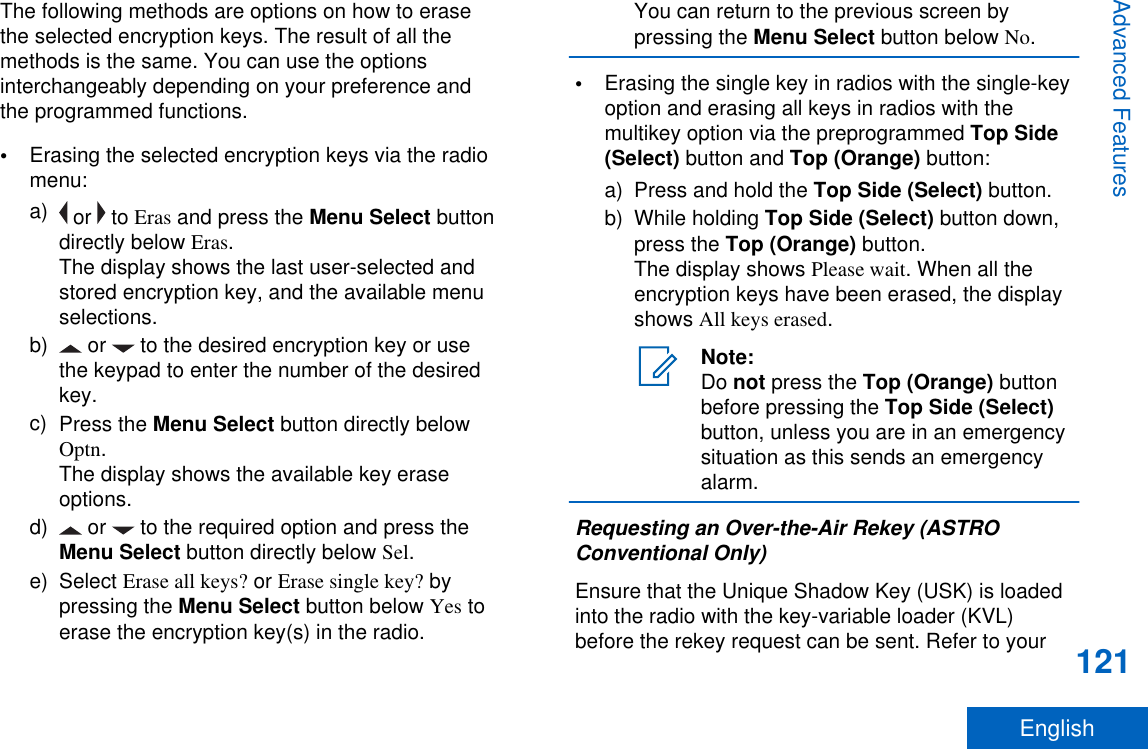
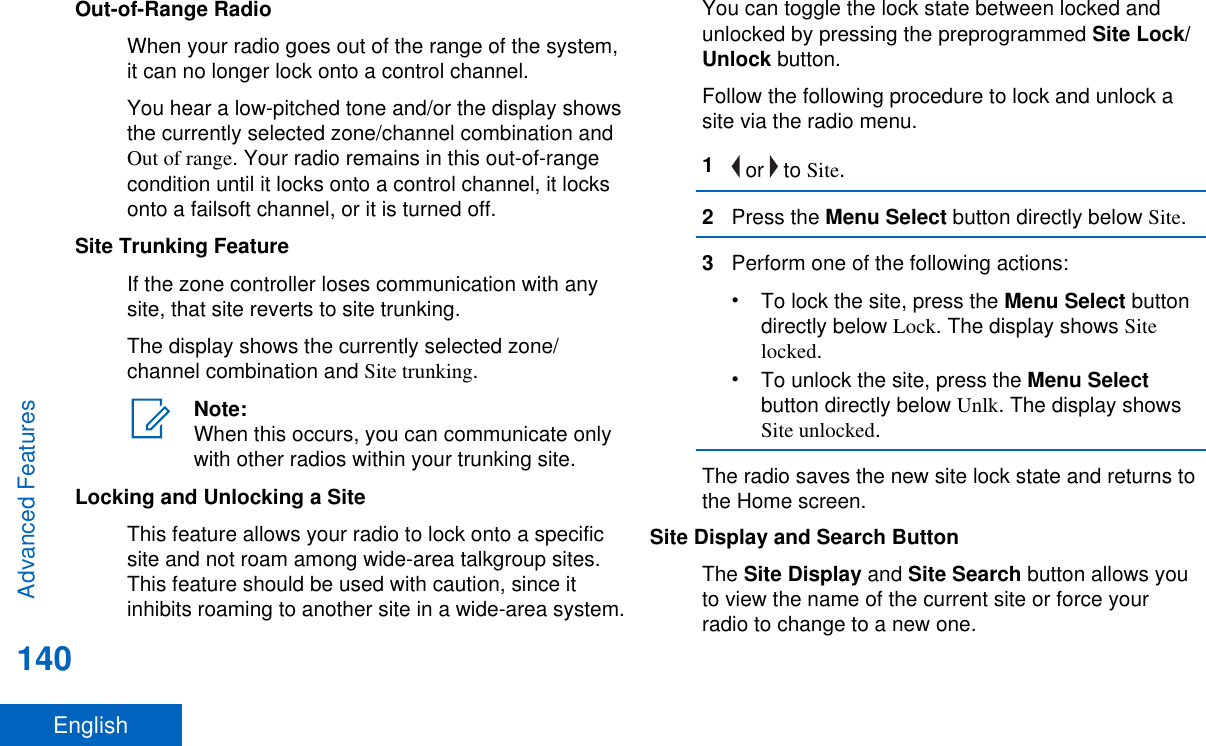
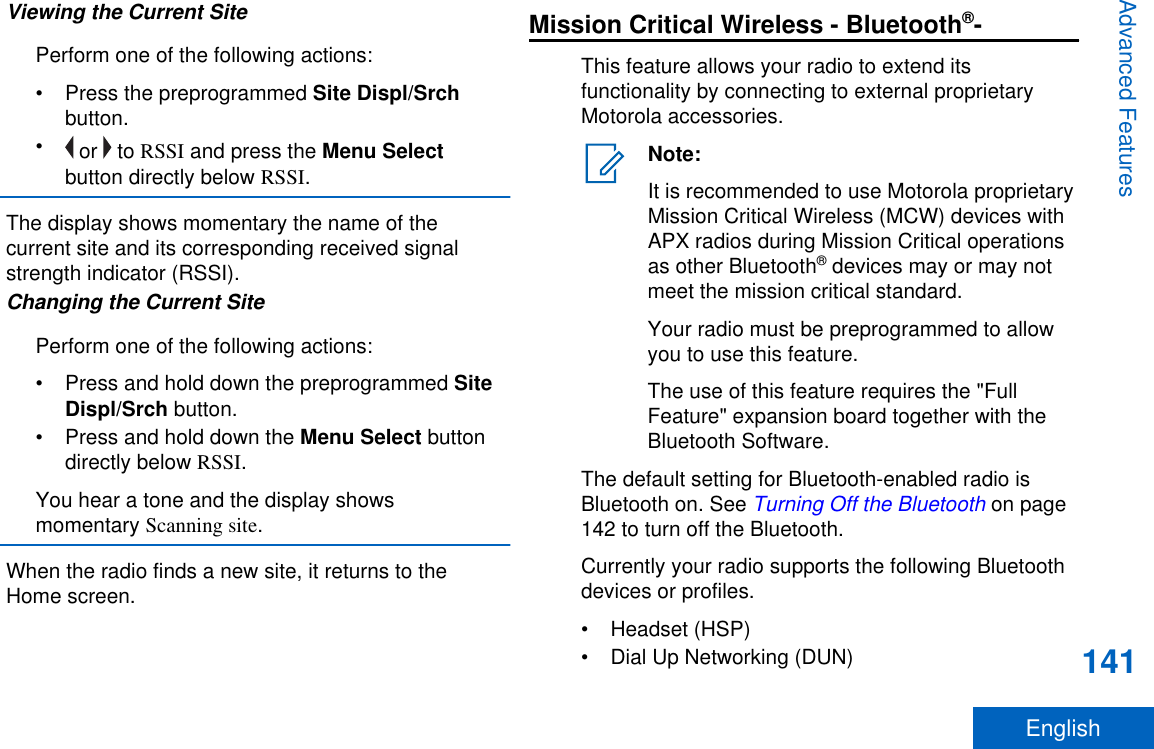
![Identifying Radio ControlsRadio Parts and Controls1011121314981234567151617181982021222324251 Antenna2 LED3 Top (Orange) Button[1]4 MicrophoneIdentifying Radio Controls28English](https://usermanual.wiki/Motorola-Solutions/89FT7085.Manual/User-Guide-3022324-Page-30.png)
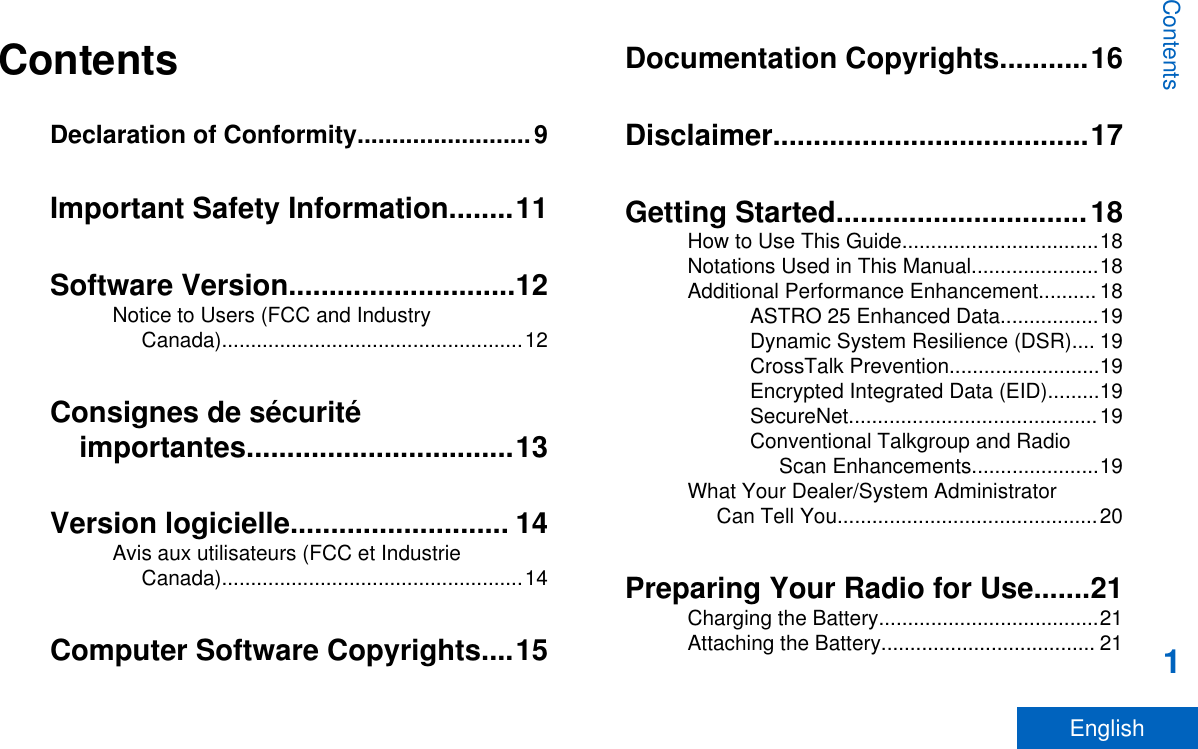
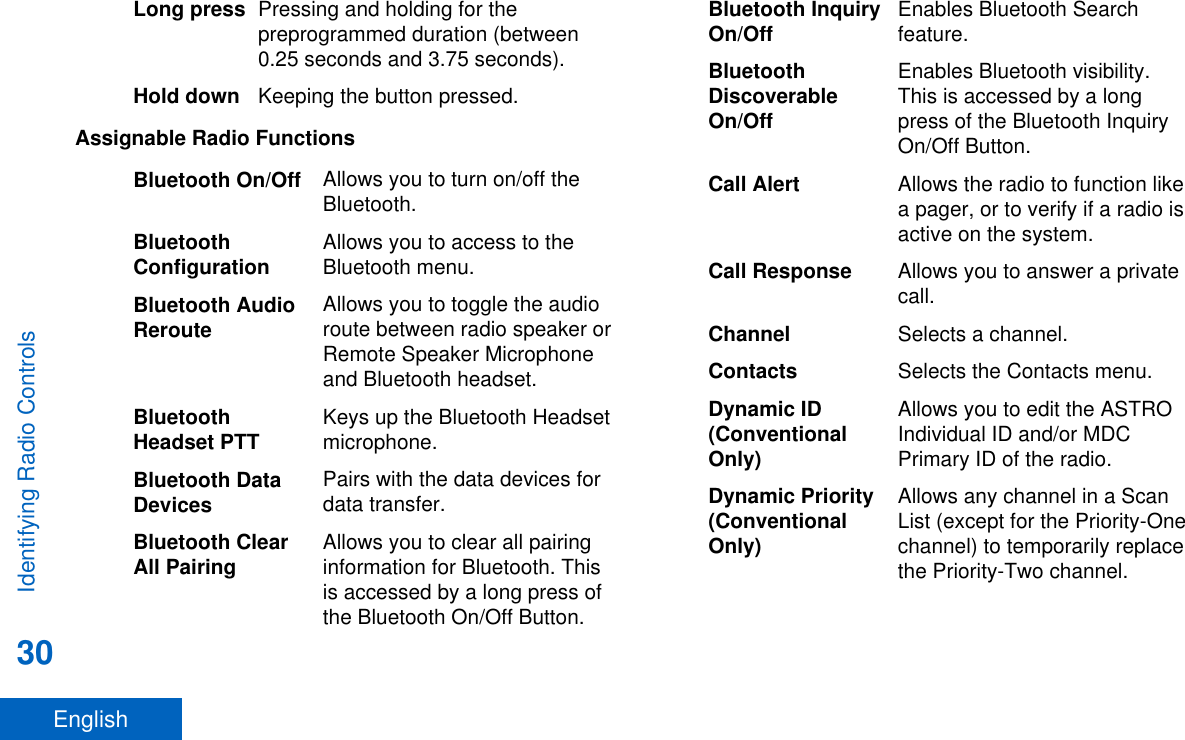
![5 Accessory Connector6 Home Button7 4–Way Navigation Button8 Battery Latch9 Keypad10 Data Feature Button11 Menu Select Buttons12 Main Display13 2–Position Concentric Switch[1]14 3–Position A/B/C Switch[1]15 On/Off/Volume Control Knob16 Top Side (Select) button[1]17 Push-to-Talk (PTT) Button18 Side Button 1[1]19 Side button 2[1]20 Battery21 Bluetooth Pairing Location Indicator22 Main Speaker23 Microphone24 Top Display25 16–Position Select Knob[1]Programmable FeaturesAny reference in this manual to controls that arepreprogrammed means that a qualified radiotechnician must use the radio programming softwareto assign a feature to a control.Your dealer can program the programmable buttonsas shortcuts to radio functions or preset channels/groups depending on the duration of a button press:Press Pressing and releasing rapidly.1These radio controls/buttons are programmable.Identifying Radio Controls29English](https://usermanual.wiki/Motorola-Solutions/89FT7085.Manual/User-Guide-3022324-Page-31.png)
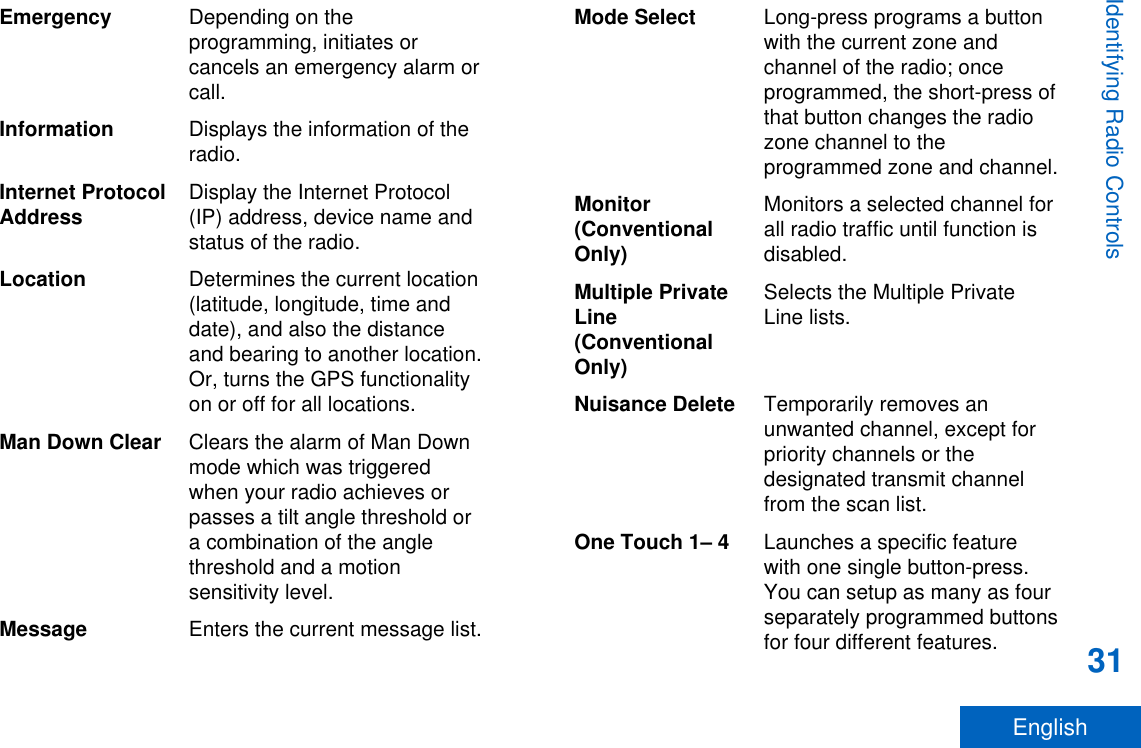

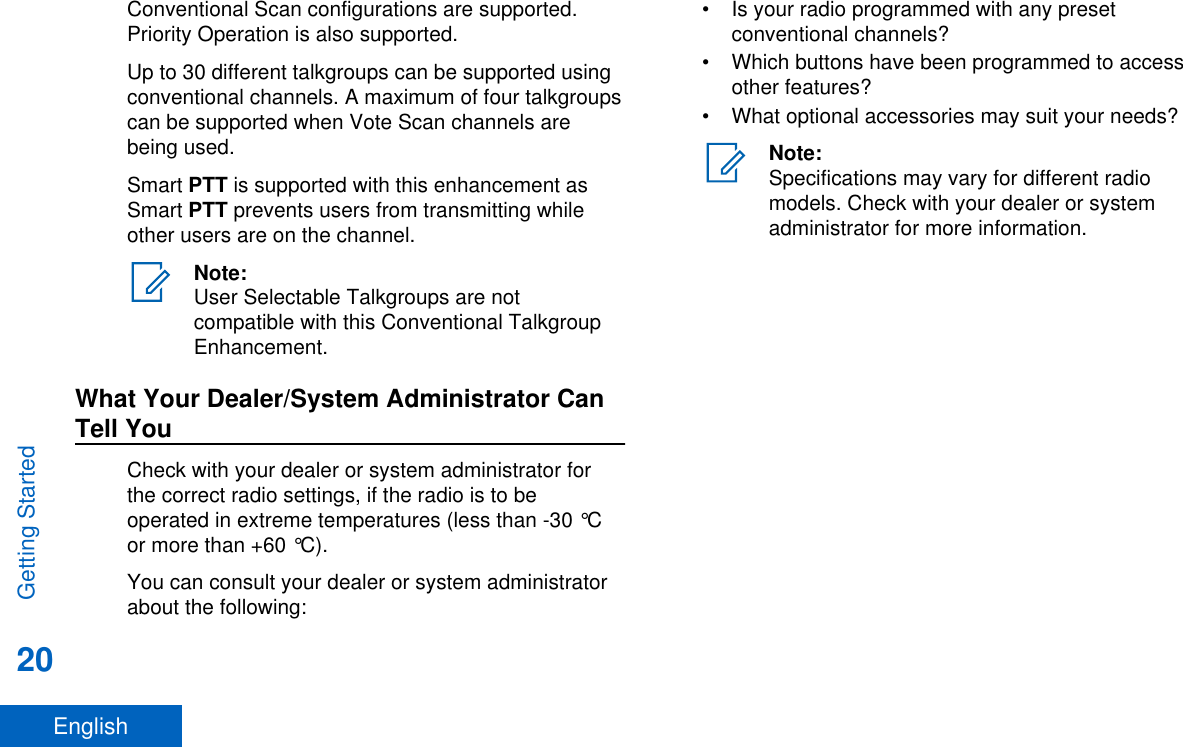
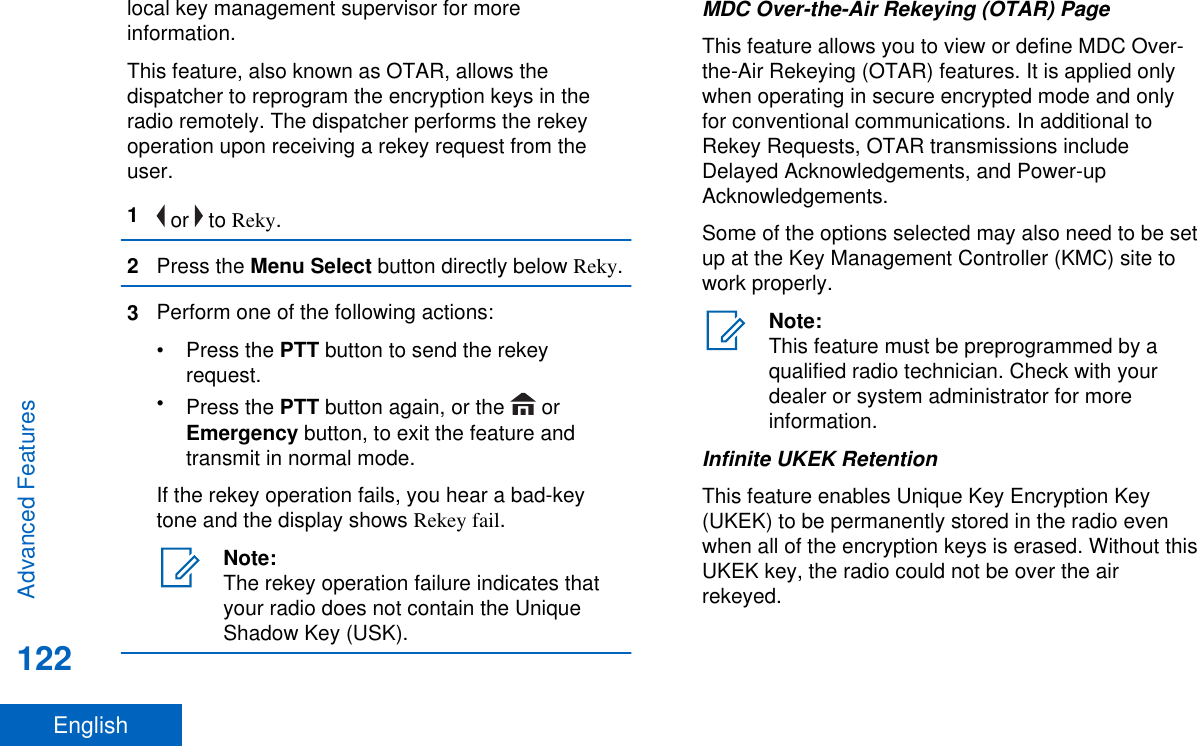
![SelectDisabled Select-disabled radios cannot changechannels while dynamically regrouped.The dispatcher has forced the radio toremain on the dynamic-regroupingchannel.The Scan or Private Call feature cannot be selectedwhile your radio is Select Disabled.Dynamic Zone Programming (DZP)Note:Your radio must be preprogrammed to allowyou to use this feature. This feature works onthe condition at least one zone in the radiomust be a non-dynamic zone.This feature provides one or more Dynamic Zones tostore the frequent used channels be it conventional ortrunking. These dynamic channels are saved frompre-existing (non-dynamic) channels in the radio. Thissaves the time and effort from the regular navigationaround the working zones and channels. User canalso delete or update the list in the Dynamic Zone.Entering the Dynamic Zone to Select a DynamicChannel1 or to Zone then press the Menu Select buttondirectly below Zone.The display shows the Zone screen.2 or to <# Dynamic Zone Channels>.[2]3Perform one of the following actions:•Press the Menu Select button below Sel toselect.•Press the Menu Select button below Exit toexit.If you have selected one of the Dynamic ZoneChannels list, the display returns to Home screenwith the selected <# Dynamic Zone Channels>shown on the screen.[2]If you have selected Exit without selecting anyDynamic Zone Channels list, the display returns toHome screen without any changes.2# indicates number of the channel on the 16-Position Switch which are numbered from 1 to 16.Advanced Features71English](https://usermanual.wiki/Motorola-Solutions/89FT7085.Manual/User-Guide-3022324-Page-73.png)
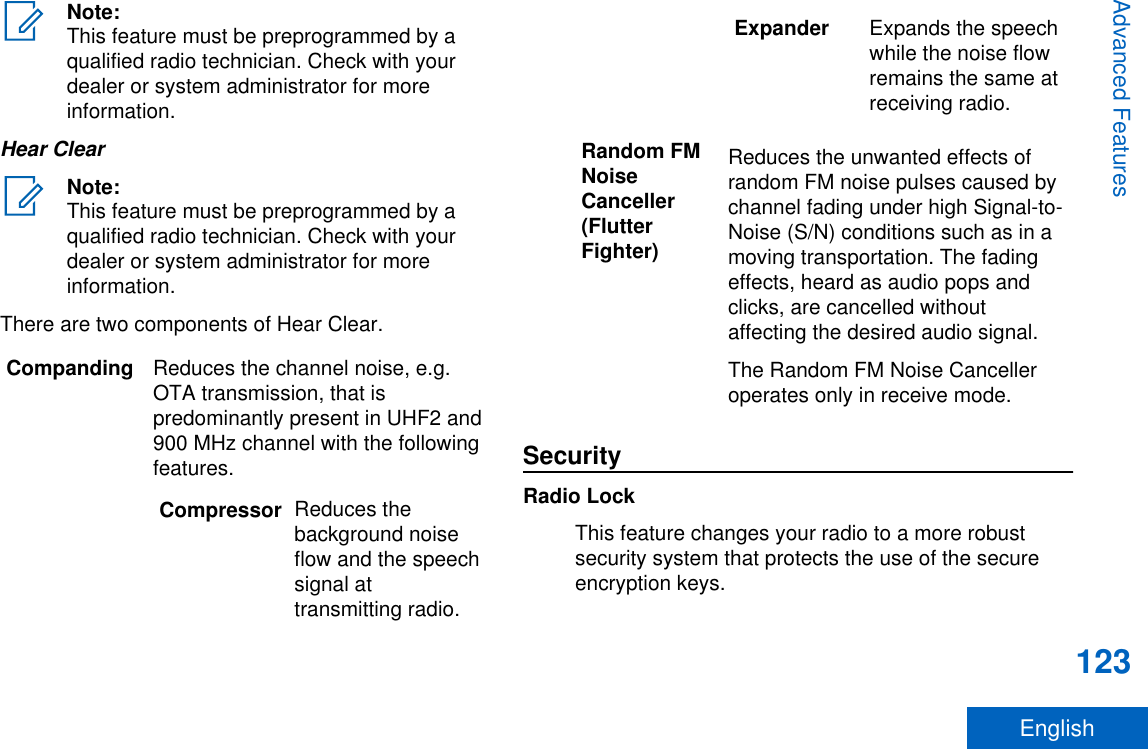
![If the call reaches the maximum ring time, the callends.Adding a New Contact Entry1 or to Cnts and press the Menu Select buttondirectly below Cnts.The entries are alphabetically sorted.2 or to [New Contact] and press the MenuSelect button directly below Sel.3 or to Name and press the Menu Selectbutton directly below Edit.The display shows Edit name and a blinking cursorappears.4Use the keypad to enter the name and press theMenu Select button directly below Ok once youhave entered the name.To cancel this operation, press the Menu Selectbutton directly below Cncl to return to the previousscreen.5 or to [Add Number] and press the MenuSelect button directly below Sel.6 or to Number 1 and press the Menu Selectbutton directly below Edit.The display shows Edit Number 1 and a blinkingcursor appears.7Use the keypad to enter the number and pressthe Menu Select button directly below Ok onceyou have entered the number.To cancel this operation, press the Menu Selectbutton directly below Cncl to return to the previousscreen.8Perform one of the following actions per theinformation you need to add to current name:• or to Type 1 and press the Menu Selectbutton directly below Edit. or to the required mode and press theMenu Select button directly below Ok.• Repeat Steps 6 through 7 to enter or edit theexisitng system IDs.• Repeat Steps 5 through 7 to add a newnumber.9Press the Menu Select button directly below Doneonce you have finished.Advanced Features75English](https://usermanual.wiki/Motorola-Solutions/89FT7085.Manual/User-Guide-3022324-Page-77.png)
![• or to [ID Entry] and press the MenuSelect button directly below Edit to enter ID. Ablinking cursor appears on the screen. Use thekeypad to type or edit a user name. Press theMenu Select button directly below Ok tosubmit.• or to scroll through the list of predefineduser names. Press the Menu Select buttondirectly below Sel to select the predefined username.• Press and hold or to scroll through thelist of predefined user names at a fast scrollrate. Press the Menu Select button directlybelow Sel to select the predefined user name.If the ID is invalid, the display shows momentaryInvalid ID.3Enter your Personal Identification Number (PIN)number.4Press the Menu Select button directly below Logn.One of the following scenarios occurs:• In ARS Server Mode, the display shows theUser Login Indicator icon, the ID, and Inprogress, with Cncl.• In ARS Non-Server Mode, the display showsthe User Login Indicator icon, the ID, andLogged in, with Logt and Exit.• In non-ARS enabled mode, the display showsOffline, with Logt and Exit.One of the following scenarios occurs:• If the user name is invalid, login fails and the userlogin failure indicator (IP indicator) icon blinks. Thedisplay also shows momentary Login failed.• If the PIN is invalid, login fails and the user loginfailure indicator (IP indicator) icon blinks. Thedisplay also shows momentary Login failed.• Wait for the logged in confirmation screen. If thelogin process is successful, the display shows thesuccessful user login indicator (IP indicator) iconand Logged in, with Logt and Exit.Note:To cancel the login process and return to theinitial user login screen, press the MenuSelect button directly below Cncl.Logging OutWhen you have logged in or you are using Offlinemode, you can log out.Advanced Features100English](https://usermanual.wiki/Motorola-Solutions/89FT7085.Manual/User-Guide-3022324-Page-102.png)

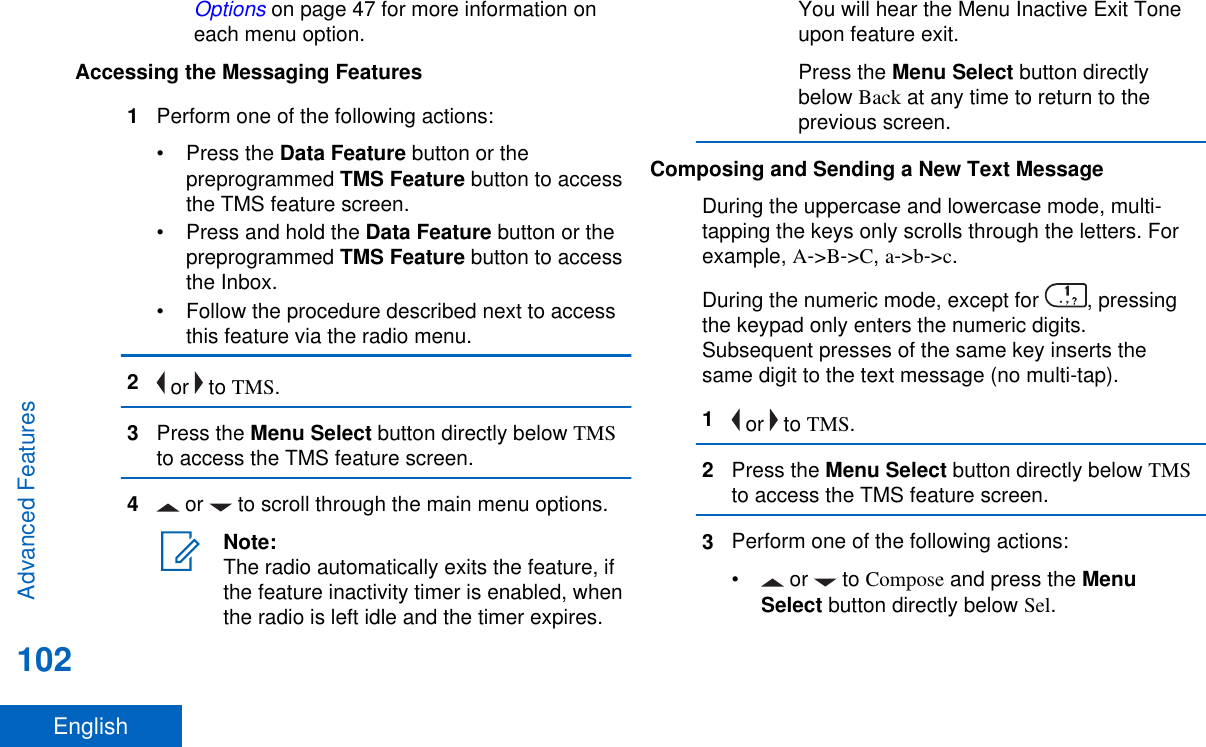
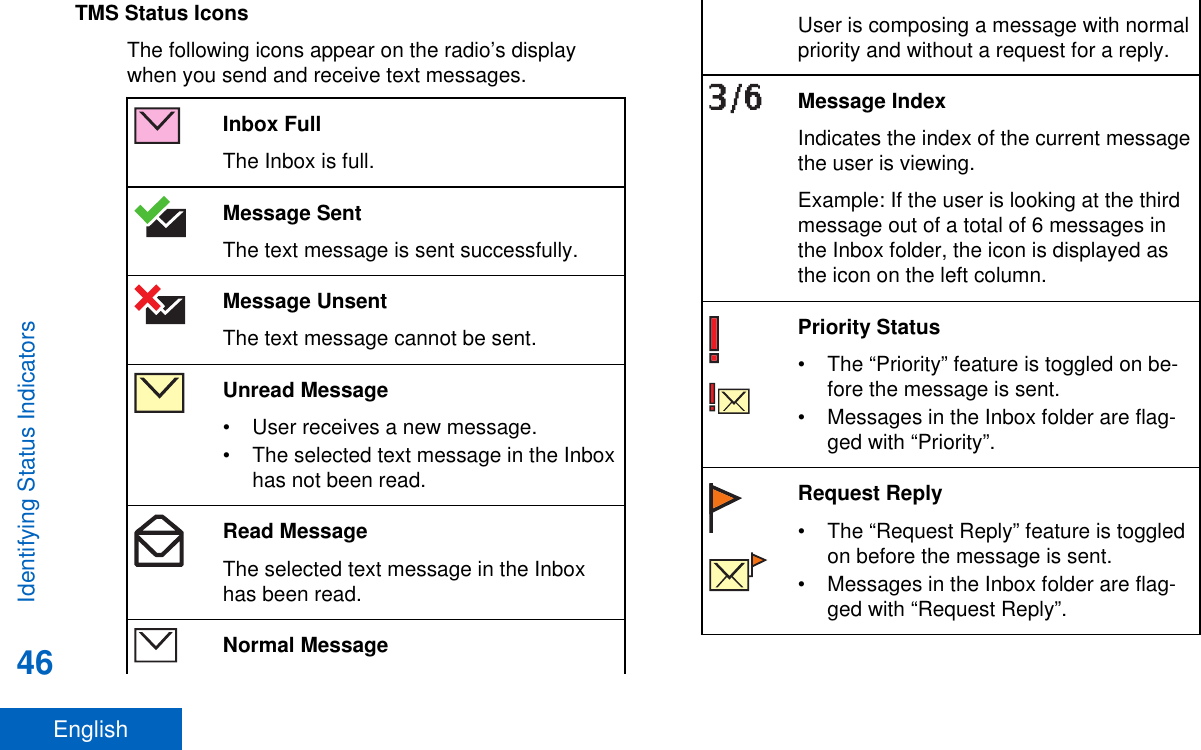
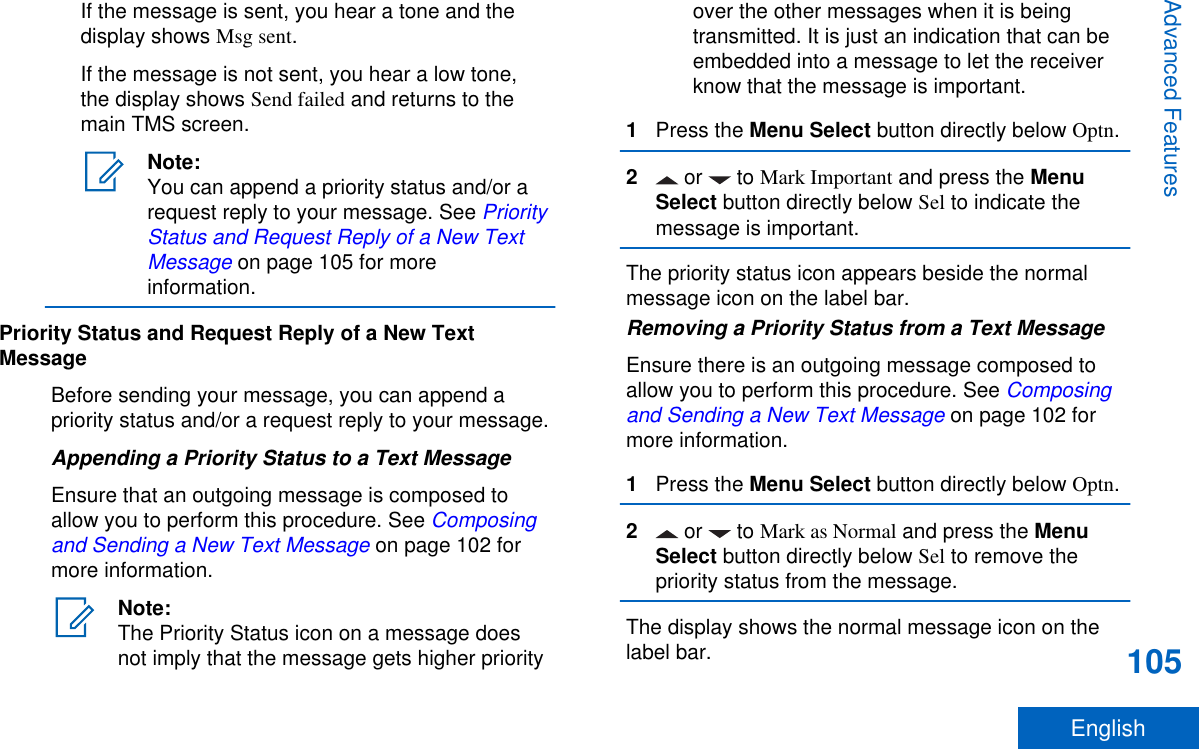
![•Press the Menu Select button directly belowExit to return to the Home screen.4 or to Text Message and press the MenuSelect button directly below Sel to compose a newmessage.A blinking cursor appears on the Compose screen.5Use the keypad to type or edit your message.6Press the Menu Select button directly below Optnonce the message is composed.7 or to Send Message and press the MenuSelect button directly below Sel.8Perform one of the following actions:• or to scroll through the address list andhighlight the required address.• or to [Other Recpnt] and press the MenuSelect button below Edit. When a blinkingcursor appears in the Enter Address screen, usethe keypad to type the address entry.9Press the Menu Select button directly below Sendor press the PTT button to send the message.The display shows the Send Message screen andSending msg.If the message is sent, you hear a tone and thedisplay shows Msg sent.If the message is not sent, you hear a low tone,the display shows Send failed and returns to themain TMS screen.Note:You can append a priority status and/or arequest reply to your message. See PriorityStatus and Request Reply of a New TextMessage on page 105 for moreinformation.You can also select the Save to Draftsoption to save your message in the Draftsfolder to send it at a later time. See Accessing the Drafts Folder on page 109for more information.Sending a Quick Text MessageQuick Text messages are messages that arepredefined and usually consist of messages that areused most frequently.Advanced Features103English](https://usermanual.wiki/Motorola-Solutions/89FT7085.Manual/User-Guide-3022324-Page-105.png)
![Each Quick Text message or Query has a maximumlength of 50 characters. You can select the requiredtext from the Quick Text or Query.1Perform one of the following actions:• To access this feature via a preprogrammedbutton, press the preprogrammed Quick Textbutton and proceed to Step 4.• To access this feature via the menu, proceedto the next step.2 or to TMS and press the Menu Select buttondirectly below TMS to access the TMS featurescreen.3Perform one of the following actions:• or to Compose and press the MenuSelect button directly below Sel.•Press the Menu Select button directly belowExit to return to the Home screen.4 or to Quick Text and press the Menu Selectbutton directly below Sel for a predefinedmessage.5 or to scroll through the list of messages andpress the Menu Select button directly below Sel toselect the required message.The message appears on the Compose screen,with a blinking cursor at the end of it. Use thekeypad to edit the message, if required.6Press the Menu Select button directly below Optn.7 or to Send Message and press the MenuSelect button directly below Sel.8Perform one of the following actions:• or to scroll through the address list andhighlight the required address.• or to [Other Recpnt] and press the MenuSelect button below Edit. When a blinkingcursor appears on the Enter Address screen.Use the keypad to type the address entry.9Press the Menu Select button directly below Sendor press the PTT button to send the message.The display shows the Send Message screen andSending msg.Advanced Features104English](https://usermanual.wiki/Motorola-Solutions/89FT7085.Manual/User-Guide-3022324-Page-106.png)
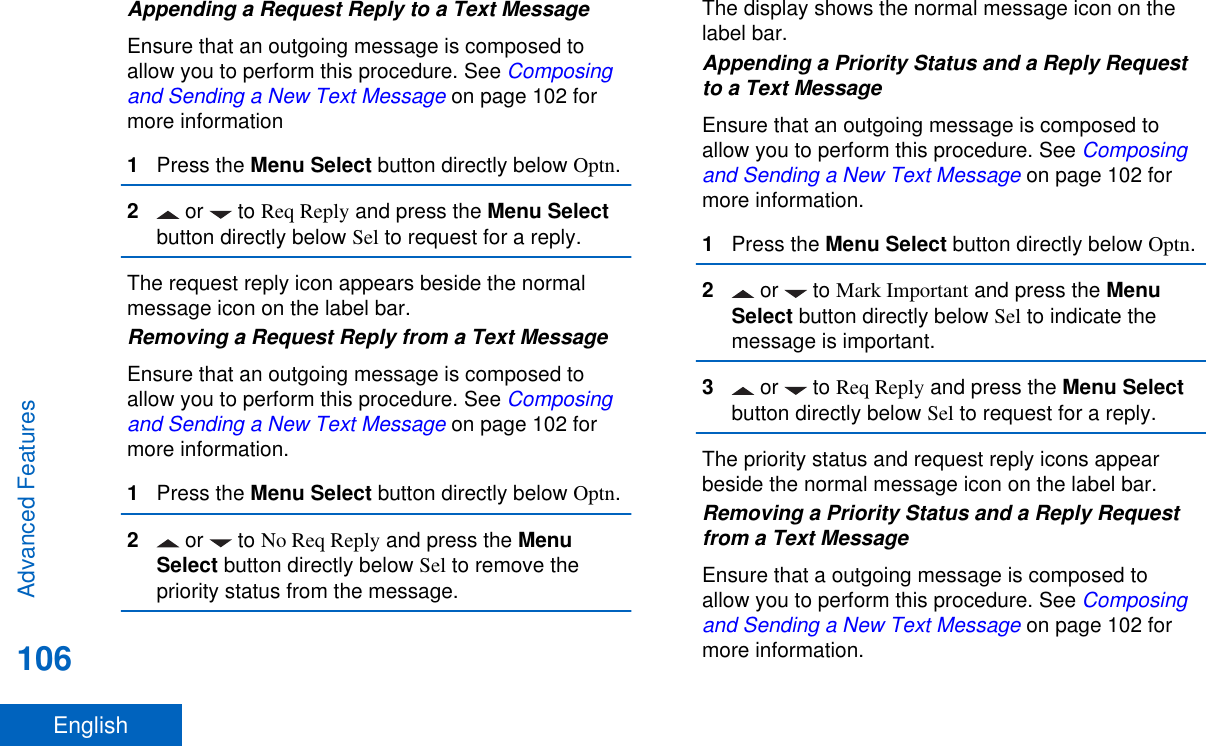
![3Perform one of the following actions:• or to scroll through the address list andhighlight the required address.• or to [Other Recpnt] and press the MenuSelect button below Edit. When a blinkingcursor appears in the Enter Address screen, usethe keypad to type the address entry.4Press the Menu Select button below Send or thePTT button to send the message.The display shows the Send Message screen andSending msg.Note:Press the Menu Select button directlybelow Back at any time to return to theprevious screen.You can append a priority status and/or arequest reply to your message. See PriorityStatus and Request Reply of a New TextMessage on page 105 for moreinformation.Deleting a Text Message1From the Inbox, Draft, or Sent screen, or toscroll through the messages.2Press the Menu Select button directly below Delto delete the current message.Deleting All Text Messages1Perform one of the following actions:•Press the Data Feature button or thepreprogrammed TMS Feature button to accessthe Messaging feature screen.• or to TMS and press the Menu Selectbutton directly below TMS to access the TMSfeature screen.2 or to Inbox or Sent then press the MenuSelect button below Clr to select all messages inthe selected folder.The display shows Del All?.3Perform one of the following actions:Advanced Features111English](https://usermanual.wiki/Motorola-Solutions/89FT7085.Manual/User-Guide-3022324-Page-113.png)
![You can upgrade the Single Factor session to a Two-Factor session by entering the Two-Factor passcodeonly. After an interruption (for example mode change,DSR switch over, power loss), the radio is capable ofrestoring the active session in its current state as longas the session is active in the server.Note:Power loss and power down are differentactivities, power down occurs when the userintentionally powers off the radio, power loss iswhen the battery dies or is removed from theunit.Two-Factor AuthenticationTwo-Factor Authentication is an extension of existingARS and TMS operation. This feature allows you toauthenticate yourself with a username, unit ID,password and passcode.The purpose of this feature is to allow the sender of atext message to address a specific user of the radio,so the message is delivered to the user, not to theradio which may have any user using it at the time.Secondly, this feature supports query authenticationrequirements so the query service knows which useroriginated a query.You can still send text messages without logging in asa user. The user login feature only enables therecipient of your message to identify you as thesender by assigning a username to your message.Note:A predefined username that is set more thanthe maximum allowed characters is an invalidname.Logging in via the Two-Factor Authentication1Perform one of the following actions:•Press the preprogrammed User Login button.• or to User, and press the Menu Selectbutton directly below User.The display shows the User Login screen.2Perform one of the following actions:• or to [ID Entry] and press the MenuSelect button directly below Edit. A blinkingcursor appears. Use the keypad to type or edita username. Press the Menu Select buttondirectly below Ok to submit.• or to scroll through the list of predefinedusernames. Press the Menu Select buttonAdvanced Features113English](https://usermanual.wiki/Motorola-Solutions/89FT7085.Manual/User-Guide-3022324-Page-115.png)
![directly below Sel to select the predefinedusername.• Press and hold or to scroll through thelist of predefined usernames at a fast scrollrate. Press the Menu Select button directlybelow Sel to select the predefined username.If the selected predefined username has morethan the maximum allowed characters, or aninvalid character in it, the display showsmomentary Invalid ID.3For radio enabled with Unit ID, perform one of thefollowing actions:• or to [UnitID Entry] and press the MenuSelect button directly below Edit. A blinkingcursor appears. Use the keypad to type or edita Unit ID. Press the Menu Select buttondirectly below Ok to submit.• or to scroll through the list of predefinedUnit IDs. Press the Menu Select button directlybelow Sel to select the predefined Unit ID.• Press and hold or to scroll through thelist of predefined Unit IDs at a fast scroll rate.Press the Menu Select button directly belowSel to select the predefined Unit ID.If the selected predefined Unit ID has more thanthe maximum allowed characters, or an invalidcharacter in it, the display shows momentaryInvalid UnitID.4Enter your password when you see a blinkingcursor.5Press the Menu Select button directly below Lognor Ok.If only one-factor is enabled, the display shows 1Flogged at the status. The login operation iscomplete.If login fails, the display shows momentary Loginfailed. The display returns to User Login screen.6For radio enabled with two-factor login, enter yourpasscode when you see a blinking cursor.7Press the Menu Select button directly below Logn.The display shows In progress.If the login fails, the display shows momentary 2F pscdfailed. Press the Menu Select button directly belowPscd to re-enter passcode. If successful, the displayshows User Login screen with 2F logged in status toindicate Two-Factor Authentication complete.Advanced Features114English](https://usermanual.wiki/Motorola-Solutions/89FT7085.Manual/User-Guide-3022324-Page-116.png)
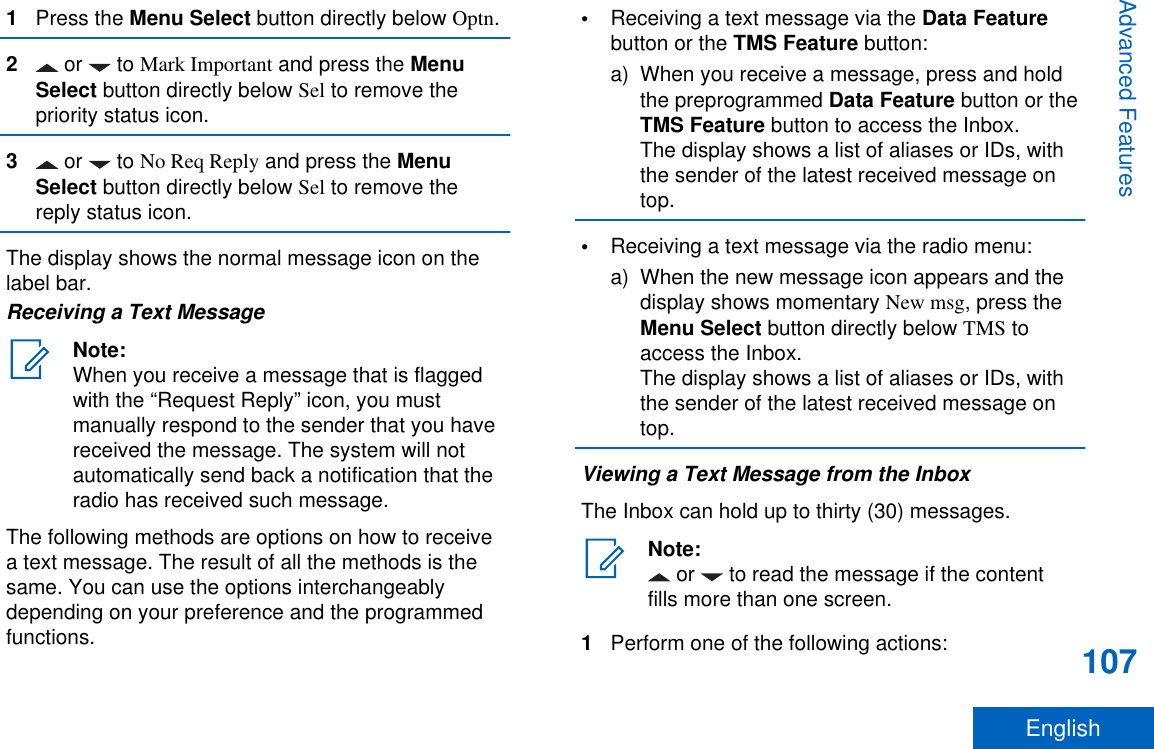
![• To access this feature via the menu, proceedto the next step.2 or to TMS and press the Menu Select buttondirectly below TMS to access the TMS featurescreen.3Perform one of the following actions:• or to Compose and press the MenuSelect button directly below Sel.•Press the Menu Select button directly belowExit to return to the Home screen.4 or to Query and press the Menu Selectbutton directly below Sel for a predefinedmessage.5 or to scroll through the list of messages andpress the Menu Select button directly below Sel toselect the required message.The message appears on the Compose screen,with a blinking cursor at the end of it.6Use the keypad to edit the message, if required.7Press the Menu Select button directly below Optn.8 or to Send Message and press the MenuSelect button directly below Sel.9Perform one of the following actions:• or to scroll through the address list andhighlight the required address.• or to [Other Recpnt] and press the MenuSelect button below Edit. A blinking cursorappears on the Enter Address screen. Use thekeypad to type the address entry.10 Press the Menu Select button below Send or thePTT button to send the message.The display shows the Send Message screen andSending msg.If the message is sent, you hear a tone and thedisplay shows Msg sent.If the message is not sent, you hear a low tone,the display shows Send failed and returns to themain TMS screen.Note:The server responds to your query with therequired report in text messages.Advanced Features116English](https://usermanual.wiki/Motorola-Solutions/89FT7085.Manual/User-Guide-3022324-Page-118.png)

![1Press the Menu Select button directly below Optn.2Perform one of the following actions:• or to Save as Waypt and press the MenuSelect button directly below Sel.• or to Save as Home and press the MenuSelect button directly below Sel and proceed tostep 5.• or to Save as Dest. and press the MenuSelect button directly below Sel and proceed tostep 5.A blinking cursor appears in the screen.3Use the keypad to edit the auto-generatedwaypoint, if required, or press the Menu Selectbutton directly below Cncl to return to the Locationmain screen.4Press the Menu Select button directly below Okonce you are done.One of the following scenarios occur:• The display shows Current loc saved as<Waypoint name>.• The display shows Current loc saved as [Home].• The display shows Current loc saved as[Destination].5To return to the Home screen, press , the PTTbutton, the preprogrammed GPS button or theMenu Select button directly below Exit.Viewing a Saved WaypointEnsure your radio shows the current location on thescreen.1Press the Menu Select button directly below Optn.2 or to Waypoints and press the Menu Selectbutton directly below Sel.The display shows a list of waypoints.3Perform one of the following actions:• or to scroll through the list.• or to select a waypoint to view thelocation information in full.4Press the Menu Select button directly below Optn.5To view the MGRS or latitude/longitude location,time and date of the selected waypoint, or toAdvanced Features132English](https://usermanual.wiki/Motorola-Solutions/89FT7085.Manual/User-Guide-3022324-Page-134.png)
![2 or to Waypoints and press the Menu Selectbutton directly below Sel.The display shows a list of waypoints.3Perform one of the following actions:• or to [Home] and press the Menu Selectbutton directly below Optn.• or to [Destination] and press the MenuSelect button directly below Optn.4 or to Edit location and press the MenuSelect button directly below Sel.The first number blinks.5Utilize the following control buttons to select thenumber/coordinates if required, then press theMenu Select button directly below Edit to changethe number/coordinates.•Press to move to the previous number/coordinates.•Press to move to the next number/coordinates.A blinking cursor appears in the Edit Locationscreen.6Utilize the following control buttons or menu tochange the number/coordinates if required thenpress the Menu Select button directly below Okonce.•Press to move one space to the left.•Press to move one space to the right.•Press the Menu Select button directly belowDel to delete any unwanted characters.•Press the Menu Select button directly belowCncl to return to the previous screen7Press the Menu Select button directly below Okonce complete setting up the new Home orDestination.One of the following scenarios occurs:• The display shows [Home] Updated and theradio returns to the Waypoints main screen.• The display shows [Destination] Updated and theradio returns to the Waypoints main screen.Deleting a Single Saved WaypointEnsure your radio shows the current location on thescreen.Advanced Features134English](https://usermanual.wiki/Motorola-Solutions/89FT7085.Manual/User-Guide-3022324-Page-136.png)


![The display shows the Site Alert screen.3 or to Start Alert and press the Menu Selectbutton directly below Sel.The display shows the Select Site screen.4 or to [SiteID Entry] to send alert via manualentry. Press the Menu Select button directlybelow Edit.The display shows the Enter SiteID screen.5Key in the desired Site ID and press the MenuSelect button directly below Ok.If a correct Site ID is entered, the display showsthe Select Alert screen.If a wrong Site ID is entered, the display showsInvalid ID and prompts to enter the Site ID again.6 or to select the desired Alert Alias and pressthe Menu Select button directly below Send.The display shows Sending req.If radio is out of range, roaming to a foreignsystem or in a failsoft situation, the display showsReq failed.If the request is successful, the display shows Reqsuccessful.If the site is not available, the display shows <SiteID> not available.If the site does not exist, the display shows <SiteID>does not exist.7To return to the Home screen, press the MenuSelect button directly below Exit.If you are at the site designated to receive this alert,you can hear an alert tone repeated periodically. Thedisplay shows the <Alert Alias> with the intelligentlighting at Home screen.Sending SSA Notification to All Sites1 or to SSA.2Press the Menu Select button directly below SSA.The display shows the Site Alert screen.3 or to Start Alert and press the Menu Selectbutton directly below Sel.The display shows the Select Site screen.Advanced Features160English](https://usermanual.wiki/Motorola-Solutions/89FT7085.Manual/User-Guide-3022324-Page-162.png)
![4 or to [All Sites] and press the Menu Selectbutton directly below Sel.The display shows the Select Alert screen.5 or to select the desired Alert Alias and pressthe Menu Select button directly below Send.The display shows Sending req.If radio is out of range, roaming to a foreignsystem or in a failsoft situation, the display showsReq failed.If the request is successful, the display shows Reqsuccessful.If one or more sites are not available, the displayshows Not all sites available. Repeat 3.6To return to the Home screen, press the MenuSelect button directly below Exit.If you are at the site designated to receive this alert,you can hear an alert tone repeated periodically. Thedisplay shows the <Alert Alias> with the intelligentlighting at Home screen.Sending SSA Notification to All Available Sites1 or to SSA.2Press the Menu Select button directly below SSA.The display shows the Site Alert screen.3 or to Start Alert and press the Menu Selectbutton directly below Sel.The display shows the Select Site screen.4 or to [All Avail] and press the Menu Selectbutton directly below Sel.The display shows the Select Alert screen.5 or to select the desired Alert Alias and pressthe Menu Select button directly below Send.The display shows Sending req.If radio is out of range, roaming to a foreignsystem or in a failsoft situation, the display showsReq failed.If the request is successful, the display shows Reqsuccessful.6To return to the Home screen, press the MenuSelect button directly below Exit.Advanced Features161English](https://usermanual.wiki/Motorola-Solutions/89FT7085.Manual/User-Guide-3022324-Page-163.png)
![If you are at the site designated to receive this alert,you can hear an alert tone repeated periodically. Thedisplay shows the <Alert Alias> with the intelligentlighting at Home screen.Stopping SSA Notification of a Single Site1 or to SSA.2Press the Menu Select button directly below SSA.The display shows the Site Alert screen.3 or to Stop Alert and press the Menu Selectbutton directly below Sel.The display shows the Select Site screen.4 or to select the desired Site Alias and pressthe Menu Select button directly below Send.The display shows Sending req.If radio is out of range, roaming to a foreignsystem or in a failsoft situation, the display showsReq failed.If the request is successful, the display shows Reqsuccessful.If the site is not available, the display shows <SiteAlias> not available.If the site does not exist, the display shows <SiteAlias>does not exist.5To return to the Home screen, press the MenuSelect button directly below Exit.The SSA Alert for the designated site stops.Stopping SSA Notification of a Single Site Via ManualEntry1 or to SSA.2Press the Menu Select button directly below SSA.The display shows the Site Alert screen.3 or to Stop Alert and press the Menu Selectbutton directly below Sel.The display shows the Select Site screen.4 or to [SiteID Entry] and press the MenuSelect button directly below Edit.The display shows the Enter SiteID screen.5Key in the required Site ID and press the MenuSelect button directly below Send.One of the following scenarios occur:Advanced Features162English](https://usermanual.wiki/Motorola-Solutions/89FT7085.Manual/User-Guide-3022324-Page-164.png)
![• If a wrong Site ID is entered, the display showsInvalid ID and prompts to enter the Site IDagain.• If a correct Site ID is entered, the displayshows Sending req.• If the request is successful, the display showsReq successful.• If the single site is not available, the displayshows <Site ID> not available.• If the single site does not exist, the displayshows <Site ID> does not exist.6To return to the Home screen, press the MenuSelect button directly below Exit.The SSA Alert for the designated site stops.Stopping SSA Notification of All Sites1 or to SSA.2Press the Menu Select button directly below SSA.The display shows the Site Alert screen.3 or to Stop Alert and press the Menu Selectbutton directly below Sel.The display shows the Select Site screen.4 or to [All Sites] and press the Menu Selectbutton directly below Send.The display shows Sending req.If radio is out of range, roaming to a foreignsystem or in a failsoft situation, the display showsReq failed.If the request is successful, the display shows Reqsuccessful.If one or more sites are not available, the displayshows Not all sites available. Repeat step 3.5To return to the Home screen, press the MenuSelect button directly below Exit.The SSA Alert for all sites stop.Stopping SSA Notification of All Available Sites1 or to SSA.2Press the Menu Select button directly below SSA.The display shows the Site Alert screen.3 or to Stop Alert and press the Menu Selectbutton directly below Sel.Advanced Features163English](https://usermanual.wiki/Motorola-Solutions/89FT7085.Manual/User-Guide-3022324-Page-165.png)
![The display shows the Select Site screen.4 or to [All Avail] and press the Menu Selectbutton directly below Send.The display shows Sending req.If radio is out of range, roaming to a foreignsystem or in a failsoft situation, the display showsReq failed.If the request is successful, the display shows Reqsuccessful.5To return to the Home screen, press the MenuSelect button directly below Exit.The SSA Alert for all available sites stop.Wi-FiThis feature allows you to turn Wi-Fi® on or off. Wi-Fican be used for wireless programming of the radiowith the Radio Management tool.Note:Wi-Fi Network Name (SSID) for the radio toconnect to must be preprogrammed by aqualified radio technician. Check with yourdealer or system administrator for moreinformationTurning Wi-Fi On or OffThe following methods are options on how to turn Wi-Fi® on or off. The result of all the methods is thesame. You can use the options interchangeablydepending on your preference and the programmedfunctions.•Turning Wi-Fi on or off via the preprogrammedbutton:a) To toggle the Wi-Fi on or off, press thepreprogrammed Wi-Fi button.This button must be preprogrammed by aqualified radio technician. Check with yourdealer or system administrator for moreinformation.•Turning Wi-Fi on or off via the radio menu button:a) or to WiFi and press the Menu Selectbutton directly below WiFi.• If the display shows WiFi Status being Off, pressthe Menu Select button directly below On.Advanced Features164English](https://usermanual.wiki/Motorola-Solutions/89FT7085.Manual/User-Guide-3022324-Page-166.png)
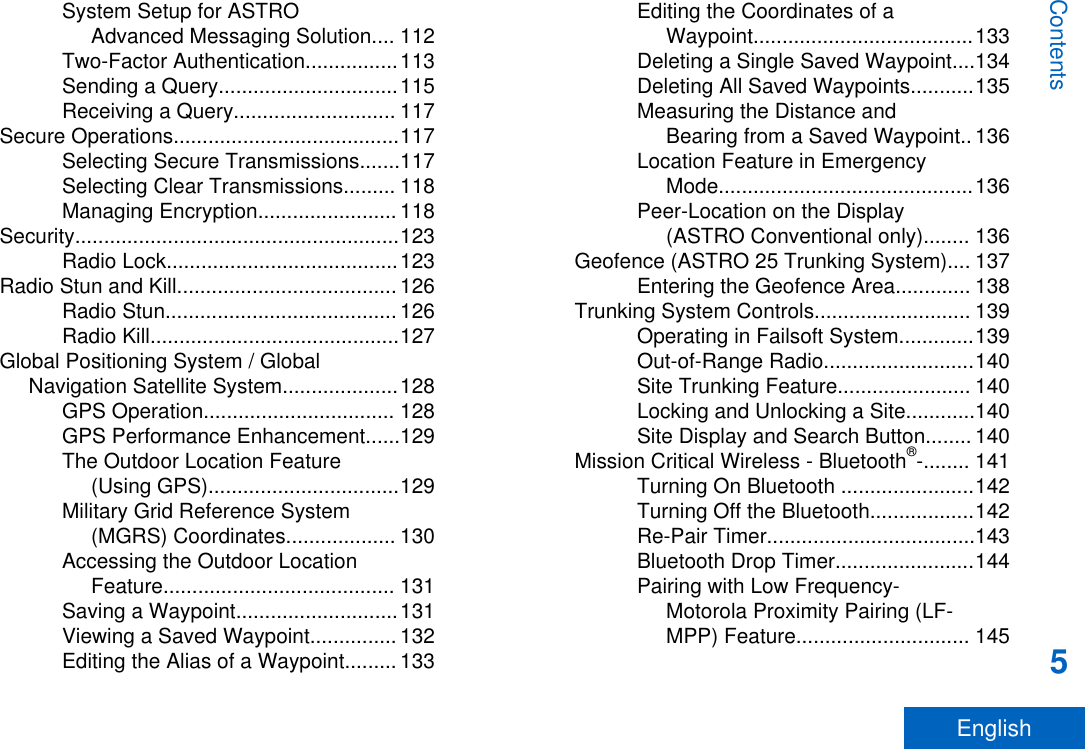
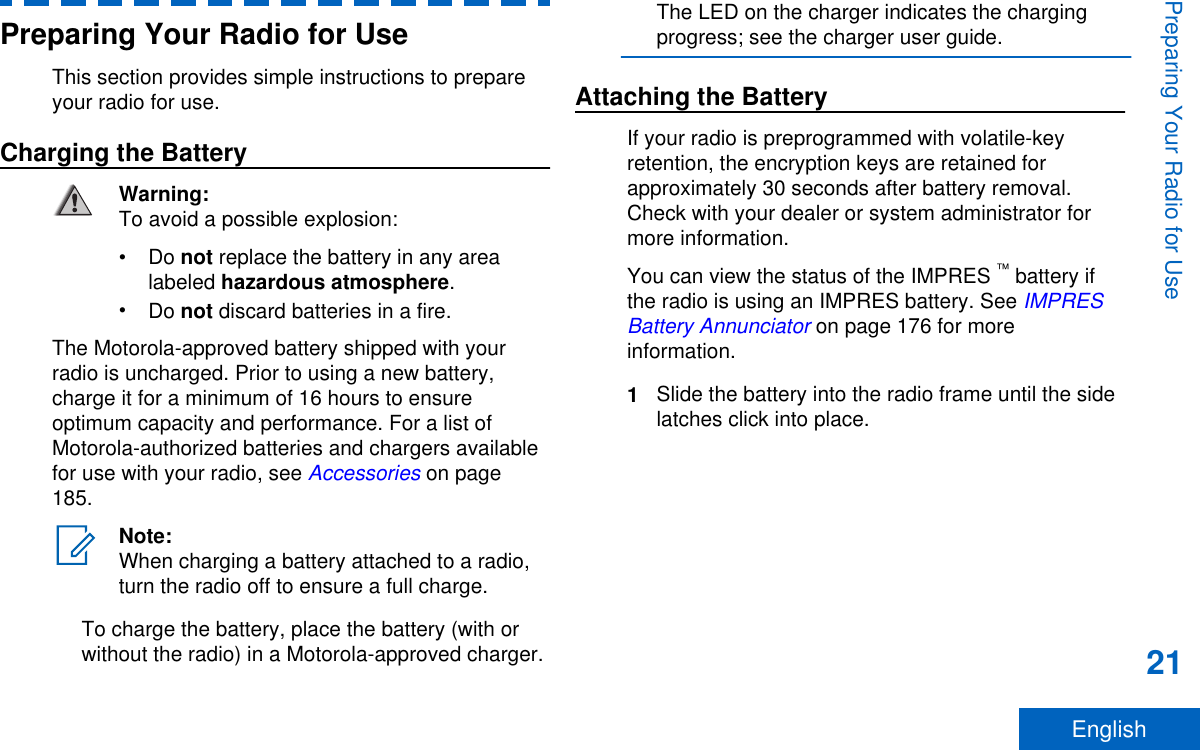
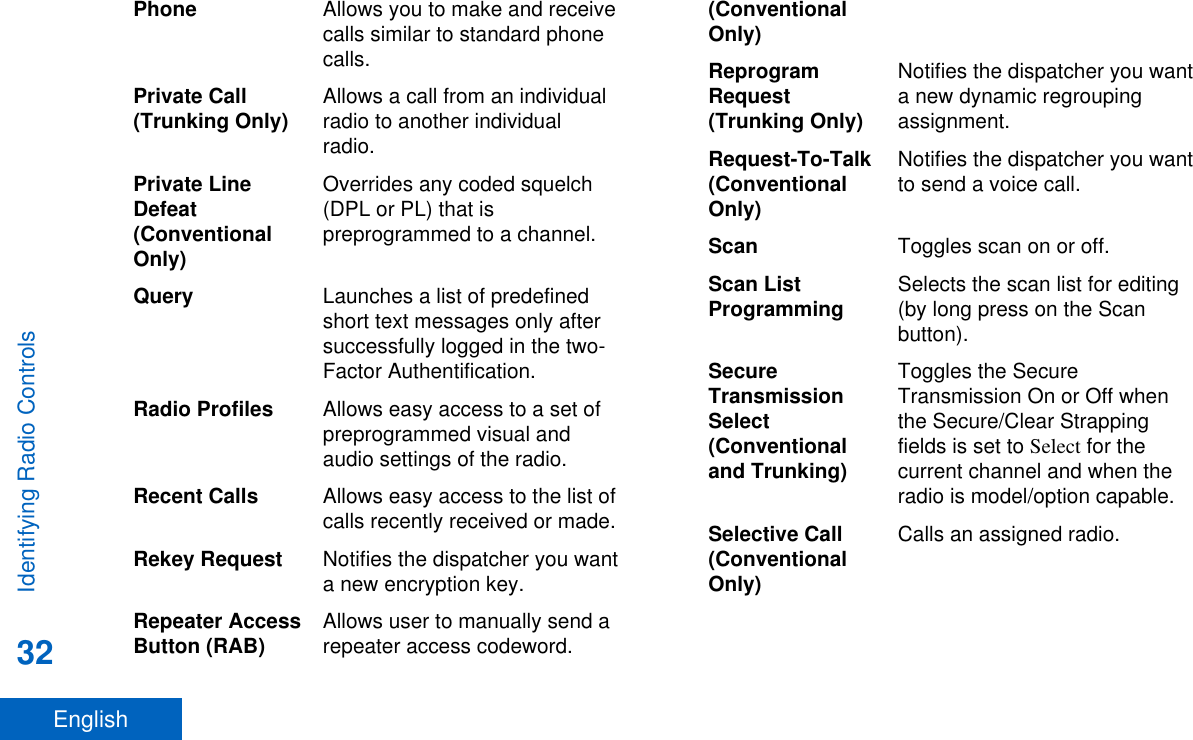
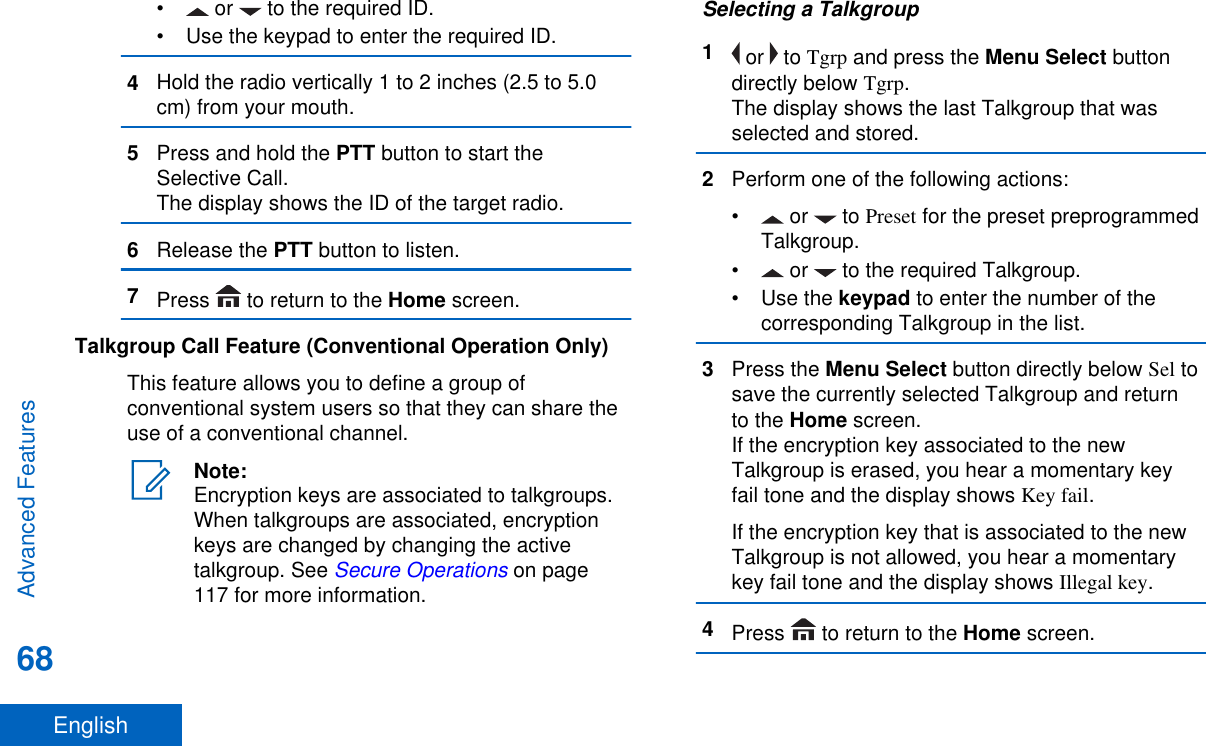
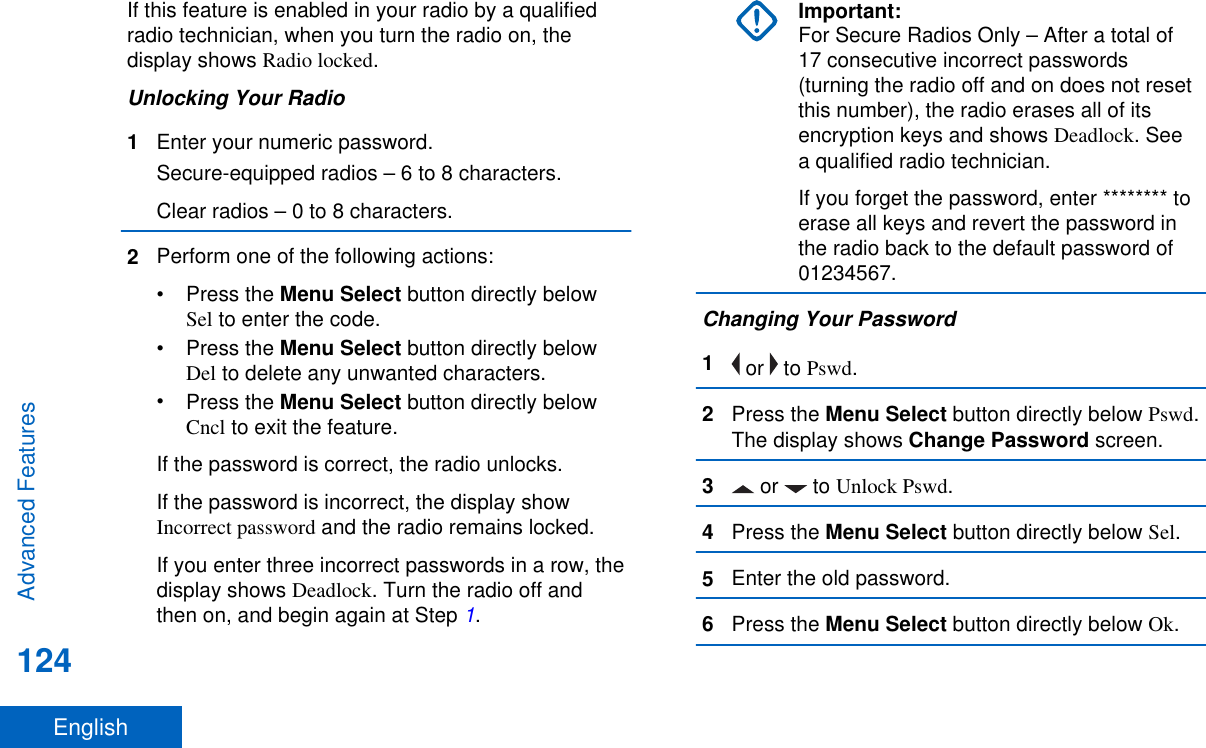
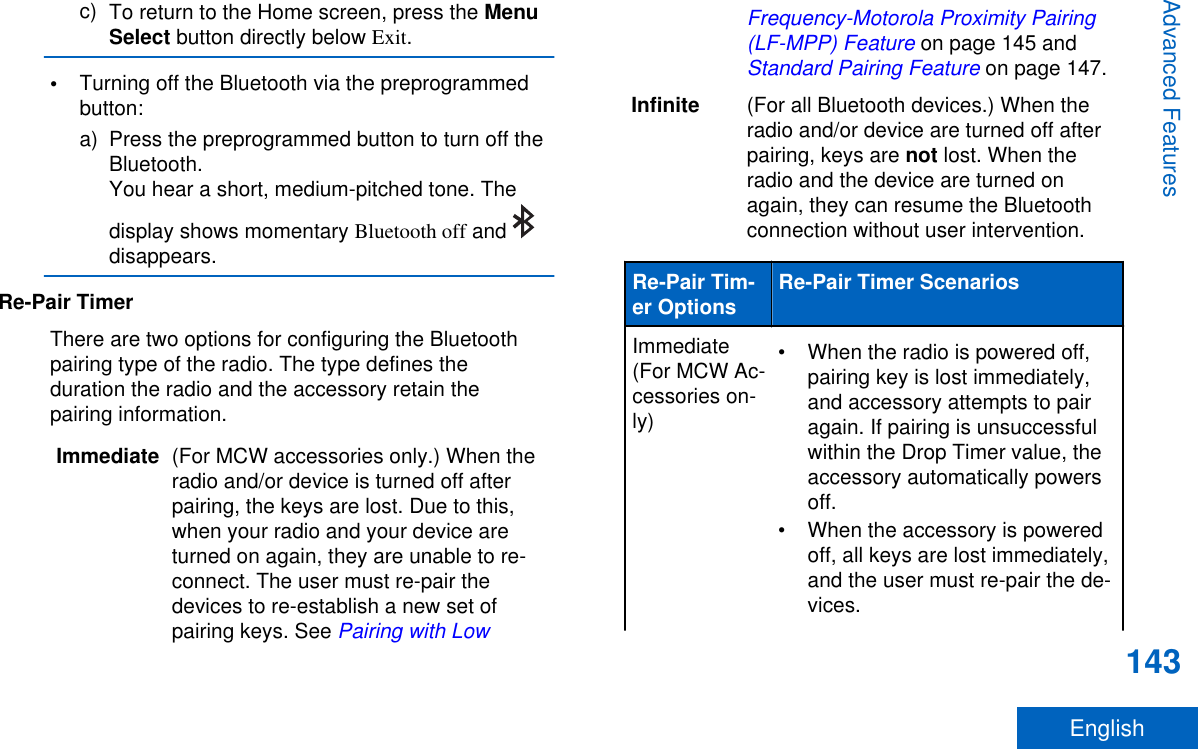
![Radio Service and RepairProper repair and maintenance procedures willassure efficient operation and long life for thisproduct. A Motorola maintenance agreement willprovide expert service to keep this and all othercommunication equipment in perfect operatingcondition. A nationwide service organization isprovided by Motorola to support maintenanceservices. Through its maintenance and installationprogram, Motorola makes available the finest serviceto those desiring reliable, continuous communicationson a contract basis. For a contract service agreement,please contact your nearest Motorola service or salesrepresentative, or an authorized Motorola dealer.Battery CareBattery Charge StatusYour radio can indicate the battery’s charge statusthrough:• the LED and sounds.• the fuel gauge icon on the display.You can also check the battery charge status via themenu entry. See IMPRES Battery Annunciator onpage 176 for more information.LED and SoundsWhen your battery is low:•the LED blinks red when the PTT button ispressed.• you hear a low-battery “chirp” (short, high-pitchedtone).Fuel Gauge IconsA blinking fuel gauge icon ( ) is displayed only whenthe battery voltage drops to low level. In this case,replace the battery with a fully charged one.Gauge Battery ChargeTop Display:76% to 100% full[3]51% to 75%[3]Helpful Tips182English](https://usermanual.wiki/Motorola-Solutions/89FT7085.Manual/User-Guide-3022324-Page-184.png)
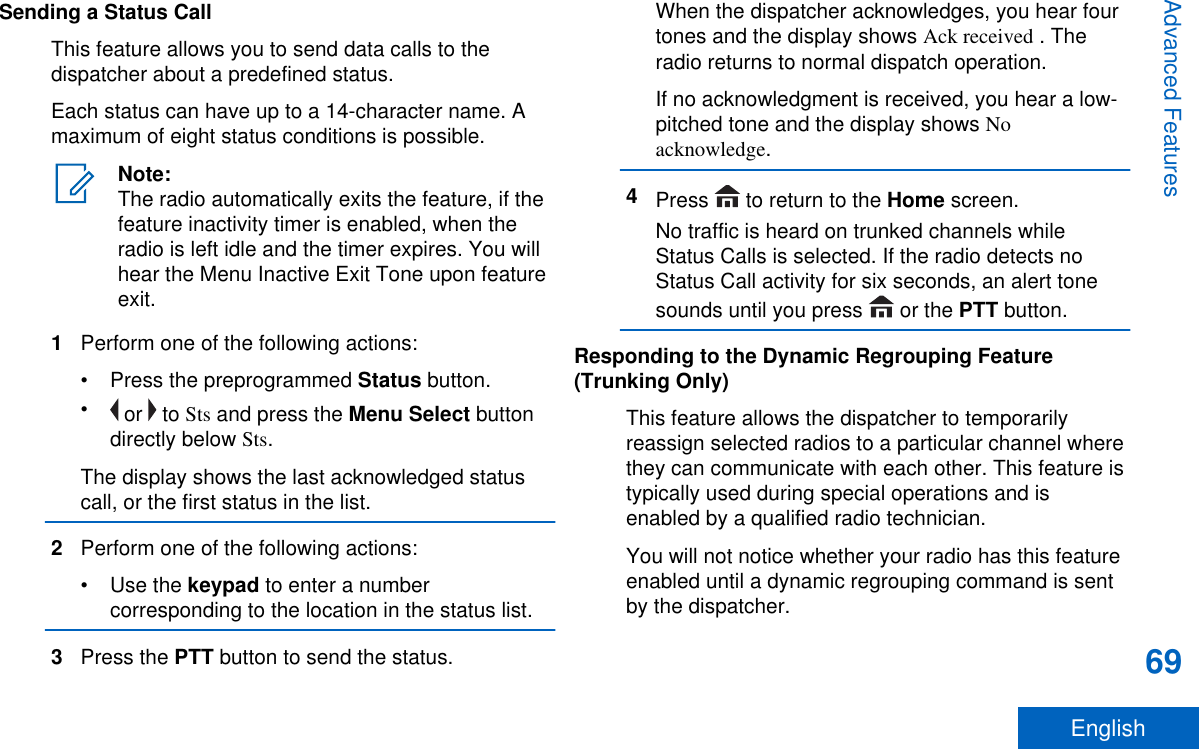
![Gauge Battery ChargeTop Display:Top Display:26% to 50%[3]Top Display:11% to 25%[3]Gauge Battery ChargeTop Display:10% or less (at 10%, the gaugebegins blinking)Battery Recycling and DisposalIn the U.S. and Canada, Motorola participates in thenationwide Rechargeable Battery RecyclingCorporation (RBRC) program for battery collectionand recycling. Many retailers and dealers participatein this program.For the location of the drop-off facility closest to you,access RBRC's Internet web site at www.rbrc.com orcall 1-800-8-BATTERY. This internet site andtelephone number also provide other useful3These are for IMPRES™ battery operation only.Helpful Tips183English](https://usermanual.wiki/Motorola-Solutions/89FT7085.Manual/User-Guide-3022324-Page-185.png)