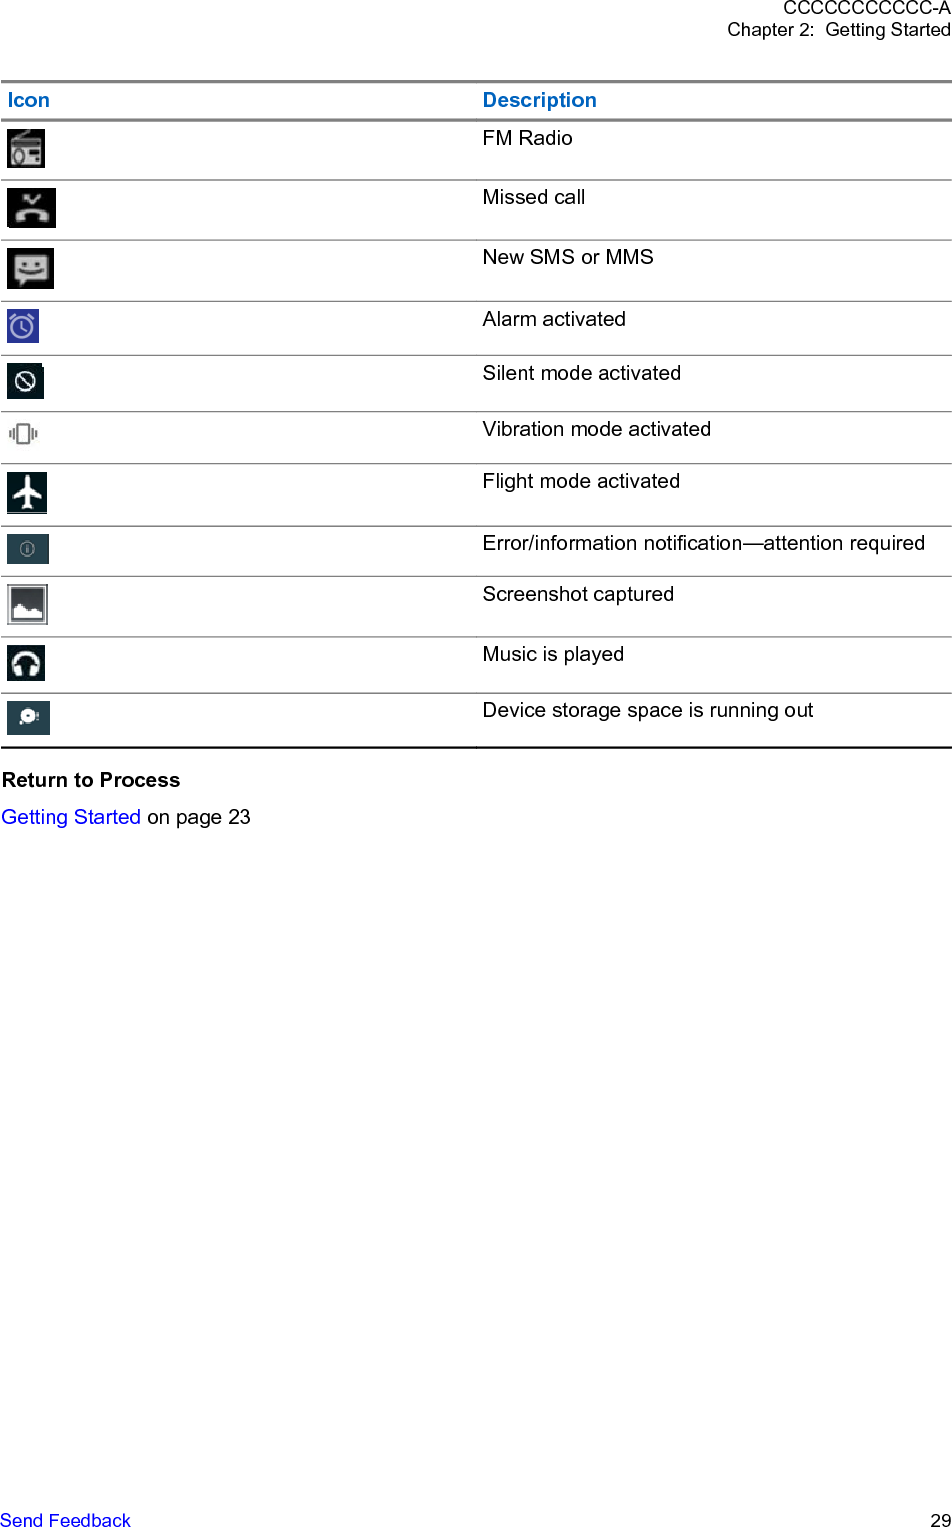
Motorola Solutions 89FT7101 LTE mission critical hand held User Manual LEX F10 Mission Critical Handheld User Guide
Motorola Solutions, Inc. LTE mission critical hand held LEX F10 Mission Critical Handheld User Guide
UserManual.wiki
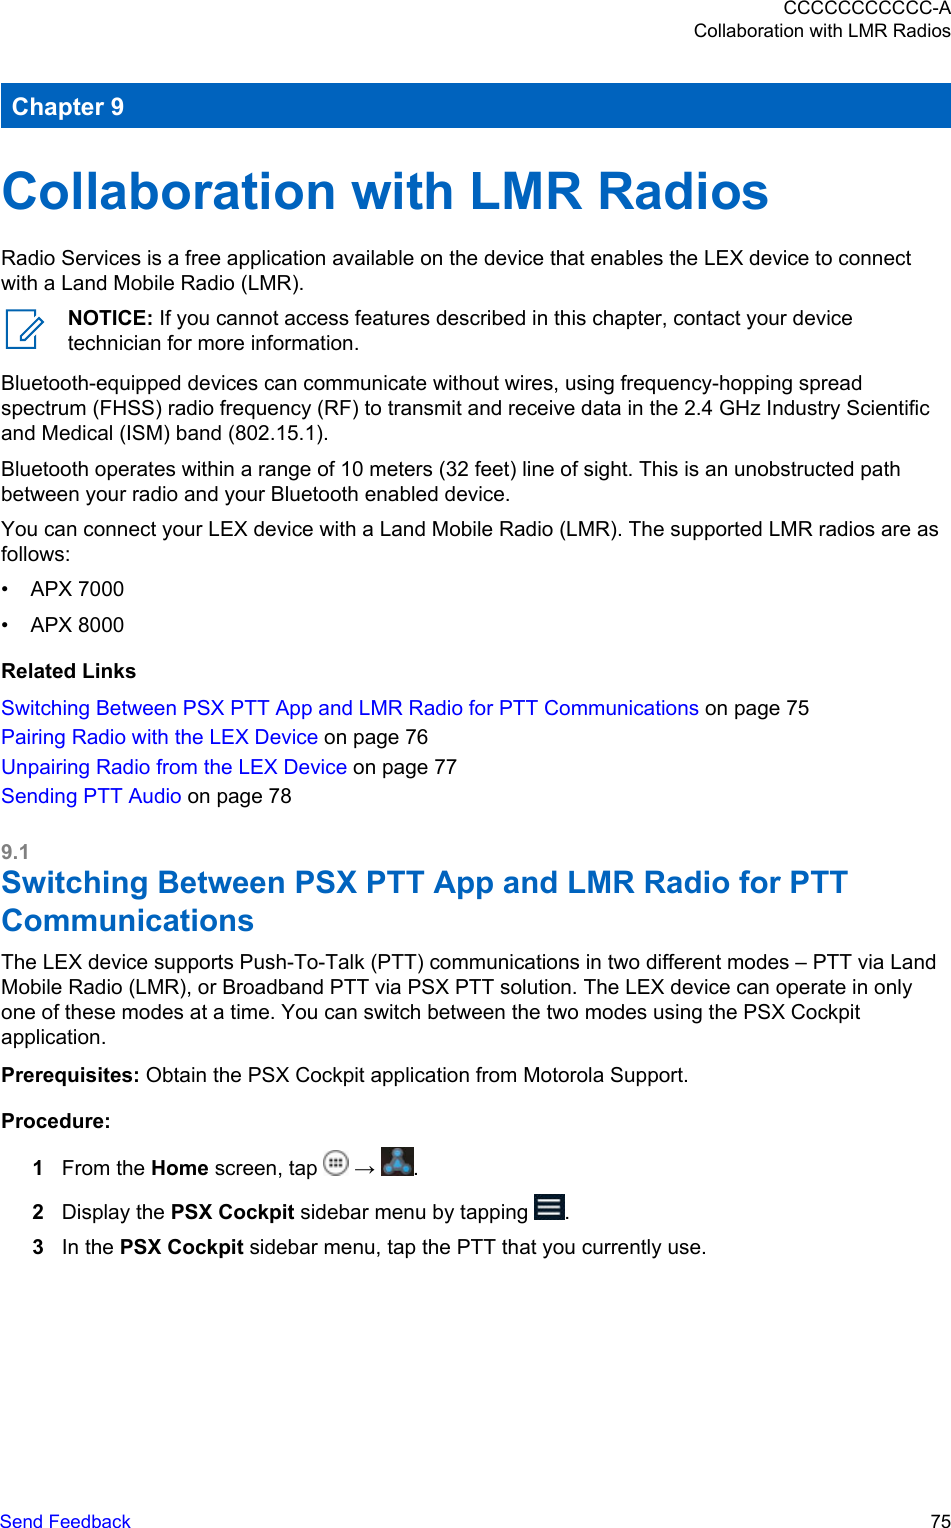
>
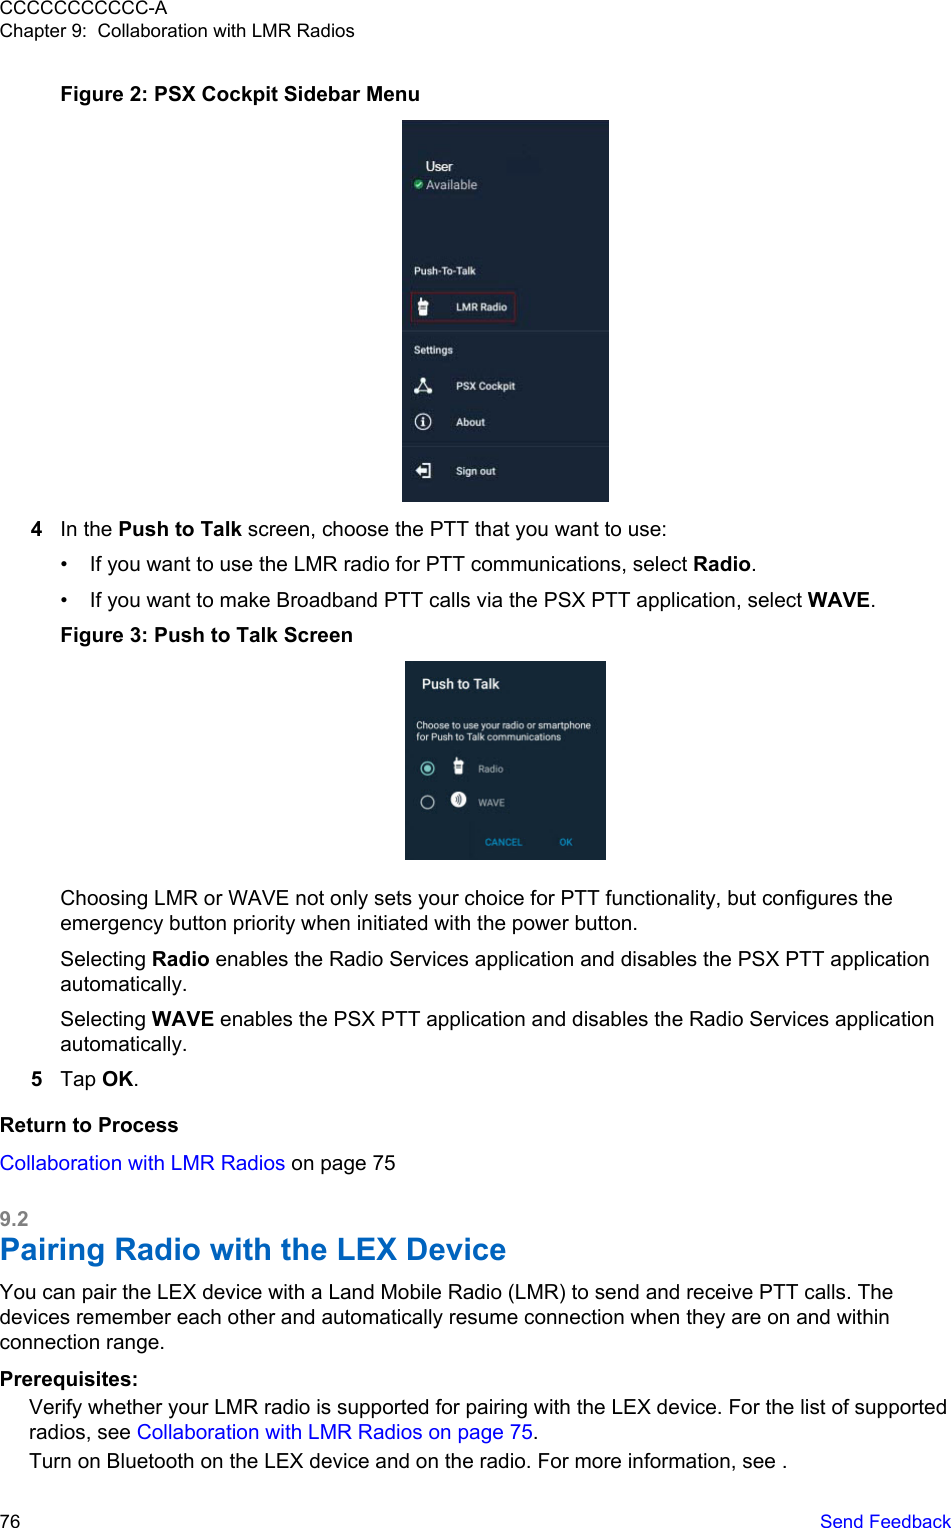
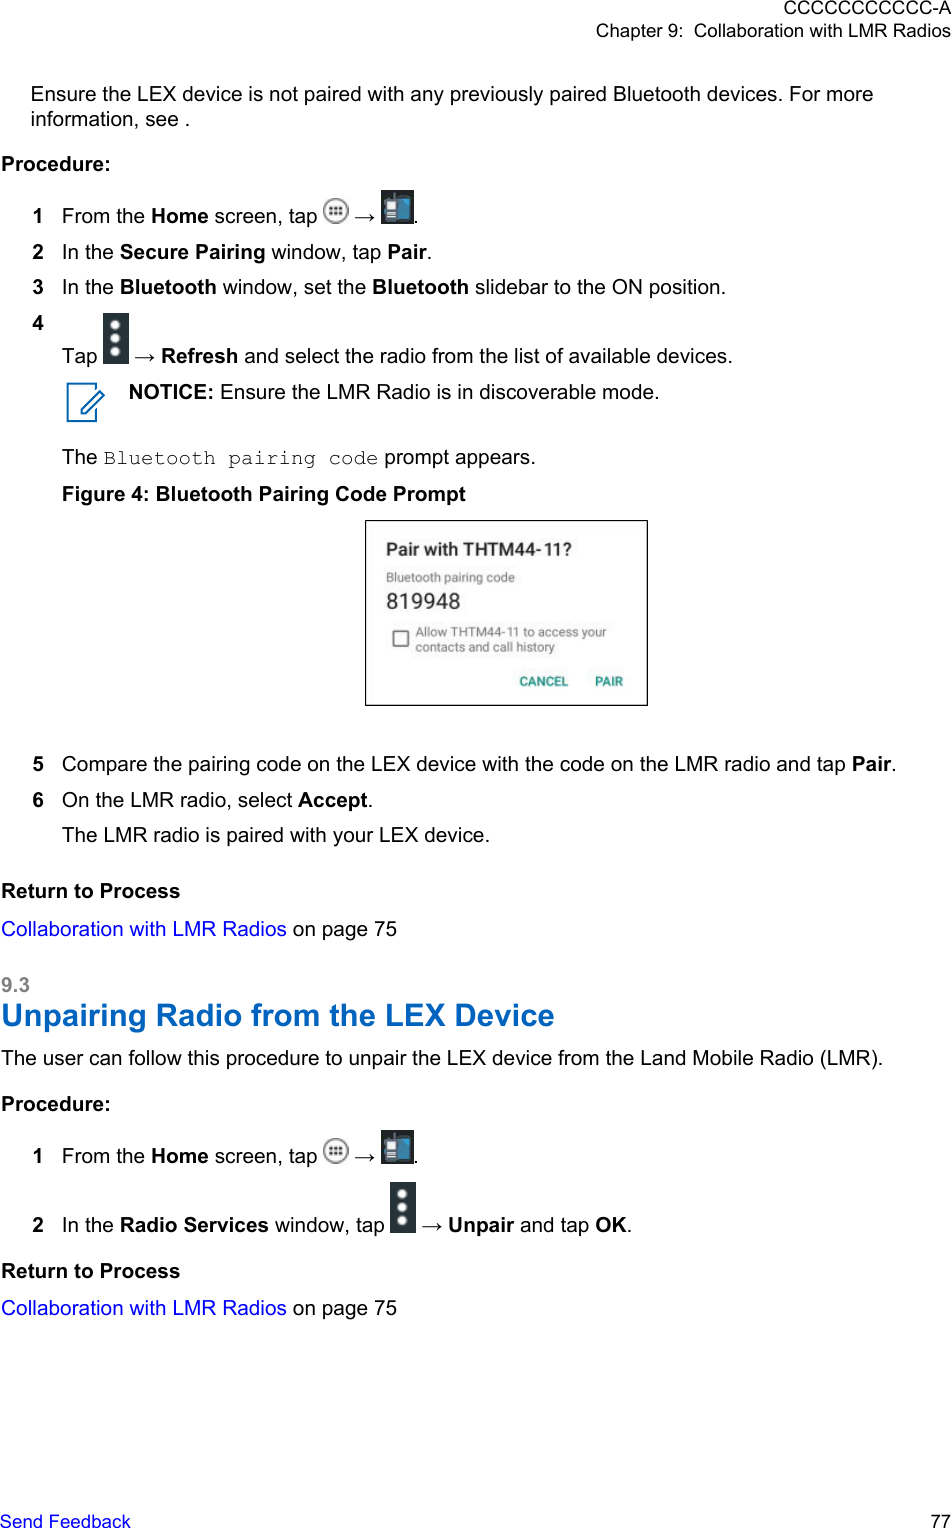
Motorola Solutions
>
89FT7101 User Manual
User Manual
Navigation menu
Upload a User Manual
Namespaces
Wiki Guide
HTML
PDF
Info
Views
User Manual
Discussion / Help
Navigation