Motorola Solutions 92FT4835 Mobile Transmitter User Manual 88C37 English
Motorola Solutions, Inc. Mobile Transmitter 88C37 English
UserManual.wiki
>
Motorola Solutions
>
92FT4835 User Manual
>
Users Manual
Contents
1.
Users Manual
2.
Amended Users Manual
Users Manual
Navigation menu
Upload a User Manual
Namespaces
Wiki Guide
HTML
PDF
Info
Views
User Manual
Discussion / Help
Navigation

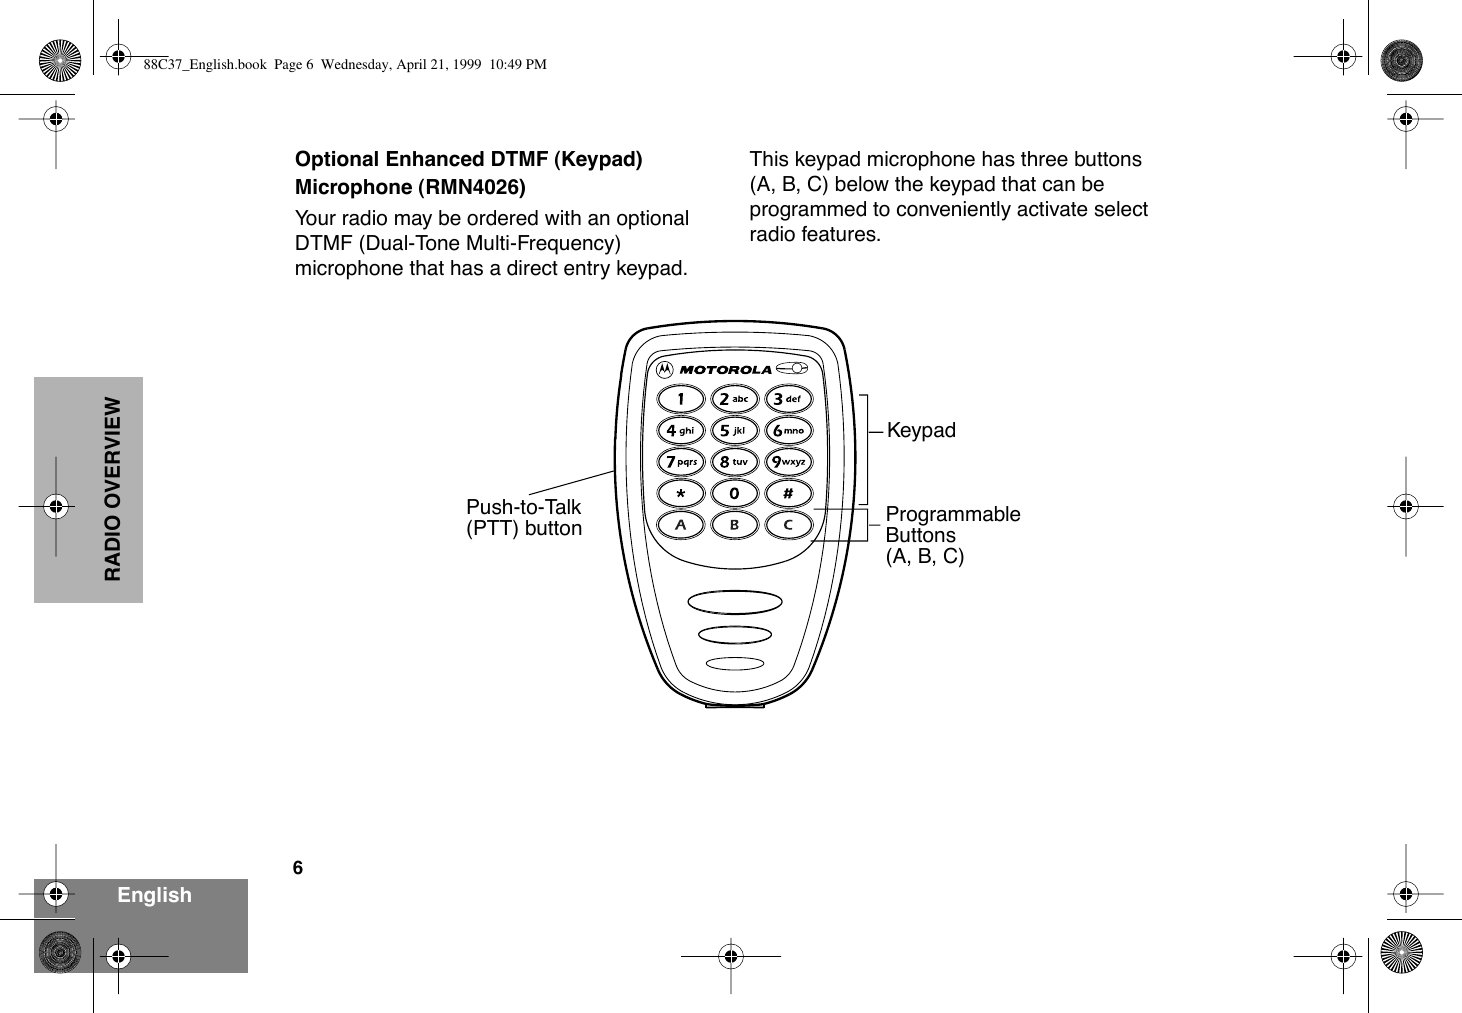
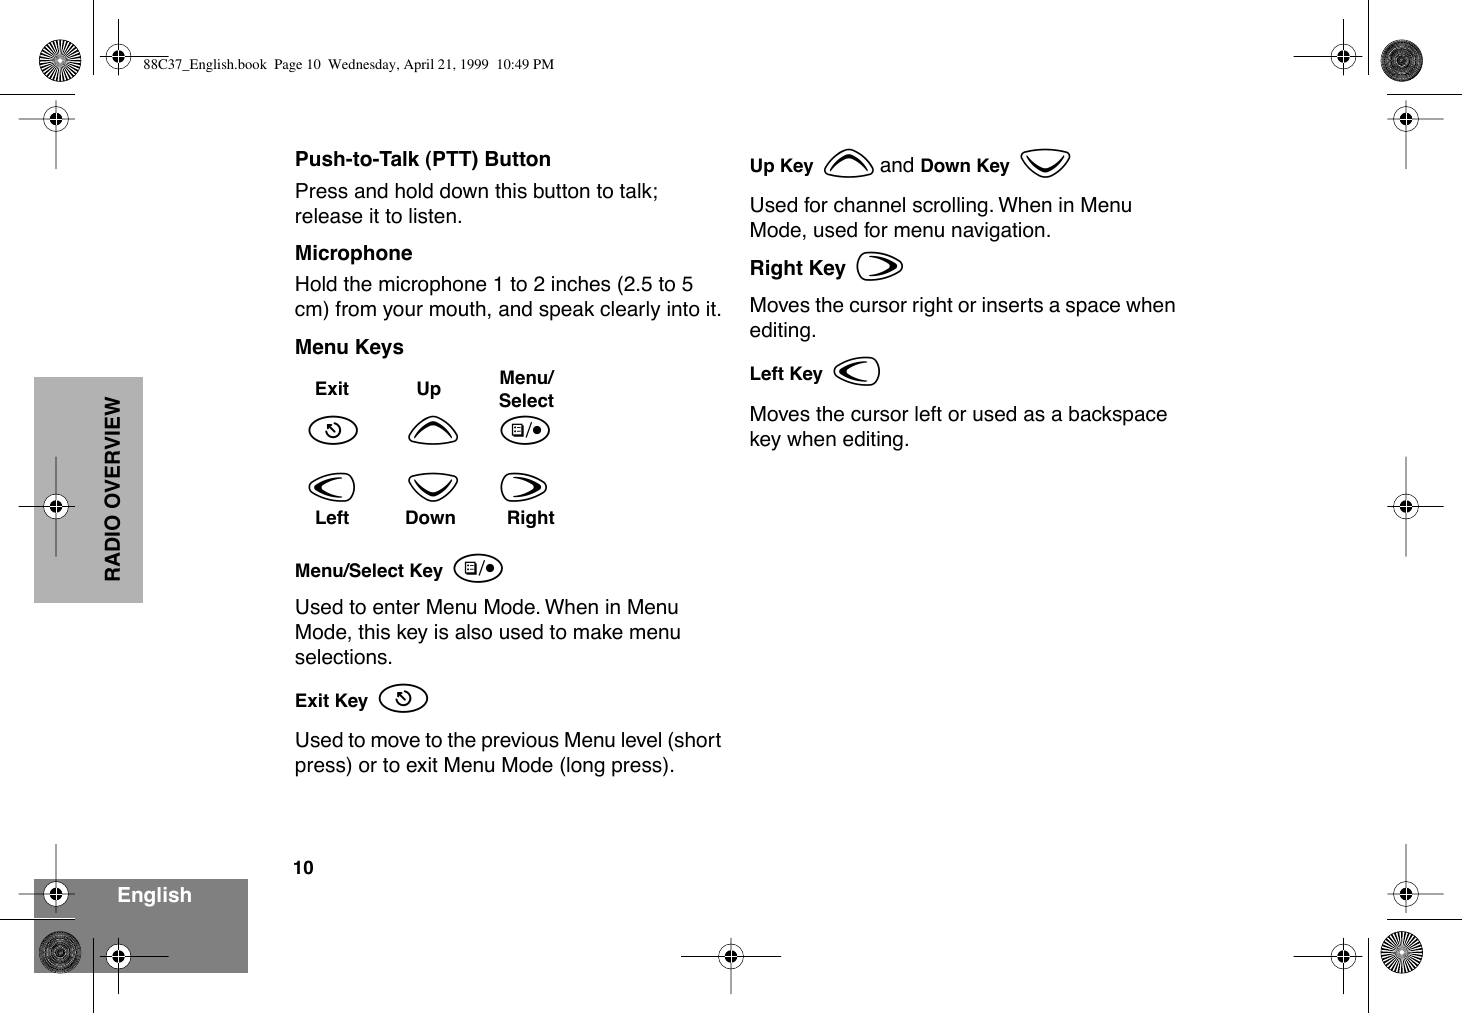
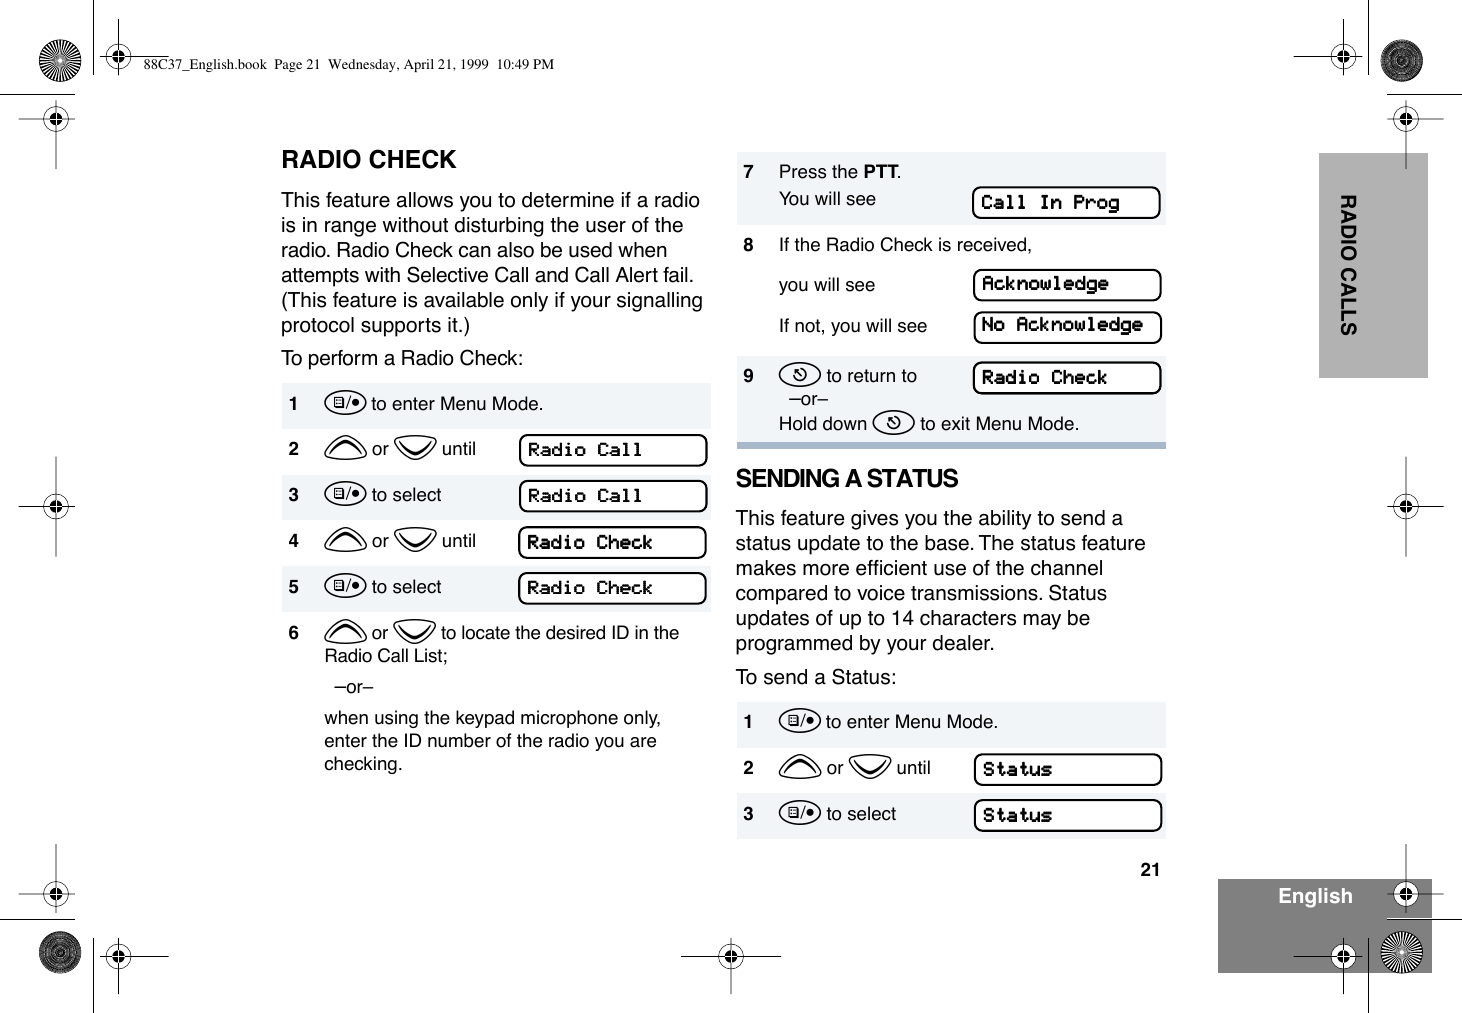
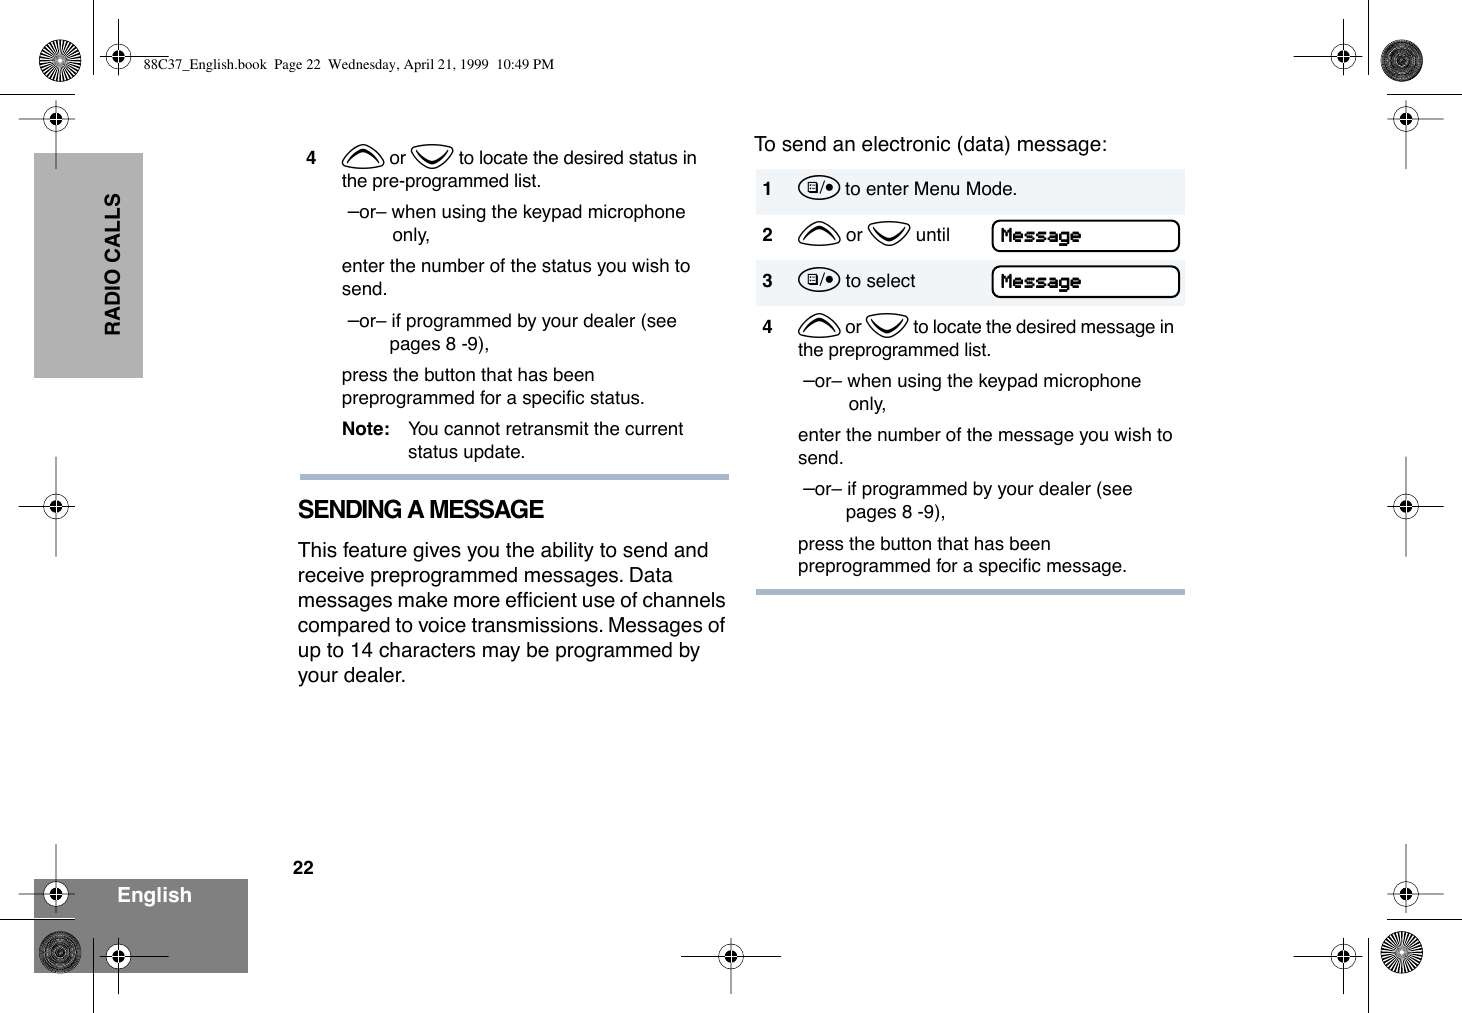
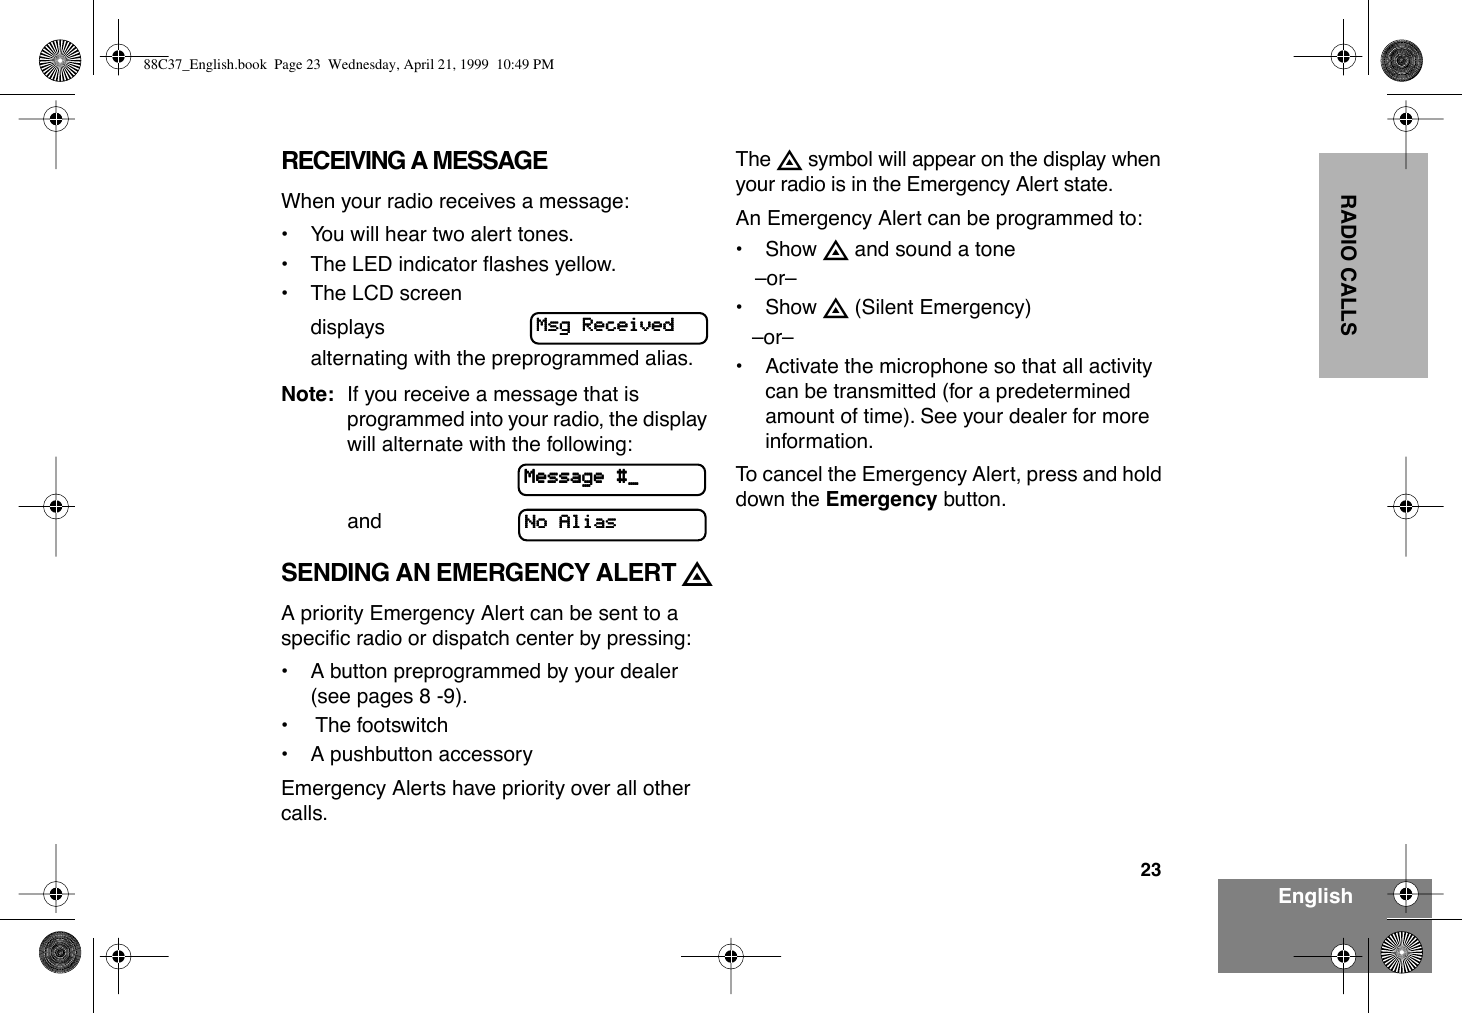
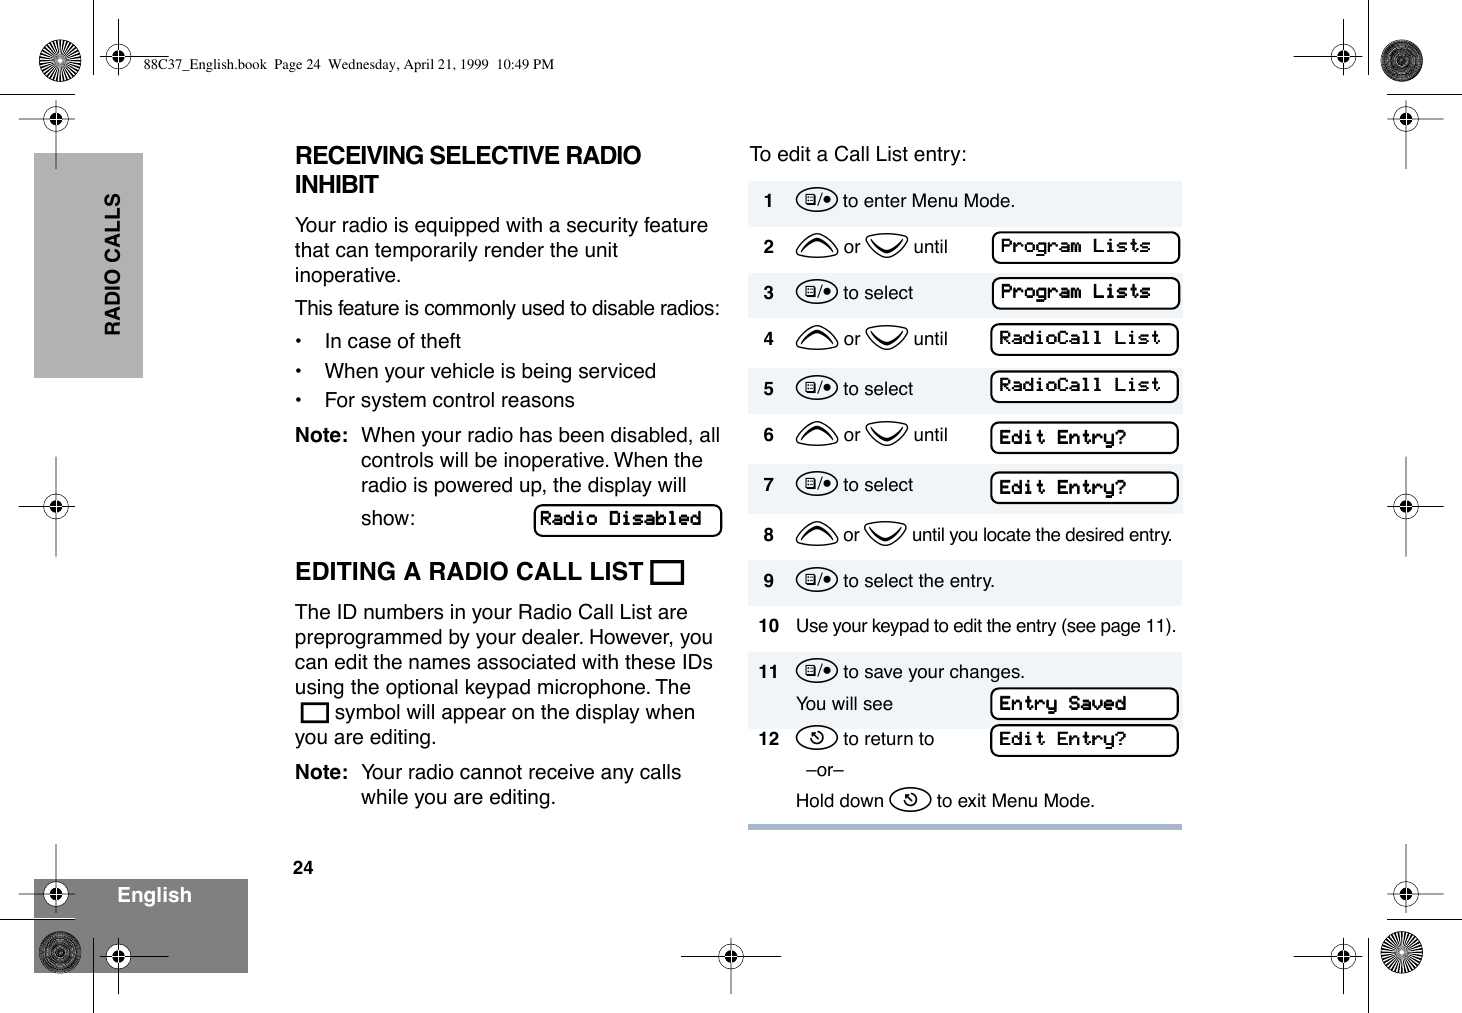
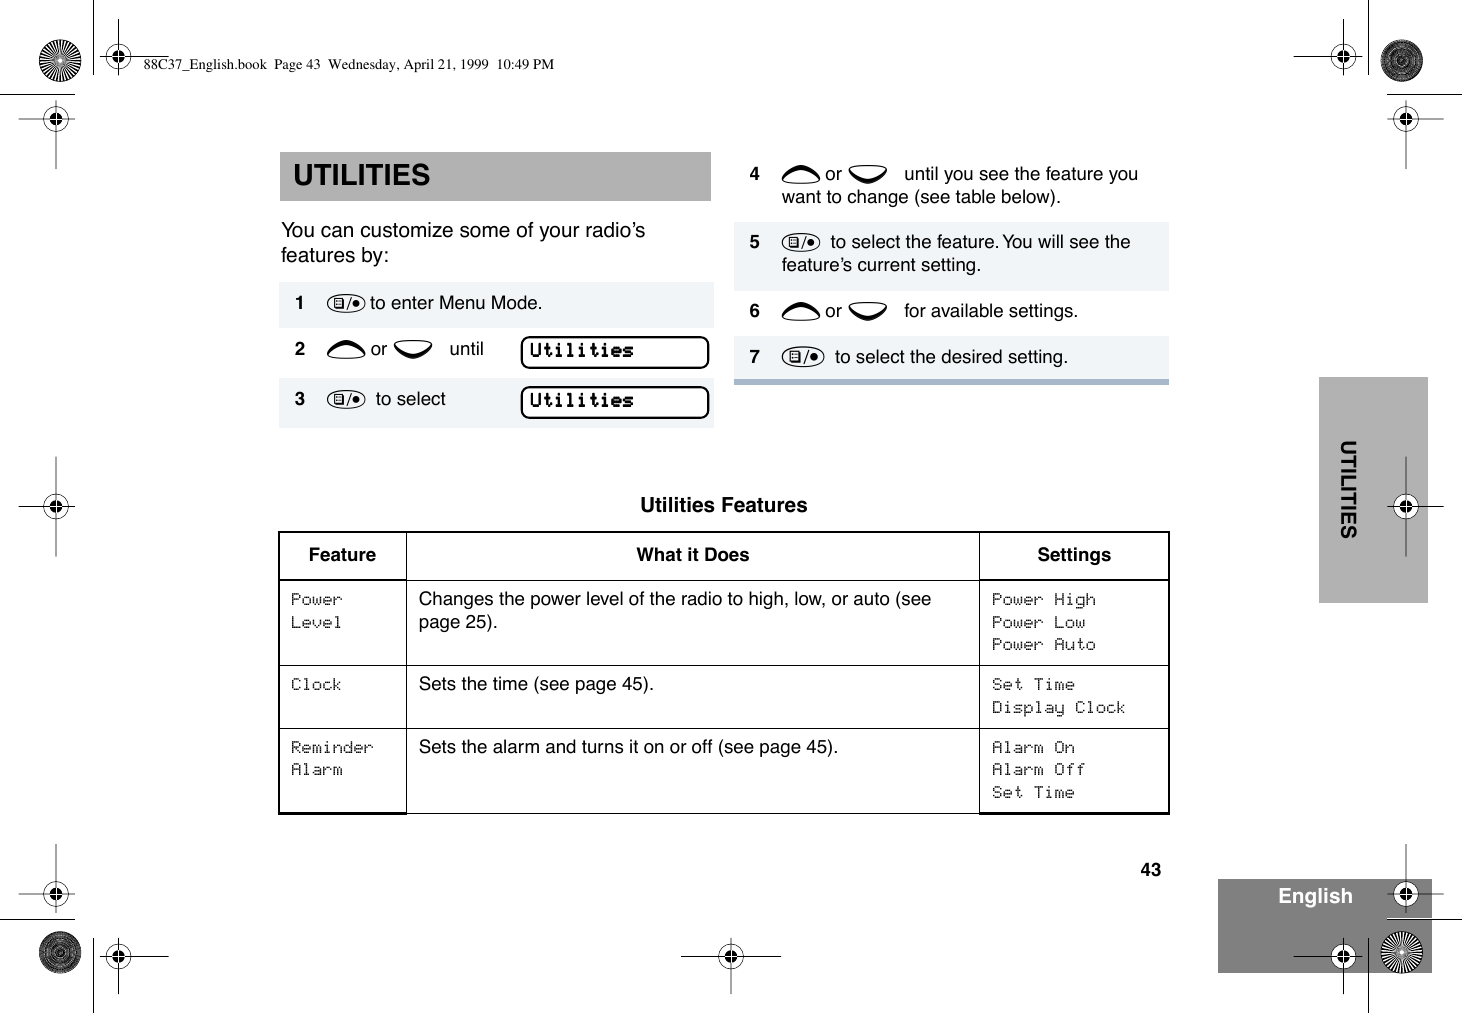
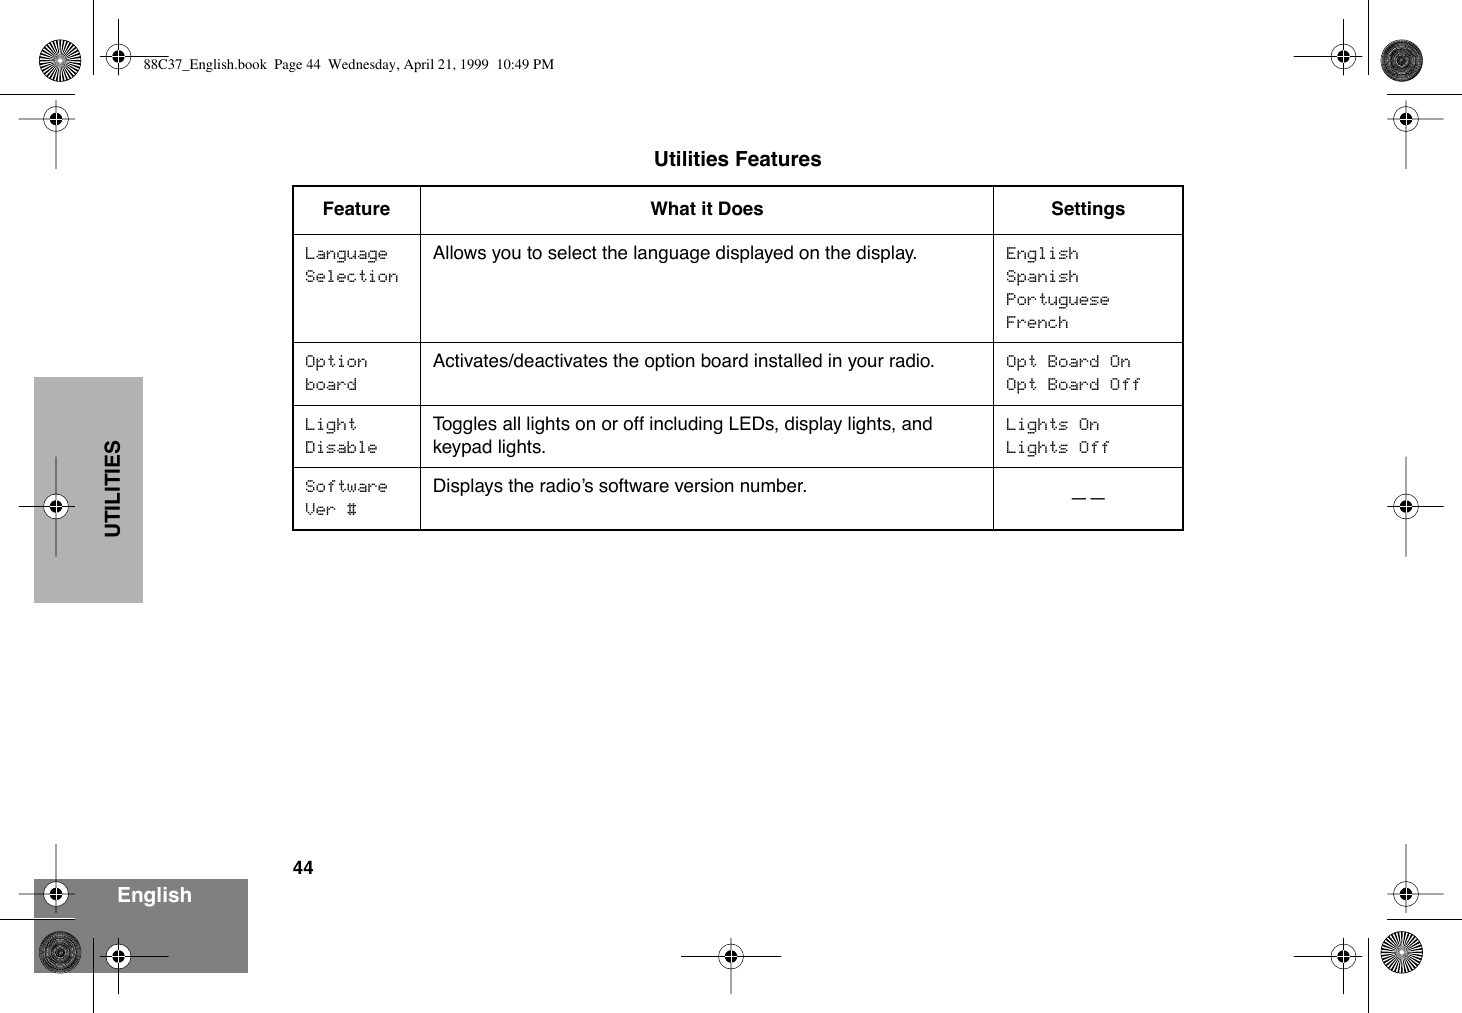
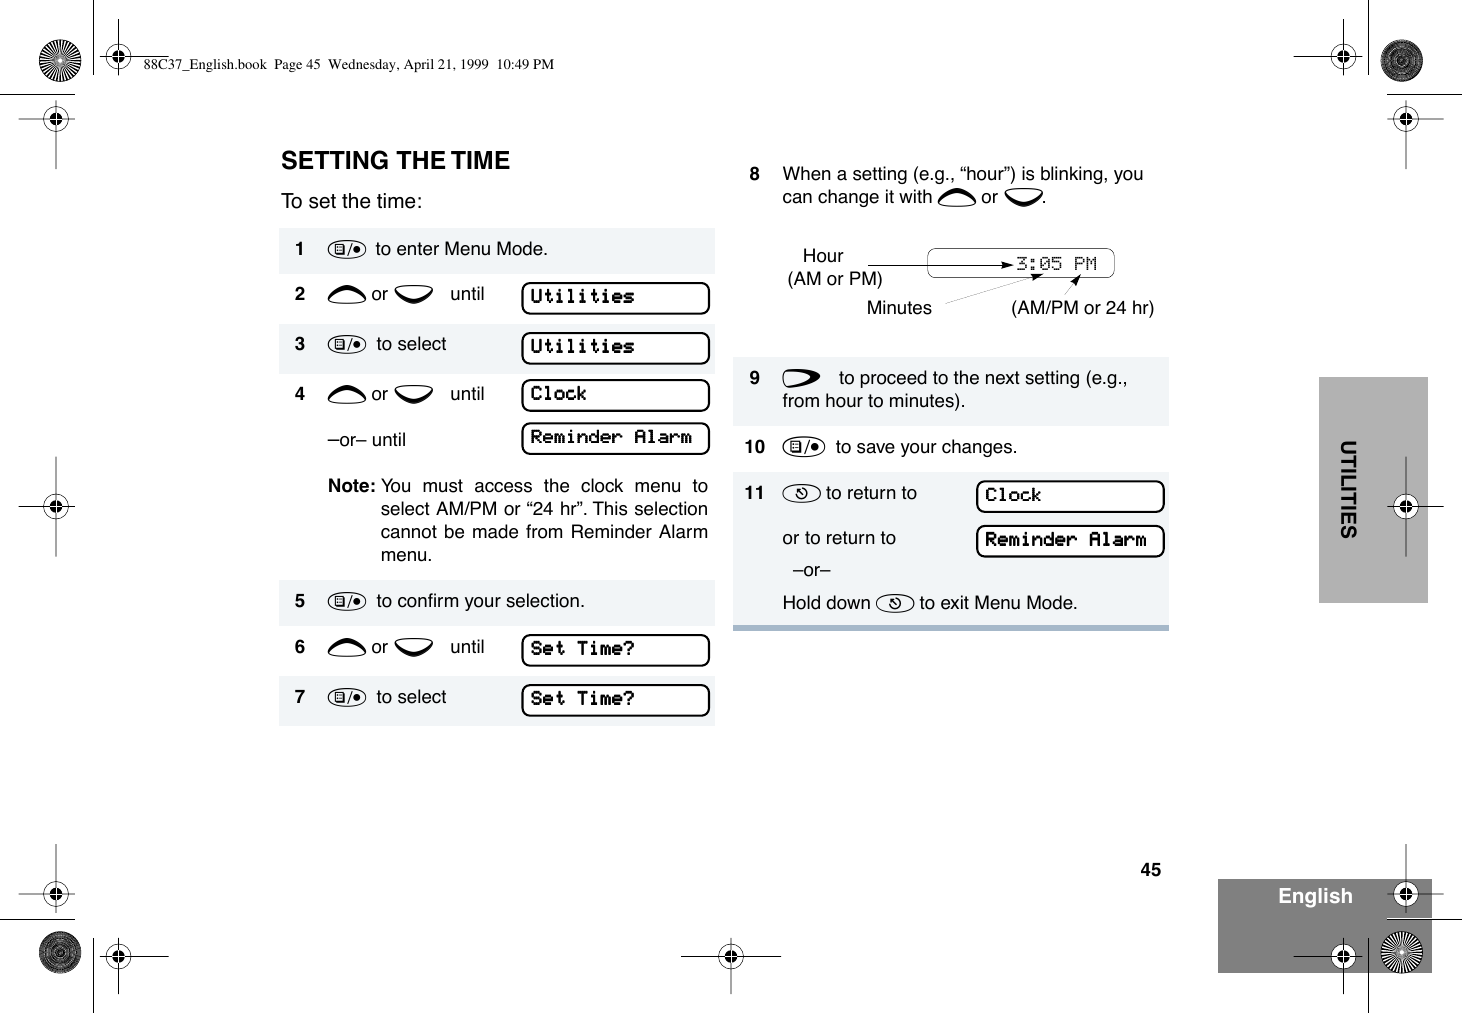
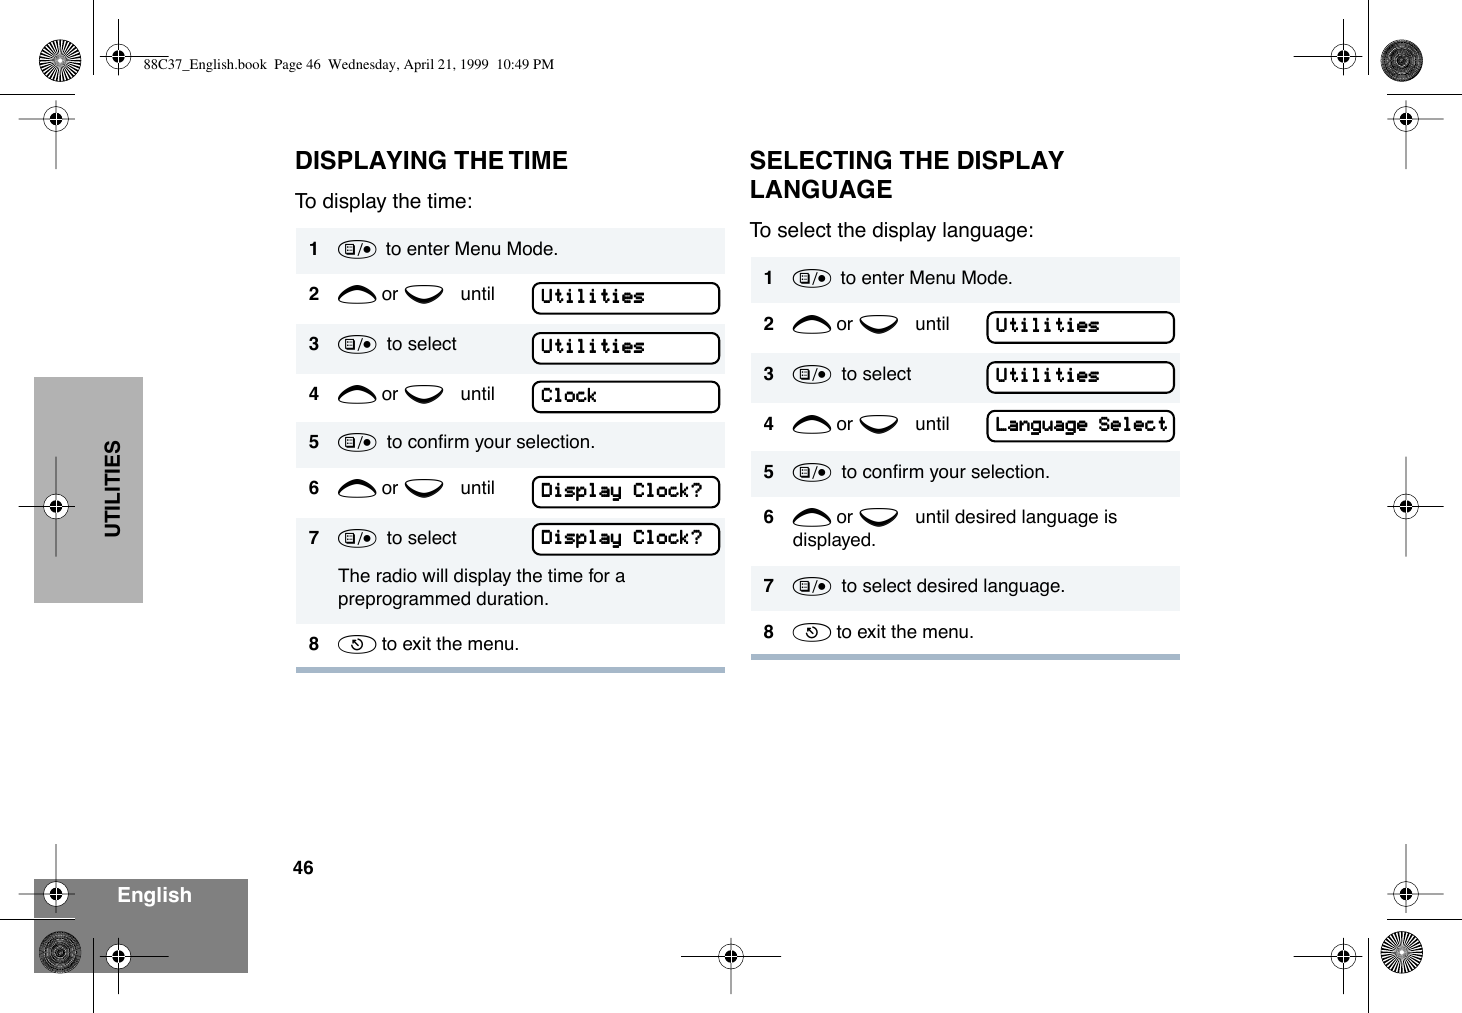
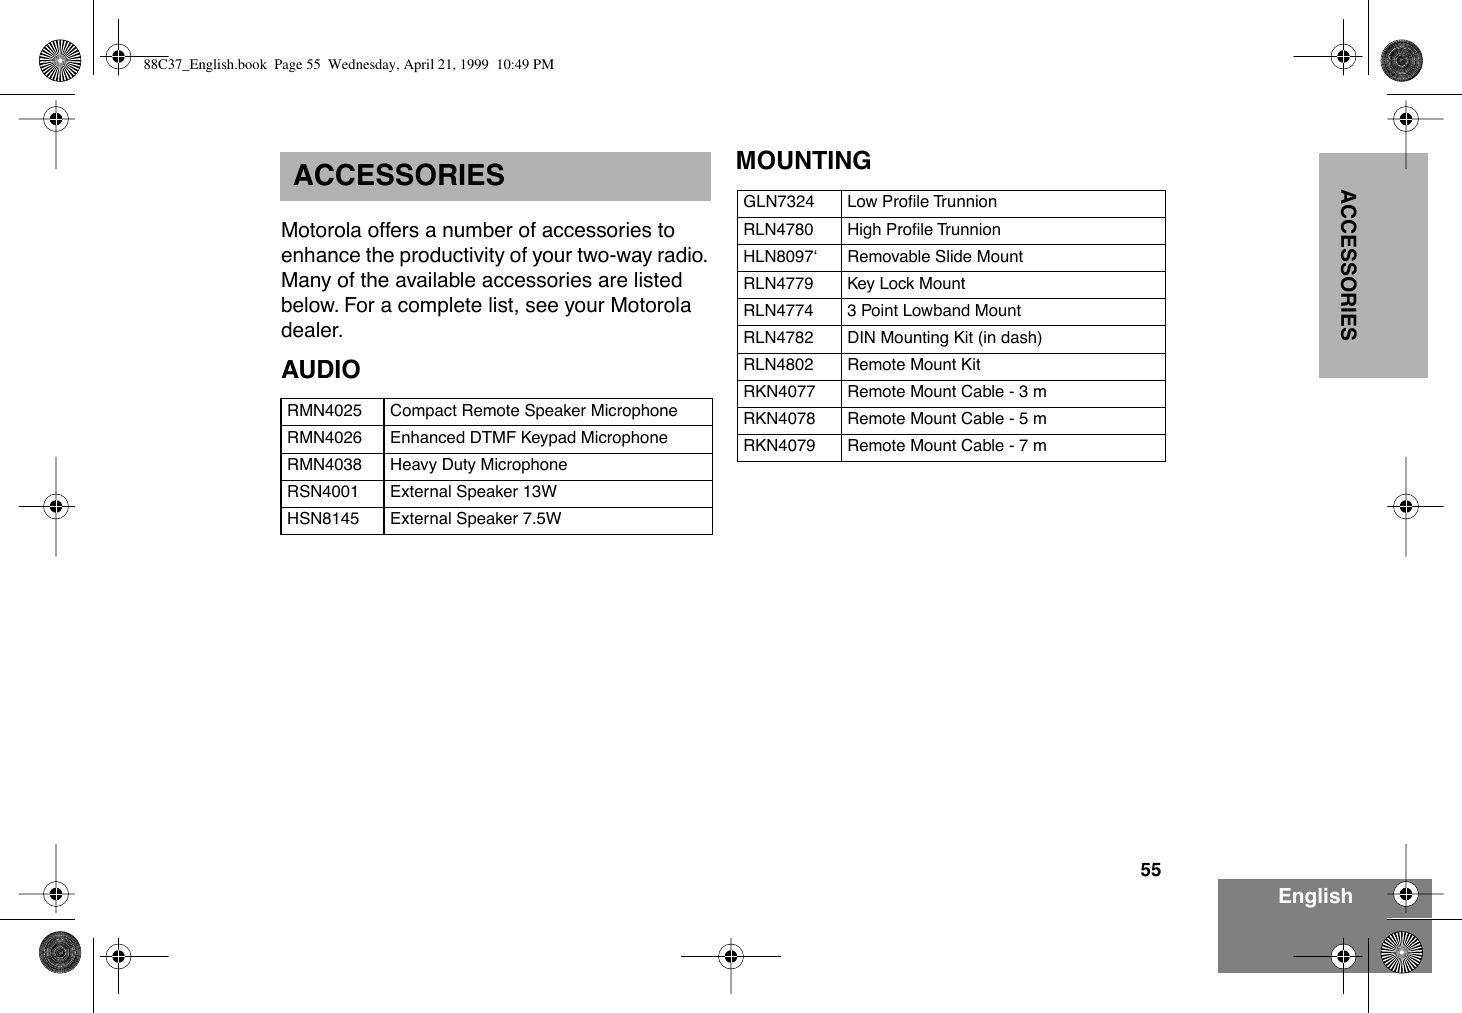
![16EnglishGETTING STARTEDSELECTING A ZONEA zone is a group of up to 16 channels. Before you can access a channel in a zone, you must select the zone in one of two ways:Method 1Method 2 (if programmed by your dealer [see pages 8 -9]).SELECTING A RADIO CHANNELYour radio offers 128 channels (8 zones of 16 channels each).Note: Due to government regulations, some channels may not be programmed. See your dealer for more information.There are three ways to select a channel:Method 1 Method 2 (if programmed by your dealer [see pages 8 -9]).Method 3 (if programmed by your dealer [see pages 8 -9]).1u to enter Menu Mode.2y or z until3u to select4y or z until you see the desired zone name.5u to select the zone.1Press the Direct Zone Access button.2y or z until you reach the desired zone.3u to select the zone.ZZZZoooonnnneeeeZZZZoooonnnneeee 1Select the appropriate Zone, if required.2y or z until you reach the desired channel, shown on LCD display.1Press the Home Revert button.1Press the Direct Channel Access button.88C37_English.book Page 16 Wednesday, April 21, 1999 10:49 PM](https://usermanual.wiki/Motorola-Solutions/92FT4835.Users-Manual/User-Guide-99109-Page-16.png)