Motorola Solutions 92FT5858 MOBILE 2-WAY RADIO User Manual APX 7500 05 UG
Motorola Solutions, Inc. MOBILE 2-WAY RADIO APX 7500 05 UG
UserManual.wiki
>
Motorola Solutions
>
92FT5858 User Manual
>
Users Manual
Contents
1.
Users Manual
2.
Safety Booklet
3.
RF Safety Booklet
Users Manual
Navigation menu
Upload a User Manual
Namespaces
Wiki Guide
HTML
PDF
Info
Views
User Manual
Discussion / Help
Navigation


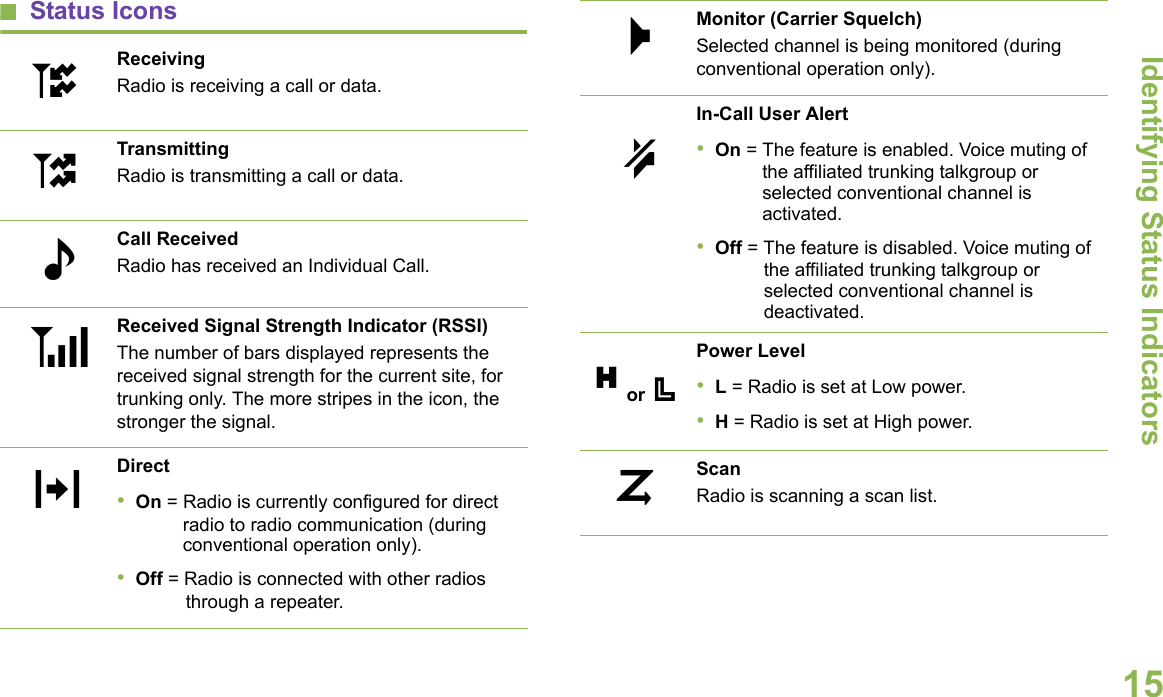
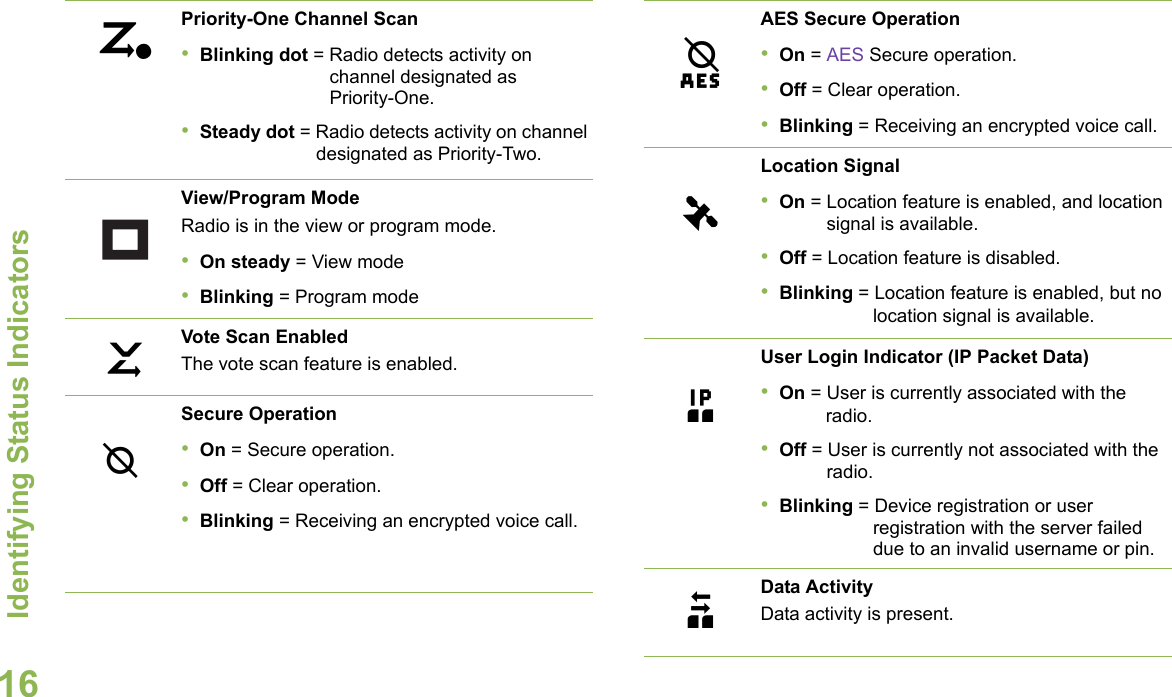
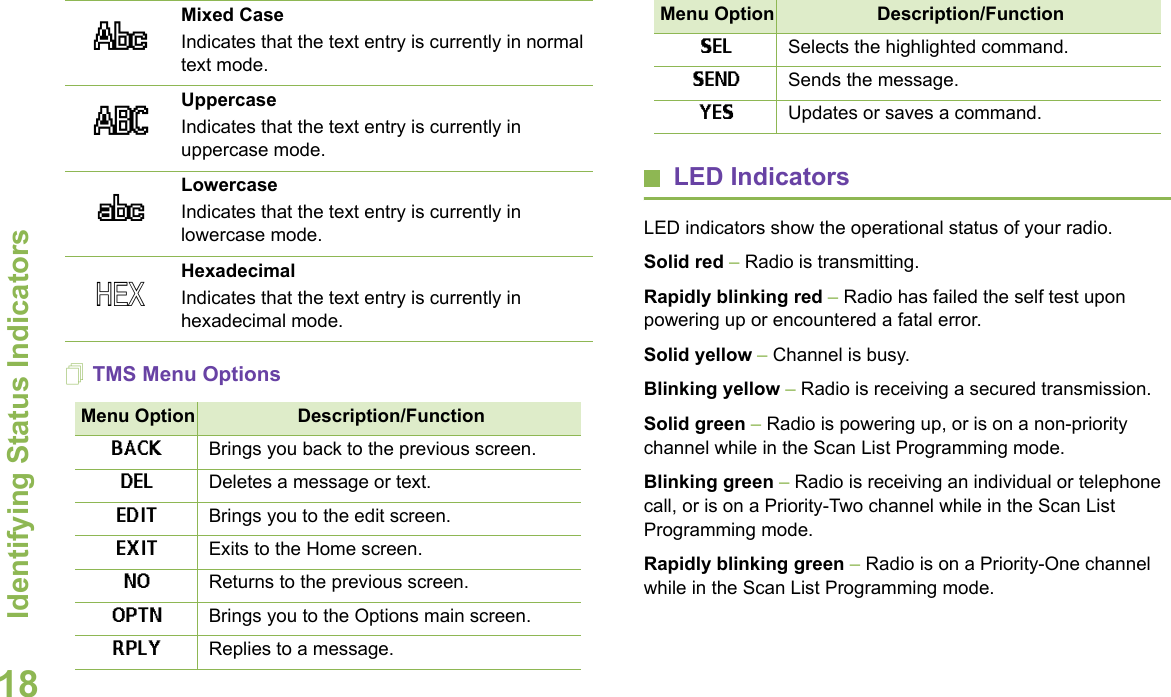
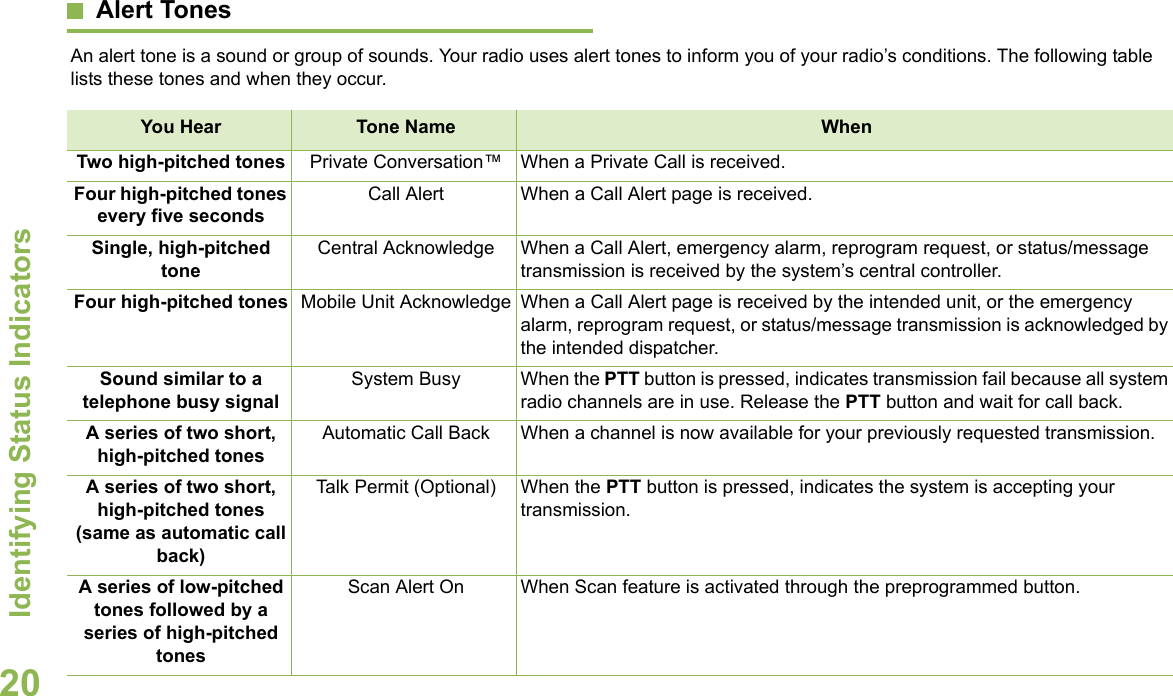
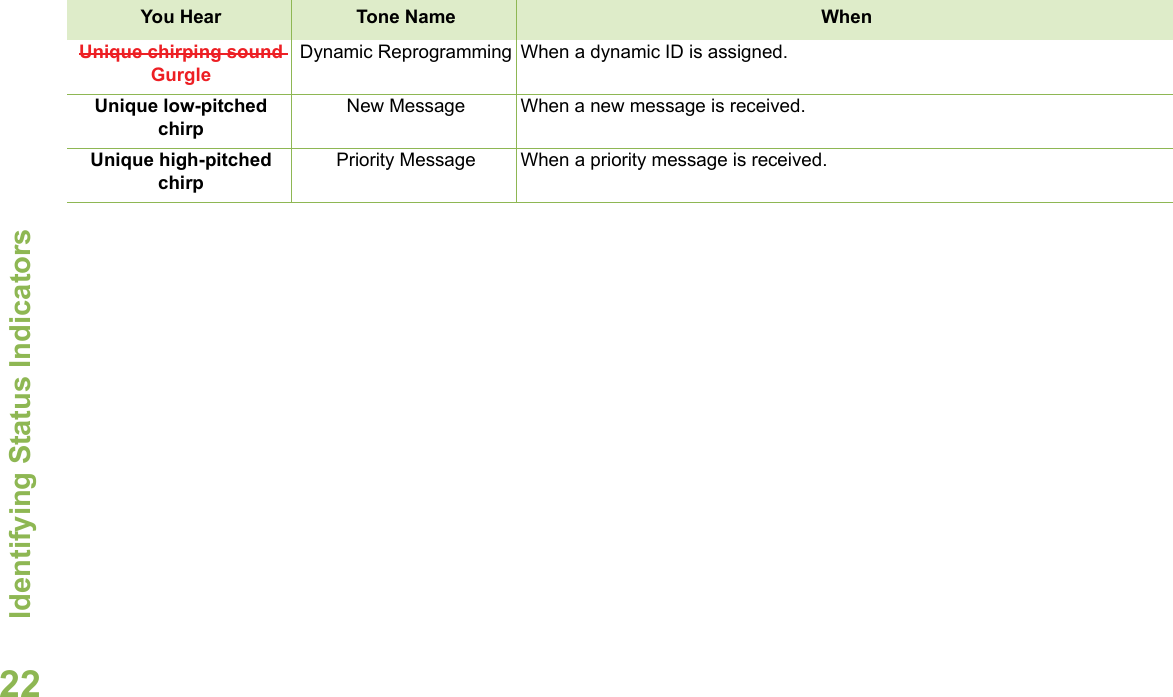
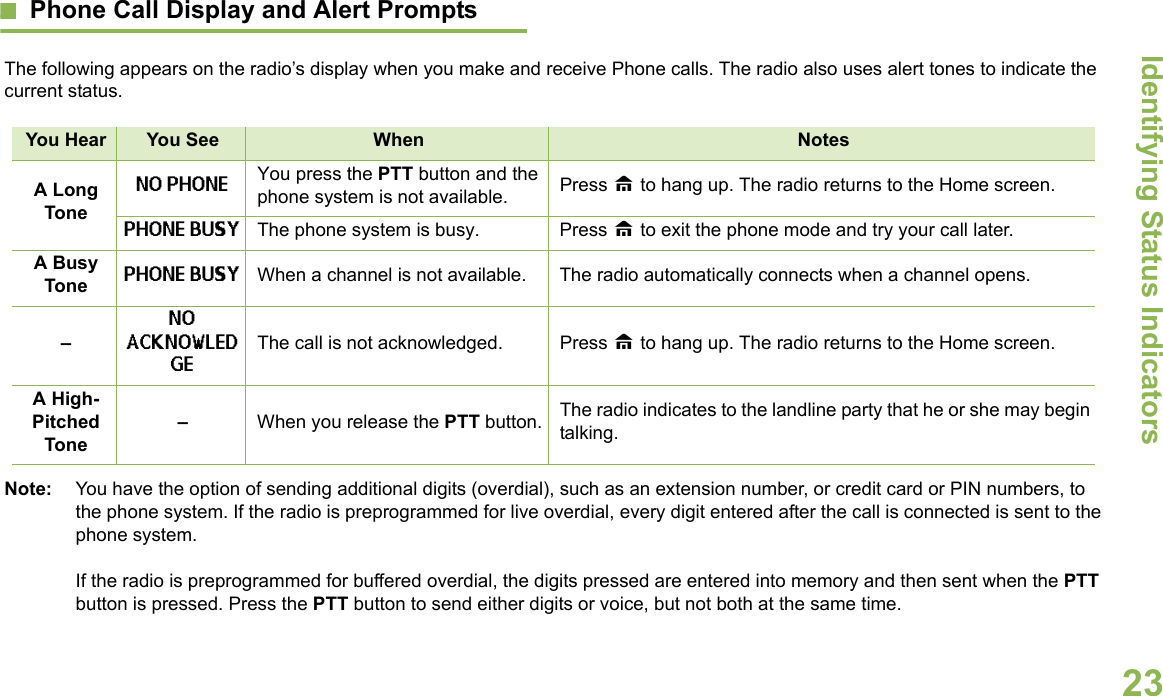
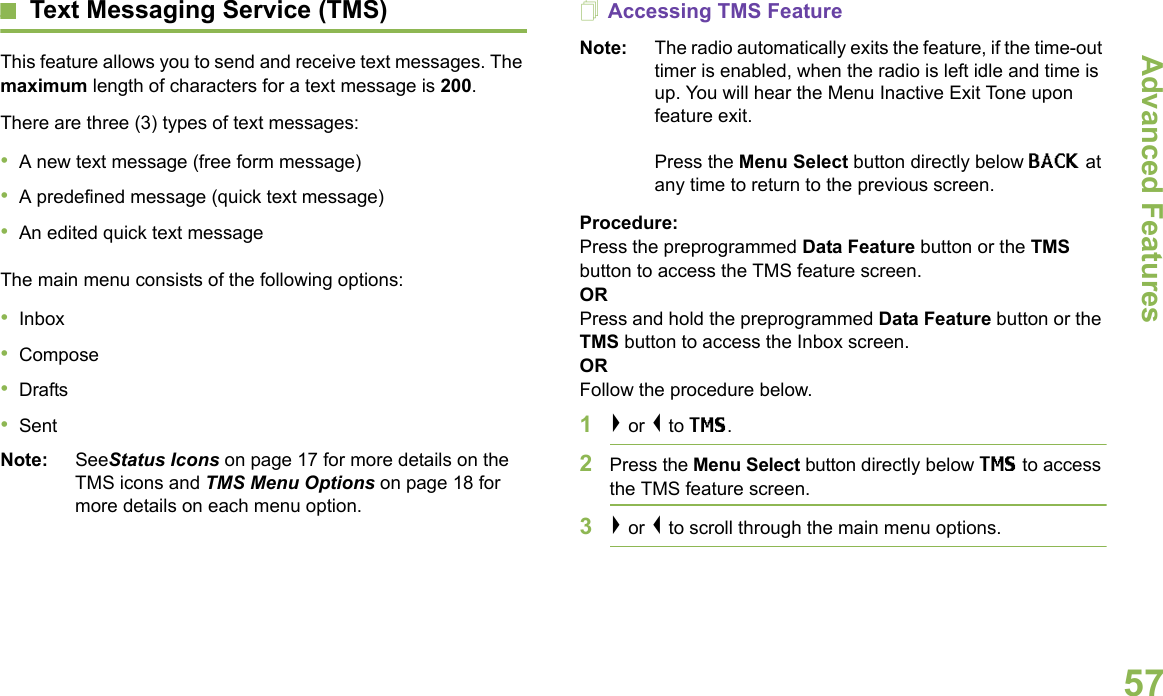
![Identifying Status IndicatorsEnglish17Text Messaging Service (TMS) IconsThis feature allows you to send and receive text messages. See Text Messaging Service (TMS) on page 57 for more information.Status IconsThe following icons appear on the radio’s display for TMS features: Inbox FullThe Inbox is full.Message SentThe text message is sent successfully.Message UnsentThe text message cannot be sent.Unread Message•User receives a new message.•The selected text message in the Inbox has not been read.,[ZrRead MessageThe selected text message in the Inbox has been read.Priority Status•The “Priority” feature is toggled on before the message is sent.•Messages in the Inbox folder are flagged with “Priority”.Request Reply•The “Request Reply” feature is toggled on before the message is sent.•Messages in the Inbox folder are flagged with “Request Reply”.Priority Status and Request Reply•User is composing a message with a priority status and a request for a reply.•Messages in the Inbox folder are flagged with “Priority” and “Request Reply”.NumericIndicates that the text entry is currently in numeric mode.]IP;pq2](https://usermanual.wiki/Motorola-Solutions/92FT5858.Users-Manual/User-Guide-1139500-Page-29.png)