Motorola Solutions 99FT7010 Office Talker User Manual motorola eps
Motorola Solutions, Inc. Office Talker motorola eps
Users Manual
U
SER
GUIDE
6880906Z36-O
TC3000
™
Portable
Communicator

and Motorola are registered trademarks of Motorola, Inc.
TELARIO, TC3000, TR3000, and TS3000 are trademarks of Motorola, Inc.
Copyright © 1999 Motorola, Inc. All rights reserved.
This manual may not be reproduced, in whole or in part, in any form
whatsoever, without the express written permission of Motorola, Inc.
Note: The Motorola products described in this manual contain one
or more computer programs. These computer programs are
protected by copyright laws and international treaties. Unauthorized
reproduction or distribution of these programs, or any part thereof,
may result in severe civil and criminal penalties, and will be
prosecuted to the maximum extent possible under the law. U.S. and
international products patents pending.
This product is covered by one or more issued U.S. Patents. Other Patent
applications pending.

1
Introduction
UTAM Registration ........................................................................................... 4
Inspection......................................................................................................... 5
TC3000 Communicator Features ..................................................................... 6
Battery Installation Instructions ........................................................................9
To Insert Battery .......................................................................................... 9
To Remove Battery...................................................................................... 9
Charging Instructions .....................................................................................10
Rapid Charge Method ...............................................................................10
Slow Charge Method................................................................................. 11
Attaching and Removing the Carry Holster.................................................... 12
Basic Functions
Turning the TC3000 Communicator On.......................................................... 13
Turning the TC3000 Communicator Off.......................................................... 13
Setting the Volume ......................................................................................... 14
Audio Routing.................................................................................................14
Battery Life Indicator ......................................................................................14
Time-Out Timer .............................................................................................. 15
Idle Timer .......................................................................................................15
Menu Options................................................................................................. 16
Select Ring Type........................................................................................16
Turning the TC3000 Communicator Off.....................................................16
Phone Functions
Entering Phone Service .................................................................................17
Making a Phone Call ...................................................................................... 17
Live Dial of a Phone Call ........................................................................... 17
Last Number Redial................................................................................... 18
Recall from Phone List ..............................................................................18
Answering a Phone Call ................................................................................. 19
Hanging-Up a Phone Call...............................................................................19
Holding a Phone Call...................................................................................... 19
Placing a Phone Call on Hold....................................................................19
Taking a Phone Call off Hold ..................................................................... 20
Transferring / Conferencing a Phone Call....................................................... 20
Phone Call Waiting.........................................................................................20
Voicemail ........................................................................................................ 20
Send Call / End Ring...................................................................................... 21
Group Ringing ................................................................................................ 21
Table of Contents

2
Table of Contents
Group Talk
Selecting a Group........................................................................................... 22
Last Group Select / Displayed ................................................................... 22
Scroll.......................................................................................................... 22
Initiating a Group Talk.....................................................................................23
Group Busy Signal .........................................................................................23
User Out of Range .........................................................................................24
System Busy Signal .......................................................................................24
Busy System Auto Retry ................................................................................25
Receiving a Group Talk .................................................................................. 26
Person Link
Link ID Recognition ........................................................................................ 27
Entering Person Link Service......................................................................... 27
Initiating a Person Link Call............................................................................ 28
Direct Entry of Link ID ...............................................................................28
Recall from Link List .................................................................................. 30
Link ID ReLink ........................................................................................... 32
Target User Busy Signal................................................................................. 33
User Out of Range .........................................................................................33
System Busy Signal .......................................................................................33
System Busy Auto Retry ................................................................................34
Receiving a Person Link................................................................................. 35
Disconnecting a Person Link.......................................................................... 35
Integrating Services
Person Link Notification During Group Talk Receive...................................... 37
Person Link Notification During Group Talk Transmit ..................................... 38
Phone Call Notification During Group Talk Receive....................................... 39
Phone Call Notification During Group Talk Transmit ......................................40
Person Link Notification During Person Link Receive ....................................41
Person Link Notification During Person Link Transmit.................................... 42
Phone Call Notification During Person Link Receive...................................... 43
Phone Call Notification During Person Link Transmit.....................................44
Person Link Notification During a Phone Call................................................. 45
Initiating a Group Talk During a Phone Call ...................................................46
Initiating a Person Link During a Phone Call..................................................47
Integrated Services Quick Reference Table ...................................................49
Accessories....................................................................................................... 51
LED Indications and Alert Tones..................................................................... 52
Troubleshooting ................................................................................................ 53

3
Table of Contents
Important Safety Information
Scope ............................................................................................................. 56
Exposure to Frequency Energy......................................................................56
Portable Communicator Operation and EME Exposure ............................58
Electromagnetic Interference / Compatibility..................................................58
Facilities..................................................................................................... 58
Medial Devices .......................................................................................... 59
Operational Warning ...................................................................................... 60
Potentially Explosive Atmospheres............................................................ 60
Batteries .................................................................................................... 60
Blasting Caps and Areas........................................................................... 60
Operational Cautions...................................................................................... 61
Communicator Care ....................................................................................... 61
Batteries and Chargers ..................................................................................61
Charging Batteries..................................................................................... 61
Charging Temperatures............................................................................. 62
Recharging NiMH Batteries....................................................................... 62
Recycling / Disposal of Batteries............................................................... 63
Battery Charger ......................................................................................... 64
Licensing ........................................................................................................... 65
Service ........................................................................................................... 66
Computer Software Copyrights ...................................................................... 66

4
Congratulations!
You are about to increase your business’
productivity through the use of the TC3000™ Communicator. The
TC3000 Communicator is part of the Telario™ product system, a
state of the art Motorola digital communications system. Your
TC3000 Communicator has been designed exclusively to function
with other TC3000 Communicators and TR3000™ Radios, and
with the TS3000™ Control Station.
Your Communicator offers you three types of communications
services:
•Phone Communication
•Group Talk Communication (up to 10 Groups)
•Person Link Communication
Your Communicator enables you to enhance your
communications like no other product by integrating services.
Integration of services allows you to:
•be informed of and accept an incoming Phone Call or
Person Link while in a Phone Call, Group Talk, or Person
Link
•make a Phone Call, Group Talk, or Person Link while in a
Phone Call.
For more information on Integrating Services, refer to page 36.
UTAM Registration
Installation of this equipment is subject to notification and
coordination with UTAM, Inc. Any relocation of this equipment
must be coordinated through, and approved by UTAM. UTAM can
be contacted at (800) 429-UTAM (800) 429-8826.
Introduction

5
Introduction
Inspection
Your Communicator ships standard with the following items:
•NiMH Battery
•Carry Holster
•Rapid Rate Charger with spare battery compartment &
charging transformer
•Manual (not shown)

6
Introduction
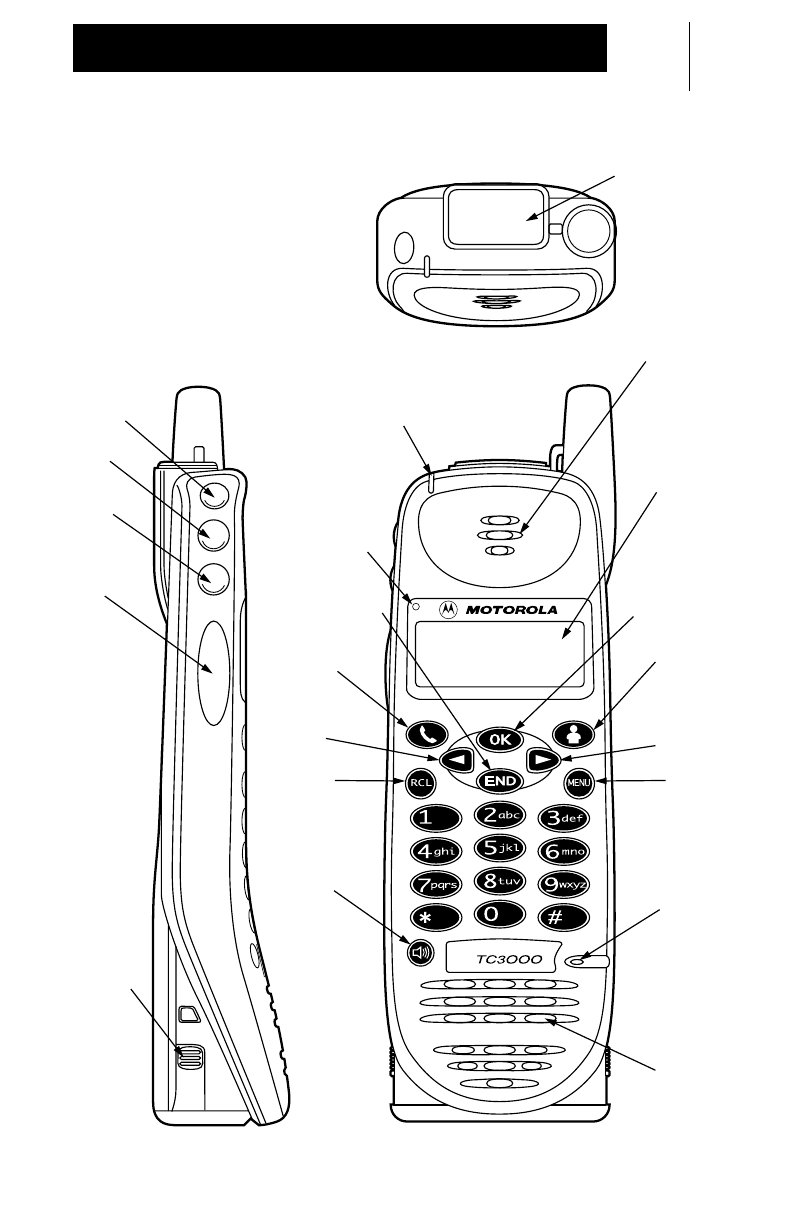
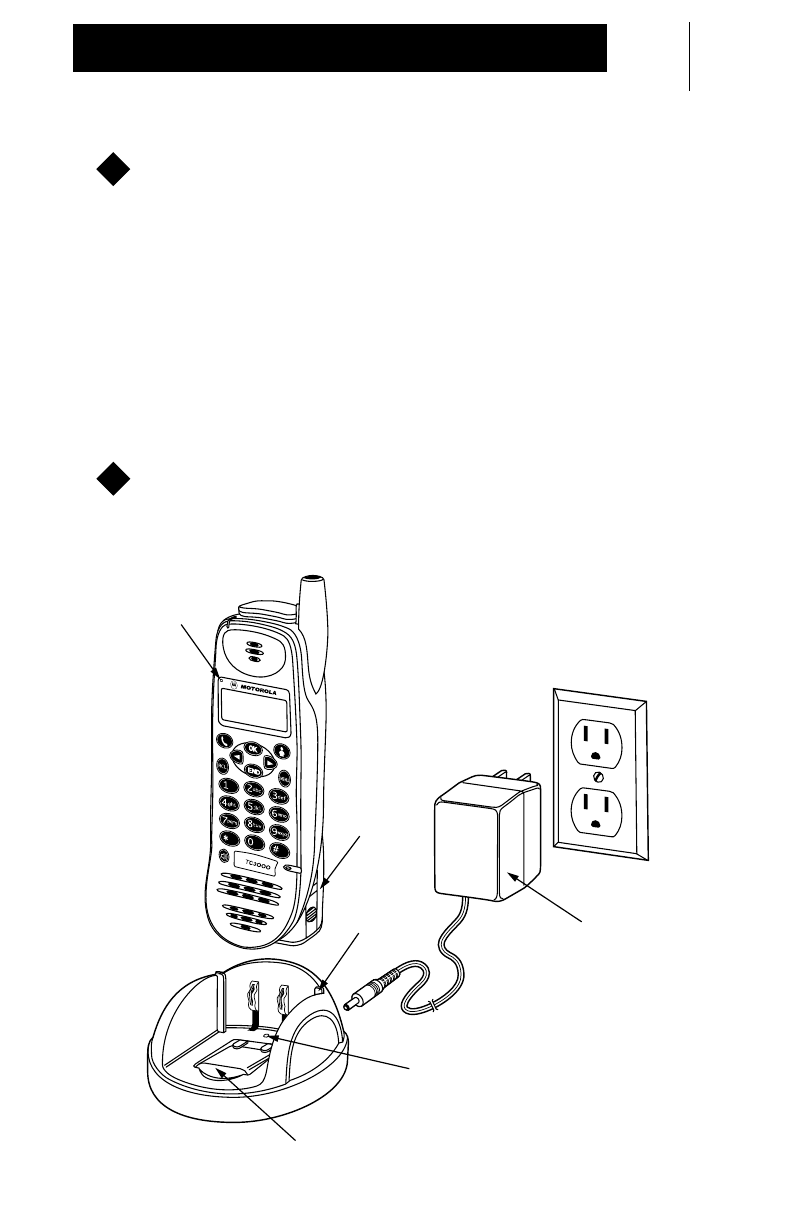
TC3000 Communicator Features
Controls
1. OK Button – Press to turn on, or to answer the display prompt
2. Link Button – Press to enter Person Link Service or accept a
Person Link
3. Scroll Buttons – Press to select a Group, scroll a list, or to
scroll the menu options
4. Menu Button – Press to enter the menu mode
5. Speaker Button – Press to route the audio from the earpiece to
the loud speaker. Press again to route the audio from the loud
speaker to the earpiece
6. Recall Button – Press to access a pre-stored list of names and
numbers
7. Phone Button – Press to enter Phone Service or to answer a
Phone Call
8. End Button – Press to:
•exit a service
•end a Phone Call or Person Link
•refuse a Person Link
•navigate back to the previous display
9. Push-To-Transmit (PTT) Button – Press and hold to transmit
10. Volume Down Button
11. Volume Up Button
12. Tap Button – Press to transfer a Phone Call or to answer call waiting
13. Accessory Connector
14. Battery Latch (located on both sides of the Communicator)
Audio Indicators
A. Low Audio (earpiece)
B. Microphone
C. High Audio (loud speaker)
Visual Indicators
D. Battery Charging LED Indicator – Indicates charging status
E. Communications Progress LED – Indicates transmit and receive
F. Display – 2-Line, 12-Character alphanumeric test
7
Introduction
1
2
3
3
4
B
5
6
7
8
9
10
11
12 E
F
D
14
13
A
C
8
Introduction
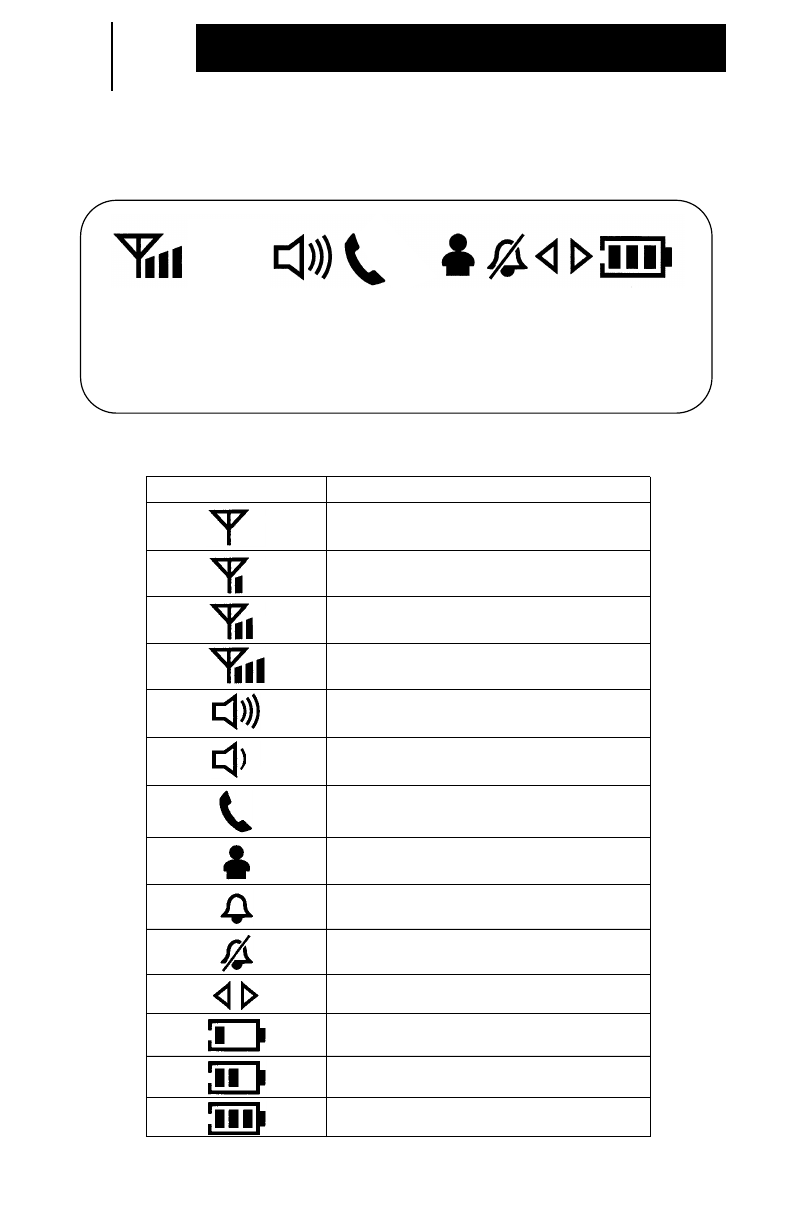
Display Icons
TC3000 Communicator Icon Indications
Icon Description
Signal Strength None – the icon will
blink
Signal Strength Weak
Signal Strength Moderate
Signal Strength Strong
Speaker Audio High – audio is heard
from the loud speaker
Speaker Audio Low – audio is heard
from the earpiece
Phone Call
Person Link
Ring
Vibrate
Scroll
Battery Level Low
Battery Level Medium
Battery Level High
9
Introduction
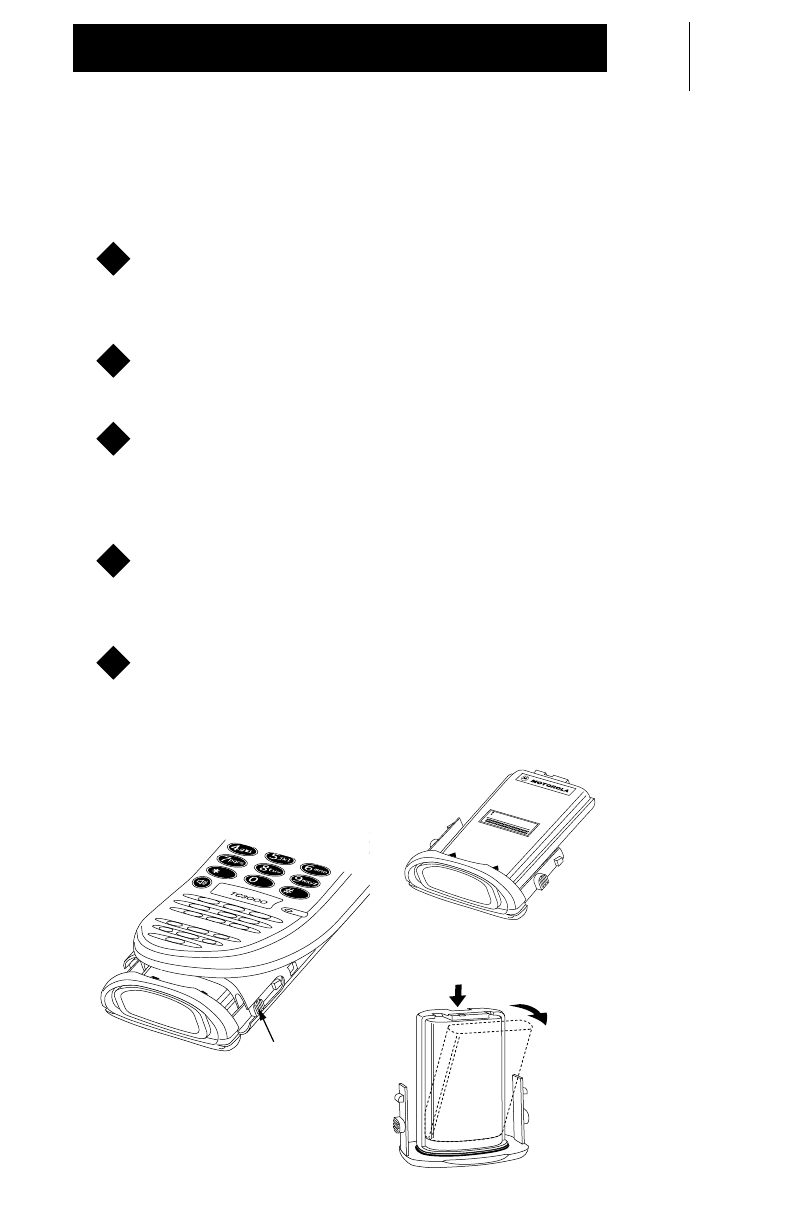
Battery Installation Instructions
To Insert Battery
Squeeze the two bottom side battery latches in and slide the
battery tray down and out of the Communicator. Refer to
Figure 1.
Place the battery pack into the tray with the arrows facing
upward. Refer to Figure 2.
Slide the battery tray into the Communicator until it snaps
into place.
To Remove Battery
Squeeze the two bottom side battery latches in and slide the
battery tray down and out of the Communicator. Refer to
Figure 1.
Remove the battery pack from the tray by pushing downward
on the battery and pivoting it away from the tray until the
hook-latch on the battery clears the tray. Refer to Figure 3.
1
2
3
1
2
WARNINGWARNING
Figure 1.
Battery Tray
Battery
Latch
WARNINGWARNING
Figure 2.
Insert Battery Pack
Figure 3.
Remove Battery Pack

10
Introduction
Charging Instructions
MPORTANT:
The battery is shipped from the factory uncharged and
must be charged before use.
Your battery will need to be charged using the rapid charge method
before operating your Communicator for the first time. The rapid
charge method fully charges your battery in 60 minutes.
Your charger has the capability of charging both a battery inside
the Communicator (rapid charge method) and a spare battery
(slow charge method) simultaneously.
OTE:
Do not leave the Communicator or battery in the charger for
extended periods of time (1 week) so as to avoid a decrease
in overall battery performance.
Plug the round end of the transformer cord into the socket
located on the back of the charger.
Plug the transformer into the appropriate AC outlet.
Rapid Charge Method (battery inside Communicator)
Align the grooved rails of the Communicator with the guide
rails of the charger and insert the Communicator, with the
battery inside, into the charger pocket. Refer to Figure 4.
OTE:
Your Communicator can be left on to receive
communications while charging without causing harm to the
battery or battery charger. However, if the Communicator
remains on while charging, it will require at least 25% more
time for the battery to charge to full capacity.
I
N
1
2
1
N
11
Introduction
When the Communicator is properly inserted into the
charger pocket the battery charging LED indicator on the
Communicator will indicate:
•
Red
while the battery is rapid charging. The battery fully
charges in 60 minutes.
•
Green
when the battery is fully charged. This occurs once
rapid charge is completed.
•
Yellow
if there is a charging problem.
Slow Charge Method (battery only)
Insert a spare battery into the charger pocket. The red LED
on the charger will light when the battery is properly
installed. The battery fully charges in 24 hours.
2
1
Figure 4.
Grooved
Rails
Guide
Rails
Red
LED
Spare Battery
Transformer
Battery Charging
LED Indicator

12
Introduction
Attaching and Removing the Carry Holster
To Attach the Carry Holster
Place the Communicator
To Remove the Carry Holster
Lift the Communicator
1
1
13
Turning the TC3000 Communicator On
Press the button.
•A short, high-pitched tone will sound, indicating successful
start-up. If the Communicator is not operating properly, a
continuous low-pitched tone will sound.
When turning on your Communicator for the
first time, the first available Group will be
your initial default Group. Afterward, when
turning the communicator on, it will default to
the last selected Group. Refer to page 22 to
select another Group.
To preserve battery life, your Communicator will enter a “battery
saver” mode after several minutes of no activity. Your
Communicator will return to full operation by pressing any button
or by receiving a transmission.
Your Communicator and its battery have been designed for
uninterrupted use, making it unnecessary to turn it off when not in
use. See Charging Instructions on page 10 for more information.
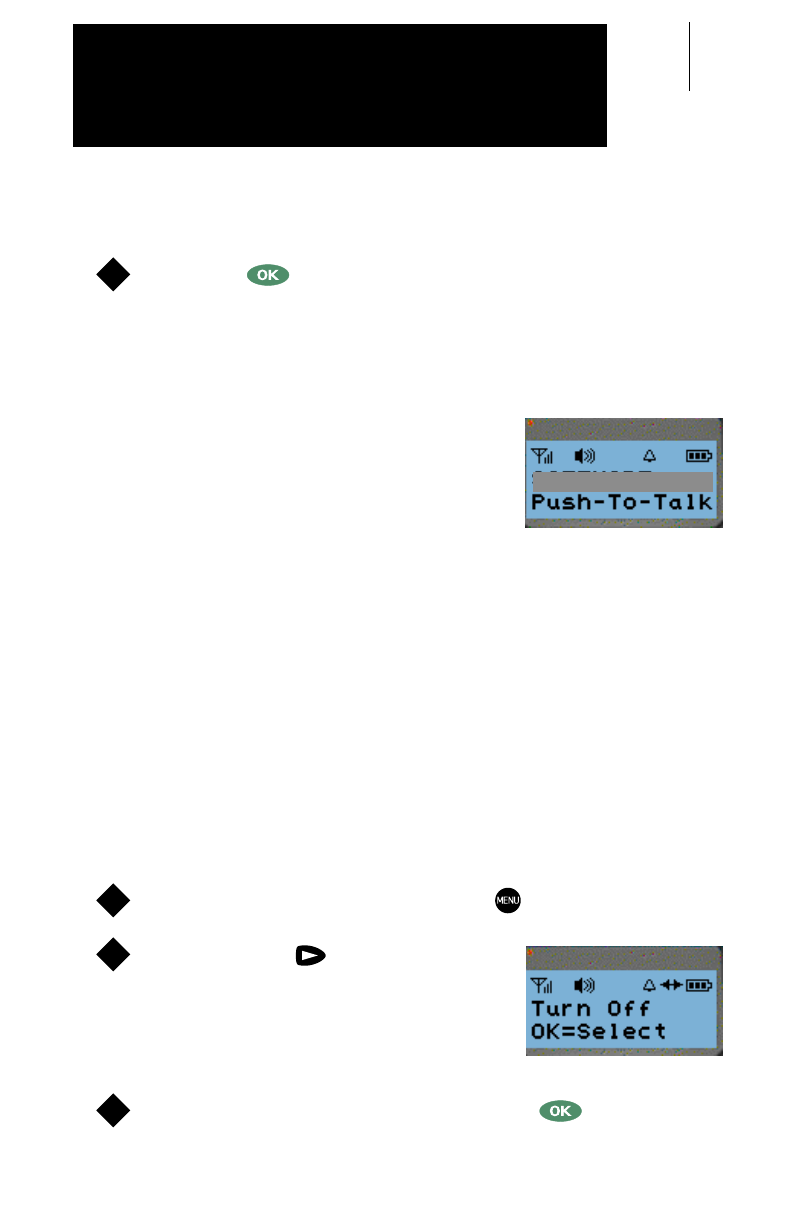
Turning the TC3000 Communicator Off
To enter the menu mode, press the button.
Press the right scroll button once
to view the
“Turn Off”
option.
•Line 2 of the display will prompt how to
turn off:
“OK=Select”
.
To turn off the Communicator, press the button.
1
Show Display
GROUP TALK1
1
2
Show Display
3
Basic Functions

14
Basic Functions
Setting the Volume
Press the volume up / down buttons on the side of the
Communicator to adjust the volume to a comfortable listening level.
Each press of the volume up / down buttons will provide you with
audio feedback of the listening level. The lowest volume level will
still provide you with minimal audio.
Audio Routing
The audio from the handset earpiece can be routed to the loud
speaker or visa versa at any time during a conversation during a
Group Talk or a Person Link. The default audio for the following
services is:
•Group Talk – High Audio (loud speaker)
•Person Link – High Audio (loud speaker)
•Phone – Low Audio (earpiece)
OTE:
While audio routing is not available in Phone Service, the
default is Low Audio.
To route the audio from the earpiece to the loud speaker,
press the button. To reroute the audio from the loud
speaker to the earpiece, press the button again.
Battery Life Indicator
Your Communicator has a built-in feature to alert you when your
battery life is low (approximately 5-10% charge remaining):
•Two (2) short, low-pitched tones will sound every 10
minutes and upon release of the PTT button.
•The display will indicate a Battery Gauge Icon. As battery
life drops, the battery gauge icon will indicate battery life in
three stages. When battery life has approximately 5-10%
charge remaining, the battery icon gauge will blink with one
bar remaining.
N
1
Blinks when
5-10% charge remains

15
Basic Functions
Time-Out Timer
Time-Out Timer limits the amount of time you have to transmit in
Group Talk or Person Link Services. Preprogrammed from
1 to 255 seconds or Off.
•When you reach the time limit, a continuous, low pitched
tone will sound (until you release the PTT) and your
transmission will be cut off.
Idle Timer
Your Communicator has a built-in Idle Timer that can be
programmed from 0-30 seconds that will take you out of any mode
or service you have entered if no action has taken place within the
given amount of time.
•For example, if you enter Phone Service but do not dial a
phone number, your Communicator will automatically return
to Group Talk Service, so as not to tie up system resources.
OTE:
This feature is applicable to Phone and Person Link
Services, and to the Menu button.
N

16
Basic Functions
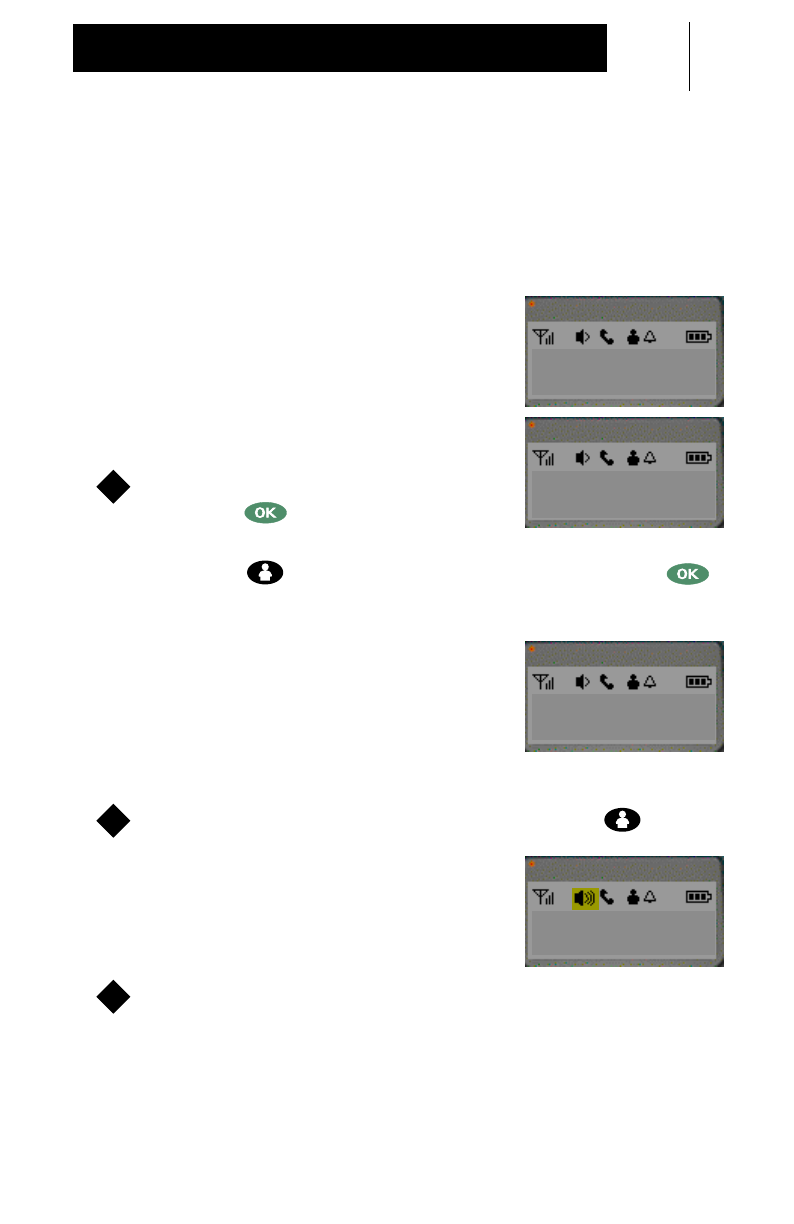
Menu Options
Within the Menu List use the or scroll buttons to select
options.
Select Ring Type
Select from two (2) audible ring types or vibration.
To enter the menu mode, press the button.
Scroll through the menu options by pressing either the
or scroll buttons until the desired ring option appears.
•Line 2 of the display will prompt how to select:
“OK=Select”
.
To select the ring option, press the button.
•You will hear the selected ring once.
Turning the TC3000 Communicator Off
To enter the menu mode, press the button.
Press the right scroll button once
to view the
“Turn Off”
option.
•Line 2 of the display will prompt how to
turn off:
“OK=Select”.
To turn off the Communicator, press the button.
1
2
3
1
2
Show Display
3

17
Your Communicator offers full duplex telephone functionality and
offers the capability of storing phone numbers alphanumerically.
If a phone number is to be designated with a name, it
must
first
be preprogrammed by an authorized Motorola dealer.
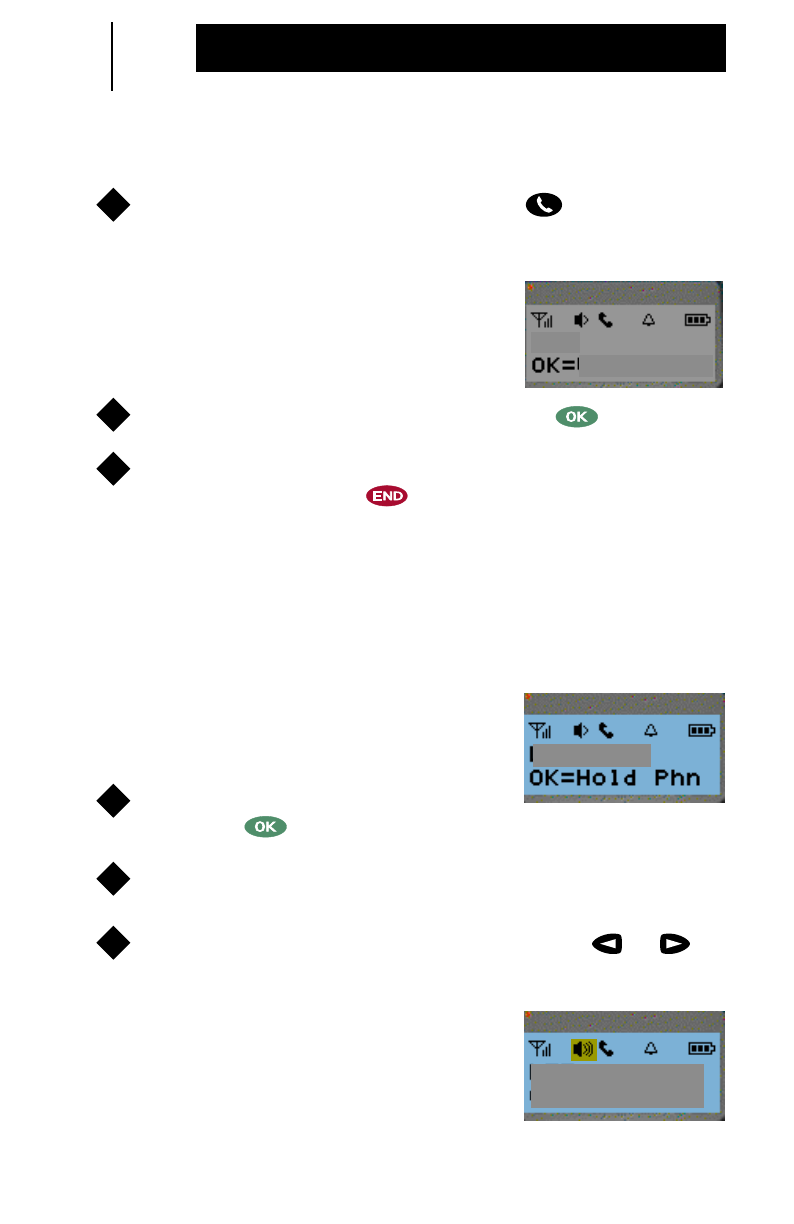
Entering Phone Service
To enter Phone Service, press the button.
•You will hear a dial tone.
Making a Phone Call
There are three (3) different ways a Phone Call can be made on
your Communicator when in Phone Service.
(1) Live Dial of a Phone Call
To enter Phone Service, press the button.
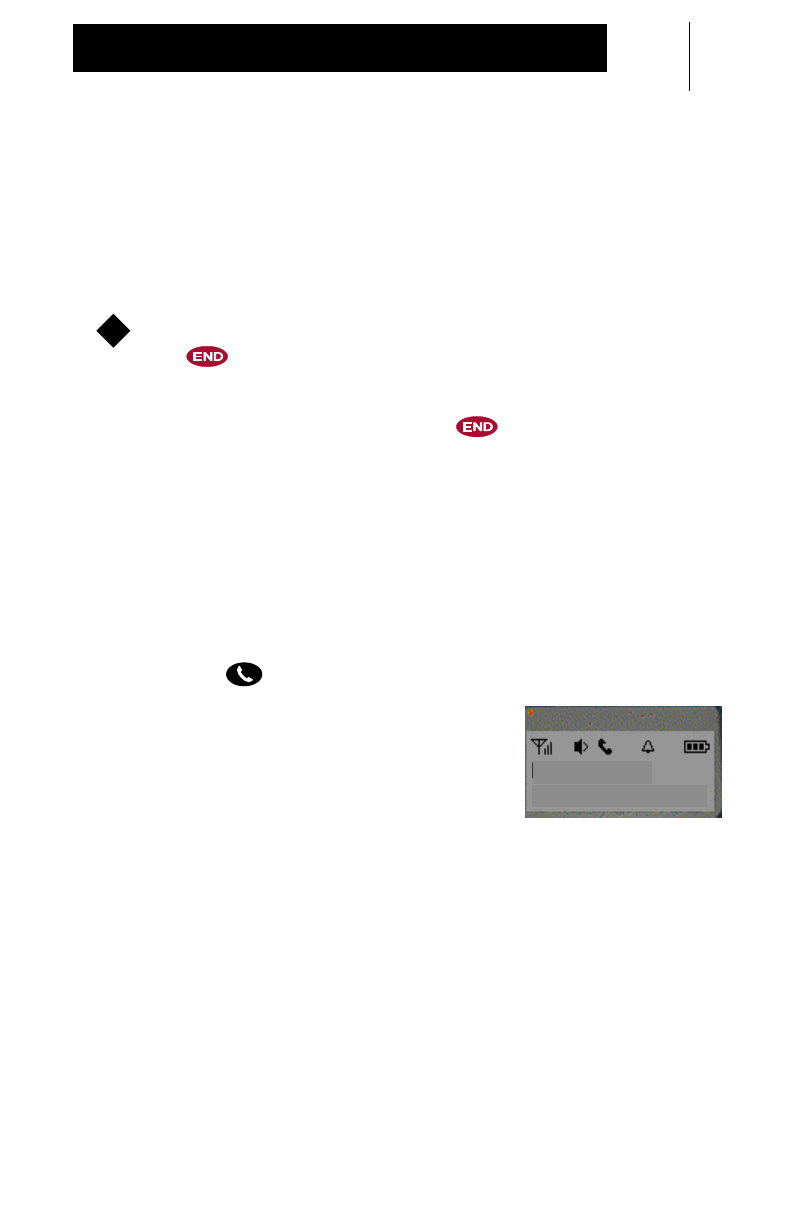
Enter the digits of the phone number to be called.
•The display will indicate the digits as
they are entered.
•The phone number will be dialed
automatically after the last digit is
entered.
1
1
2
Show Display
Phone Functions
18
Phone Functions
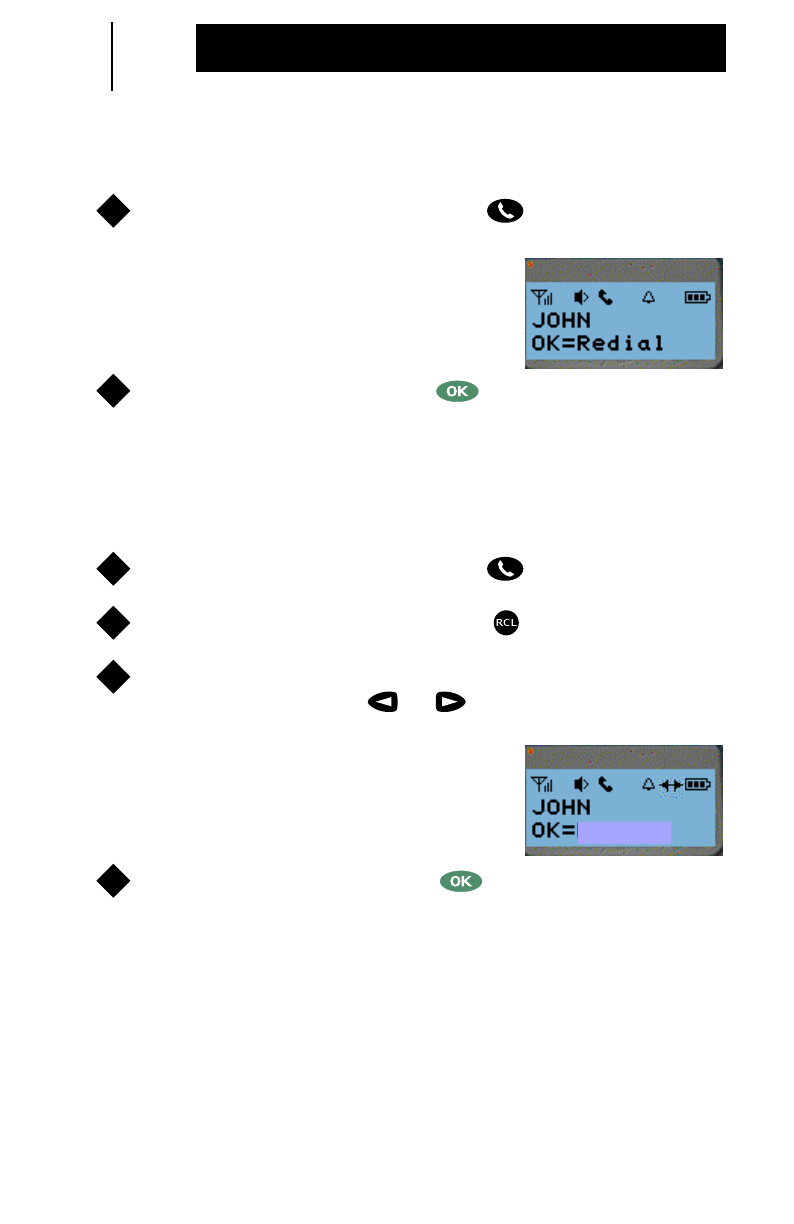
(2) Last Number Redial
To enter Phone Service, press the button.
•Line 1 of the display will indicate the
last phone number or name dialed.
Line 2 of the display will prompt how to
redial:
“OK=Redial”
.
To redial and send, press the button.
(3) Recall from Phone List
To enter Phone Service, press the button.
To access the phone list, press the button.
Scroll through the phone list of names and numbers stored
by pressing either the or scroll buttons.
•Line 1 of the display will indicate the
stored phone number or name. Line 2
of the display will prompt how to dial:
“OK=Select”
.
To select and send, press the button.
1
Show Display
2
1
2
3
Show Display
Select
4
19
Phone Functions
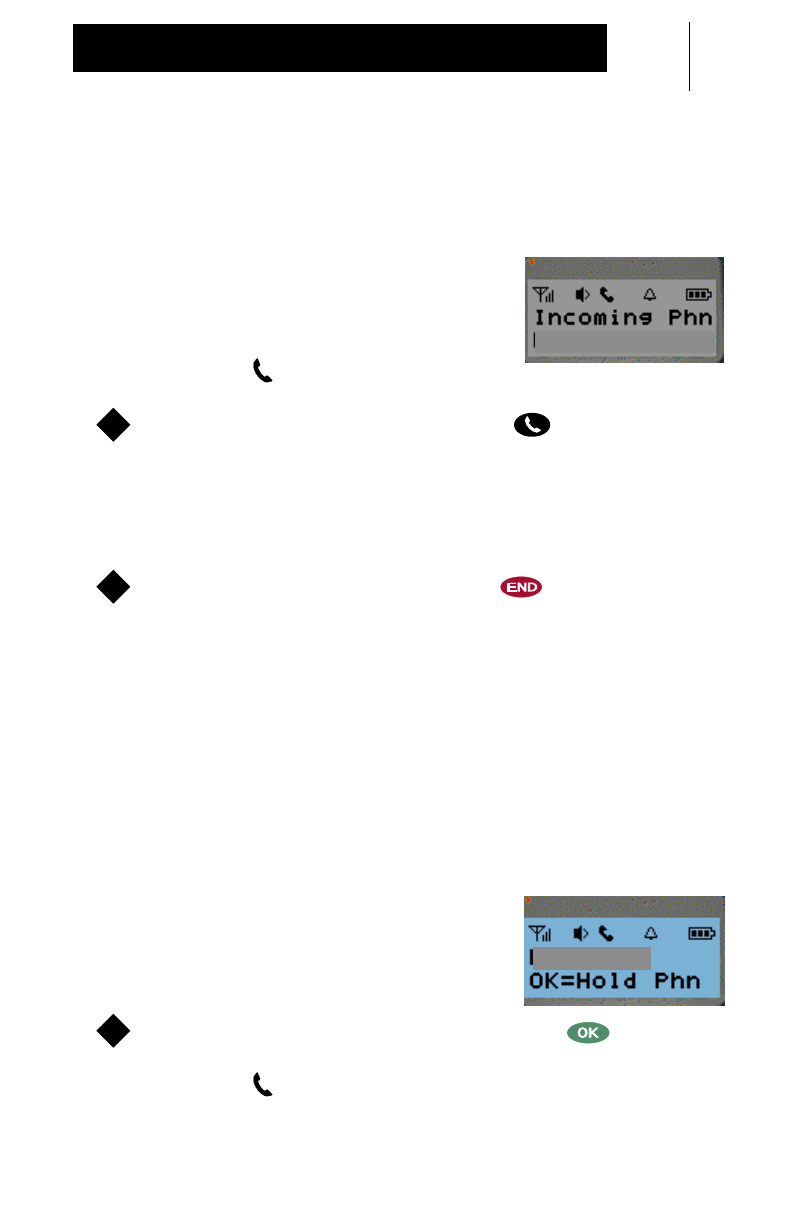
Answering a Phone Call
•The Communicator will ring.
•Line 1 of the display will indicate
“Incoming Phn”
. Line 2 of the display
will indicate
“PHN=Answer”
.
•The
Phone
icon will blink.
To answer the Phone Call, press the button.
Hanging-Up a Phone Call
To hang-up a Phone Call, press the button.
Holding a Phone Call
A Phone Call can be placed on hold to make another Phone Call,
Group Talk, or Person Link. This feature is dependent upon your
phone system or PBX.
Placing A Phone Call On Hold
•While a Phone Call is in progress,
Line 2 of the display will prompt how to
place the Phone Call on hold:
“OK=Hold Phn”
.
To place the Phone Call on hold, press the button.
•The
Phone
icon will blink.
Show Display
PHN=Answer
1
1
Show Display
EDUARDO
1

20
Phone Functions
Holding a Phone Call (Cont’d.)
Taking A Phone Call Off Hold
•Line 2 of the display will prompt how to
take a Phone Call off hold:
“OK=Off
Hold”
.
To take the Phone Call off hold and resume your
conversation, press the button.
Transferring / Conferencing a Phone Call
The
Tap
button is available to transfer a Phone Call to another
phone number or to establish a conference call. This feature is
dependent upon your phone system or PBX. Please reference
your phone system manual for details on transferring or
conference calling.
Phone Call Waiting
The
Tap
button is available for call waiting. This feature is
dependent upon your phone system or PBX. Please reference
your phone system manual for details on call waiting.
Voicemail
Voicemail is supported by your Communicator. This feature is
dependent upon your phone system or PBX. Please reference
your phone system manual for details on voicemail.
Show Display
Off Hold
EDUARDO
1
21
Phone Functions
Send Call / End Ring
Incoming Phone Calls can be sent directly to voicemail. This
feature is dependent upon your phone system or PBX. Please
reference your phone system manual for details in retrieving
voicemail messages.
To send an incoming Phone Call directly to voicemail, press
the button.
OTE:
If voicemail is not available or supported by your phone
system or PBX, pressing the button simply stops the
Communicator’s ringing.
Group Ringing
More than one Communicator can share the same phone
number. All Communicators with the same phone number will
receive notification (ringing and display indication) of an incoming
Phone Call, but only one Communicator – the first to answer by
pressing the button – can receive the Phone Call. Once a
Phone Call has been answered, all other
Communicators sharing that same phone
number will display
“Line In Use”
and their
phone lines will become inactive until the
first Communicator hangs up the Phone
Call.
1
N
Line In Use
22
Your TC3000 Communicator supports two-way Group Talk
communications among TC3000 Communicators and TR3000
Radios.
A Group Talk is a transmission to a specific group of assigned
members. Your Communicator always defaults to Group Talk
Service.
Selecting a Group
There are two (2) ways to select a Group to initiate a Group Talk.
(1) Last Group Selected / Displayed
Once your Communicator has been turned on, it will default to
the last selected Group until it is actively changed to another
Group.
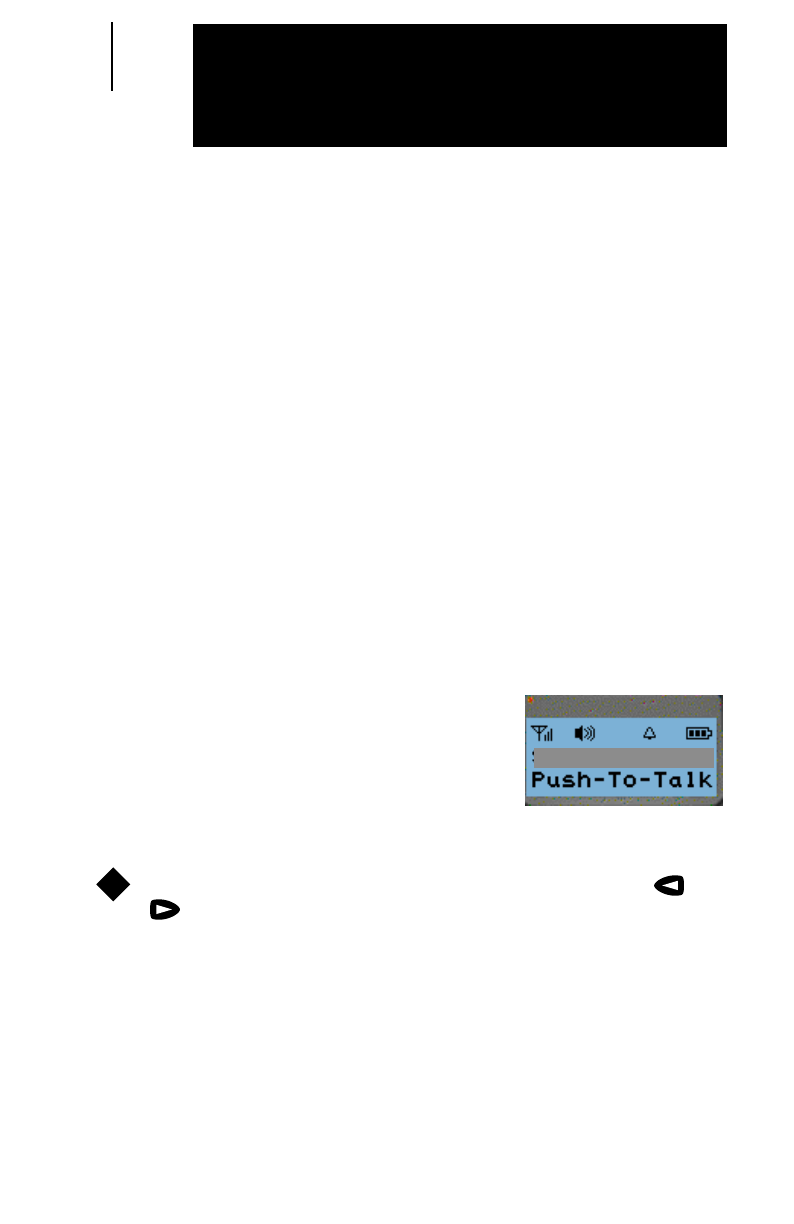
•Line 1 of the display will indicate the
default Group. Line 2 of the display will
prompt
“Push-To-Talk”
.
(2) Scroll
Scroll through the Group List by pressing either the or
scroll buttons.
•Line 1 of the display will indicate the Groups as you scroll
through the list. Line 2 of the display will prompt
“Push-To-Talk”
.
Show Display
GROUP TALK2
1
Group Talk
23
Group Talk
Initiating a Group Talk
Select the desired Group.
Press and hold the PTT button to initiate a Group Talk.
•Two (2) medium-pitched access tones
and one (1) high-pitched permit tone
will sound, indicating that you may
begin speaking.
•Line 1 of the display will indicate the
Group. Line 2 of the display will
indicate
“Group Talk”
.
Release the PTT button to listen.
•The progress LED will light continuously while transmitting
and blink while receiving.
Group Busy Signal
If a continuous, low-pitched tone is heard
while attempting a Group Talk, it indicates
that someone else is talking on that Group.
1
2
Show Display
GROUP TALK1
Show Display
Group Talk
GROUP TALK1
3
Show Display
GROUP TALK1
24
Group Talk
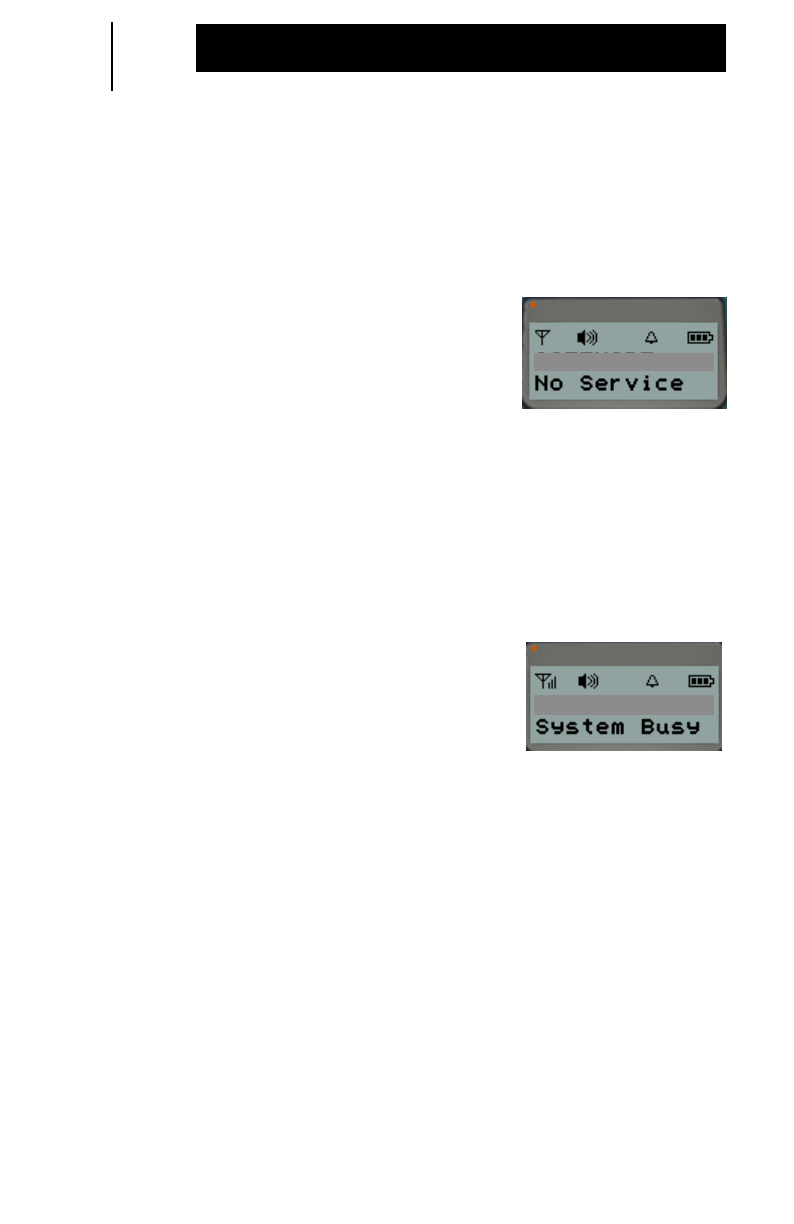
User Out of Range
If a continuous, low-pitched tone is heard while attempting a
Group Talk, it indicates that you are out of range or the Control
Station is inoperable.
•Line 1 of the display will indicate the
Group. Line 2 of the display will
indicate
“No Service”
.
•The signal strength icon bars will not
be present and the icon will blink.
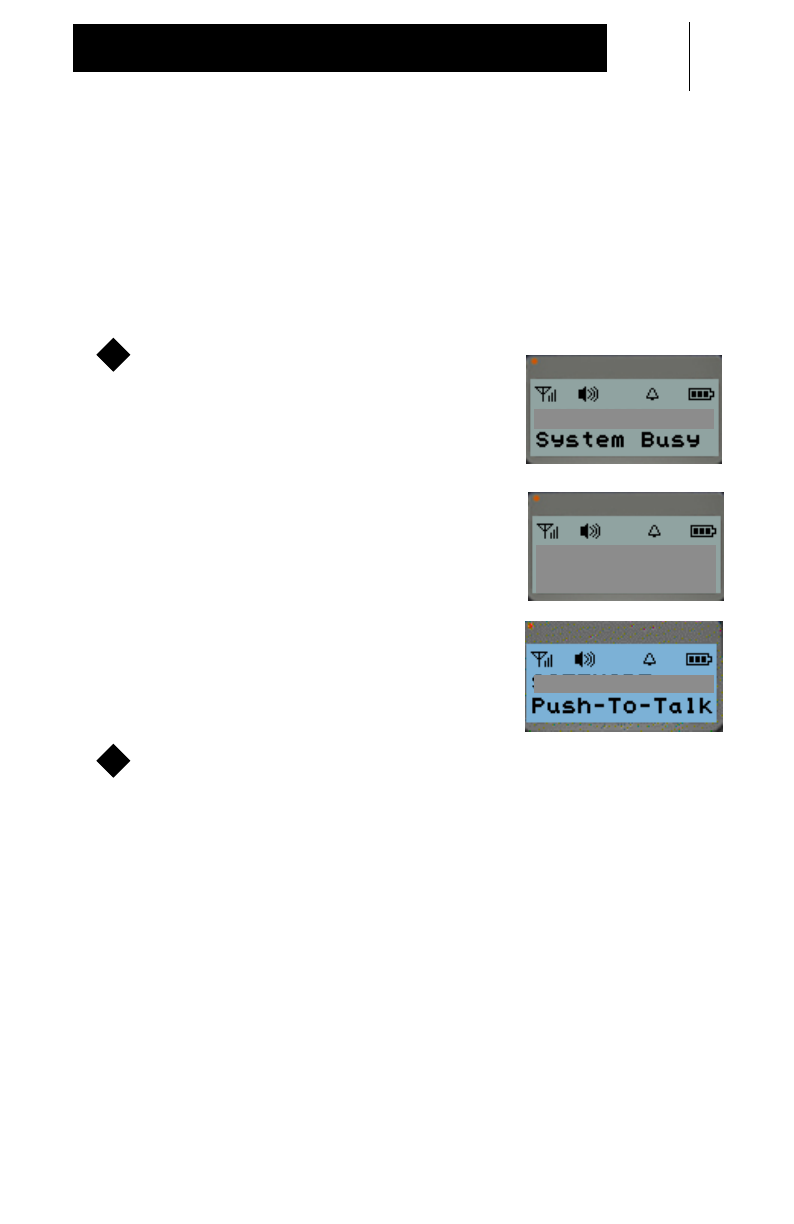
System Busy Signal
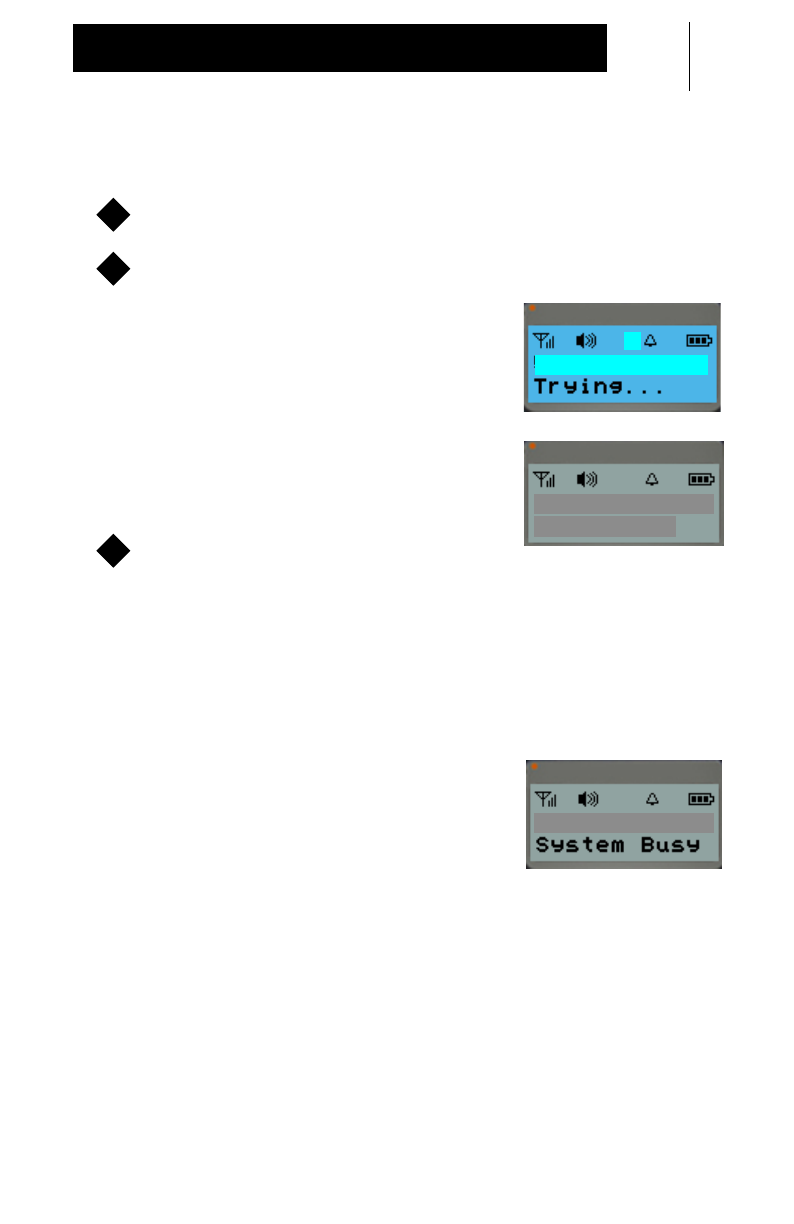
If fast, low-pitched busy tones are heard while attempting a
Group Talk, it indicates that all system resources are busy.
•Line 1 of the display will indicate the
Group. Line 2 of the display will
indicate
“System Busy”
.
Show Display
GROUP TALK 1
Show Display
GROUP TALK 1
25
Group Talk
System Busy Auto Retry
Your Communicator has a built-in system busy auto retry when
initiating a Group Talk. When your Group Talk is unable to be
connected because the system is busy, your Communicator will
automatically retry for 20 seconds. When the system is available
you will be alerted and can retry your Group Talk.
•Line 1 of the display will indicate the
Group. Line 2 of the display will
indicate
“System Busy”
.
•Line 2 of the display will indicate
“Retrying”
for 20 seconds.
•When the system is available, three
(3) short, high-pitched tones will
sound. Line 2 of the display will
indicate
“Push-To-Talk”
.
Press and hold the PTT button to retry your Group Talk.
OTE:
Any keypress or incoming communication will terminate the
system busy audio retry.
11
Show Display
GROUP TALK 2
Show Display
GROUP TALK 2
Retrying
Show Display
GROUP TALK 2
1
N

26
Group Talk
Receiving a Group Talk
A Group Talk can be received
only
on your selected Group.
Select the desired Group.
Listen for voice activity. Make sure the PTT button is
released.
•Line 1 of the display will indicate the
Group. Line 2 of the display will
indicate
“Receive Talk”
when voice
activity is heard.
Press and hold the PTT button to respond and release to
listen.
•The progress LED will blink while receiving.
•If a low-pitched tone is heard while attempting to respond, it
indicates that you cannot transmit at this time. Refer to
“Group Busy Signal” on page 23.
1
2
Show Display
GROUP TALK1
3

27
Your TC3000 Communicator supports Person Link Service. A
Person Link is a private two-way communication between two
people. A Person Link can be made between two TC3000
Communicators or between a TC3000 Communicator and a
TR3000 Radio.
Your Communicator also offers you the capability of storing Link
ID numbers alphanumerically.
To initiate a Person Link, you can either enter the Link ID directly
or select the Link ID or name from the Link list.
A Link ID or name
must
first be preprogrammed into a Link list
by a Motorola authorized dealer.
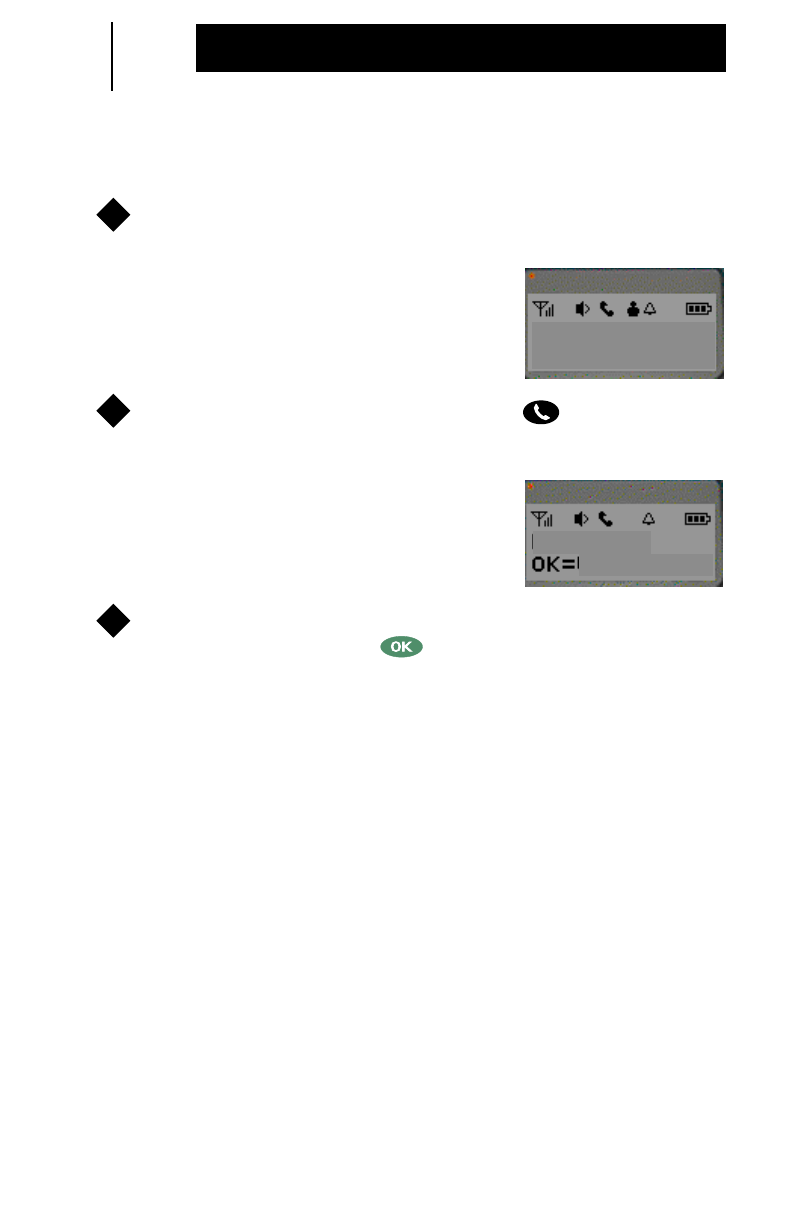
Link ID Recognition
Your Communicator will display an incoming Link ID or name if it
is stored in the Person Link memory list.
•Line 1 of the display will indicate the
Link ID or name of another
Communicator or Radio.
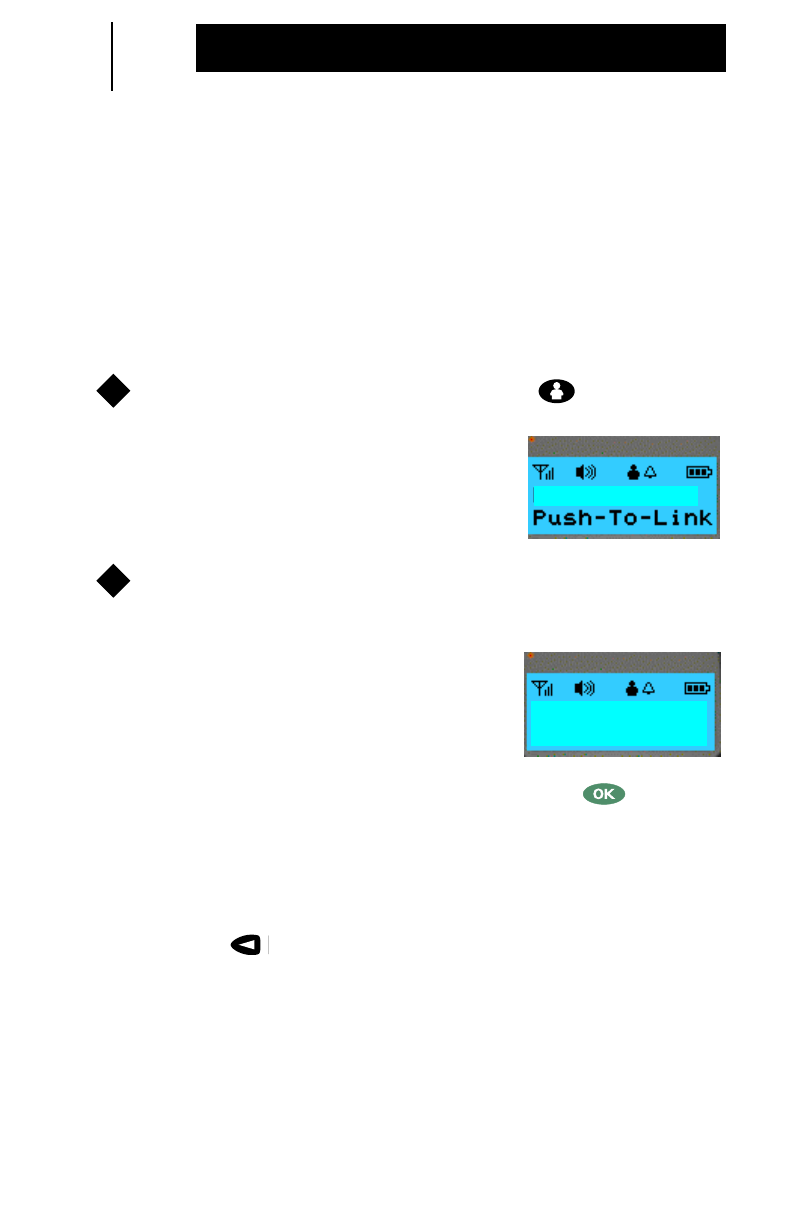
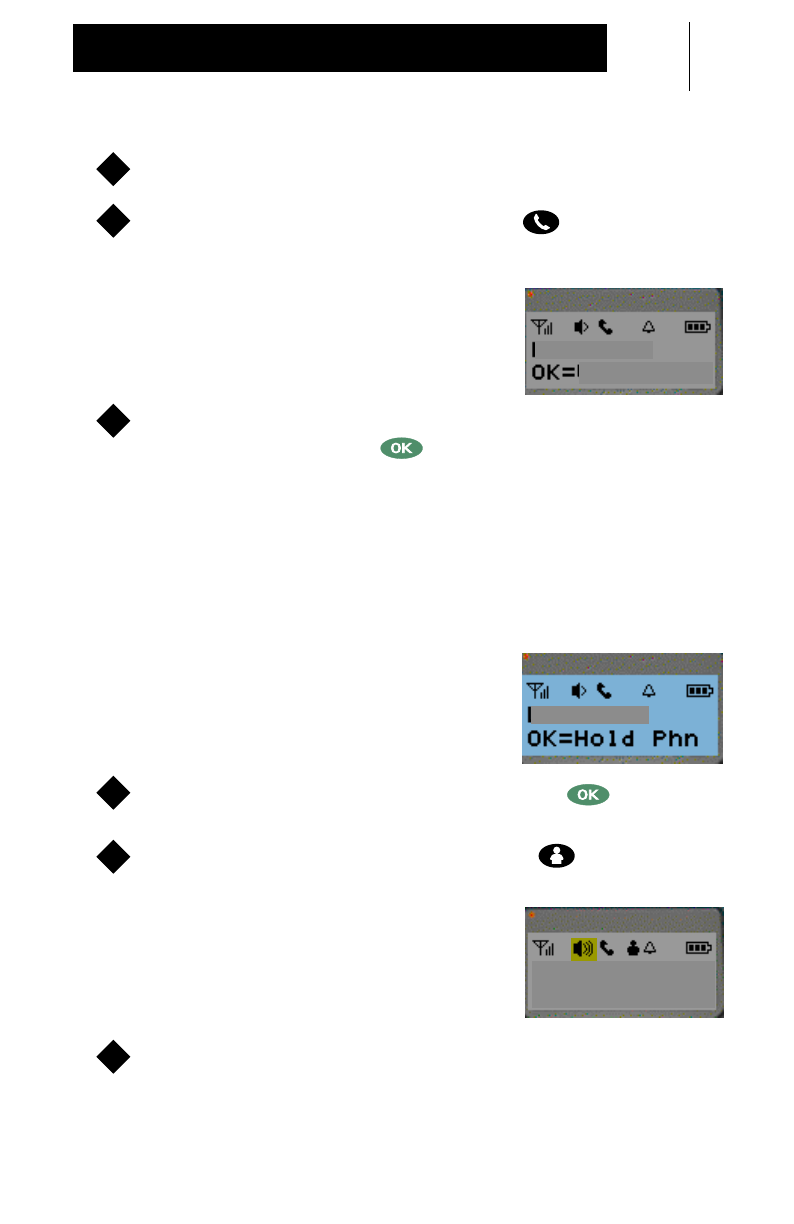
Entering Person Link Service
To enter Person Link Service, press the button.
Show Display
1
Person Link
28
Person Link
Initiating a Person Link
There are three (3) different ways a Person Link can be initiated
on your Communicator when in Person Link Service.
(1) Direct Entry of Link ID
If the desired Link ID is not stored in your Link list, you can
manually enter the Link ID digits.
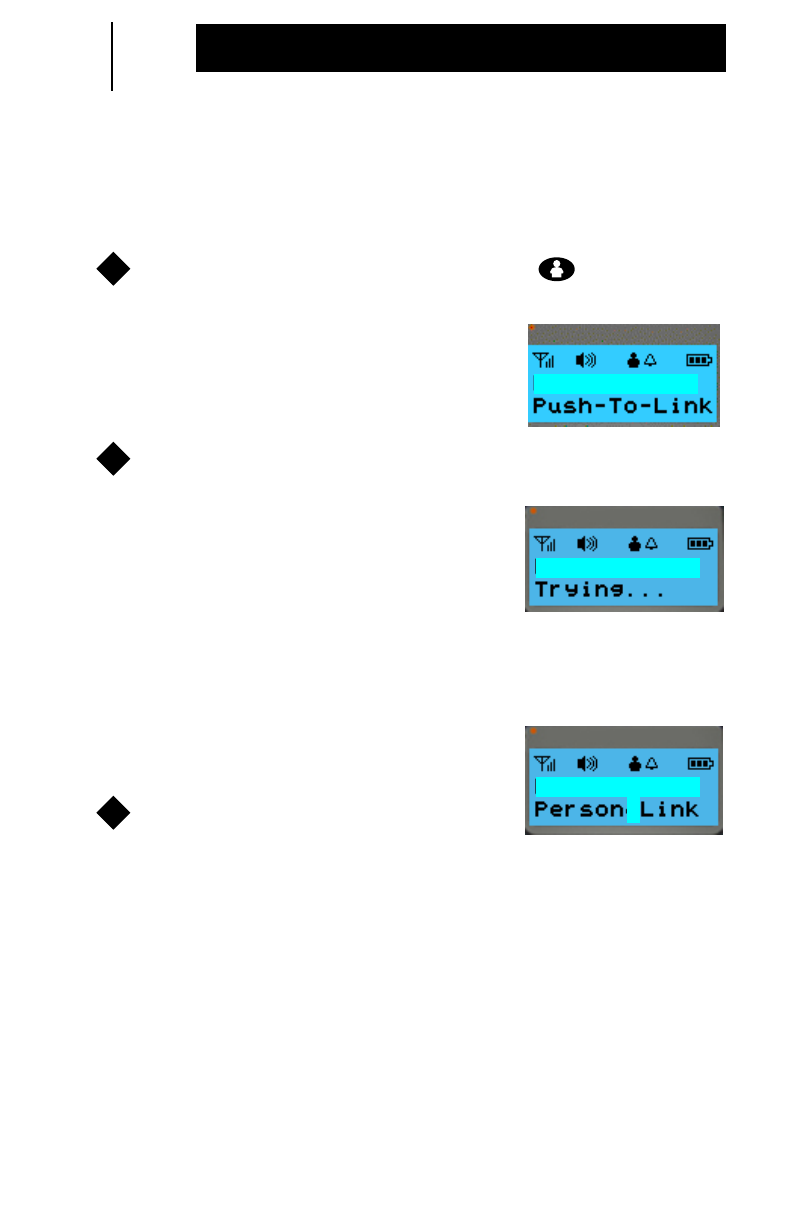
To enter Person Link Service, press the button.
•Line 1 of the display will indicate the
last Link ID or name called. Line 2 of
the display will prompt
“Push-To-Link”
.
Enter the 5-digit Link ID of the Communicator or Radio to
be called.
•Line 1 of the display will indicate the
Link ID digits as they are entered. Line
2 of the display will prompt
“Enter
Lnk ID”
.
OTE:
If you enter less than 5 digits and press the button, a
short, low-pitched tone will sound. Pressing the PTT will
sound a continuous, low-pitched tone until you release the
PTT.
OTE:
If an error is made when entering a digit, press the
left scroll button to clear a single digit at a time.
1
Show Display
54321
2
Show Display
123_
Enter Lnk ID
N
N
29
Person Link
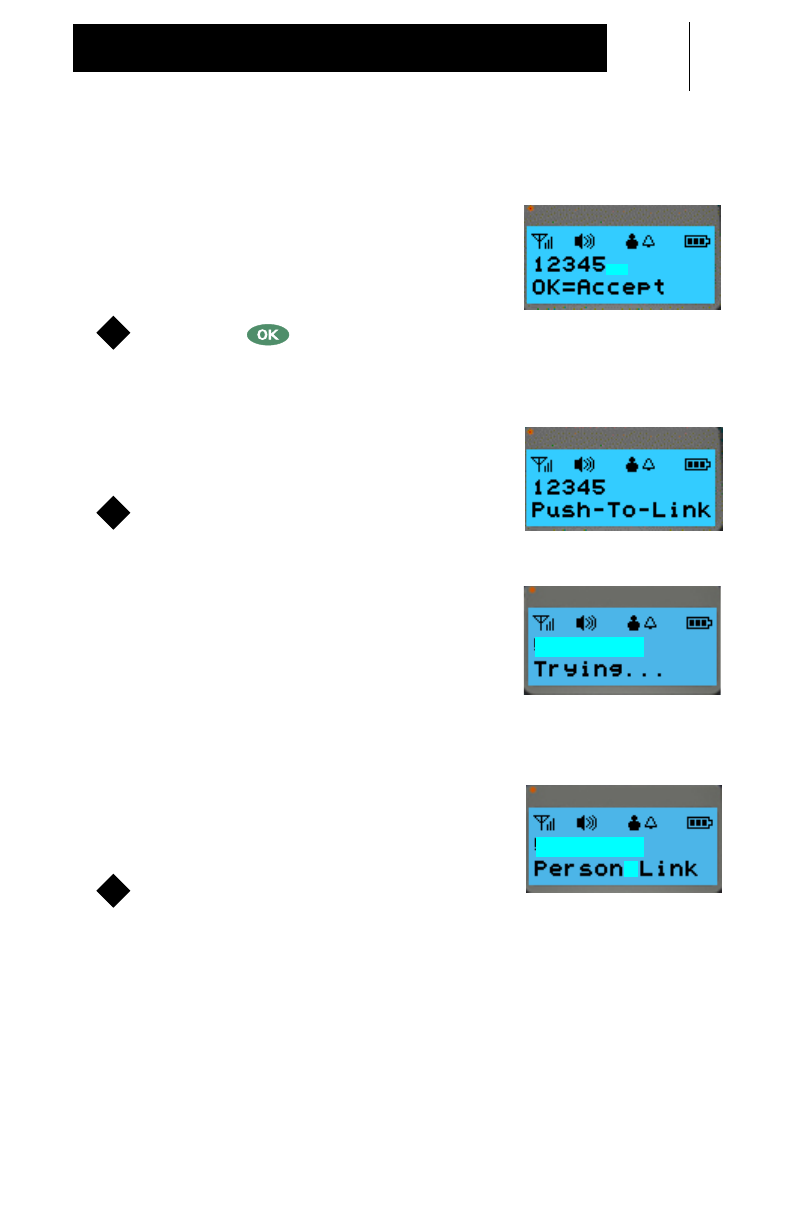
(1) Direct Entry of Link ID (Cont’d.)
•After the 5th digit has been entered,
Line 2 of the display will prompt how to
dial:
“OK=Accept”
.
Press the button to accept.
Or
, you can use the
optional short cut by pressing the PTT button to accept and
send the Person Link. Go directly to Step 4.
•Line 2 of the display will prompt
“Push-To-Link”
.
Press and hold the PTT button to send
your Person Link.
•Two (2) medium-pitched access tones
and one (1) high-pitched permit tone
will sound, indicating that you may
begin speaking. Line 2 of the display
will indicate
“Trying...”
until the other
person either accepts or declines the
Person Link.
•When the Person Link is accepted by
the other person, line 2 of the display
will indicate
“Person Link”
.
Release the PTT button to listen.
•The progress LED will light continuously while transmitting.
•Upon release of the PTT button, line 2 will prompt
“Push-To-Link”
.
Show Display
3
Show Display
4
Show Display
12345
Show Display
12345
5
30
Person Link
Initiating a Person Link (Cont’d.)
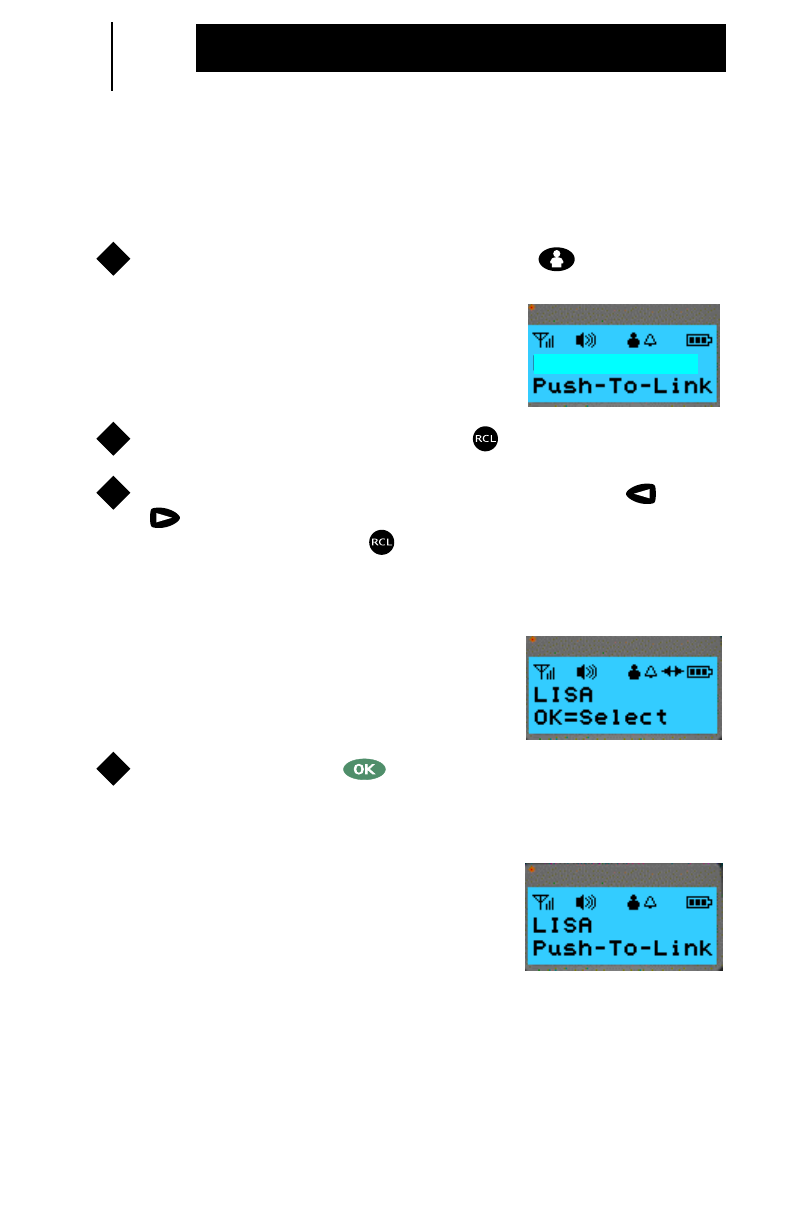
(2) Recall From Link List
To enter Person Link Service, press the button.
•Line 1 of the display will indicate the
last selected Link ID or name. Line 2
of the display will prompt
“Push-To-Link”
.
To access the Link list, press the button.
Scroll through the Link list by pressing either the or
scroll buttons. To view the Link ID of a name stored in
the Link list, press the button again. The Link ID will
remain on the display for three (3) seconds and then revert
back to the name.
•Line 1 of the display will indicate the
stored Link ID or name. Line 2 of the
display will prompt how to dial:
“OK=Select”
.
To select, press the button.
Or
, you can use the
optional short cut by pressing the PTT button to select and
send the Person Link. Go directly to Step 5.
•Line 2 of the display will prompt
“Push-To-Link”
.
1
Show Display
54321
2
3
Show Display
4
Show Display
31
Person Link
(2) Recall From Link List (Cont’d.)
Press and hold the PTT button to send your Person Link.
•Two (2) medium-pitched access tones
and one (1) high-pitched permit tone
will sound, indicating that you may
begin speaking. Line 2 of the display
will indicate
“Trying...”
until the other
person either accepts or declines the
Person Link.
•When the Person Link is accepted by
the other person, line 2 of the display
will indicate
“Person Link”
.
Release the PTT button to listen.
•The progress LED will light continuously while transmitting.
•Upon release of the PTT button, line 2 will prompt
“Push-To-Link”
.
5
Show Display
Show Display
6
32
Person Link
Initiating a Person Link (Cont’d.)
(3) Link ID ReLink
To enter Person Link Service, press the button.
•Line 1 of the display will indicate the
last Link ID or name called. Line 2 of
the display will prompt
“Push-To-Link”
.
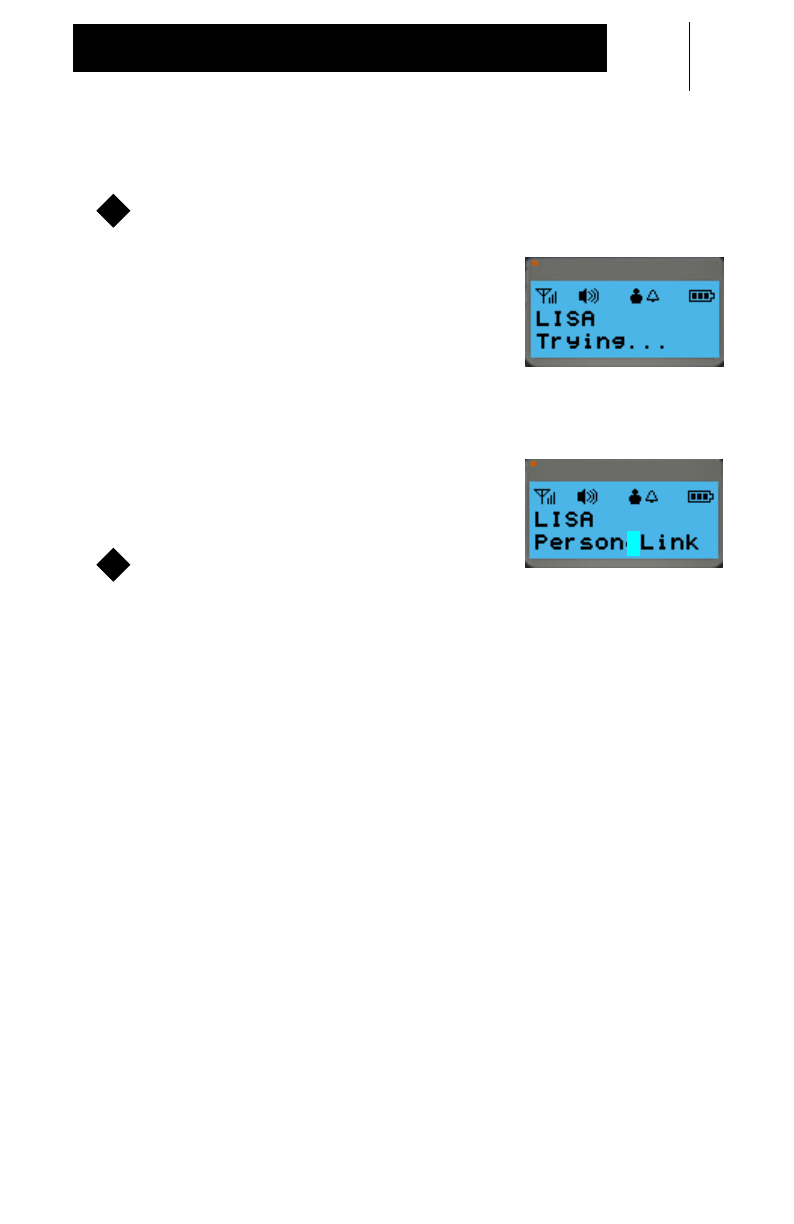
Press and hold the PTT button to send your Person Link.
•Two (2) medium-pitched access tones
and one (1) high-pitched permit tone will
sound, indicating that you may begin
speaking. Line 2 of the display will
indicate
“Trying...”
until the other
person either accepts or declines the
Person Link.
•When the Person Link is accepted by
the other person, line 2 of the display
will indicate
“Person Link”
.
Release the PTT button to listen.
•The progress LED will light continuously while transmitting.
•Upon release of the PTT button, line 2 will prompt
“Push-To-Link”
.
1
Show Display
LISA
2
Show Display
LISA
Show Display
LISA
3
33
Person Link
Target User Busy Signal
If two (2) medium-pitched access tones and one (1) low pitched
tone is heard while attempting a Person Link, it indicates that the
other person is on another call and either declined or ignored your
Person Link.
•Line 1 of the display will indicate the
Link ID or name. Line 2 of the display
will indicate
“Unavailable”
.
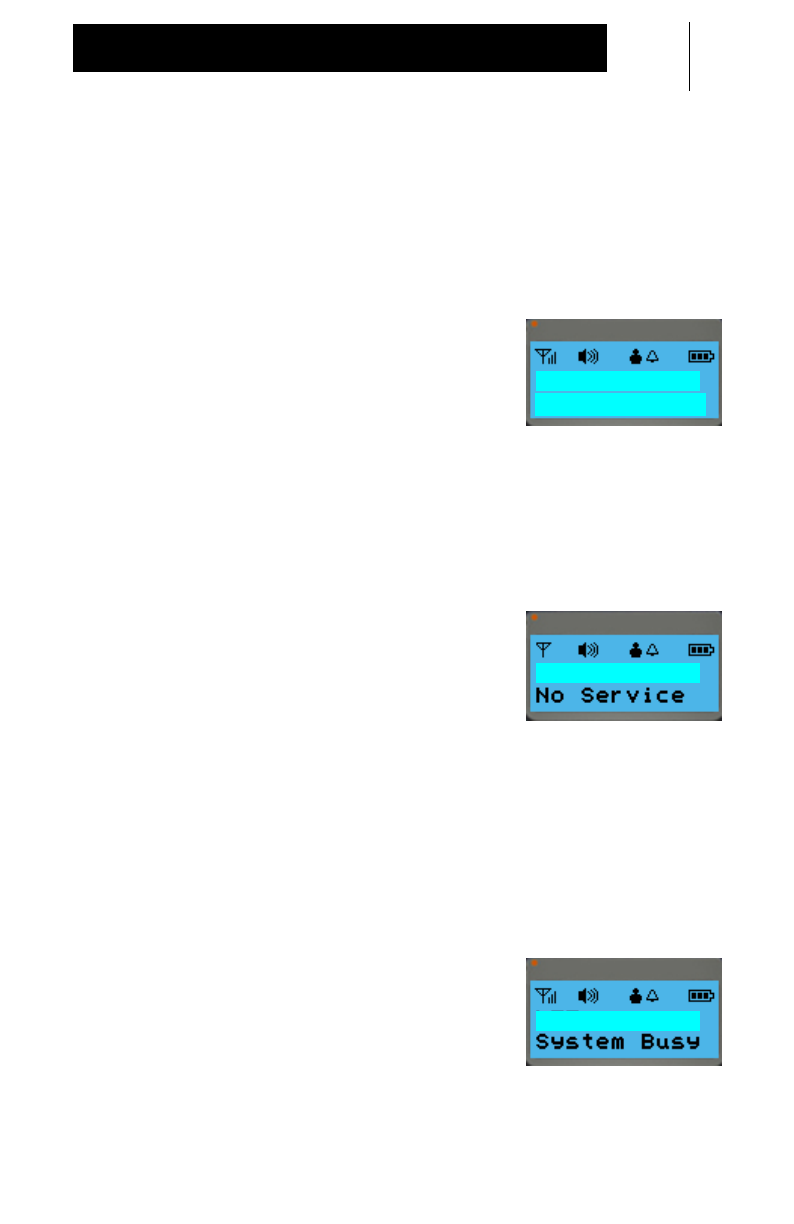
User Out of Range
If a continuous, low-pitched tone is heard while attempting a
Person Link, it indicates that you are out of range or the Control
Station is inoperable.
•Line 1 of the display will indicate the
Link ID or name. Line 2 of the display
will indicate
“No Service”
.
•The signal strength icon bars will not
be present and the icon will blink.
System Busy Signal
If fast, low-pitched busy tones are heard while attempting a
Person Link, it indicates that all system resources are busy.
•Line 1 of the display will indicate the
Link ID or name. Line 2 of the display
will indicate
“System Busy”
.
Show Display
Unavailable
LISA
Show Display
LISA
Show Display
LISA
34
Person Link
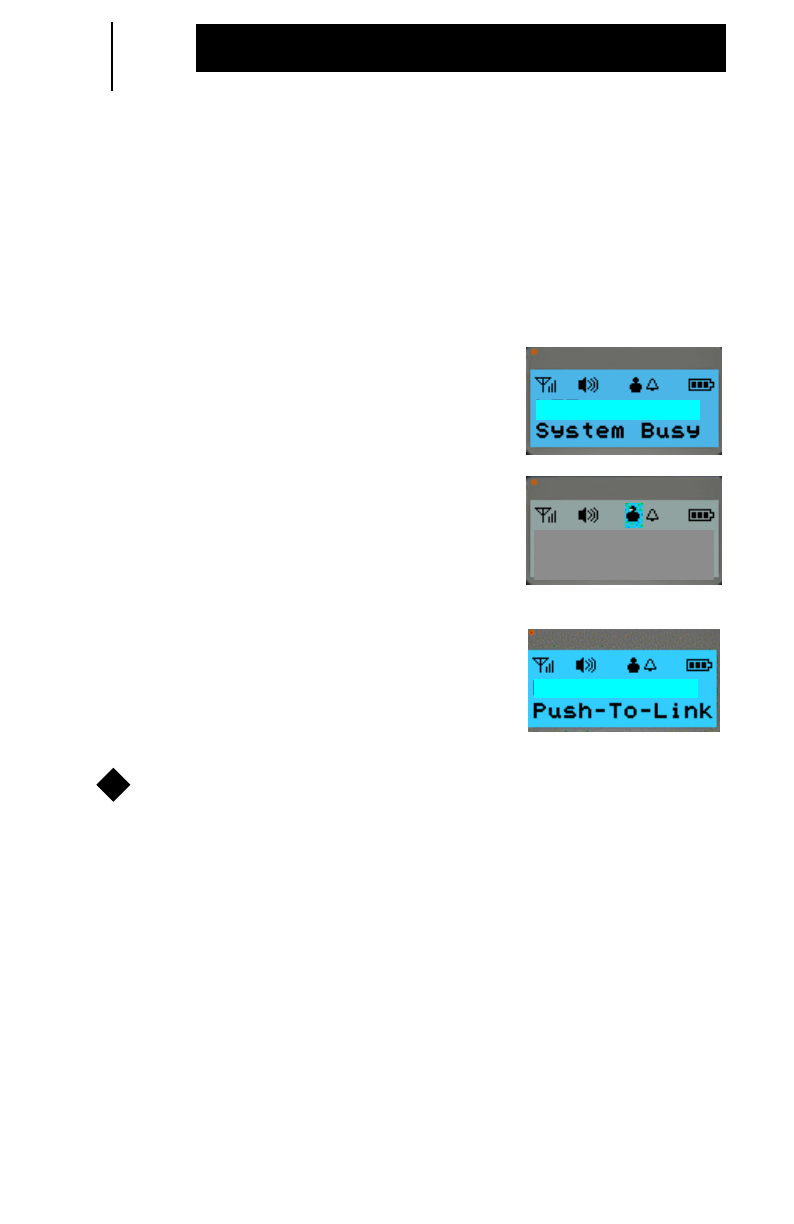
System Busy Auto Retry
Your Communicator has a built-in system busy auto retry when
initiating a Person Link. When your Person Link is unable to be
connected because the system is busy, your Communicator will
automatically retry for 20 seconds. When the system is available
you will be alerted and can retry your Person Link.
•Line 2 of the display will indicate
“System Busy”
.
•Line 2 of the display will indicate
“Retrying”
for 20 seconds.
•When the system is available, three
(3) short, high-pitched tones will
sound. Line 1 of the display will
indicate the Person Link and Line 2 of
the display will indicate
“Push-To-Link”
.
Press the PTT button to retry your Person Link.
OTE:
Any keypress or incoming communication will terminate the
system busy audio retry.
Show Display
LISA
Show Display
LISA
Retrying
Show Display
LISA
1
N
35
Person Link
Receiving a Person Link
The following indicators occur when receiving an incoming
Person Link:
•Four (4) short, medium-pitched alert tones will sound.
•Blinking
Link
icon.
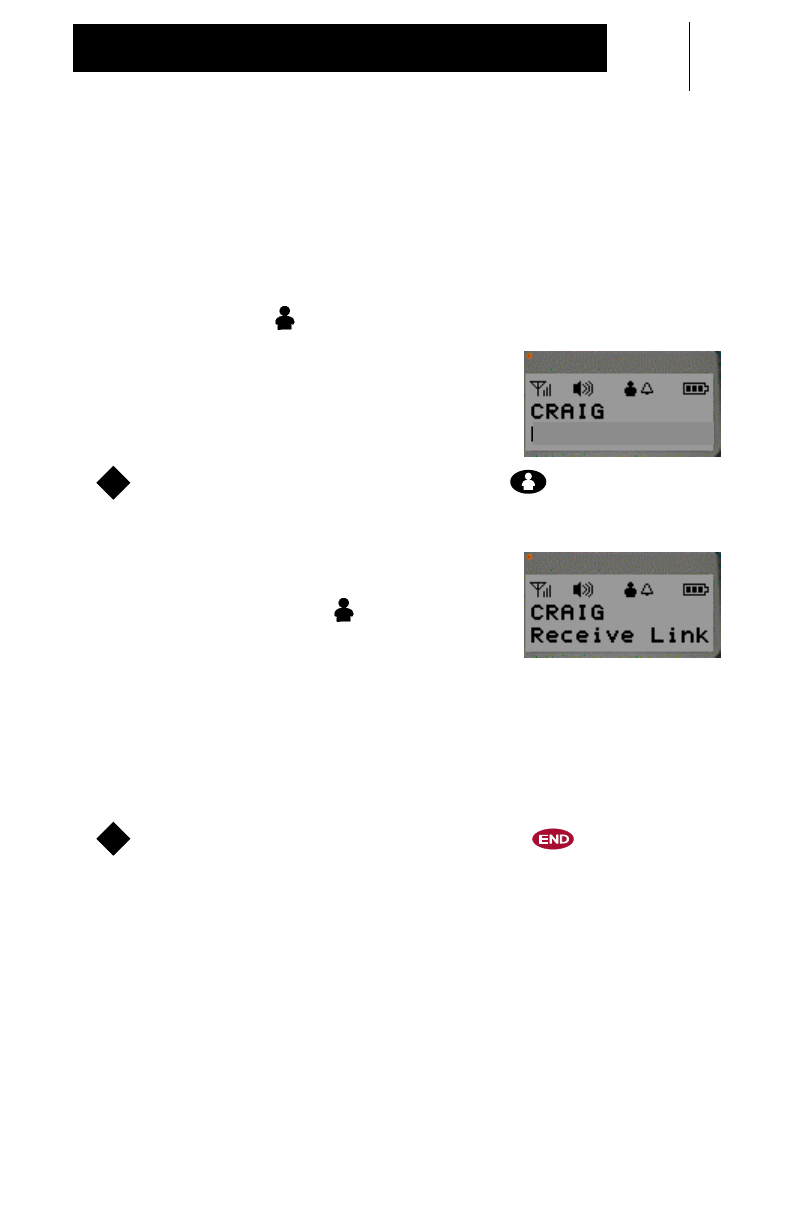
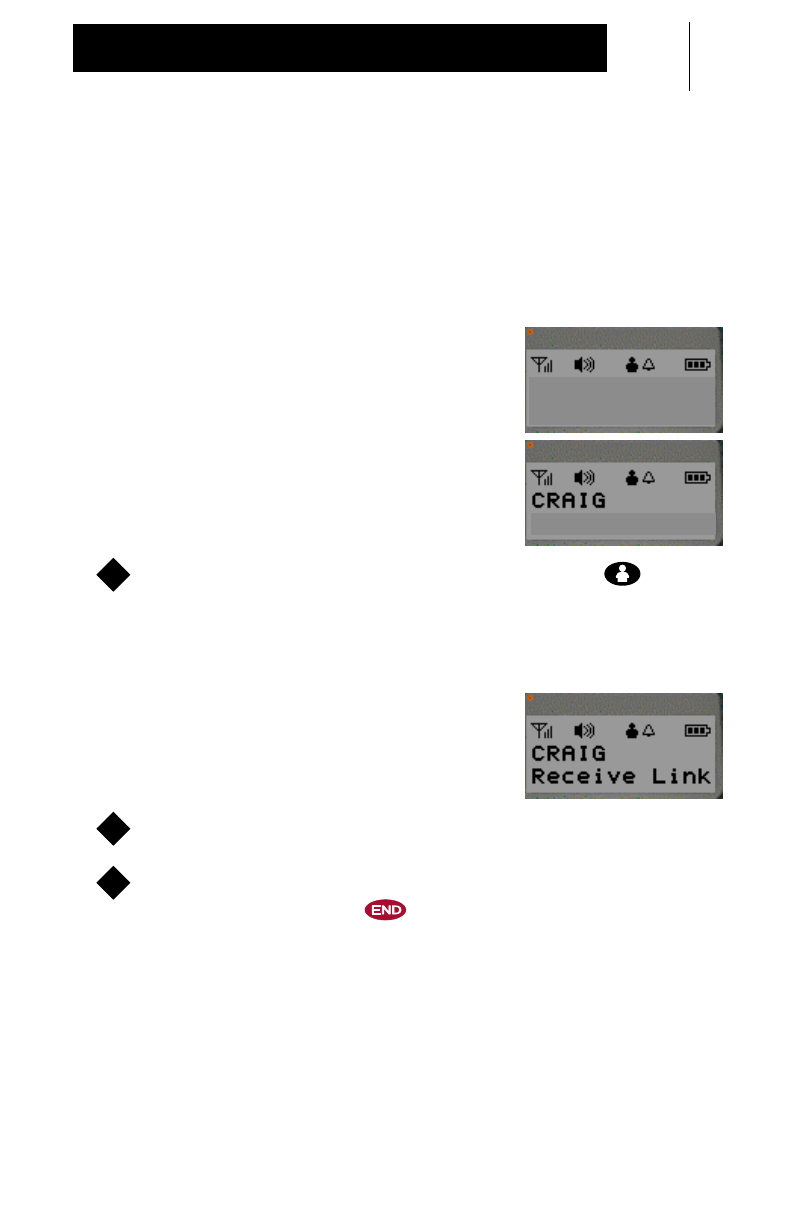
•Line 1 of the display will indicate the
Link ID or name. Line 2 of the display
will indicate:
“Incoming Lnk”
.
To accept the Person Link, press the button within 10
seconds.
•Once the Person Link is accepted, line
2 of the display will indicate
“Receive
Link”
and the
Link
icon will stop
blinking.
•The progress LED will blink while receiving.
Disconnecting a Person Link
To disconnect a Person Link, press the button.
Show Display
Incoming Lnk
1
Show Display
1

36
Integrated Services
Your Communicator enables you to enhance your
communications like no other product by integrating services.
Integration of services allows you to:
•be informed of and accept an incoming Phone Call or
Person Link while in a Group Talk, Phone Call, or Person
Link
•make a Phone Call, Group Talk, or Person Link while in a
Phone Call.
You will hear two (2) short, medium-pitched tones when
receiving another incoming Phone Call or Person Link. These
tones are referred to as an “Other Incoming Communication
Tone”.
37
Integrated Services
Person Link Notification During Group Talk Receive
You can receive an incoming Person Link while receiving in a
Group.
•Two (2) short, medium-pitched tones will sound.
•Line 1 of the display alternates
between
“Incoming Lnk”
and the
incoming name
or
when name is not
available line 1 will indicate
“Incoming Lnk”
. Line 2 of the display
will prompt how to answer:
“LNK=Accept”
.
To accept the incoming Person Link, press the button
within 10 seconds of notification.
•Your Group Talk will terminate.
•Line 1 of the display will indicate the
Link ID or name. Line 2 of the display
will indicate
“Receive Link”
.
Press the PTT to speak and release to listen.
To decline the incoming Person Link and continue with your
Group Talk, press the button.
Show Display
LNK=Accept
Show Display
Incoming Lnk
LNK=Accept
1
Show Display
2
3
38
Integrated Services
Person Link Notification During Group Talk Transmit
You can receive an incoming Person Link while transmitting in a
Group.
•Two (2) short, medium-pitched tones will sound.
•Line 1 of the display alternates
between
“Incoming Lnk”
and the
incoming name
or
when name is not
available line 1 will indicate
“Incoming Lnk”
. Line 2 of the display
will indicate
“Group Talk”
.
Release the PTT button.
•Line 1 of the display will indicate the
incoming Link ID or name. Line 2 of
the display will prompt how to answer:
“LNK=Accept”
.
To accept the incoming Person Link, press the button
within 10 seconds of notification.
•Your Group Talk will terminate.
•Line 1 of the display will indicate the
Link ID or name. Line 2 of the display
will indicate
“Receive Link”
.
Press the PTT to speak and release to listen.
To decline the incoming Person Link and continue with your
Group Talk, press the button.
Show Display
Group Talk
Show Display
Incoming Lnk
Group Talk
1
Show Display
LNK=Accept
2
Show Display
3
4

39
Integrated Services
Phone Call Notification During Group Talk Receive
You can answer an incoming Phone Call while receiving in a
Group.
•Two (2) short, medium-pitched tones will sound.
•Line 1 of the display will indicate
“Incoming Phn”
. Line 2 of the display
will prompt how to answer:
“PHN=Answer”
.
To answer the incoming Phone Call, press the button.
•Your Group Talk will terminate.
To decline the incoming Phone Call and continue with your
Group Talk, press the button.
Show Display
PHN=Answer
1
2

40
Integrated Services
Phone Call Notification During Group Talk Transmit
You can answer an incoming Phone Call while transmitting in a
Group.
•Two (2) short, medium-pitched tones will sound.
•Line 1 of the display will indicate
“Incoming Phn”
. Line 2 of the display
will indicate
“Group Talk”
.
Release the PTT button.
To answer the incoming Phone Call, press the button.
•Your Group Talk will terminate.
To decline the incoming Phone Call and continue with your
Group Talk, press the button.
Show Display
Group Talk
1
2
3
41
Integrated Services
Person Link Notification During Person Link Receive
You can receive another incoming Person Link while receiving in
a Link.
•Two (2) short, medium-pitched tones will sound.
•Line 1 of the display alternates
between
“Incoming Lnk”
and the
incoming name
or
when name is not
available line 1 will indicate
“Incoming Lnk”
. Line 2 of the display
will prompt how to answer:
“LNK=Accept”
.
To accept the incoming Person Link, press the button
within 10 seconds of notification.
•Your first Person Link will terminate.
•Line 1 of the display will indicate the
incoming Link ID or name. Line 2 of
the display will indicate
“Receive
Link”
.
Press the PTT to speak and release to listen.
To decline the incoming Person Link and continue with your
first Person Link, press the button.
Show Display
LNK=Accept
Show Display
Lnk
LNK=Accept
1
Show Display
2
3
42
Integrated Services
Person Link Notification During Person Link Transmit
You can receive another incoming Person Link while transmitting
in a Link.
•Two (2) short, medium-pitched tones will sound.
•Line 1 of the display alternates
between
“Incoming Lnk”
and the
incoming name
or
when name is not
available line 1 will indicate
“Incoming Lnk”
. Line 2 of the display
will indicate
“Person Link”
.
Release the PTT button.
•Line 2 of the display will prompt how to
answer:
“LNK=Accept”
.
To accept the incoming Person Link, press the button
within 10 seconds of notification.
•Your first Person Link will terminate.
•Line 1 of the display will indicate the
Link ID or name. Line 2 of the display
will indicate
“Receive Link”
.
Press the PTT to speak and release to listen.
To decline the incoming Person Link and continue with your
first Person Link, press the button.
Show Display
Person Link
Show Display
Lnk
Person Link
1
Show Display
LNK=Accept
2
Show Display
3
4
43
Integrated Services
Phone Call Notification During Person Link Receive
You can answer an incoming Phone Call while receiving in a
Link.
•Two (2) short, medium-pitched tones will sound.
•Line 1 of the display will indicate
“Incoming Phn”
. Line 2 of the display
will prompt how to answer:
“PHN=Answer”
.
To answer the incoming Phone Call, press the button.
•Your Person Link will terminate.
To decline the incoming Phone Call and continue with your
Person Link, press the button.
Show Display
Incoming Phn
PHN=Answer
1
2
44
Integrated Services
Phone Call Notification During Person Link Transmit
You can answer an incoming Phone Call while transmitting in a
Link.
•Two (2) short, medium-pitched tones will sound.
•Line 1 of the display will indicate
“Incoming Phn”
. Line 2 of the display
will indicate
“Person Link”
.
Release the PTT button.
•Line 2 of the display will prompt how to
answer:
“PHN=Answer”
.
To answer the incoming Phone Call, press the button.
•Your Person Link will terminate.
To decline the incoming Phone Call and continue with your
Person Link, press the button.
Show Display
Incoming Phn
Person Link
1
Show Display
Incoming Phn
PHN=Answer
2
3
45
Integrated Services
Person Link Notification During a Phone Call
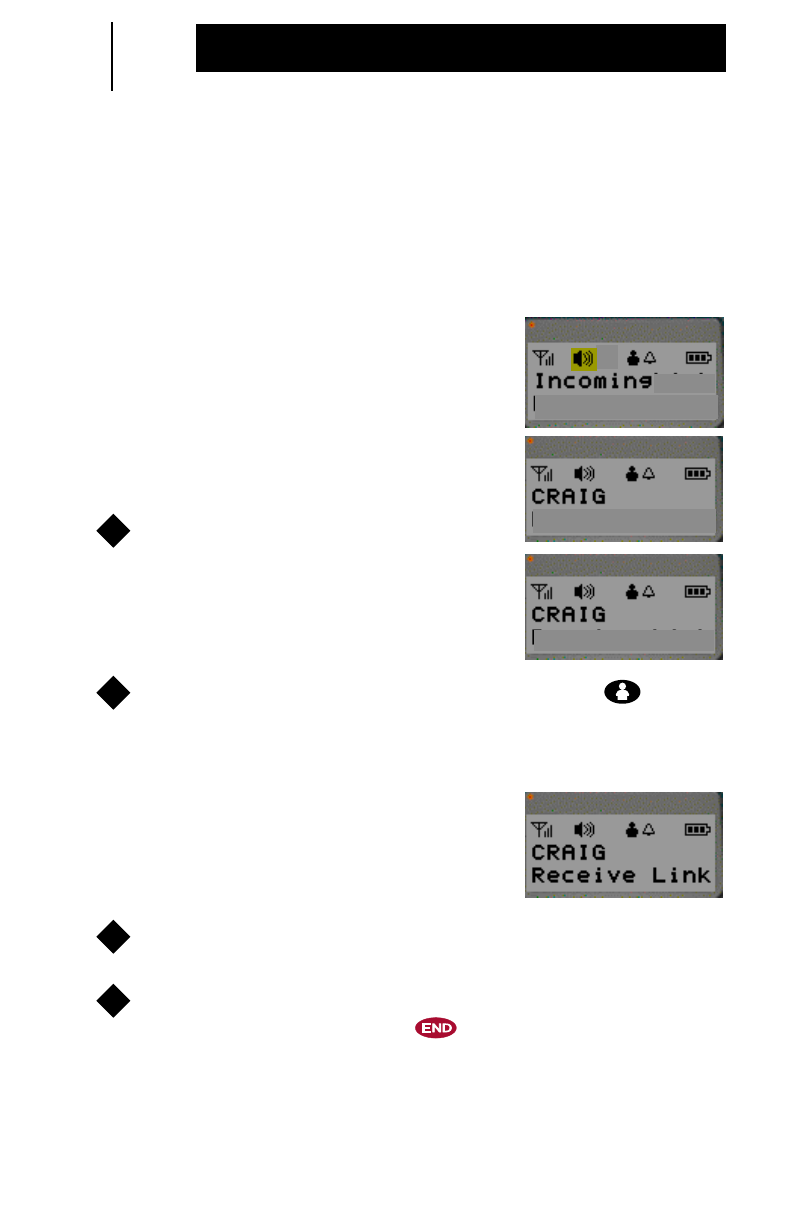
You can receive an incoming Person Link while on a Phone Call.
•Two (2) short, medium-pitched tones will sound.
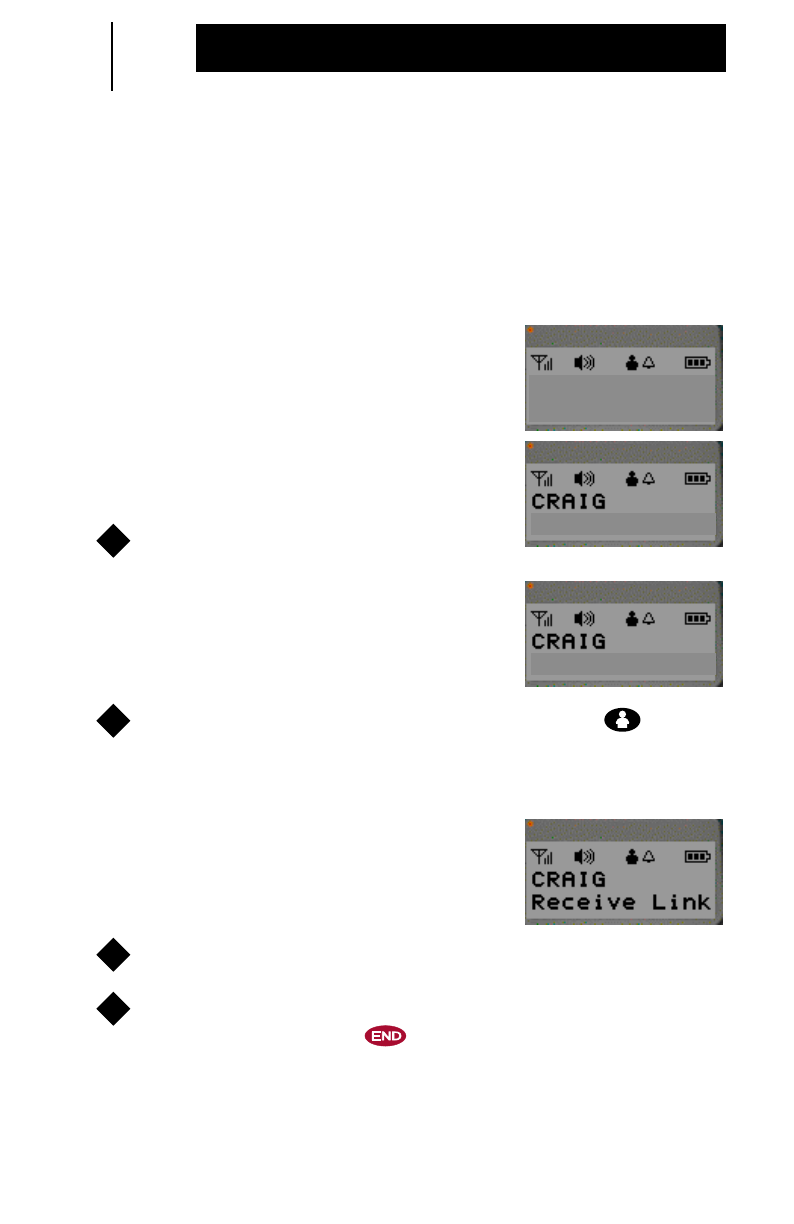
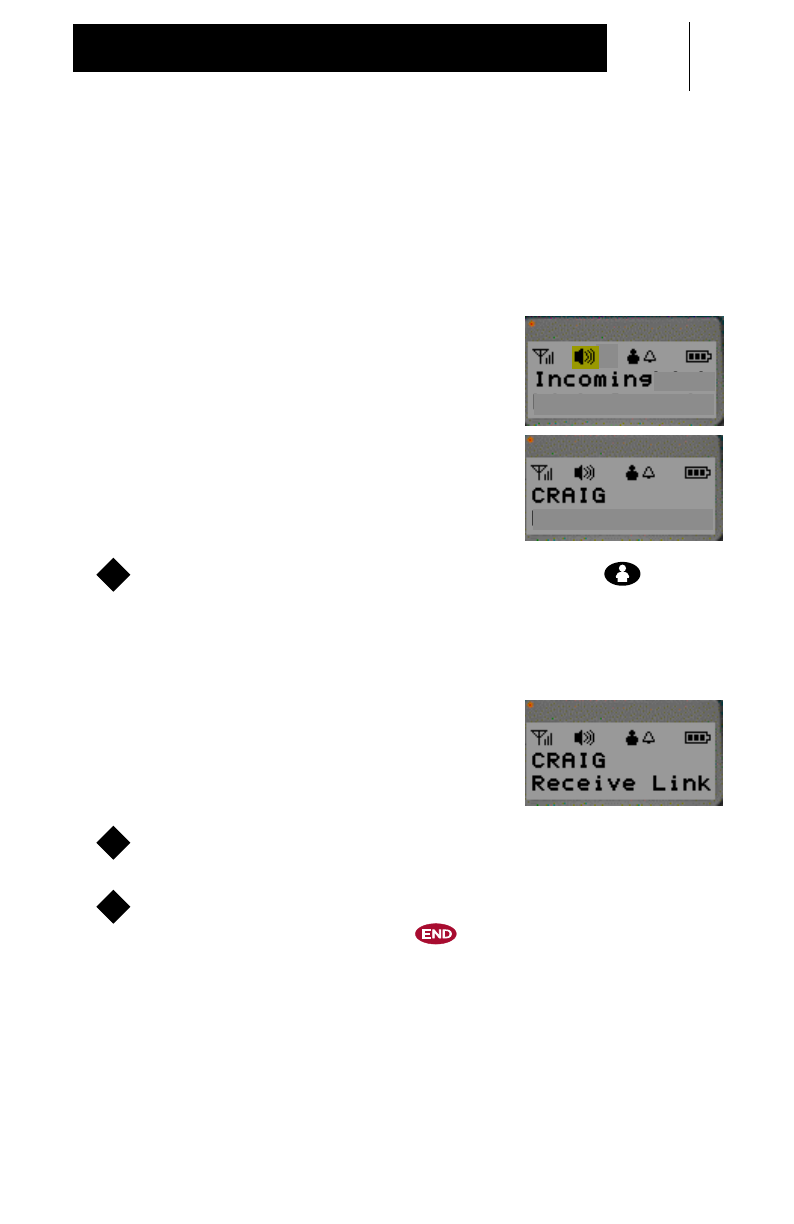
•Line 1 of the display alternates
between
“Incoming Lnk
and the
incoming Link ID or name. Line 2 of
the display will prompt how to place
the Phone Call on hold:
“OK=Hold
Phn”
.
To place the Phone Call on hold,
press the button.
OTE:
If the button is pressed accidently instead of the
button, you will disconnect your Phone Call and enter
Person Link Service.
•Line 1 of the display alternates
between
“Incoming Lnk”
and the
incoming Link ID or name. Line 2 of
the display will prompt how to answer:
“LNK=Accept”
.
To accept the incoming Person Link, press the button.
•Line 1 of the display will indicate the
Link ID or name. Line 2 of the display
will indicate
“Receive Link”
.
Press the PTT button to speak and release to listen.
Show Display
CRAIG
OK=Hold Phn
Show Display
Incoming Lnk
OK=Hold Phn
1
N
Show Display
Incoming Lnk
LNK=Accept
2
Show Display
CRAIG
Receive Link
3
46
Integrated Services
Person Link Notification During a Phone Call (Cont’d.)
To resume your Phone Call, press the button to enter
Phone Service.
•Line 2 of the display will prompt how to
take the Phone Call off hold:
“OK=Off
Hold”
.
To take the Phone Call off hold, press the button.
To decline the incoming Person Link and continue with your
Phone Call, press the button.
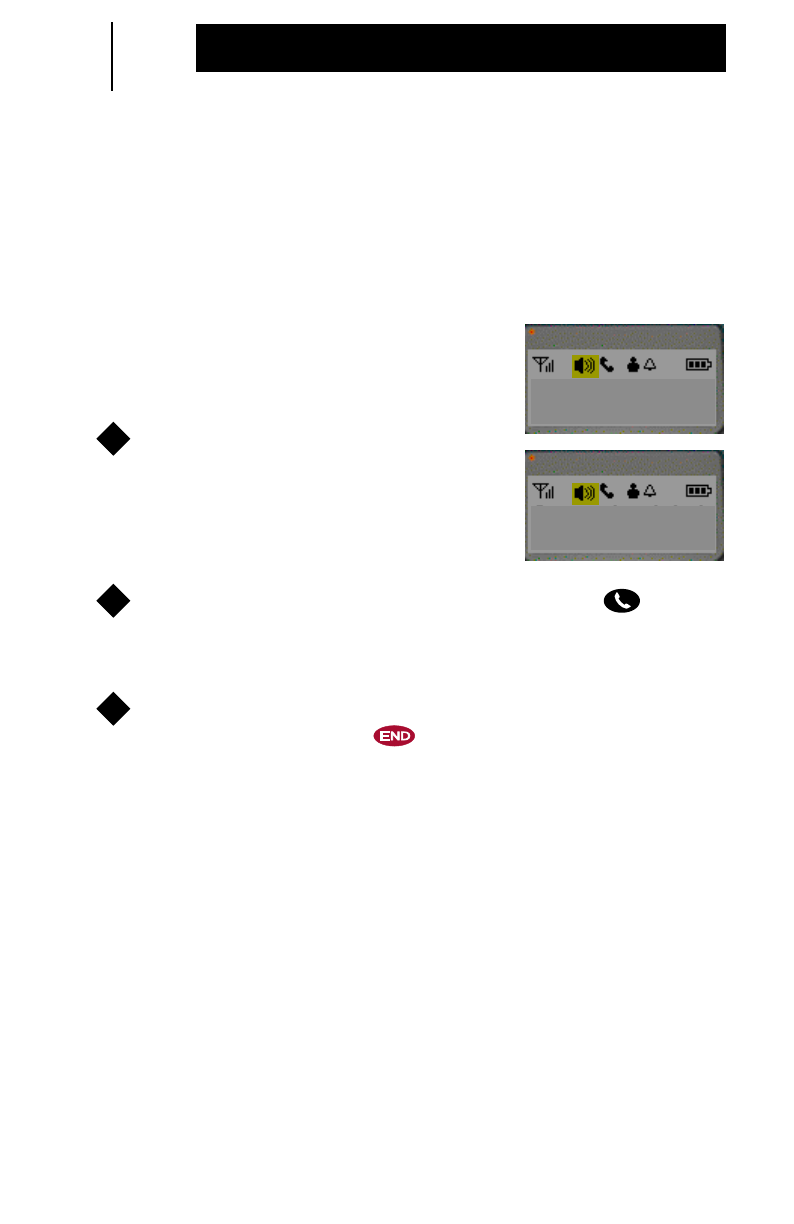
Initiating a Group Talk During a Phone Call
You can place a Phone Call on hold to initiate a Group Talk.
•Line 2 of the display will prompt how to
place a Phone Call on hold:
“OK=Hold Phn”
.
To place the Phone Call on hold,
press the button.
Press and release the PTT button.
Scroll through the Group List by pressing the or
scroll buttons.
•Line 1 of the display will indicate the
Groups as you scroll through the list.
Line 2 of the display will prompt
“Push-To-Talk”
.
4
Show Display
Off Hold
5
6
Show Display
EDUARDO
1
2
3
Show Display
GROUP TALK1
Push-To-Talk
47
Integrated Services
Press the PTT button to speak and release to listen.
To resume your Phone Call, press the button to enter
Phone Service
•Line 2 of the display will prompt how to
take the Phone Call off hold:
“OK=Off
Hold”
.
To take the Phone Call off hold and resume your
conversation, press the button.
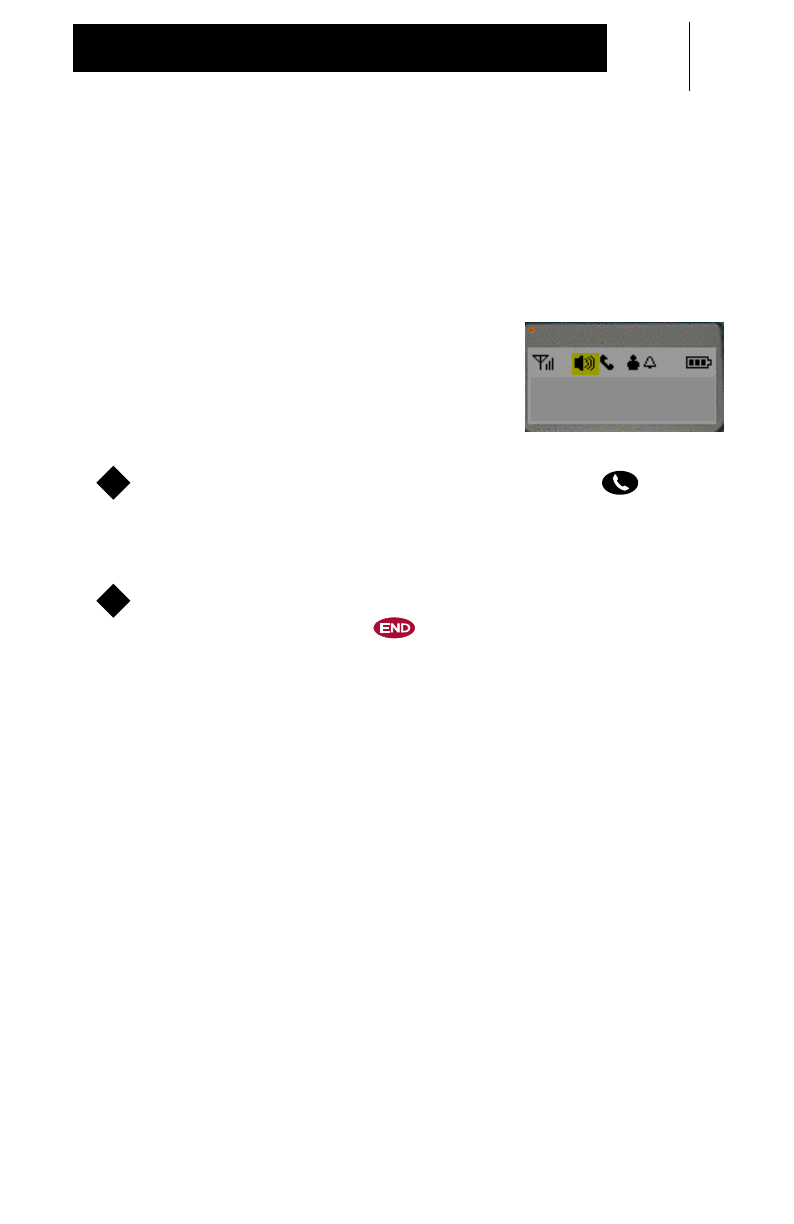
Initiating a Person Link During a Phone Call
You can place a Phone Call on hold to initiate a Person Link.
•Line 2 of the display will prompt how to
place a Phone Call on hold:
“OK=Hold Phn”
.
To place the Phone Call on hold, press the button.
To enter Person Link Service, press the button.
•Line 1 of the display will indicate the
last Link ID or name called. Line 2 of
the display will prompt
“Push-To-Link”
.
Use one of the three (3) different ways a Person Link can
be initiated. Refer to pages 32 through 30.
4
5
Show Display
Off Hold
EDUARDO
6
Show Display
EDUARDO
1
2
Show Display
CRAIG
Push-To-Link
3
48
Integrated Services
Initiating a Person Link During a Phone Call (Cont’d.)
Press the PTT button to speak and release to listen.
•Line 1 of the display will indicate the
Link ID or name called. Line 2 of the
display will prompt
“Push-To-Link”
.
To resume your Phone Call, press the button to enter
Phone Service.
•Line 2 of the display will prompt how to
take the Phone Call off hold:
“OK=Off Hold”
.
To take the Phone Call off hold and resume your
conversation, press the button.
4
Show Display
CRAIG
Push-To-Link
5
Show Display
Off Hold
EDUARDO
6
49
Integrated Services
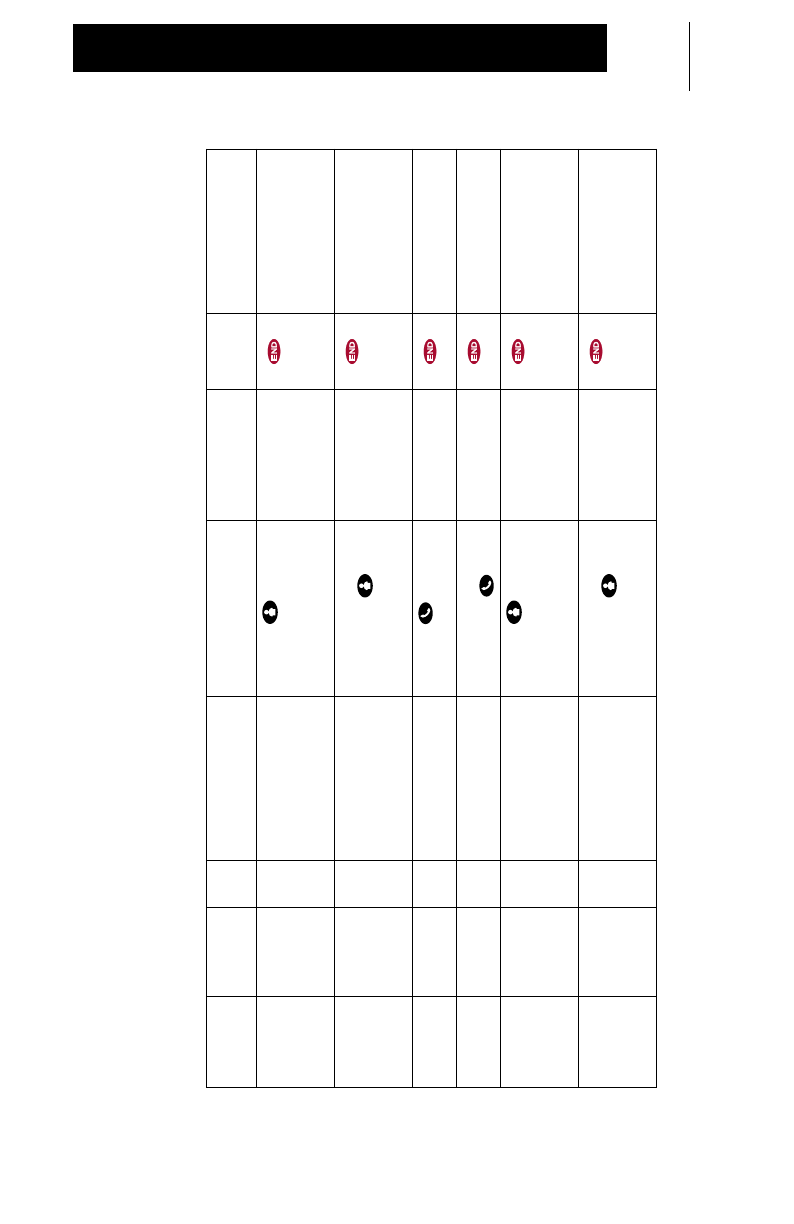
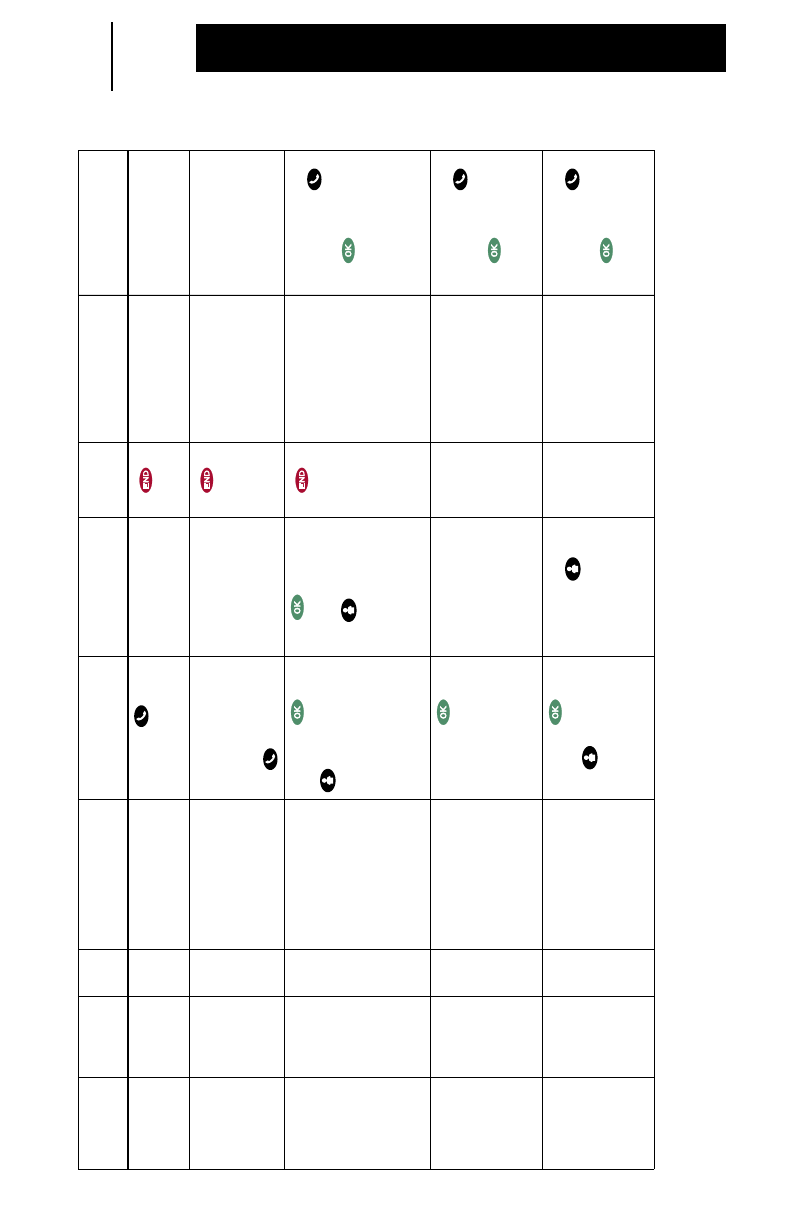
Integrated Services Quick Reference Table
Initial State Second
State Alert Display Alert Action to Accept Result of Accept Action to
Ignore New Display
Group Talk
Receive Incoming
Person Link *Line 1: Incoming Lnk/
Incoming Name
(when avail.)
Line 2: LNK=Accept
Press the button
within 10 seconds Group Talk
terminates Line 1: Link ID or name
Line 2: Receive Link
Group Talk
Transmit Incoming
Person Link *Line 1: Incoming Lnk/
Incoming Name
(when avail.)
Line 2: LNK=Accept
Release the PTT button
and press the button
within 10 seconds
Group Talk
terminates Line 1: Link ID or name
Line 2: Receive Link
Group Talk
Receive Incoming
Phone Call *Line 1: Incoming Phn
Line 2: PHN=Answer Press the button Group Talk
terminates Line 1: Incoming Phn
Line 2: OK=Hold
Group Talk
Transmit Incoming
Phone Call *Line 1: Incoming Phn
Line 2: Group Talk Release the PTT button
and press the button Group Talk
terminates Line 1: Incoming Phn
Line 2: OK=Hold
Person Link
Receive Incoming
Person Link *Line 1: Incoming Lnk/
Incoming Name
(when avail.)
Line 2: LNK=Accept
Press the button
within 10 seconds First Person Link
terminates Line 1: Link ID or name
Line 2: Receive Link
Person Link
Transmit Incoming
Person Link *Line 1: Incoming Lnk/
Incoming Name
(when avail.)
Line 2: LNK=Accept
Release the PTT button
and press the button
within 10 seconds
First Person Link
terminates Line 1: Link ID or name
Line 2: Receive Link
* = 2 Short, Medium-Pitched Tones.
50
Integrated Services
Initial State Second
State Alert Display Alert Action to Accept Result of Accept Action to
Ignore New Display Additional Action
Person Link
Receive Incoming
Phone Call *Line 1: Incoming Phn
Line 2: PHN=Answer Press the
button Person Link
terminates Line 1: Incoming
Phn
Line 2: OK=Hold
Person Link
Transmit Incoming
Phone Call *Line 1: Incoming Phn
Line 2: Person Link Release the PTT
button. Display line 2
will indicate
PHN=Answer. Press
the button
Person Link
terminates Line 1: Incoming
Phn
Line 2: OK=Hold
Phone Call Incoming
Person
Link
*Line 1: Incoming
Link/Link ID
or name
Line 2: OK=Hold Phn
Press the
button
or
press the
button
The button
will place the Phone
Call on hold.
The button will
terminate the
Phone Call and
enter Person Link
Service.
Line1: Incoming
Lnk/Link ID
or name
Line 2: LNK=Accept
To return to Phone
Call, press the
button followed by
the button to
take the Phone Call
off hold
Phone Call Initiate a
Group Talk N/A Line 2: Hold Phn Press the
button followed by a
quick press and
release of the PTT.
Select from the
Group list if needed.
Phone Call is on
hold and you are in
Group standby
mode.
N/A Line 1: Group Name
Line 2: Push-To-Talk To return to Phone
Call, press the
button followed by
the button to
take the Phone Call
off hold
Phone Call Initiate a
Person
Link
N/A Line 2: Hold Phn Press the
button followed by
the button.
Select the Link ID or
name.
Phone Call is on
hold. The
button will enter
Person Link
Service.
N/A Line 1: Link ID or
name
Line 2: Push-To-Link
To return to Phone
Call, press the
button followed by
the button to
take the Phone Call
off hold
* = 2 Short, Medium-Pitched Tones.

51
Accessories
Carrying Accessories:
HLN9767 Wrist Strap
HLN9776 Plastic Carry Case Holster w/Swivel Belt Clip
HLN9777 Soft Leather Carry Case w/Open Keypad
HLN9782 Nylon Carry Case w/Belt Loop
HLN9786 Soft Leather Carry Case w/Protected Keypad
Battery Chargers:
HTN9018 120 V Desktop Rapid Charger w/Spare
Battery Compartment
HTN9019 120 V Multi-Unit Rapid Charger
Batteries:
HNN9021 650 mAH NiMH Battery
Audio Accessories:
HMN9065 Lightweight Headset w/Swivel Boom
Microphone
HMN9066 Flexible Ear Receiver – Mickey Microphone
HMN9067 Remote Speaker Microphone
HMN9068 Earbud w/Clip Microphone
HMN9069 Two-Piece Surveillance Microphone
HLN9070 Earpiece w/Volume Control
HLN9787 Earpiece without Volume Control
HLN9788 Earbud

52
LED Indications
Radio Condition LED Color(s)
Group Talk Transmit Continuous Red
Group Talk Receive Blinking Red
Person Link Transmit Continuous Red
Person Link Receive Blinking Red
Battery Charging Indicator LED:
Rapid Charging
Fully Charged
Unsuccessful Charge
Continuous Red
Continuous Green
Continuous Yellow
Alert Tones
Radio Condition Alert Tone(s)
Successful Power-Up Short, High-Pitched Tone
Unsuccessful Power-Up Continuous, Low-Pitched Tone
Group Talk Permit Two (2) Short, Medium-Pitched Access Tones followed by
One (1) High-Pitched Permit Tone
Group Talk Busy Signal Continuous, Low-Pitched Tone
Person Link Receive Four (4) Short, Medium-Pitched Tones
Person Link Talk Permit Two (2) Medium-Pitched Access Tones followed by
One (1) High-Pitched Permit Tone
Person Link Target User Busy Signal Two (2) Medium-Pitched Access Tones followed by
One (1) Low-Pitched Tone
Valid (Good) Button Press Short, High-Pitched Tone
Invalid Button Press Short, Low-Pitched Tone
User Out of Range Continuous, Low-Pitched Tone
System Busy Signal Fast, Low-Pitched Tones
System Busy Auto Retry Three (3) Short, High-Pitched Tones
Low Battery (approx. 5-10% charge
remaining) Two (2) Short, Low-Pitched Tones every ten (10) minutes
Time-Out Timer Expired Continuous, Low-Pitched Tone
Other Incoming Communications Two (2) Short, Medium-Pitched Tones
LED Indications & Alert Tones

53
Symptom Problem Solution
1. 1a.
1b.
1a.
1b.
2. 2a. 2a.
3. 3a. 3a.
4. 4a.
4b.
4c.
4d.
4a.
4b.
4c.
4d.
5. 5a.
5b.
5a.
5b.
6. 6. 6a.
6b.
7.
.7. 7.
8. 8a.
8b.
8a.
8b.
Troubleshooting

54
Troubleshooting
Symptom Problem Solution

55
Troubleshooting
Symptom Problem Solution

56
Important Safety
Information
Read this information before using your Communicator. For safe
and efficient operation, observe these guidelines.
•Privacy of communications may not be ensured when
using your Communicator. Your Motorola dealer may
enable encryption for sensitive communications.
•Your Communicator complies with Part 15 of the U.S.
FCC Rules and Industry Canada RSS-213. Operation
is subject to the following two conditions:
(1) This device may not cause harmful interference,
and (2) this device must accept any interference
received, including interference that may cause
undesired operation.
Scope
This document provides information and instructions for the safe
and efficient operation of Motorola Portable Two-Way Radios.
The information provided in this document supersedes the
general safety information contained in user guides published
prior to 1st April 1999. For information regarding radio use in a
hazardous atmosphere please refer to the Factory Mututal (FM)
Approval Manual Supplement or Instruction Card which is
included with radio models that offer this capability.
Exposure to Radio Frequency Energy
National and International Standards and Guidelines
Your Motorola Two-Way Radio, which generates and radiates
radio frequency (RF) electromagnetic energy (EME), is designed
to comply with the following National and International Standards
and Guidelines regarding exposure of human beings to radio
frequency electromagnetic energy:

57
Important Safety Information
•Federal Communications Commission Report and Order
No. FCC 96-326 (August 1996)
•American National Standards Institute (C95-1-1992)
•National Council on Radiation Protection and
Measurements (NCRP - 1986)
•International Commission on Non-Ionizing Radiation
Protection (ICNIRP - 1988)
•National Radiological Protection Board of the United
Kingdom (GS11 - 1998)
•Verband Deutscher Elektrotechniker (VDE) DIN-0848
•Department of Health and Welfare Canada, Safety Code 6
•European Committee for Electrotechnical Standardization
(CENELEC)
– Env. 50166 - 1 1995E - Human Exposure to
Electromagnetic Fields Low Frequency (0 Hz to 10 kHz)
– Env. 50166 - 2 1995E - Human Exposure to
Electromagnetic Fields High Frequency (10k Hz to
300 GHz)
– Proceedings of SC211/8 1996 - Safety Considerations
for Human Exposure to E.M.Fs from Mobile
Telecommunications Equipment (M.T.E.) in the
Frequency Range 30 MHz - 6 GHz (E.M.F -
Electromagnetic Fields)

58
Important Safety Information
To assure optimal performance and that human exposure to radio
frequency electromagnetic energy is within the guidelines set forth
in the above standards, always adhere to the following
procedures:
Portable Communicator Operation and EME Exposure
•When placing or receiving a Phone Call, hold the
Communicator as you would a telephone. Speak directly
into the mouthpiece and position the antenna up and over
your shoulder.
•When using the Communicator as a
two-way radio, hold the device in a
vertical position with the microphone 1
to 2 inches (2.5 to 5.0 centimeters)
away from your mouth. Keep the
antenna at least 1 inch (2.5
centimeters) from your head and body.
•For body-worn operation, the antenna
should be kept at least 1 inch (2.5
centimeters) from the body when
transmitting.
•DO NOT hold the antenna when the Communicator is “IN
USE.” Holding the antenna affects call quality and may
cause the Communicator to operate at a higher power level
than needed.
Electromagnetic Interference / Compatibility
OTE:
Nearly every electronic device is susceptible to
electromagnetic interference (EMI) if inadequately shielded,
designed or otherwise configured for electromagnetic
compatibility.
Facilities
To avoid electromagnetic interference and/or compatibility
conflicts, turn off your Communicator in any facility where posted
notices instruct you to do so. Hospitals or health care facilities may
be using equipment that is sensitive to external RF energy.
2.5 to 5.0 cm
(1 to 2 in.)
N

59
Important Safety Information
Medical Devices
Pacemakers
The Health Industry Manufacturers Association recommends that a
minimum separation of 6 inches (15 centimeters) be maintained
between a handheld wireless phone and a pacemaker. These
recommendations are consistent with the independent research by,
and recommendations of, Wireless Technology Research.
Persons with pacemakers should:
•ALWAYS keep the Communicator more than 6 inches
(15 centimeters) from their pacemaker when the radio is
turned on.
•NOT carry the Communicator in the breast pocket.
•Use the ear opposite the pacemaker to minimize the
potential for interference,
•Turn the Communicator OFF immediately if you have any
reason to suspect that interference is taking place.
Hearing Aids
Some digital radios may interfere with some hearing aids. In the
event of such interference, you may want to consult your hearing
aid manufacturer to discuss alternatives.
Other Medical Devices
If you use any other personal medical device, consult the
manufacturer of your device to determine if it is adequately
shielded from RF energy. your physician may be able to assist you
in obtaining this information.

60
Important Safety Information
Operational Warnings
Potentially Explosive Atmospheres
Turn off your Communicator when you are in any area with a
potentially explosive atmosphere, unless it is a type especially
qualified for use in such areas (for example, Factory Mutual
Approved). Sparks in a potentially explosive atmosphere can
cause an explosion or fire resulting in bodily injury or even death.
OTE:
The areas with potentially explosive atmospheres referred
to include fueling areas such as: below decks on boats; fuel
or chemical transfer or storage facilities; areas where the air
contains chemicals or particles, such as grain, dust or metal
powders; and any other area where you would normally be
advised to turn off your vehicle engine. Areas with
potentially explosive atmospheres are often but not always
posted.
Batteries
Do not replace or charge batteries in a potentially explosive
atmosphere. Contact sparking may occur while installing or
removing batteries and cause an explosion.
Blasting Caps and Areas
To avoid possible interference with blasting operations, turn off
your Communicator when you are near electrical blasting caps, in
a blasting area, or in areas posted: “Turn off two-way radio”. Obey
all signs and instructions.
!
N

61
Important Safety Information
Operational Cautions
Batteries
All batteries can cause property damage and/or bodily injury such
as burns if a conductive material such as jewelry, keys, or beaded
chains touch exposed terminals. The conductive material may
complete an electrical circuit (short circuit) and become quite hot.
Exercise care in handling any charged battery, particularly when
placing it inside a pocket, purse, or other container with metal
objects.
Communicator Care
•Avoid physical abuse of your Communicator such as
carrying it by the antenna or remote microphone.
•Wipe the battery contacts with a lint-free cloth to remove
dirt, grease, or other material which may prevent good
electrical connections.
•When not in use, keep the accessory jack covered with the
protective cap.
•Clean the Communicator exterior using a cloth moistened
with water.
AUTION:
Use of chemicals such as detergents, alcohol, aero-
sol spray, and/or petroleum products may be harmful
and damage the housing and cover.
Batteries and Chargers
MPORTANT:
The battery is shipped from the factory uncharged and
must be charged before use.
Charging Batteries
To ensure peak performance, batteries should be fully charged
before use and periodically thereafter. The battery lasts
approximately 40 hours when fully charged. Standard use has a
5-5-90 duty cycle. This means during normal use, the average
!
!C
I

62
Important Safety Information
user transmits 5%, receives 5%, and remains in battery
conservation mode 90% of the time. If the unit is continuously
transmitting and receiving, battery life will be approximately 5
hours. A battery conversation time of up to 300 hours is
achievable between charging cycles.
Please observe the following precautions while handling and
charging batteries:
Charging Temperatures
Charging batteries in cold temperatures (below 45˚F)
can result in electrolyte leakage and may destroy the
battery. Charging in hot temperatures (above 95˚F)
will not damage the battery, but will reduce charge
capacity. Charge batteries at approximately 77˚F.
ARNING:
To reduce risk of injury, charge only Motorola NiMH
type rechargeable batteries listed. Other types of
batteries may burst, causing personal injury and
damage.
Recharging NiMH Batteries
Recharge the battery before use to ensure optimum capacity and
performance. Your battery was designed to be used only with a
Motorola charger, specifically designed for your Communicator.
Charging in non-Motorola equipment may lead to battery damage
and void the battery warranty.
MPORTANT:
While charging a battery that is inside your
Communicator, turn the device off to ensure a proper
charge.
77˚95˚
45˚
!
W
I

63
Important Safety Information
Recycling / Disposal of Batteries
ARNING:
Batteries contain hazardous substances. do not
dispose of any batteries in a fire as they may
explode!
The U.S. Environmental Protection Agency (EPA) classifies used
NiMH batteries as hazardous waste, unless certain exemptions
apply.
At the end of your battery’s useful life, it can be recycled. However,
recycling facilities may not be available in all areas. Under various
state or local laws, such batteries must be recycled or disposed of
properly, and cannot be dumped in landfills or incinerators.
Motorola fully endorses and encourages the recycling of NiMH
batteries. In the United States, you can ship your NiMH batteries
to the following address post paid to be recycled:
INMETCO
P.O. Box 720
245 Porteville Road
Ellwood City, PA 16117
Tel: (412) 758-5515
Fax: (412) 758-9311
You should consider the methods of collecting, labeling, and
shipping used NiMH batteries. Consult your federal, state, or local
EPA for specific legal requirements and for recycling options in
your area.
Motorola, as a responsible corporate citizen, has always been
concerned with the protection of the environment. Please feel free
to call our toll-free number,1-800-422-4210, for further battery
information.
!
W

64
Important Safety Information
Battery Charger
•To reduce risk of injury, charge only the rechargeable
Motorola authorized batteries. Other batteries may explode,
causing personal injury and damage.
•Use of accessories not recommended by Motorola may
result in risk of fire, electric shock, or injury.
•To reduce the risk of damage to the electric plug and cord,
pull by the plug rather than the cord when disconnecting the
charger.
•An extension cord should not be used unless absolutely
necessary. Use of an improper extension cord could result
in risk of fire and electric shock. If an extension cord must
be used, make sure that the cord size is 18AWG for lengths
up to 15 feet (4.62mm).
•To reduce risk of fire, electric shock, or injury, do not
operate the charger if it has been broken or damaged in
any way. Take it to a qualified Motorola service
representative.
•Do not disassemble the charger; it is not repairable and
replacement parts are not available. Disassembly of the
charger may result in risk of electrical shock or fire.
•To reduce risk of electric shock, unplug the charger from the
ac outlet before attempting any maintenance or cleaning.
•This equipment is not suitable for outdoor use. Use only in
dry locations/conditions.
•Connect equipment only to an appropriately fused and wired
supply of the correct voltage (as specified on the product).
•When not in use, disconnect the transformer from the ac outlet.
•The socket outlet to which the transformer is connected
should be close by and easily accessible.
•In equipment using fuses, replacements must comply with
the type and rating specified in the equipment instructions.
•Maximum ambient temperature around the transformer unit
must not exceed 40˚C (104˚F).
•Output power from the transformer unit must not exceed the
ratings stated on the product label located on the bottom of
the charger.
•Make sure the cord is located where it will not be stepped
on, tripped over, or subjected to water, damage, or stress.

65
Licensing
This system operates in the 1.9 GHz Unlicensed Personal
Communications Services (UPCS) band. The protocol is a derivative
of the Personal Handyphone System (PHS) called Personal
Advanced Communications Systems (PACS) that meets the FCC
Part 15 Rules and Etiquette. The access method used is Time
Division Multiple Access (TDMA) also managed and coordinated by
UTAM, Inc. as designated by FCC Part 15 Rules.
Your Communicator operates on FM radio communication
frequencies and is subject to the rules and regulations of the local
communications governing agencies.
The following is a list of communications agencies in various
countries:
United States
Federal Communications Commission
Consumer Assistance
Branch License Division
Gettysburg, PA 17326
Tel (717) 337-1212
Canada
Contact your regional industry Canada licensing office.
Mexico
Secretaria De Comunicaciones Y Transportes
Direccion General De Politicas
Y Normas De Comunicaciones
Av. Eugenia No. 197-5o. Piso
Mexico, D.F. 06700
If your country is not listed, contact your local Motorola dealer for
licensing information.

66
Licensing
Service
Because this unit contains a radio transmitter, most local
governments prohibit anyone from making internal adjustments to
the transmitter unless specifically licensed to do so by
government regulations. If your Communicator fails to operate or
any operational difficulties arise, contact your local Motorola
dealer.
Proper repair and maintenance procedures assure efficient
operation and long life for your Communicator. Frequency, power
and deviation must be checked at least once yearly.
Computer Software Copyrights
The Motorola products described in this manual may include
copyrighted Motorola computer programs stored in semiconductor
memories or other media. Laws in the United States and other
countries preserve for Motorola certain exclusive rights for
copyrighted computer programs, including the exclusive right to
copy or reproduce in any form, the copyrighted computer
program. Accordingly, any copyrighted Motorola computer
programs contained in the Motorola products described in this
manual may not be copied or reproduced in any manner without
the express written permission of Motorola. Futhermore, the
purchase of Motorola products shall not be deemed to grant,
either directly or by implication, estoppel or otherwise, any license
under the copyrights, patents or patent applications of Motorola,
except for the normal non-exclusive royalty-free license to use that
arises by operation of law in the sale of a product.