Music Tribe Commercial MY Sdn Bhd
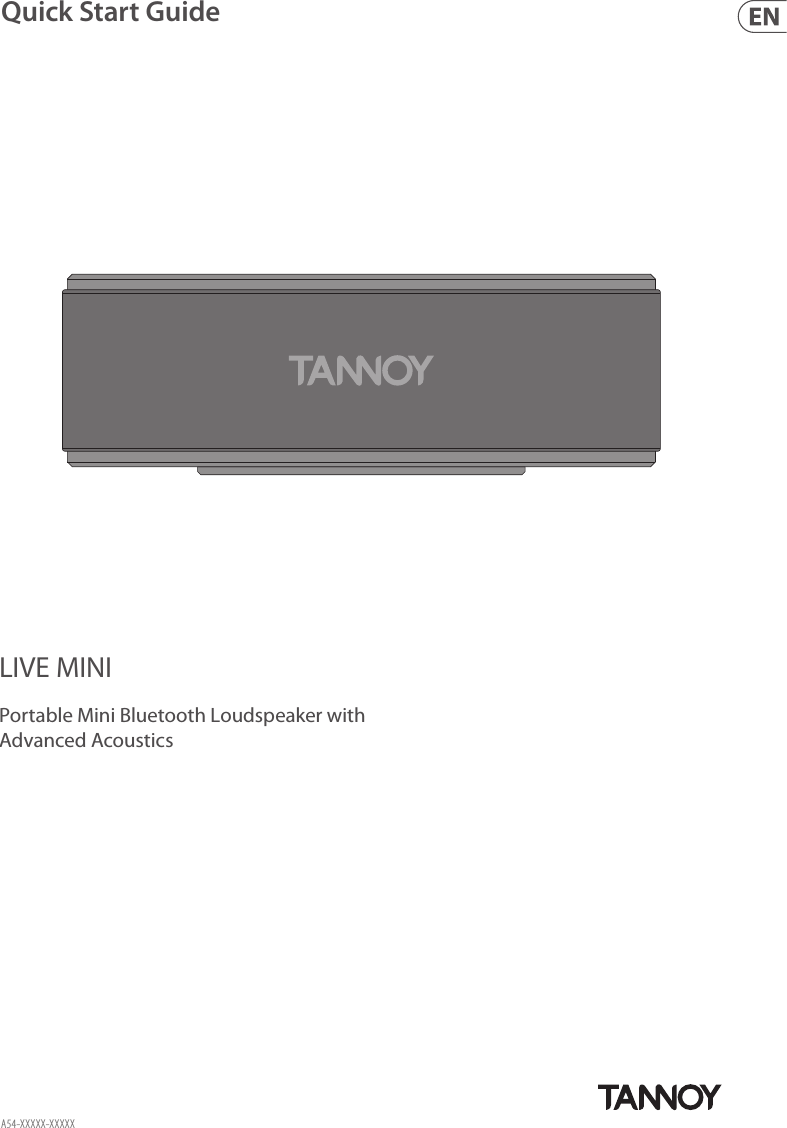
 LIVEMINI Portable Speaker User Manual 15 LIVE MINI UserMan

MUSIC Group Manufacturing PH Ltd. Portable Speaker 15 LIVE MINI UserMan

15_LIVE MINI UserMan

Quick Start GuideLIVE MINIPortable Mini Bluetooth Loudspeaker with Advanced AcousticsA54-XXXXX-XXXXX
2LIVE MINI 3Quick Start GuideLEGAL DISCLAIMERLIMITED WARRANTYImportant Safety InstructionsInstrucciones de seguridadTerminals marked with this symbol carry electrical current of sucient magnitude to constitute risk of electric shock. Use only high-quality professional speaker cables with ¼" TS or twist-locking plugs pre-installed. Allother installation or modication should be performed only by qualiedpersonnel.This symbol, wherever it appears, alerts you to the presence of uninsulated dangerous voltage inside the enclosure - voltage that may be sucient to constitute a risk ofshock.This symbol, wherever it appears, alerts you to important operating and maintenance instructions in the accompanying literature. Please read themanual.CautionTo reduce the risk of electric shock, do not remove the top cover (or the rear section). No user serviceable parts inside. Refer servicing to qualiedpersonnel.CautionTo reduce the risk of re or electric shock, do not expose this appliance to rain and moisture. Theapparatus shall not be exposed to dripping or splashing liquids and no objects lled with liquids, such as vases, shall be placed on the apparatus.CautionThese service instructions are for use by qualied service personnel only. Toreduce the risk of electric shock do not perform any servicing other than that contained in the operation instructions. Repairshave to be performed by qualied servicepersonnel.1.  Read these instructions.2.  Keep these instructions.3.  Heed all warnings.4.  Follow all instructions.5.  Do not use this apparatus near water.6.  Clean only with dry cloth.7.   Do not block any ventilation openings. Install in accordance with the manufacturer’s instructions.8.  Do not install near any heat sources such as radiators, heat registers, stoves, or other apparatus (including ampliers) that produce heat.9.  Do not defeat the safety purpose of the polarized or grounding-type plug. A polarized plug has two blades with one wider than the other. A grounding-type plug has two blades and a third grounding prong. The wide blade or the third prong are provided for your safety. Ifthe provided plug does not t into your outlet, consult an electrician for replacement of the obsolete outlet.10.  Protect the power cord from being walked on or pinched particularly at plugs, convenience receptacles, and the point where they exit from the apparatus.11.   Use only attachments/accessories specied by themanufacturer.12.  Use only with the cart, stand, tripod, bracket, or table specied by the manufacturer, orsold with the apparatus. When a cart is used, use caution when moving the cart/apparatus combination to avoid injury from tip-over.13.  Unplug this apparatus during lightning storms or when unused for long periods of time. 14.  Refer all servicing to qualied service personnel. Servicing is required when the apparatus has been damaged in any way, such as power supply cord or plug is damaged, liquid has been spilled or objects have fallen into the apparatus, the apparatus has been exposed to rain or moisture, does not operate normally, or has beendropped.15. The apparatus shall be connected to a MAINS socket outlet with a protective earthing connection.16.  Where the MAINS plug or an appliance coupler is used as the disconnect device, the disconnect device shall remain readily operable.17. Correct disposal of this product: This symbol indicates that this product must not be disposed of with household waste, according to the WEEE Directive (2012/19/EU) and your national law. This product should be taken to a collection center licensed for the recycling of waste electrical and electronic equipment (EEE). The mishandling of this type of waste could have a possible negative impact on the environment and human health due to potentially hazardous substances that are generally associated with EEE. At the same time, your cooperation in the correct disposal of this product will contribute to the ecient use of natural resources. For more information about where you can take your waste equipment for recycling, please contact your local city oce, or your household waste collection service.18. Do not install in a conned space, such as a book case or similar unit.19.  Do not place naked ame sources, such as lighted candles, on the apparatus.20. Please keep the environmental aspects of battery disposal in mind. Batteries must be disposed-of at a battery collection point.21.  Use this apparatus in tropical and/or moderate climates.MUSIC Group accepts no liability for any loss which may be suered by any person who relies either wholly or in part upon any description, photograph, or statement contained herein. Technical specications, appearances and other information are subject to change without notice. All trademarks are the property of their respective owners. MIDAS, KLARK TEKNIK, LAB GRUPPEN, LAKE, TANNOY, TURBOSOUND, TC ELECTRONIC, TC HELICON, BEHRINGER, BUGERA, COOLAUDIO and EUROCOM are trademarks or registered trademarks of MUSIC Group IP Ltd. © MUSIC Group IP Ltd. 2017 All rights reserved.For the applicable warranty terms and conditions and additional information regarding MUSIC Group’s Limited Warranty, please see complete details online at music-group.com/warranty. Las terminales marcadas con este símbolo transportan corriente eléctrica de magnitud suciente como para constituir un riesgo de descarga eléctrica. Utilicesolo cables de altavoz profesionales y de alta calidad con conectores TS de 6,3 mm o de bayoneta prejados. Cualquier otra instalación o modicación debe ser realizada únicamente por un técnicocualicado.Este símbolo, siempre que aparece, leadvierte de la presencia de voltaje peligroso sin aislar dentro de la caja; estevoltaje puede ser suciente para constituir un riesgo dedescarga.Este símbolo, siempre que aparece, leadvierte sobre instrucciones operativas y de mantenimiento que aparecen en la documentación adjunta. Por favor, leaelmanual.AtenciónPara reducir el riesgo de descarga eléctrica, no quite la tapa (olaparte posterior). Nohay piezas en el interior del equipo que puedan ser reparadas por el usuario. Sies necesario, póngase en contacto con personal cualicado.AtenciónPara reducir el riesgo de incendio o descarga eléctrica, no exponga este aparato a la lluvia, humedad o alguna otra fuente que pueda salpicar o derramar algún líquido sobre el aparato. Nocoloque ningún tipo de recipiente para líquidos sobre elaparato.AtenciónLas instrucciones de servicio deben llevarlas a cabo exclusivamente personal cualicado. Paraevitar el riesgo de una descarga eléctrica, no realice reparaciones que no se encuentren descritas en el manual de operaciones. Lasreparaciones deben ser realizadas exclusivamente por personalcualicado.1.  Lea las instrucciones.2.  Conserve estas instrucciones.3.  Preste atención a todas las advertencias.4.  Siga todas las instrucciones.5.  No use este aparato cerca del agua.6.  Limpie este aparato con un paño seco.7.   No bloquee las aberturas de ventilación. Instale el equipo de acuerdo con las instrucciones del fabricante.8.  No instale este equipo cerca de fuentes de calor tales como radiadores, acumuladores de calor, estufas u otros aparatos (incluyendo amplicadores) que puedan producir calor.9.  No elimine o deshabilite nunca la conexión a tierra del aparato o del cable de alimentación de corriente. Unenchufe polarizado tiene dos polos, uno de los cuales tiene un contacto más ancho que el otro. Una clavija con puesta a tierra dispone de tres contactos: dos polos y la puesta a tierra. El contacto ancho y el tercer contacto, respectivamente, son los que garantizan una mayor seguridad. Si el enchufe suministrado con el equipo no concuerda con la toma de corriente, consulte con un electricista para cambiar la toma de corriente obsoleta.10.  Coloque el cable de suministro de energía de manera que no pueda ser pisado y que esté protegido de objetos alados. Asegúrese de que el cable de suministro de energía esté protegido, especialmente en la zona de la clavija y en el punto donde sale del aparato.11.   Use únicamente los dispositivos o accesorios especicados por el fabricante.12.  Use únicamente la carretilla, plataforma, trípode, soporte o mesa especicados por el fabricante o suministrados junto con el equipo. Altransportar el equipo, tenga cuidado para evitar daños y caídas al tropezar con algún obstáculo.13.  Desenchufe el equipo durante tormentas o si no va a utilizarlo durante un periodo largo.14.  Confíe las reparaciones únicamente a servicios técnicos cualicados. La unidad requiere mantenimiento siempre que haya sufrido algún daño, si el cable de suministro de energía o el enchufe presentaran daños, sehubiera derramado un líquido o hubieran caído objetos dentro del equipo, si el aparato hubiera estado expuesto a la humedad o la lluvia, si ha dejado de funcionar de manera normal o si ha sufrido algún golpe o caída.15. Al conectar la unidad a la toma de corriente eléctrica asegúrese de que la conexión disponga de una unión atierra.16.  Si el enchufe o conector de red sirve como único medio de desconexión, éste debe ser accesiblefácilmente.
4LIVE MINI 5Quick Start GuideConsignes de sécuritéDÉNI LÉGALGARANTIE LIMITÉEWichtige SicherheitshinweiseNEGACIÓN LEGALGARANTÍA LIMITADA17. Cómo debe deshacerse de este aparato: Este símbolo indica que este aparato no debe ser tratado como basura orgánica, según lo indicado en la Directiva WEEE (2012/19/EU) y a las normativas aplicables en su país. En lugar de ello deberá llevarlo al punto limpio más cercano para el reciclaje de sus elementos eléctricos/ electrónicos (EEE). Al hacer esto estará ayudando a prevenir las posibles consecuencias negativas para el medio ambiente y la salud que podrían ser provocadas por una gestión inadecuada de este tipo de aparatos. Además, el reciclaje de materiales ayudará a conservar los recursos naturales. Para más información acerca del reciclaje de este aparato, póngase en contacto con el Ayuntamiento de su ciudad o con el punto limpio local.18. No instale esta unidad en un espacio muy reducido, tal como encastrada en una librería o similar.19.  No coloque objetos con llama, como una vela encendida, sobre este aparato.20. Tenga presentes todas las advertencias relativas al reciclaje y correcta eliminación de las pilas. Las pilas deben ser siempre eliminadas en un punto limpio y nunca con el resto de la basura orgánica.21.  Use este aparato en rangos de temperatura moderados y/o tropicales.MUSIC Group no admite ningún tipo de responsabilidad por cualquier daño o pérdida que pudiera sufrir cualquier persona por conar total o parcialmente en la descripciones, fotografías o armaciones contenidas en este documento. Las especicaciones técnicas, imágenes y otras informaciones contenidas en este documento están sujetas a modicaciones sin previo aviso. Todas las marcas comerciales que aparecen aquí son propiedad de sus respectivos dueños. MIDAS, KLARK TEKNIK, LAB GRUPPEN, LAKE, TANNOY, TURBOSOUND, TC ELECTRONIC, TC HELICON, BEHRINGER, BUGERA, COOLAUDIO y EUROCOM son marcas comerciales o marcas registradas de MUSIC Group IP Ltd. © MUSIC Group IP Ltd. 2017 Reservados todos los derechos. Si quiere conocer los detalles y condiciones aplicables de la garantía así como información adicional sobre la Garantía limitada de MUSIC Group, consulte online toda la información en la web music-group.com/warranty.Les points repérés par ce symbole portent une tension électrique susante pour constituer un risque d’électrocution. Utilisez uniquement des câbles d’enceintes professionnels de haute qualité avec ches Jack mono 6,35 mm ou ches à verrouillages déjà installées. Touteautre installation ou modication doit être eectuée uniquement par un personnel qualié.Ce symbole avertit de la présence d’une tension dangereuse et non isolée à l’intérieur de l’appareil - elle peut provoquer des chocs électriques.AttentionCe symbol signale les consignes d’utilisation et d’entre ! Tienimportantes dans la documentation fournie. Lisez les consignes de sécurité du manuel d’utilisation del’appareil.AttentionPour éviter tout risque de choc électrique, ne pas ouvrir le capot de l’appareil ni démonter le panneau arrière. L’intérieur de l’appareil ne possède aucun élément réparable par l’utilisateur. Laissertoute réparation à un professionnelqualié.AttentionPour réduire les risques de feu et de choc électrique, n’exposez pas cet appareil à la pluie, à la moisissure, auxgouttes ou aux éclaboussures. Ne posez pas de récipient contenant un liquide sur l’appareil (unvase par exemple).AttentionCes consignes de sécurité et d’entretien sont destinées à un personnel qualié. Pour éviter tout risque de choc électrique, n’eectuez aucune réparation sur l’appareil qui ne soit décrite par le manuel d’utilisation. Les éventuelles réparations doivent être eectuées uniquement par un technicienspécialisé.1.  Lisez ces consignes.2.  Conservez ces consignes.3.  Respectez tous les avertissements.4.  Respectez toutes les consignes d’utilisation.5.  N’utilisez jamais l’appareil à proximité d’un liquide.6.  Nettoyez l’appareil avec un chion sec.7.   Veillez à ne pas empêcher la bonne ventilation de l’appareil via ses ouïes de ventilation. Respectezles consignes du fabricant concernant l’installation del’appareil.8.  Ne placez pas l’appareil à proximité d’une source de chaleur telle qu’un chauage, une cuisinière ou tout appareil dégageant de la chaleur (y compris un ampli depuissance).9.  Ne supprimez jamais la sécurité des prises bipolaires ou des prises terre. Les prises bipolaires possèdent deux contacts de largeur diérente. Leplus large est le contact de sécurité. Les prises terre possèdent deux contacts plus une mise à la terre servant de sécurité. Si la prise du bloc d’alimentation ou du cordon d’ali-mentation fourni ne correspond pas à celles de votre installation électrique, faites appel à un électricien pour eectuer le changement de prise.10.  Installez le cordon d’alimentation de telle façon que personne ne puisse marcher dessus et qu’il soit protégé d’arêtes coupantes. Assurez-vous que le cordon d’alimentation est sufsamment protégé, notamment au niveau de sa prise électrique et de l’endroit où il est relié à l’appareil; cela est également valable pour une éventuelle rallonge électrique.11.   Utilisez exclusivement des accessoires et des appareils supplémentaires recommandés par lefabricant.12.  Utilisez exclusivement des chariots, des diables, desprésentoirs, despieds et des surfaces de travail recommandés par le fabricant ou livrés avec le produit. Déplacezprécautionneusement tout chariot ou diable chargé pour éviter d’éventuelles blessures en cas dechute.13.  Débranchez l’appareil de la tension secteur en cas d’orage ou si l’appareil reste inutilisé pendant une longue période de temps. 14.  Les travaux d’entretien de l’appareil doivent être eectués uniquement par du personnel qualié. Aucunentretien n’est nécessaire sauf si l’appareil est endommagé de quelque façon que ce soit (dommagessur le cordon d’alimentation ou la prise par exemple), siun liquide ou un objet a pénétré à l’intérieur du châssis, si l’appareil a été exposé à la pluie ou à l’humidité, s’il ne fonctionne pas correctement ou à la suite d’une chute.15.  L’appareil doit être connecté à une prise secteur dotée d’une protection par mise à la terre. 16.  La prise électrique ou la prise IEC de tout appareil dénué de bouton marche/arrêt doit rester accessible enpermanence.17. Mise au rebut appropriée de ce produit: Ce symbole indique qu’en accord avec la directive DEEE (2012/19/EU) et les lois en vigueur dans votre pays, ce produit ne doit pas être jeté avec les déchets ménagers. Ce produit doit être déposé dans un point de collecte agréé pour le recyclage des déchets d’équipements électriques et électroniques (EEE). Une mauvaise manipulation de ce type de déchets pourrait avoir un impact négatif sur l’environnement et la santé à cause des substances potentiellement dangereuses généralement associées à ces équipements. En même temps, votre coopération dans la mise au rebut de ce produit contribuera à l’utilisation ecace des ressources naturelles. Pour plus d’informations sur l’endroit où vous pouvez déposer vos déchets d’équipements pour le recyclage, veuillez contacter votre mairie ou votre centre local de collecte des déchets.18. N’installez pas l’appareil dans un espace conné tel qu’une bibliothèque ou meuble similaire.19.  Ne placez jamais d’objets enammés, tels que des bougies allumées, sur l’appareil.20. Gardez à l’esprit l’impact environnemental lorsque vous mettez des piles au rebus. Les piles usées doivent être déposées dans un point de collecte adapté.21.  Utilisez l’appareil dans un climat tropical et/ou modéré.MUSIC Group ne peut être tenu pour responsable pour toute perte pouvant être subie par toute personne se ant en partie ou en totalité à toute description, photographie ou armation contenue dans ce document. Les caractéristiques, l’apparence et d’autres informations peuvent faire l’objet de modications sans notication. Toutes les marques appartiennent à leurs propriétaires respectifs. MIDAS, KLARK TEKNIK, LAB GRUPPEN, LAKE, TANNOY, TURBOSOUND, TC ELECTRONIC, TC HELICON, BEHRINGER, BUGERA, COOLAUDIO et EUROCOM sont des marques ou marques déposées de MUSIC Group IP Ltd. © MUSIC Group IP Ltd. 2017 Tous droits réservés. Pour connaître les termes et conditions de garantie applicables, ainsi que les informations supplémentaires et détaillées sur la Garantie Limitée de MUSIC Group, consultez le site Internet music-group.com/warranty.VorsichtDie mit dem Symbol markierten Anschlüsse führen so viel Spannung, dassdie Gefahr eines Stromschlags besteht. Verwenden Sie nur hochwertige, professionelle Lautsprecherkabel mit vorinstallierten 6,35 mm MONO-Klinkensteckern oder Lautsprecherstecker mit Drehverriegelung. Alle anderen Installationen oder Modikationen sollten nur von qualiziertem Fachpersonal ausgeführt werden.AchtungUm eine Gefährdung durch Stromschlag auszuschließen, darf die Geräteabdeckung bzw. Geräterückwandnicht abgenommen werden. ImInnern des Geräts benden sich keine vom Benutzer reparierbaren Teile. Reparaturarbeiten dürfen nur von qualiziertem Personal ausgeführtwerden.
6LIVE MINI 7Quick Start GuideBESCHRÄNKTE GARANTIEHAFTUNGSAUSSCHLUSSInstruções de Segurança ImportantesAchtungUm eine Gefährdung durch Feuer bzw. Stromschlag auszuschließen, darf dieses Gerät weder Regen oder Feuchtigkeit ausgesetzt werden noch sollten Spritzwasser oder tropfende Flüssigkeiten in das Gerät gelangen können. Stellen Sie keine mit Flüssigkeit gefüllten Gegenstände, wie z. B. Vasen, aufdasGerät.AchtungDie Service-Hinweise sind nur durch qualiziertes Personal zu befolgen. Umeine Gefährdung durch Stromschlag zu vermeiden, führen Sie bitte keinerlei Reparaturen an dem Gerät durch, dienicht in der Bedienungsanleitung beschrieben sind. Reparaturen sind nur von qualiziertem Fachpersonaldurchzuführen.1.  Lesen Sie diese Hinweise.2.  Bewahren Sie diese Hinweise auf.3.  Beachten Sie alle Warnhinweise.4.  Befolgen Sie alle Bedienungshinweise.5.  Betreiben Sie das Gerät nicht in der Nähe vonWasser.6.  Reinigen Sie das Gerät mit einem trockenen Tuch.7.   Blockieren Sie nicht die Belüftungsschlitze. Beachten Sie beim Einbau des Gerätes die Herstellerhinweise.8.  Stellen Sie das Gerät nicht in der Nähe von Wärmequellen auf. Solche Wärmequellen sind z. B. Heizkörper, Herde oder andere Wärme erzeugende Geräte (auch Verstärker).9.  Entfernen Sie in keinem Fall die Sicherheitsvorrichtung von Zweipol- oder geerdeten Steckern. Ein Zweipolstecker hat zwei unterschiedlich breite Steckkontakte. Ein geerdeter Stecker hat zwei Steckkontakte und einen dritten Erdungskontakt. Derbreitere Steckkontakt oder der zusätzliche Erdungskontakt dient Ihrer Sicherheit. Falls das mitgelieferte Steckerformat nicht zu Ihrer Steckdose passt, wenden Sie sich bitte an einen Elektriker, damit die Steckdose entsprechend ausgetauscht wird.10.  Verlegen Sie das Netzkabel so, dass es vor Tritten und scharfen Kanten geschützt ist und nicht beschädigt werden kann. Achten Sie bitte insbesondere im Bereich der Stecker, Verlängerungskabel und an der Stelle, an der das Netzkabel das Gerät verlässt, aufausreichendenSchutz.11.   Das Gerät muss jederzeit mit intaktem Schutzleiter an das Stromnetz angeschlossen sein.12.  Sollte der Hauptnetzstecker oder eine Gerätesteckdose die Funktionseinheit zum Abschalten sein, muss diese immer zugänglich sein.13.  Verwenden Sie nur Zusatzgeräte/Zubehörteile, dielaut Hersteller geeignet sind.14.  Verwenden Sie nur Wagen, Standvorrich-tungen, Stative, Halter oder Tische, die vom Hersteller benannt oder im Lieferumfang des Geräts enthalten sind. Falls Sie einen Wagen benutzen, seien Sie vorsichtig beim Bewegen der Wagen- Gerätkombination, umVerletzungen durch Stolpern zuvermeiden.15. Ziehen Sie den Netzstecker bei Gewitter oder wenn Sie das Gerät längere Zeit nicht benutzen.16.  Lassen Sie alle Wartungsarbeiten nur von qualiziertem Service-Personal ausführen. EineWartung ist notwendig, wenn das Gerät in irgendeiner Weise beschädigt wurde (z. B. Beschädigung des Netzkabels oder Steckers), Gegenstände oder Flüssigkeit in das Geräteinnere gelangt sind, das Gerät Regen oder Feuchtigkeit ausgesetzt wurde, das Gerät nicht ordnungsgemäß funktioniert oder auf den Boden gefallen ist.17.  Korrekte Entsorgung dieses Produkts: Dieses Symbol weist darauf hin, das Produkt entsprechend der WEEE Direktive (2012/19/EU) und der jeweiligen nationalen Gesetze nicht zusammen mit Ihren Haushaltsabfällen zu entsorgen. DiesesProdukt sollte bei einer autorisierten Sammelstelle für Recycling elektrischer und elektronischer Geräte (EEE) abgegeben werden. Wegen bedenklicher Substanzen, diegenerell mit elektrischen und elektronischen Geräten in Verbindung stehen, könnte eine unsachgemäße Behandlung dieser Abfallart eine negative Auswirkung auf Umwelt und Gesundheit haben. Gleichzeitig gewährleistet Ihr Beitrag zur richtigen Entsorgung dieses Produkts die eektive Nutzung natürlicher Ressourcen. Fürweitere Informationen zur Entsorgung Ihrer Geräte bei einer Recycling-Stelle nehmen Sie bitte Kontakt zum zuständigen städtischen Büro, Entsorgungsamt oder zu Ihrem Haushaltsabfallentsorgerauf.18. Installieren Sie das Gerät nicht in einer beengten Umgebung, zum Beispiel Bücherregal oder ähnliches.19.  Stellen Sie keine Gegenstände mit oenen Flammen, etwa brennende Kerzen, auf das Gerät.20. Beachten Sie bei der Entsorgung von Batterien den Umweltschutz-Aspekt. Batterien müssen bei einer Batterie-Sammelstelle entsorgt werden.21.  Verwenden Sie das Gerät in tropischen und/oder gemäßigten Klimazonen.MUSIC Group übernimmt keine Haftung für Verluste, die Personen entstanden sind, die sich ganz oder teilweise auf hier enthaltene Beschreibungen, Fotos oder Aussagen verlassen haben. Technische Daten, Erscheinungsbild und andere Informationen können ohne vorherige Ankündigung geändert werden. Alle Warenzeichen sind Eigentum der jeweiligen Inhaber. MIDAS, KLARK TEKNIK, LAB GRUPPEN, LAKE, TANNOY, TURBOSOUND, TC ELECTRONIC, TC HELICON, BEHRINGER, BUGERA, COOLAUDIO und EUROCOM sind Warenzeichen oder eingetragene Warenzeichen der MUSIC Group IP Ltd. © MUSIC Group IP Ltd. 2017 Alle Rechte vorbehalten. Die geltenden Garantiebedingungen und zusätzliche Informationen bezüglich der von MUSIC Group gewährten beschränkten Garantie nden Sie online unter music-group.com/warranty.Aviso!Terminais marcados com o símbolo carregam corrente elétrica de magnitude suciente para constituir um risco de choque elétrico. Use apenas cabos de alto-falantes de alta qualidade com plugues TS de ¼" ou plugues com trava de torção pré-instalados. Todas as outras instalações e modicações devem ser efetuadas por pessoasqualicadas.Este símbolo, onde quer que o encontre, alerta-o para a leitura das instruções de manuseamento que acompanham o equipamento. Por favor leia o manual deinstruções.AtençãoDe forma a diminuir o risco de choque eléctrico, nãoremover a cobertura (ouasecção de trás). Não existem peças substituíveis por parte do utilizador no seu interior. Para esse efeito recorrer a um técnicoqualicado.AtençãoPara reduzir o risco de incêndios ou choques eléctricos o aparelho não deve ser exposto à chuva nem à humidade. Alémdisso, não deve ser sujeito a salpicos, nem devem ser colocados em cima do aparelho objectos contendo líquidos, taiscomojarras.AtençãoEstas instruções de operação devem ser utilizadas, emexclusivo, por técnicos de assistência qualicados. Para evitar choques eléctricos não proceda a reparações ou intervenções, que não as indicadas nas instruções de operação, salvo se possuir as quali-cações necessárias. Para evitar choques eléctricos não proceda a reparações ou intervenções, que não as indicadas nas instruções de operação. Só o deverá fazer se possuir as qualicaçõesnecessárias.1.  Leia estas instruções.2.  Guarde estas instruções.3.  Preste atenção a todos os avisos.4.  Siga todas as instruções.5.  Não utilize este dispositivo perto de água.6.  Limpe apenas com um pano seco.7.   Não obstrua as entradas de ventilação. Instale de acordo com as instruções do fabricante.8.  Não instale perto de quaisquer fontes de calor tais como radiadores, bocas de ar quente, fogões de sala ou outros aparelhos (incluindo amplicadores) que produzam calor.9.  Não anule o objectivo de segurança das chas polarizadas ou do tipo de ligação à terra. Uma cha polarizada dispõe de duas palhetas sendo uma mais larga do que a outra. Uma cha do tipo ligação à terra dispõe de duas palhetas e um terceiro dente de ligação à terra. A palheta larga ou o terceiro dente são fornecidos para sua segurança. Se a cha fornecida não encaixar na sua tomada, consulte um electricista para a substituição da tomada obsoleta.10.  Proteja o cabo de alimentação de pisadelas ou apertos, especialmente nas chas, extensões, e no local de saída da unidade. Certique-se de que o cabo eléctrico está protegido. Verique particularmente nas chas, nos receptáculos e no ponto em que o cabo sai doaparelho.11.   O aparelho tem de estar sempre conectado à rede eléctrica com o condutor de protecção intacto.12.  Se utilizar uma cha de rede principal ou uma tomada de aparelhos para desligar a unidade de funcionamento, esta deve estar sempre acessível.13.  Utilize apenas ligações/acessórios especicados pelofabricante.14.  Utilize apenas com o carrinho, estrutura, tripé, suporte, ou mesa especicados pelo fabricante ou vendidos com o dispositivo. Quandoutilizar um carrinho, tenha cuidado ao mover o conjunto carrinho/dispositivo para evitar danos provocados pela terpidação. 15. Desligue este dispositivo durante as trovoadas ou quando não for utilizado durante longos períodos detempo.16.  Qualquer tipo de reparação deve ser sempre efectuado por pessoal qualicado. É necessária uma reparação sempre que a unidade tiver sido de alguma forma danicada, como por exemplo: no caso do cabo de alimentação ou cha se encontrarem danicados; naeventualidade de líquido ter sido derramado ou objectos terem caído para dentro do dispositivo; no caso da unidade ter estado exposta à chuva ou à humidade; seesta não funcionar normalmente, ou se tiver caído.17.  Correcta eliminação deste produto: este símbolo indica que o produto não deve ser eliminado juntamente com os resíduos domésticos, segundo a Directiva REEE (2012/19/EU) e a legislação nacional. Este produto deverá ser levado para um centro de recolha licenciado para a reciclagem de resíduos de equipamentos eléctricos e electrónicos (EEE). O tratamento incorrecto deste tipo de resíduos pode ter um eventual impacto negativo no ambiente e na
8LIVE MINI 9Quick Start GuideGARANTIA LIMITADALEGAL RENUNCIANTEsaúde humana devido a substâncias potencialmente perigosas que estão geralmente associadas aos EEE. Ao mesmo tempo, a sua colaboração para a eliminação correcta deste produto irá contribuir para a utilização eciente dos recursos naturais. Paramais informação acerca dos locais onde poderá deixar o seu equipamento usado para reciclagem, é favor contactar os serviços municipais locais, a entidade de gestão de resíduos ou os serviços de recolha de resíduosdomésticos.18. Não instale em lugares connados, tais como estantes ou unidades similares.19.  Não coloque fontes de chama, tais como velas acesas, sobre o aparelho.20. Favor, obedecer os aspectos ambientais de descarte de bateria. Baterias devem ser descartadas em um ponto de coletas de baterias.21.  Use este aparelho em climas tropicais e/ou moderados.O MUSIC Group não se responsabiliza por perda alguma que possa ser sofrida por qualquer pessoa que dependa, seja de maneira completa ou parcial, de qualquer descrição, fotograa, ou declaração aqui contidas. Dados técnicos, aparências e outras informações estão sujeitas a modicações sem aviso prévio. Todas as marcas são propriedade de seus respectivos donos. MIDAS, KLARK TEKNIK, LAB GRUPPEN, LAKE, TANNOY, TURBOSOUND, TC ELECTRONIC, TC HELICON, BEHRINGER, BUGERA, COOLAUDIO e EUROCOM são marcas ou marcas registradas do MUSIC Group IP Ltd. © MUSIC Group IP Ltd. 2017 Todos direitos reservados. Para obter os termos de garantia aplicáveis e condições e informações adicionais a respeito da garantia limitada do MUSIC Group, favor vericar detalhes na íntegra através do website music-group.com/warranty.
10 LIVE MINI 11Quick Start Guide(EN) Step 1: Hook-UpLIVE MINI Hook-upCharging BasePower AdapterPower AdapterLIVE MINILIVE MINIPower Connection direct to LIVE MINIBluetooth Connection to LIVE MINIAuxiliary Connection to LIVE MINIPower Connection using the LIVE MINI charging base (recommended)
12 LIVE MINI 13Quick Start Guide(EN) Step 2: ControlsLIVE MINI Controls LIVE MINI Controls(EN) Step 2: ControlsTop Panel Controls(1)  Previous – this button is used for playing the previous song in the play list.(2)  Microphone Aperture– below this small hole is the element for the internal microphone. This microphone is used for phone calls and voice interaction with your mobile devices. Keep this area clean and dry, and do not cover, or the microphone response will be degraded.(3)  Next – this button is used for playing the next song in the play list.(4)  Power ON/Battery Indicator – this is illuminated steadily for about 10 seconds when the LIVE MINI Power button is pressed ON. When the LIVE MINI is charging, the indicator will slowly  ash. The color indicates the battery status as follows:Red: Battery charge is lowYellow: Battery charge is less than 20%Green: Battery charge is greater than 50% The LIVE MINI does not need to be on when charging.The indicator will turn on and  ash red when the battery charge is very low and the LIVE MINI is about to shut down.(5)  Power Button – press this button once to turn the LIVE MINI on. The Power ON indicator  will turn on when the LIVE MINI is on. Press the button for about 1 second to turn o  the LIVE MINI.(6)  – Button – this button is used for various operations, including Volume Down.(7)  Multi-Function Button – this MFB button is used in various operations of the LIVE MINI, including Pause and Play.(8)  + Button – this button is used for various operations, including Volume UP.(9)  Aux Input Indicator – this indicates that the LIVE MINI is connected to an auxilliary device such as an MP3 player, via the rear panel 3.5 mm TRS Aux connector.(10)  Bluetooth Button– this button is used in various operations such as Bluetooth pairing to compatible devices.See the Getting Started section of this manual for details of setting up the Bluetooth connection.(11)  Bluetooth Indicator – this indicates the status of the bluetooth connection.Rear Panel Connectors(12)  Aux Input – this 3.5 mm TRS connector accepts line-level stereo input signals from external devices such as MP3 players or computer audio outputs.(13)  Power Input – this connector is used with the supplied power adapter to charge the internal battery of the LIVE MINI when it is not attached to its charging base.The LIVE MINI can be charged using this power input connector, or charged when it is connected to the charging base (this is the recommended method).Use only the supplied power adapter.Charging BaseThe LIVE MINI is supplied with a charging base. This base should be placed on a dry and clean, horizontal surface.We recommend charging using the charging base, because the power connection can be left in place on the charging base. This reduces the chance of damage due to multiple connecting and disconnecting of the power connection directly to the LIVE MINI.(14)  Power Connector – these four spring terminals make the power connection to the bottom  of the LIVE MINI when it is connected to the charging base.When  tting the LIVE MINI to the charging base, make sure this connector lines up correctly to the corresponding connector on the bottom of the LIVE MINI.Keep this connector clean and dry, as well as the corresponding mating connector on the bottom of the LIVE MINI.(15)  Power Input – this connector is used with the supplied power adapter to charge the internal battery of the LIVE MINI when it is connected to the charging base.The supplied power adapter can be left connected to the charging base.Use only the supplied power adapter.TopFrontRearRearFront(12) (13)(1) (2) (3)Base Top(14)(15)(4) (5) (6) (7) (8) (9) (10) (11)
14 LIVE MINI 15Quick Start GuideOperations Table(EN)   Step 3: Getting startedLIVE MINI Getting startedOVERVIEWThis Getting Started guide will help you set up the LIVE MINI and brie y introduce its capabilities. The LIVE MINI contains 2 premium transducers and a unique bass radiator design that allows for excellent music reproduction wherever you go. The Bluetooth connectivity and 3.5 mm auxilliary input allow a wide variety of connection options.POWER CONNECTIONSBefore using the LIVE MINI for the very  rst time, we recommend that you make sure it is fully charged  rst. Use the supplied power adapter only, and connect it either directly to the rear power connector on the LIVE MINI, or the charging base.Make sure the charging base is placed on a clean, dry, and  at horizontal surface, and that the LIVE MINI is correctly  tted into the base.When charging the LIVE MINI, the Power LED will show the charge status. When the LIVE MINI is fully charged, the Power LED will show a steady green.Do not leave the LIVE MINI unattended during charging.Please note that the battery is not user-replaceable. it can be replaced by an authorised repair center.Battery NotesThe LIVE MINI internal battery type is Li-ion. To maximise the battery life, we recommend that you do not run the battery down to a very low charge. Keep it out of the “battery low” charge range (red POWER LED) as much as possible. It is better to recharge the battery from a medium charge (even if you have to charge it more often).There is no need to fully discharge the battery at any time.The playing time will vary depending upon the volume and type of music program. The louder the music, and the more bass content, then the less battery time is available.Operation of the LIVE MINI at high temperatures will also a ect battery life. Do not place the LIVE MINI near to radiators,  replaces, heaters, or other sources of heat, such as power ampli ers. Do not place the LIVE MINI in direct sunlight during high daytime temperatures.When the LIVE MINI is not going to be used for a long time, such as storage, make sure it is charged  rst.Unplug the external power adapter from the AC Mains when the LIVE MINI is not in its charging base.BLUETOOTH CONNECTIONThe procedure for setting up a typical Bluetooth connection is as follows:First, read the documentation that came with your device, and become familiar with the Bluetooth operation procedures and details.Make sure that your device has Bluetooth enabled.Turn on the Power to the LIVE MINI. The BT LED will  ash, showing it is trying to pair with your device.If the TANNOY LIVE MINI does not appear in your device list, press the BT button on the LIVE MINI for 3 seconds.When the TANNOY LIVE MINI appears in your device list, select it and it will be paired. The BT LED will turn on steady.In operation, the + and - buttons can be used to increase and decrease the volume, and the previous and next buttons can be used to move up and down your playlist.While connected via Bluetooth, incoming calls can be answered by pressing the Multi Function Button (MFB), and using the internal microphone on the LIVE MINI to talk.The following table shows some of the details of operation.TroubleshootingProblems with the Bluetooth connection may be  xed using the following points:Try pressing and holding the + and - buttons on the LIVE MINI for 5 seconds. This will reset the Bluetooth connection list within the LIVE MINI.Try deleting any previous instances of “TANNOY LIVE MINI” in your device, and then try pairing again from new.AUX CONNECTIONThe 3.5 mm TRS input connection on the rear of the LIVE MINI allows connection to the line-level audio output of various devices including computers and MP3 players, for example.When a connection is made to the Aux input, the LIVE MINI will automatically switch to play the incoming audio, rather than Bluetooth devices.In operation, the + and - buttons can be used to increase and decrease the volume, and the MFB button can be used to Mute the sound.Function Name Status Operation Remark LED StatusTurn On O   Press and hold the POWER button until the power LED lights up LIVE MINI will start to connect to the last used device, if the device list is not empty. Otherwise it will enter pairing mode.Power LED will light for 10 seconds.The Power LED color indicates the battery status:Green : >50% Yellow: >20%Red: Battery LowTurn O  On Press and hold the POWER button until the Power LED turns red and then o Power LED O Show battery statusOn Press the POWER button Power LED turns on for 3 seconds Power LED color shows the charge status as above.Bluetooth mode (BT=Bluetooth, MFB=Multi-Function Button)Enter pairing On, but not in call-active stateHold BT button for 3 secondsLIVE MINI is ready for pairing and connecting.This expires in 5 minutes.BT LED  ashes blue slowlyManual Connection RequestIdle state Press MFB buttonLIVE MINI starts to connect to the last used device.No changeBT connection establishedBT LED On steadyVolume Up  Music playing or a call is activePress '+' button  BT LED  ashes onceVolume Down Music playing or a call is activePress '-' button BT LED  ashes onceVolume maximum/minimumMusic playing or a call is active'+' / '-' Press and hold the + or - buttons to keep increasing or decreasing volume BT LED  ashes twicePlay/Pausemusic playerA2dp pro le connectedPress MFB once BT LED  ashes onceForward  Audio streamingPress PREV buttonJump to next song  BT LED  ashes onceBackward Audio streamingPress NEXT buttonJump to previous song  BT LED  ashes onceIncoming call BT LED   ashesAnswer a call  Incoming call  Press MFB once BT LED On steadyReject an incoming callIncoming call Hold MFB for 1 second No  changeEnd/cancel a call Call active Press MFB once  No changeLast number redial HFP connectedPress MFB twice HFP = Hands Free Protocol  No changeVoice dial HFP connectedPress MFB three timesNo change
17Quick Start Guide16 LIVE MINIThree way callPlace an incoming call on holdIncoming call Press MFB twice  LED Status No changeAccept waiting release active Second  call on hold/waitingPress MFB once  No changeAccept waiting hold activeSecond call on hold/waitingPress MFB twice No changeAccept held incoming callIncoming call on holdPress MFB once  No changeReject held incoming callIncoming call on holdHold MFB for 1 secondNo changeRelease all held  Call on hold/waitingPress MFB+BT buttons No  changeAdd held to 3 way Call on hold/waitingDouble pressMFB+BT buttonsNo changeReset Bluetooth paired device listReset BT paired  device listIdle state Hold '+' & '-' together for 5 secondsBT LED  ashes several timesAUX modeVolume up  AUX mode Press '+' button  AUX  LED  ashes onceVolume down AUX mode Press '-' button AUX  LED  ashes onceVolume maximum/minimumAUX mode '+' / '-' Press and hold the + or - buttons to keep increasing or decreasing volume AUX  LED  ashes twiceMute/unmute AUX mode Press MFB AUX  LED  ashes onceSwitch BT mode AUX mode Press BT buttonor Unplug the 3.5mm jackChange to BT ledSwitch AUX mode BT mode Plug in 3.5mm jackAUX  LED ONBattery StatusFull charged  Any state Plug in charger POWER LED Green steady> 50% full Any state Plug in charger POWER LED slowly  ashing Yellow< 50% full Any state Plug in charger POWER LED slowly  ashing RedNote:LIVE MINI will automatically turn itself o  if there is no audio input for 20 minutes.Operations Table continued Speci cationsPerformanceAudio output power 2 x 8 Watts RMS @ 4 OhmsTransducers 2 x 1.75" with neodymium magnetsPassive radiators 2 xAux input 3.5 mm TRSExternal power adapter input 100-240 VAC 50/60 HzExternal power adapter output 5 VDC, 2A maximumType Li-ionRating voltage 7.4 VCapacity 2600 mAhVersion Bluetooth 4.2 RF frequency range 2402 to 2480 MHzChannel No. 79Maximum output power 10 dBmEnvironmentalOperating temperature range 5°C to 40°C (41°F to 104°F)PhysicalDimensions (H x W x D) 63 x 186 x 65 mm (0.5 x 7.3 x 2.6")Weight 0.89 kg (1.96 lbs)Power RequirementsInternal BatteryBluetooth Wireless Technology
19Quick Start GuideFEDERAL COMMUNICATIONS COMMISSION COMPLIANCE INFORMATIONResponsible Party Name:  MUSIC GROUP SERVICES NV INC.Address:  5270 PROCYON STREET,LAS VESGAS, NV89118 USA.Phone Number:  +1 702 800 8290LIVE MINIcomplies with the FCC rules as mentioned in the following paragraph:This equipment has been tested and found to comply with the limits for a ClassB digital device, pursuant to part 15 of the FCC Rules. These limits are designed to provide reasonable protection against harmful interference in a residential installation. This equipment generates, uses and can radiate radio frequency energy and, if not installed and used in accordance with the instructions, may cause harmful interference to radio communications. However, there is no guarantee that interference will not occur in a particular installation. If this equipment does cause harmful interference to radio or television reception, which can be determined by turning the equipment o  and on, the user is encouraged to try to correct the interference by one or more of the following measures:—Reorient or relocate the receiving antenna.—Increase the separation between the equipment and receiver.—Connect the equipment into an outlet on a circuit di erent from that to which the receiver is connected.—Consult the dealer or an experienced radio/TV technician for help.This equipment complies with Part 15 of the FCC Rules. Operation is subject to the following two conditions:(1) This device may not cause harmful interference, and(2) This device must accept any interference received, including interference that may cause undesired operation.This transmitter must not be co-located or operating in conjunction with any other antenna or transmitter.Caution!The MUSIC Group is not responsible for any radio or TV interference caused by unauthorized modi cations to this equipment.Such modi cations could void the user authority to operate the equipmentFCC RF Radiation Exposure Statement:(1) This Transmitter must not be co-located or operating in conjunction with any other antenna or transmitter.(2) This equipment complies with FCC RF radiation exposure limits set forth for an uncontrolled environment. This equipment should be installed and operated with a minimum distance of 20 centimeters between the radiator and your body.LIVE MINI19Quick Start Guide18 LIVE MINIOther important information1. Register online. Pleaseregister your new MUSIC Group equipment right after you purchase it by visiting tannoy.com. Registeringyour purchase using our simple online form helps us to process your repair claims more quickly and e  ciently. Also, read the terms and conditions of our warranty, ifapplicable.2. Malfunction. Should your MUSICGroup Authorized Reseller not be located in your vicinity, you may contact the MUSIC Group Authorized Ful ller for your country listed under “Support” at tannoy.com. Shouldyour country not be listed, pleasecheck if your problem can be dealt with by our “OnlineSupport” which may also be found under “Support” at tannoy.com. Alternatively, please submit an online warranty claim at tannoy.com BEFORE returning theproduct.3. Power Connections. Beforeplugging the unit into a power socket, please make sure you are using the correct mains voltage for your particular model. Faulty fuses must be replaced with fuses of the same type and rating withoutexception.Important informationOther important information

Navigation menu