MySugr Logbook User Manual En GB
2018-07-11
: Mysugr Logbook Manual En Gb logbook_manual_en_GB manual 3.52 android app_logbook
Open the PDF directly: View PDF ![]() .
.
Page Count: 20

mySugr Logbook User Manual
Version: 3.52.0_Android - 2018-07-05
1 Indications for Use
1.1 Intended Use
The mySugr Logbook is used to support the treatment of
diabetes through daily diabetes-related data management
and aims to support the optimisation of therapy. You can
manually create log entries which include information about
your insulin therapy, current and target blood glucose levels,
carbohydrate intake and details of your activities.
Additionally, you can synchronise other therapy devices such
as blood glucose meters to mitigate errors caused by
manually entering values and to better your confidence in
usage.
The mySugr Logbook supports the optimisation of therapy in
two ways:
1) Monitoring: Through monitoring your parameters in
day-to-day life, you are helped to make better informed
therapy decisions. You can also generate data reports for
discussion of therapy data with your health care
professional.
2) Therapy Compliance: The mySugr Logbook provides
you with motivational triggers, feedback on your current
therapy status and gives you rewards for staying
motivated to stick to your therapy, and therefore
increasing therapy compliance.
1.2 Who is the mySugr Logbook for?
The mySugr Logbook has been tailor-made for people:
diagnosed with diabetes
aged 18 years and above
under guidance of a doctor or other healthcare professional
who are physically and mentally able to independently
manage their diabetes therapy
able to proficiently use a smartphone
1.3 What devices does the mySugr Logbook work on?
The mySugr Logbook can be used on any iOS device with
iOS 10.3 or higher. It is also available on most Android
smartphones with Android 5.0 or higher. The mySugr
Logbook should not be used on rooted devices or on
smartphones that have a jailbreak installed.
1.4 Environment for Use
As a mobile application, the mySugr Logbook can be used in
any environment where there is an internet connection and
where mobile phone use is permitted.
1

2 Contraindications
None known
3 Warnings
3.1 Medical Advice
The mySugr Logbook is a registered medical device and is
used to support the treatment of diabetes, but cannot
replace a visit to your doctor/diabetes care team. You still
require professional and regular review of your long-term
blood glucose values (HbA1c) and must continue to
independently manage your blood sugar levels.
3.2 Recommended Updates
To ensure safe and optimised running of the mySugr
Logbook, it is recommended that you install software
updates as soon as they are available. The Web version of
the Logbook automatically uses the latest released version.
4 Key Features
4.1 Summary
mySugr wants to make your daily diabetes management
easier and optimise your overall diabetes therapy but this is
only possible if you take an active and intense role in your
care, specifically around entering information into the app. In
order to keep you motivated and interested, we've added
some fun elements into the mySugr Logbook. It’s important
to enter as much information as possible and to be
completely honest with yourself. This is the only way to
benefit from recording your information. Entering false or
corrupted data does not help you.
mySugr Logbook key features:
Lightning quick data entry
Personalised logging screen
Detailed analysis of your day
Handy photo functions (multiple pics per entry)
Exciting challenges
Multiple report formats (PDF, CSV, Excel)
Clear graphs
Practical glucose reminders
Social sharing
Apple Health Integration
Secure data backup
Fast multi-device sync
Accu-Chek Aviva/Performa Connect/Guide/Instant
Integration
Beurer GL 50 evo Integration (Germany & Italy Only)
Ascensia Contour Next One Integration (where available)
4.2 Key Features
Quick and easy data entry.
2

Quick and easy data entry.
Smart search.
Neat and clear graphs.
Handy photo function (multiple pics per entry).
Exciting challenges.
Multiple report formats PDF, CSV, Excel (PDF and Excel
only in mySugr Pro).
Smile-inducing feedback.
3

Practical glucose reminders.
Social sharing functions.
Fast multi device sync (mySugr Pro).
5 Getting started
5.1 Installation
iOS: Open the App Store on your iOS device and search for
“mySugr”. Click on the icon to see the details, then press
“Get” and then “Install” to start the installation process. You
may be asked for your App Store password; once entered,
the mySugr Logbook will begin to download and install.
Android: Open the Play Store on your Android device and
search for “mySugr”. Click on the icon to see the details,
then press “Install” to start the installation process. You will
be asked to accept the download conditions by Google. After
that, the mySugr Logbook will begin to download and install.
To use the mySugr Logbook you have to create an account.
This is necessary in order to export your data later.
4
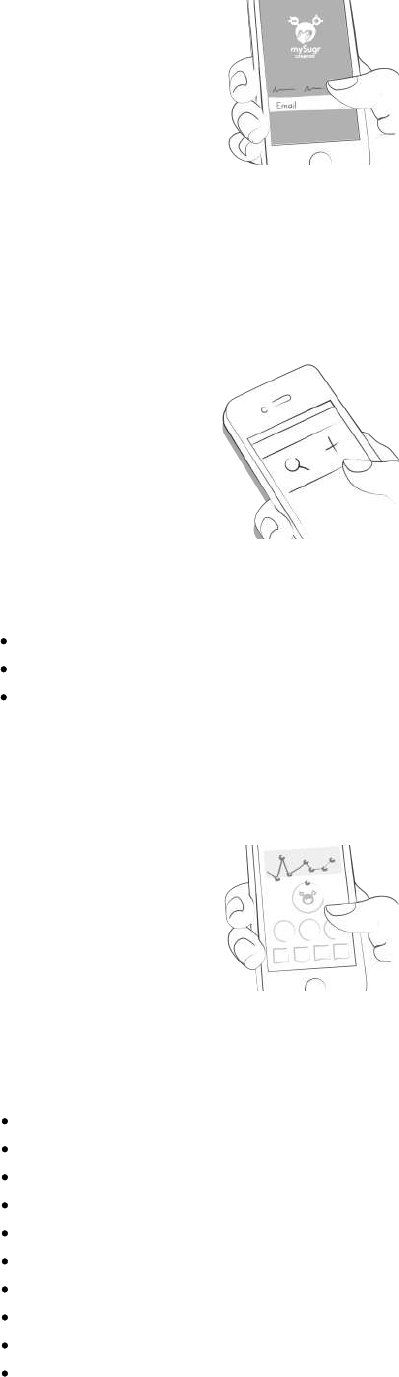
5.2 Home
The two most commonly used features are the Magnifying
Glass, used to search for entries (mySugr Pro), and the
Plus Sign, used to make a new entry.
Below the graph you'll see statistics for the current day:
Average blood glucose
Blood glucose deviation
Hypos and hypers
Below this you can find fields with information about units of
insulin, carbohydrates, and more. These fields are arranged
according to their order on the new entry screen.
Under the graph you can see tiles that contain the following
information for specific days:
blood glucose average
blood glucose deviation
number of hypers and hypos
insulin ratio
bolus or mealtime insulin taken
amount of carbohydrates eaten
duration of activity
pills
weight
blood pressure
5
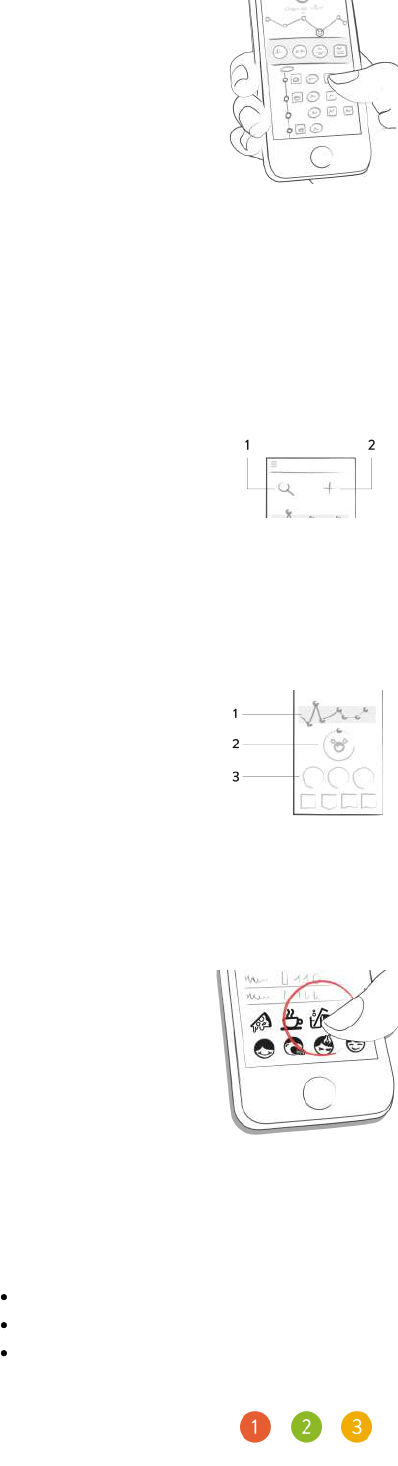
5.3 Explanation of terms, icons and colors
1) Tapping on the Magnifying Glass icon on your
dashboard allows you to search for entries, tags, locations,
etc.
2) Tapping on the Plus Sign allows you to add an entry.
The colors of the elements on the dashboard (3) and the
monster (2) actively react to your glucose levels of the
current day. The color of the graph adapts to the time of day
(1).
Each tag in the new entry screen describes a situation,
scenario, some context, a mood, or an emotion. There is a
text description of each tag directly below each icon.
The colors used in variable areas of the mySugr Logbook
are as described above, based on target ranges provided by
the user in the settings screen.
Red: Blood glucose not in target range
Green: Blood glucose in target range
Orange: Blood glucose is not great but ok
Within the Logbook you see a variety of tiles. There are five
6

different shapes representing five categories.
1) Blood glucose, weight, HbA1c, Ketone
2) Insulin
3) Pills
4) Food
5) Activity
5.4 Profile
Use the side menu to access Profile & Settings.
Change your personal, therapy and application settings. If
you wish, you can enter more specific details about you,
your diabetes type, and your diabetes diagnosis date.
Change password at the bottom if needed.
Enter your name, email address, gender and date of birth. If
you need to change your email address in the future, here is
where it happens. You can also change your password or
log out. Last but not least, you can give your diabetes
monster a name! Go ahead, be creative!
mySugr needs to know some details about your diabetes
management in order to function properly. For example, your
blood glucose units (mg/dl or mmol/l), how you measure your
carbohydrates, and how you deliver your insulin (pump,
pen/syringes, or no insulin). If you use an insulin pump, you
can enter your basal rates, decide if you'd like them
displayed on the graphs, and if you want them displayed in
7

30-minute increments. If you take any oral medications
(pills), you can enter the names of them here so they are
available to select when creating a new entry. If desired, you
can also enter many other details (age, type of diabetes,
target BG ranges, target weight, etc.). You can even enter
details about your diabetes devices. If you can't find your
specific device, just leave it blank for now – but please let us
know so we can get it added to the list.
Total basal insulin for the 24-hour period is shown in the
upper right hand corner. Tap the green check mark (upper
right corner) to save your basal rates or the “x” (upper left
corner) to cancel and return to the settings screen.
Define your diabetes devices and meds here. Don't see your
device or med on the list? Don't worry, you can skip it – but
please let us know so we can add it. Flip the appropriate
switch to decide if you want monster sounds on or off, and if
you want to receive a weekly email report. You can also
change the settings of the Bolus Advisor (if available in your
country).
6 Entries
6.1 Add an entry
Open the mySugr Logbook.
8

Tap on the plus sign.
Change date, time and location if needed.
Take a picture of your food.
Enter blood glucose, carbs, nutrition, insulin details, pills,
activity, weight, HbA1c, ketones and notes.
Select tags.
Tap on the reminder icon to get reminder menu. Move the
9

slider to the desired time.
Save entry.
You did it!
6.2 Edit an entry
Tap on the entry you‘d like to edit or slide to the right and
click edit.
Edit entry.
Tap the green check to save the changes or tap the "x“ to
cancel and go back.
10

6.3 Delete an entry
Tap on the entry you would like to delete or swipe to the right
to delete the entry.
Delete entry.
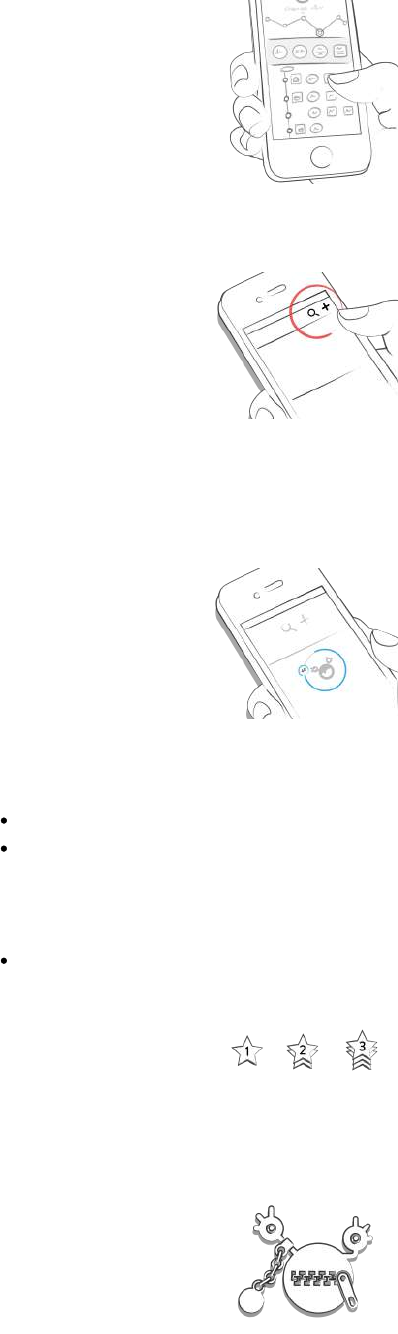
6.4 Search an entry
Tap on the magnifying glass.
Use filter to retreive appropriate search results.
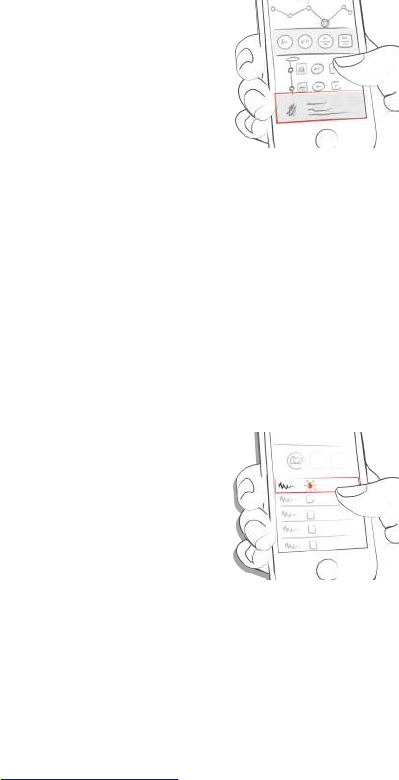
6.5 Logbook
Scroll up and down on your entries or tap and drag the graph
left and right to navigate.
11
Add or search entries by tapping the appropriate icon.
7 Earn points
You get points for each action you take to care for yourself,
and the goal is to fill the bar with points each and every day.
How many points do I get?
1 Point: Tags, more pics, pills, notes, meal tags
2 Points: blood glucose, meal entry, location, bolus (pump)
/ insulin short acting (pen/syringe), description of meal,
temp basal (pump) / insulin long acting (pen/syringe), blood
pressure, weight, ketones
3 Points: first pic, activity, activity description, HbA1c
Get 50 points per day and tame your monster!
8 Estimated HbA1c
The top right of the graph displays your estimated HbA1c –
assuming you’ve logged enough blood glucose values (more
on that, next). Note: this value is only an estimate and is
based on your logged blood glucose levels. This result can
deviate from laboratory results.
12

HbA1c - what's behind this important test
In order to calculate an estimated HbA1c, the mySugr
Logbook needs an average of 3 blood glucose values per
day for a minimum period of 7 days. Enter more values for a
more accurate estimate.
The maximum calculation period is 90 days.
9 Coaching
You can find Coaching in the side-menu (in countries where
this service is available).
Tap to collapse or expand messages. You can view and
send messages here.
Badges indicate unread messages.
13

10 Challenges
Challenges are found via the side menu.
Challenges are usually oriented towards achieving goals
related to better overall health or diabetes management,
such as checking your blood sugar more often or getting
more exercise.
11 Import data
11.1 Hardware
Please be sure that your meter is properly connected to your
smartphone. Go to the Bluetooth settings on your
smartphone, turn on your meter, and wait until the two
devices have connected. If you are using the Beurer GL50
Evo please go into the meter memory to activate Bluetooth.
Select "Connections" from the menu.
Select your device from the list.
14

Click "Enable" and follow the instructions displayed in the
mySugr Logbook.
Following the successful activation of your meter, your blood
glucose values are automatically synchronised with the
mySugr Logbook. This synchronisation happens every time
you connect the device to your smartphone with the mySugr
Logbook open.
ATTENTION: The blood glucose units of measurement
(mg/dL or mmol/L) must be identical in the blood glucose
meter and in the settings of the mySugr Logbook otherwise
data synchronisation is not possible. If the settings do not
match they must be adjusted in the mySugr Logbook to
perform data synchronisation from the device.
When duplicates are detected (for example, a reading in the
meter memory that was also manually entered into the
mySugr Logbook) they are automatically merged.
Extremely high or low values are marked as such: Values
below 20 mg/dL are displayed as Lo, values above 600
mg/dL are displayed as Hi. The same goes for the equivalent
values in mmol/L.
After all data has been imported you can perform a live
measurement. Go to the dashboard in the mySugr Logbook
and then insert a test strip into your meter.
15
When prompted by your meter, apply a sample of blood to
the test strip and wait for the result, just like you normally
would. The value is transferred into the mySugr Logbook
along with the current date and time. You can also add
additional information to the entry if desired.
ATTENTION: Blood glucose values imported from the
iBGStar / BGStar can not be changed or deleted!
11.2 Import CGM Data
11.2.1 Import CGM Data via CSV or TXT into mySugr
Using a computer, login to your mySugr account at
hello.mysugr.com and find “Importer” in the side menu. Drag
the .csv file from your CGM program into the upload area.
The mySugr monsters will crunch the data and load it into
your account. It should only take a moment or two. Once it’s
complete, start the mySugr Logbook on your smartphone.
Your CGM data will appear in the graph as soon as the
synchronisation is finished.
11.2.2 Import CGM via Apple Health (iOS only)
Make sure that Apple Health is enabled in the mySugr
Logbook settings and make sure that sharing for blood
glucose is enabled in the Apple Health settings. Open the
mySugr Logbook and the CGM data will appear in the graph.
*Note for Dexcom: The Health app will display the Sharer’s
glucose information with a three-hour delay. It will not display
real time glucose information.
11.2.3 Import of Freestyle Libre data (Android only)
In the side-menu you find "other data sources". This gives
you a list of possible sources of data to fill your Logbook.
Choose "Abbott Freestyle Libre" and log in with your
LibreView user-data. Confirm that you want to share your
data with mySugr.
11.2.4 Hide CGM Data
16

Double tap on the graph to open an overlay control panel
where you can enable or disable visibility of CGM data in
your graph.
12 Export data
Select “Reports” from the side menu.
Change file format and period if needed (mySugr Pro) and
tap “Export”. Once on your screen, tap the button in the
upper right (lower left since iOS 10) to access the options for
sending and saving.
13 Apple Health/Google Fit
You can activate Apple Health in the side-menu under
'Connections'. Google Fit can be activated in the side-menu
With Apple Health you can share data between mySugr and
other health apps.
14 Analysis
Swipe the daily overview to the left to get to analysis mode.
You'll get to the overview of the last 7 days. Swipe to the left
again and enter the 14-day overview.
17

The dots show you where you are in time. Swipe left again
and you'll get to your monthly overview. Here, you'll even be
able to see your quarterly overview!
Scroll down to see the graphs displaying past data!
The blue area shows your average number of daily logs,
your total number of logs and how many points you've
already collected.
15 Deinstallation
15.1 Deinstallation iOS
Tap and hold the mySugr Logbook icon until it starts to
shake. Tap the small "x" that appears in the upper corner. A
message will appear asking you to confirm the uninstallation
(by pressing "Delete") or cancel (by pressing "Cancel").
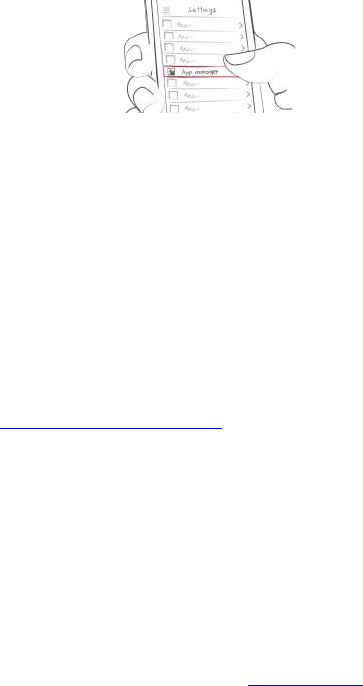
15.2 Deinstallation Android
In the Settings of your Android phone look for Apps, find the
mySugr Logbook in the list and tap "Uninstall." That's it!
18
16 Data Security
Your data is safe with us - this is very important to us (we’re
users of mySugr too). The mySugr Logbook is a registered
medical device (Medical Devices Directive 93/42/EEC). It is
certified, carries the CE mark and is registered with the FDA.
As such, it is required to meet the highest of data security
and reliability standards.
For more information, please refer to our privacy notice
within our Terms and Conditions
17 Support
17.1 Troubleshooting
We care about you. That’s why we have people with
diabetes to take care of your questions, worries and
concerns.
For quick troubleshooting, visit our FAQs page
17.2 Support
If you have questions about mySugr, need help with the app,
or have noticed a mistake or problem, please contact us
immediately at support@mysugr.com.
You can also call us on:
+ 1 (855) 337-7847 (US toll-free)
+ 44 800-011-9897 (UK toll-free)
+ 43 720 884555 (Austria)
+ 49 511 874 26938 (Germany)
18 About the Manufacturer
mySugr GmbH
Schottenfeldgasse 69/3.1
A-1070 Vienna, Austria
Telephone:
+1 (855) 337-7847 (US toll-free),
+44 800-011-9897 (UK toll-free),
+43 720 884555 (Austria)
+ 49 511 874 26938 (Germany)
E-Mail: support@mysugr.com
CEO: Frank Westermann
Company Registration Number: FN 376086 v
Jurisdiction: Commercial Court of Vienna, Austria
UID-Nummer: ATU67061939
19

User's Manual Version 69 (en_GB), 2018-07-05
20
