NEBI MOBI EVE008 Handheld Mobile Digital Device User Manual W450
NEBI.MOBI LLC Handheld Mobile Digital Device W450
Users Manual
1
Phone
User Manual
Product:Handheld Mobile Digital Device
Trade Name:NEBI.MOBI
Model Name:EVE008
FCC ID:2AB4I-EVE008
2
Contents
1 .KEY DESCRIPTION ............................................................................................................ 3
2. THE USE OF MOBILE PHONE MEMORY CARD AS U DISK ..................................................... 3
3.WI-FI ............................................................................................................................... 4
4.BLUETOOTH ...................................................................................................................... 5
5.DIAL ................................................................................................................................. 7
6.E-MAIL .......................................................................................................................... 10
7. CALCULATOR ................................................................................................................ 10
8. BROWSER ..................................................................................................................... 10
9.SOUND RECORDER ........................................................................................................ 10
10. CALENDAR ................................................................................................................. 11
11. SETTINGS ................................................................................................................... 11
12. CLOCK ........................................................................................................................ 15
13. FM RADIO ................................................................................................................. 16
14. PEOPLE....................................................................................................................... 16
15. GALLERY..................................................................................................................... 17
16.CAMERA...................................................................................................................... 18
17.MESSAGING ................................................................................................................ 19
18.MUSIC ........................................................................................................................ 20
19.SECURITY WARNINGS AND PRECAUTIONS ................................................. 20

3
1 .Key Description
Button Function
Back • Into the back interface can return to a layer of
directory
Home
• On any application or interface, press the button to
return to the Home interface
• Press and hold the application window can be opened
recently executed
Menu • Access to menu options
Power
• Press to lock the screen
• Long presses the POWER key, can choose to Power off,
Airplane mode,Silent mode,Meeting mode,General mode.
Side key • Adjust the volume
2. the use of mobile phone memory card as U disk
To the computer to transfer music, photos and other files to your memory
card, you must first mobile phone memory card is set to U disk.
• The phone memory card set to U disk
1) Using the USB cable to connect your phone to the computer.The status
bar will show the notification icon.
2) Open the Notifications panel.
3) In the notification panel, touch USB connection, and then in the pop-up
page, touch the "Turn on USB storage".
4) Connected as USB Storage:USB storage,Media device,Camera(PTP).
• Note: If you connect your phone to your computer, select Open the USB
storage device, the phone will not recognize the memory card.You will
not be able to use certain applications, such as camera phone.

4
• U disk to uninstall from the computer
1)Open the notification panel.
2)in the notification panel, touching off USB storage device, then touch
the "Turn off USB storage" in the pop-up page
3.Wi-Fi
Turn on Wi-Fi and connect to a wireless network:
1) Press menu, then touch System settings> Wireless and network.
2) Select the Wi-Fi check box to turn on the Wi-Fi. The phone will
automatically scan for available wireless networks.
3) Touch the Wi-Fi settings. Then the Wi-Fi network list will show the
Wi-Fi network to find the network name and security settings (open
network or WEP, WPA/WPA2 encryption). If you enable network
notifications in the Wi-Fi settings, the phone will find the available
open wireless network in the status bar display this icon ( ).
4) Touch one of the Wi-Fi network to connect to. When you select an open
network, the phone will automatically connect to the network. If you
select WEP, WPA/WPA2 encrypted network, you must first enter the
appropriate password, and then touch the connection.。
• Note: When the phone is connected to a wireless network, the status bar
will display Wi-Fi icon (), And shows the approximate signal
strength (number of strip lit).If you touch the phone is currently
connected wireless network, it displays the name of the Wi-Fi network,
5
status, signal strength, security and IP address.If you want to remove
the phone's wireless network settings, touch this window is not saved.
If you want to connect to this network, you must re-enter these settings.
• Note: Unless you choose not to save encrypted network, otherwise the next
phone to connect to the encrypted wireless network previously connected,
do not need to re-enter the appropriate password. Wi-Fi networks on their
own search, which is the phone without having to perform additional steps
can be connected to the Wi-Fi network.
Connection to other Wi-Fi networks
1) Wireless and network on the screen, touch the Wi-Fi settings. Find
Wi-Fi networks will be displayed in the Wi-Fi network list.
2) Touch other Wi-Fi networks can be connected to the network.
• Note: In addition, the phone is also available on the Internet via GPRS.
GPRS SIM card in our current default boot is open, the user can manually
select the specific location in the Settings> SIM card management> data
connection, touch the "data connection" to close the current SIM card
data connection.
4.Bluetooth
Turn on Bluetooth or set the phone can be detected
1) Press menu, then touch System settings.

6
2) Touch the wireless network, and then select the Bluetooth check box
to turn the Bluetooth function. Turned on, the status bar will appear
Bluetooth ( ).Touch the "SEARCH FOR DEVICES" will begin to search for
Bluetooth devices within range.
3) Touch the Bluetooth settings, all discovered devices are displayed
in the bottom of the list of Bluetooth devices.
(Click on the bluetooth name,bluetooth set to can be detected. So that
other Bluetooth devices within range will be able to find the phone.)
Important: The phone can detect the most short time of two minutes.
• Pairing and connecting bluetooth headset
1) Press menu, then touch Settings.
2) Touch the "SEARCH FOR DEVICES" will begin to search for Bluetooth
devices within range.If the list can not find your device, touch the
scanning equipment, re-scan again.
3) Make sure that you want to pair with Bluetooth devices is set to the
detection mode
4) Touch the headset in the device list to match.
• NOTE: Bluetooth devices generally need to enter a password to pair. More
than "0000" as the default password. The pairing and connection status
will be displayed below the headset in the list of Bluetooth devices.
When Bluetooth headset is connected to the phone, the status bar will
display the Bluetooth connected icon( ).You can start using the headset
to make or receive calls.
• Interrupt the connection with the Bluetooth headset

7
1) Press the Menu> System settings> Wireless and Networking> Bluetooth
Settings.
2) In the list of Bluetooth devices, touch or tap and hold hands-free
headset is connected.
3) Touch the icon( ). Then you choice the "Unpair".
5.Dial
• Start the dial-up
Open the main application interface to touch the dial. Enter the phone number
in the dial box.
• Call
In the dialer interface, enter the number you want to call. Click to dial
to let you choose to use that SIM card dialing. Fuzzy matching based on the
input number to search for local contacts and contact information, enter the
number displayed in the query results. Fuzzy matching phonetic including
contact number and contact name. Click a search results will recall the number.
For more information call the extension; can click on the bottom of the screen
after the call is connected, the dial pad to open the input interface, enter
the extension number, or directly on the menu select "pause time of 2 seconds
and extend the waiting time to dial the extension.
• Phone call log
Set
aside and then heard a phone number in the menu of the phone call records.
The lower left corner of each phone records will show the phone inbound and
outbound. Can call the situation: inbound, outbound and missed screening the
8
call records.
Click on the single records, direct dial a phone number. Click on the
small arrow of the right side of the phone records, you can view the details
of the section record.
Press and a call log to bring up the Edit menu: Remove from call log, edit
number before call.
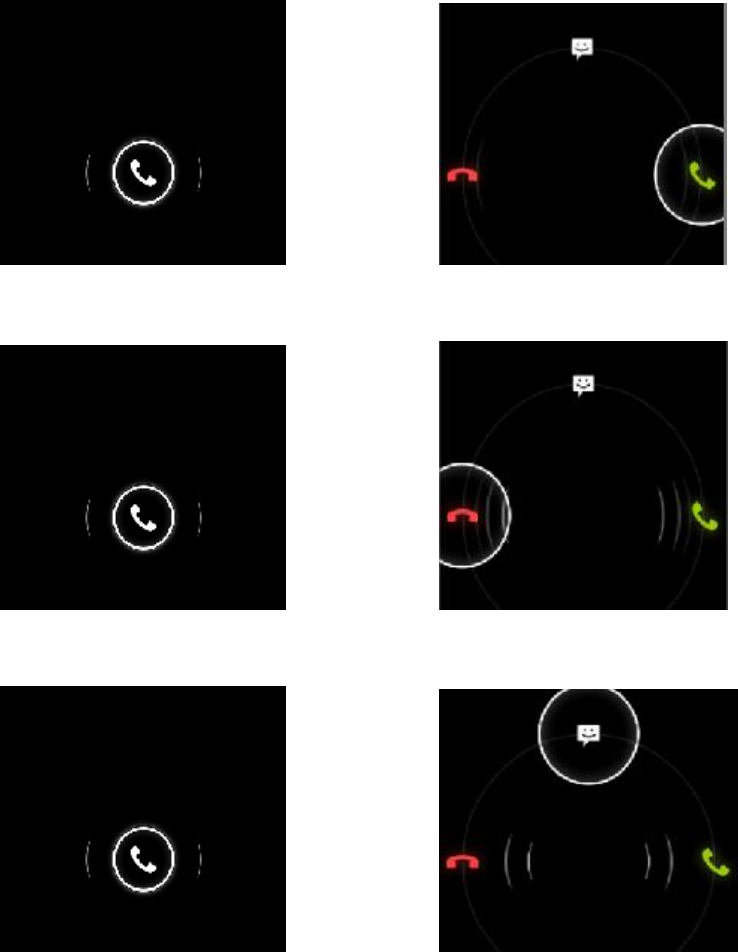
• Answer call
• End call
• End call and send a text message
• Proximity sensor

9
According to the distance of the phone with the human body, and automatically
adjust the phone backlight switch.
During a call, the phone to your ear, the phone screen backlight will
automatically turn off can be a good power-saving and prevent inadvertently.
• Two-way call / a multiparty call (conference call)
• Note: This feature requires SIM card multi-party call feature
1) Phone has been talk all the way
2) Touch the icon( ) again exhale all the way to call, two-way call is
established, the call interface to view to the state.
3)Touch the icon( ) – Two calls merged into a multi-call.
• Telephone recording
During a call, the Menu button to Start recording, call recording.
• Call settings
Voice Call
1)Voice mail: The voice mailbox in setting in the input voicemail number.
2) IP prefix number:Edit IP number.
3) Call forwarding: including:Always forward,Forward when busy,Forward
when unanswer,Forward when unreachable.
4) Call barring
5) Additional settings: *Caller ID *Call waiting
Internet Call:Internet call related settings.
Other settings: Including Fixed Dialing Numbers,Minute Reminder,Quick
Responses,TTY Mode.
10
6.E-mail
G-mail is Google's free webmail service.Can permanently keep your important
messages,files and pictures,use the search quichly and easily find any
desired content.
Note: multiple functions need to use a G-mail account, such as: synchronize
contacts and calendar.
7.Calculator
Calculator can carry out some simple arithmetic.
·Touch the number keys followed by a blank box display.
·The calculator interface,press the MENU button,select the Advanced
panel,or hold down the screen to the left sliding switch to high-level panel.
8.Browser
You can visit the website and download songs,pictures,video,games…
1)on the browser screen, then touch the address bar enter the URL.
2)Use the keypad to enter a web address.You enter the address at the same
time, in line with the web address will appear on the screen. You can touch
the URL to go directly to that page or continue to enter the URL.
9.Sound Recorder
The recorder can record sound, and quickly send via MMS or Bluetooth, can
also be recorded sound as ringtones.

11
1) Click on the program recorder.
2) Keep the cell phone microphone near the sound source.
3) Click the recording or start recording the sound, click on the stop or
playback.
All recordings are saved in the default music program in SoundRecording
folder.
10.Calendar
Into the calendar program.
The default display to the month the way.
There are four kinds of display mode:
1) Day Display a day's schedule.Or so can flip slide.
2) Week Show a week's schedule.Or so can flip slide.
3) Month The screen displays a monthly schedule (most recently clicked
on the date) slide up and down on a monthly basis flip.
4) Agenda Displays a time space schedule.
11.Settings
• Wireless & networks
1) SIM management
* touch to select the SIM card or disable the SIM card, disable the status
bar shows the flight mode.
* the default SIM card, you can choose the voice telephony, video telephony,
information and data

12
connection is turned on or choose to use that SIM card.
2) Wi-Fi : Touch the Wi-Fi open .Open Wi-Fi will
automatically search for available networks, did not set a password can
be connected directly to the need to enter a password to set a password
to connect
Note: Wi-Fi open and then open the offline mode, the Wi-Fi will
automatically turn off; open flight mode and then connect to the Wi-Fi,
the Wi-Fi can be used normally.
3) Bluetooth
4) Data usage: Open or close the data connection of the SIM card, view
the SIM traffic usage.
5) Airplane mode: Open the airplane mode, the mobile phone mobile network
related services be banned.
6) VPN settings
7) Mobile networks: Enter the interface of the mobile network settings,
including: *data usage *access point names *network mode
*network operators.
8) GPRS transfer prefer
• DEVICE
1)Audio profiles
This option for you provide the mobile phone in incoming call, announcement
of the bell ring set state.include: vibrate,volume,phone ringtone,notification
ringtone,feedbace. In order to adapt to the users in various environment。

13
* activate: According to the right of the dot, dot heart for the green
that open.
* volume:Can manual sliding to choose.
2)Display
* brightness: The brightness to adjust the screen brightness.
* wallpaper:Set wallpaper,choose wallpaper from gallery,live
wallpapers,video wallpaper,wallpapers.
* auto-rotate screen: Rotating the phone changed direction.
* sleep: Screen standby time.
* font size: Set the phone to the font size.
3)Storage
* Default write disk:USB storage,SD Card.
* SD card & phone memory usage.
* Unmount SD card and erase SD card.
4)Battery
Display the battery.
5)Apps
Manage and remove installed applications.
• PERSONAL
1)Accounts & sync
* Applications can sync,send and receive data at any time
* Applications sync data automatically.

14
2)Location services
* Use wireless networks
* See location in applications(such as Maps)using wireless networks.
3)Security
* Screen unlock: Use pattern, PIN or password lock screen.
* SIM card lock: The SIM card lock to enter the PIN (4-8 digits) can
be set SIM-locked.
The SIM card PIN (Personal Identification Number) is to prevent the illegal
use of SIM card. The PIN code is usually provided with the SIM card. The
initial value provided by the service provider.
Modify the PIN code is locked, you need to open the "SIM lock", then enter
the Change Password interface, the phone will automatically prompt the old PIN
code input, and asked to enter two new PIN code, the last phone will be prompted
for your PIN modified successfully. Three times in a row to enter the PIN code
has errors, the SIM card PIN code will be automatically locked and the PUK code
is usually provided with the SIM card. If you do not, should go to the service
provider to obtain this password.
10 times in a row enter the wrong PUK code, the SIM card will be permanently
locked.
4) Language & input
* Select language: The default support 15 language.
5) Backup & reset
* DRM reset:Deletes all DRM licenses.

15
* Factory data reset:Erases all data on phone.
• SYSTEM
1) Data & time
Set a time and date.
2) Schedule power on\off
Set time turns on/off the phone time.
3) Accessibility
* Large text:Set the phone to display the font is large.
* Power button ends call: During a call,pressing power ends call instead
of turning off screen.
* Auto-rotate screen:Rotating the phone changed direction.
* Quick boot: enable\disable quick boot.
4) Developer options
* USB debugging:USB debugging only for development。Use this function
can be in computer and mobile duplicate data between devices.
* Stay awake: After open charging screen will not be dormancy.
* Allow mock locations
5) About phone
Check status information and use electricity, etc.
12.Clock
Click the "set alarm" to enter alarm,press the menu:

16
1) Desk clock:Return desk clock.
2) Add alarm:Add an effective alarm clock.
3) Settings:Edit the settings of the alarm clock.
13.FM Radio
Through this program, you can listen to FM radio on the device due to
the FM radio through the wired headset as an antenna to receive signals, before
the use of this procedure make sure that access to the original equipment of
headphones, listen to when you can switch the sound output way for a speaker
or wired headset.
14.People
• Open the main application interface> People.
1)The default display phone contacts and the SIM card contacts, the
contacts are sorted according to the first letter of the alphabet.
2)Click the Search icon( ), enter the contact search interface.
3)Click " " sign to create a new contact.
• Search for a contact
1) Enter numbers or letters and the list name part of the agreement will
be displayed in the search results.
2)If there is no search to match the contact, the interface will appear
"None found".
• Speed Dial
1)1 for voice mail.
17
2)2-9 numbers, click you can add a speed dial number, select the contacts
as speed dial, caller.
state: Successfully set up the dialer interface and long press the
number keys to dial the contact number.
15.Gallery
• Open the gallery
Open the main application interface, the Touch Gallery.
The Camera screen, press the Menu key to open the menu, then select Gallery
• Use a photo
Take a picture, you can also view photos or photos to share with friends.
• View photos
1) In the picture on the screen, touch the album to view pictures in the
albums.
2) Touch the thumbnails to view pictures full screen.
You can choose to display small or large thumbnails. Hold down the screen
to drag to the left to view the next photo or drag to the right to view the
previous photo.
The list of albums or photos, press and hold the photo to the left scroll
to view a photo, or right to scroll through a photo.
• Can make the following operation
1)Set as Contact icon\Wallpaper
2)Crop picture

18
3)Use Bluetooth,Messaging,Email to send pictures
4)Use video
After shooting video, you can also view the video or will video and close
friends to share.
5) Play videos:
* In the gallery screen,touch the video album,and then touch you want
to watch the video,you can start playing the video.
* Touch screen will display the player control keys.
16.Camera
• Prepared in advance
Installed before using the camera or video camera memory card. All the
photos taken by camera phone or video will be stored in the memory card.
• Turn on the camera
Open the main application interface, touch the camera. If you want to
photography, sliding control is switched to the shooting mode.
Touch the icon( ) switch taken before and after.
• Take a picture
1)Touch the icon( ).
2)After shooting the photo automatically to the camera time for the file
name, save to library default camera pictures folder.
3)Touch the preview pane button to view photos.
4)Touch the Settings button on the interface of the camera to select
camera settings.
19
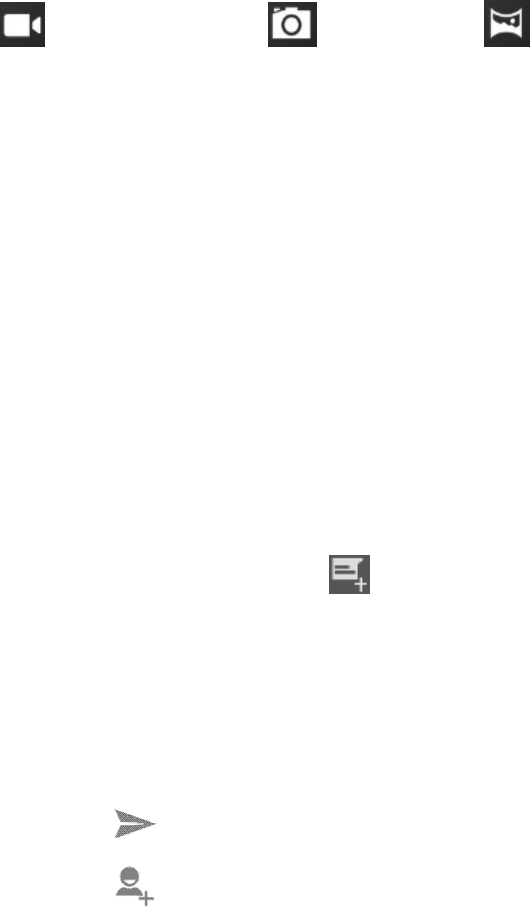
5) In the camera viewfinder mode, press the Menu key, you can choose to
video camera( ), take picture( ), panorama( ).
17.Messaging
• Important: The phone's messages to each other's numbers for the title,
recorded in a similar chat "session" is stored, instead of the usual
folder structure. Which the blue dialog box information is received by
the machine messages, green dialog box displays information messages from
the machine.
• Send SMS
1) APPS>Messaging,touch the icon( ) to compose new message。
2) Write message:
a. Click the "receiver" input box to start the input method, click the
"type message" input box to start the Input Method, you can input characters.
b. Touch the icon( ),sending the edited information.
c. Touch the icon( ),enter the "people" select contacts.
• Send MMS
The new message, the message defaults to SMS, when reaching one of the
following automatically be converted to MMS. After the preparation is complete,
click "Send" will be issued to the MMS.
1) "Write message" interface, press the Menu button:
* Add subject:Edit subject.
* Discard:Cancel the edit information.
* Insert quick text:Can choose the quick text.

* Insert smiley:There are 21 kinds of expressions for selection.
* Insert contact:Add contact into "people".
* Settings:Set message.
2) Touch the icon( ),can attach many types of attachments, additional
attachment, the message is automatically converted into MMS.
The attachment types include: Photo (supports GIF, JPEG and other
formats), photographs, video (3GP, MP4 format), shooting video and audio
(support MIDI, MP3, WAV and other formats), sound recordings, slides.
Note: At present, the mobile phone mass can only support up to 100
recipients.
18.Music
Music can play digital audio files in the phone memory card. The music
supports the following music file formats: AMR, M4A, MIDI, MP3, WAV, OGG.
FCC RF Exposure Information and Statement
The SAR limit of USA (FCC) is 1.6 W/kg averaged over one gram of tissue.
Device types: EVE008(FCC ID: 2AB4I-EVE008) has also been tested against this
SAR limit. The highest SAR value reported under this standard during product
certification for use at the ear is 0.132W/kg and when properly worn on the body
is 1.125W/kg. This device was tested for typical body-worn operations with the
back of the handset kept 1.0cm from the body. To maintain compliance with FCC
RF exposure requirements, use accessories that maintain a 1.0cm separation
distance between the user's body and the back of the handset. The use of belt
clips, holsters and similar accessories should not contain metallic components
in its assembly. The use of accessories that do not satisfy these requirements
may not comply with FCC RF exposure requirements, and should be avoided.
This device complies with part 15 of the FCC rules. Operation is subject to the
following two conditions: (1) this device may not cause harmful interference,
and (2) this device must accept any interference received, including
interference that may cause undesired operation.
NOTE: The manufacturer is not responsible for any radio or TV interference
caused by unauthorized modifications to this equipment. Such modifications
could void the user’s authority to operate the equipment.
NOTE: This equipment has been tested and found to comply with the limits for
a Class B digital device, pursuant to part 15 of the FCC Rules. These limits
are designed to provide reasonable protection against harmful interference in
a residential installation. This equipment generates uses and can radiate
radio frequency energy and, if not installed and used in accordance with the
instructions, may cause harmful interference to radio communications.
However, there is no guarantee that interference will not occur in a particular
installation.
If this equipment does cause harmful interference to radio or television
reception, which can be determined by turning the equipment off and on, the
user is encouraged to try to correct the interference by one or more of the
following measures:
- Reorient or relocate the receiving antenna.
- Increase the separation between the equipment and receiver.
-Connect the equipment into an outlet on a circuit different from that to which
the receiver is connected.
-Consult the dealer or an experienced radio/TV technician for help.