NEC of America KMP6J1J1 Single-Band PCS GSM Phone User Manual N331i
NEC Corporation of America Single-Band PCS GSM Phone N331i
UserManual.wiki
>
NEC of America
>
KMP6J1J1 User Manual
Users Manual
Navigation menu
Upload a User Manual
Namespaces
Wiki Guide
HTML
PDF
Info
Views
User Manual
Discussion / Help
Navigation


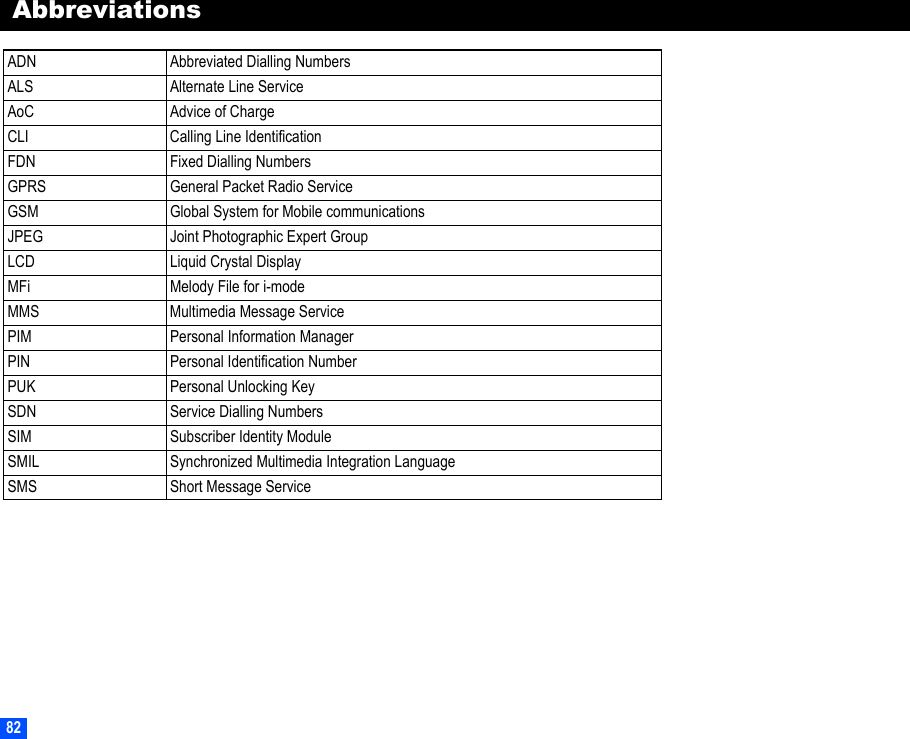
![582Depending on the conditions, the menu number and available options may vary.2Depending on the conditions, some options may be displayed in gray and not be available.Editing a composed MMS☛With the Compose MMS screen displayed, press .☛Press the appropriate key for the required option.– Insert slide Inserts a new slide just before the currently displayed slide.– Remove slide Deletes the currently displayed slide.–Text colour Enables to select the Text colour from the 16 different colours– Background colour Enables to select the Background colour from the 16 different colours.–Set Fit modeEnables to select the size in which the image is displayed.Hidden: Displays the image in the actual size.Fill: Displays the image in the reduced size so that the height and width fit into the image display area.Meet (Default): Displays the image in the reduced size so that the longer side of the height or width fits the corresponding side of the image display area.Slice: Displays the image in the reduced size so that the shorter side of the height or width fits the corresponding side of the image display area.–Options Displays the sub menu. You can set the length of time for playing back slides and showing texts etc. by using this option.Change region size Enables to change the region size by using the [UP] and [DOWN] keys.– Swap image/text Enables to swap the place of image field and text field on the slide.Previous slide Displays the previous slide.Next slide Displays the next slide.No. Edit menu–Send Sends the MMS.–Save Saves the MMS being edited in the Draft (“Draft” on page 62).– Open phonebk. Adds the destination address directly from the phonebook.–Add To Adds the destination address.No. Compose menu Options (ALL) (Continued)](https://usermanual.wiki/NEC-of-America/KMP6J1J1/User-Guide-373785-Page-71.png)