NEC of America RSZ3446 GSM/EGPRS/WCDMA/LTE MOBILE PHONE User Manual 1
NEC Corporation of America GSM/EGPRS/WCDMA/LTE MOBILE PHONE 1
Contents
- 1. User Manual 1
- 2. User Manual 2
- 3. USERS MANUAL 1
- 4. USERS MANUAL 2
User Manual 1

Q24-FR000000013539
475-8008US-001
Printed in China
Quick Start
NEC TBD
Getting to Know Your Phone
Topview
Charging the phone
➀Connect the enclosed microUSB cable to
the covered microUSB port.
➁Plug in the supplied power adapter to an
electrical outlet to begin charging.
Note: In order to ensure that this product is
waterproof, make sure that port and jack
cover are completely closed and sealed.
Talking on the Phone
Calling
➀From the Home screen, tap .
➁Enter a phone number or select a contact
from the list.
➂Tap located in the center at the bottom
of your screen.
➃Tap to end t he ca l l.
Voicemail
➀From the Home screen, tap .
➁Tap to be connected to your voicemail.
➂Follow the voice prompts.
Personalization
Customize your phone with the applications
and widgets that you use most often. Access
them right from the Home screen.
➀From the Home screen, tap .
➁Touch and hold the application or widget
you want to make a shortcut.
➂Drag it to the Home screen you prefer.
➃To create a folder to organize shortcuts,
touch and hold a shortcut, and then drag it
to another shortcut.
➄To remove a shortcut, touch and hold it,
and then drag it to X Remove.
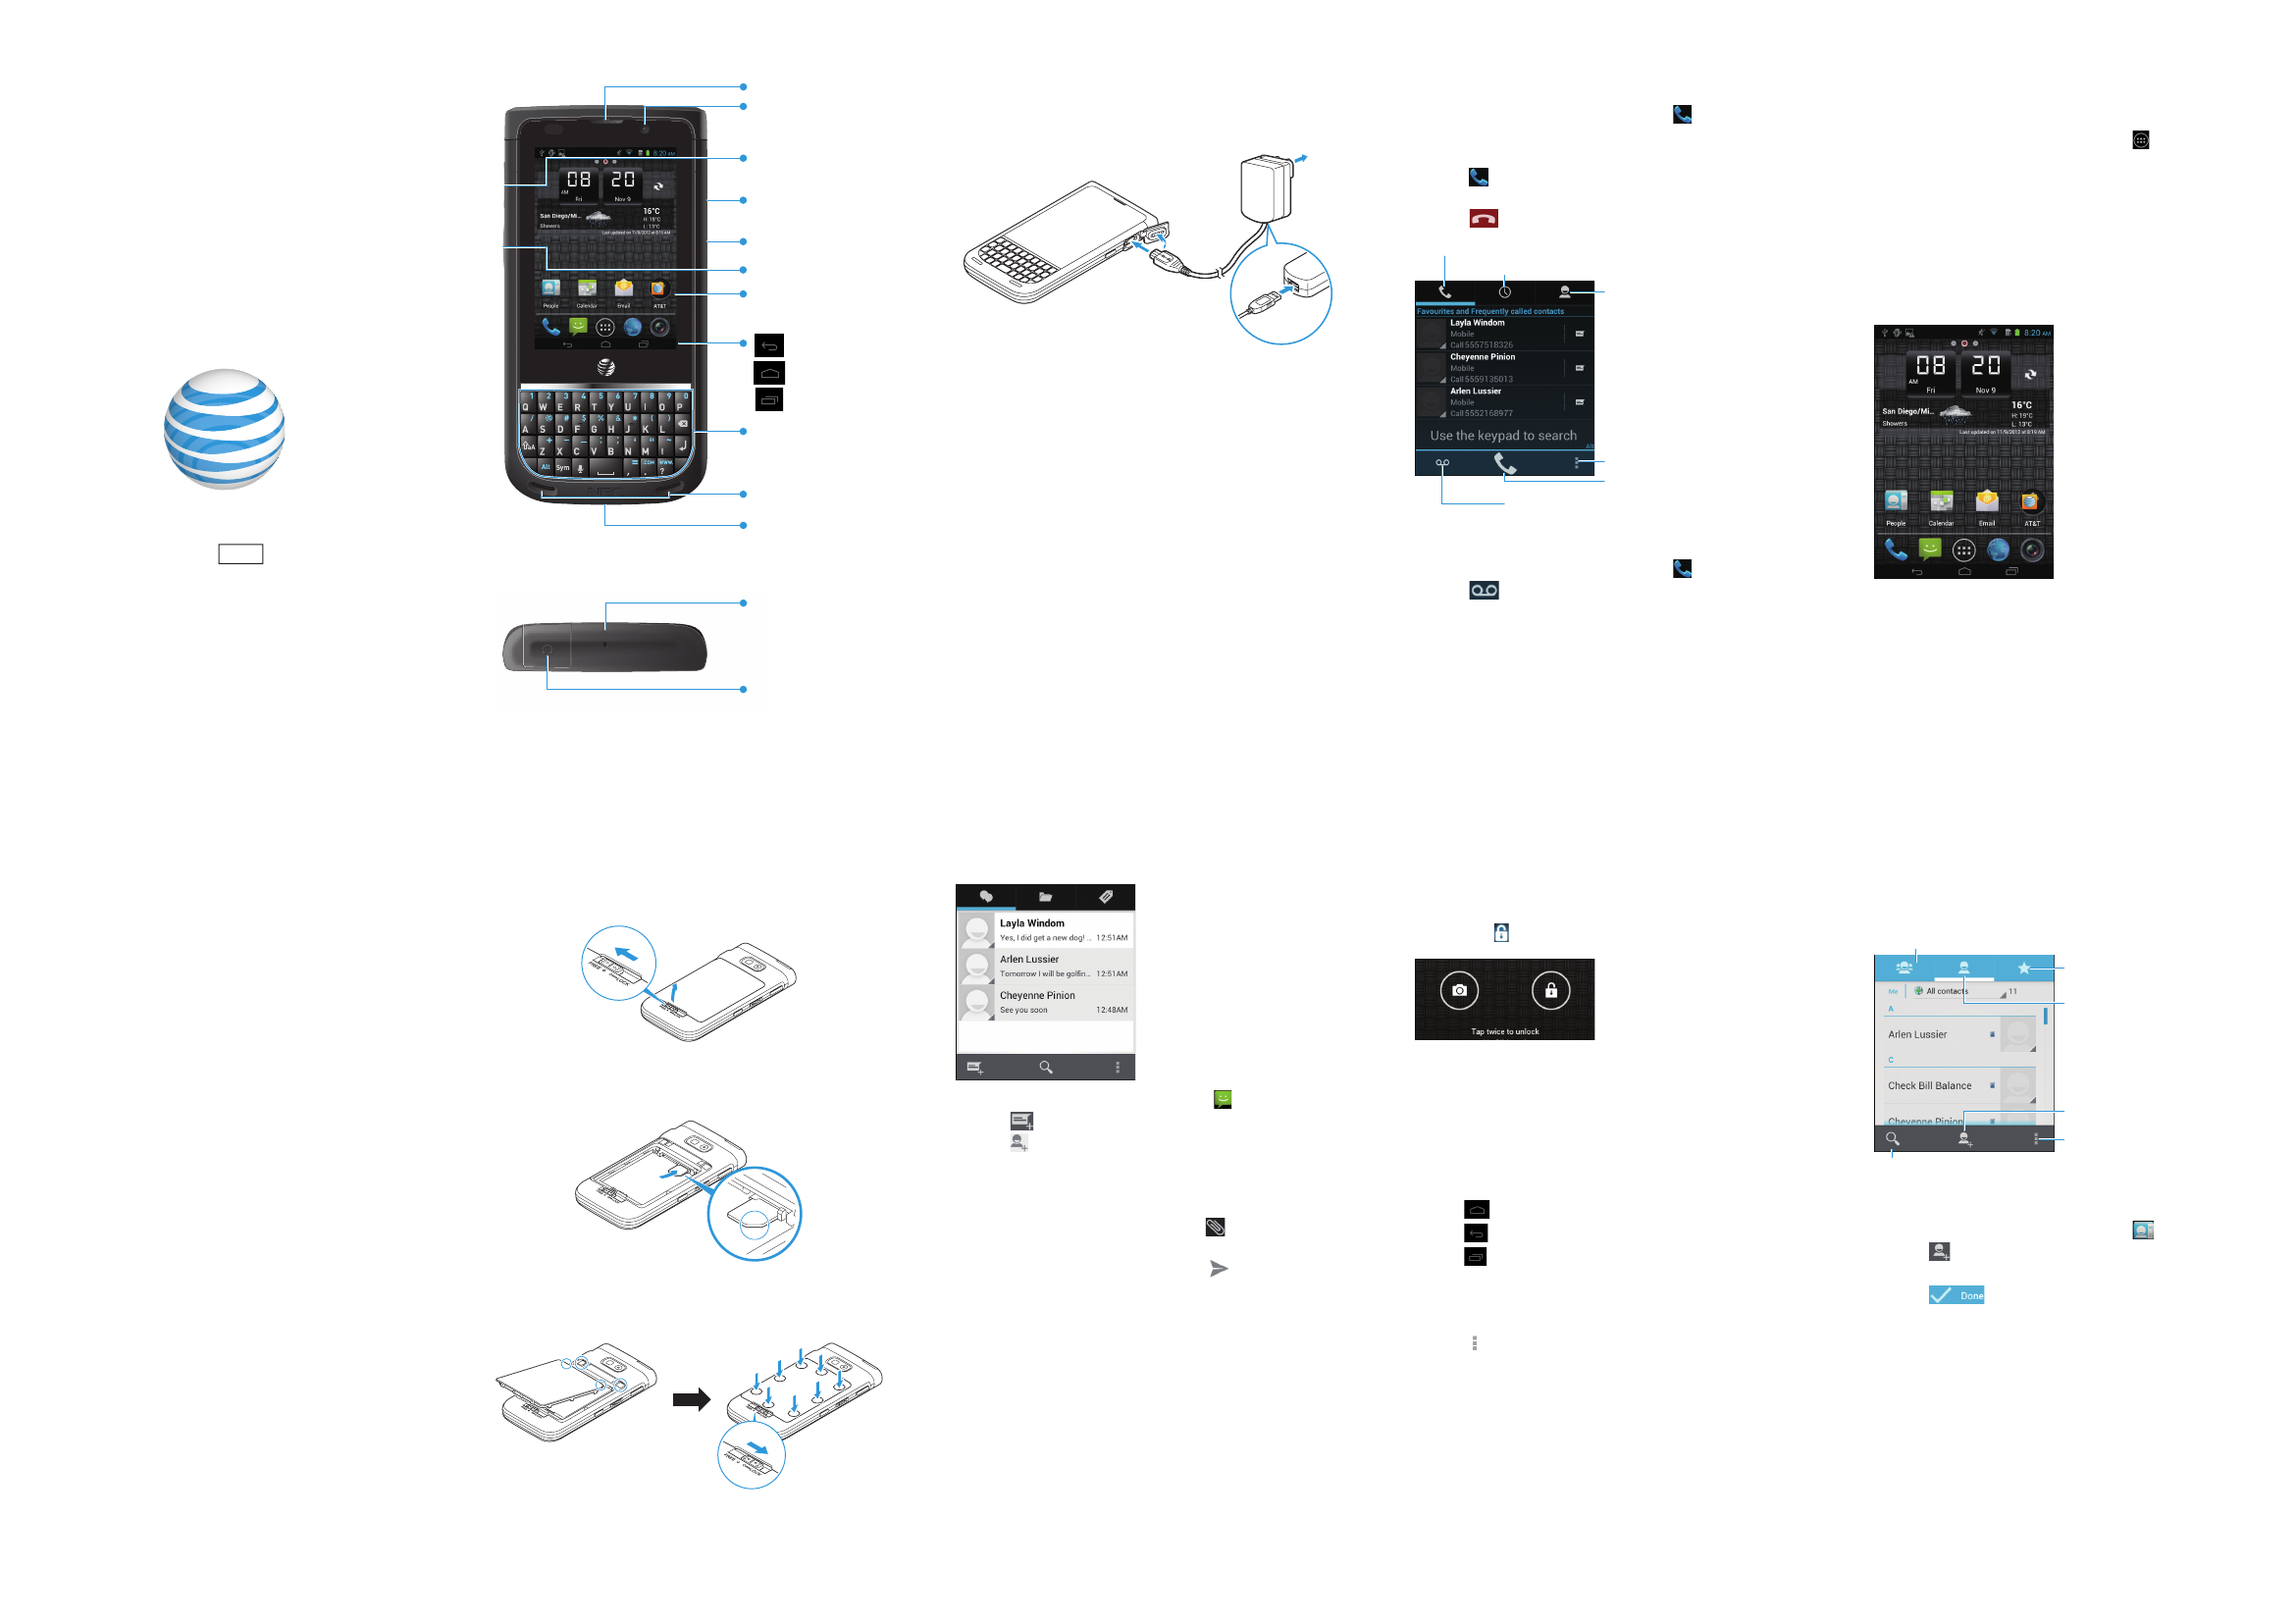
Volume
Push To Talk key
Touch panel
display
Keypad
Speakers
Earpiece
Front camera
Charger /
microUSB port
Microphone
Power
Back
Home
Recent Apps
Headset jack
Microphone
Start calling.
Listen to Voicemail messages.
People
Settings
Select from the history.
Make a call.
Find More Information
On the Web
• For information about your wireless
account or network, visit att.com/wireless.
On the Phone
• Dial 611 for assistance with AT&T service or
phone.
• Call AT&T Customer Care at
1-800-331-0500.
Optional Accessories
AT&T has accessories for productivity,
convenience, and fashion. You can also shop
for accessories at
att.com/WirelessAccessories.
NEC is a Trademark of NEC Corporation.
Android is a trademark of Google, Inc.
Service provided by AT&T Mobility. © 2013 AT&T
Intelectual Property. All rights reserved. AT&T, AT&T logo,
and all other AT&T marks contained herein are
trademarks of AT&T Intellectual Property and / or AT&T
affiliated companies. All other marks contained herein
are property of their respective owners.
Setting Up Your Phone
➀Slide latch to the left. Then remove the
cover and then the battery.
➁Install the SIM card (and microSD card if
applicable). Replace the battery and then
back cover.
➂Ensure the back cover is completely
seated and re-sealed. Then slide latch to
the right to lock.
Text Messaging
➀From the Home screen, tap .
➁Tap .
➂Tap , or enter the contact directly.
You can add more than one recipient.
➃Tap the message field, and then enter your
message.
➄To add an attachment, tap , and then
select the file.
➅To send your message, tap .
Phone Basics
Lock: Briefly press the power switch.
Unlock: Briefly press the power switch, and
then Tap twice to unlock.
Navigation & Touch screen
Your phone features a touch screen that
makes navigation quick and easy.
• Use your fingertip to lightly tap the screen.
• Swipe your finger on the touch screen to
scroll up / down and left / right.
• Tap to return to the Home screen.
• Tap to return to the previous screen.
• Tap to see all apps that you have
recently used.
• Swipe the Home screen left or right to
access your other screens.
• Tap to open the option menu for the
current screen.
People
Keep in touch with your favorite people by
adding them to your contact list.
Adding a new contact
➀From the Home screen, tap .
➁Tap to add a new contact.
➂Enter all contact information.
➃Tap .
1
2
Find a contact.
Menu
Add favorites.
Show all contacts.
Set up group contacts.
Add a contact.
NEC_Ruby_QSG_4C.fm Page 1 Tuesday, November 13, 2012 1:51 PM

Email
Access your Gmail, corporate email and
personal email anywhere.
Account Set up
➀From the Home screen, tap .
➁Enter your email and password, and then
tap Next.
➂Follow the on-screen instructions to
complete the set up.
Sending an Email
➀From the Home screen, tap .
➁Tap .
➂Select recipients from contacts, or enter
the email address directly. You can add
more than one recipient. Tap when
finished.
➃Tap the title and message fields, and then
type your title and message.
➄To add an attachment, tap and "Attach
file", and then select the file.
➅To send your email, tap .
Internet
Browsing the Web
➀From the Home screen, tap .
➁Enter the website in the address bar, and
then press on the keypad, or select a
recent address in the drop down menu.
➂To zoom in or out, use your fingers to pinch
or spread the screen.
➃To bring up the address bar, swipe slightly
between the notification bar and the
screen.
Browser Bar
You can access quick links like Facebook,
Twitter, Sports, Entertainment, News and
more.
➀To bring up shortcuts and favorites bar,
swipe in an upward motion.
➁Swipe left or right and tap your selection.
Push To Talk (PTT)
Enhanced Push to Talk (PTT) is available from
AT&T and connects work groups with direct
communications.
Setting up PTT
Making a PTT Call
Press and hold the PTT key, wait for the beep,
and start speaking. To listen to others speak,
release the key.
Push To Talk (PTT)
Adding a PTT Contact
Google Play Store™
From the Application list screen, tap Play
Store.
Use your existing Google account or create
one following the steps on the screen.
Navigating Play Store
From the Play Store, you will have multiple
options to select and search for apps and
games.
•Tap Apps to access apps by category.
•Tap Games to access games by category.
•Tap Movies to access books by category.
Follow the instructions to install. Once
completed, the application will appear in the
Notification Bar.
Note: A Google Checkout payment method
is required to purchase apps.
Bluetooth & WI-FI
Connecting to Bluetooth
You can connect wirelessly to compatible
devices, such as phones, computers,
headsets and car kits.
➀From the Home screen, tap .
➁Find and tap .
➂Slide the Bluetooth bar to the right to turn
on .
➃Tap on 'Bluetooth' to search for devices.
➄Select the desired device. A password may
be required to activate.
Connecting to Wi-Fi
➀From the Home screen, tap .
➁Find and tap .
➂Slide the Wi-Fi bar to the right to turn on
.
➃Tap on 'Wi-Fi' to search for networks.
➄Select the desired network to connect to.
Note: Secured networks will require a
password.
Camera & Video
Taking a Picture
➀From the Home screen, tap .
➁Tap to take a photo.
➂Select Save or Discard.
Taking a video
➀From the camera screen, tap to switch
to video recorder.
➁To start recording, tap .
➂Press to stop recording.
Music
➀From the Home screen, tap .
➁Tap .
➂Select the category you want to browse,
Artist, Albums, Songs, or Playlist.
➃While browsing your collection, tap a song
to play.
➄Use the on-screen icons to control music
playback, Repeat Play and more.
Network Indicators
Your 4G LTE wireless device will display one
of the following network indicators to let you
know which of AT&T's wireless networks you
are connected to.
: Connected to AT&T's 4G LTE network.
: Connected to AT&T's HSPA+ network.
: Connected to AT&T's EDGE / 2G network.
Limited 4G LTE availability in select markets.
4G speeds delivered by LTE, or HSPA+ with
enhanced backhaul, where available.
Compatible data plan required. LTE is a
trademark of ETSI. Learn more at att.com/
network.
A network indicator does not necessarily
mean that you will experience any particular
upload or download data speeds. Actual
upload and download data speeds depend
upon a variety of factors, including the
device, network utilization, file
characteristics, terrain, etc. Learn more at:
wireless.att.com/learn/articlesresources/
wireless-terms.jsp.
Your AT&T Wireless Customer Agreement,
Section 3.2 Where and How Does AT&T
Service Work?
AT&T Services
•AT&T Code Scanner: Reads UPC, QR, and
Data Matrix barcodes, Scan, Shop & Save.
•AT&T Navigator®: Get voice-guided, turn-
by-turn, driving directions, and traffic
updates.
•Live TV: Watch live TV using your AT&T U-
verse® account.
•YPMobile: Search to find businesses and
events near your location.
Some services may requires subscription and incur data
usage. AT&T U-verse Live TV requires mobile broadband
service. Service not available in all areas. Programming
subject to blackout restrictions. Download and watch
capability available for select content, requires Wi-Fi
connections and is available for viewing for limited time
periods.
Shutter Switch Camera
and Video mode
Start / Stop recording
NEC_Ruby_QSG_4C.fm Page 2 Tuesday, November 13, 2012 1:51 PM