NEO ELECTRONICS NAS-DS01W0 WiFi door sensor User Manual 15 NAS DS01W0 UserMan
SHENZHEN NEO ELECTRONICS CO.,LTD WiFi door sensor 15 NAS DS01W0 UserMan
15_NAS-DS01W0 UserMan
WiFi door sensor instructions
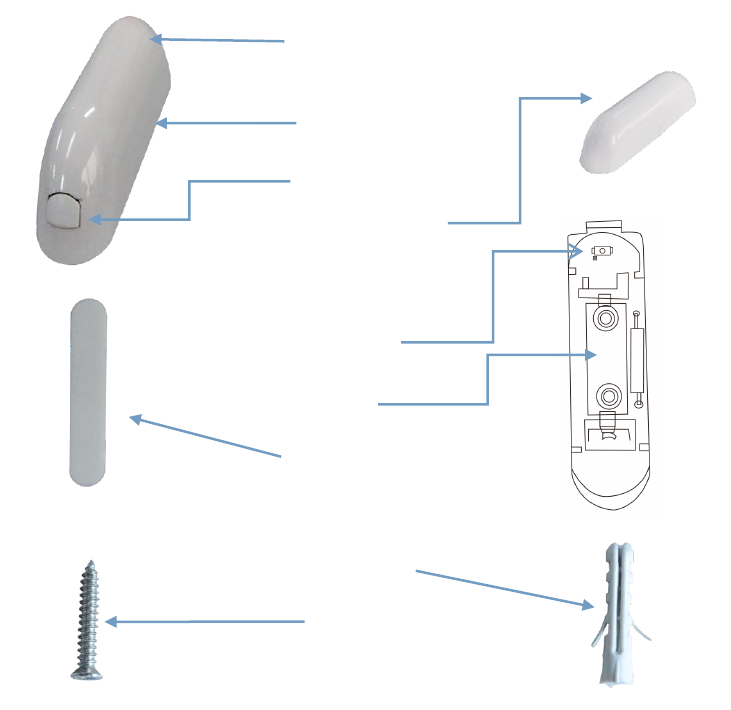
Description and installation
product description :
Installation Steps
Door Sensor Installation:
Option One
Disassemble the door sensor main body and take out battery, fix it on the door with
screws.
Disassemble the door sensor deputy body and fix it on the corresponding door
frame position
Door sensor main body
LED light
Door sensor deputy body
Sticker
Screw stopper
Screw
Battery
Disassemble button
reset
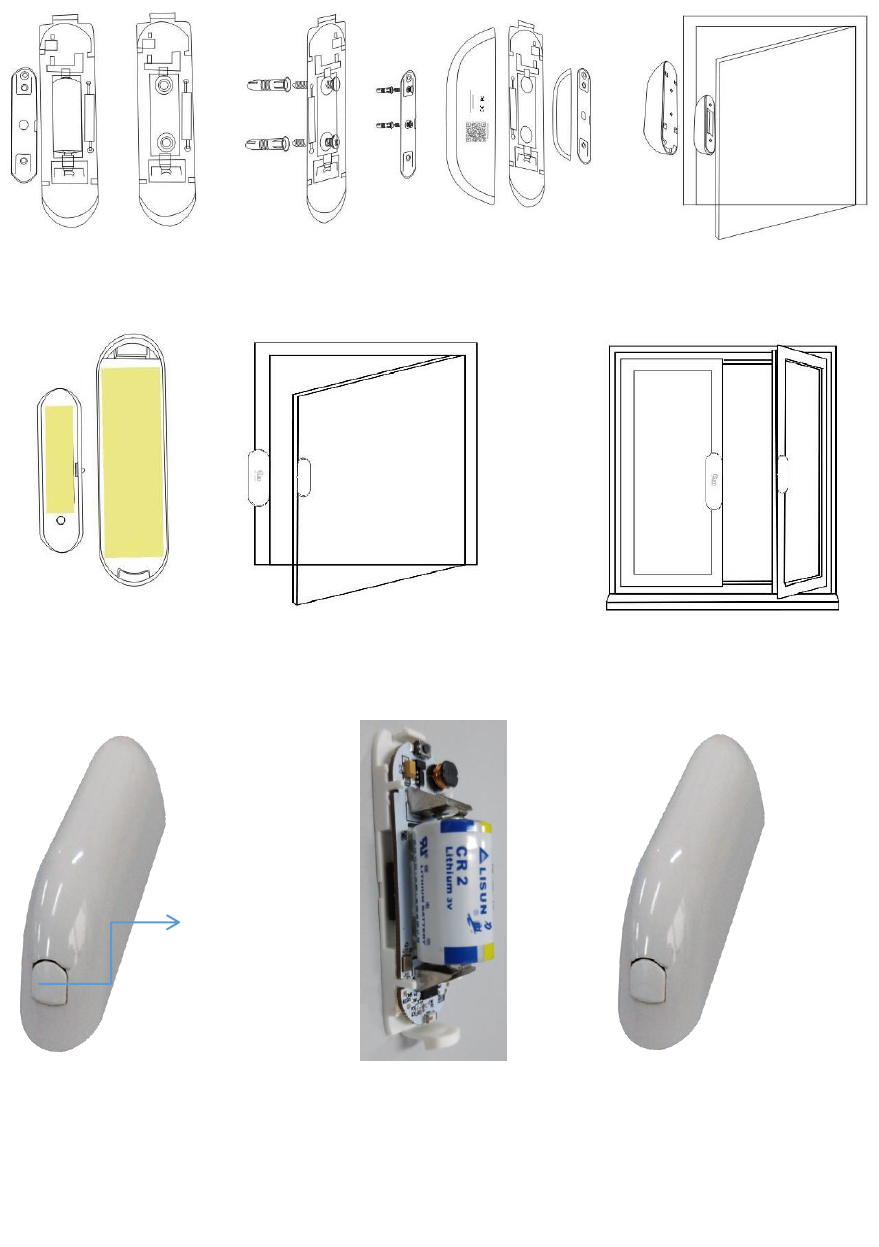
Option Two
Put the sticker on the bottom of door sensor to fix it on the wall
Battery Installation
Disassemble the door sensor Install battery Assemble the door
main body sensor main body
Specification
Reset:
(1) Press the reset button for 6 seconds till the indicator flash rapidly.Then device turns t
o smart wifi mode.
Disassemble from here

(2) Press the reset button again for 6 seconds till the indicator flash slowly. The device t
urns to AP mode.
Battery:CR2-3V x 1
Standby current:13uA
Working current:115mA-120mA
Standby life:5 years
Working life:1 year(14 times/day);2 years(7 times/day)
Wireless:2.4GHz
Protocol:IEEE 802.11b/g/n
Wireless Range:45m
Working Temperature:0℃~ 40℃ (32°F~104°F)
Working humidity: 20% ~ 85%
Storage Temperature:0℃ ~ 60℃ (32°F ~140°F)
Storage humidity:0% ~ 90%
Size:72mm x 22mm x 20mm
Magnet:40mm x 11mm x 11mm
Certification: RoHS, FCC, CE,
NOTE: This equipment has been tested and found to comply with the limits for a
Class B digital device, pursuant to part 15 of the FCC Rules. These limits are designed to
provide reasonable protection against harmful interference in a residential installation.
This equipment generates uses and can radiate radio frequency energy and, if not
installed and used in accordance with the instructions, may cause harmful interference
to radio communications. However, there is no guarantee that interference will not
occur in a particular installation. If this equipment does cause harmful interference to
radio or television reception, which can be determined by turning the equipment off
and on, the user is encouraged to try to correct the interference by one or more of the
following measures:
- Reorient or relocate the receiving antenna.
- Increase the separation between the equipment and receiver.
-Connect the equipment into an outlet on a circuit different from that to which the
receiver is connected.
-Consult the dealer or an experienced radio/TV technician for help
Changes or modifications not expressly approved by the party responsible for
compliance
could void the user's authority to operate the equipment.
This device complies with Part 15 of the FCC Rules. Operation is subject to the following
two conditions:
(1) this device may not cause harmful interference, and
(2) this device must accept any interference received, including interference that may
cause undesired operation.
FCC Radio Frequency Exposure Statement
The device has been evaluated to meet general RF exposure requirements. The device
can be used in fixed/mobile/portable exposure conditions. The min separation distance
is 20cm.
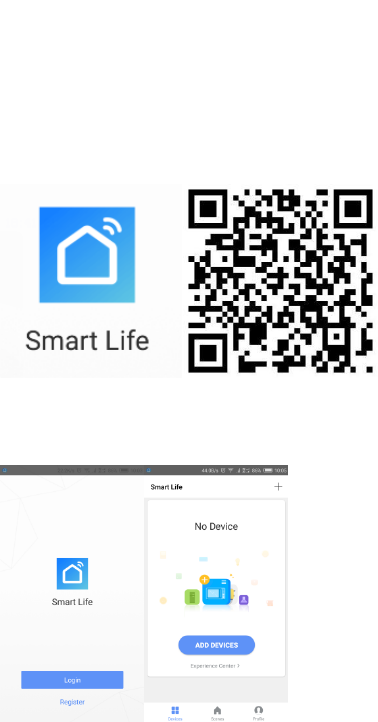
APP download
1) Android phone:Download"Smart life" from Google play store;IOS device:Download"Smar
t life" from APP store.
2) Scan QR code bellow to install.
1) Register and login .
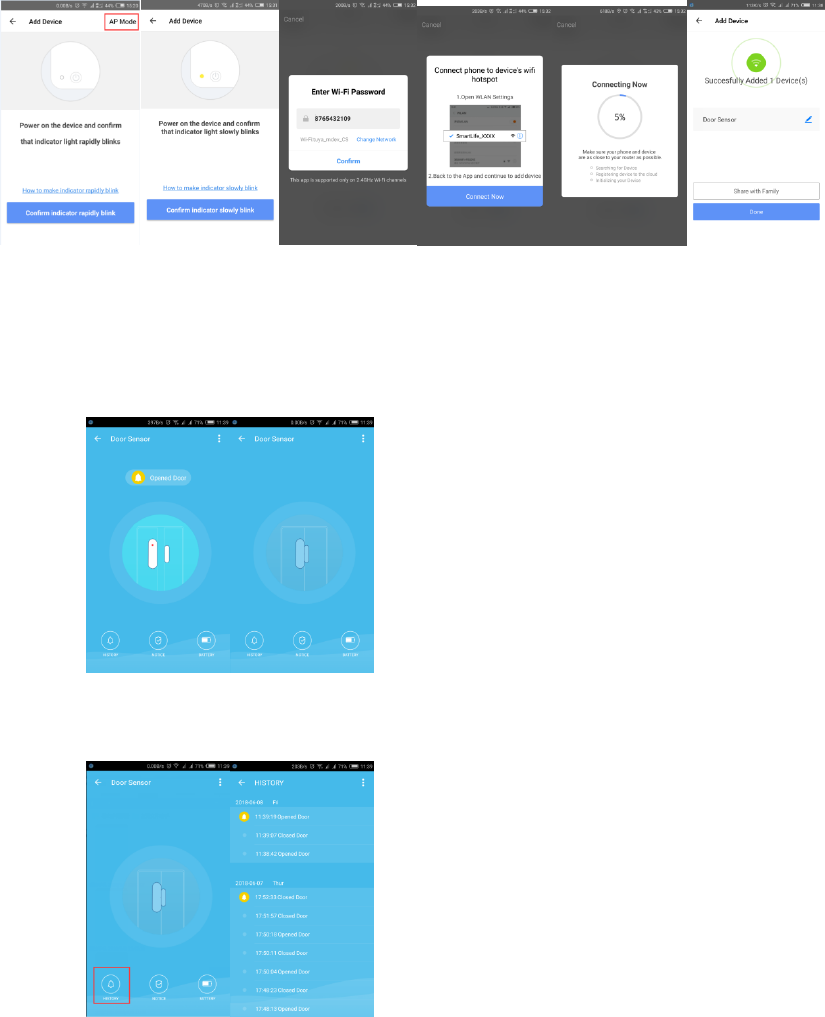
Adding device
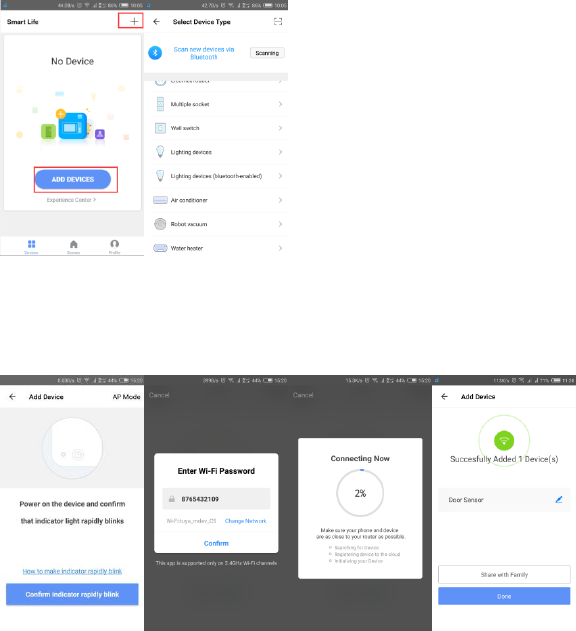
The default is Smart Wifi mode as the device is power-up(the indicator light flashes quickly); If
the indicator light shows and exception, pls press the reset button for 6s, forced reset into smart
wifi mode; Press reset button again for 6s to change AP mode.(the indicator light flash slowly)
The configuration mode will last for 2 minutes, after 2 minutes, the light goes off and the device
goes into sleep mode. The user needs to long press reset button to wake up the device before
adding it again.
Note: Press reset button for 2-3s when configuration, the led light will go off, device will go into
sleep mode.
1. Select the device to add, and choose smart wifi or AP mode to add.
Note: The device currently supports 2.4G wifi signals.
(1) Smart wifi mode (follow the app instructions)
(2) AP compatible mode: After entering smart wifi mode, hold the reset button for 6s, the
device indicator light will turn to flash slowly.
Main function, working status and record setting
1. Working status, open/close the door
It takes 3-5 seconds to receive the notification pushing when it is triggered.
2. Alarm Record
3. Turn on and turn off the alarm(No alarm pushing will be received after alarm closed, only
alarm record can be received.)
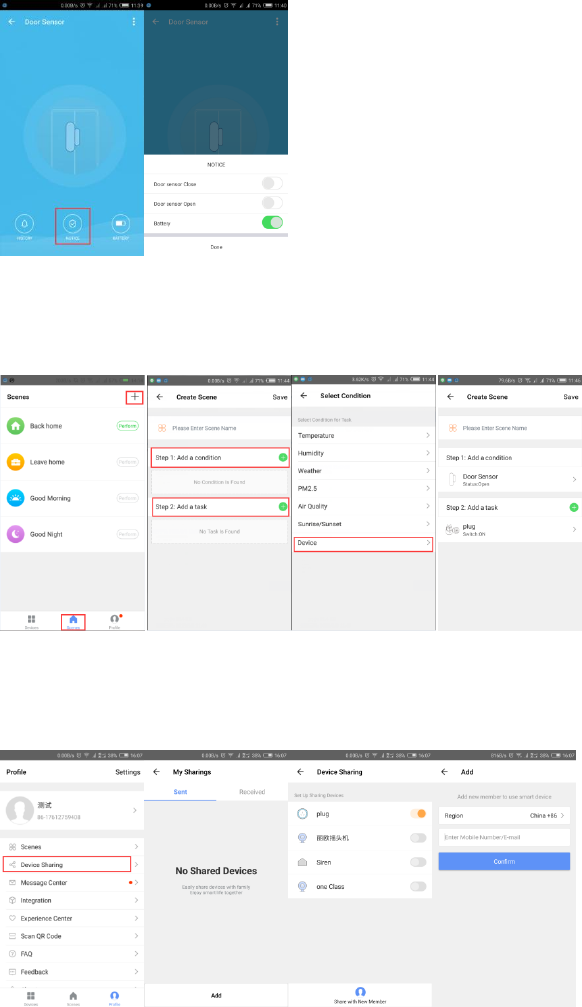
4. Linkage setting, by setting the Scenes to link two devices(door sensor used for active
conditions only)
5. Device Sharing, allowing others to control the devices without adding it.(Note: Sharing can be
removed from the Personal Center)
Other Functions
1. App’s push and operation sound.(Background push requires user to give the App
corresponding permission)
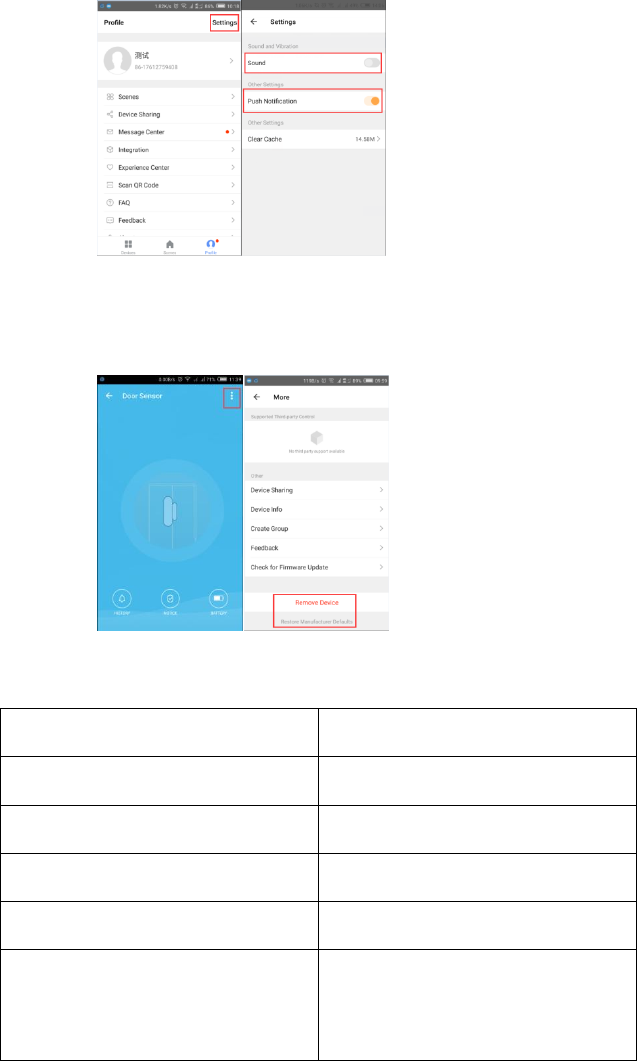
2. Reset again:(take out the battery and then install it,wait for about 10-20 seconds to add
device again,if device reset failed )
3. Indicator
Devices Status
Indicator Status
Smart wifi
Indicator flashes quickly
AP compatible mode
Indicator flashes slowly
Turn on
Indicator lights flicker two times.
Turn off
Indicator lights flicker two times.
Reset
Indicator lights up for 4s and after
2 seconds lights off, device goes
into configuration mode