NETIS SYSTEMS WF2106R 150Mbps Wireless-N USB Adapter with Detachable Antenna User Manual WF 2106
NETIS SYSTEMS CO., LTD. 150Mbps Wireless-N USB Adapter with Detachable Antenna WF 2106
Users manual
WF-2106
Quick Installation Guide
netis 150M Wireless-N USB Adapter with
Detachable Antenna
V1.1
2010-10-13

150M Wireless-N USB Adapter with Detachable Antenna Quick Installation Guide
- 1 -
1. Check Your Package Contents
The following items should be found in your package:
¾ 150M Wireless-N USB Adapter with Detachable Antenna
¾ Quick Installation Guide
¾ CD-ROM
Make sure that the package contains above items. If any of the above items is missing or damaged,
please contact the store you bought this product from.
2. Before Your Begin
Minimum Requirements:
¾ Available USB 1.1 or USB 2.0 slot
¾ 300 MHz processor and 32 MB of memory
¾ CD-ROM drive
¾ An 802.11b/g/n access point (for Infrastructure Mode) or another 802.11b/g/n wireless
adapter (for Ad-Hoc; Peer-to-Peer networking mode.)
¾ Microsoft® Windows® 7, Vista™, XP, 2000 SP4
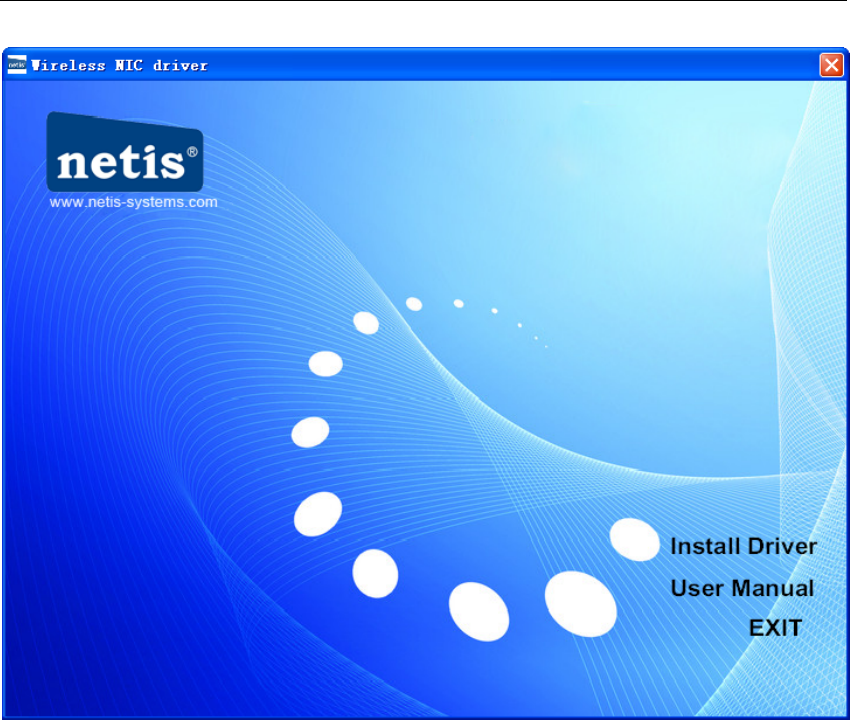
3. Insert the CD
Turn on the computer and insert the included CD in the CD-ROM drive. The install screen will
appear. If not, click the Start button and choose Run and enter D:\CDView.exe (if ‘D’ is your
CD-ROM drive)
Select ‘Install Driver’ and follow the software instructions.
150M Wireless-N USB Adapter with Detachable Antenna Quick Installation Guide
- 2 -
Figure 3-1
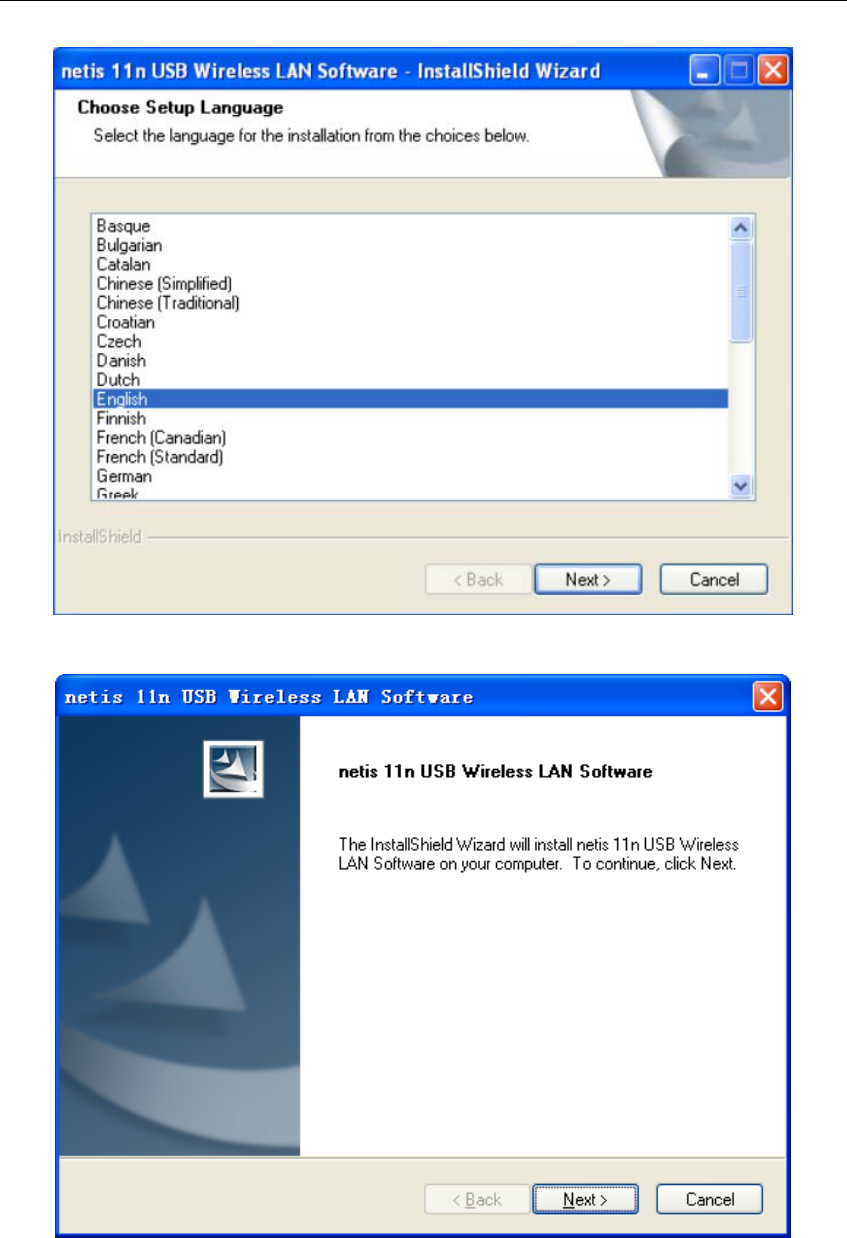
The following is the step-by-step instructions in Windows XP. The steps and screens are
similar for the other Windows operating systems
¾ Select language and then click Next
150M Wireless-N USB Adapter with Detachable Antenna Quick Installation Guide
- 3 -
Figure 3-2
¾ Click Next
Figure 3-3
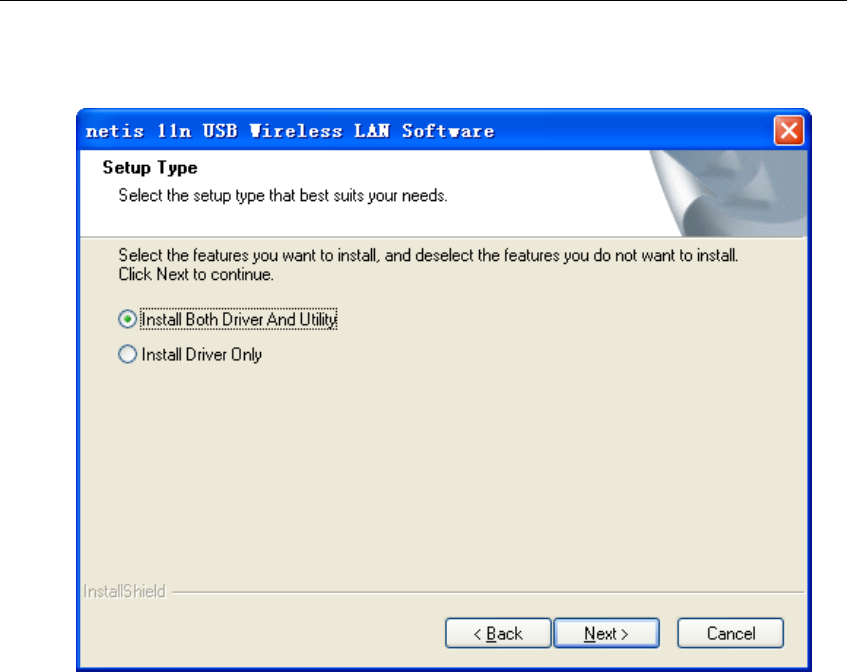
¾ Select the setup type that best suits your needs and then click ‘Next’. The default ‘Install
150M Wireless-N USB Adapter with Detachable Antenna Quick Installation Guide
- 4 -
Both Driver and Utility’ is recommended, but you can also select ‘Install Driver Only’ if you
don’t want to install utility
Figure 3-4
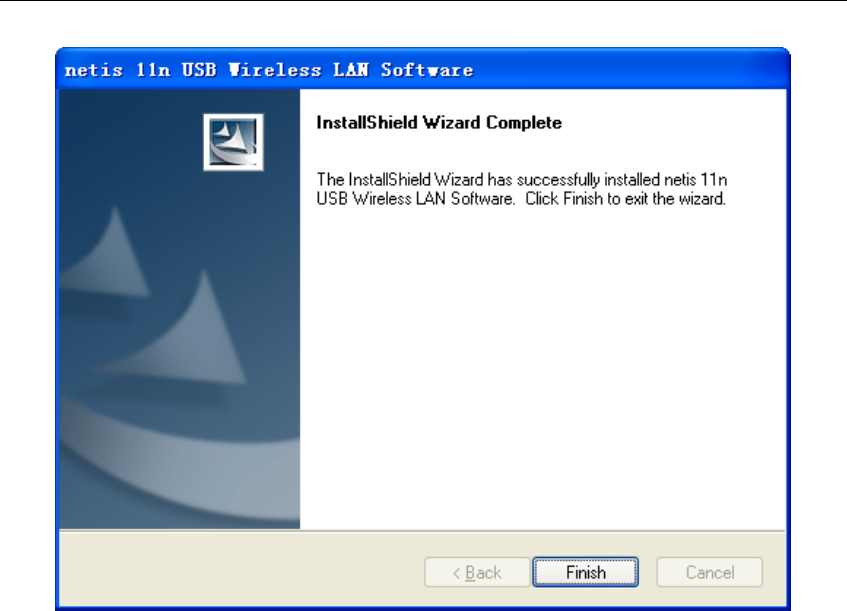
¾ Follow the InstallShield Wizard steps, and click Finish when done.
150M Wireless-N USB Adapter with Detachable Antenna Quick Installation Guide
- 5 -
Figure 3-5
4. Insert the 150M Wireless-N USB Adapter
with Detachable Antenna
The description of the indicator is as follows:
¾ Lnk/Act flash (green): data transmitting
¾ Lnk/Act on for 3seconds (green): WPS is successfully connected
In order to use the utility immediately, you’d better restart your computer. When the computer is
totally start, hold the adapter and insert it into a USB slot, the driver will be installed
automatically.
5. Connecting To a Wireless Network
Use the Wireless LAN Utility to check the link information, search for available wireless
networks, or create profiles that hold different configuration settings. You can double-click the
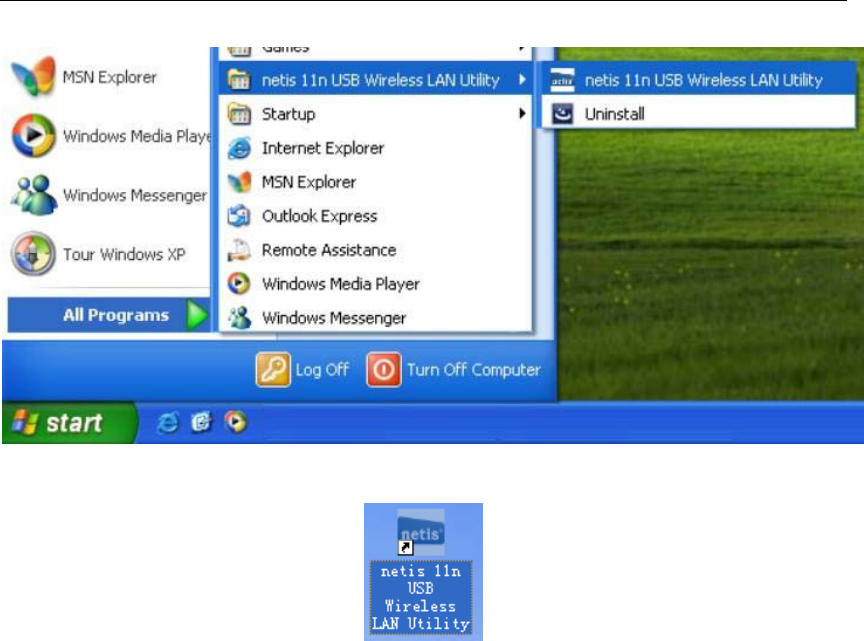
icon on your desktop to run it. Another way to start the Configuration Utility is to click Start> All
Programs> netis 11n USB Wireless LAN Utility> netis 11n USB Wireless LAN Utility.
150M Wireless-N USB Adapter with Detachable Antenna Quick Installation Guide
- 6 -
Figure 5-1
¾ Double click the icon on the desk-top
Figure 5-2
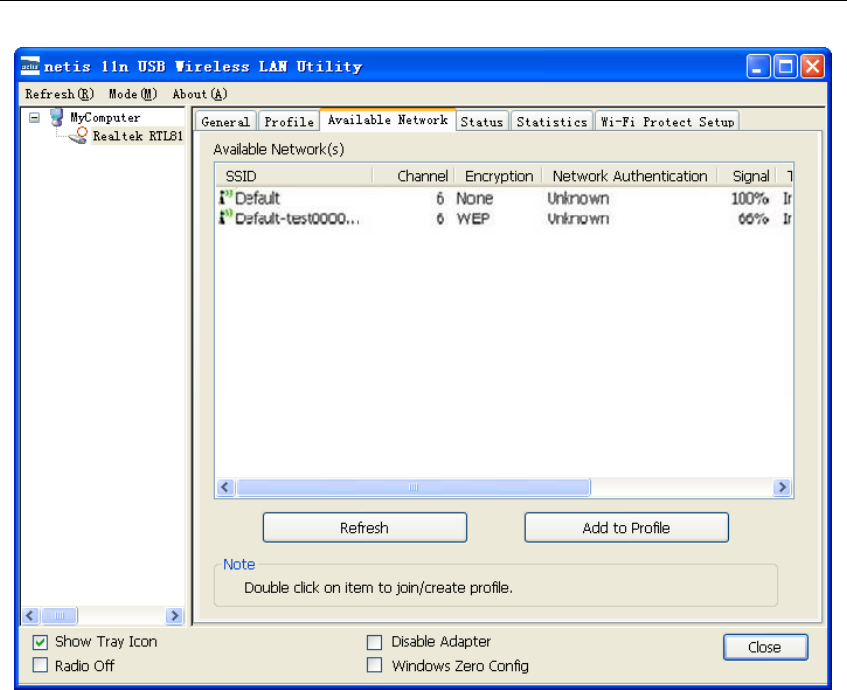
You can use the following methods to connect to a wireless network.
Method 1:
¾ Click on the Available Network tab and available wireless networks will be displayed. You
can then double click on the network that you wish to connect to.
150M Wireless-N USB Adapter with Detachable Antenna Quick Installation Guide
- 7 -
Figure 5-3
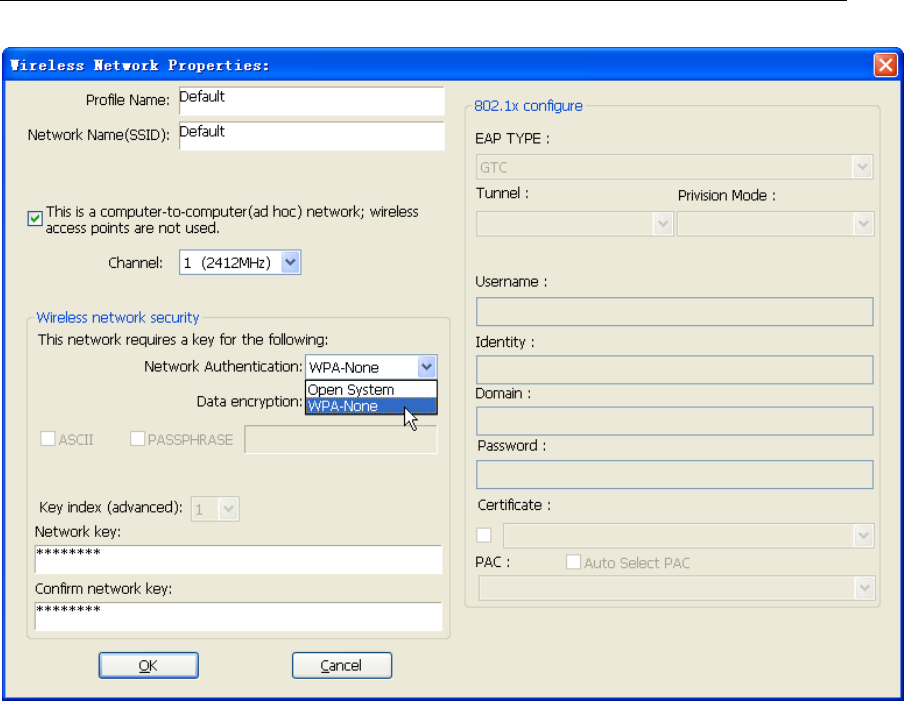
¾ If the network you are connecting to is encrypted, you will need to enter and confirm the
network key/password, then click OK.
150M Wireless-N USB Adapter with Detachable Antenna Quick Installation Guide
- 8 -
Figure 5-4
Method 2: WPS (Wi-Fi Protected Setup)
Note: You can use method 2 only if your router also has WPS functionality.
A: Button
¾ Push and hold WPS button on back of Router until WPS LED flashes (or as indicated
according to manufacturer)
¾ Push WPS button on wireless network adapter and hold for about 3-5 seconds
¾ A safe connection will be established automatically in a moment
¾ The reverse – pushing and holding WPS button on adapter briefly, then pushing and holding
WPS button on router briefly – may also be utilized
B: PIN
¾ Select the Wi-Fi Protected Setup tab in the utility
¾ Choose to enter the WPS PIN of the router by ticking the Input PIN from AP box, provide
router WPS PIN, and click on PIN Input Config. This PIN is often printed on a label on the
router. If it is not found on the router, or has possibly been changed, you may need to access
your router interface to find this PIN.
¾ Alternatively, you may choose to utilize a WPS PIN provided by this wireless adapter, click
on PIN Input Config, and enter PIN in your router's interface.

150M Wireless-N USB Adapter with Detachable Antenna Quick Installation Guide
- 9 -
FCC Statement
This equipment has been tested and found to comply with the limits for a Class B digital
device, pursuant to part 15 of the FCC rules. These limits are designed to provide
reasonable protection against harmful interference in a residential installation. This
equipment generates, uses and can radiate radio frequency energy and, if not installed and
used in accordance with the instructions, may cause harmful interference to radio
communications. However, there is no guarantee that interference will not occur in a
particular installation. If this equipment does cause harmful interference
to radio or television reception, which can be determined by turning the equipment off
and on, the user is encouraged to try to correct the interference by one or more of the
following measures:
-Reorient or relocate the receiving antenna.
-Increase the separation between the equipment and receiver.
-Connect the equipment into an outlet on a circuit different from that to which the
receiver is connected.
-Consult the dealer or an experienced radio/TV technician for help.
To assure continued compliance, any changes or modifications not expressly approved by
the party responsible for compliance could void the user’s authority to operate this
equipment. (Example- use only shielded interface cables when connecting to computer or
peripheral devices).
This equipment complies with Part 15 of FCC RF Rules. Operation is subject to the
following two conditions:
1) This device may not cause interference and
2) This device must accept any interference, including interference that may cause
undesired operation of the device.
Caution!
The manufacturer is not responsible for any radio or TV interference caused by
unauthorized modifications to this equipment. Such modifications could void the user
authority to operate the equipment.