NETIS SYSTEMS WF2404R 300Mbps Wireless-N Broadband Router User Manual WF 2404
NETIS SYSTEMS CO., LTD. 300Mbps Wireless-N Broadband Router WF 2404
Users manual
WF-2404
Quick Installation Guide
netis 300Mbps Wireless-N
Broadband Router
V1.1
2010-09-24

300Mbps Wireless-N Broadband Router Quick Installation Guide
1
1. Check Your Package Contents
The following items should be found in your package:
¾ 300Mbps Wireless-N Broadband Router
¾ Power adapter
¾ Quick Installation Guide
¾ CD-Rom
¾ Ethernet cable
Make sure that the package contains above items. If any of the above items is missing or
damaged, please contact the store you bought this product from.
2. Before You Begin
Minimum Requirements:
¾ Broadband (DSL/Cable) modem and service with Ethernet port
¾ 802.11n b/g/n wireless adapter or Ethernet adapter and cable for each computer
¾ Internet Explorer® 5.0, Firefox® 2.0 or Safari® 1.4 or higher
300Mbps Wireless-N Broadband Router Quick Installation Guide
2
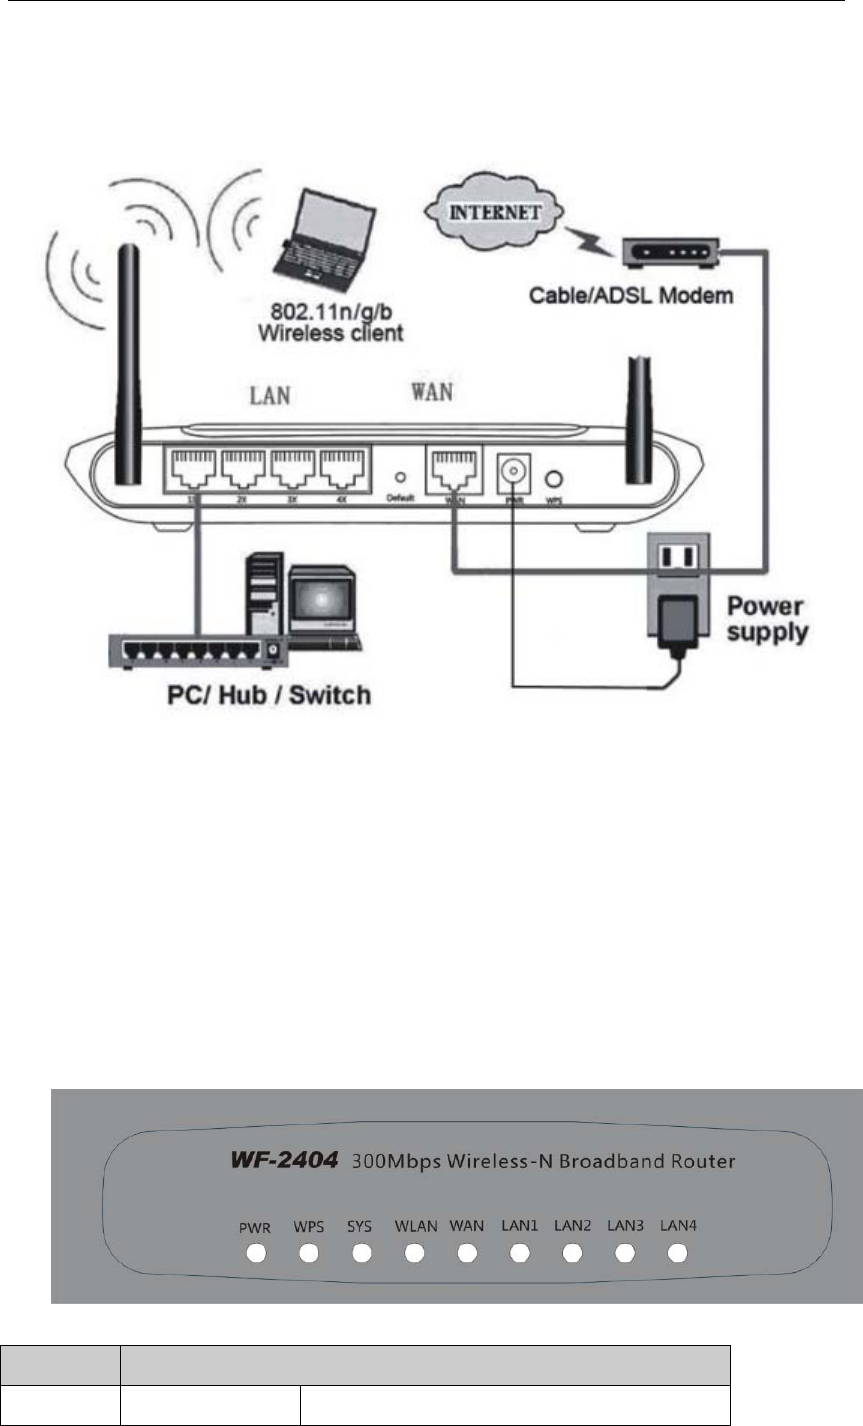
3. Hardware Installation
¾ Attach one end of an Ethernet cable to your computer’s Ethernet port, and the other end to
one of the LAN ports of your router.
¾ Connect another Ethernet cable from your Cable/DSL modem to the WAN port of your
router.
¾ Connect the single DC output connector of the power adapter to the power jack on the back
of the router and plug the Power Adapter into an AC outlet.
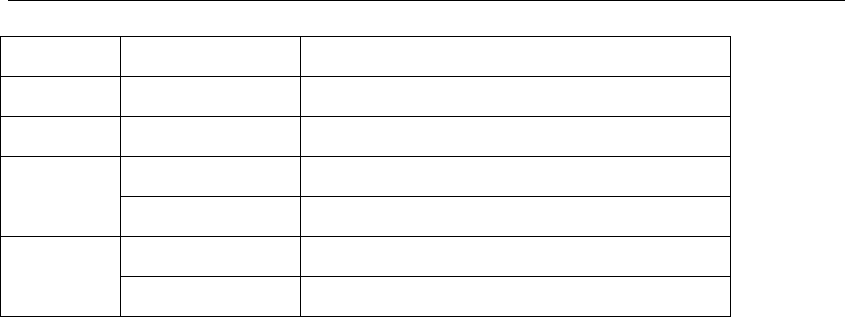
4. LED Indicators
Figure 4-1
LED Function
PWR ON Power on
300Mbps Wireless-N Broadband Router Quick Installation Guide
3
WPS Flashing slowly WPS is running
SYS Flashing Normal
WLAN Flashing Wireless data transmitting
On WAN Connection normal
WAN Flashing Data transmitting
On Corresponding LAN port connection normal
LAN Flashing Corresponding LAN port data transmitting
5. Configure Your Computer
You can manage the 300Mbps Wireless-N Broadband Router through the Web browser- based
configuration utility. To configure the device via Web browser, at least one properly
configured computer must be connected to the device via Ethernet or wireless network. The
Router is configured with the default IP address of 192.168.1.1 and subnet mask of
255.255.255.0 and its DHCP server is enabled by default.
Here we use Windows XP for example. If your network settings are not already set and
you need to complete this step, the configurations are similar for the other operating
systems.
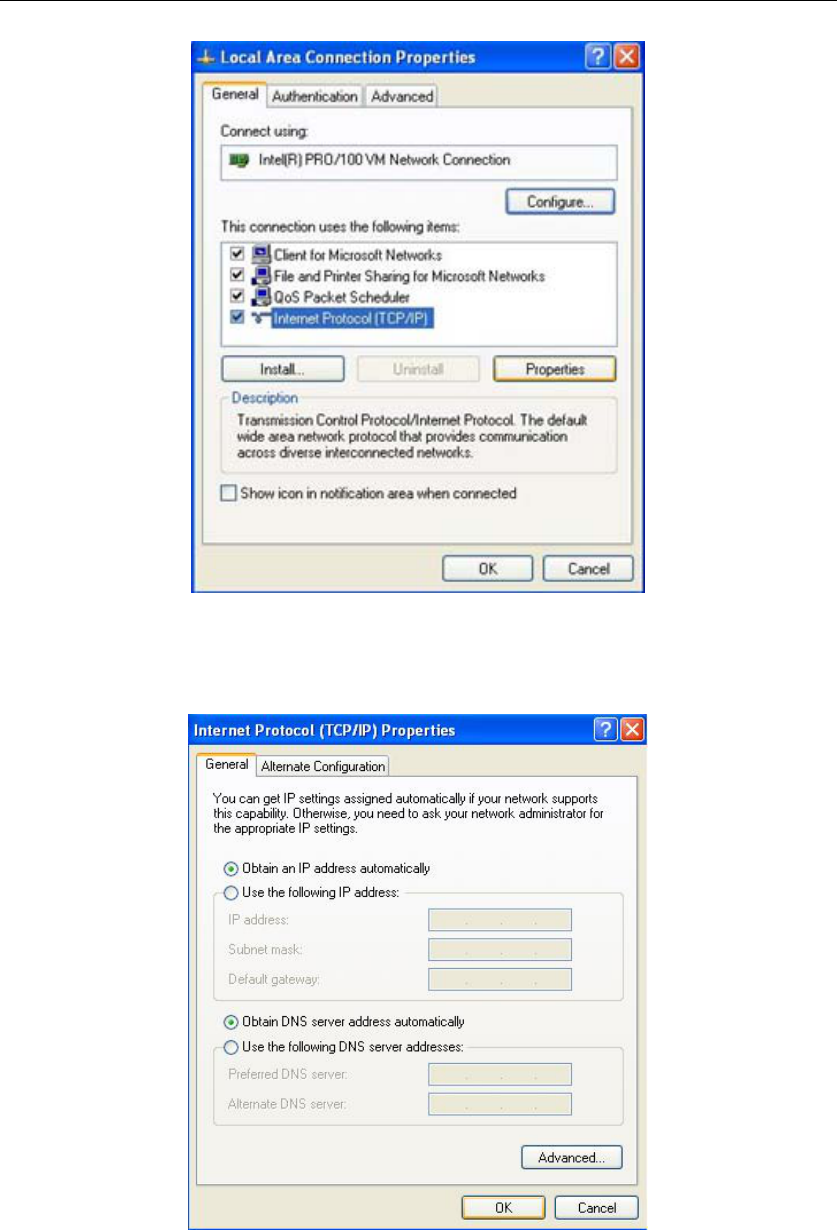
¾ Open My Computer on your desktop or through the Start menu, right click on My
Network Places in the Other Places menu to the left and select Properties. Right click
on your Local Area Connection in the window that appears and select Properties. In the
properties window that appears, under “This connection uses the following items:” select
Internet Protocol (TCP/IP) and then click the Properties button below.
300Mbps Wireless-N Broadband Router Quick Installation Guide
4
Figure 5-1
¾ Select obtain an IP address automatically and obtain DNS server address
automatically, click OK
Figure 5-2
¾ Back in the previous window, click OK
300Mbps Wireless-N Broadband Router Quick Installation Guide
5
6. Log In to Router Interface
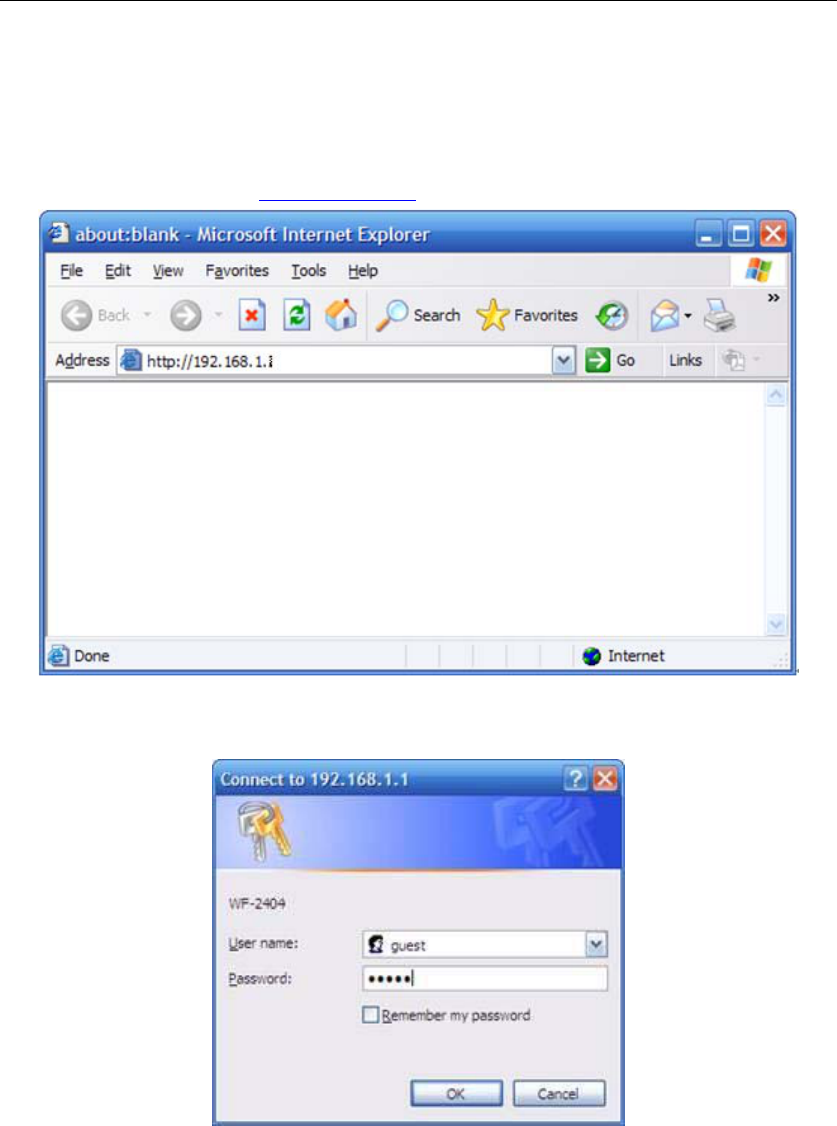
¾ Open a web browser (Safari, Internet Explorer, etc.) on the computer you have just
connected to the router, type http://192.168.1.1 in the address bar, and press enter
Figure 6-1
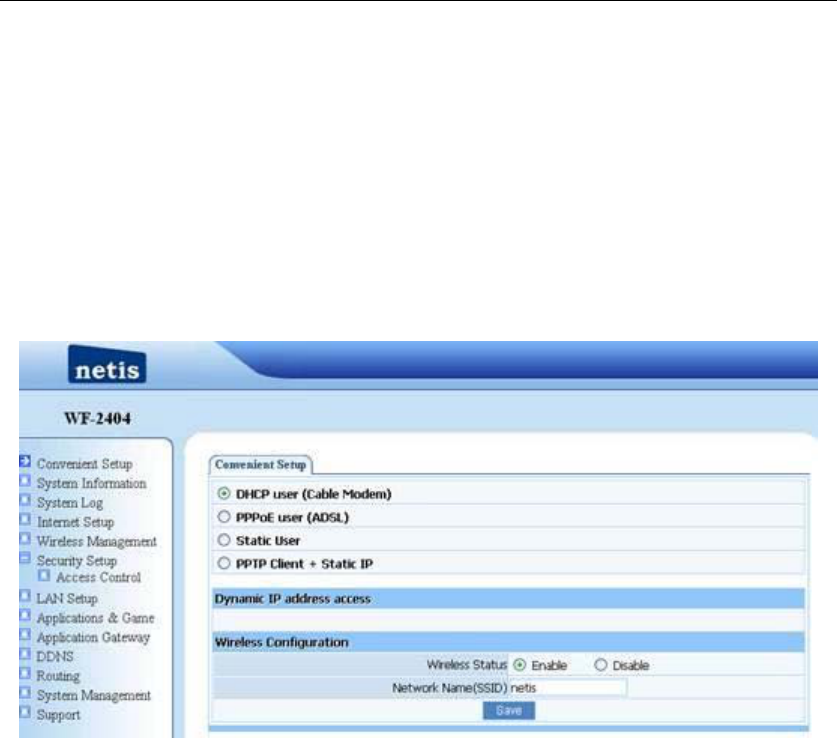
¾ In the pop-up window, enter the user name guest and password guest and then click OK
Figure 6-2
¾ After you have logged in, the router's user interface will be displayed. The left menu shows
the main options to configure the system, and the right screen is the summary information for
viewing and adjusting the configurations.
300Mbps Wireless-N Broadband Router Quick Installation Guide
6
7. Router Setup
7.1. Internet Connection Settings
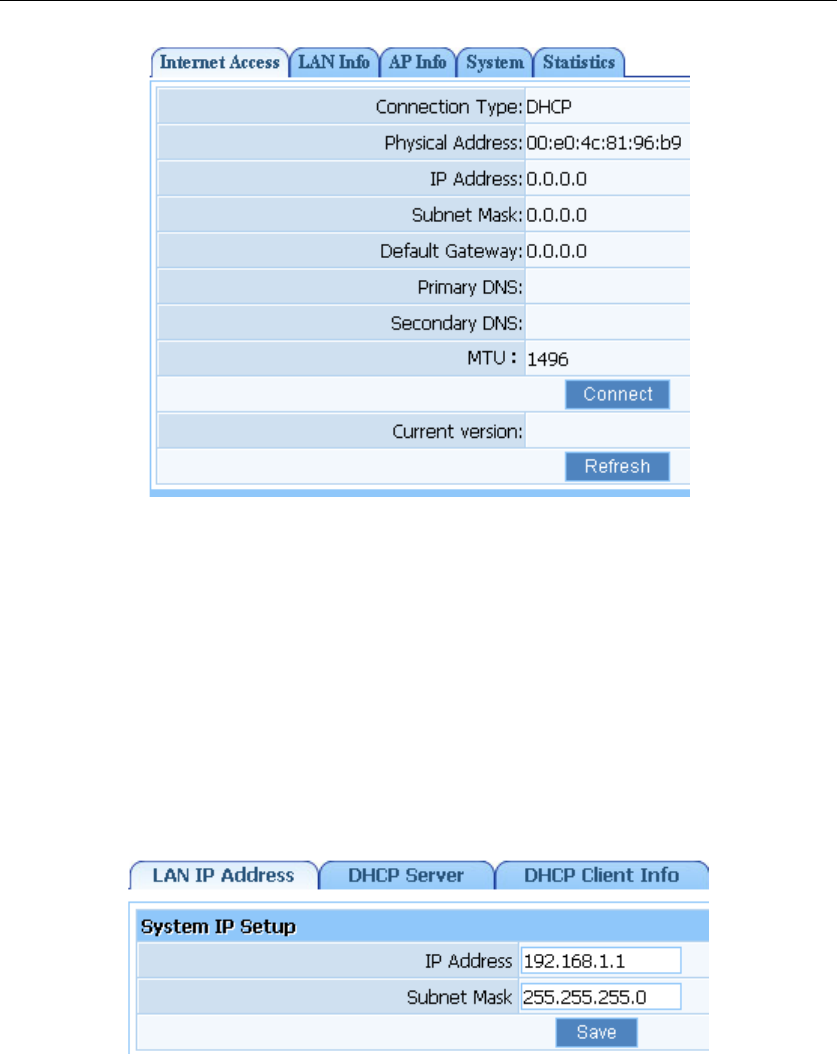
¾ Most connections utilize a dynamic IP (DHCP) and the default is already set to this. If you
have another connection type (like static IP), you will need to click on ‘Convenient Setup’ in
the menu and input information given you by your service provider and then click save.
Figure 7-1
¾ You may already be connected to the Internet. Click on ‘System Information’- ‘Internet
access info’ to see if you have an IP, Gateway, etc (refer to the following picture). If not, your
service provider probably requires you clone the MAC address of your computer to the router.
To do so, click on ‘Internet Setup’ in the menu, then click on ‘Clone MAC Address’ button to
get your computer's MAC address in according to your Internet connection type, and then click
the ‘Save’ button below.
300Mbps Wireless-N Broadband Router Quick Installation Guide
7
Figure 7-2
¾ If you are still not connected, or experience an erratic connection, your modem may have
the same IP as the router (192.168.1.1). You will need to change the router's IP. Click on ‘LAN
Setup’- ‘LAN IP Address’ and you will see this IP in the main interface. You may edit it to
something different (192.168.2.1 for example). After entering the new IP, click on ‘Save’ below,
the router will reboot, and you will need to enter the user name and password again. Check your
system status for IP again, and test connection.
Note: You will need to enter the new IP in the browser to access the user interface for any
future setting changes.
Figure 7-3
7.2. Advanced Settings
7.2.1. Restore to Factory Default
If the router ever freezes in a setting change process or if you can’t access it because you can’t
remember the IP you have given it or other problem, you may have to utilize the reset button on
the back of the router to put it back to factory settings. You have to press and hold this button
300Mbps Wireless-N Broadband Router Quick Installation Guide
8
for a few seconds (2-6s) with a pencil when it is working, then release and it will restore
settings to the factory configuration.
The other way to restore factory settings is through the same user interface used in setup.
Click on ‘System management’- ‘Restore’, and click on the ‘Restore’ button.
7.2.2. Password Change
You may wish to change the router's password. To do so, click on ‘System Management’-
‘Password setup’, enter a new password, confirm it, and click on ‘Save’
7.2.3. Firmware Upgrade
Click on ‘System Management’- ‘Upgrade.’ You will be able to browse to select a newer
firmware version you have downloaded and then click on the ‘Upgrade’ button to proceed.
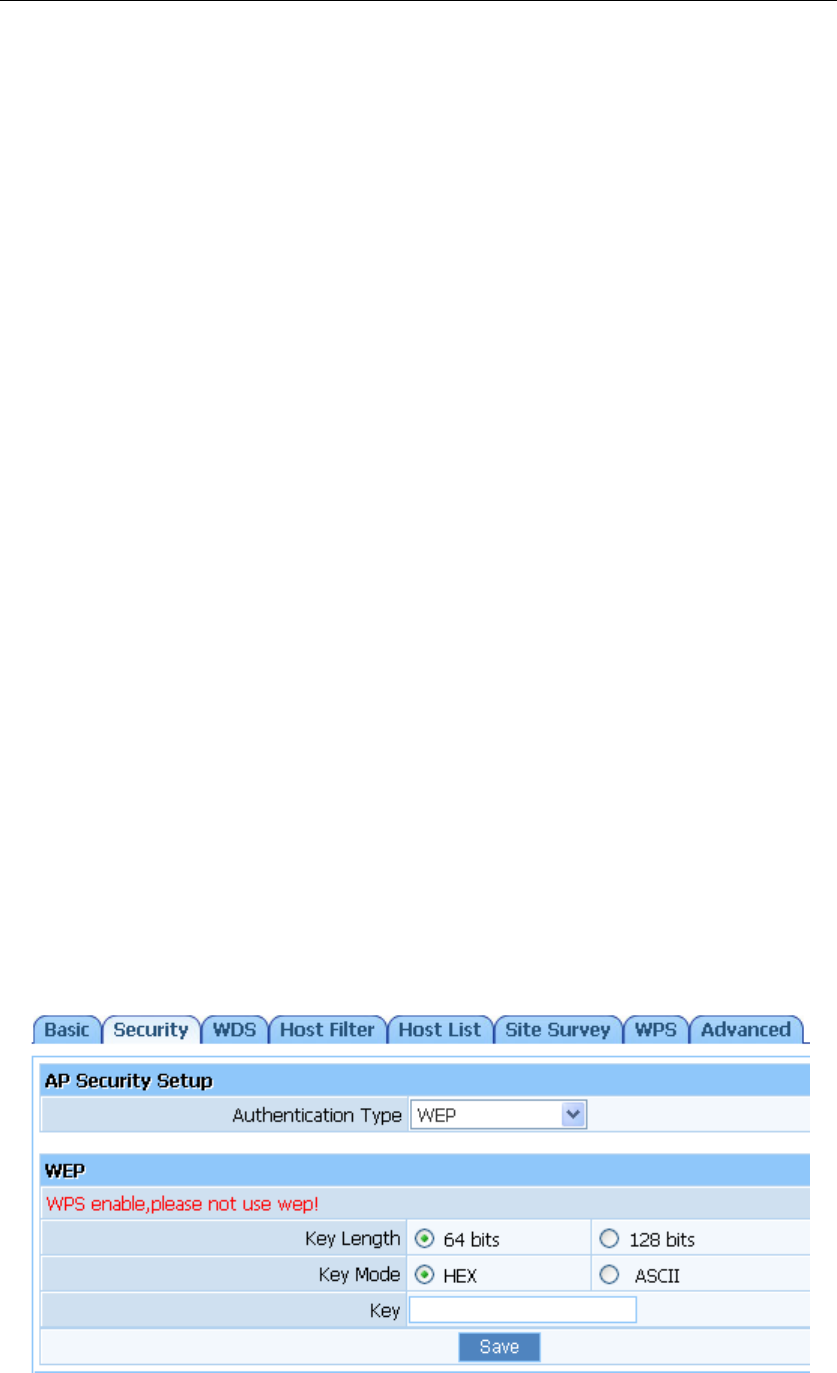
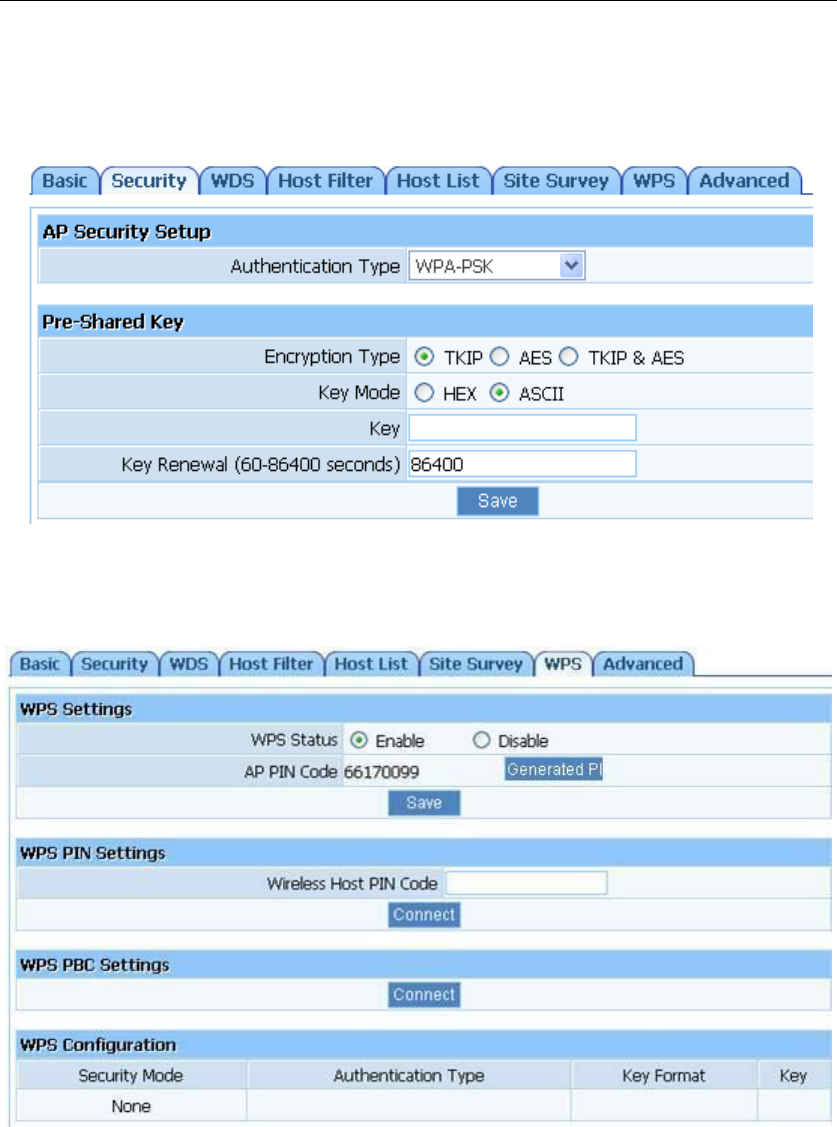
7.2.4. Wireless Security Settings
To protect your wireless network from unauthorized user access, you may wish to set up
wireless security. Click ‘Wireless Management’- ‘AP Setup’ - ‘Security’. Five different
encryption modes - “None”, “WEP”, “WPA-PSK”, “WPA2-PSK” and “WPA/WPA2-PSK” -
are provided. WEP authentication mode is not recommended when WPS is enabled.
¾ If you want to use WEP, you can select ASCII characters (alphanumeric) or Hexadecimal
(‘A-F’, ‘a-f’ and ‘0-9’). For 64-bit WEP, input 10 Hex values (in the ‘A-F’, ‘a-f’ and ‘0-9’ range)
or 5 ASCII characters. For 128-bit WEP, input 26 Hex values (in the ‘A-F’, ‘a-f’ and ‘0-9’ range)
or 13 ASCII characters
Figure 7-4
300Mbps Wireless-N Broadband Router Quick Installation Guide
9
¾ If you want to use WPA/ WPA2/ WPA&WPA2 to encrypt, you can select ASCII characters
(alphanumeric format) or Hexadecimal digits (‘A-F’, ‘a-f’ and ‘0-9’). No matter what type you
select, input 64 Hex values (in the ‘A-F’, ‘a-f’ and ‘0-9’ range) or 8-63 ASCII characters.
Figure 7-5
¾ You can use WPS (Wi-Fi Protected Setup) to secure your wireless network if the
connecting wireless device is also WPS enabled.
Figure 7-6
Method 1: Button
Push and hold WPS button on back of Router until WPS LED flashes
Push WPS button on wireless network adapter and hold for about 3-5 seconds
A safe connection will be established automatically in a moment
The reverse – pushing and holding WPS button on adapter briefly, then pushing and
holding WPS button on router briefly – may also be utilized

300Mbps Wireless-N Broadband Router Quick Installation Guide
10
Method 2: PIN
Select this router for connection in your OS network connections or wireless adapter
software settings
Choose to enter the WPS PIN of the router and provide default router WPS PIN
printed on label on bottom of router. This PIN may be changed though, and you may
do so/confirm current PIN in the router's user interface – click ‘Wireless
Management’- ‘AP Setup’ - ‘WPS’ and you will be able to see the AP PIN as well as
generate a new one and save it
Alternatively, you may choose to utilize a WPS PIN provided by your wireless
adapter and enter it in the router in the same part of the user interface - click ‘Wireless
Management’- ‘AP Setup’ - ‘WPS’ and enter adapter PIN for ‘Wireless Host PIN
Code’.
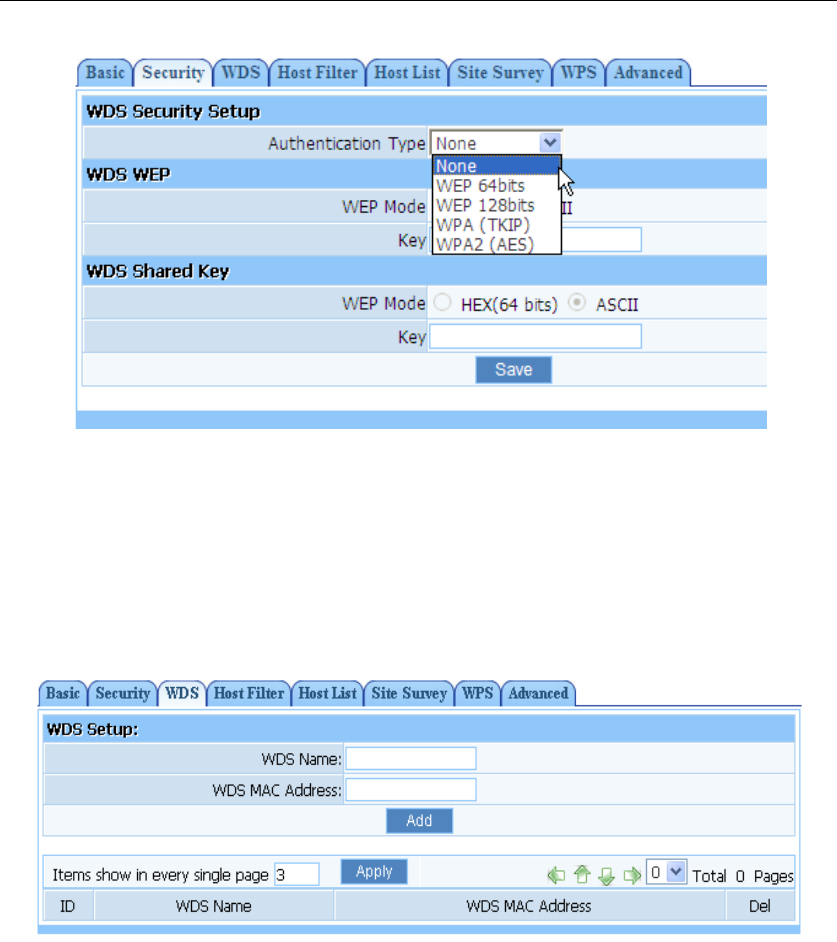
7.2.5. WDS (Wireless Distribution System)
If you are using this router to spread the wireless coverage of another router, or to spread the
coverage to another router, you can use WDS. For this example, WDS will be established
between a router that the MAC address is 00-22-4f-cc-ae-f5 (R1) and another router that the
MAC address is 00-22-4f-bc-af-5d (R2). The MAC address is printed on a label on the bottom
of the router, or may be seem both netis routers. Please follow the steps below, but keep in
mind that if one router in this setup is not netis you should first confirm it is capable of WDS
and its interface menu may be considerably different:
R1:
¾ It should first be established that routers function normally as a routers not in a network
involving WDS, and R1 (the router connected to a modem) should be configured below from a
starting point where it was individually functional.
¾ Click on ‘Wireless Management’- ‘AP Setup’- ‘Security’ and select and save None as
authentication type
¾ Click on ‘Wireless Management’- ‘AP Setup’- ‘Basic’ and select and save radio mode as
WDS or AP + WDS
¾ Click on ‘Wireless Management’- ‘AP Setup’- ‘Security’ and select and save None as
WDS authentication type or select a WDS security type, enter key and save. Note that some
other brands of router may not have the option of or be compatible in WDS wireless security.
For key parameters, please refer to Wireless security settings
300Mbps Wireless-N Broadband Router Quick Installation Guide
11
Figure 7-7
¾ Click on ‘Wireless Management’- ‘AP Setup’ - ‘WDS.’ You may choose to click on AP
Scan to scan for R2, select R2 in the window that appears and click on the connect button at the
bottom of the list in this window. The SSID/name and MAC address of R2 will automatically
be entered, and you can click on the Add button to finalize. Alternatively, you may manually
enter the name and MAC address of R2 then click add.
Figure 7-8
R2:
¾ Select ‘LAN setup’- ‘LAN IP address’, change the IP address to something in line with R1.
If R1 is 192.168.1.1 change the R2 to 192.168.1.90 or if the R1 is 192.168.2.1 change the R2 to
192.168.2.90 and so on. Click on the save button below, and the router will reboot automatically.
You should note what this new IP is as you will need it for future access to the user interface of
this router
¾ Select ‘LAN setup’- ‘DHCP Server’, select disable DHCP server
¾ Click on ‘Wireless Management’- ‘AP Setup’ - ‘Security’ and select and save None as
authentication type
¾ Click on ‘Wireless Management’- ‘AP Setup’ - ‘Basic’ and select and save radio mode as
WDS or AP + WDS

300Mbps Wireless-N Broadband Router Quick Installation Guide
12
¾ Click on ‘Wireless Management’- ‘AP Setup’ - ‘Security’ and select and the same WDS
security settings as for R1
¾ Click on ‘Wireless Management’- ‘AP Setup’ - ‘WDS.’ You may choose to click on AP
Scan to scan for R1, select R1 in the window that appears and click on the connect button at the
bottom of the list in this window. The SSID/name and MAC address of R1 will automatically
be entered, and you can click on the Add button to finalize. Alternatively, you may manually
enter the name and MAC address of R1 then click add.
Note:
¾ Please make sure the channel matches in both routers. Click on ‘Wireless management’-
‘AP Setup’ - ‘Basic’, check that channels are the same, and change and save if necessary
¾ As there are sometimes compatibility issues between brands, you may need to use
Wireless-G and not Wireless-N. Change settings in both routers. In the netis router click on
‘Wireless management’- ‘AP Setup’ - ‘Basic’ and select and save a setting that does not include
Wireless-N
¾ Please make sure that R1 and R2 are in the same IP range, that is if the IP of R1 is
192.168.1.1, then the IP address of R2 should be 192.168.1.x (the range of x runs from 1
through 255 but 1 should not be used as it is already taken by R1, and other equipment in the
network having static/permanent IPs should also be avoided.
¾ Please make sure the WDS authentication type and key in both routers are the same, or
turned off for both and as there are sometimes compatibility issues between brands, you may
need to disable all security.