NETIS SYSTEMS WF2409B 300Mbps High Performance Wireless-N Broadband Router User Manual QIG WF 2409 V1 1
NETIS SYSTEMS CO., LTD. 300Mbps High Performance Wireless-N Broadband Router QIG WF 2409 V1 1
user manual
WF-2409
300Mbps High
Performance Wireless-N
Broadband Router
Quick Installation Guide
V1.1
2011-06-23

WF-2409 Quick Installation Guide
1
Certification
FCC CE
FCC Statement
This equipment has been tested and found to comply with the limits for a Class B digital device,
pursuant to part 15 of the FCC rules. These limits are designed to provide reasonable protection
against harmful interference in a residential installation. This equipment generates, uses and can
radiate radio frequency energy and, if not installed and used in accordance with the instructions,
may cause harmful interference to radio communications. However, there is no guarantee that
interference will not occur in a particular installation. If this equipment does cause harmful
interference to radio or television reception, which can be determined by turning the equipment off
and on, the user is encouraged to try to correct the interference by one or more of the following
measures:
-Reorient or relocate the receiving antenna.
-Increase the separation between the equipment and receiver.
-Connect the equipment into an outlet on a circuit different from that to which the receiver is
connected.
-Consult the dealer or an experienced radio/TV technician for help.
To assure continued compliance, any changes or modifications not expressly approved by the party
responsible for compliance could void the user’s authority to operate this equipment. (Example- use
only shielded interface cables when connecting to computer or peripheral devices)
FCC Radiation Exposure Statement
This equipment complies with FCC RF radiation exposure limits set forth for an uncontrolled
environment. This transmitter must not be co-located or operating in conjunction with any other
antenna or transmitter. This equipment should be installed and operated with a minimum distance
of 20 centimeters between the radiator and your body.
This equipment complies with Part 15 of the FCC Rules. Operation is subject to the following two
conditions:
(1) This device may not cause harmful interference, and
(2) This device must accept any interference received, including interference that may cause
undesired operation.
Caution!
The manufacturer is not responsible for any radio or TV interference caused by unauthorized
modifications to this equipment. Such modifications could void the user authority to operate the
equipment.

WF-2409 Quick Installation Guide
2
Package Contents
The following items should be found in your package:
300Mbps High Performance Wireless-N Broadband Router
Power Adapter
Quick Installation Guide
3 Antennas
CD-ROM
Ethernet Cable
Make sure that the package contains above items. If any of the above items is missing or
damaged, please contact the store you bought this product from.
Before You Begin
Minimum Requirements:
Broadband (DSL/Cable) modem and service with Ethernet port
802.11b/g/n wireless adapter or Ethernet adapter and cable for each computer
Internet Explorer ,
® 5.0 Firefox®2.0 or Safari® 1.4 or higher
Brand and Copyright Announcement
Copyright © 2010 Netis Corporation.
All rights reserved
is a registered trademark of Netis Corporation. Other trademarks and trade
names may be used in this document to refer to either the entities claiming the marks and
names or their products.
Reproduction in any manner without the permission of Netis Corporation is strictly
forbidden
All the information in this document is subject to change without notice.
USA/Canada Technical Support
Phone: 1-866-71-network or 1-866-716-3896 (free in USA & Canada)
E-mail: usa_support@netis-systems.com
WF-2409 Quick Installation Guide
3
1. Hardware Installation Procedure
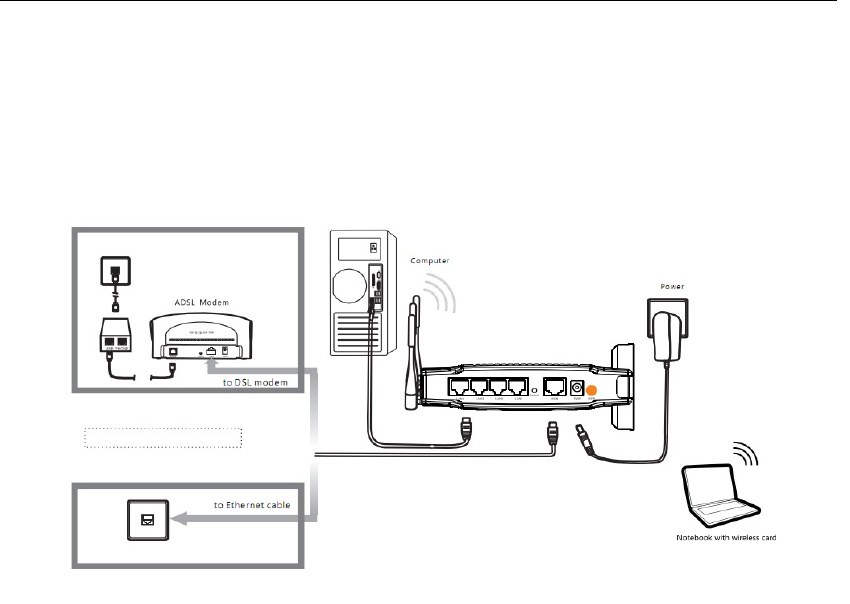
The procedures to install the WF-2409 please refer to Figure 1-1.
Figure 1-1
Step 1 connecting your computer to the LAN port.
Attach one end of the Ethernet cable with RJ-45 connector to your hub, switch or a computer’s
Ethernet port, and the other end to one of the LAN ports of your WF-2409.
Step 2 Connecting Cable/ADSL Modem to the WAN port.
Connect the Ethernet cable attaching to your Cable/ADSL modem to the WAN port of your
WF-2409.
Step 3 connecting the power adapter.
Connect the single DC output connector of the power adapter to the power jack on the side of
the WF-2409. Then plug the Power Adapter into an AC outlet.
Step 4 Power on the following devices in this order:
Cable/ADSL modem, Router, and PCs
2. Login
You can manage the WF-2409 through the Web browser-based configuration utility. To
configure the device via Web browser, at least one properly configured computer must be
connected to the device via Ethernet or wireless network. The WF-2409 is configured with the
default IP address of 192.168.1.1 and subnet mask of 255.255.255.0 and its DHCP server is
enabled by default. Before setting up the Router, make sure your PCs are configured to obtain
WF-2409 Quick Installation Guide
4
an IP address automatically from the Router by the steps below.
2.1. Configure computer (Windows 7)
Please follow the steps below to setup your computer:
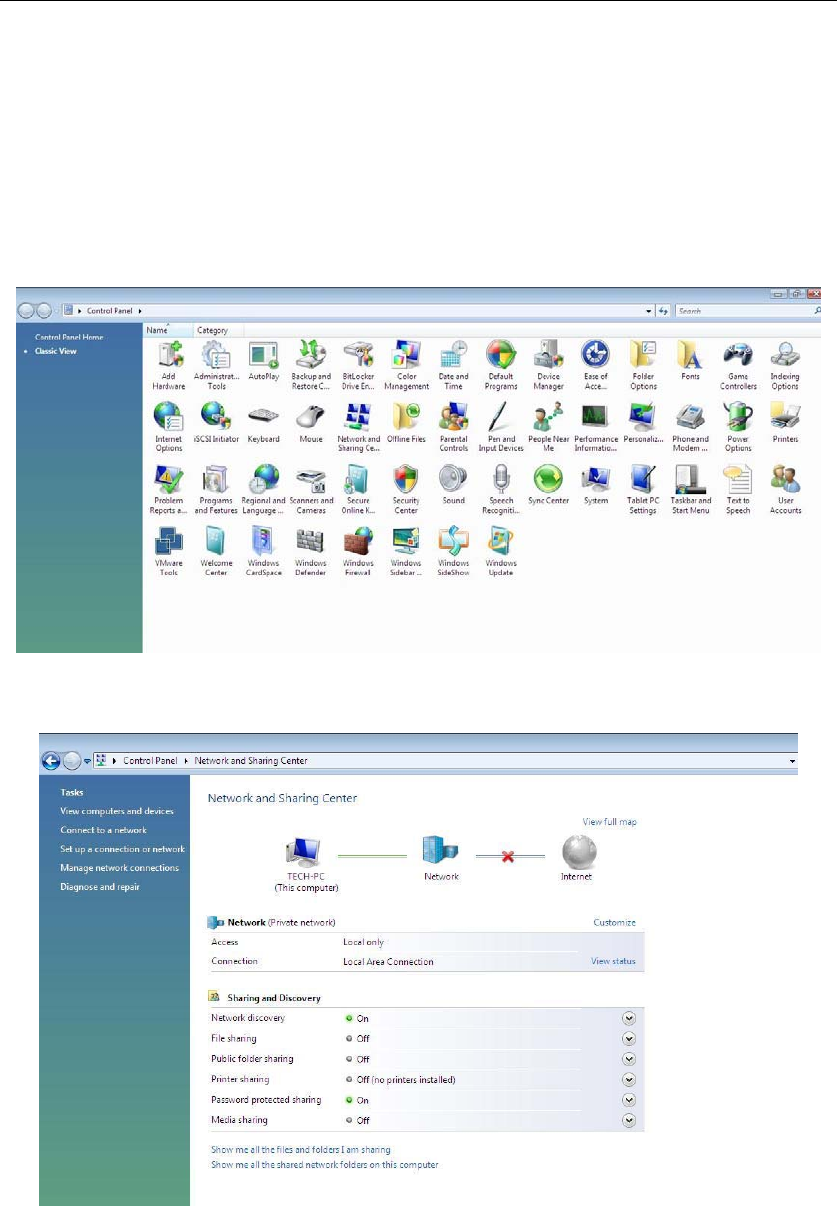
1. Go to Start Settings Control Panel
2. Click Network and Sharing Center
Figure 2-1
3. Click Manage Network Connections
Figure 2-2
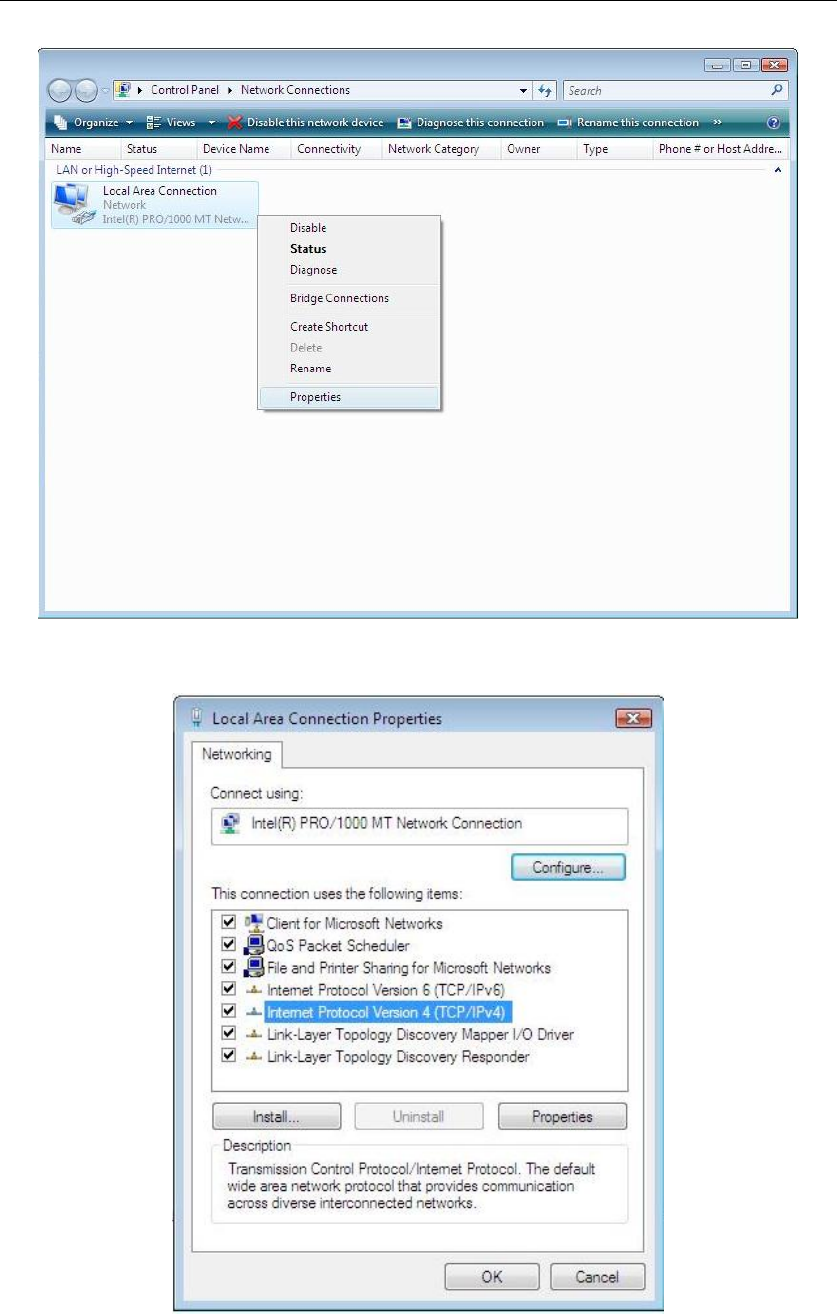
4. Highlight the icon Local Area Connection, right click your mouse, and click Properties
WF-2409 Quick Installation Guide
5
Figure 2-3
5. Highlight Internet Protocol Version 4 (TCP/IP) and then press Properties button
Figure 2-4
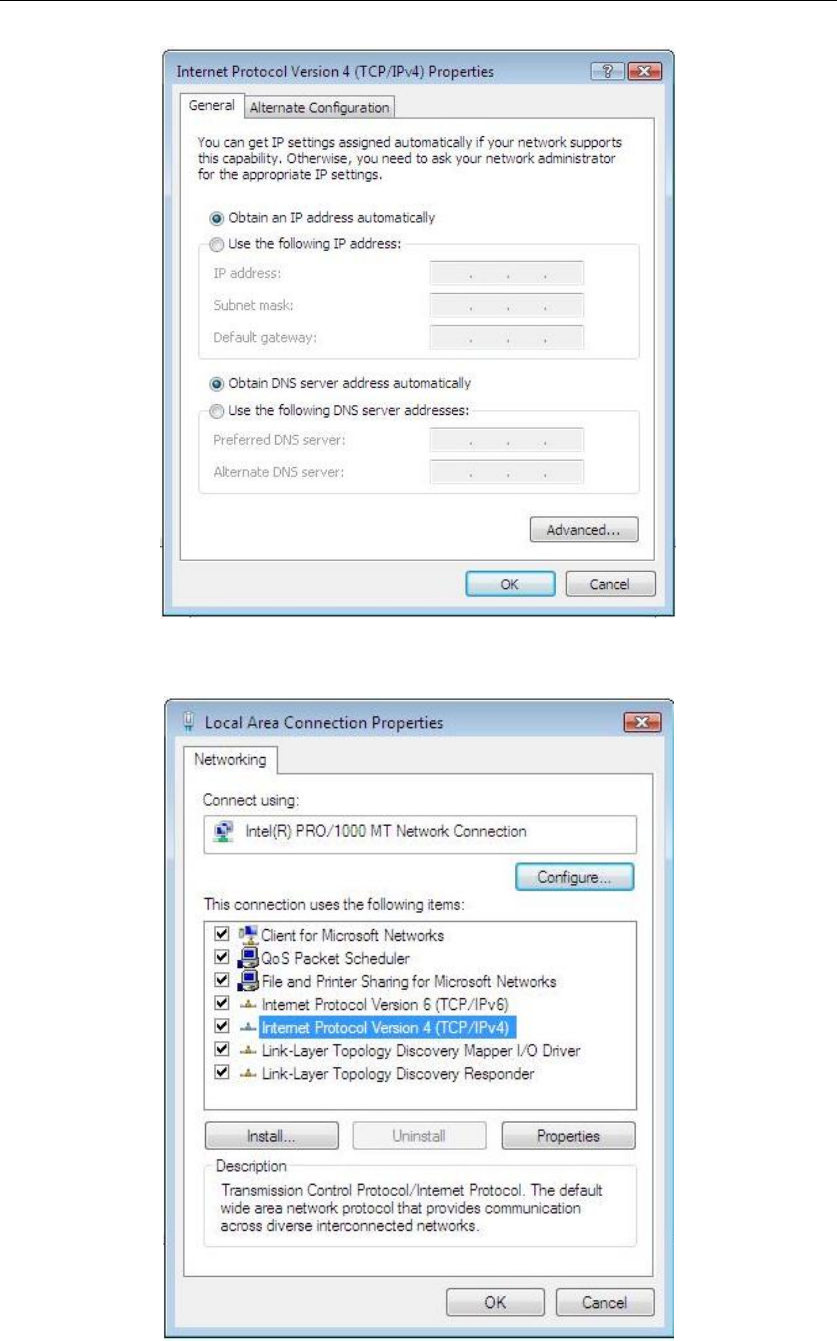
6. Choose Obtain an IP address automatically and Obtain DNS server address automatically,
and then press OK to close the Internet Protocol (TCP/IP) Properties window
WF-2409 Quick Installation Guide
6
Figure 2-5
7. Press OK to close the Local Area Connection Properties window
Figure 2-6
WF-2409 Quick Installation Guide
7
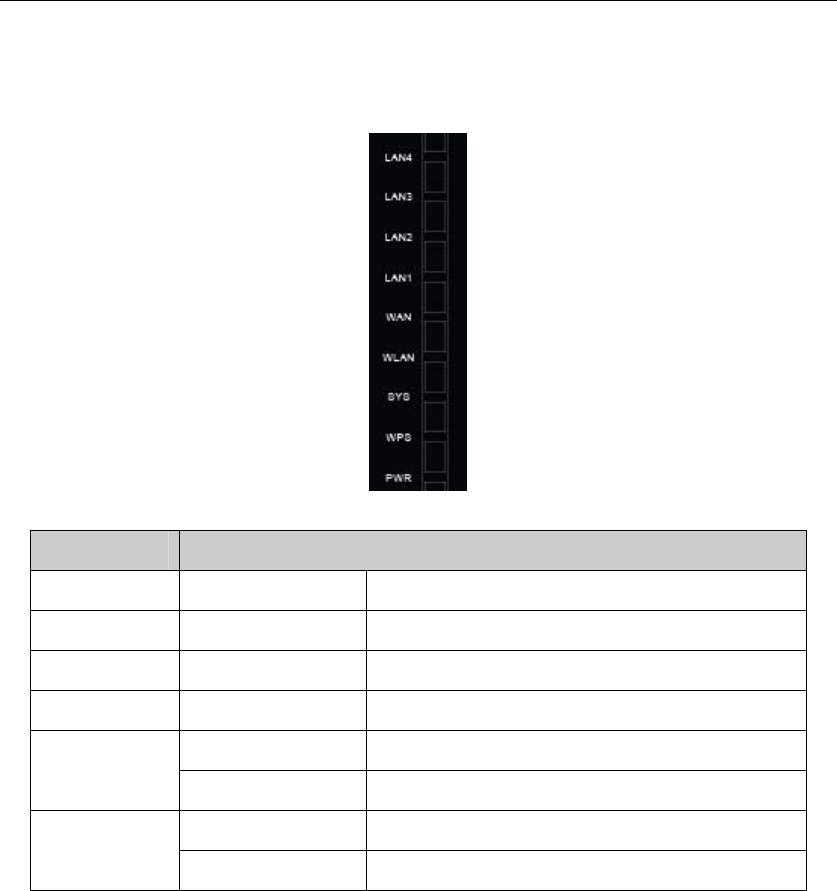
2.2. LED Indicators
Figure 2-7
LED Function
PWR On Power on
WPS Flashing slowly WPS is running
SYS Flashing Normal
WLAN Flashing Wireless data transmitting
ON WAN connection normal
WAN Flashing Data transmitting
ON Corresponding LAN port connection normal
LAN Flashing Corresponding LAN port data transmitting
2.3. Additional Settings for Wireless Client
If you choose to access the router via a wireless client, also verify the following:
1. Make sure your PC is equipped with 802.11b 802.11g or 802.11n wireless adapter and
has appropriate WLAN card driver/utility and TCP/IP installed.
2. Set the wireless adapter to use appropriate TCP/IP settings as described in previous
section.
3. Launch the wireless adapter’s provided utility and verify that your wireless client is
configured with these settings:
Operation Mode: Infrastructure
SSID: default
Authentication: Disabled

WF-2409 Quick Installation Guide
8
Encryption: Off
Radio Band: 802.11B/G/N
2.4. Checking PC’s IP and Connection with the Router
After configuring the TCP/IP protocol, use the ping command to verify if the computer
can communicate with the Router. To execute the ping command, open the DOS window and
ping the IP address of the WF-2409 at the DOS prompt:
For Windows 98/Me: Start -> Run. Type command and click OK.
For Windows 2000/XP: Start -> Run. Type cmd and click OK.
At the DOS prompt, type the following command:
If the Command window returns something similar to the following:
C:\Documents and Settings\admin>ping 192.168.1.1
Pinging 192.168.1.1 with 32 bytes of data:
Reply from 192.168.1.1: bytes=32 time=1ms TTL=64
Reply from 192.168.1.1: bytes=32 time=1ms TTL=64
Reply from 192.168.1.1: bytes=32 time=1ms TTL=64
Reply from 192.168.1.1: bytes=32 time=1ms TTL=64
Ping statistics for 192.168.1.1:
Packets: Sent = 4, Received = 4, Lost = 0 (0% loss),
Approximate round trip times in milli-seconds:
Minimum = 1ms, Maximum = 1ms, Average = 1ms
Then the connection between the router and your computer has been successfully established.
If the computer fails to connect to the router, the Command window will return the following:
C:\Documents and Settings\admin>ping 192.168.1.1
Pinging 192.168.1.1 with 32 bytes of data:
Request timed out.
Request timed out.
Request timed out.
Request timed out.
Ping statistics for 192.168.1.1:

WF-2409 Quick Installation Guide
9
Packets: Sent = 4, Received = 0, Lost = 4 (100% loss),
Verify your computer's network settings are correct and check the cable connection between
the router and the computer.
In order to make the whole network operate successfully, it is necessary to configure the
WF-2409 through your computer has a WEB browser installed. Please follow up the steps
listed below.
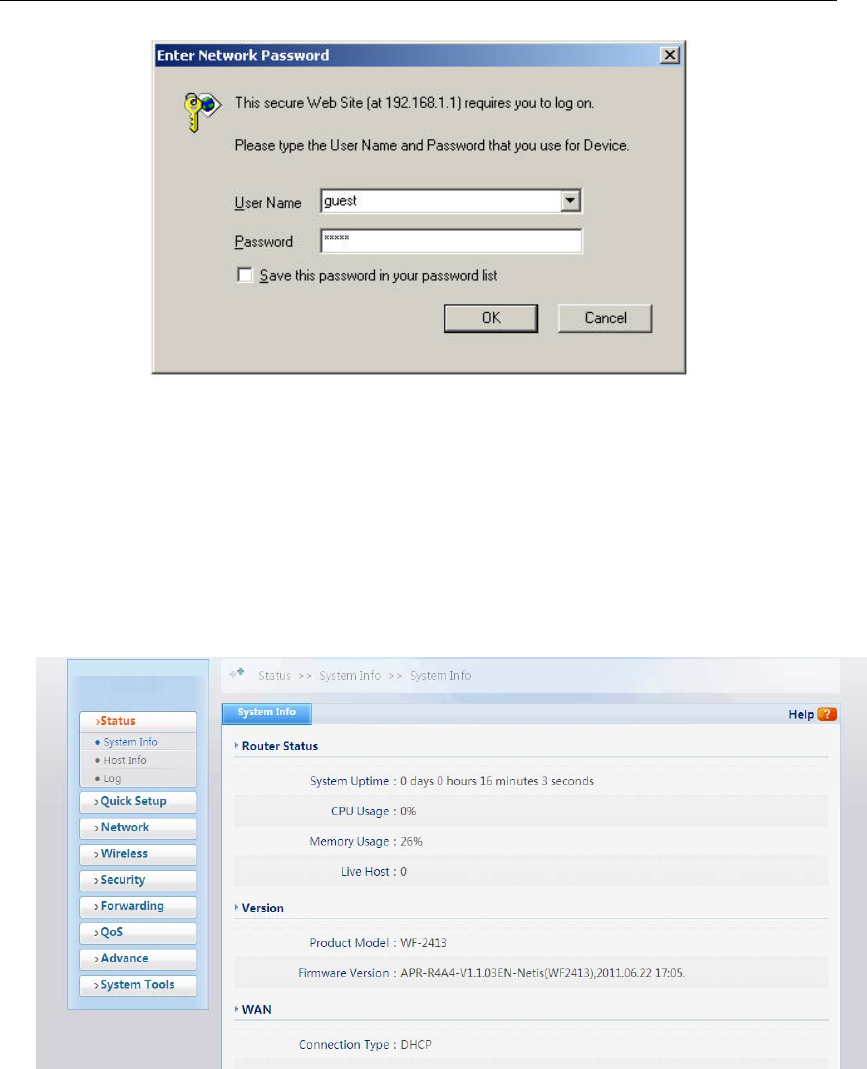
2.5. Login
1. Startup Internet Explorer and enter http://192.168.1.1, then press Enter
Figure 2-1
2. You will enter the user name and password. The default user name is guest, password is
guest, too. You can’t modify you user name but can modify your password. You need modify
you password when you successfully login, incase anyone else may invade your Internet
illegally.
WF-2409 Quick Installation Guide
10
Figure 2-2
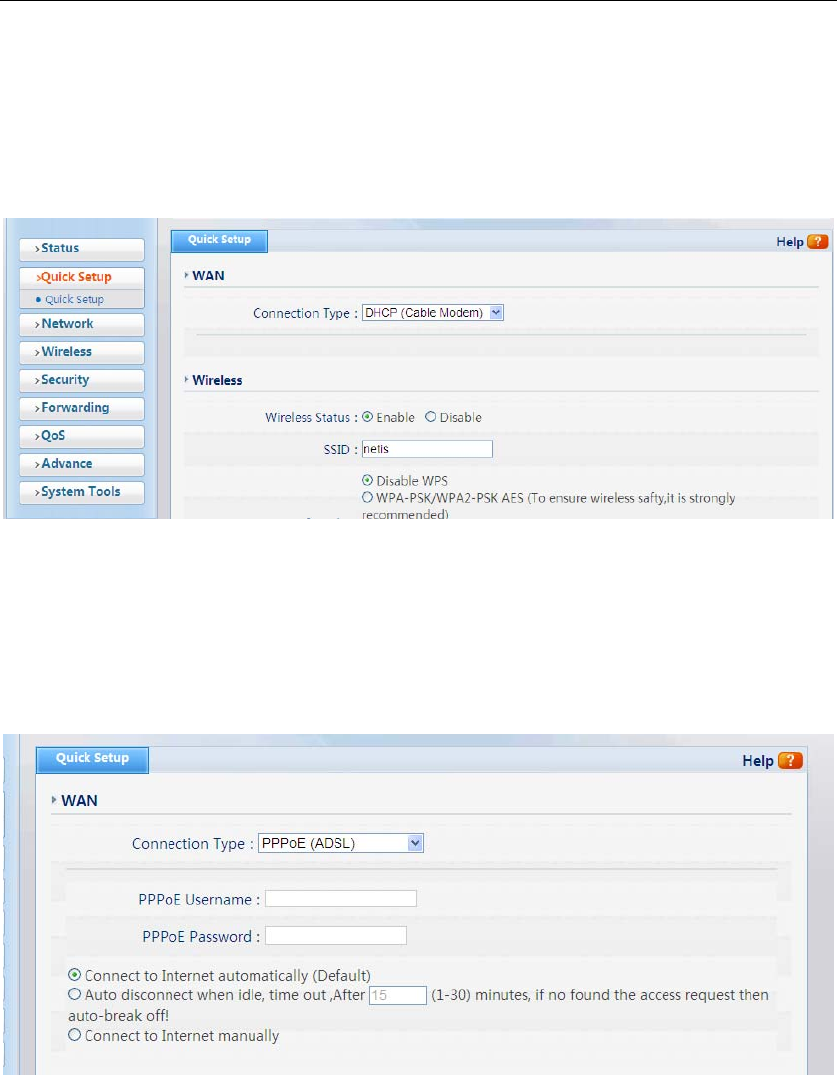
3. After successful login, you will be able to see the WF-2409’s web-based configuration utility
refer to Figure 2- From now on the WF-2409 acts as a Web server sending HTML pages/forms
at your request. You can click the menu options at the left to start the configuration task.
In the home page of the WF-2409, the left navigation bar shows the main options to configure
the system. In the right navigation screen is the summary of system status for viewing the
configurations.
Figure 2-10
3. System configuration
3.1. Convenient Setup
Providing you the convenient and simplest method for configure the router, the purpose of this
item is to provide an easy way for you to use it and configure your router to access the Internet
WF-2409 Quick Installation Guide
11
quickly; including “DHCP”, ”PPPoE”, ”Static IP”, ”PPTP”, ”L2TP” and “Wireless
Configuration”. This is the most convenient tool for you to configure router.
3.1.1. DHCP user (Cable Modem)
Figure 3-1
After select this item, you will obtain an IP address from your ISP automatically, those ISP who
supply Cable modem always use DHCP technology.
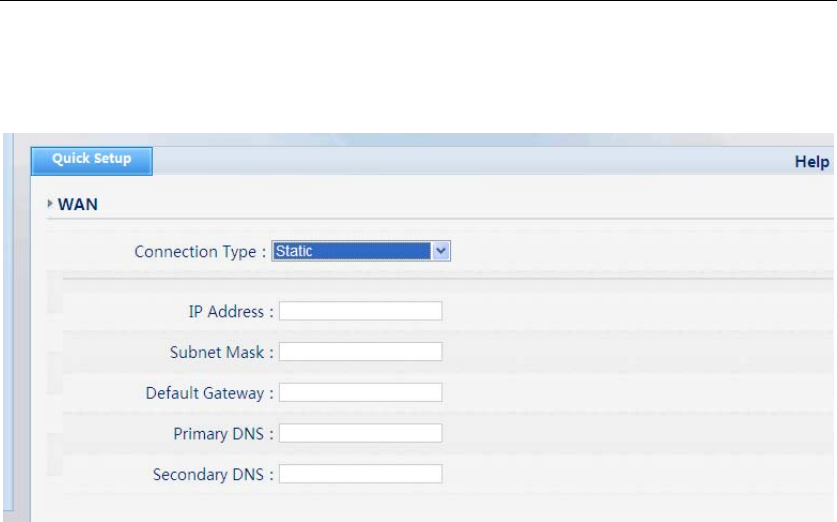
3.1.2. PPPoE user (ADSL)
Figure 3-2
If your ISP provides you the PPPoE service (all ISP with DSL transaction will supply this
service, such as the most popular ADSL technique), please select this item. In the “Convenient
configuration” You can input your PPPoE username and password to access the Internet. You
can connect to Internrt automatically,manually or disconnect Internet when idle ,time out.
PPPoE Username
Input PPPoE username provided by ISP
PPPoE Password
Input PPPoE password provided by ISP.
WF-2409 Quick Installation Guide
12
3.1.3. Static User
Figure 3-3
This item should only be used when users use a static IP address to access Internet, you should
input your “WAN IP address”, ”subnet mask”,” default gateway” and “DNS server (domain
name server) IP address” according to the information provided by your ISP. And every IP
address should be input in appropriate IP field, a IP address only divided into four IP octets by
sign”.” is acceptable.
IP address
The IP address that your Internet access into
Subnet mask
Specify a Subnet Mask for your WAN segment
Default gateway
It is provided by your ISP
Primary DNS
DNS server is used for resolve domain name. Your ISP will provides you with at least one DNS
IP address, input IP address of your DNS server in this field
Secondary DNS
Input IP address of backup DNS server, or you can leave this field blank.
WF-2409 Quick Installation Guide
13
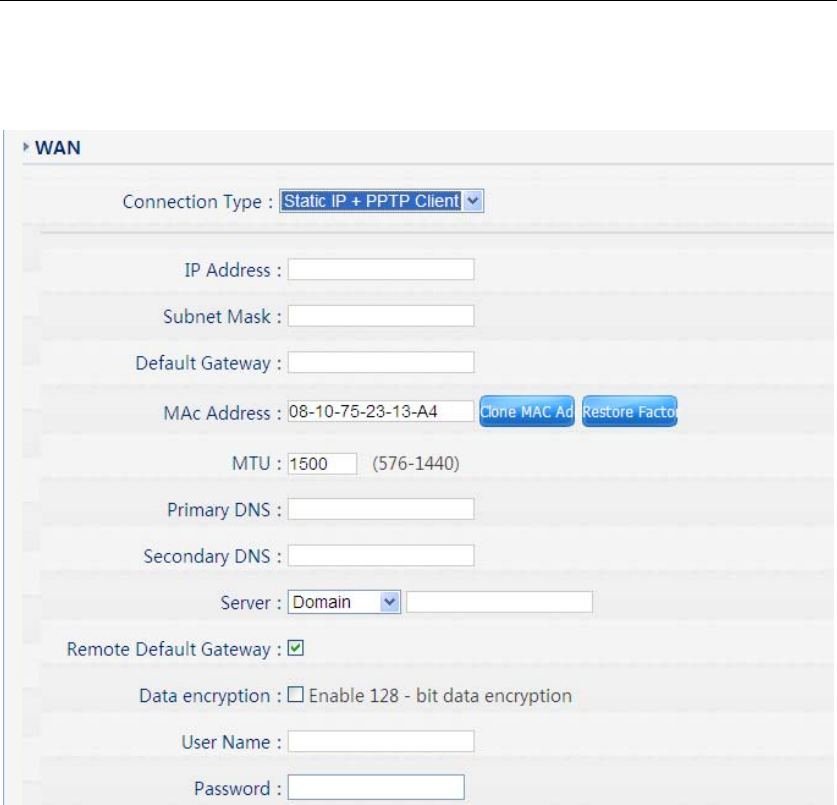
3.1.4. Static IP + PPTP Client
Figure 3-4
If your ISP provides you the Static PPTP service, please select this item. In the “Convenient
configuration” You can input your PPTP Server, username and password to access the Internet.
Server
The Server IP address that your Internet access into
IP Address
The Local IP address that your Internet access into Subnet mask
Subnet mask
Specify a Subnet Mask for your WAN segment
Primary DNS
DNS server is used for resolve domain name. Your ISP will provides you with at least one DNS
IP address, input IP address of your DNS server in this field
Secondary DNS
Input IP address of backup DNS server, or you can leave this field blank
Default gateway
It is provided by your ISP
User Name
Iput User name your ISP provides
Password
WF-2409 Quick Installation Guide
14
It is provided by your ISP
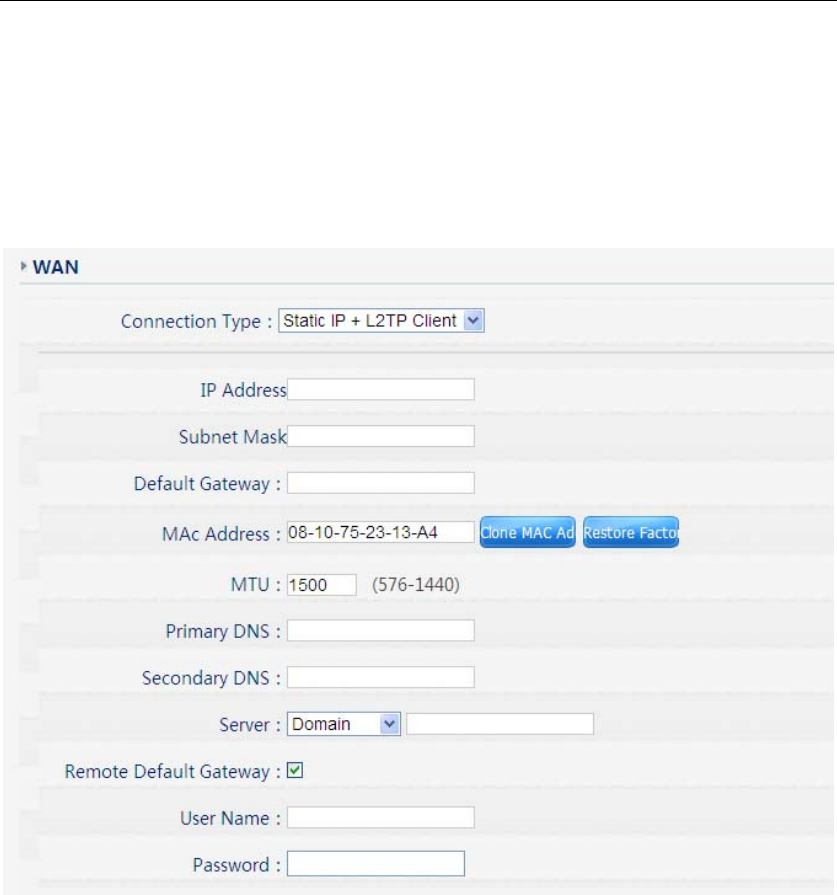
3.1.5. Static IP + L2TP Client
Figure 3-5
If your ISP provides you the Static L2TP service, please select this item. In the “Convenient
configuration” You can input your L2TP Server, username and password to access the Internet.
Server
The Server IP address that your Internet access into
IP Address
The Local IP address that your Internet access into Subnet mask
Subnet mask
Specify a Subnet Mask for your WAN segment
Default gateway
It is provided by your ISP
Primary DNS
DNS server is used for resolve domain name. Your ISP will provides you with at least one DNS
IP address, input IP address of your DNS server in this field
Secondary DNS
Input IP address of backup DNS server, or you can leave this field blank

WF-2409 Quick Installation Guide
15
User Name
Iput User name your ISP provides
Password
It is provided by your ISP
3.1.6. Wireless Configuration
You can choose “Enable” or “Disable” to enable or disable the wireless function. The default
setting is ”enable”. If you chose the “Disable” status, the router will become a wired broadband
router without wireless function, so be careful when you choose this status.
SSID
SSID (Service Set Identifier) is your wireless network's name shared among all points in a
wireless network. The SSID must be identical for all devices in the wireless network. It is
case-sensitive and must not exceed 32 characters. Make sure all points in the wireless network
have the same SSID. For added security, you should change the default SSID to a unique name
Security
The item allows you to encrypt your wireless communication, and you can also protect your
wireless network from unauthorized user access. It supplies “None”, “WEP”, “WPA-PSK”,
“WPA2-PSK” and “WPA/WPA2-PSK” five different encryption modes. And you can also use
WPS function and then it will be encrypted to WPA2-AES mode automatically
Now you have finished the configuration of this WF-2409. Congratulations!