NITGen NT001201 EyeD OptiMouse User Manual SecuDesktop 2000
NITGen Co., Ltd. EyeD OptiMouse SecuDesktop 2000
NITGen >
users manual
Guide
NITGen Co., Ltd.
www.nitgen.com

2
" CD-ROM (Or 1.44MB FDD)
" Parallel ports (EPP or ECP mode-EPP mode recommended)
" PS/2 port (mouse jack port)
" 16 MB RAM
" 20 MB hard disk empty space
" MS Windows 95/98/NT 4.0 or Windows 2000
! USB Driver
" IBM compatible models PC486 or later
" CD-ROM (or 1.44MB FDD)
" USB port
" 16 MB RAM
" 20 MB hard disk empty space
" MS Windows 95/98/NT 4.0 or Windows 2000

Installing Drivers
Installing DriversInstalling Drivers
Installing Drivers
Installing USB Driver
Installing Parallel Driver
4
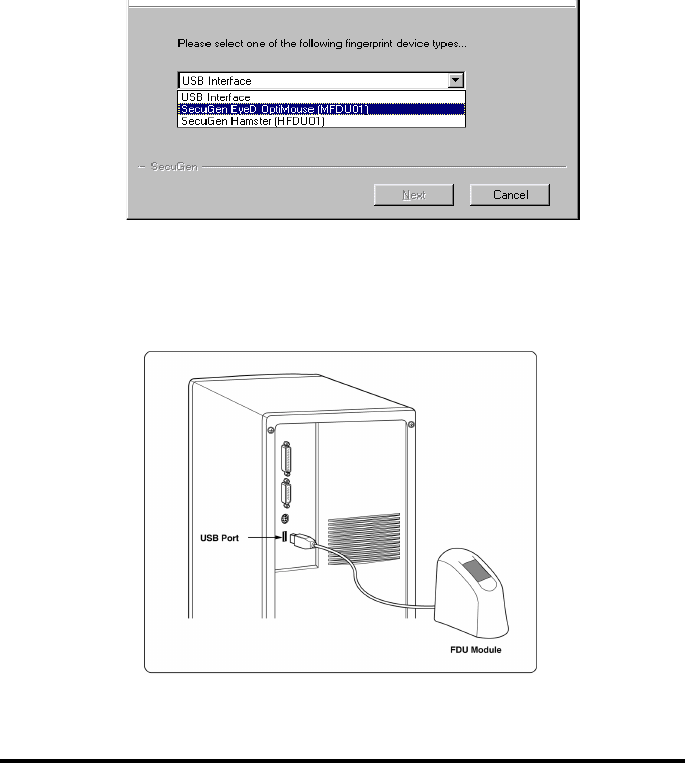
2. When the driver installation is finished, connect the USB cable to
the USB port on the host computer as shown below.
※ Note: It can be a little different according to the OS type.
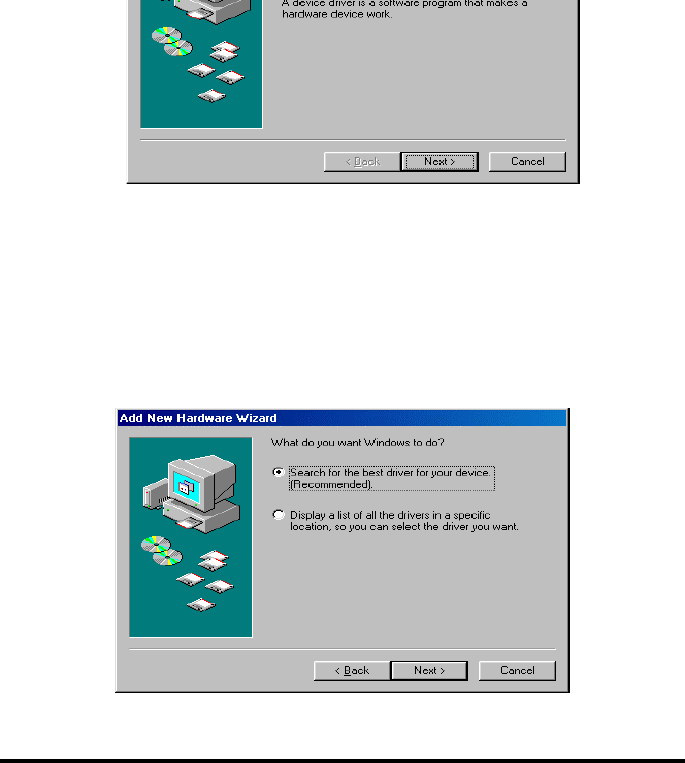
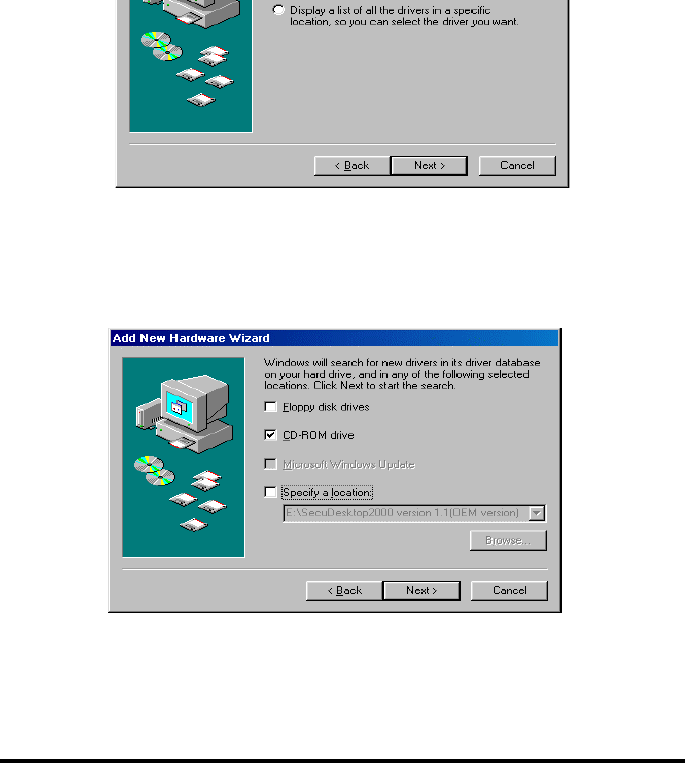
4. Choose “Search for the driver that is the most appropriate for
the device (Recommended)”, then click <Next>.
6
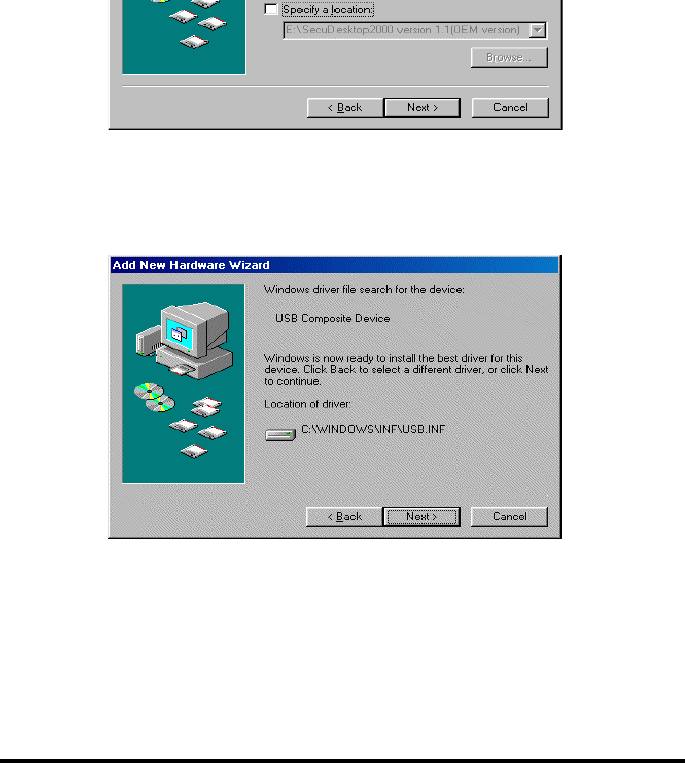
6. “USB composite device” dialog box appears, click <Next>.
※ note: In case of USB Hamster, installation is now completed.
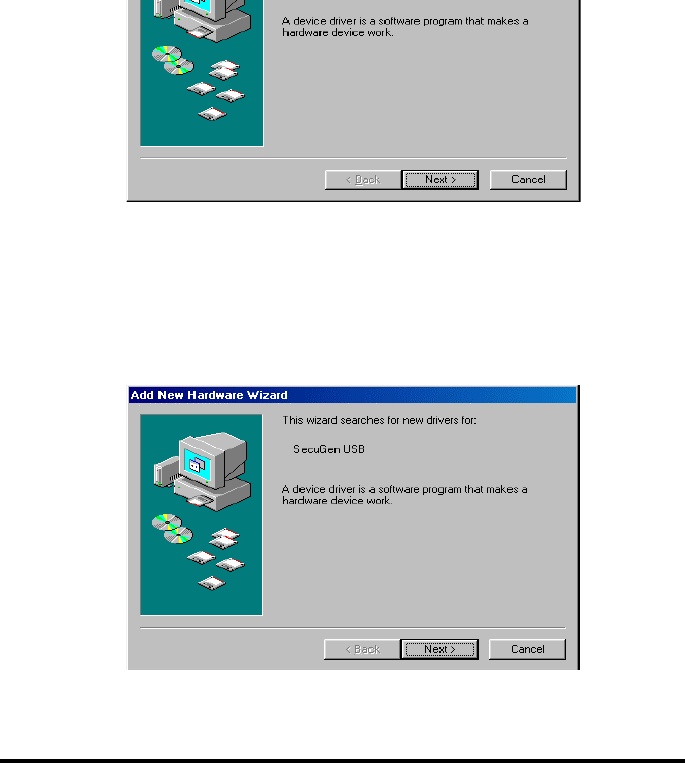
8. When “SecuGen USB” wizard dialog appears, click <Next>.
8
10. Click the CD-ROM drive check box, and then click <Next>.
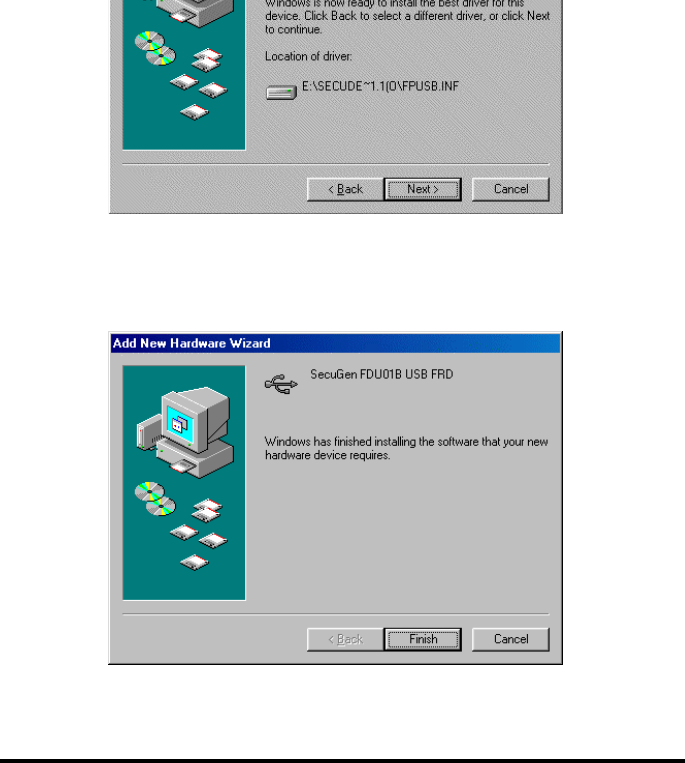
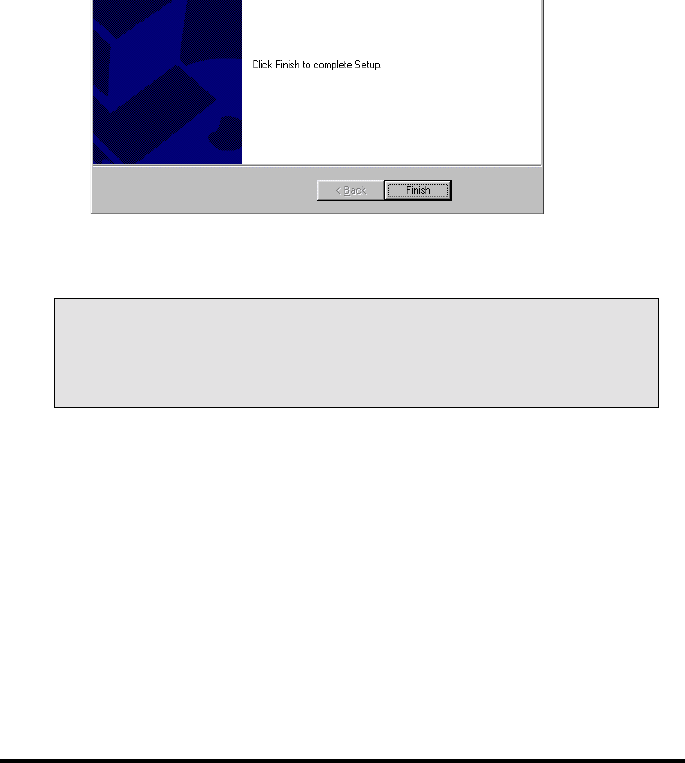
12. Click <Finish>. The installation is now finished.
10
Printer port
PS/2
port
Parallel
port
recognizers, connect the fingerprint recognizer first before starting
driver installation program.
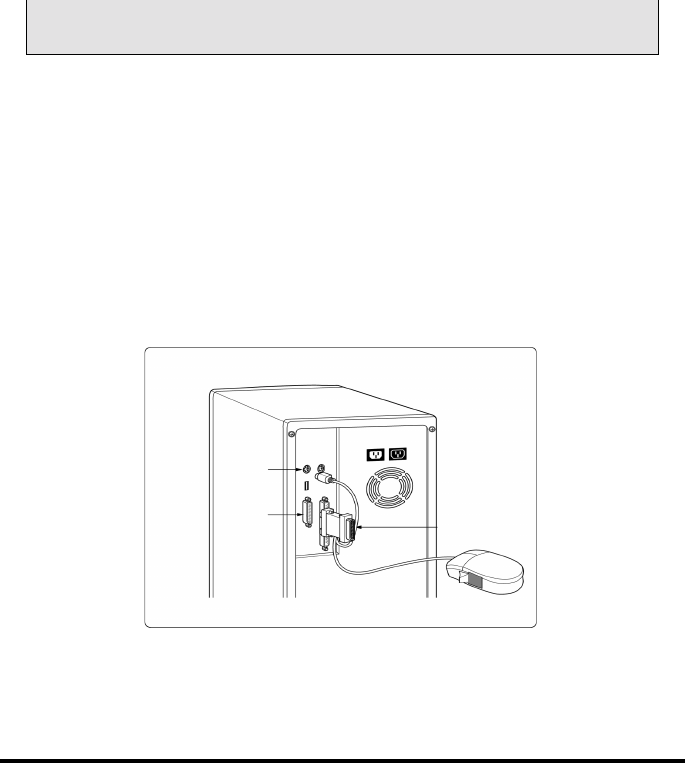
1. Turn off the power of computer.
2. Connect the PS/2 mouse connector to PS/2 port (mouse or
keyboard port) of the host computer.
3. Connect the mouse parallel adapter to the parallel port (Printer
port) of the host computer. To attach a local printer, connect the
printer cable to the back of the mouse parallel adapter.
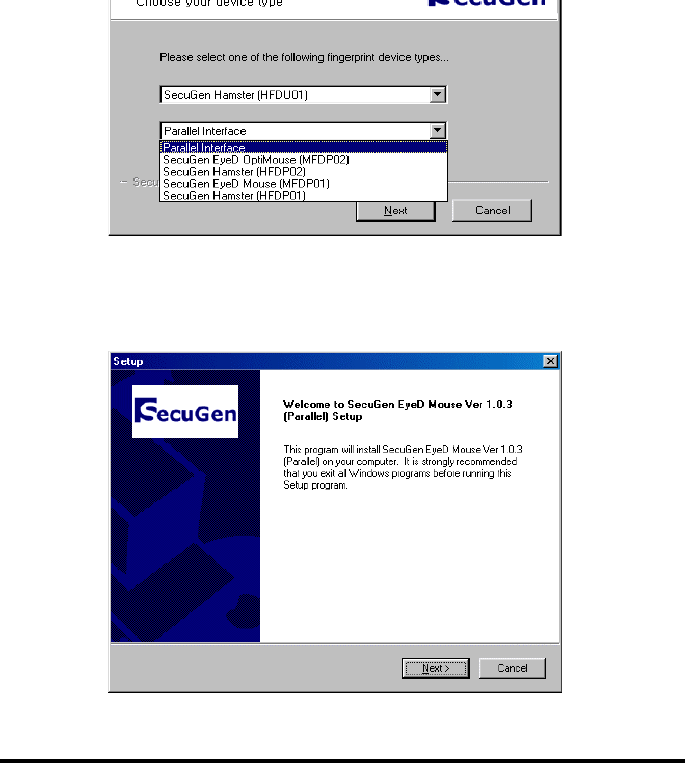
6. Setup dialog box will start automatically. Click <Next> to continue.
12
# note: In the case of parallel port device, the BIOS settings on
your computer SHOULD BE
SHOULD BESHOULD BE
SHOULD BE set for EPP(recommended) or ECP
parallel port mode. You can change the mode on BIOS Setup.

Diagnostic Tools
Diagnostic ToolsDiagnostic Tools
Diagnostic Tools
Executing Diagnostic Tools
Checking System State
View of Fingerprint Images
Brightness and Contrast Controls
Others
15
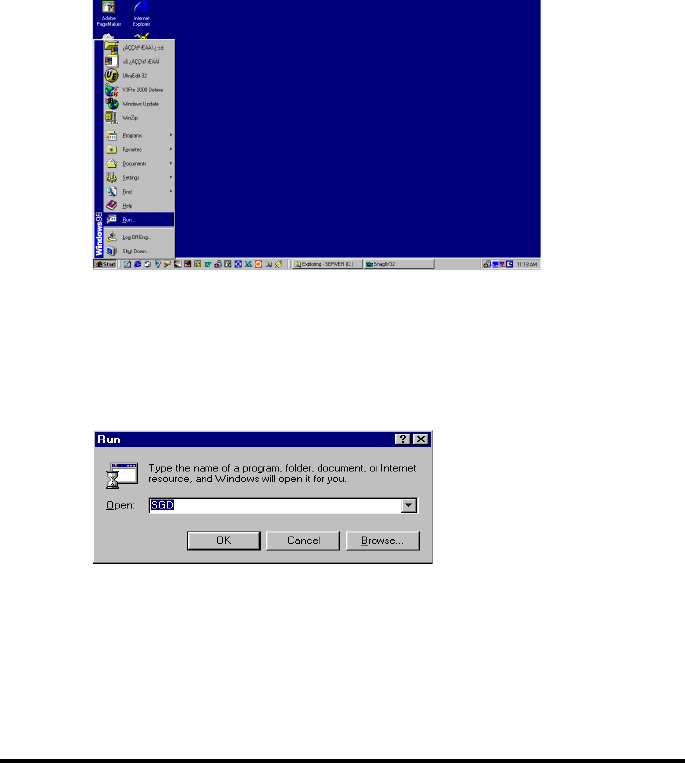
2. Type “SGD” as shown below, then click <OK>.
16
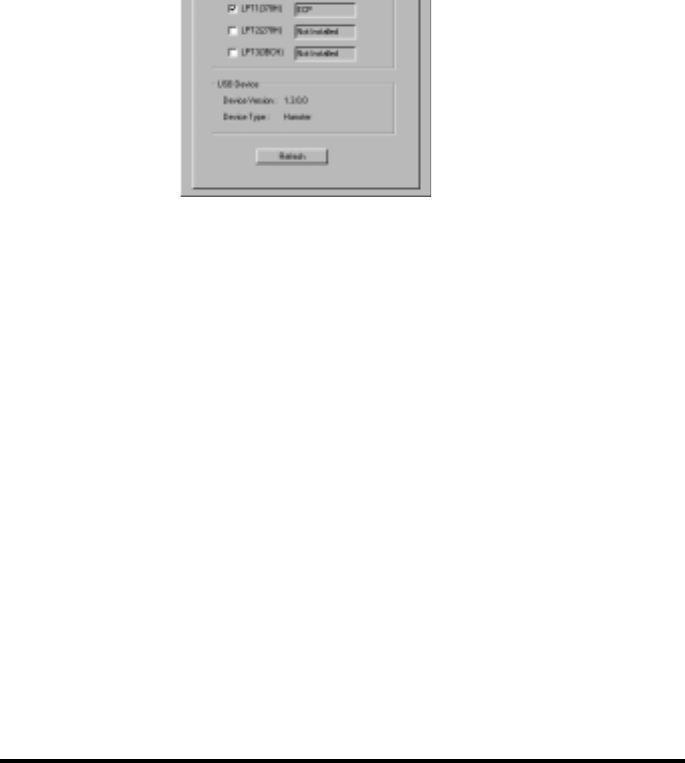
Drivers installed
If parallel type has been checked, it indicates that a driver for
parallel type device has been installed. And, if USB type has
been checked, a driver for USB has been installed. If both have
been checked, both types of drivers have been installed.
Parallel Port Status
It appears only when parallel type driver has been installed. It
indicates the printer port connected to the current system’s
parallel port.
USB Device
It appears only when a USB type driver has been installed. It
shows the device version and type of the USB device connected
to current system.
17
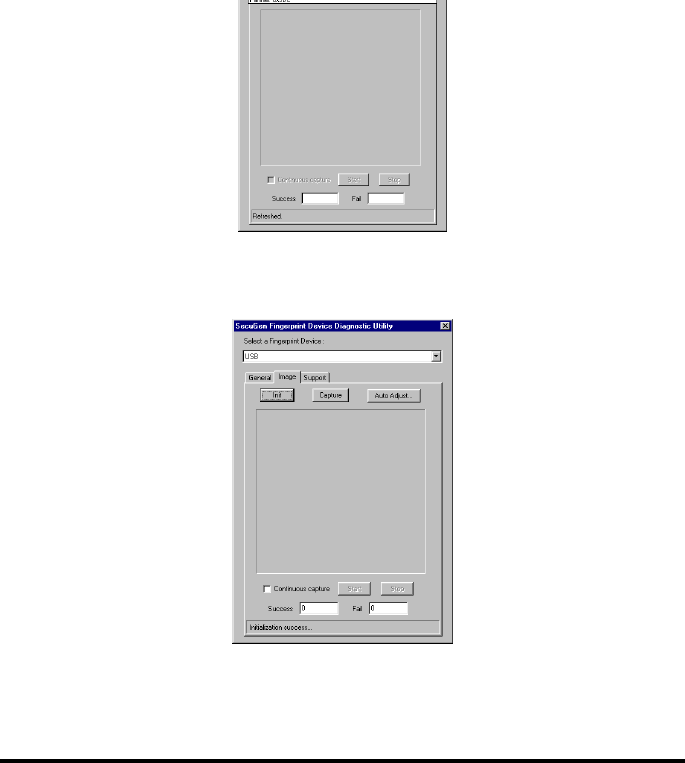
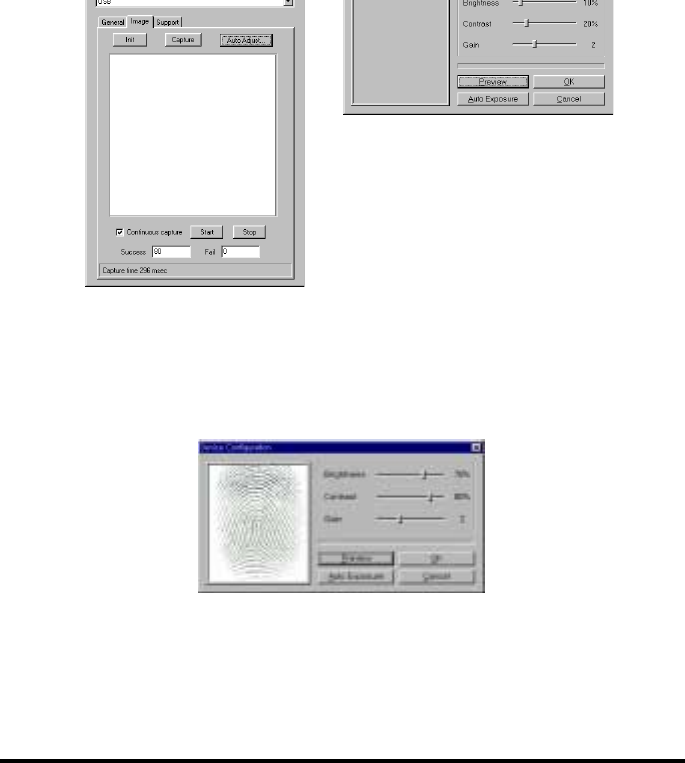
2. Click <Init> button to initialize the device.
18
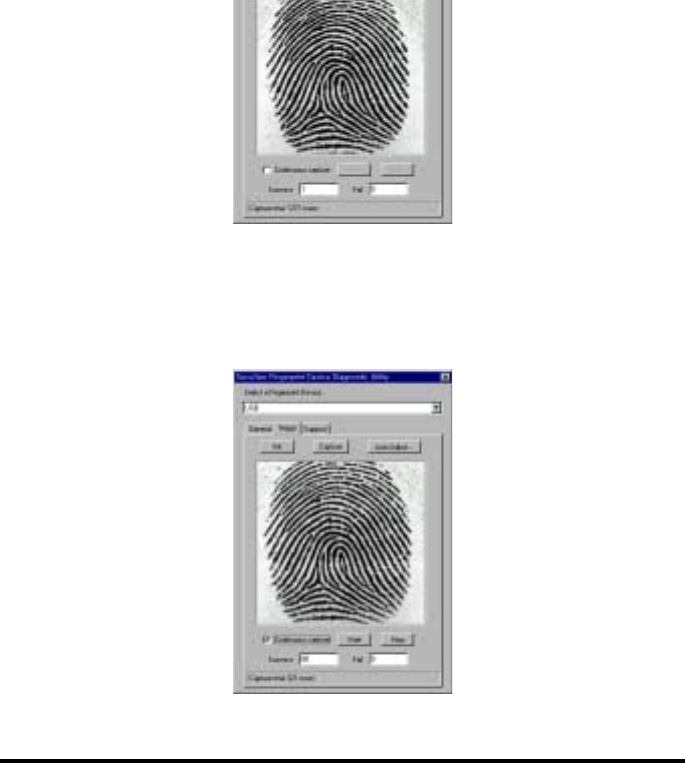
4. If you click <Start> after selecting check box “Continuous
Capture”, then fingerprint image appears continuously. At this
time, information about the action state of the device appears
below.
19
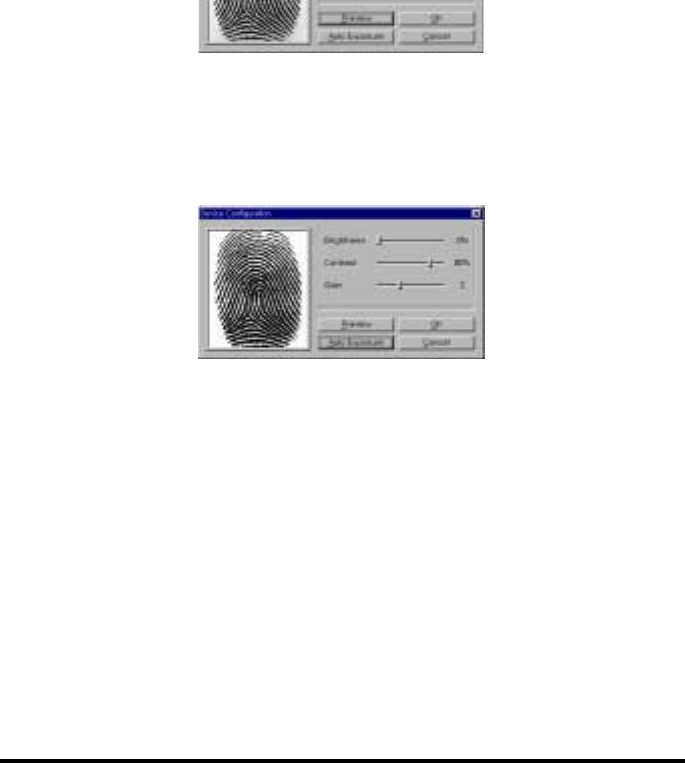
2. If you click <Preview>, the fingerprint image is captured. If it
appears too bright as below, adjust ‘Brightness’ or ‘Contrast’. If
it is still bright, increase ‘Gain’ value one level at a time.
20
4. If you click <Auto Exposure>, it will automatically find the most
optimum setup value.
21

22
Changing the BIOS Set-up Mode
When the Printer Does Not Work
When the Mouse Does Not Move
When the Fingerprint Recognizer Does Not Function
Others

23
1. If you want to either change or check the ‘printer port mode’ in
system BIOS, press ‘Delete’ key or ‘F2’ key while computer is
booting.
2. Generally you can find either the ‘Integrated Peripheral’ or ‘I/O
Device Configuration’ menu although it is a bit different by computer
types.
3. Using +,- keys or PageUp and PageDown keys, select ECP or EPP
mode among the ECP, EPP, and SPP modes.
4. Quit the BIOS SETUP after saving the changes, and then the
computer gets automatically rebooted.
" When the Printer Does Not Work
① First, check if the fingerprint input window has appeared. The
printer does not function while the fingerprint recognizing driver is
working. You can use after closing the fingerprint input window.
② Detach the fingerprint recognizing mouse and connect only the
printer. If the printer works properly, it is a mouse malfunction.
③ If the printer does not function after detaching the fingerprint
24
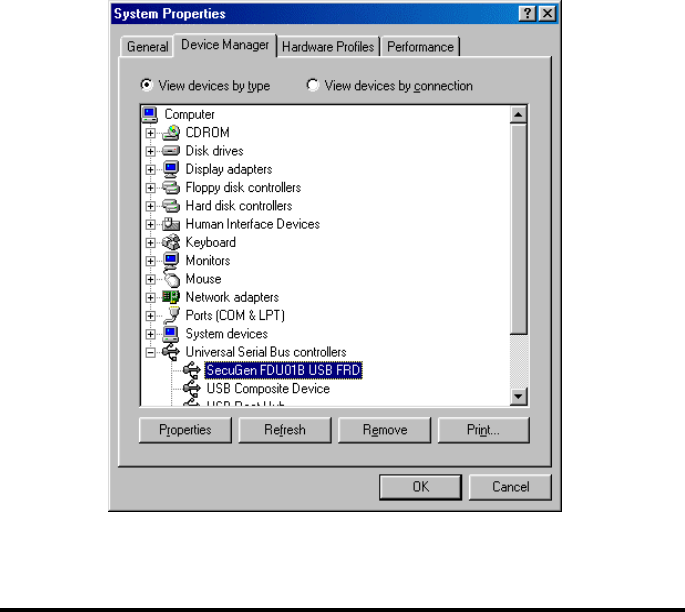
② Make sure that the installation has been done properly. If you
want to check it, open the ‘Setting’->‘Control Panel’ in the ‘Start’
menu. Then double-click ‘System’ icon. Click ‘Device manager’ tap,
then check if there are “Human Interface Device”, “mouse” and
“SecuGen *** USB FRD”.

25
connecting the USB cable to the USB port.
! Reboot the computer after connecting the device to start the Add
New Hardware Wizard.
" You cannot use the fingerprint-recognizing mouse when you use
USB device. If you use either the USB keyboard or a Hub port, you can
use the fingerprint-recognizing hamster, but you cannot use the
fingerprint-recognizing mouse by connecting it.