NOVA Biomedical 51360 13.56 MHz RFID TAG TRANSMITTER HID User Manual
NOVA Biomedical Corporation 13.56 MHz RFID TAG TRANSMITTER HID
UserManual.wiki
>
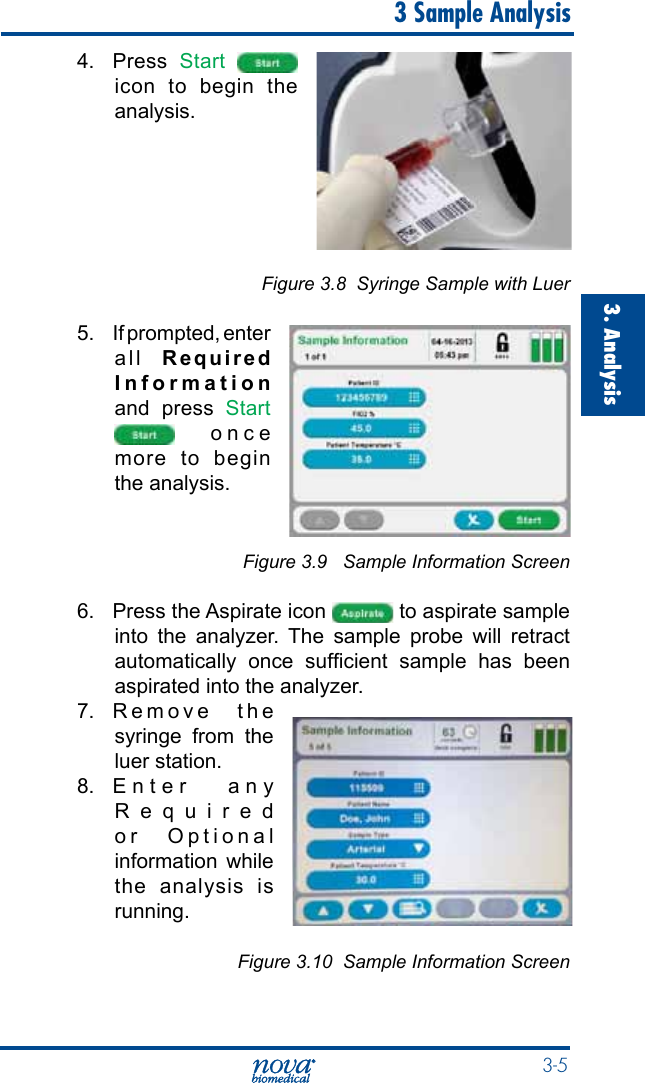
NOVA Biomedical
>
51360 User Manual
User Manual
Navigation menu
Upload a User Manual
Namespaces
Wiki Guide
HTML
PDF
Info
Views
User Manual
Discussion / Help
Navigation
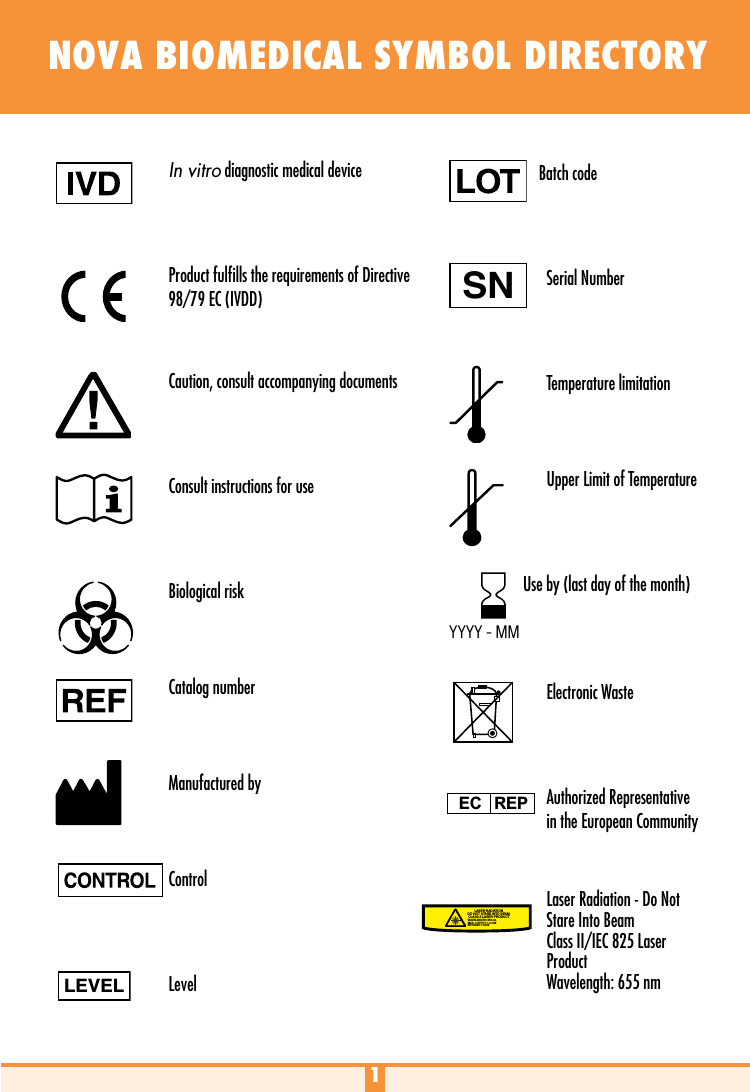


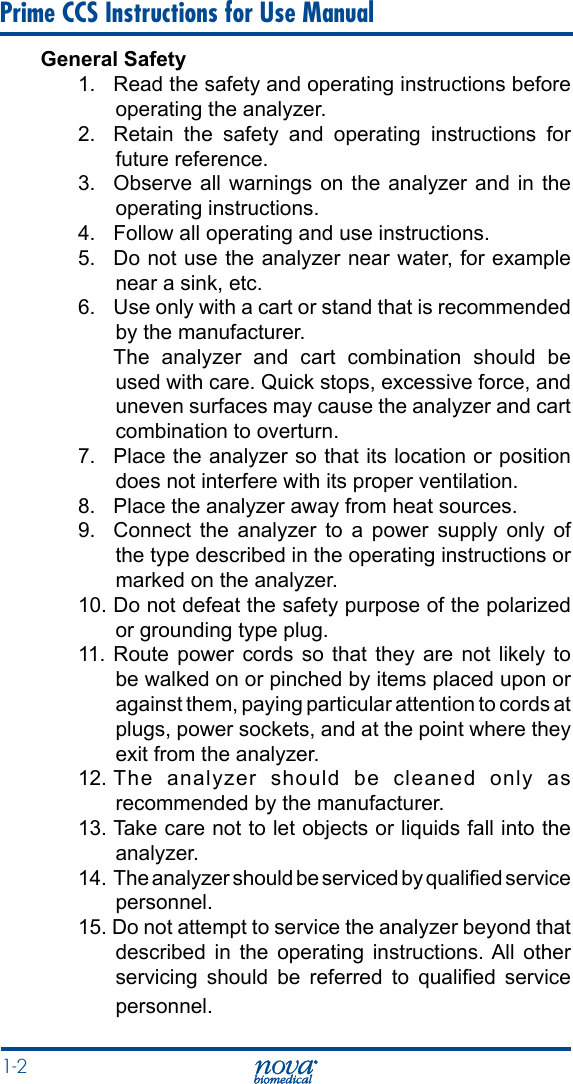


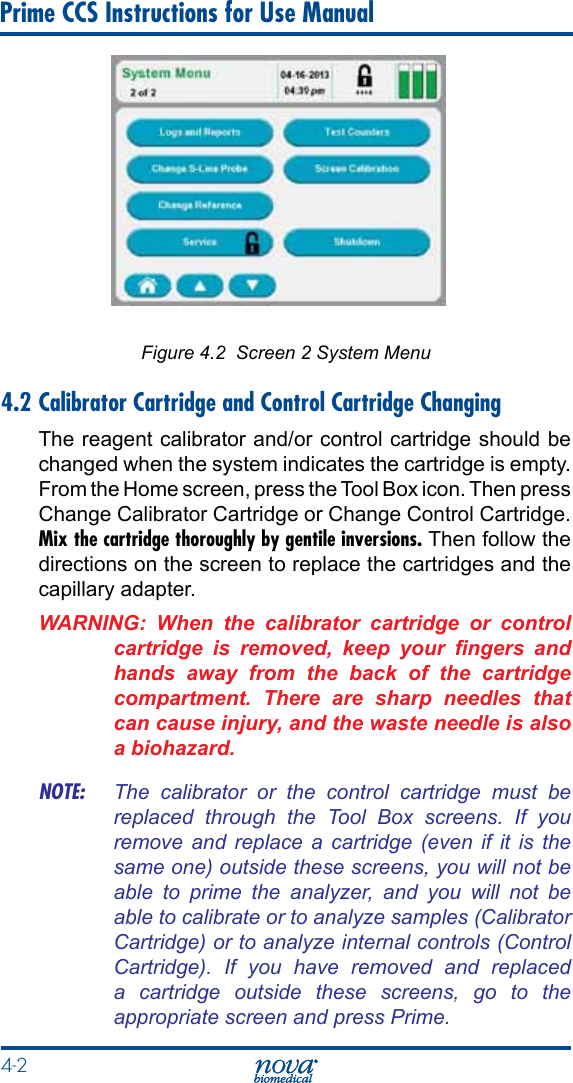

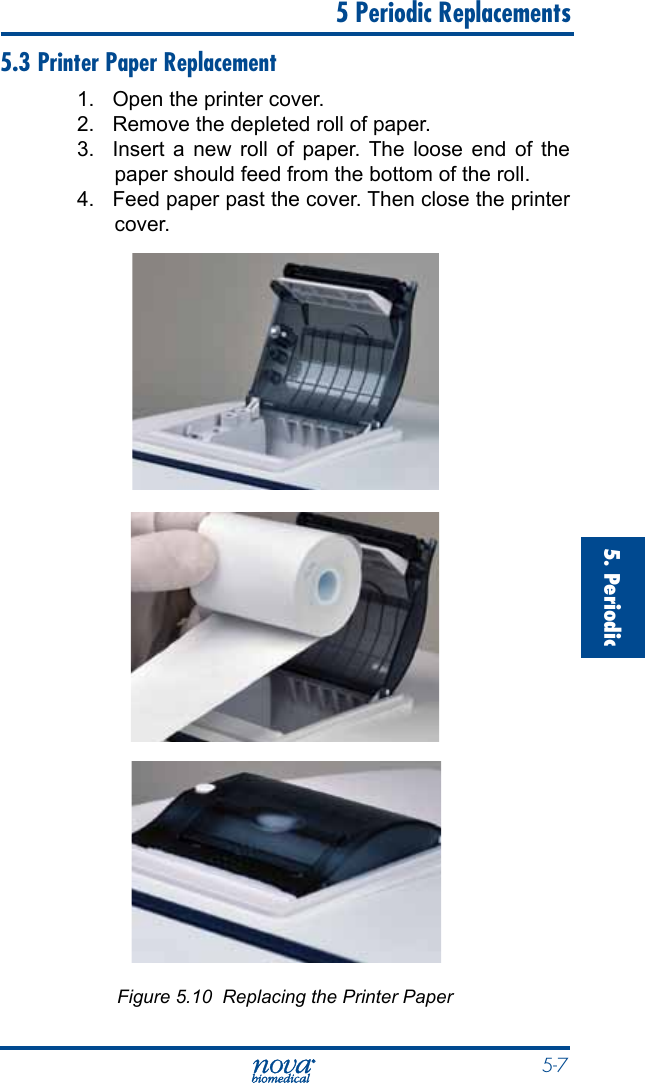


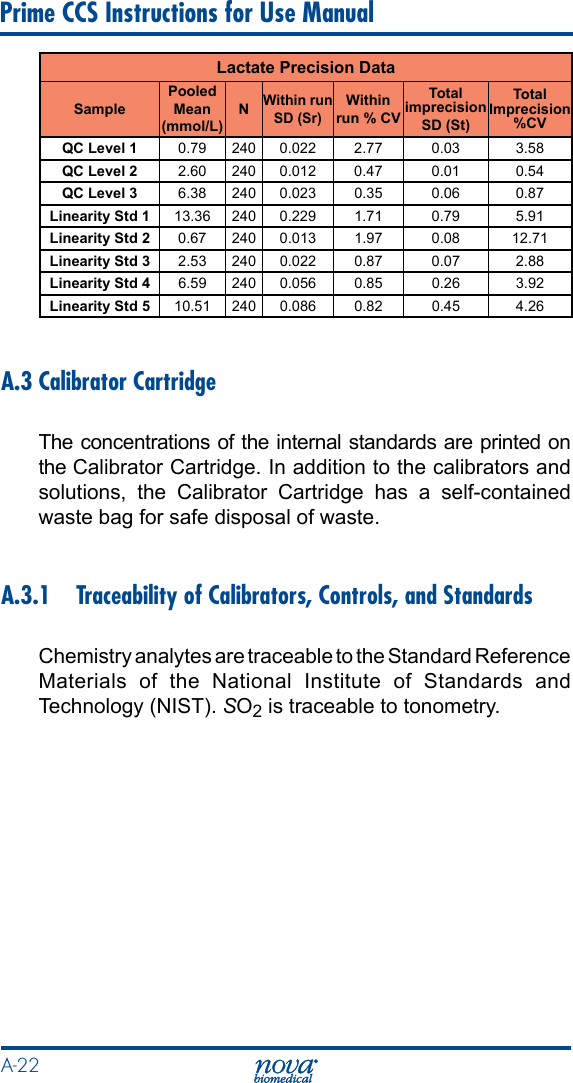
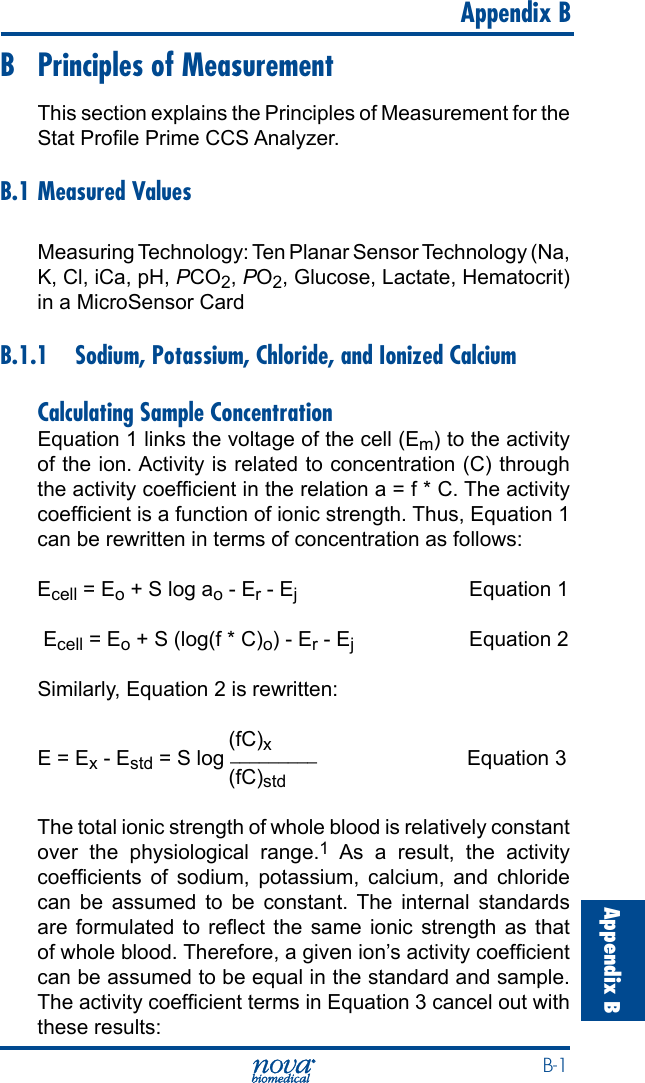
![B-3Appendix B Appendix BB.1.3 Partial Pressure of Carbon Dioxide (PCO2)Definition of PCO2The partial pressure (tension) of carbon dioxide in solution is dened as the partial pressure of carbon dioxide in the gas phase in equilibrium with the blood.Principle of PCO2 MeasurementPCO2 is measured with a modied pH sensor. Carbon dioxide in the unknown solution makes contact with a hydrogen ion selective membrane CO2 diffuses across the membrane into a thin layer of bicarbonate buffer in response to partial pressure difference. This solution then becomes equilibrated with the external gas pressure of the uid in contact with the outer surface of the membrane. CO2 in the solution becomes hydrated producing carbonic acid which results in a change in hydrogen ion activity.CO2 + H20 <=> H2CO3 <=> H+ + [HCO-3 ] Equation 8The pH of this internal solution varies with the PCO2 according to the Henderson-Hasselbalch equation. pH = pKa + log {HCO3- / PCO2 * a}The measured potential is related to the logarithm of PCO2 content of the sample after compensation of the measured potential of the pH sensor.](https://usermanual.wiki/NOVA-Biomedical/51360/User-Guide-2077889-Page-89.png)
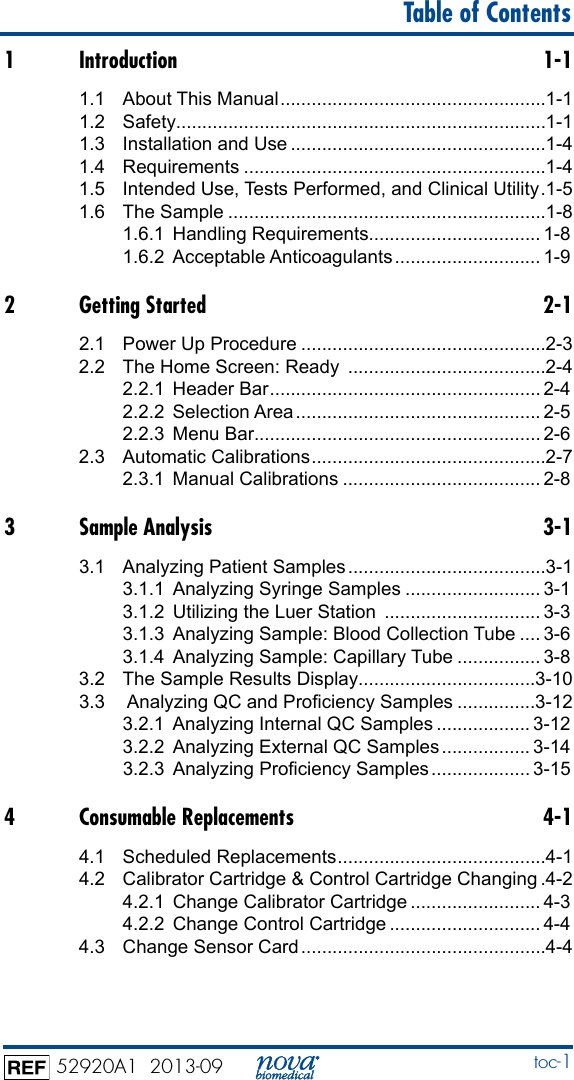
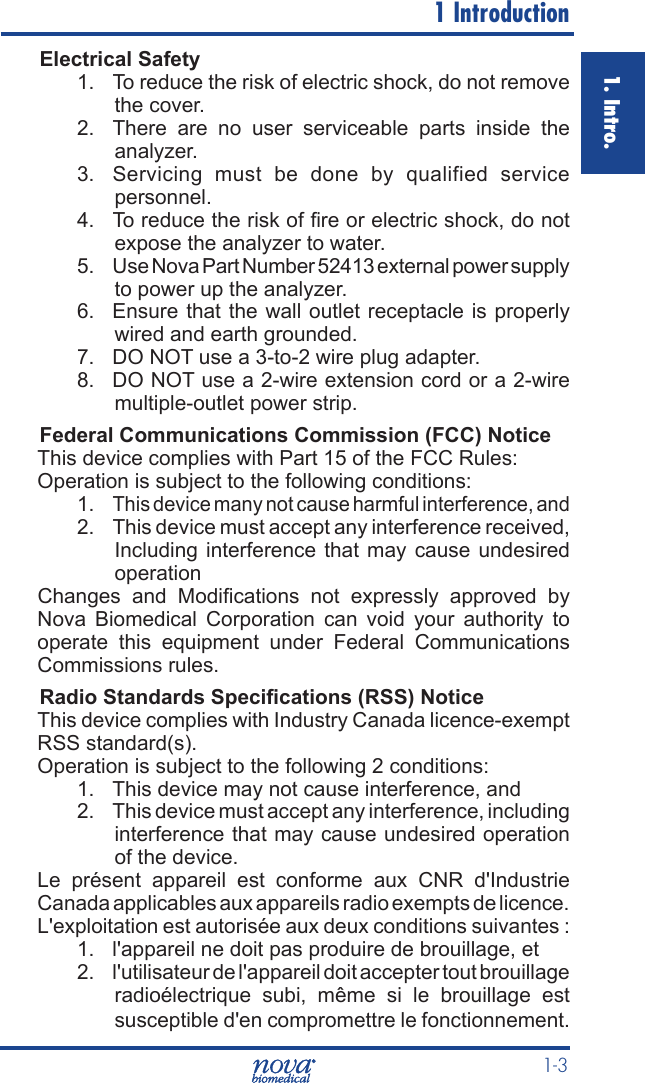
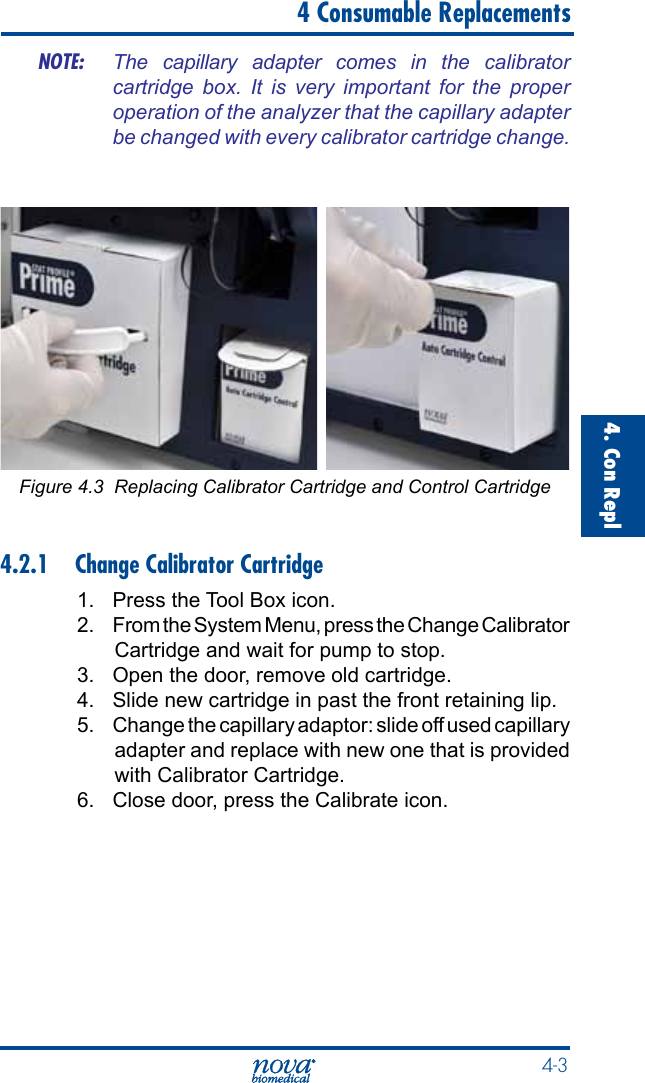
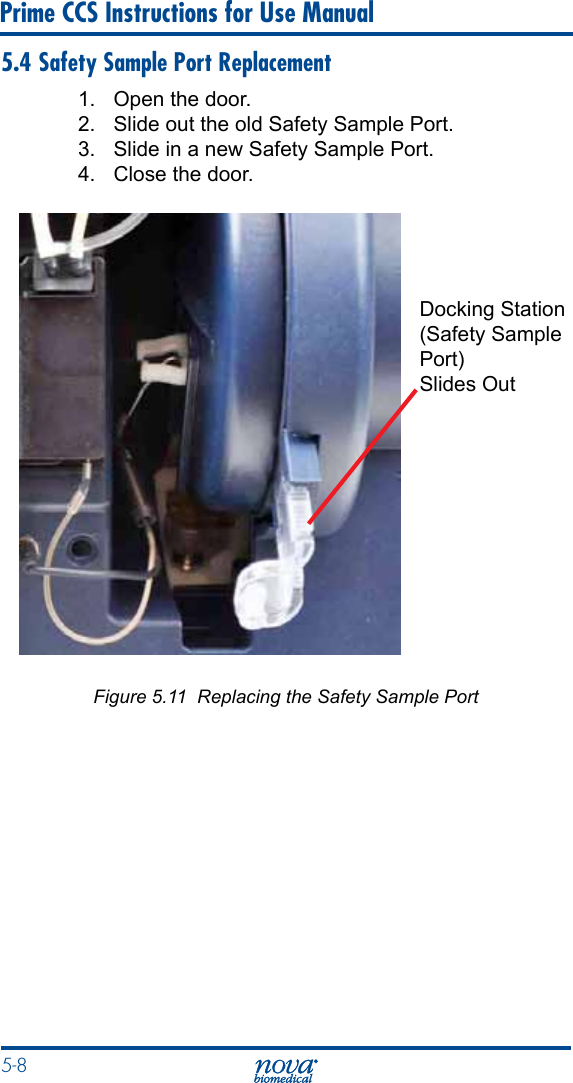
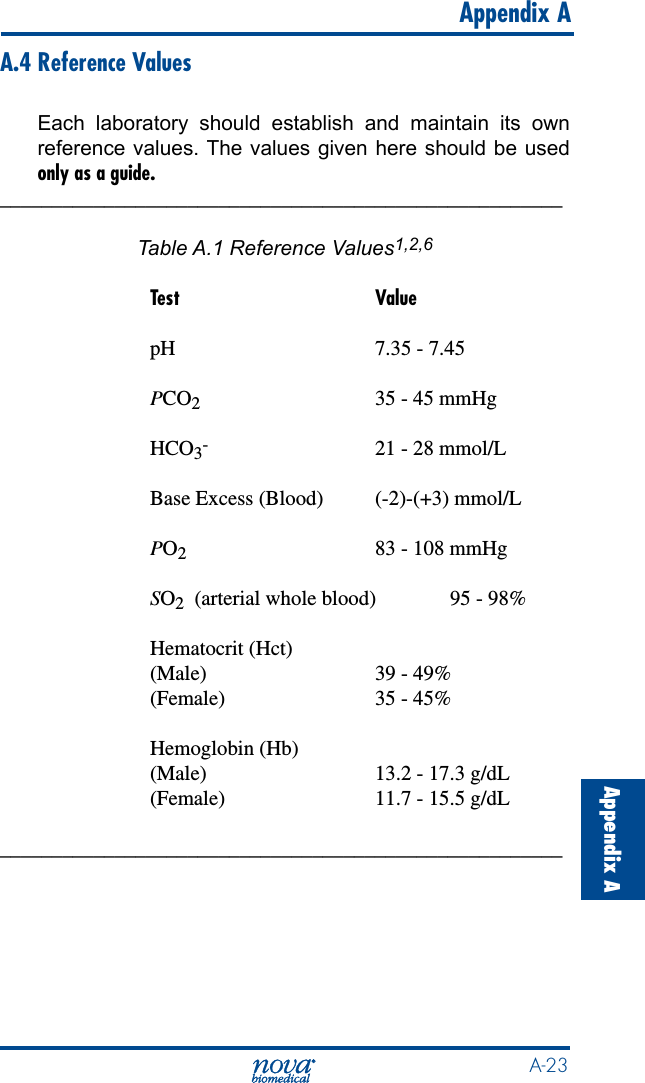
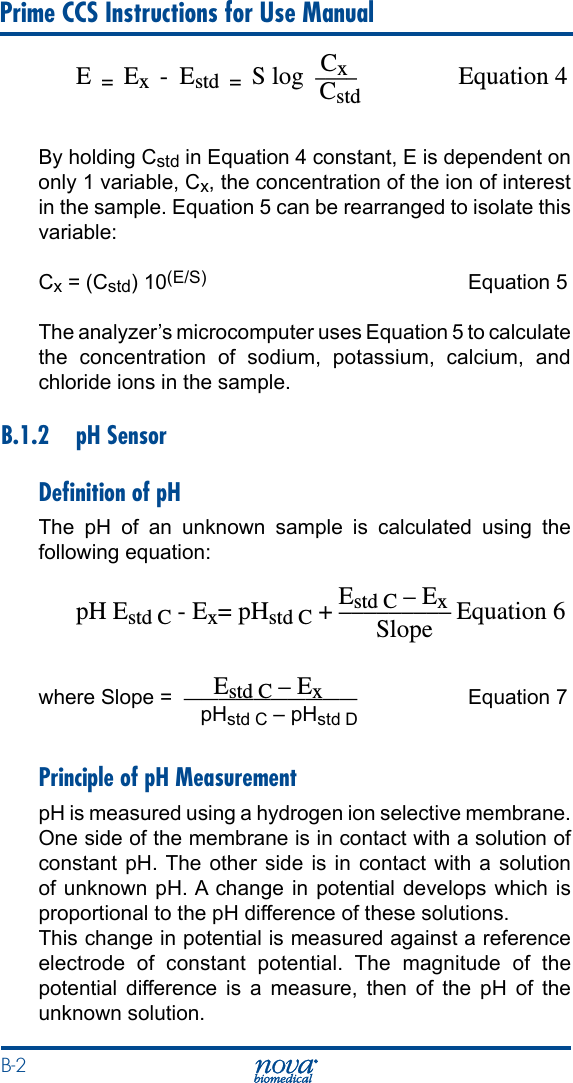
 Equation 13PCO2 (corrected) = PCO2 x e (0.04375(T - 37)) Equation 14PO2 (corrected) = PO2 x 10U Equation 15 (5.49 x 10¹¹) Y + 0.071U = –————————— x (T - 37) (9.72 x 10⁻⁹)Y + 2.30and Y = e[3.88 x ln(PO2)]([ ])](https://usermanual.wiki/NOVA-Biomedical/51360/User-Guide-2077889-Page-92.png)
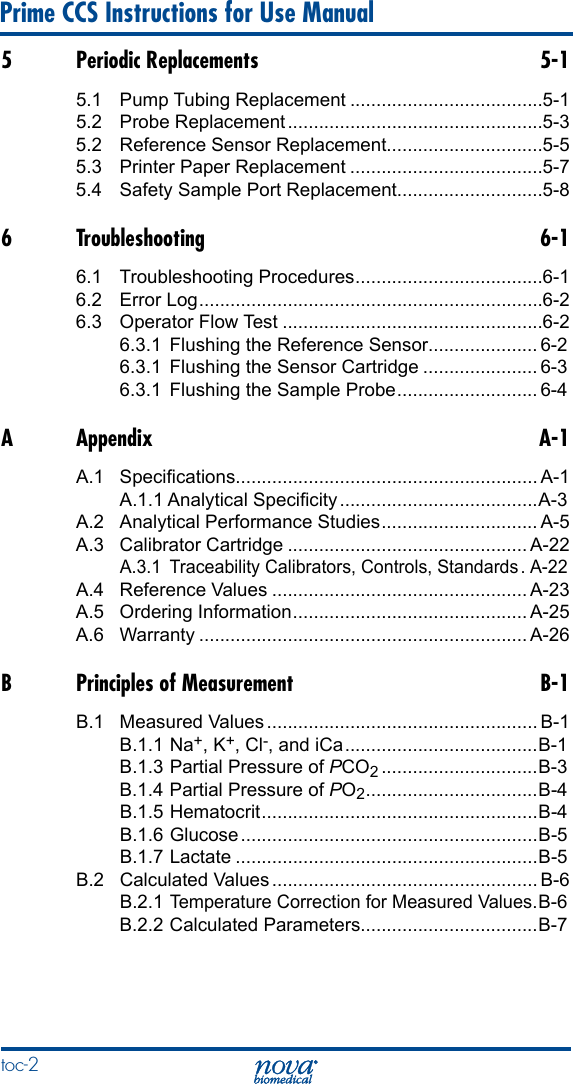
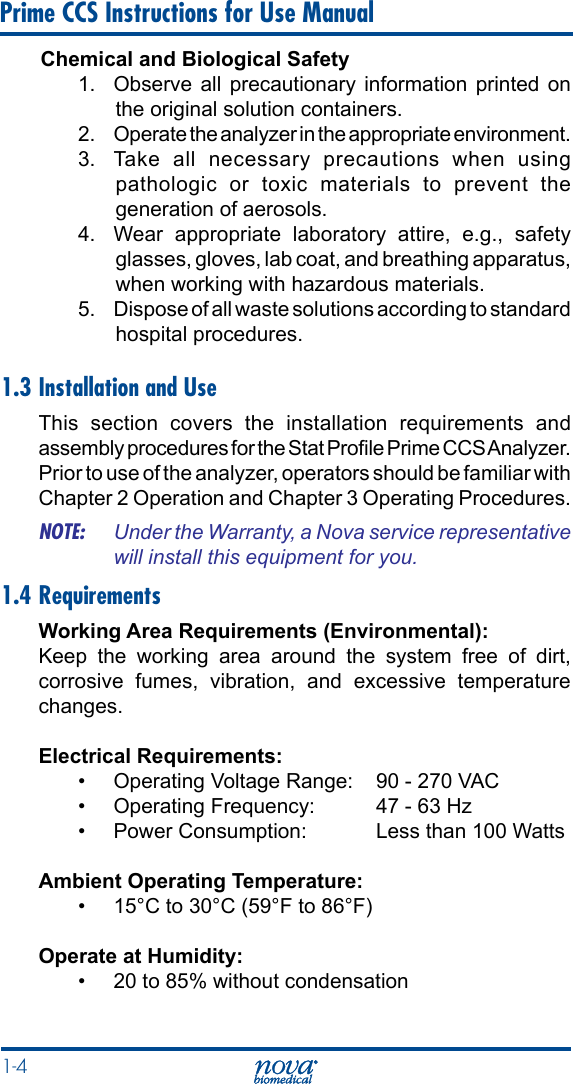
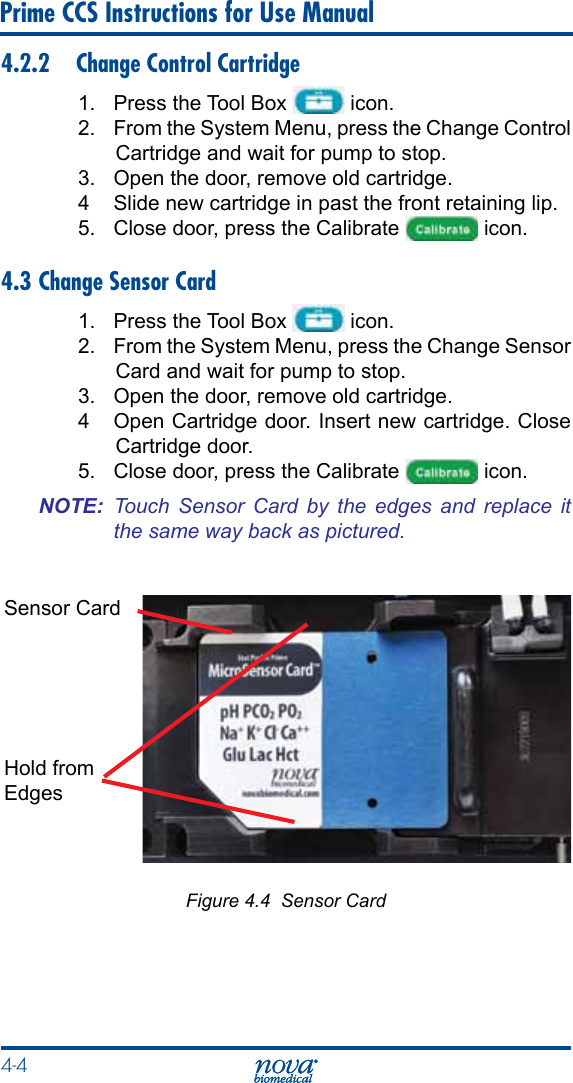
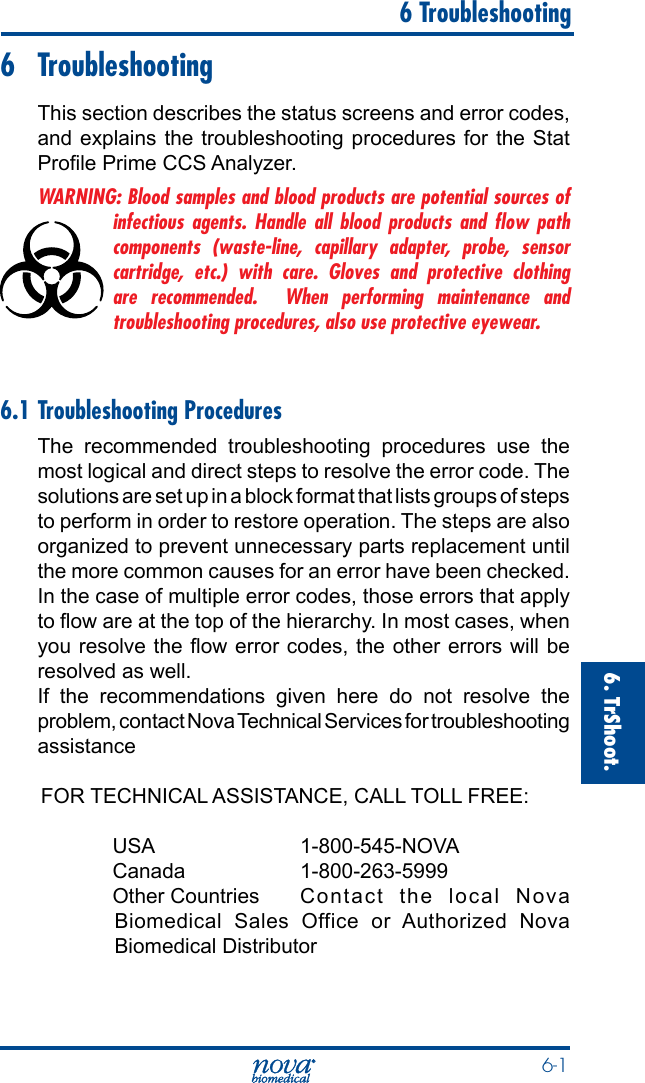
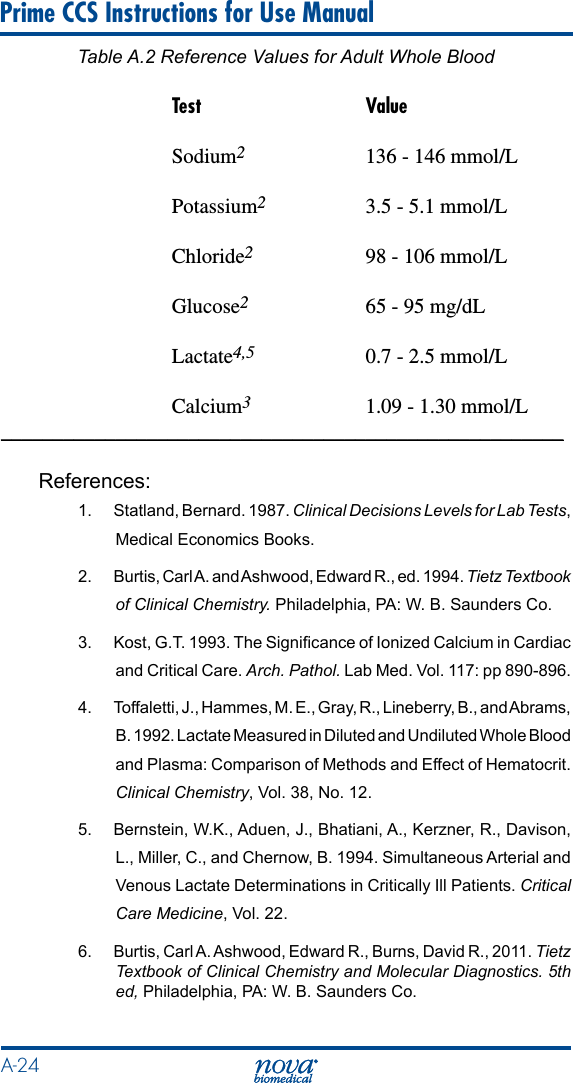
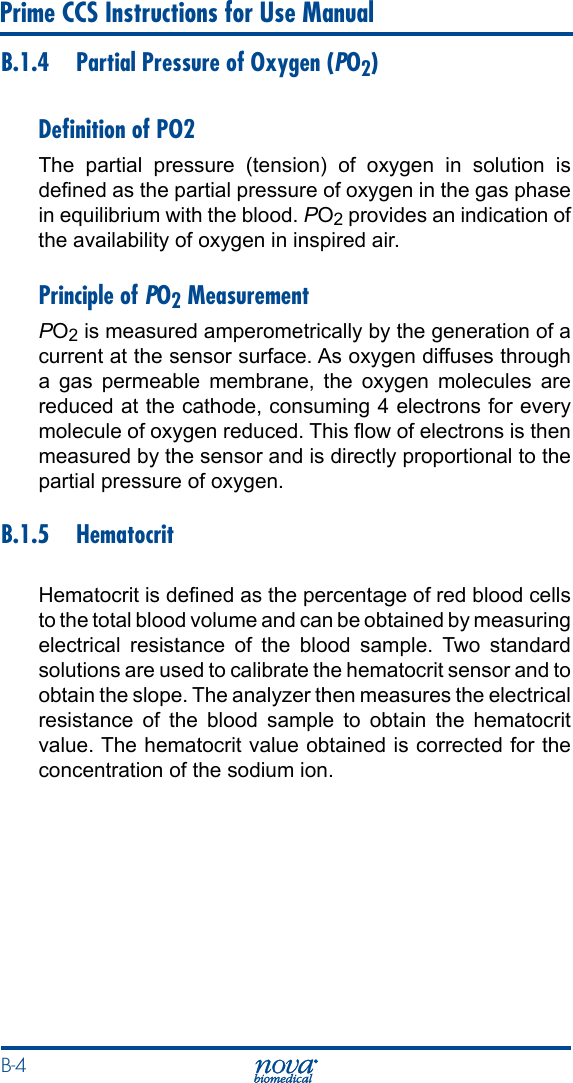
![B-7Appendix B Appendix BB.2.2 Calculated ParametersCalculated Bicarbonate Concentration [HCO3-]2Bicarbonate Concentration (mmol/L) is calculated using the Henderson-Hasselbalch equation: [HCO3-]pH = pK + log –———— Equation 16 α(PCO2 ) where pH and PCO2 are measured.pK = 6.091 α = 0.0307 = solubility coefcient of CO2 in plasma at 37 °C Rearranging Equation 16 gives:Log10 [HCO3-] = pH + log10 PCO2 - 7.604 Equation 17*The equations are from NCCLS standards2.Total Carbon Dioxide Content (TCO2)*TCO2 (mmol/L) includes both dissolved carbon dioxide and [HCO3-] and is calculated as follows: TCO2 = [HCO3-] + α(PCO2) Equation 18where PCO2 is measured and [HCO3-] is calculated from Equation 17.* The equations are from Reference 2.](https://usermanual.wiki/NOVA-Biomedical/51360/User-Guide-2077889-Page-93.png)
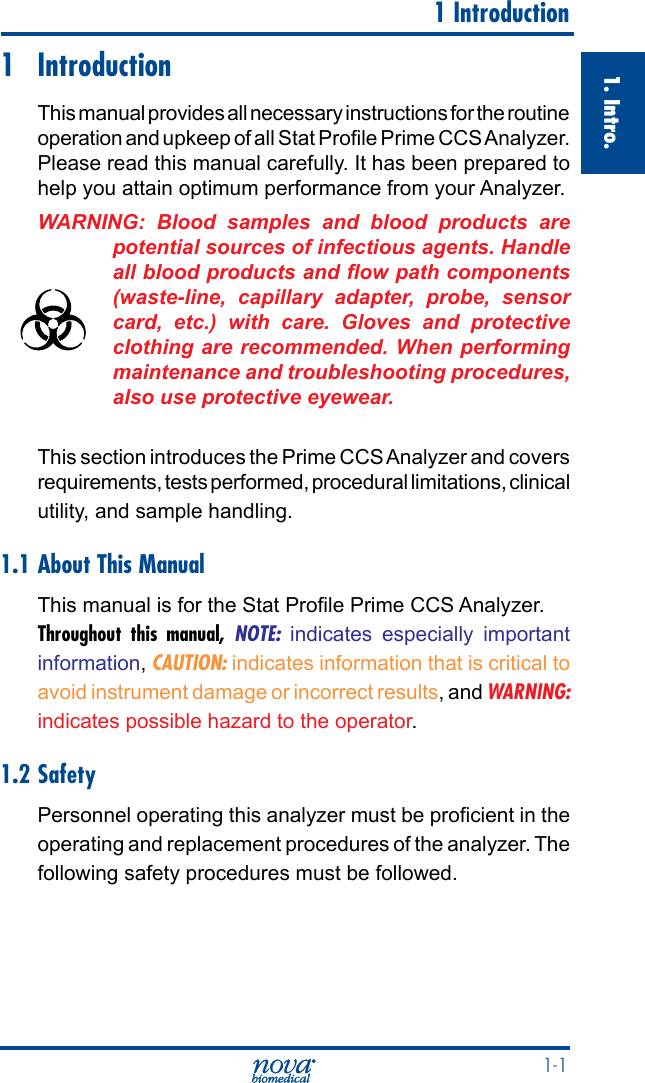
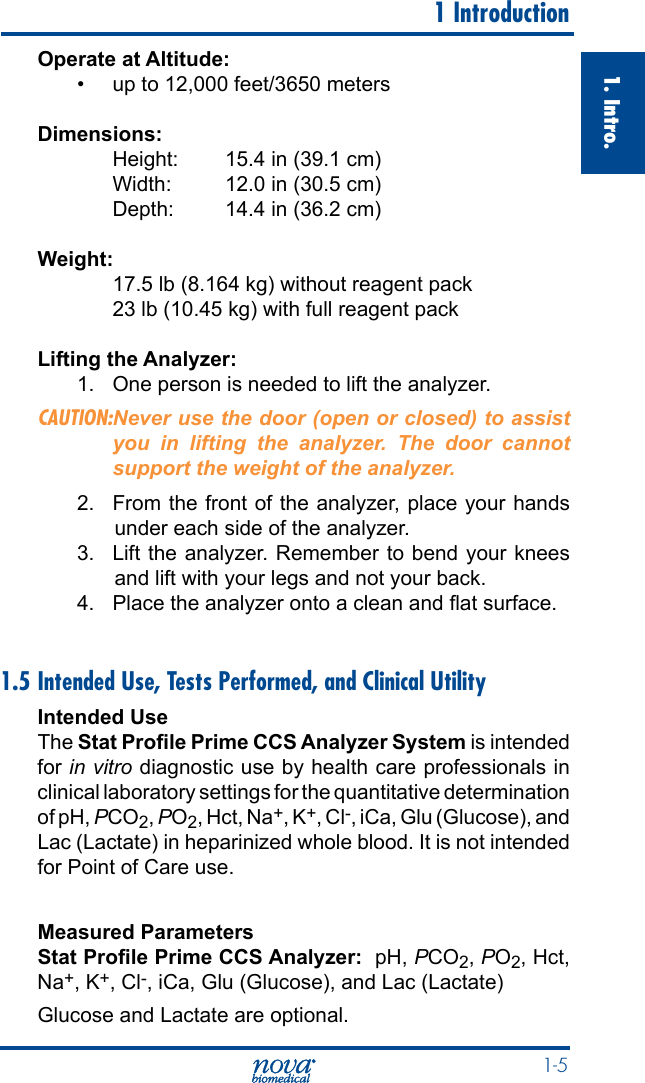
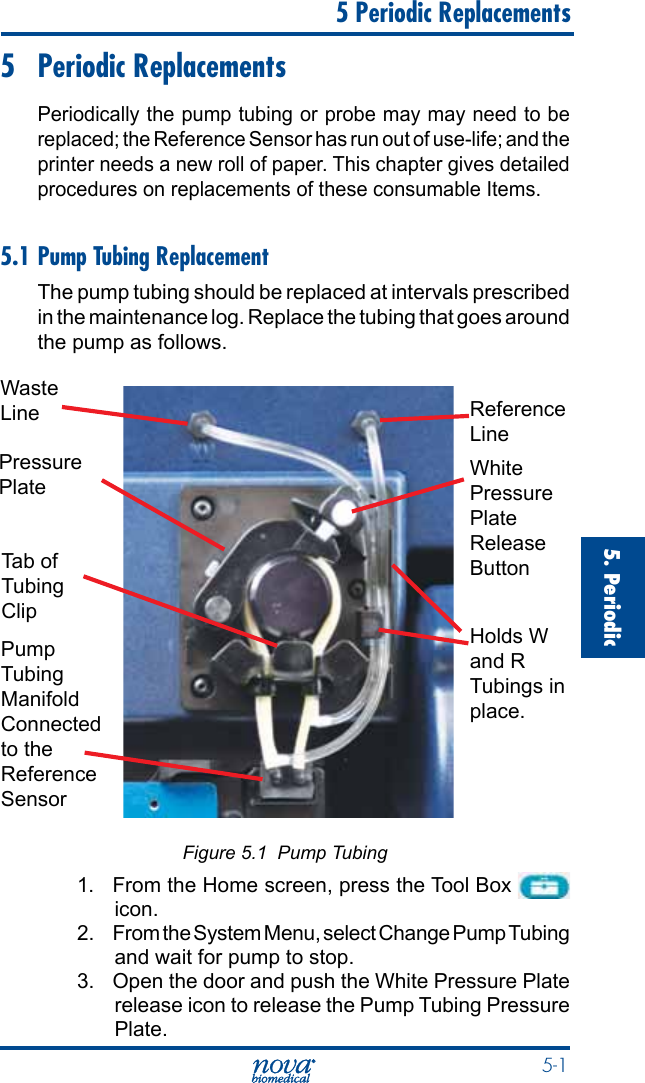
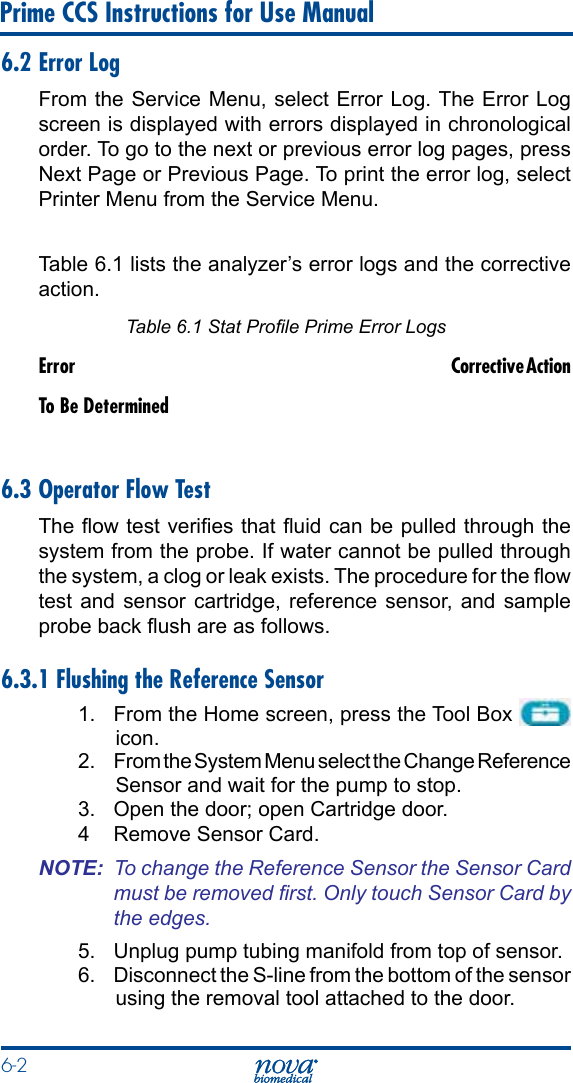
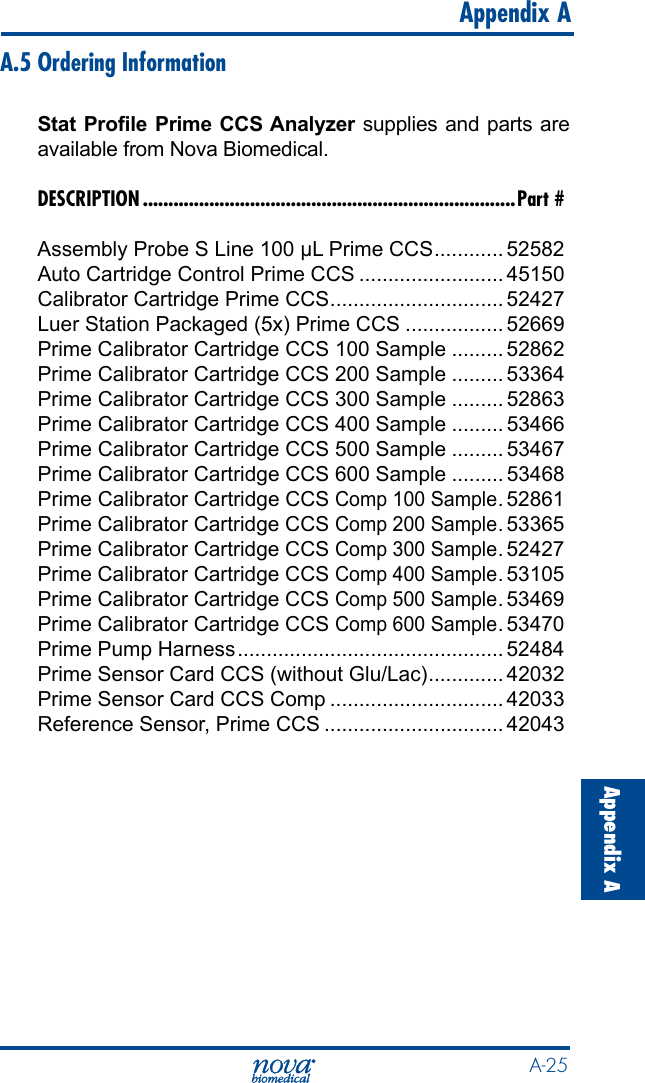
![B-8 Prime CCS Instructions for Use ManualHemoglobin (Calculated)The hemoglobin is calculated based on the following calculation:Hemoglobin g/dL = Measured Hematocrit ÷ 3.0 Equation 19NOTE: The hemoglobin calculation is an estimation based on a normal mean corpuscular hemoglobin concentration of 33.3%. The Stat Prole Prime CCS Analyzer hemoglobin estimation from samples with Red cell dyscrasia or hemoglobinopathies may vary signicantly from hemoglobin measured by cyanmethemoglobin method.Base Excess of Blood (BE-B)*Base excess of blood is dened as the concentration of titratable base needed to titrate blood to pH 7.40 at 37 °C while the PCO2 is held constant at 40 mm Hg. Base excess of blood is calculated as follows:BE-B = (1 - 0.014[Hb]) ([HCO3-] - 24 + (1.43[Hb] + 7.7)(pH - 7.4) ) Equation 20* The equations are from Reference 2.](https://usermanual.wiki/NOVA-Biomedical/51360/User-Guide-2077889-Page-94.png)
![B-9Appendix B Appendix BStandard Bicarbonate Concentration (SBC)The Standard Bicarbonate is dened as the bicarbonate concentration of the plasma of whole blood equilibrated to a PCO2 of 40 mmHg at a temperature of 37 °C with the hemoglobin fully saturated with oxygen. Standard bicarbonate is calculated as follows:SBC = 24.5 + 0.9Z + Z ( Z - 8 )(0.004 + 0.00025 [Hb]) Equation 21where Z = [BE-B] - 0.19 [Hb] ((100 - SO2 )/100)[Hb] = The hemoglobin value which is measured, manually entered, or is the 14.3 g/dL default valueBase Excess Extracellular Fluid (BE-ECF)*The Base Excess Extracellular uid is a corrected form of the Base Excess Blood in which allowance has been made for the fact that blood is only approximately 37% of the extracellular uid volume. Base excess is calculated as follows:BE-ECF = [HCO3-]- 25 + 16.2 (pH - 7.40) Equation 22* The equations are from Reference 2.](https://usermanual.wiki/NOVA-Biomedical/51360/User-Guide-2077889-Page-95.png)
![B-10 Prime CCS Instructions for Use ManualOxygen Content (O2Ct)Oxygen content is dened as the total amount of oxygen contained in a given volume of whole blood, including dissolved oxygen and oxygen bound to hemoglobin. It is expressed in milliliters of oxygen per 100 milliliters of blood (volume %) as calculated from the oxygen saturation and the hemoglobin concentration. Four moles of oxygen (22,393 mL/mol at standard temperature and pressure) can combine with 1 mole of hemoglobin (64,458 g/mol) so that oxygen capacity is equal to 4 (22393)_________ = 1.39 mL of O2 per gram of Hb Equation 23 64458 therefore O2Ct = (1.39 [Hb]) (SO2/100) + (0.0031 [PO2]) Equation 24where 0.0031 is the solubility coefcient of O2.On the analyzer, hemoglobin can be manually entered, calculated from the measured hematocrit, or occur as a default value.Oxygen Saturation (O2Sat)Oxygen saturation is dened as the amount of oxyhemoglobin in blood expressed as a fraction of the total amount of hemoglobin able to bind oxygen. It is calculated as follows: [PO2']3 + 150 [PO2']O2Sat = –––––––––––––––––––––––– x100 Equation 25 [PO2']3 + 150 [PO2'] + 23400where [PO2'] = [PO2] x e [2.3026 x (0.48 (pH – 7.4) – 0.0013([HCO3-] – 25))]NOTE: The equation for calculating oxygen saturation assumes a normal shape and position of the patient's oxygen dissociation curve.](https://usermanual.wiki/NOVA-Biomedical/51360/User-Guide-2077889-Page-96.png)
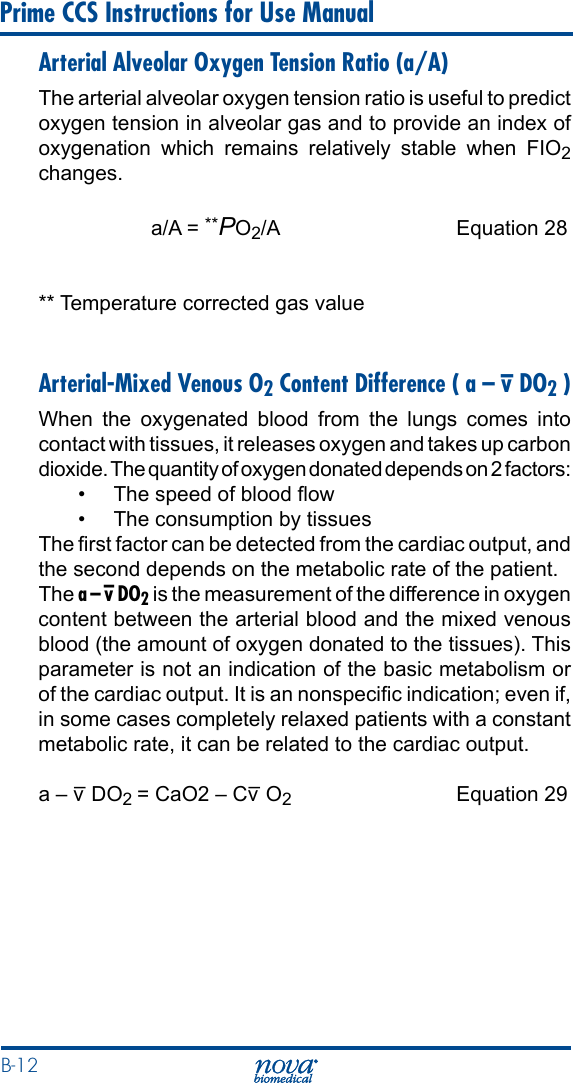
![B-11Appendix B Appendix BAlveolar Oxygen (A)Alveolar Oxygen refers to the partial pressure of oxygen in alveolar gas. It is calculated as follows: %FIO2A = ––––– (B.P. - 0.045T2 + 0.84T - 16.5) - 100 %FIO2 1-(%FIO2/100) **PCO2 –––––– + ––––––––– 100 0.8 Equation 26where T = patient temperature B.P. = barometric pressure %FIO2 = fraction inspired oxygen, as a percent** Temperature corrected gas valueArterial Alveolar Oxygen Tension Gradient (AaDO2)The arterial alveolar oxygen tension gradient is a useful index of gas exchange within the lungs and is dened as: Aa DO2 = A- **PO2 Equation 27** Temperature corrected gas valueNOTE: For capillary samples, AaDO2 results have an asterisk (*). AaDO2 results are dependent on how the samples are drawn and handled, thus care must be taken when interpreting these calculated results.)[(]](https://usermanual.wiki/NOVA-Biomedical/51360/User-Guide-2077889-Page-97.png)
![B-14 Prime CCS Instructions for Use ManualIonized Calcium “Normalized” to pH 7.4The activity and concentration of ionized calcium in whole blood is pH dependent. In vitro, a pH increase of 0.1 unit decreases the ionized calcium level by 4 to 5% (conversely, a pH decrease has an equal but opposite effect). The sample of choice for ionized calcium determination is anaerobically collected whole blood.If an anaerobic sample is not available, by measuring the actual pH of the sample at which the ionized calcium concentration was measured normalized ionized calcium can be calculated. The normalized ionized calcium represents what the ionized calcium concentration would have been if the initial pH was 7.40 (the midpoint of the pH reference range). The equation used for this calculation is as follows:log [iCa] 7.4 = log [Ca++]X - 0.24 (7.4 - X) Equation 33where X = measured pH of the sample[iCa]X = ionized calcium concentration in the sample at the measured pH[iCa] 7.4 = normalized concentration of ionized calcium at pH 7.40The equation assumes a normal concentration of total protein and may be used for measured values between pH 7.2 and 7.6. Between pH 6.9 and 7.2 and between pH 7.6 and 8.0, modied forms of the equation are used. Normalized ionized calcium values for samples with pH outside the range pH 6.9 to pH 8.0 are not displayed.](https://usermanual.wiki/NOVA-Biomedical/51360/User-Guide-2077889-Page-100.png)