NT ware Systemprogrammierung MICARDHID001 RFID Transponder Reader Device for Copy Systems User Manual
NT-ware Systemprogrammierung GmbH RFID Transponder Reader Device for Copy Systems
UserManual.wiki
>
NT ware Systemprogrammierung
>
MICARDHID001 User Manual
User Manual
Navigation menu
Upload a User Manual
Namespaces
Wiki Guide
HTML
PDF
Info
Views
User Manual
Discussion / Help
Navigation
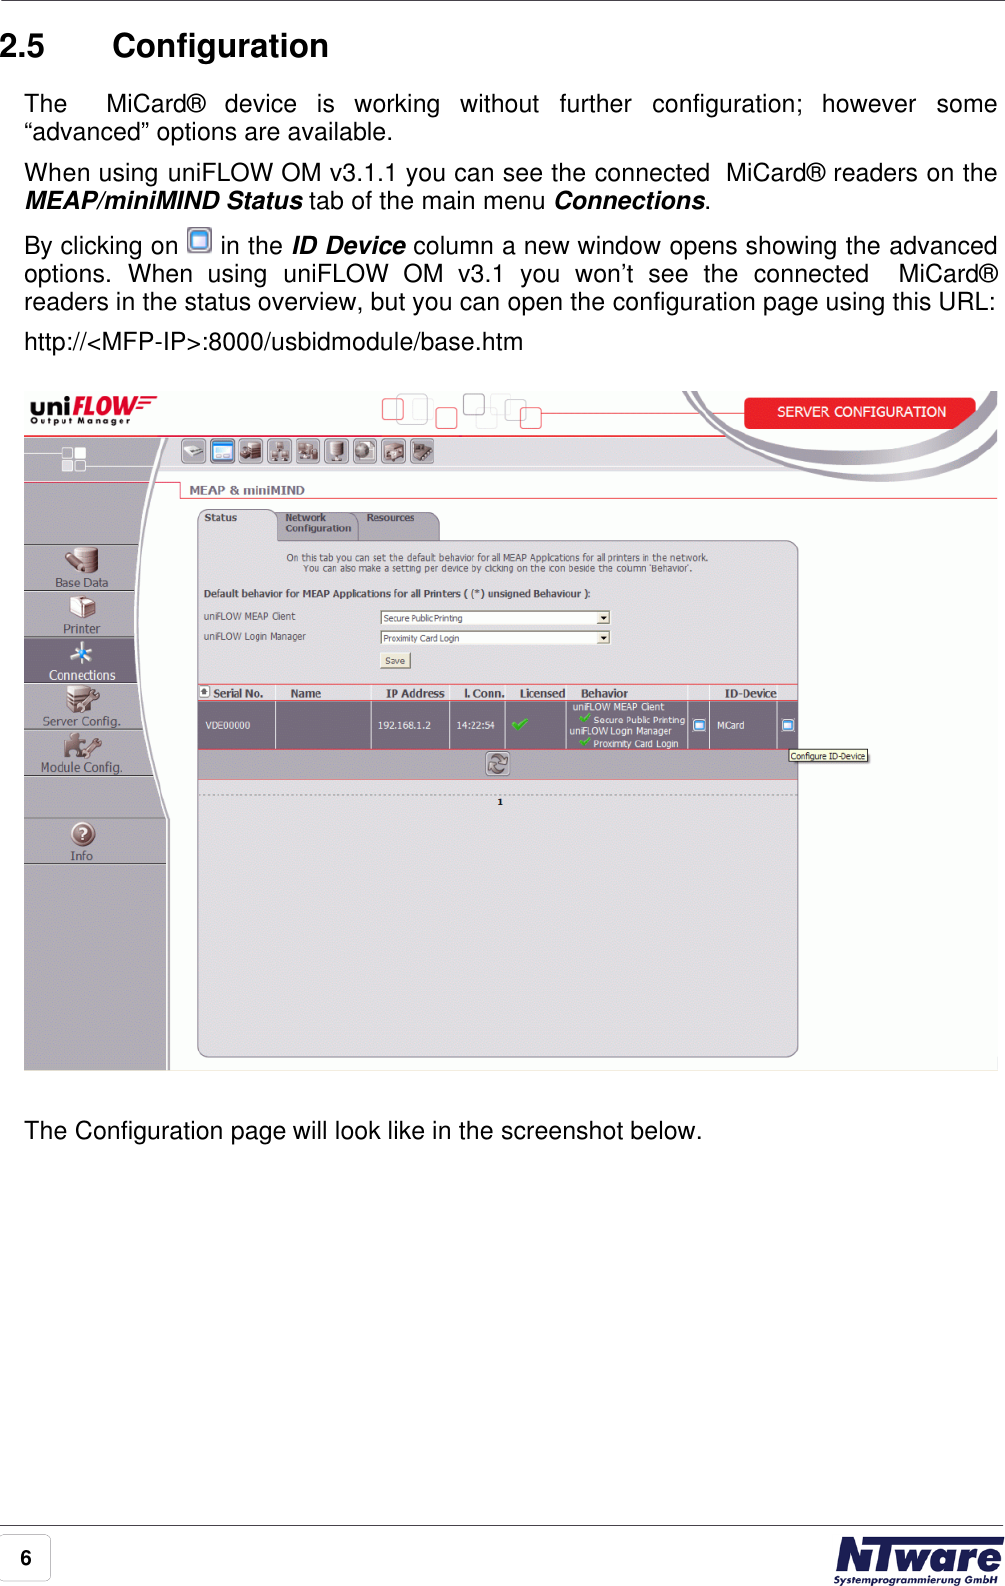
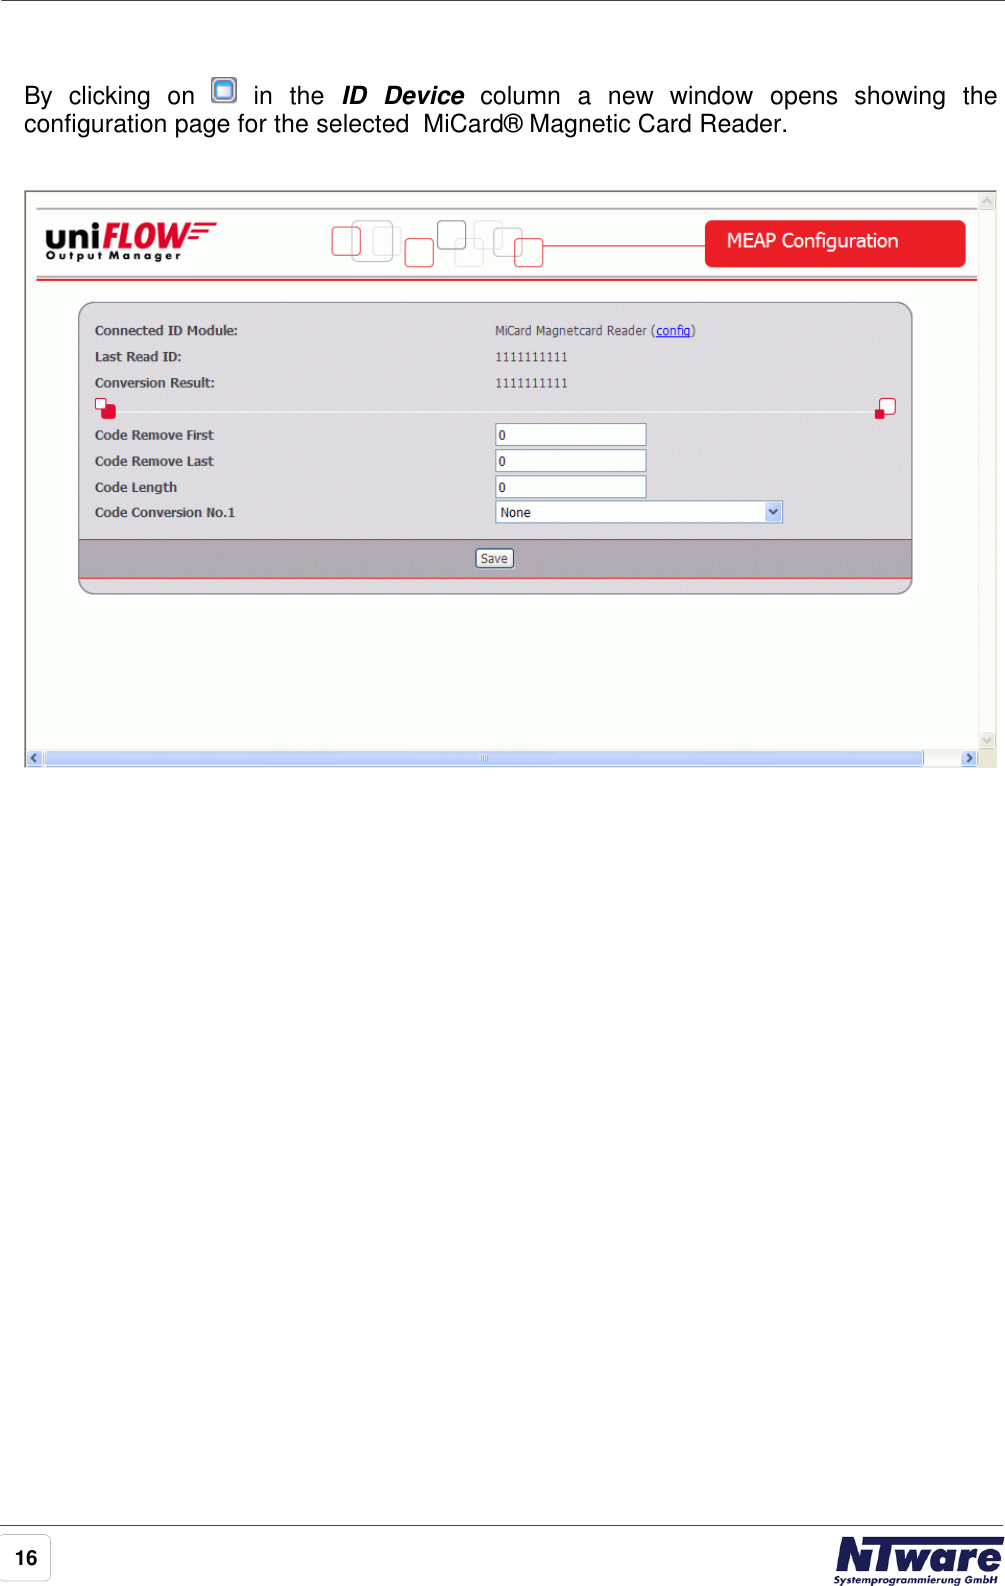
![8specifies the code length applied after the code conversion. For instance a value of 6applied to A881C045 will result in A881C0, whereas a value of 10 applied to A881C045will result in 00A881C045.Code Conversion No. [N] specifies the code conversion that has to be applied to the ID read in a series of codeconversions at step [N]. The result of the code conversions at step [N] is displayed nextto the name of the code conversion in the drop down list. If the result is empty “()”, thiscode conversion can’t be applied in the actual step (cf. screenshot above).](https://usermanual.wiki/NT-ware-Systemprogrammierung/MICARDHID001/User-Guide-988962-Page-10.png)
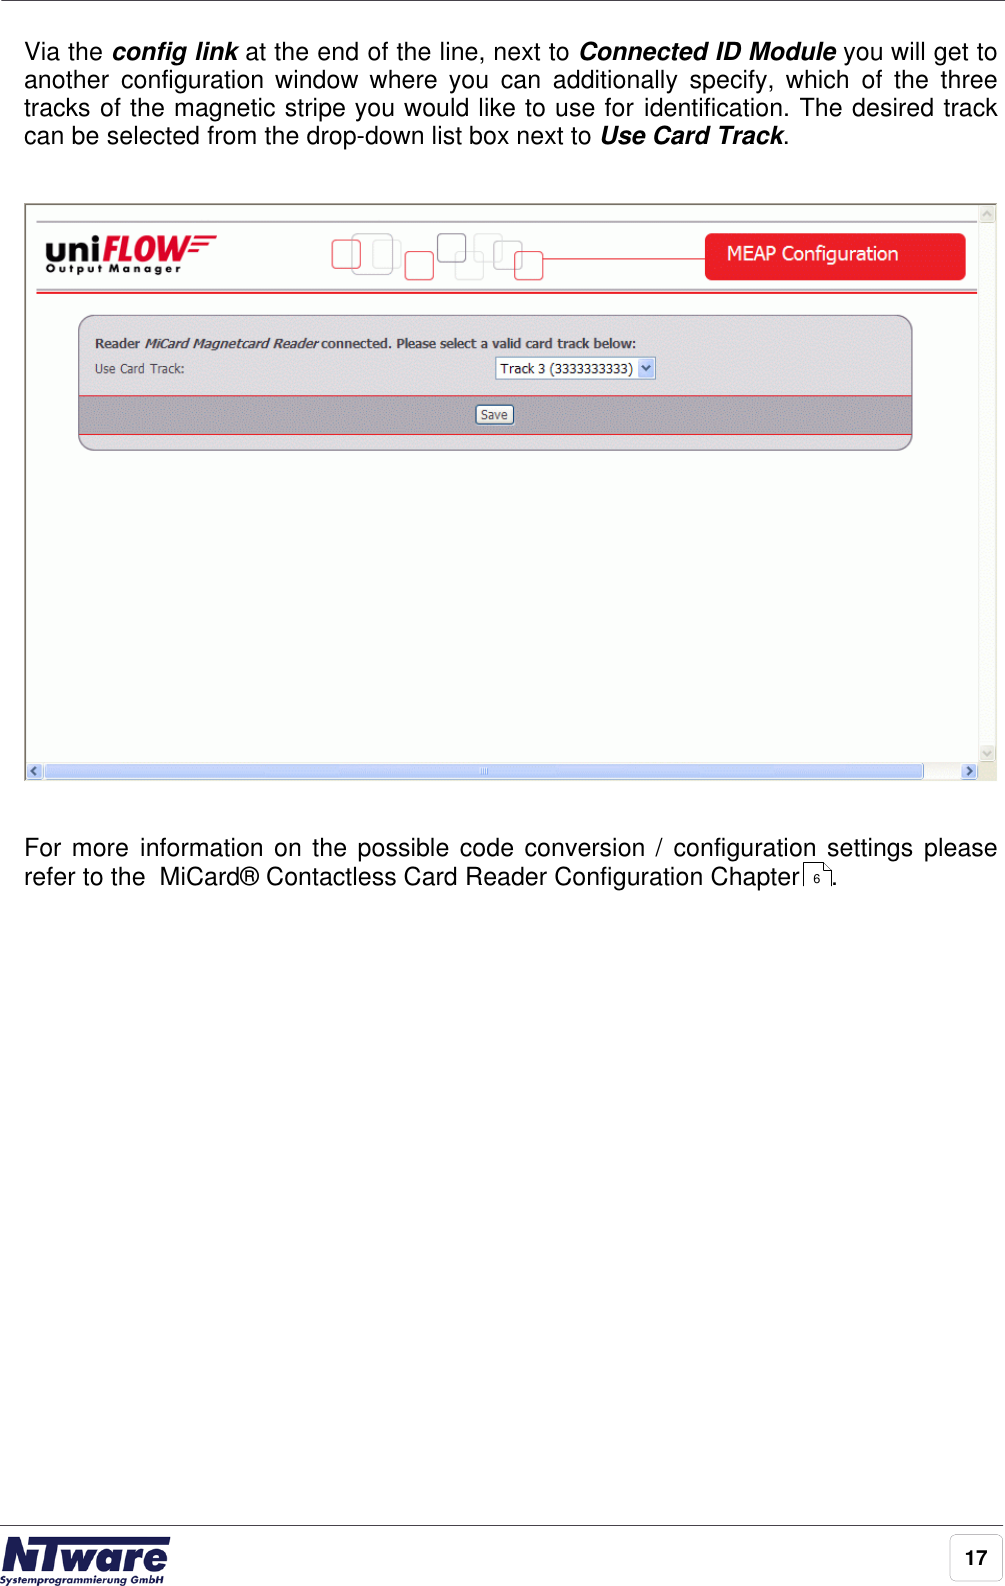
![9After a code conversion step [N] is saved by clicking the Save button the configurationpage will allow to specify code conversion step [N+1] as shown in the screenshotabove.](https://usermanual.wiki/NT-ware-Systemprogrammierung/MICARDHID001/User-Guide-988962-Page-11.png)