NVIDIA P1988W Tablet User Manual P1988w Uer manualx
NVIDIA Corporation Tablet P1988w Uer manualx
UserManual.wiki
>
NVIDIA
>
P1988W User Manual
User Manual
Navigation menu
Upload a User Manual
Namespaces
Wiki Guide
HTML
PDF
Info
Views
User Manual
Discussion / Help
Navigation

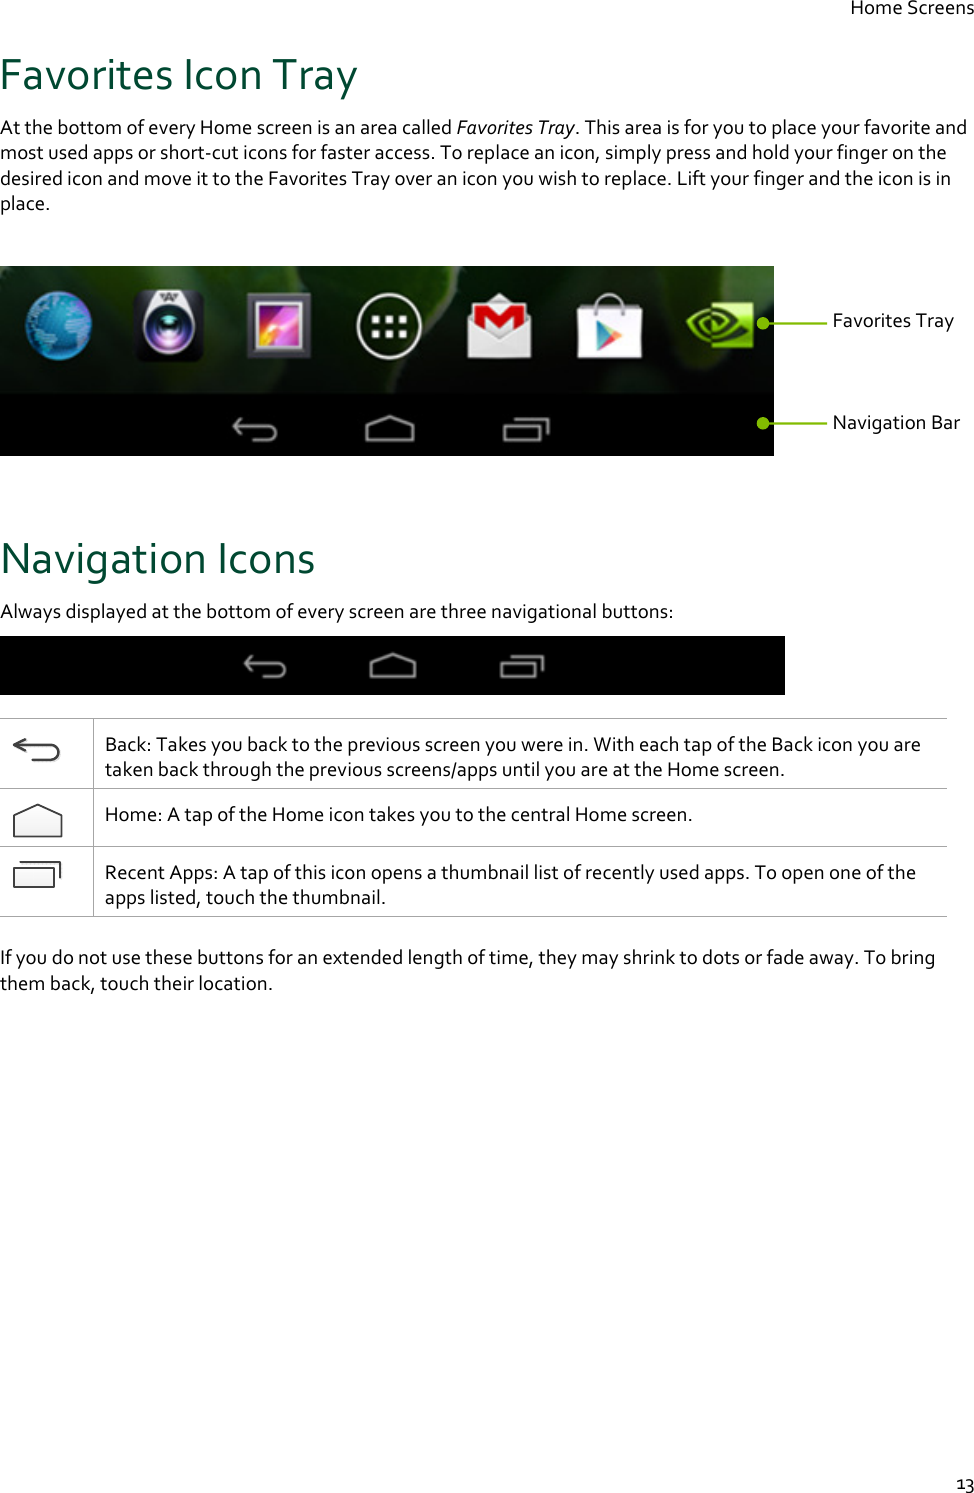
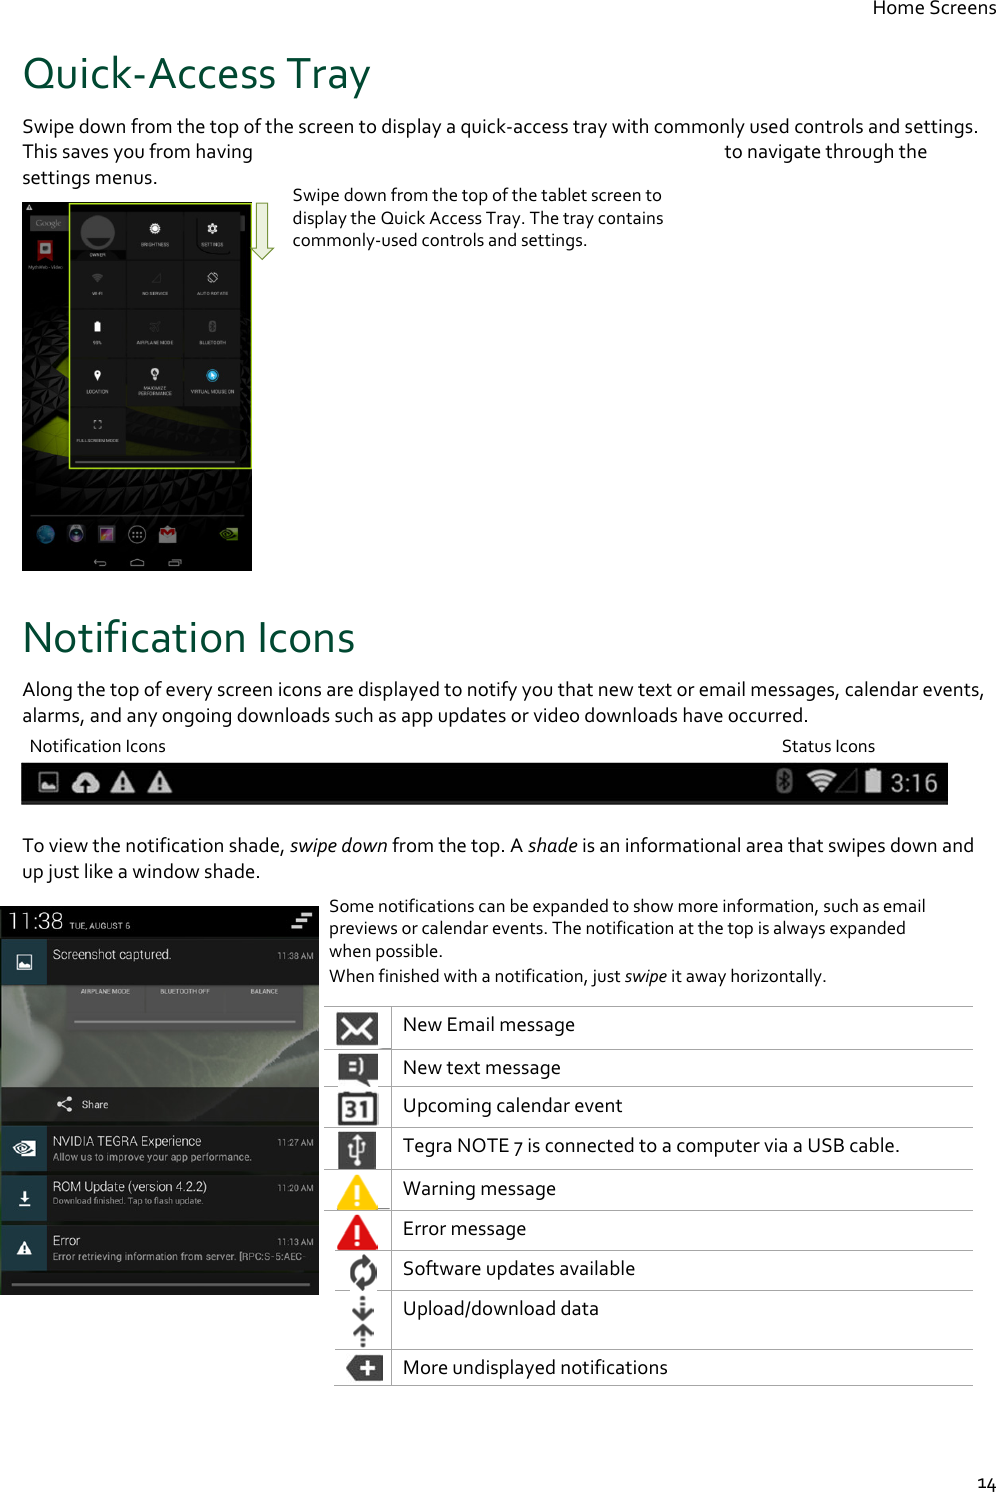
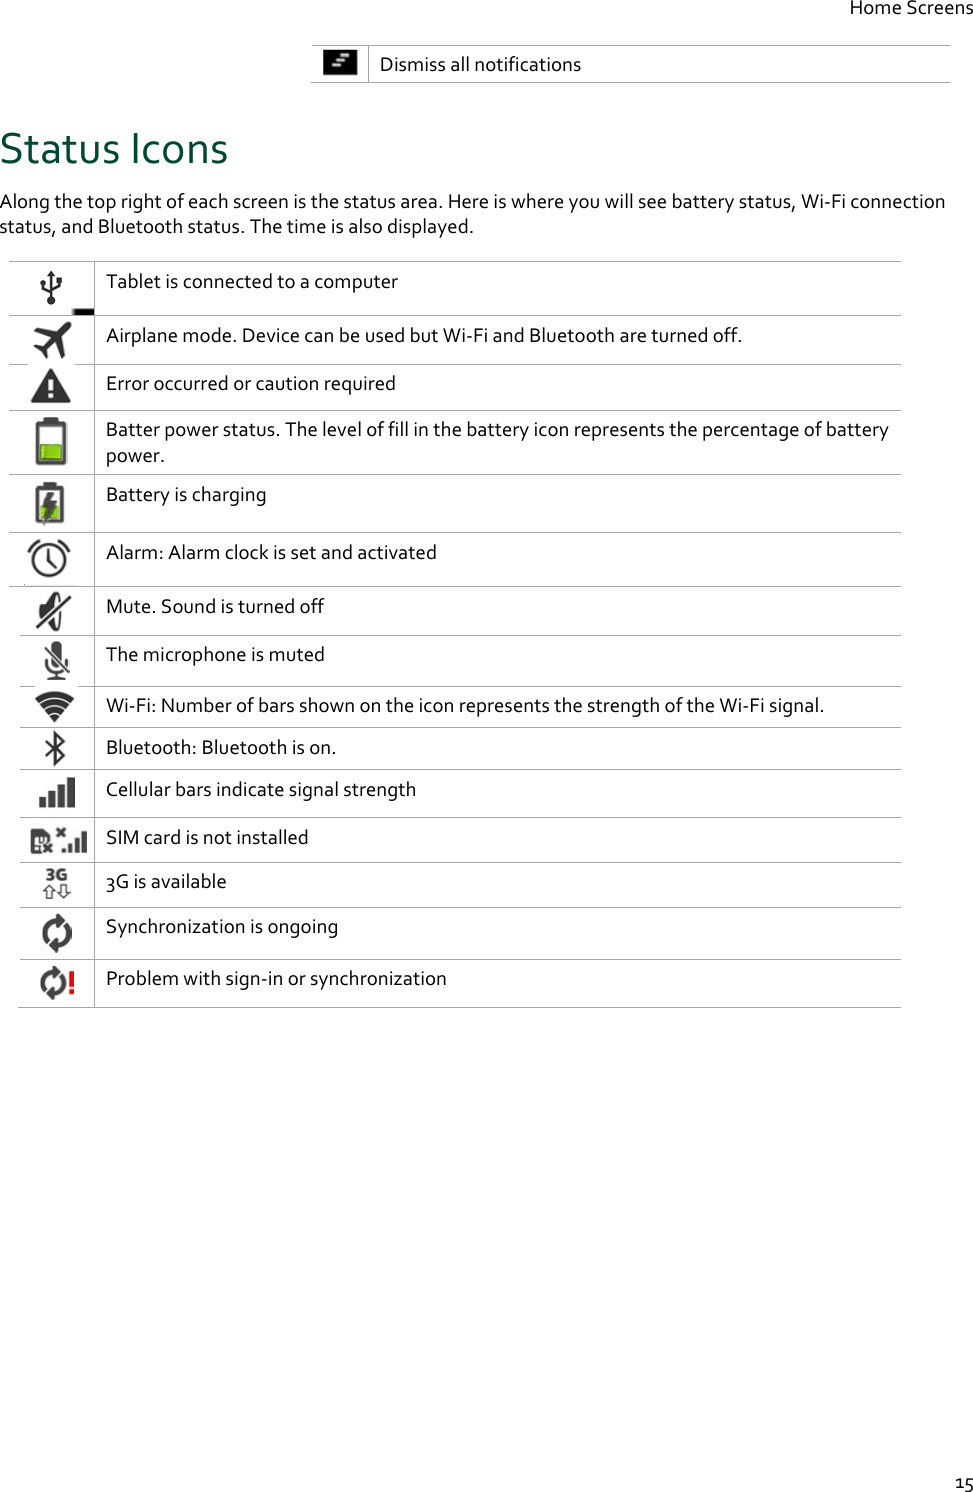
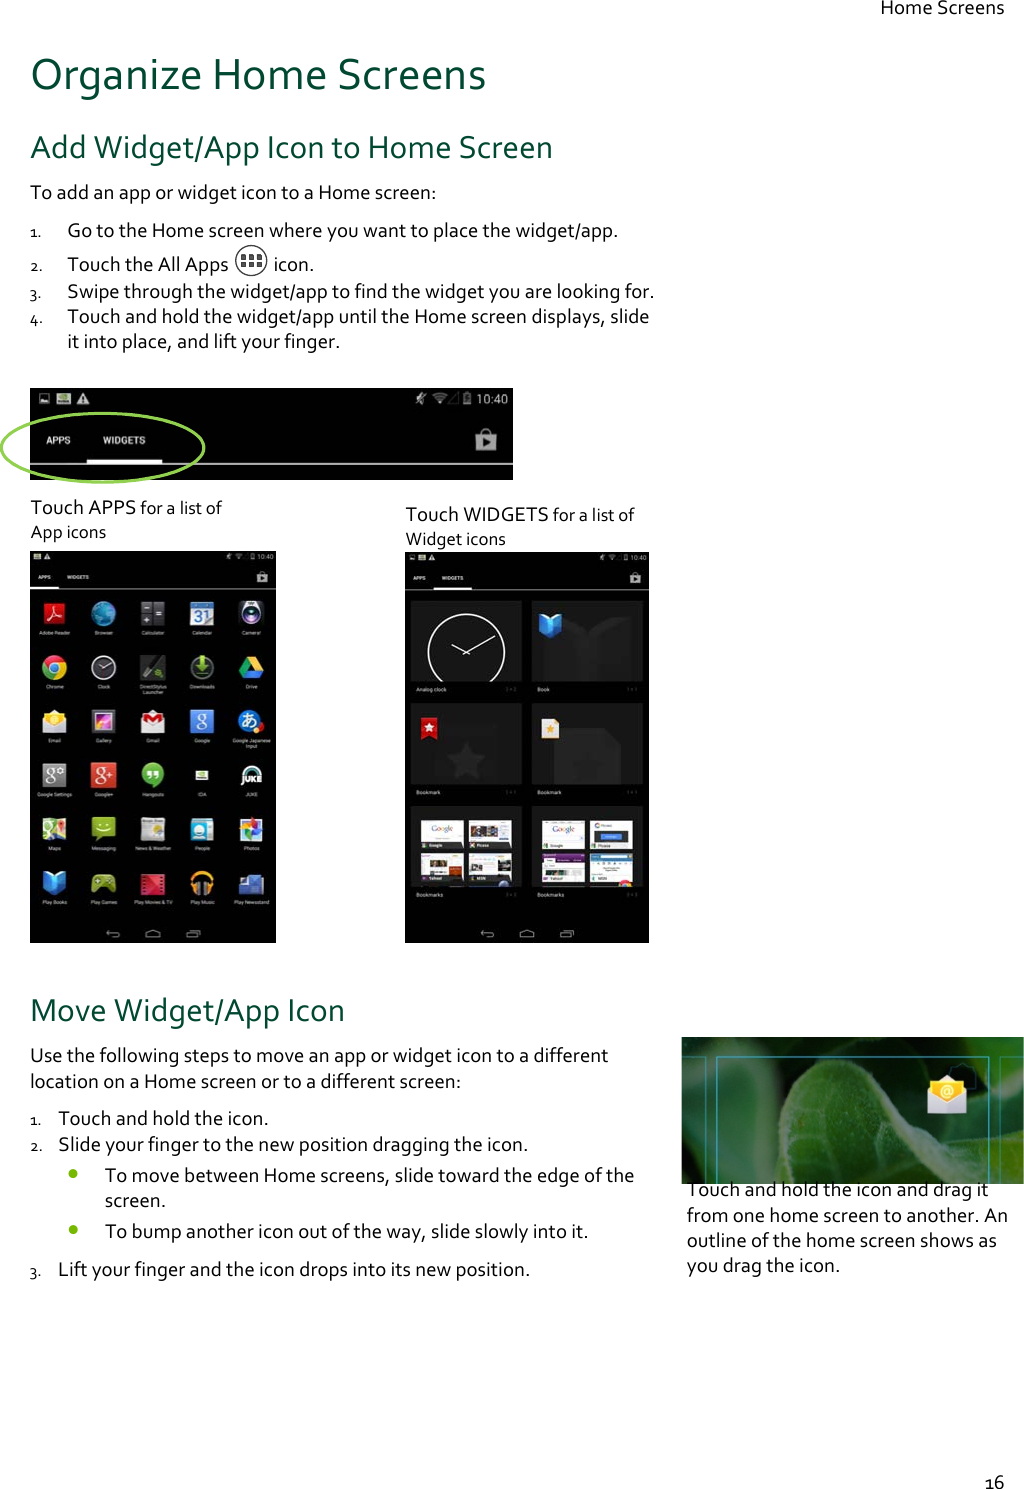


![Health and Safety 51 Never attempt to repair Tegra NOTE 7 yourself. This device does not contain any user-serviceable parts. Do not attempt to open, disassemble, or remove the battery. You run the risk of electric shock. To clean the display, use a soft, lint-free cloth. If necessary, breathe upon the display surface and wipe off immediately and softly. Avoid getting moisture in openings. Don’t use window cleaners, household cleaners, aerosol sprays, solvents, alcohol, ammonia, or abrasives to clean the display. Operate the Tegra NOTE 7 in a place where the temperature is always between 5 and 30°C (41 to 86°F). Store Tegra NOTE 7 in a place where the temperature is always between 0 and 35°C (32 to 95°F) with a relative humidity of 70% or lower. When taking the device from a low temperature condition, allow the device to reach room temperature before turning the power on. Use this product only with approved equipment and/or accessories If the product sustains damage requiring service, disconnect the product from the AC electrical outlet and refer servicing to an authorized service provider. Headset/Earphone Volume Level Notice WARNING: TO PREVENT POSSIBLE HEARING DAMAGE, DO NOT LISTEN AT HIGH VOLUME LEVELS FOR LONG PERIODS. Lithium Battery Notice WARNING: THIS [DEVICE] CONTAINS A NON-USER-SERVICEABLE LITHIUM-ION BATTERY PACK. THERE IS RISK OF EXPLOSION, FIRE, BURN OR LEAKING WHICH CAN BE CAUSED BY IMPROPER CHARGING, SHORTING OF THE BATTERY PACK, CRUSH DAMAGE OR OTHER MISUSE. ALWAYS USE CHARGERS DESIGNED SPECIFICALLY FOR USE WITH THIS [DEVICE]. DO NOT ATTEMPT TO DISASSEMBLE, REPLACE, OR OTHERWISE ATTEMPT TO ACCESS THE BATTERY PACK. CONTACT CUSTOMER SUPPORT FOR REPAIR OR REPLACEMENT INFORMATION. RECYCLE THE DEVICE ACCORDING TO LOCAL RULES AND REGULATIONS. CONTACT YOUR LOCAL WASTE DISPOSAL/RECYCLE FACILITY. Static Charge Notice WARNING: FAILURE TO FOLLOW THESE SAFETY INSTRUCTIONS COULD RESULT IN FIRE, ELECTRIC SHOCK OR OTHER INJURY OR DAMAGE. ELECTRICAL EQUIPMENT CAN BE HAZARDOUS IF MISUSED. OPERATION OF THIS PRODUCT, OR SIMILAR PRODUCTS, MUST ALWAYS BE SUPERVISED BY AN ADULT. DO NOT ALLOW CHILDREN ACCESS TO THE INTERIOR OF ANY ELECTRICAL PRODUCT AND DO NOT PERMIT THEM TO HANDLE ANY CABLES. Magnetic Field Notice WARNING: THE BACK OF YOUR TABLET CONTAINS STRONG MAGNETS THAT MATE WITH THE CUSTOM DESIGNED COVER TO HOLD YOUR TABLET UPRIGHT. THESE MAGNETS MAY AFFECT MAGNETIC STORAGE DEVICES INCLUDING CREDIT CARDS.](https://usermanual.wiki/NVIDIA/P1988W/User-Guide-2284047-Page-51.png)