Narda 8718B Users Manual
8718B to the manual 8f21b708-bc59-409d-85c6-7141b52932f6
2015-02-05
: Narda Narda-8718B-Users-Manual-493536 narda-8718b-users-manual-493536 narda pdf
Open the PDF directly: View PDF ![]() .
.
Page Count: 137 [warning: Documents this large are best viewed by clicking the View PDF Link!]
- Introduction
- Understanding Your Model 8718B
- Probe Selection
- Making a Measurement
- Introduction
- Getting Started
- Entering the Probe Model
- Zeroing the Probe
- Measurement Display Screens
- Main Measurement Display Screen
- Alternate Measurement Display Screen
- Bar Graph Ranges
- Testing the Probe
- Using Probe Correction Factors
- Checking or Changing the Probe Model
- Measurement Uncertainty
- Making a Measurement
- Precautions
- Using the Menu System
- Units of Measure
- Spatially Averaged Measurements
- Data Logging
- Time-Averaged Measurements
- Alarm Settings
- Using The RF Exposure Standards Feature
- Back Light and Battery Status
- Keypad Lockout and Display Blanking
- Probe Zero
- Advanced Settings
- Operation with a Fiber Optic Link
- Operation with a Data Recorder
- User’s Software
- Description
- System Requirements
- Installing the User’s Software
- Starting and Exiting the 8718B User’s Program
- Establishing Communications between the Meter and the Computer
- Main Menu Screen
- Viewing or Changing Probe Calibration Data
- Viewing Installed Probes
- Installing a Probe
- Probe Installation Screen
- Removing Installed Probes
- Downloading Logged Data from the Meter
- File Format for Survey Data
- Selecting a File to View
- Logged Survey Data Window
- Logged Survey Data Screen
- Printing a Logged Data Record
- Exporting Data
- Clearing the Meter’s Memory
- Diagnostics
- Update Meter Firmware
- Appendix A: Communications with a Computer
- Appendix B: Theory of Operation
- Appendix C: Maintenance
- Index
- Warranty
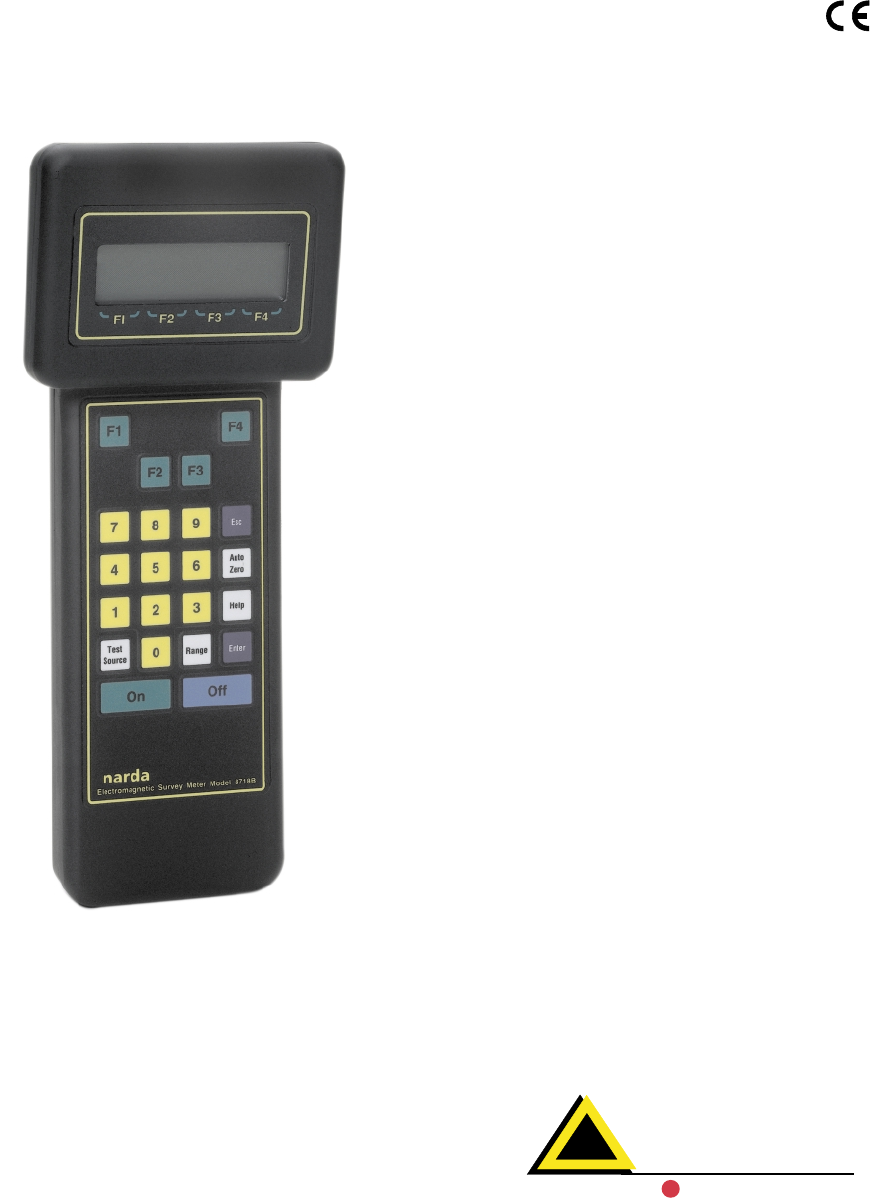
USER'S GUIDE
Model 8718B
Electromagnetic
Radiation
Survey Meter
P/N 42983600 RevB
narda
Safety Test Solutions
an communications company
L
3

1Chapter 1 Introduction
1Introduction
About the Model 8718B
Your Model 8718B is a hand-held, battery-powered
meter designed to simplify the measurement of
electromagnetic fields. It can be used with any
Narda 8700 Series probe. The 8718B is an
upgraded version of the original Model 8718.
Although there are many enhancements, the
8718B is most easily distinguished from its
predecessor by the quick-release style probe
connector.
The meter enables you to perform both simple
measurements and more demanding ones that
require averaging and/or data logging. It can be
mounted on a tripod and used with an optional
fiber optic link for enhanced accuracy in certain
applications.
Getting Started with the Model 8718B
It is important to become familiar with the Model 8718B before
you use it. Chapter 2 explains the basic meter hardware.
Chapters 3 and 4 cover probe selection and basic operation.
The menu system, which is the gateway to all the meter’s
advanced features, is the subject of Chapter 5.
It is strongly recommended that, as a minimum, you read
Chapters 2-4, and preferably Chapter 5, thoroughly before you
attempt to use the Model 8718B. The advanced features in
Chapters 6 though 17 can then be referred to as required.
Chapter 18 covers the use of the User's Software.
Return the Owner
Registration Card for
updates and your
copy of the
Applications Booklet.
Note

2Operating the Meter
User’s Guide Updates
This User’s Guide was thoroughly reviewed for accuracy prior to
publication. Corrections to this guide necessitated by errors or
omissions or by minor revisions to the meter firmware will be
covered in the README file enclosed with the User's Software.
The README file is available at any time from the HELP menu
within the User's Software.
Equipment Supplied
Your Model 8718B is supplied with:
•Meter
•Battery Charger/Power Supply
•Power Cord (230 volt chargers only)
•Storage Case
•Probe Extension Cable Model 8744-04
•Electric Field Attenuator Model 8713B
•User's Software (CD-ROM)
•Computer Cable
•User’s Guide
Using this Guide with a Model 8718
The Model 8718 can be upgraded to take advantage of most, but
not all, of the improvements incorporated into the Model 8718B.
The upgrade includes some minor hardware changes and the
installation of the Version 3.0 firmware that is described in this
guide. There are only a few differences in the operation of a
Model 8718 upgraded with Version 3.0 firmware versus the new
8718B. Those differences are noted in this guide.
3Chapter 2 Understanding Your Model 8718B
2Understanding Your Model 8718B
General Description
It is important to be familiar with the Model 8718B before
you use it. This section includes descriptive data keyed to
highlighted illustrations to help you locate the various features
of the meter. The descriptions not only identify the features but
tell you how they are used.
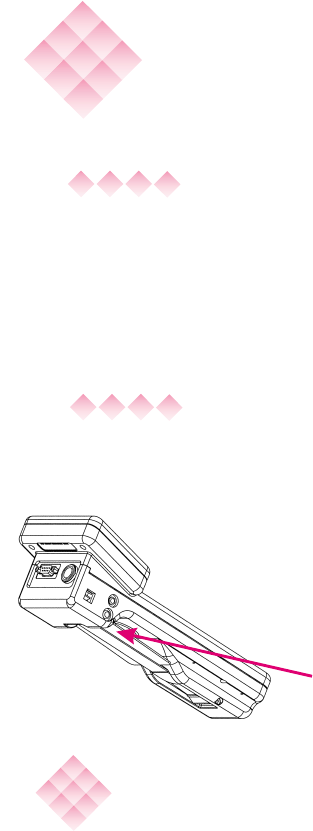
Battery Charger and Power Cord
The battery charger and power cord are used to recharge the
battery within the Model 8718B.
To recharge the meter, first connect the cable of
the battery charger to the larger jack on the left
side of the meter. Make sure the plug is fully
inserted into the jack. Connect the power cord to
the wall outlet.
The battery will be fully charged in about 8 hours.
The indicator light on the charger illuminates
during charging. A full charge will give you about
20 hours of operation (approximately 6.5 hours if
back lighting is used).
The charger can also be used to power the
Model 8718B when it is to be operated for periods
beyond the capacity of the battery.
NiCad batteries
should be fully dis-
charged (<20% indi-
cation) before
recharging. Charge
for a minimum of 8
hours. See Checking
Battery Status in
Chapter 12.
Note
4Operating the Meter
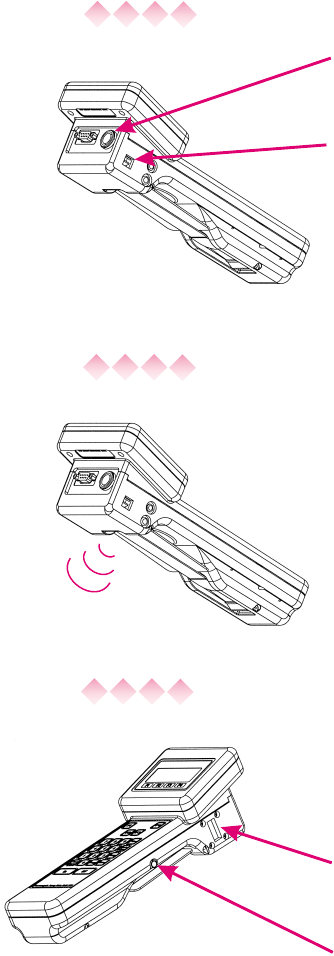
Probe Connection
To make measurements, you must use your
Model 8718B with a compatible probe. Connect
the cable of the probe to the probe connector
located at the top of the unit.
If you use a fiber optic link, the probe connects to a
fiber optic transmitter. A fiber optic cable connects
the transmitter to the rectangular fiber optic jack on
the left side of the meter.
Audio Alarm
Your Model 8718B is equipped with an audible
alarm that emits sound through a tiny hole on the
bottom of the meter. The alarm sounds whenever
the field strength exceeds the measurement range
of the probe (over ranges).
You can also set the meter to sound its alarm at a
specific level and/or turn on a variable-tone mode.
Probe Test Sources
Your Model 8718B is equipped with two RF
sources for testing your probes. The Test Source
key will turn these sources on. They will stay on for
approximately 20 seconds.
A microwave (waveguide) window on the right side
of the probe is used for testing high frequency
probes.
A contact on the right side of the meter is used for
testing low frequency probes. Most probes have
three test points on the head of the probe.

5Chapter 2 Understanding Your Model 8718B
Strap and Tripod Mount
A strap is provided on the underside of the Model
8718B. It has a hook and loop closure to permit
easy adjustment, around your hand.
Behind the strap is a threaded connector used to
secure the meter to a tripod. Loosen the strap to
access this connector.
Operation With a Computer
To update probe calibration information or retrieve
stored measurements, you must connect your
Model 8718B to a personal computer and use the
User's Software provided by Narda.
See Chapter 18, User's Software.
Operation With a Recorder
To obtain a continuous record of measurement
over an extended period of time, you can connect a
data recorder to the smaller jack located on the left
side of the meter.
See Chapter 17, Operation with a Data Recorder.

6Operating the Meter
Keypad
The Model 8718B has four groups of keys distinguished by their
color.
Function keys (green)
Numeric keys (yellow)
Special Function keys (white)
Power keys (blue, green)
Power Keys
Two power keys are used to turn the Model
8718B On and Off.
Function Keys
Use the four function keys
(F1-F4) to select the options displayed on
the bottom line of the display screen
directly above the F1, F2, F3, and F4
markings. In a few cases the options will be
spelled out on the display.
The keys on the
8718B must be firmly
depressed to per-
form their function
and give a tactile
feedback when prop-
erly depressed.
Note

7Chapter 2 Understanding Your Model 8718B
Numeric Keypad
Use the numeric keypad to enter number data into the Model
8718B. You also use the numeric keypad to select a numbered
option listed on the display screen.
Special Function Keys
Six special function keys enable you to perform specific
functions.
Esc Returns you to the previous menu. In a few
cases you must enter a selection rather than
use the Esc key.
Auto Enables you to automatically zero the meter
Zero and probe.
Help Displays a help screen that explains your options.
Test Turns on the built-in low frequency and high
Source frequency probe test sources for approximately
20 seconds.
Range Locks in a specific measurement range for the
bar graph. The digital display is not affected. The
meter automatically displays a digital value over
the probe’s entire measurement range. See Bar
Graph Ranges on page 23.
Enter Stores data you entered with the numeric
keypad. Confirms an option you selected from
a menu screen.
8Operating the Meter

9Chapter 3 Probe Selection
Introduction
The 8700 series RF measurement system offers a very broad
selection of probes. The factors that you should consider in
selecting the probe, or probes, best suited for your task are
described in this section.
3Probe Selection
The probe frequency range should include the frequencies of all
the emitters to be surveyed at one time.
The measurement range of the probe should be adequate for
the field levels that you anticipate, i.e., do you expect strong
fields or weak fields? Probes give more accurate and more
stable readings when they are not used at the extreme low end
of their sensitivity range. Therefore, if you anticipate measuring
very weak fields, select a probe with a lower power full-scale
measurement range to get greater sensitivity. In contrast, higher
power probes give additional safety margins, especially at
microwave frequencies where field strength can change rapidly
with a small change in distance to the source. Select a probe
with a higher power full-scale measurement range if you
anticipate measuring high level fields.
Most standards recommend that you measure both electric (E)
and magnetic (H) fields below 300 MHz (due to the possibility
that measurements may be made in the near field). Since most
experts agree that the electric field poses a greater danger at
lower frequencies due to induced and contact currents that can
occur, the electric field is normally measured first. Higher
frequency measurements are normally made of only the electric
field since measurements will generally be made in the far field.
FREQUENCY
RANGE
POWER
DENSITY
OR FIELD
STRENGTH
ELECTRIC FIELD
VERSUS
MAGNETIC
FIELD
Key Factors in Selecting a Probe

10 Operating the Meter
Flat response probes are the most common. Narda’s patented
shaped frequency response probes read out in Percent of
Standard and are particularly useful in complex, multi-signal
environments where exposure limits are different for the various
emitter frequencies and in classified environments.
The majority of the 8700 series probes have four-inch (10 cm)
diameter heads. The minimum measurement distance for
these probes is about 4 inches (10 cm) from the outside surface
of the probe. Measurements made at closer distances can
result in inaccurate readings due to capacitive coupling. The
Models 8721D, 8723D, and 8725D have two-inch (5 cm)
diameter heads that can be used as close as 2 inches (5 cm)
from the source to the outside of the probe. These probes are
ideal for the measurement of waveguide leaks. Similarly, the
Model 8781D has a one-inch (2.5 cm) diameter head with a
flexible shaft that is designed for locating leaks in densely
packaged microwave systems.
Shaped Frequency Response Probes
The goal in designing and manufacturing a traditional, “flat”
frequency response probe is to make the probe equally
responsive to energy at every frequency within its rated
frequency range. In contrast, Narda’s patented shaped
frequency response probes are designed and manufactured so
that their sensitivity mirrors a particular standard as closely as
possible. For example, many of the major standards in the
world set limits for maximum exposure at the lowest frequencies
of 100 mW/cm2. These same standards typically limit exposure
in the VHF region to 1 mW/cm2and to 5-10 mW/cm2in the
microwave region. A shaped frequency response probe
designed for such a standard is 100 times more sensitive in the
VHF region than at the lowest frequencies. The result is that
energy from all sources within the probe’s rated frequency
range are not only summed in terms of RMS power but are also
weighted in direct proportion to a particular standard's
frequency dependent exposure limits.
FLAT
RESPONSE
OR SHAPED
FREQUENCY
RESPONSE
SIZE AND
MINIMUM
MEASUREMENT
DISTANCE
11Chapter 3 Probe Selection
The readout on the 8718B is shown in terms of Percent of
Standard. The full scale of Narda’s shaped probes is typically
either 300% or 600% of a standard. This permits measurements
of exposure environments where the weighted field strengths
range from as high as three to six times the maximum
permissible exposure (MPE) level to environments where the
levels are less than one percent of the MPE.
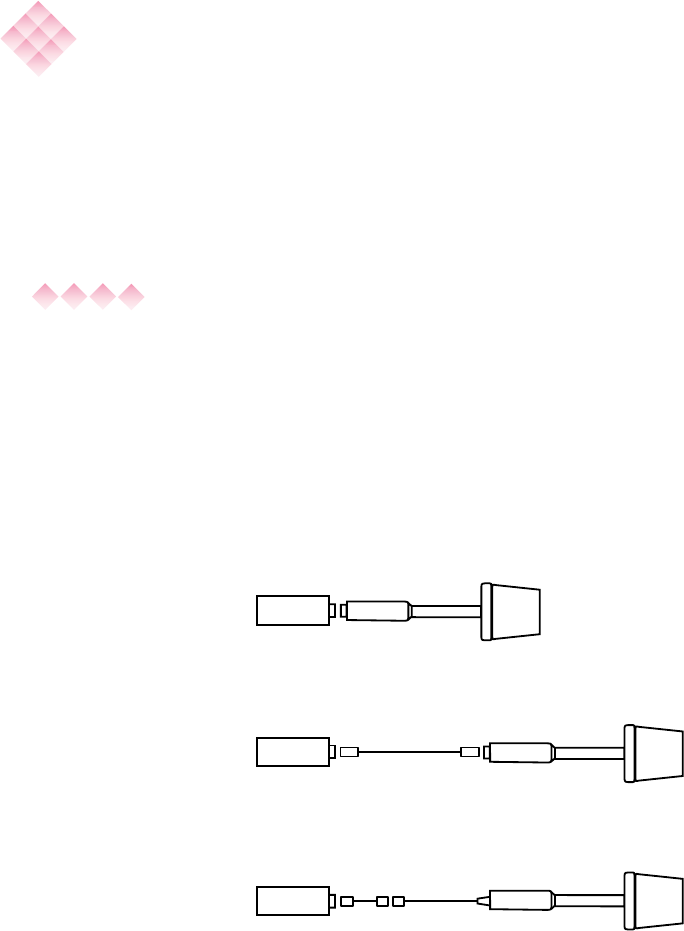
Connecting a Probe
Connect a cable with a quick-release, eight-pin connector to the
connector at the top of your Model 8718B. This cable will be
either (1) a short adapter cable for attachment to older style
8700 series probes with integral cables or (2) a 4 ft. (1.2m) long
cable with a quick-release connector on both ends for use with
the 8700 "D" series probes. The D series probes have a
quick-release, eight-pin connector that allows the probe to
attach directly to your 8718B or be used with a cable
A direct connection can be useful for certain low frequency
measurements. See Low Frequency Measurements in the
Applications Booklet.
8718B
8718B
8718B
8700D Series Probe
8700D Series Probe
8700/8700B Series Probe
Direct Connection
4' (1.2m) cable
Model 8744-04 (supplied)
1' (0.3m) adapter cable
P/N 2178770 (optional accessory)
It is important to un-
derstand that each
shaped frequency re-
sponse probe model
is designed
to conform to a par-
ticular standard.
Note
12 Operating the Meter
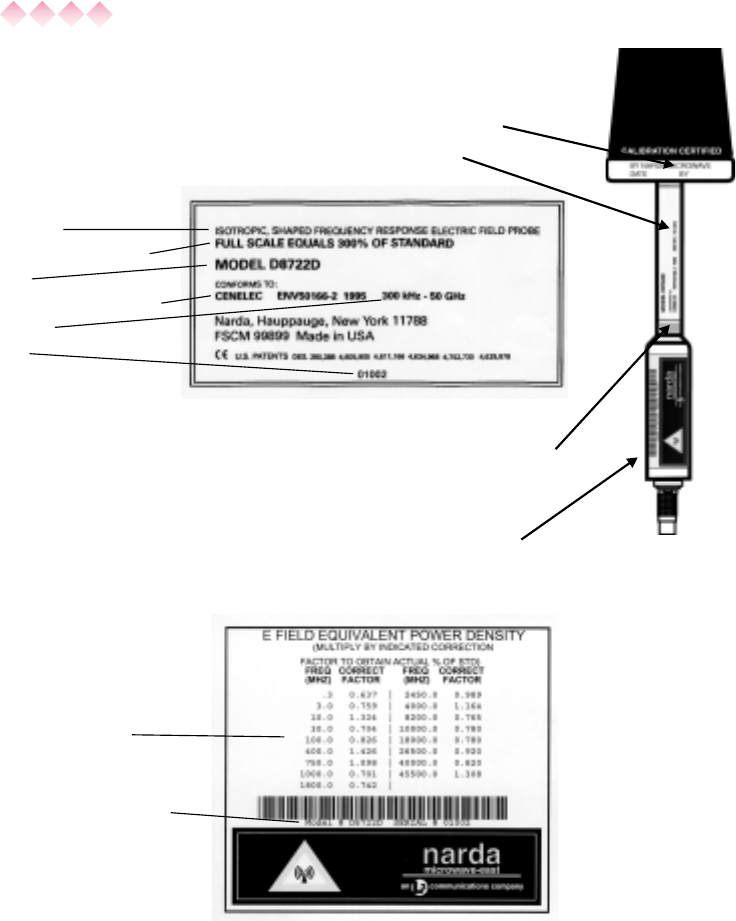
Probe Identification
Narda 8700D series probes use the following
labels and indicators:
•Certified Calibration Date Label
•Model Identification Label
•Color Band to Indicate the Full Scale
Measurement Range (20 mW/cm2
probes do not have a colored band)
•Calibration Label With Frequency
Correction Factors
Field Type (E or H)
Full Scale Measurement Range
Model Number
Standards (Shaped Probes Only)
Frequency Range
Serial Number
Correction Factor Listed for
Every Calibration Frequency
Model Number and Serial Number

13Chapter 4 Making a Measurement
4Making a Measurement
See Chapter 5,
Using the Menu
System, for details
on features and
operation.
Introduction
This chapter will help you make measurements with your Model
8718B. Information is included for turning the meter on,
selecting, zeroing, and testing a probe, plus an explanation of
the main measurement screen of the meter. Some general
information is also included about measurement surveys,
precautions you should observe, and the use of probe
correction factors.
Getting Started
Press the On power key. The meter model, serial, and firmware
version will be displayed briefly. After a few seconds, the
Opening Menu Screen will appear.
To Make Measurements...
1. Select the probe you want to use and connect it to
the meter.
2. Proceed as directed in Entering the Probe Model.
To access the meter’s menu system to perform some other
function...
1. Press F4 (MENU). The First Menu Screen will appear.
See Chapter 5, Using the Menu System.
CAL DATE 0 9 / 01 / 98
CAL DUE 09 / 01 / 9 9
CONNECT PROBE NOW
MEASURE MENU
F1 F2 F3 F4
CALIBRATION DATE
• Indicates date the meter
was last calibrated
CALIBRATION DUE DATE
•Indicates recommended
date for next calibration
Note

14 Operating the Meter
Entering the Probe Model
Narda's 8700 Series system is completely modular — all 8700
series meters work with all 8700 series probes. The single most
important thing you must do is tell the 8718B meter which probe
you are using.
The Model 8718B has the basic characteristics of every 8700
Series probe stored in its internal memory. All you have to do is
select the correct model number and the meter automatically
sets the correct scales.
The Model 8718B can also store the specific calibration
details for up to six probes.This includes the probe serial
number, calibration date, and the calibration factors marked on
the handle of the probe. Probes with this additional detail stored
in the meter are referred to as probes in memory.
Putting probes into memory has several advantages:
•It makes it easier to select a probe
•Data that is downloaded after using a data logging mode
will include a record of the probe’s calibration date and
its serial number.
•It makes using frequency correction much easier.
Probes are put into the meter’s memory using a personal
computer:
•By Narda on the day of shipment for all probes shipped
at the same time as the meter.
•By you at any time when you use the User's Software
supplied by Narda and a personal computer. Refer to
Chapter 18, User's Software for detailed information
regarding computer operations.
The single most im-
portant thing you
must do is tell the
8718B meter which
probe you are using.
Note
15Chapter 4 Making a Measurement
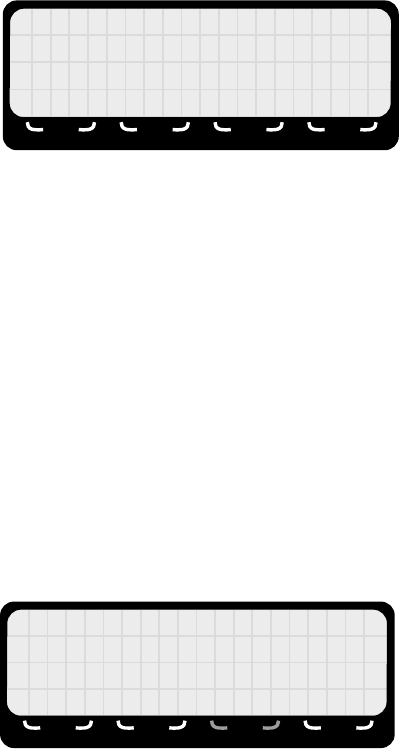
To select from the PROBES IN MEMORY...
1. If you haven’t already, press F1 (MEASURE).
2. The model number and the serial number of the last
probe used will be displayed on the second line of the
display. If you want to use the same probe, press
Enter.
3. If you want to use a different probe, look for the model
number in the positions above the F1, F2, or F3
legends. If more than three probes are in memory they
can be found by pressing F4 (MORE).
4. Press the appropriate function key and the probe
model and serial number will be displayed on the
second line of the screen. If this is correct, press Enter.
5. A new screen will appear specifying probe model
number, serial number, frequency range, field type,
maximum measurement range, and type of response
(flat or shaped). If this information is correct, press F1.
If this information does not match your requirements,
you need to select another probe. Press F2 and you
will go back to the Select Probe screen to make
another selection.
6. Proceed with the probe zeroing process. See Zeroing
the Probe on page 17.
SELECT PROBE
MODEL A8722 SND XXXXX
OR SELECT FROM L I ST
87XX 87XX 87XX MORE
F1 F2 F3 F4
A8742D S/N 00001
300 H -3GHzzkE-FLD
600 % STD SHAPED
YES NO MENU
F1 F2 F3 F4
16 Operating the Meter
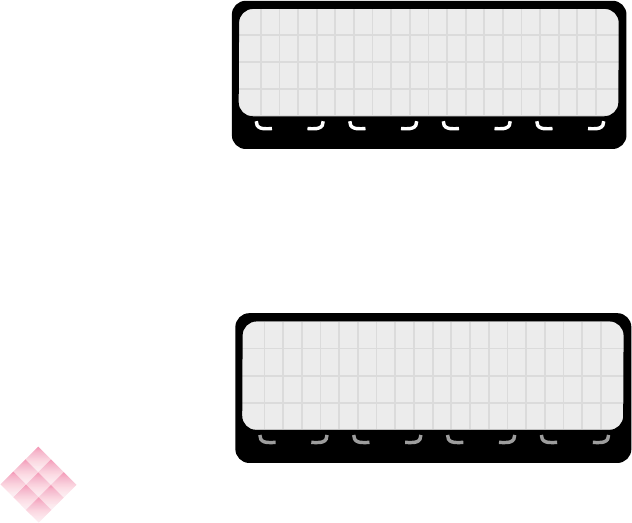
To use a PROBE that is NOT IN MEMORY...
1. If you haven't already, press F1 (MEASURE).
2. The model number of the last probe used will be
displayed on the second line of the display. If you want
to use the same model probe, press Enter.
3. If you want to use a different model probe, select
PROBE by pressing F4. If more than three probes are in
memory, you will have to press F4 twice (MORE, then
PROBE). One of several screens that list all 8700 series
probes will appear.
4. If you see the model of the probe you want to use, press
the appropriate number key. The newer "D" series
probes are listed first.
5. If you do not see the model number you want, use the
7 (BACK) or 8 (NEXT) keys to page forward and
backward until you do. Press the appropriate number
key to select a probe model.
6. A new screen will appear specifying probe model
number, frequency range, field type, maximum
measurement range, and type of response (flat or
shaped). If this information is correct, press F1. If this
information does not match your requirements you need
to select another probe. Press F2 and you will go back
to the Select Probe screen to make another selection.
1 A8722D 5 A8732D
2 B8722D 6 A8742D
3 C8722D
4 D8722D 8 NEXT
F1 F2 F3 F4
You must return to
the Opening Menu
Screen and repeat
the probe selection
and zeroing process
if you want to
change probes.
Press 7 (Probe) from
the First Menu
Screen and then
press F4 (RESTART).
SELECT PROBE
MODEL A8722 SND XXXXX
OR SELECT FROM L I ST
87XX 87XX 87XX PROBE
F1 F2 F3 F4
Note
17Chapter 4 Making a Measurement
Zeroing the Probe
The probe and meter must be “zeroed” together. It is important
that the probe is not exposed to radiated fields during the
zeroing process. The storage case is shielded and provides a
convenient “zero density” environment.
To zero the probe...
1. Place the probe in the storage case. Be careful not
to move the probe while zeroing takes place (on
probes with low frequency test points, you can create
static which will give inaccurate results).
2. When you are ready, press the ENTER key. The
screen will say ZEROING.
3. The meter will beep and the main measurement screen
will appear in about 15 seconds after zeroing is completed.
If you get a message that the probe could not be zeroed, the
most likely causes are:
•The probe is not connected properly. Check the
connector and retry.
•The meter is set for a fiber optic input and you are
using the standard cable input (or vice versa). Turn the
meter off. Turn the meter back on and press
(F4) (MENU) to access the menu system. Press
8(NEXT) to get to the Second Menu Screen. Press
3 (CABLE/FO) to the probe input status. Press F1 (OK)
if it is correct or F4 to select the alternate. Then press
Esc to return to the Opening Menu Screen.
7. Proceed with the probe zeroing process.
A8722D SNXXXXX
300 H -50GHzzkE-FLD
300 % STD SHAPED
YES NO MENU
F1 F2 F3 F4
Position the probe in
the case with one
test point pointed
downward and the
other two test points
above the foam.
This will insure that
the test points are
not touching the
foam.
Note

18 Operating the Meter
•The field strength is not low enough. Move away from
the RF field source, use the storage case to zero the
probe.
•The probe is damaged. Try another probe.
To reconfirm the zero while the instrument is in use...
1. Establish a zero density environment for the probe as
before.
2. Press the Auto Zero key. This will automatically “touch
up” the zero and correct for any drift in a few seconds.
Measurement Display Screens
There are two display screen options:
•The Main Measurement Display Screen.
•The Alternate Measurement Display Screen.
Main Measurement Display Screen
The Main Measurement Display Screen shows a maximum value
on the third line of the display. The Alternate Measurement
Display Screen provides frequency-specific, real time information
instead of a maximum value.
See Chapter 12,
Probe Zero,
for additional infor-
mation on the char-
acteristics of
the survey system
including the causes
of zero drift.
Note
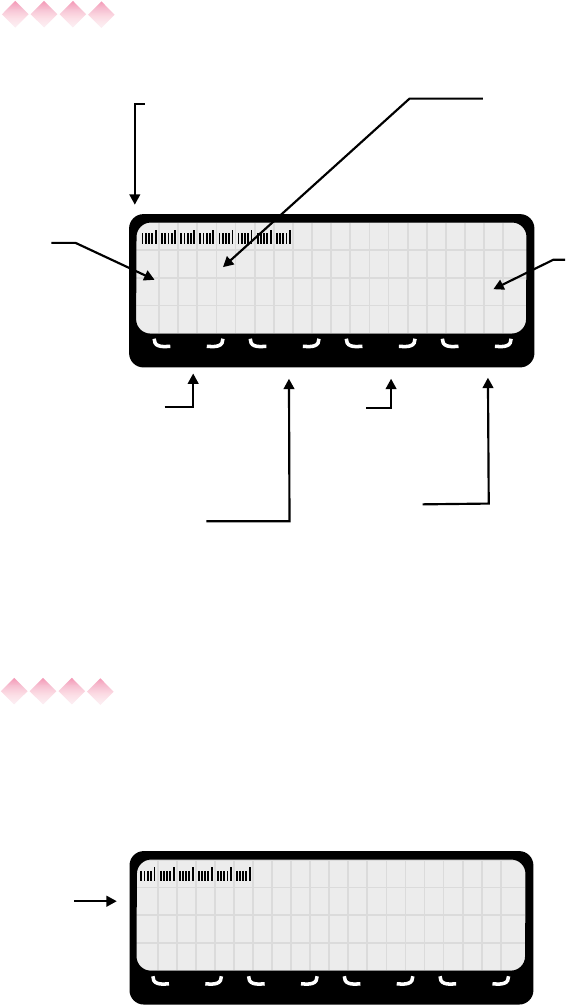
19Chapter 4 Making a Measurement
Main Measurement Display Screen
(Shaped Probes)
12. 1 % STD
27.5 MAX CF 1.00
ALT MAXR MENU FREQ
F1 F2 F3 F4
FIELD STRENGTH
•Indicates actual measured value
•Unit of measure is always % STD
for shaped frequency response
probes
BAR GRAPH
•Indicates approximate
field strength
•100 segment, three
10:1 (10 dB) ranges
MAXIMUM VALUE
•Indicates the
maximum value that
has occurred since
you began making
measurements or
since resetting the
maximum using
F2 (MAXR)
•The unit of measure is
the same as for the
instantaneous value
shown on the line
above.
PROBE FREQUENCY
CORRECTION
•CF = 1.00 indicates
no correction factor is
being applied
•CF= X.XX indicates
the numeric value that
is being applied
•A frequency displayed
here indicates that the
meter is applying a
correction factor
based on the stored
calibration data for the
specific probe in use.
F1
Change to the
Alternate
Measurement
Display Screen
F2
Reset the
Maximum Value to
the current Field
Strength displayed
on the second line
F3
Go to the First
Menu Screen
F4
Allows you to enter
or change the
frequency that you
are correcting for
probe frequency
deviation
Main Measurement Display Screen
(Flat Probes)
The Main Measurement Display Screen for flat frequency
response probes is the same as the screen for shaped
frequency response probes except as indicated below.
6.26 /Wmcm
2
11.5 MAX CF 1.00
ALT MAXR MENU FREQ
F1 F2 F3 F4
FIELD STRENGTH
•Indicates actual
measured value
•Unit of measure can be
changed by going to the
First Menu Screen

20 Operating the Meter
Alternate Measurement Display Screen
The Alternate Measurement Display Screen is very similar to the
Main Measurement Display Screen with one difference. This
display mode is used to show frequency-specific, real time
information on the third line of the display instead of a maximum
value. It should be used only for single frequency or narrow
band measurement applications. The information that is shown
depends on whether a flat frequency response probe or a
shaped frequency response probe has been selected.
•Flat Frequency Response Probes. This display mode
instantly converts the measured value to a percent of
the referenced exposure standard at a particular
frequency.
•Shaped Frequency Response Probes. This display
mode instantly converts the measured value, shown in
Percent of Standard, to an equivalent power density
value at a particular frequency.
The use of the Alternate Measurement Display Screen also
introduces an automatic correction for probe frequency
deviation for probes in memory.
The option to change display screens is only available when
other options such as spatial averaging, data logging or time
averaging have not been turned on.
To use the Alternate Measurement Display Screen...
1. Make sure that the 8718B is set to the correct exposure
standard. See Chapter 11 Using the Standards
Feature.
2. Press F4 (FREQ) from the Main Measurements Display
Screen. A new screen will appear to allow you to enter
a frequency.
3. Enter the frequency that you are measuring. You must
fill all four positions. If you make a mistake just enter
more digits until correct. For greater accuracy, use the
units that allow the larger number. For example, enter
10.00 kHz, not 00.01 MHz.
The Alternate Mea-
surement Display
Screen should only
be used for single
frequency measure-
ments or where all
emitter frequencies
are close and the ex-
posure standard has
the same limits. Re-
fer to Using Probe
Correction Factors
on page 24.
Note
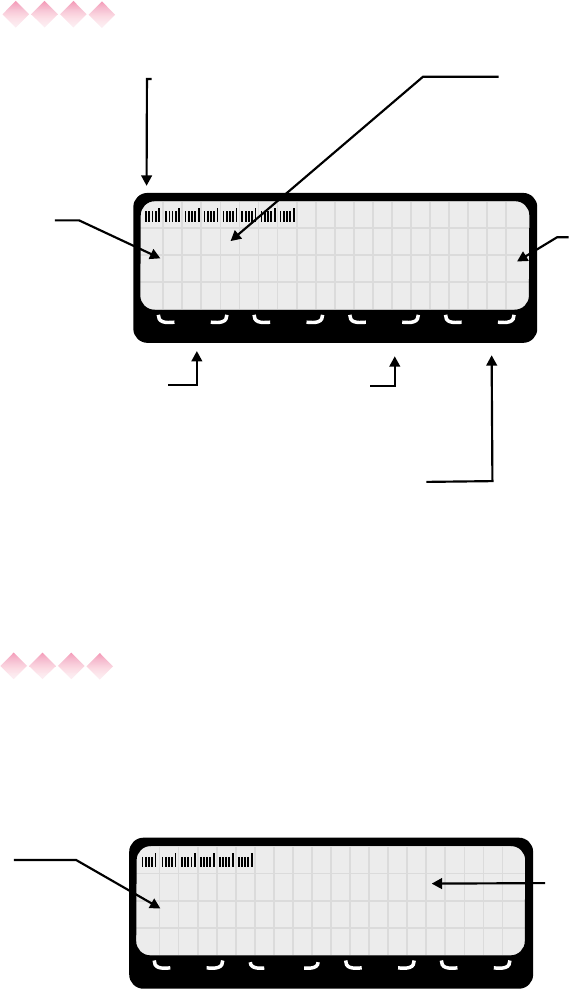
21Chapter 4 Making a Measurement
Alternate Measurement Display Screen
(Shaped Probes)
FIELD STRENGTH
•Indicates actual
measured value
•Unit of measure can be
changed by going to the
First Menu Screen
Alternate Measurement Display Screen
(Flat Probes)
The Alternate Measurement Display Screen for flat frequency
response probes is the same as the screen for shaped
frequency response probes except as indicated below.
12. % S DT
0.61 Wmm zc/ 210.00 HG
AM I N MAXR MENU FREQ
1
F1 F2 F3 F4
FIELD STRENGTH
•Indicates actual measured value
•Unit of measure is always % STD
for shaped frequency response
probes
BAR GRAPH
•Indicates approximate
field strength
•100 segment, three 10:1
(10 dB) ranges
CALCULATED
FIELD STRENGTH
•Displays field strength
in mW/cm2that has
been calculated from
the % STD reading
using the referenced
standard and the
indicated frequency
PROBE FREQUENCY
CORRECTION
•CF = 1.00 indicates
no correction factor is
being applied
•CF= X.XX indicates
the numeric value that
is being applied
•A frequency displayed
here indicates that the
meter is applying a
correction factor
based on the stored
calibration data for the
specific probe in use.
F1
Change to the
Alternate
Measurement
Display Screen
F3
Go to the First
Menu Screen
F4
Allows you to enter
or change the
frequency that you
are correcting for
probe frequency
deviation
.26 Wmmc/
2
125. 2% STD 10. 00 HzG
AM I N MAXR MENU FREQ
6
F1 F2 F3 F4
CALCULATED
PERCENT OF
STANDARD
•Displays percent of
standard that has been
calculated from the
field strength reading
using the referenced
standard and the
indicated frequency

22 Operating the Meter
4. Change the units (if needed) by pressing either
F1 (kHz), F2 (MHz), or F3 (GHz).
5. Press F4 (SAVE). The probe correction factor will be
displayed briefly if you are using a probe in memory
and you will automatically return to the measurement
screen. See Using Probe Correction Factors on page 24.
6. From the Main Measurement Screen press F1(ALT)to
select the Alternate Measurement Display Screen.
To return to the Main Measurements Display Screen...
1. From the Alternate Measurement Display Screen, press
F1 (MAIN) to select the Main Measurements Display
Screen.
Note
Alternate values can-
not be calculated at
low frequencies for
standards with very
high magnetic field
limits. A “greater
than” symbol (>) is
shown under these
conditions.

23Chapter 4 Making a Measurement
Bar Graph Ranges
The Range key is used to control how the bar graph displays
information. The digital display is not affected and the meter
automatically displays a digital value over the probe’s entire
measurement range. There are four available settings: AUTO,
HIGH, MID, and LOW. The bar graph has 100 divisions.
You will probably find it convenient to use the AUTO setting
most of the time, but under a few conditions you may find one of
the three fixed ranges useful. The following table illustrates how
the range setting will affect the bar graph. For simplicity, a
probe with a full scale rating of 100 mW/cm2is used as an
example.
Range Measurement Range
AUTO As the field level increases the bar graph
automatically switches between three ranges:
0.01 to 1, 1 to 10, and 10 to 100.
HIGH 1to100
MID 0.1 to 10
LOW 0.01 to 1
If you exceed the upper limit of either the MID or LOW range, the
bar graph will be replaced with the message RANGE
OVERLOAD. The digital display will continue to show the
correct value. If you exceed the full scale measurement range of
the probe, the word "OVERLOAD" will appear
Testing the Probe
Your Model 8718B is equipped with two RF sources for testing
probes. Press Test Source and both sources will stay on for
approximately 20 seconds.
A contact on the right side of the unit is used for testing low
frequency probes and the low frequency section of
ultra-broadband probes. Most probes have three test points
around the head of the probe. Position the probe so that one of
the test points touches the contact on the meter. You should
The Range Key only
affects how the bar
graph displays infor-
mation.
Note

24 Operating the Meter
get a deflection on the bar graph but the amount of deflection is
not important. Repeat for the other two test points to insure that
the probe is working correctly. The D series magnetic field
probes have a single, conductive test point that is used to
simultaneously test all three sensors.
A microwave window on the right side of the probe is used for
testing high frequency probes. Hold the probe parallel to the
right side of the meter and position the probe head against the
test window so that one of three arrows on the probe is pointing
towards the window. These arrows indicate the location of the
three sensors inside the probe. A deflection of any magnitude
on the bar graph is acceptable. Repeat for the other two sensors
to insure that the probe is working correctly.
Ultra-broadband probes contain both high frequency and low
frequency sensors. These probes require six checks – three
high frequency and three low frequency.
Using Probe Correction Factors
All probes have a certain amount of frequency sensitivity.
Frequency sensitivity is the amount of deviation from the correct
measured value that a probe yields at various frequencies.
Obviously, the smaller the deviation, the better. But since a
certain amount of frequency deviation is unavoidable, the more
frequencies that you calibrate the probe at, the better. At each
calibration frequency, you have a correction factor.
Multiplying the reading on the meter by a correction factor
marked on the handle of a Narda 8700 Series probe
compensates for the probe’s frequency sensitivity. The Model
8718B is unique because it can perform this task automatically.
Correction factors can be used:
•When there is only a single emitter being surveyed.
•When there are multiple emitters all operating at the
same frequency (this is often the case with industrial
equipment).
A probe that does
not show a move-
ment of the bar
graph for all three
(or six) tests may be
damaged and should
not be used to make
measurements.
Note

25Chapter 4 Making a Measurement
•When there are multiple emitters with frequencies that
are close to each other and the nearest calibration
frequencies have very similar correction factors.
Correction factors should NOT be used:
•When the frequencies of the emitters are diverse.
Correction factors may vary considerably and there is no
way to determine the distribution of energy from the
various emitters. It is more accurate not to use a
correction factor under these conditions. See
Measurement Uncertainty on page 27.
To use a correction factor for a probe in memory...
1. Press F4 (FREQ) from the measurement screen. A
new screen will appear to allow you to enter a
frequency.
2. Enter the frequency for which you want to correct
readings. Make sure you fill in all four positions. If you
make a mistake just enter more digits until correct. For
greater accuracy, use the units that allow the larger
numbers. For example, enter 10kHz, not 00.01 MHz.
3. Change the units (if needed) by pressing either
F1 (kHz), F2 (MHz), or F3 (GHz).
4. Press F4 (SAVE). The meter will automatically
calculate the correction factor for the frequency you
have entered from the two closest correction factors
that were stored when you put the probe in memory.
The calculated numeric value will be displayed briefly
before the meter automatically returns to the
measurement screen. See page 64 for a more
complete description.
5. The frequency that you are correcting for will be
displayed on the right side of the third line of the
display.
Do not use correction
factors in a broadband,
multi-emitter environ-
ment.
Note
26 Operating the Meter
To use a correction factor for a probe NOT in memory...
1. Press F3 (MENU). The First Menu Screen will appear.
2. Press 8(NEXT) to access the Second Menu Screen.
3. Press 1(COR FACT). A screen will appear that shows
the correction factor.
4. Use the correction factors on the handle of the probe to
determine the appropriate correction factor and then
use the numeric keys on the meter to enter this value.
Enter a three digit number, ignoring the decimal point,
and rounding to two digits to the right of the decimal
point. If you make a mistake, just enter more digits
until correct. For example, to enter a correction factor
of 1.22, simply enter 1,2, and then 2while a correction
factor of 0.94 is entered as 0,9, and 4.
5. Press Enter to save this correction factor. The meter
automatically returns to the measurement screen.
6. The numeric correction factor will be displayed on
the right side of the third line of the display in the form
CF X.XX.
1 DATA LOG 5 UNI TS
2 TIME AVG 6 RS232
3 SPAT I AL 7 PROBE
4 BAT/LIFE 8 NEXT
F1 F2 F3 F4
1 COR FACT 5 ALARM
2 SETT INGS 6 STNDS
3 CABLE / FO 7 BLANK
4 LOCKOUT 8 BACK
F1 F2 F3 F4
27Chapter 4 Making a Measurement
Measurement Uncertainty
The uncertainty of any measurement includes several factors
related to the probe and meter.
•Frequency response or frequency sensitivity is typically
±1 dB to ±2 dB (from about ±25% to about ±55%).
The correct use of correction factors can greatly reduce
the amount of uncertainty associated with frequency
response.
Checking or Changing the Probe Model
To check the probe model that the meter is currently set to...
1. Press F3 (MENU). The First Menu Screen will appear.
2. Press 7 (PROBE). A Screen will appear that shows the
model number and basic characteristics of the probe.
The probe serial number is shown for probes selected
from memory.
3. Press F1 (OK) key to return to the First Menu Screen.
4. Press Esc to return to the Measurement Display Screen.
To change to another probe without turning the meter off...
1. Press F3 (MENU). The First Menu Screen will appear.
2. Press 7 (PROBE). A screen will appear that shows the
model number and basic characteristics of the probe.
3. Press F4 (RESTART) to return to the Opening Menu
Screen. Press F1 (MEASURE) and begin the probe
selection process.
8712D SN 12345
300MHz z50GH E_FLD
20 Wmcm/
2
FLAT
OK RESTART
F1 F2 F3 F4
_

28 Operating the Meter
Making a Measurement
Refer to the Applications Booklet for both general and specific
information on making measurements.
Precautions
When making measurements of electromagnetic fields, a
potential exists to expose yourself to excessive levels.
Approach the source of energy slowly and begin making
measurements from a distance at which low field levels exist.
Be prepared to evacuate the area immediately if RF field levels
in excess of the applicable standard are observed.
•Ellipse ratio is ±0.75 dB or better, depending on the
model of the probe. The ellipse ratio is the ratio of
readings that occur when one rotates the probe around
the axis of its handle. Narda calibrates its probes by
rotating the probe about its axis and using the mean
value to determine the correction factor. If you rotate
the probe around its axis and use the mean value,
ellipse ratio can be eliminated as a source of uncertainty.
•Isotropic response is the error that occurs when the
probe is pointed in different directions. It includes the
ellipse ratio plus some additional uncertainties.
Although the probes pick up energy from all directions,
they are most accurate when pointed at the source of
energy. Generally speaking, the isotropic response is
no greater than the ellipse ratio providing that the probe
is pointed towards the source.
•Calibration uncertainty represents another 0.5 dB.
•The Model 8718B meter has a maximum uncertainty
of ±3%.
A good rule of thumb is that the total uncertainty is no greater
than ±3 dB when correction factors are not used, providing
that the probe is pointed at the source of energy. There are
other issues related to field perturbation that can be more
significant sources of uncertainty. See Field Perturbation in
Measurement in the Applications Booklet.

29Chapter 5 Using the Menu System
5Using the Menu System
General
The menu system allows you to store data and to select various
operating modes. It is accessed by pressing the appropriate
function key that corresponds to MENU on the bottom line of the
display screen. The menu is comprised of two menu screens
and several sub-menus. Press the number on the keypad that
matches the number on the menu to make your selection.
Instructions or sub-menus appear when one of the basic menu
options is selected. Press the Help key or refer to the
appropriate chapter of this guide for detailed instructions.
The following keys are used to move through the various menu
options and to set measurement parameters:
Function
Keys
F1-F4
Most menu options are offered on the fourth
(bottom) line of the display. Simply press the
function key that matches the marking just
below the display.
Numeric
Keys
0-9
Used to make a selection where options are
listed on several lines of the display. Often,
multiple options are listed in two columns.
Used to input a specific value or range
(frequency, data logging interval, time and date,
etc.).
ENTER
Key
Press the ENTER key after entering a numeric
value to complete the selection process.
ESC key Press the ESC key to return to the previous
screen without making a selection.
30 Operating the Meter
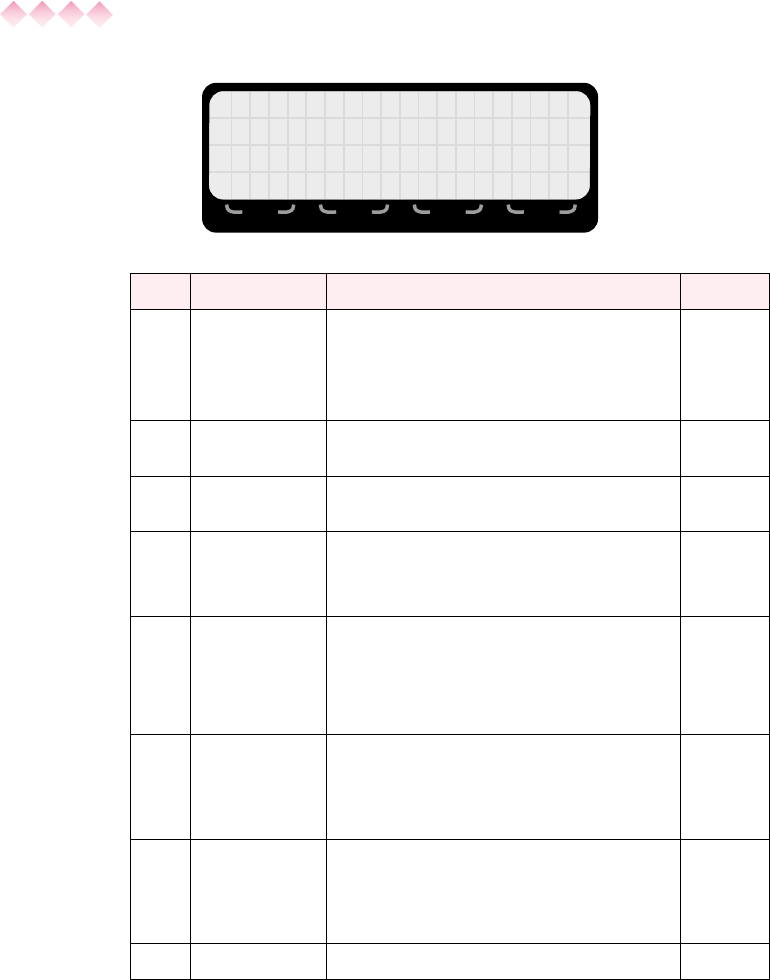
1DATALOG 5UNITS
2 TIME AVG 6 RS232
3 SPAT I AL 7 PROBE
4 BAT / L I FE 8 NEXT
F1 F2 F3 F4
Key Menu Options Chapter
1DATA LOG
Log with time and date stamp.
Log spatially averaged values with time
and date stamp.
Continuous logging at various rates.
8
2TIME AVG Turn fixed time averaging (various
duration) on or off.9
3SPATIAL Turn the spatial averaging mode (used for
whole body averaging) on or off.7
4BAT/LITE
Check battery charge status and
estimated time remaining.
Turn the back light on or off.
12
5UNITS
Select from all appropriate units of
measure (i.e., mW/cm2, V/m, V2/m2) for the
probe in use. Percent of Standard is the
only unit of measure for shaped frequency
response probes.
6
6RS232
Change the baud rate.
Turn the RS232 port on or off. (Automatic
on for Model 8718B. Menu is for Model
8718 only)
17
7PROBE
Show the model and serial number of the
probe in use.
Select another probe and restart the
zeroing process
4
8NEXT Go to the Second Menu Screen.
First Menu Screen
31Chapter 5 Using the Menu System
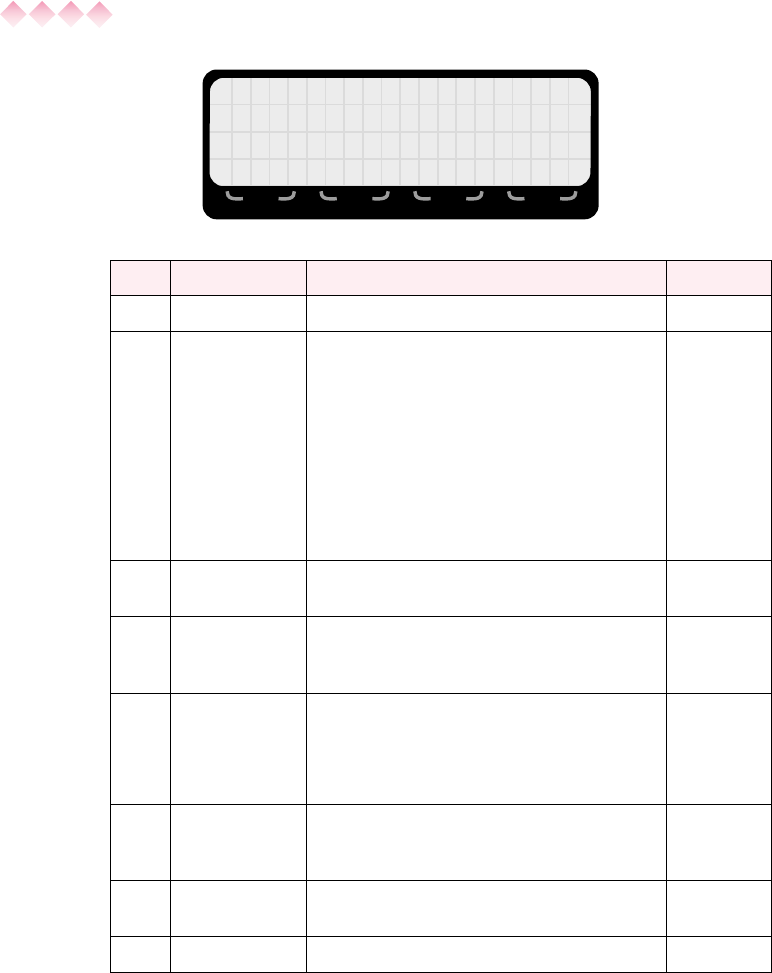
Second Menu Screen
1COR AFCT 5ALARM
2SETTNIGS 6STNDS
3CABLE/FO 7BLANK
4LOCKOUT 8BACK
F1 F2 F3 F4
Key Menu Options Chapter
1COR FACT Enter a numeric probe correction factor. 4
2SETTINGS
Check or set the meter’s internal clock
(time/date)
Enter a value for temperature. Used when
the probe is separated from the meter and
operating at a different ambient temperature.
Clear the memory of logged data.
Set the function keys for right or left handed
operation.
Adjust the display contrast.
15
3 CABLE/FO Select between the standard probe cable
input and the fiber optic receiver. 16
4LOCKOUT
Lock the keypad so that settings will not
accidentally be changed. To release, press
ENTER and ESC together.
13
5ALARM
Turn the audio alarm on or off.
Set the alarm threshold in terms of percent
of full scale of the probe in use (1% to 99%).
Turn the variable tone alarm on or off.
10
6STNDS
Check or set the standard that is
referenced for various measurement
options.
11
7BLANK Blank the display and lock the keypad. To
release, press ENTER and ESC together. 13
8BACK Return to the first menu screen.

32 Operating the Meter
Menu Commands
The following is a list of menu commands that are shown on the
fourth line of the display and selected by using the four function
keys (F1-F4).
AUTO Auto – returns the meter to the normal,
automatic temperature correction mode.
ABORT Abort clearing the memory
BEGIN Begin – confirms that the meter is ready to
perform time averaging to meet the requirements
of a specific standard.
CABLE Cable – changes the meter input from fiber optic
receiver to the standard cable input.
CANCEL Cancel making the selection and return to the
previous menu.
CONT Continuous – initiate logging for an undefined
interval.
CLEAR Clear the memory of logged data.
CLR Clear the screen and return to making real time
measurements.
DISCARD Discard this data point without storing it.
END End the logging run or averaging interval.
FO Fiber Optic – changes the meter input from the
standard cable input to the fiber optic receiver.
FREQ Frequency – change or enter a frequency.
GHz GHz – used to enter a frequency.
HR Hours – used to define a logging interval.
kHz kHz – used to enter a frequency.
LEFT Left – set menus for left-handed operation.
LOG Log the current measured value.
33Chapter 5 Using the Menu System
MAIN Main – switch to the Main Measurement Display
Screen.
MAXR Maximum Reset - reset the maximum value to
the instantaneous value.
MEASURE Measure – begin the measurement process by
selecting and zeroing the probe.
MEM Memory – display the available memory.
MENU Menu – access the First Menu Screen.
MIN Minutes – used to define a logging interval.
MHz MHz – used to enter a frequency.
NO No – the current probe selection is incorrect.
Return to the menu to make another selection.
OFF Off – turn special mode off.
OK OK – continue with the same setting.
ON On – turn special mode on.
PAUSE Pause during data logging or time averaging.
QUIT Quit special mode and return to the standard
measurement screen.
RESTART Restart the probe selection and zeroing process.
RGT Right – set menus for right-handed operation.
SAVE Save the data point or the new setting.
SEC Seconds – used to define a logging interval.
SET Set the time, date, temperature, or display
contrast.
START Start averaging or data logging.
STNDS Standards – access the menu of available
exposure standards.
STOP Stop the current averaging run.
YES Yes – the current probe selection is correct.
Proceed with zeroing process.

34 Operating the Meter
Default Conditions Upon Turn-On
The Model 8718B is designed to automatically return to a basic
set of operating parameters every time it is turned on. Although
in some cases this may require additional key strokes to set up
the meter as desired, this feature is designed to minimize the
chance of making measurements while unknowingly having the
meter incorrectly configured.
The table below lists the operating parameters that can be
expected upon turn-on.
Parameter Default Condition
Alarms Last Used settings will be used
Back Light OFF to conserve battery power.
Blank Out OFF – display will be active.
Cable/Fiber Optic Last Used input will be active.
Data Logging OFF
Display Contrast Last Used setting will be in use.
Display Screen Main Measurement Display Screen
Lockout OFF –keypad will be active.
Probe Model Last Used probe model will be featured
on the probe selection screen.
Right/Left Last Used setting for function key
location will be in use.
RS232 Port OFF to conserve battery power.
Spatial Averaging OFF
Standard Last Used standard will be referenced.
Temperature OFF – the meter will sense ambient
Correction temperature and automatically correct.
35Chapter 5 Using the Menu System
Time Averaging OFF
Unit of Measure Last Used unit of measure will be in use
if previous and current probe both have
flat or shaped frequency response. If
current probe is shaped, unit will be %
of STD. If current probe is flat and
previous probe was shaped, then unit
will be mW/cm2.
36 Operating the Meter
37Chapter 6 Units of Measure
6Units of Measure
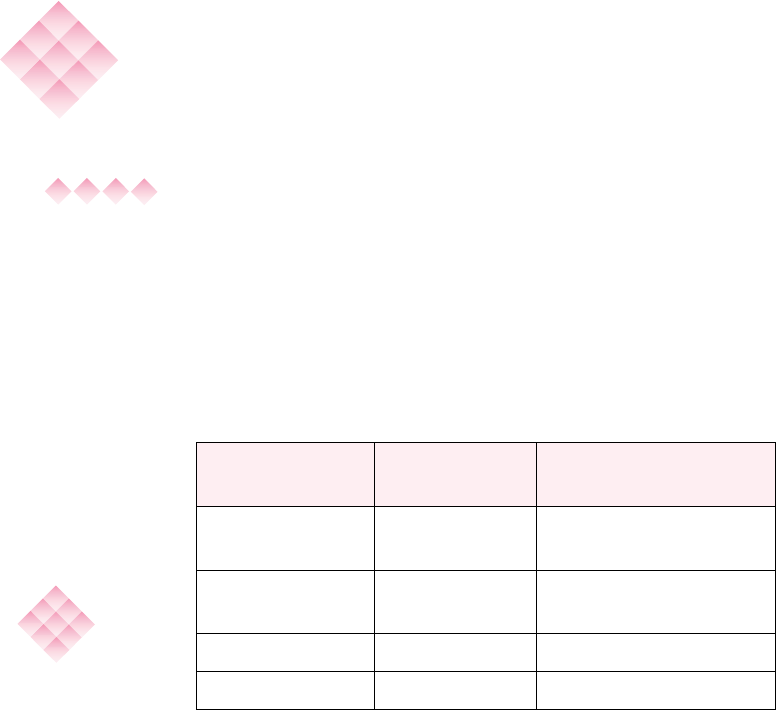
Available Units of Measure
The 8718B Meter allows you to quickly select any unit of
measure that is appropriate for the probe in use. The available
units of measure depend on whether the probe is designed to
measure the electric field or the magnetic field. It also depends
on whether the probe has a “flat” frequency response or a
“shaped” frequency response. The available units of measure
for the various types of probes are:
Percent of Standard
is the only unit of
measure available
for shaped fre-
quency response
probes. Shaped
probes have fre-
quency response
curves designed to
mimic a particular
exposure standard.
See Chapter 3,
Shaped Frequency
Response Probes.
Note
Field
Component
Frequency
Response Units of Measure
Electric Flat mW/cm2,W/m
2, V/m,
V2/m2, pJcm3
Magnetic Flat mW/cm2,W/m
2,
A/m, A2/m2, pJcm3
Electric Shaped Percent of Standard
Magnetic Shaped Percent of Standard
38 Operating the Meter
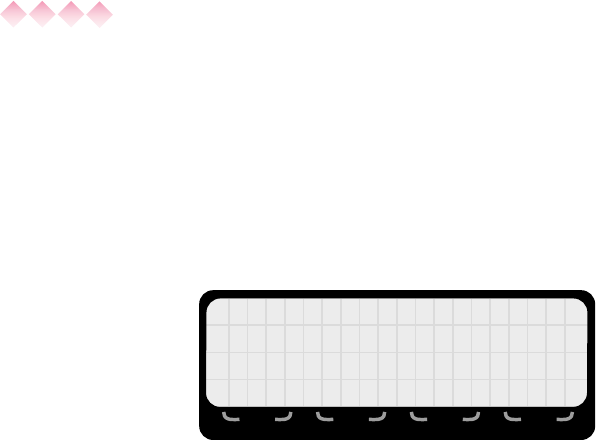
Changing the Unit of Measure
To change the unit of measure that the meter is set for ...
1. Access the menu system by pressing the function key
that corresponds to the legend below MENU on the
bottom line of the display.
2. Press the number 5on the keypad to select UNITS from
the First Menu Screen. A screen will appear that offers
the available units of measure for the probe in use.
3. Press the number key on the keypad that matches the
desired unit of measure. For example, pressing 1
selects mW/cm2as the unit of measure. This unit of
measure is available for all probes with a flat frequency
response.
4. The meter will automatically return to the measurement
screen. If you had accessed the menu system from the
Opening Menu Screen, you will return to that screen.
1mW/c 2
m
2W/m
26V
2/m2
3V/m 7pJ/cm
3
F1 F2 F3 F4

39Chapter 7 Spatially-Averaged Measurements
Spatially Averaged Measurements
7
Understanding Spatial Averaging
The major standards concerned with human exposure to radio
frequency radiation specify maximum exposure levels averaged
over the whole body. The co-linear dipole antenna arrays that
are very common in modern wireless communications systems,
for example, have multiple lobes close to the antenna. The field
strength typically varies by 6-7 dB along the length of an array.
Therefore, the measured value is highly dependent on not only
the distance from the antenna but the height above the ground.
The traditional method of making spatially-averaged
measurements is to use a “storypole”. A storypole is a
non-conductive pole , often wooden, equal in height to an
average adult with distance marks equally spaced along its
length. Measurements are made alongside the storypole at
each height and then mathematically averaged. The height and
spacing of each measurement varies from standard-to-standard.
For example, the IEEE C95.1-1999 standard specifies
measurements from 0 centimeters (ground level) to 200
centimeters in 20 centimeter increments. Some exposure
standards, such as Canada’s Safety Code 6, require that
measurements be averaged across two dimensions – vertically
and horizontally. Modern wireless communications sites make
this manual technique more difficult than ever since field levels
at many sites, particularly multi-user sites, are constantly
varying. For example, paging systems go on and off and the
number of cellular channels in use is constantly changing.
Thus, a series of measurements made at varying heights can
vary more as a function of time than location.

40 Operating the Meter
Spatial Averaging with the 8718B
The Model 8718B uses time to quickly make precise, spatially
averaged measurements. With the 8718B set for spatial
averaging, press the F1 function key to start the timer. Pressing
the same key again stops the timer. During this interval of time,
the meter takes a large number of measurements. The results
are presented as both an average value and a peak value.
Effective measurement technique requires you to simply move
the probe slowly from toe-to-head while the timer is running.
Although this technique may not be specifically called out in a
particular exposure standard, it is technically sound and much
more accurate than averaging a series of measurements. It is
anticipated that future updates of the major standards will reflect
this automatic technique now that the survey equipment makes
it practical.
To make spatially averaged measurements ...
1. Access the menu system by pressing the function key
that corresponds to the legend below MENU on the
bottom line of the display.
2. Press the number 3on the keypad to select SPATIAL
from the First Menu Screen.
3. Press F1 (ON).
4. The meter will automatically return to the measurement
screen with new options for the function keys. If you
had accessed the menu system from the Opening
Menu Screen (where the calibration dates are shown),
you will return to that screen.
5. Holding the meter in one hand and the probe in the
other, touch the head of the probe to the ground.
SPAT I AL AVERAGI NG
MODE I S ON
ON OFF
F1 F2 F3 F4
41Chapter 7 Spatially-Averaged Measurements
6. Press F1 (START) while slowly moving the probe
vertically at a constant rate of movement.
7. Strive for an interval of about ten seconds between
starting and stopping the timer. The meter will beep
every second as a timing aid.
8. When the probe reaches the height equal to the top of
an adult’s head ( about 6 ft./1.9 m), press F1 again
(STOP).
9. The meter will show the average value on the second
line of the display and the maximum value on the left
side of the third line of the display. The bar graph will
be indicating the instantaneous field magnitude in real
time. The averaging interval will be shown on the right
side of the third line, which can be useful in perfecting
your spacial averaging technique.
24. % S DT
39.5 MAX
CF 1. 0
TSART MA
X MEN QU I T
2
F1 F2 F3 F4
0
RU
17. % S DTERAGE
39.5 MAX
10.4 SEC
TSART
CLR MENU QUIT
8
F1 F2 F3 F4
AV
12. % S DT
39.5 MAX
CF 1. 0
S TOP
1
Fl F2 F3 F4
0
It is important to
move the probe
vertically at a con-
stant rate to obtain
an accurate spa-
tially averaged
measurement.
Note
The averaging time
resolution is approxi-
mately 1/4 second.
Note
42 Operating the Meter
10. To make another spatially averaged measurement,
press F1 (START) again.
11. To temporarily suspend the spatial average mode and
make real time measurements, press F2 (CLR). To
make another spatially-averaged measurement, press
F1 (START) again.
12. To end spatial averaging altogether, press F4 (QUIT).
The meter will automatically return to the standard
measurement screen. If you had accessed the menu
system from the Opening Menu Screen, you will return
to that screen.
13. To initiate spatial averaging again at a later point, use
the menu system to select SPATIAL from the First
Menu Screen.

43Chapter 8 Data Logging
8Data Logging
Logging Options
The 8718B Meter features several methods of collecting data.
The basic choices are:
•Logging Data with the Meter. The logged data stored
in the meter is downloaded to a computer at a later date
using the User's Software, where it can be viewed and
printed. The data can also be exported in spreadsheet
or database formats for further processing.
•Continuous Output to a Computer. Data collection, if
any, is performed by the computer.
•Analog Output. An analog voltage is continuously
available for use with a Chart Recorder or A/D converter.
Logging Data
The 8718B has three logging modes to collect field strength
measurements, store the data in the meter’s memory, and later
export the data to a personal computer via the RS232 port on
the top of the meter. The three logging modes are:
•Collect a series of up to 999 data points, one at a time,
and automatically assign a reference number to each
data point. The reference numbers can refer to either
site plan locations or to a diagram of the industrial
equipment being surveyed. Each data point also has a
time and date stamp.
Mode 1

44 Operating the Meter
•Collect a series of up to 999 spatially-averaged data
points, one at a time, and automatically assign a
reference number to each data point. Both the average
value and the maximum value at each location are
stored. The reference numbers can refer to either site
plan locations or to a diagram of the industrial
equipment being surveyed. Each data point also has a
time and date stamp.
•Automatically collect a series of data points at specific
intervals of time for a specific time period. Each data
point also has a time and date stamp.
Format for Logged Data
A record contains a header and one or more data points. Each
record is identified by a user-defined two-digit survey number
and the time and date the survey was performed. The header
defines the serial number of the 8718B meter, its calibration
date, the probe model used, and a number of other settings.
These settings may include logging rate, frequency correction,
averaging mode, and averaging time.
If the probe used was selected from memory, the header will
also include the serial number of the probe and its calibration
date.
Mode 2
Mode 3
45Chapter 8 Data Logging
To initiate one of the three logging modes described
above...
1. Access the menu system by pressing the function key
that corresponds to the legend below MENU on the
bottom line of the display.
2. Press the number 1on the keypad to select DATA
LOG from the First Menu Screen.
3. A new menu will appear, presenting the three logging
modes. If any of the three logging modes is currently
active, the line showing that option will be flashing.
4. To review the available memory before beginning to
make logged measurements, press F2 (MEM).
5. A screen will appear showing the approximate amount
of available memory and the amount of memory
already used. The bar graph is a rough indicator of
remaining memory capacity as a percentage of total
capacity. See Memory Capacity at the end of this
chapter for information on how to determine the number
of additional measurements that can be stored.
6. Press Esc to return to the logging menu screen.
7. To turn off the logging feature, press F4 (QUIT).
If you access the
menu system from
the Opening Menu
Screen, you will re-
turn to that screen.
Once a probe has
been selected and
zeroed, the measure-
ment screen will re-
flect the logging
mode that you have
selected.
Note
1LOGWITHREF #
2LOGAVGWITHREF#
3 CONT I NUOUS LOGG I NG
MEM QU I T
F1 F2 F3 F4
AILALBORY
10 B AVAI
L, 15 Bkk
SED
MENU QUIT
AV
F1 F2 F3 F4
U
EM
EM
46 Operating the Meter
Mode 1 Logging
To initiate Mode 1 logging (a series of data points with a
reference number assigned to each data point)...
1. Press the number 1on the keypad to select LOG
WITH REF # from the logging menu screen.
2. A screen will appear requesting that you assign a two-
digit survey number to this logging run of data points.
Use the numeric keypad to enter the two-digit number
and then press F1 (OK)orENTER. Make note of this
number so that you can later associate this survey
number with the data points collected. If you make a
mistake, press F2 (CLR) to clear the screen and enter
a new survey number.
3. Press F4 (QUIT)orF3 (MENU) if you change your mind.
4. The meter will automatically return to the
measurement screen with new options available for
the function keys.
5. Proceed to make measurements as normal. To log
the value of the point currently being measured and
displayed on the second line of the display,
press F1 (LOG).
NEW LOGG I NG RUN :
ENTE NEW FRNO.__
OK CLR MENU QU I T
F1 F2 F3 F4
RE
12. % S DT
27. 5 MAX CF 1. 0
LOG MAX END QU I T
1
F1 F2 F3 F4
0
R
47Chapter 8 Data Logging
6. A screen will appear that indicates the value of reading
that has been temporarily stored in memory and the
number of the data point. The first data point will be 001.
7. Press F1 (SAVE) to permanently log this data point into
the meter’s memory with its associated data point
number. The meter will automatically return to the
measurement mode.
8. Press F3 (DISCARD) to erase the data point from the
meter’s temporary memory. The meter will
automatically return to the measurement mode.
9. Press F1 (LOG) again to log the second data point. It
will automatically be assigned data point 002 providing
that you had saved the first data point. If you had
elected to discard the first data point, then this point
will be designated data point 001.
10. Press either F1 (SAVE) or F3 (DISCARD). The meter
will automatically return to the logged measurements
screen.
11. Continue to record up to 999 data points in this manner.
12. To end this logging run and begin a new run,
press F3 (END). The screen will appear that allows
you to enter another two-digit survey number.
DATA POINT NO.001
12. 1 % STD
SAVE D I SCARD
F1 F2 F3 F4
NEW LOGG I NG RUN :
ENTE NEW FRNO.__
OK CLR MENU QU I T
F1 F2 F3 F4
RE

48 Operating the Meter
13. Use the numeric keypad to enter a new two-digit
survey number and then press F1 (OK)orENTER.
Again, make note of this number so that you can later
associate this survey number with the data points
collected. If you make a mistake, press F2 (CLR)to
clear the screen and enter a new survey number. The
meter will automatically return to the logged
measurements screen.
14. To end logging altogether and return to the standard
measurement screen, press F4 (QUIT). To initiate
logging again at a later point, use the menu system to
select DATA LOG from the First Menu Screen.
Mode 2 Logging
To initiate Mode 2 logging (a series of spatially-averaged
data points with a reference number assigned to each data
point)...
1. From the main data-logging screen, press the number 2
on the keypad to select LOG AVG WITH REF # from
the logging menu screen.
2. A screen will appear requesting that you assign a two-
digit survey number to this logging run of data points.
Use the numeric keypad to enter the two-digit number
and then press F1 (OK)orENTER. Make note of this
number so that you can later associate this survey
number with the data points collected. If you make a
mistake, press F2 (CLR) to clear the screen and enter a
new survey number.
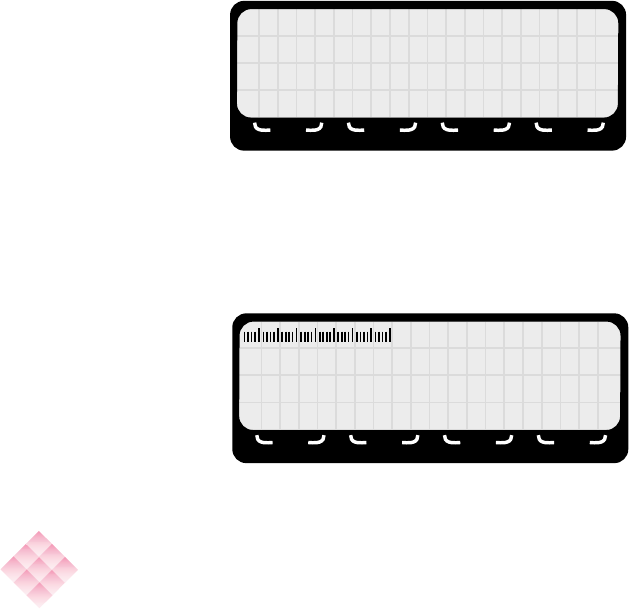
1LOGWITHREF #
2LOGAVGWITHREF#
3 CONT I NUOUS LOGG I NG
MEM QU I T
F1 F2 F3 F4
49Chapter 8 Data Logging
3. Press F4 (QUIT)orF3 (MENU) if you change your mind.
4. The meter will automatically return to the measurement
screen with new options available for the function keys.
5. Proceed to make measurements as normal. To initiate
making a spatially-averaged measurement that will be
logged, hold the meter in one hand and the probe in
the other with the head of the probe touching the
ground.
6. Press F1 (START) while slowly moving the probe
vertically at a constant rate of movement. Keep your
finger on the F1 key during this operation.
7. Strive for an interval of about ten seconds between
starting and stopping the timer. The displayed value
will flash and the audio signal will sound every second
as a timing aid.
8. When the probe reaches the height equal to the top of
an adult's head (about 6 ft./1.9 m), press F1 again
(STOP).
NEW LOGG I NG RUN :
ENTE NEW FRNO.__
OK CLR MENU QU I T
F1 F2 F3 F4
RE
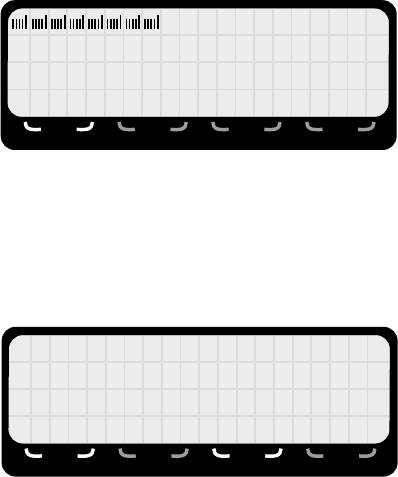
12. 1 % STD
27.5 MAX CF 1.00
START MAXR END QU I T
F1 F2 F3 F4
It is important to
move the probe
vertically at a con-
stant rate to obtain
an accurate spa-
tially averaged
measurement.
Note
50 Operating the Meter
DATA POINT NO.001
12. 1 % STD AVG
27. 5 % STD MAX
SAVE D I SCARD
F1 F2 F3 F4
10. Press F1 (SAVE) to permanently log this data point into
the meter’s memory with its associated data point
number. The meter will automatically return to the
logged measurement screen.
11. Press F3 (DISCARD) to erase the data point from the
meter’s temporary memory. The meter will
automatically return to the logged measurement
screen and display real time values.
12. Press F1 (START) again to begin the second spatially
averaged data point. It will automatically be assigned
data point 002 providing that you had saved the first
data point. If you had elected to discard the first data
point, then this point will be designated data point 001.
13. Press either F1 (SAVE) or F3 (DISCARD).
14. Continue to record up to 999 spatially-averaged data
points in this manner. Both the average and maximum
values will be saved and will be associated with a
specific data point number.
9. A screen will appear that indicates the average and
maximum values of the reading that has been
temporarily stored in memory and the number of the
data point. The first data point will be 001.
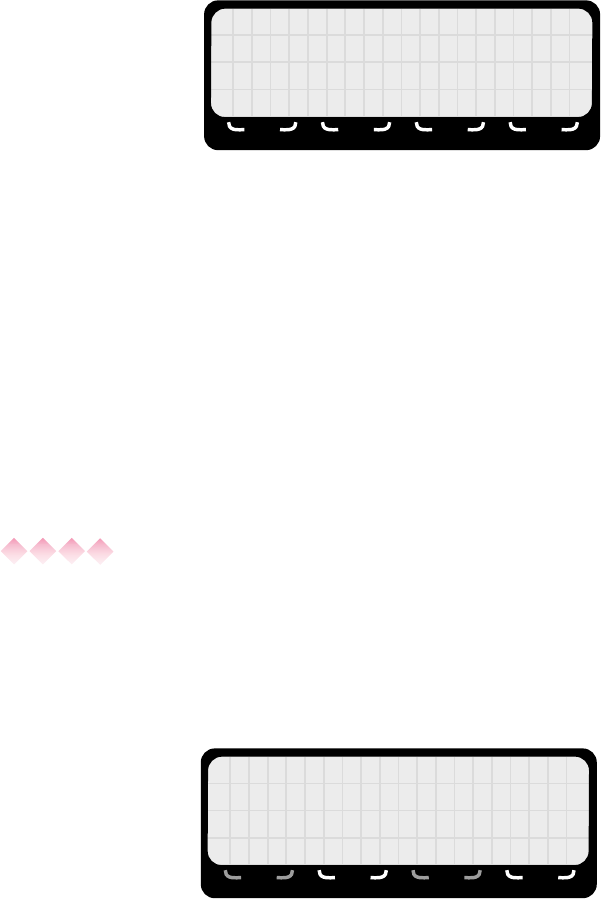
12. % S DT
27. 5 MAX CF 1. 0
STOP
1
F1 F2 F3 F4
0
51Chapter 8 Data Logging
15. To end this logging run and begin a new run, press F3
(END). The screen will appear that allows you to enter
another two-digit survey number.
16. Use the numeric keypad to enter a new two-digit
survey number and then press F1 (OK)orENTER.
Again, make note of this number so that you can later
associate this survey number with the data points
collected. If you make a mistake, press F2 (CLR)to
clear the screen and enter a new survey number.
The meter will automatically return to the
logged-measurements screen.
17. To end logging altogether and return to the standard
measurement screen, press F4 (QUIT). To initiate
logging again at a later point, use the menu system to
select DATA LOG from the First Menu Screen.
NEW LOGG I NG RUN :
ENTE NEW FRNO.__
OK CLR MENU QU I T
F1 F2 F3 F4
RE
Mode 3 Logging
To initiate Mode 3 logging (a series of data points
automatically logged at specific intervals)...
1. From the main data logging screen, press the
number 3on the keypad to select CONTINUOUS
LOGGING from the logging menu screen.
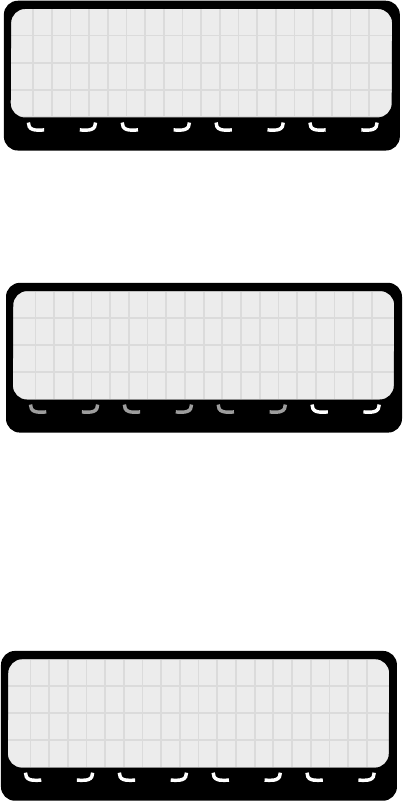
1LOGWITHREF #
2LOGAVGWITHREF#
3 CONT I NUOUS LOGG I NG
MEM QU I T
F1 F2 F3 F4
52 Operating the Meter
2. A screen will appear requesting that you assign a two-
digit survey number to this logging run of data points.
Use the numeric keypad to enter the two-digit number
and then press F1 (OK)orENTER. Make note of this
number so that you can later associate this survey
number with the data points collected.
3. A new menu screen will appear that offers five different
logging rates: 1/SEC,10/MIN,1/MIN,10/HR, and 2/HR.
4. Press the number on the numeric keypad (1-5) that
corresponds to the desired logging rate.
5. A new menu screen will appear. The numeric keypad
and the function keys are used to define the duration of
time to be logged.
NEW LOGG I NG RUN :
ENTE NEW FRNO.__
OK CLR MENU QU I T
F1 F2 F3 F4
RE
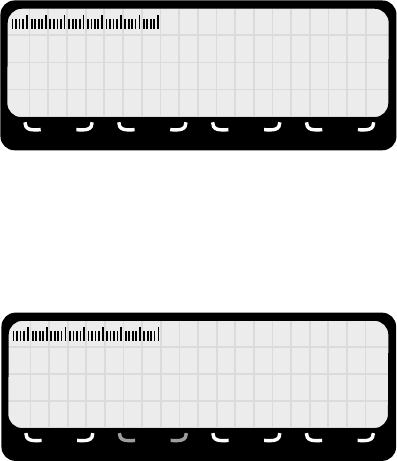
CONT I NUOUS LOGG I NG
RATE=10 / MI N
DURATION=__SEC/MN/HR
SEC MI N HR CONT
F1 F2 F3 F4
LOGGING RATE=10/MIN
1= 1/SEC 4= 10/HR
2= 10 /MIN 5= 2/HR
3= 1/MIN OFF
F1 F2 F3 F4
53Chapter 8 Data Logging
6. To log for a specific interval of time, enter a two-digit
number on the keypad. If you make a mistake entering
a number, simply continue entering numbers until the
correct value is displayed. Then press either F1 (SEC),
F2 (MIN), or F3 (HRS) and the meter will automatically
return to the measurement screen with new options
available for the function keys.
7. To log for an indeterminate interval of time (until you
tell the meter to stop or the memory is filled), press
F4 (CONT). The meter will automatically return to the
measurement screen with new options available for the
function keys.
8. Proceed to make measurements as normal. To initiate
logging, press F1 (LOG). The meter will beep every
time a data point is recorded.
9. If a specific interval of time had been selected, the
meter will automatically stop logging at the end of this
interval. To stop logging earlier or when set to an
indeterminate period of time, press F3 (END).
12. 1 % STD
27.5 MAX CF 1.00
LOG MAXR MENU QU I T
F1 F2 F3 F4
12.1 % STD
27.5 MAX CF 1.00
LOG END QU I T
F1 F2 F3 F4
54 Operating the Meter
To begin another logging run at a different rate or for a
different duration...
•Press F3 (MENU). Press the number 1on the keypad
to select DATA LOG from the First Menu Screen and
proceed as previously described.
To end logging altogether and return to the standard
measurement screen...
•Press F4 (QUIT). To initiate logging again at a later
point, use the menu system to select DATA LOG from
the First Menu Screen.
NEW LOGG I NG RUN :
ENTE NEW FRNO.__
OK CLR MENU QU I T
F1 F2 F3 F4
RE
10. A screen will appear requesting that you assign
another two digit survey number to the new logging
run. Use the numeric keypad to enter the two-digit
number and then press F1 (OK)orENTER. Again,
make note of the number for later use. If you make a
mistake, press F2 (CLR) to clear the screen and enter
a new survey number. The meter will automatically
return to the logged measurements screen.
Memory Capacity
To determine the remaining memory of the 8718B meter...
1. Access the menu system by pressing the function key
that corresponds to the legend below MENU on the
bottom line of the display.
2. Press the number 1on the keypad to select DATA
LOG from the First Menu Screen.
55Chapter 8 Data Logging
A record contains a header and one or more data points.
To estimate the approximate number of data points and
records (logging runs) that can be stored with the
available memory ...
1. Allocate 33 bytes for each header. A separate header
is used for each record.
2. Allocate 7 bytes for each data point from Mode 1 and
Mode 3 logging.
3. Allocate 14 bytes for each for each spatially averaged
data point from Mode 2 logging. More memory is
used in this mode because both average and peak
values are stored.
4. Determine whether there is sufficient available memory
to perform the desired task. If there is, proceed with
logging as described above.
5. If you determine that there is insufficient memory to
perform the desired task because much of the meter’s
memory has been used, it will be necessary to empty
the memory. Press F4 (QUIT)
6. To download the current memory contents, you must
connect the 8718B to a computer. See Chapter 18,
User's Software.
AILALBORY
10 B AVAI
L, 15 Bkk
SED
MENU QUIT
AV
F1 F2 F3 F4
U
EM
EM
3. Press F2 (MEM).
4. A screen will appear showing the approximate amount
of available memory and the amount of memory
already used. The bar graph is a rough indicator of
remaining memory capacity as a percentage of total
capacity.
56 Operating the Meter
7. To discard the contents of the meter’s memory once the
contents have been downloaded or without saving the
information, access the menu system by pressing the
function key that corresponds to the legend below
MENU on the bottom line of the display.
8. Press 8(NEXT) to get to the Second Menu Screen.
9. Press 2(SETTINGS).
10. A new screen will appear offering several options.
11. Press 3 (CLEAR MEMORY). A screen will appear
requesting that you confirm your request and warning
that the stored information will be lost.
12. Press F1 (CLEAR) to clear the memory or F1 (ABORT)
to return to the First Menu Screen without clearing the
memory.
SETT I NGS
1CLOCK 4RGT/LEFT
2TEMP 5DISPLAY
3CLEARMEMORY
F1 F2 F3 F4
CLEAR MEMORY
CLEAR I NG THE MEMORY
CAN NOT BE REVERSED
CLEAR ABORT
F1 F2 F3 F4
Analog Output
The 8718B Meter allows the user to output a DC voltage that is
proportional to the instantaneous measured value. When
connected to a typical chart recorder, it will provide a
continuous analog record of the measured field strength.
See Chapter 17, Operation with a Data Recorder.

57Chapter 9 Time-Averaged Measurements
9Time-Averaged Measurements
Measurement Options
The 8718B meter features two averaging modes:
•Perform fixed-time averaging over any one of several
specific time intervals.
•Perform averaging to meet the requirements of a
specific standard. The averaging period is
automatically set by meter.
Making Time-Averaged Measurements
To make time averaged measurements ...
1. Access the menu system by pressing the function key
that corresponds to the legend below MENU on the
bottom line of the display.
2. Press number 2on the keypad to select TIME AVG
from the First Menu Screen.
3. A new menu will appear offering two averaging modes.
The status of both modes will be shown.
4. Press F4 (OFF) to turn either time averaging mode off
and return to the measurements screen.
T IME AVERAGI NG
1FIXEDTIME:OFF
2STANDARDS: OFF
ENTER NO . TO TURN ON
F1 F2 F3 F4
Mode 1
Mode 2
58 Operating the Meter
Mode 1 Averaging
To initiate Mode 1 averaging (fixed time averaging over any
one of several specific time intervals)...
1. Press number 1on the keypad to select FIXED TIME
from the averaging menu screen. Selecting Mode 1
averaging will automatically shut off Mode 2 averaging
if it is on.
2. A new menu screen will appear that offers four
different averaging intervals: 30 SEC,1MIN,6MIN,
and 30 MIN. If an averaging interval had previously
been selected and is currently active, that selection will
be flashing.
3. Press the number on the numeric keypad (1-4) that
corresponds to the desired averaging interval and the
meter automatically returns to the measurement
screen with new options available for the function
keys. If you had accessed the menu system from the
Opening Menu Screen, you will return to that screen.
4. At any time you can press F4 (QUIT) to turn the time
averaging mode off and return to the normal
measurements screen.
F I XED T IME AVERAG I NG
1=30 SEC 3= 6 MIN
2= 1 MIN 4=30 MIN
OFF
F1 F2 F3 F4
12. 1 % STD
27.5 MAX CF 1.00
START MENU QU I T
F1 F2 F3 F4
59Chapter 9 Time-Averaged Measurements
5. The meter will continue to make real-time
measurements until you initiate making the time-
averaged measurement.
6. Determine where you want to make the averaged
measurement and place or hold the probe in the
desired position. For short intervals, it may be
practical to hold the meter in one hand and the probe
in the other. For longer intervals, it is suggested that
you place the probe on some form of non-conductive
stand so that it does not move. At frequencies above
50 MHz, the meter should be separated from the probe
by a minimum of 12 inches (30 centimeters) to
minimize any interaction between the meter, the probe,
and the electromagnetic field. At the lower
frequencies, the measurement techniques are very
different. See Low Frequency Measurements in the
Applications Booklet.
7. Press F1 (START) when you are ready to begin the
time-averaged measurement.
8. The averaged value is displayed on the screen and will
flash each time it is updated (one second intervals).
The meter will automatically stop at the end of the
selected averaging interval.
9. To end time averaging prior to the end of the
averaging interval, press F4 (STOP).
10. At the end of the averaging interval, the meter will
show the time-averaged value and the averaging
interval on the second line of the display. The
maximum value will be shown on the third line of the
display. The bar graph will be indicating the
instantaneous field strength in real time.
24 . 2 % STD AVERAGE
39.5 MAX CF 1.00
PAUSE STOP
F1 F2 F3 F4
60 Operating the Meter
11. To make another time-averaged measurement over the
same interval, press F1 (START) again.
12. To temporarily suspend the time average mode (once
the current measurement interval has been completed
or stopped) and make real time measurements, press
F2 (CLR). To make another time-averaged
measurement over the same interval, press F1
(START) again.
13. To end time averaging altogether and return to the
standard measurement screen (once the current
measurement interval has been completed or
stopped), press F4 (QUIT). To initiate time averaging
again at a later point, use the menu system to select
TIME AVG from the First Menu Screen.
To temporarily pause during a time-averaged
measurement...
1. To temporarily suspend time averaging, press F3
(PAUSE). The word *PAUSED* will appear on the
fourth line of the display. To resume time averaging
and complete the measurement, press F1 (START).
24 . % S DTERAGE
39 .5 MAX 10 .4 SEC
TSART
CLR MENU QU I T
2
F1 F2 F3 F4
AV
If you access the
menu system from
the Opening Menu
Screen, you will re-
turn to that screen.
Once a probe has
been selected and
zeroed, the mea-
surement screen will
reflect the averaging
mode that you have
selected.
Note
24 . 2 % STD AVERAGE
39.5 MAX CF 1.00
START *PAUSED * STOP
F1 F2 F3 F4

61Chapter 9 Time-Averaged Measurements
The PAUSE feature
can be useful when
measuring the aver-
age value from cer-
tain rotating radars.
The effective mea-
surement technique
requires you to
pause during the pe-
riod of time when you
are not in the beam
of the
radar. Continue this
technique for two or
more revolutions (de-
pending on the RPM)
to ob-
tain a
realistic
average
value of the field in
the beam at your lo-
cation. For details on
this measurement
technique, see Radar
Measurements in the
Applications Booklet.
Note
2. You may continue to pause and start the averaging as
many times as needed. The time interval initially
selected applies only to the measurement time.
3. To end time averaging while *PAUSED*, press
F4 (STOP).
To change the averaging interval...
1. To change the averaging interval (once the current
measurement interval has been completed or
stopped), press F4 (QUIT). To initiate a new time
averaging interval, use the menu system to select
TIME AVG from the First Menu Screen.
2. Proceed as previously described to select FIXED
TIME from the averaging menu screen and then the
new averaging interval.
Mode 2 Averaging
Mode 2 averaging (time averaging to meet the requirements of
a specific standard) requires two parameters to be properly set
before being used:
•The meter must be set to the correct standard for your
application.
•The meter must be set for a specific frequency because
the averaging time in many standards is frequency
dependent. For example, IEEE C95.1-1999 specifies a
six minute averaging period for Controlled Environments
from 3 kHz to 15 GHz. Above 15 GHz, the averaging
period decreases to ten seconds at 300 GHz based on
a logarithmic function.
62 Operating the Meter
To set the meter for a specific frequency...
1. Press F4 (FREQ) from the measurement screen. A
new screen will appear to allow you to enter a
frequency.
2. Enter the frequency that you want to use for the time-
averaged measurements. Make sure you fill in all four
positions. If you make a mistake just enter more digits
until correct. For greater accuracy, use the units that
allow the larger number. For example, enter
10.00 kHz, not 00.01 MHz.
3. Change the units (if needed) by pressing either
F1 (kHz), F2 (MHz), or F3 (GHz).
4. Press F4 (SAVE). The meter will automatically return
to the measurement screen.
5. If the probe used is a probe in memory, the frequency
that you have set will be displayed on the right side of
the third line of the display. The meter will also
automatically correct the readings for probe frequency
deviation. The meter does this by using the closest
calibration frequencies above and below the selected
frequency to calculate and apply an appropriate
correction factor. This new correction factor is briefly
shown on the second line of the display after you
press F4 (SAVE) before the meter automatically
returns to the measurement screen.
FREQUENCY : __ . __ GH
CORRECT. FACTOR:1.00
Hkz z z MH GH SAVE
F1 F2 F3 F4
63Chapter 9 Time-Averaged Measurements
To initiate Mode 2 averaging (averaging to meet the
requirements of a specific standard)...
1. Make sure that the meter is set for the correct standard
or change it if needed. See Chapter 11, Using the
Standards Feature.
2. Make sure the meter is set to the correct frequency for
the measurement you are making. See page 64.
3. Press number 2on the keypad to select STANDARDS
AVG from the averaging menu screen. Selecting
Mode 2 averaging will automatically shut off Mode 1
averaging if it is on.
4. A new screen will appear stating that averaging has
been enabled in accordance with a specific standard.
5. Press F3 (CANCEL) to return to the initial time
averaging menu screen to make another selection or
press F4 (OFF) to turn time averaging off and return to
the standard measurement screen.
6. Press F1 (BEGIN) to automatically return to the
measurement screen with new options available for the
function keys.
AVERAGI NG ENABLED
STND: IEEEC95. 1-1999
LEVEL : CONTROLLED
BEG I N CANCEL OFF
F1 F2 F3 F4
6.26 Wmcm/
2
11.5 MAX 10.00 GHz
START MENU FREQ QU I T
F1 F2 F3 F4
64 Operating the Meter
7. The meter will continue to make real time
measurements until you initiate making the time-
averaged measurement.
8. Press F1 (START) when you are ready to begin the
time-averaged measurement.
9. The averaged value is displayed on the screen and will
flash every second each time it is updated. The meter
will automatically stop at the end of the averaging
interval, which was determined by the standard and
the frequency.
10. To end time averaging prior to the end of the
averaging interval, press F4 (STOP).
11. At the end of the averaging interval, the meter will
show the time-averaged value on the second line of
the display and the maximum value on the third line of
the display. The bar graph will be indicating the
instantaneous field strength in real time.
12. To make another time-averaged measurement at the
same frequency, press F1 (START) again.
8.71 Wmcm/2 AVERAGE
11. MAX 10.00 GHz
P AUSE STOP
F1 F2 F3 F4
8.71 mW/c m
2
AVERAGE
11.5 MAX 10.00 GHz
START CLR MENU QUI T
F1 F2 F3 F4
If you access the
menu system from
the Opening Menu
Screen, you will re-
turn to that screen.
Once a probe has
been selected and
zeroed, the mea-
surement screen will
reflect the averaging
mode that you have
selected.
Note

65Chapter 9 Time-Averaged Measurements
13. To temporarily suspend the time average mode (once
the current measurement interval has been completed
or stopped) and make real time measurements, press
F2 (CLR). To make another time-averaged
measurement under the same conditions, press F1
(START) again.
14. To end time averaging altogether and return to the
standard measurement screen (once the current
measurement interval has been completed or
stopped), press F4 (QUIT). To initiate time averaging
again at a later point, use the menu system to select
TIME AVG from the First Menu Screen.
To temporarily pause during a time averaged
measurement...
1. To temporarily suspend time averaging, press
F3 (PAUSE). The word *PAUSED* will appear on the
fourth line of the display. To resume time averaging
and complete the measurement, press F1 (START).
2. You may continue to pause and start the averaging as
many times as needed. The time interval determined
by the standard and the frequency applies only to the
measurement time (excludes time when "PAUSED").
3. To end time averaging while *PAUSED*, press F4 (STOP).
8.71 mW/c m
2
AVERAGE
11.5 MAX 10.00 GHz
START * PAUSED* STOP
F1 F2 F3 F4
The PAUSE feature
can be useful when
measuring the aver-
age value from cer-
tain rotating radars.
The effective mea-
surement technique
requires you to
pause during the pe-
riod of time when
you are not in the
beam of the radar.
Continue this tech-
nique for two or
more revolutions
(depending on the
RPM) to obtain a re-
alistic average value
of the field in the
beam at your loca-
tion. For details on
this measurement
technique, see Ra-
dar Measurements
in the Applications
Booklet.
Note
66 Operating the Meter
To change the frequency...
1. To change the frequency (once the current
measurement interval has been completed or
stopped), press F2 (CLR) if the averaged value is
displayed.
2. Once the meter is displaying real time values, the
frequency menu is accessed by pressing F3 (FREQ).
3. Proceed as previously described to set the meter to a
new frequency.

67Chapter 10 Alarm Settings
10 Alarm Settings
Alarm Description
The Model 8718B Meter is equipped with an audible alarm that
emits sound through a tiny hole on the bottom of the meter. The
alarm sounds automatically whenever the field strength
exceeds the measurement range of the probe or over ranges.
The meter can also be set to sound its alarm at a specific level
and/or to sound a variable tone indication of field strength.
Controlling the Alarm Functions
To make changes to the audio alarm settings...
1. Access the menu system by pressing the function key
that corresponds to the legend below MENU on the
bottom line of the display.
2. Press 8(NEXT)togototheSecond Menu Screen.
3. Press 5(ALARM) to access the alarm menu. A new
menu will appear that allows you to:
•Turn the audio alarm on or off.
•Set the alarm threshold in terms of percent of full scale
of the probe in use (1% to 99%).
•Turn the variable tone alarm on or off.
Note
If you access the
menu system from
the Opening Menu
Screen, you will re-
turn to that screen.
Once an alarm set-
ting has been made,
the alarm function
will be initiated once
the meter is placed
into the measure-
ment mode.
AUD IO ALARM SETT I NGS
FIXED IS TONE IS
ON @ 2 5% OFF
ON OFF ON OFF
F1 F2 F3 F4

68 Operating the Meter
4. The left side of the display gives the status of the fixed
alarm. It indicates whether the fixed alarm is either on
or off and the current alarm threshold setting in terms
of percent of full scale of the probe in use (1% to 99%).
5. The right side of the display indicates whether the
variable tone alarm is either on or off.
6. The bottom line of the display indicates which function
key (F1-F4) is used to turn the two alarms on or off.
Fixed Alarm
1. Use F1 (ON)orF2 (OFF) to change the status of the
fixed alarm.
2. Use the numeric key pad to enter a two-digit alarm
threshold number. This number is equal to the percent
of full scale of the measurement range of the probe in
use. For example, to set the meter to sound its alarm
at 5 mW/cm2when using a Model 8721D probe, which
has a full scale measurement range of 20 mW/cm2, set
the alarm threshold to 25%.
3. If you want to turn the variable tone alarm on or off do
that next. See Variable Tone Alarm on the following
page.
4. When you are satisfied with all the alarm settings, press
ENTER and the meter will return to the measurement
screen.
Note
If you change to an-
other probe with a
different full scale
measurement range,
the alarm threshold
will also change. A
setting that is often
used with shaped fre-
quency response
probes is 50% of
Standard. To set
the alarm for one of
the 8722 series
probes, which have
full scale measure-
ment ranges of 300%
of standard, calculate
the threshold setting
by dividing the de-
sired alarm level by
the full scale value.
In this case
50/300 = 16.66%.
Set the alarm thresh-
old to 17% and the
alarm threshold will
be 51% of Standard
when using a
8722 series probe.

69Chapter 10 Alarm Settings
Variable Tone Alarm
1. Use F3 (ON)orF4 (OFF) to change the status of the
fixed alarm. The variable tone alarm constantly
generates a series of tones that increase in frequency
in direct proportion to field strength.
2. If you want to turn the fixed alarm on or off, do that next
See Fixed Alarm on the previous page.
3. When you are satisfied with all the alarm settings,
press ENTER and the meter will return to the
measurement screen.
Note
The fixed and vari-
able tone alarms op-
erate independently
of each other. The
meter can be set to
have both alarms
off, either one of the
alarms on, or both
alarms on. If both
alarms are turned
on, the variable tone
rate will vary with
the field strength un-
less the measured
field strength ex-
ceeds the fixed
alarm threshold.
The alarm will then
sound a continuous
tone.
70 Operating the Meter

71Chapter 11 Using the RF Exposure Standards Feature
11 Using The RF Exposure
Standards Feature
Application
The Model 8718B Meter is always set to reference a particular
safety standard, regulation, or guidance.
The 8718B uses the referenced standard in two ways:
•The Alternate Measurement Display Screen displays
additional information about the instantaneous
measurement at a particular frequency. See Alternate
Measurement Display Screen on page 20.
•Time-averaged measurements are made to conform to
the referenced standard at the specified frequency.
Checking or Changing the Standard
To determine which standard the 8718B is currently set to
reference ...
1. Access the menu system by pressing the function key
that corresponds to the legend below MENU on the
bottom line of the display.
2. Press number 8(NEXT) to select the Second Menu
Screen.
3. Press number 6to select STNDS.
4. A screen will appear that specifies the current
standard. The specific level or tier will be specified for
standards with more than a single tier.
72 Operating the Meter
Many standards have
more than one tier,
i.e., IEEE C95.1-1999
establishes different
Maximum Permissi-
ble Exposure (MPE)
levels and averaging
times for Controlled
Environments and for
Uncontrolled Envi-
ronments.
Note
IEEE C95. 1-1999
CONTROLLED ENV I R
OK STNDS
F1 F2 F3 F4
5. Press F1 (OK) to continue using this standard as a
reference without change.
To change the standard or tier that the 8718B references...
6. Press F4 (STNDS). A new menu screen will
automatically appear that lists several major
international standards.
7. Press the number on the keypad that matches the
desired standard.
For standards with only a single tier...
8. A new screen will appear that lists the complete
standard number.
1FCC‘97 5 IRPA
2 I EEE ‘ 99 6 US DOD
3 ANS I ‘ 82 7 UK
4ACGIH 8NEXT
F1 F2 F3 F4
ANSI C95 .1 -1982
OK STNDS
F1 F2 F3 F4
73Chapter 11 Using the RF Exposure Standards Feature
9. Press F1 (OK) to begin using this standard as a
reference.
10. Alternately, press F4 (STNDS) to select another
standard.
For standards with two or three tiers...
11. A new screen will appear that lists the complete
standard number at the top of the display. The
available tiers will be listed below the basic standard.
12. Press the number on the keypad that matches the
desired tier. The screen will change so that only the
standard and the selected tier are shown with two
options available for the function keys.
13. Press F1 (OK) to begin using this standard and tier as a
reference.
14. Alternately, press F4 (STNDS) to select another
standard.
FCC REGULAT IONS ' 97
1 OCCUPA ' L / CONTRL ' D
2 GEN POP / UNCONTR ' D
ENTER NO . TO SELECT
F1 F2 F3 F4
FCC REGULAT IONS ' 97
OCCUPA ' L / CONTRL ' D
OK STNDS
F1 F2 F3 F4
Changing the level
referenced on a
multi-tier standard
does NOT change the
characteristics of a
probe ie. a probe
rated at 600% of oc-
cupational limits al-
ways yields an output
in Percent of the Oc-
cupational limits.
Note
74 Operating the Meter

75Chapter 12 Back Light and Battery Status
12 Back Light and Battery Status
Application for Back Light
The liquid crystal display (LCD) on the Model 8718B Meter
provides high contrast in bright outdoor lite. However, LCD’s do
not generate any light and can be difficult to read in low light
conditions. The LCD on the 8718B contains a high brightness
back light that can be turned on whenever it is needed.
The only disadvantage to using the back light is that it consumes
much more energy than the meter circuits and significantly
reduces operating time between battery charges.
Controlling the Back Light
To turn the back light on or off...
1. Access the menu system by pressing the function key
that corresponds to the legend below MENU on the
bottom line of the display.
2. Press 4to select BAT/LITE from the First Menu Screen.
A new screen will appear that indicates both battery
status and back light status.
3. Press F3 (ON)orF4 (OFF) to turn the back light on or
off as required.
4. Press the ESC key to return to the First Menu Screen.
Press it again to return to the measurements screen.
BATTERY GHT
LEVEL= 90% l I S OFF
TIME=18HRS lON OFF
F1 F2 F3 F4
lLI
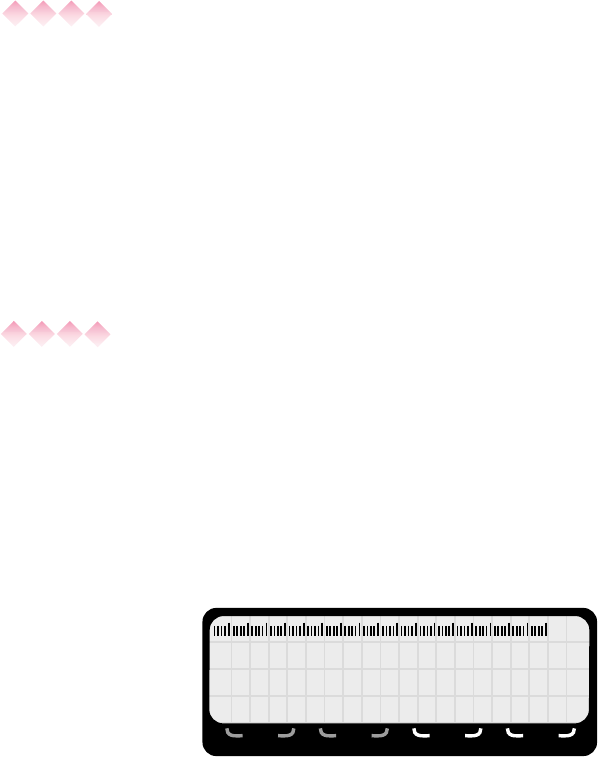
76 Operating the Meter
Battery Capacity
The Model 8718B Meter uses a custom rechargeable battery.
Under normal conditions, the battery provides about 20 hours of
use before it must be recharged. The two features on the 8718B
that significantly increase the current draw and therefore reduce
the operating time are the back light and the RS232 serial port.
It is for this reason that the default condition upon turn-on for
both these features is off. Operating time with the back light on
is about 6.5 hours. This is normally sufficient for a full day of
measurements but it is a factor that must be considered.
Checking Battery Status
To check the battery status...
1. Access the menu system by pressing the function key
that corresponds to the legend below MENU on the
bottom line of the display.
2. Press 4to select BAT/LITE from the First Menu Screen.
A new screen will appear that indicates both battery
status and back light status.
3. The bar graph indicates the approximate charge level
of the battery. The charge level is also shown as a
numerical percentage on the left side of the third line of
the display.
The estimated operating time under the current
operating conditions is shown on the left side of the
bottom line of the display. Turning the back light on,
for example, reduces the operating time significantly.
BATTERY GHT
LEVEL= 90% l I S OFF
TIME=18HRS lON OFF
F1 F2 F3 F4
lLI

77Chapter 12 Back Light and Battery Status
4. Press the ESC key to return to the First Menu Screen.
Press it again to return to the measurements screen.
Accuracy of Battery Status Indicator
The characteristics of Ni-Cad rechargeable batteries make it
difficult to provide a truly accurate indication of charge level.
This is because there is very little voltage difference over a broad
range of charge levels.
The battery status indicator on the 8718B is reasonably
accurate when indicating charge levels of more than 80% or less
than 20%. Unfortunately, indicated charge levels greater than
20% but less than 80% are only very rough estimates.
It is a characteristic of these batteries to get a large voltage
increase with only a brief charging period if one starts with a
battery that is completely discharged. However, under such
conditions, the battery has very little capacity and the voltage
drops quickly in use. Since the status indicator circuits measure
battery voltage, this can lead to erroneous indications of charge
level when the meter is first turned on. This false indication will
only occur when the batteries do not receive a complete charge.
The battery should be charged for a minimum of eight hours,
but ideally only when the status indicator shows a level of less
than 20%. The back light can be turned on to speed up the
discharge process when desired. These batteries obtain a
maximum charge when charging takes place with batteries
close to fully discharged.
78 Operating the Meter

79Chapter 13 Keypad Lockout and Display Blanking
13 Keypad Lockout and
Display Blanking
Description
The Lockout feature disables the keypad to prevent inadvertent
changes in operation. This feature can be useful while climbing
and/or if the meter is left unattended during a long data logging
session.
The Blank feature both disables the keypad and blanks the
display. This feature can be useful if the meter is left unattended
during a long data logging session.
Keypad Lockout
To lock the keypad...
1. Access the menu system by pressing the function key
that corresponds to the legend below MENU on the
bottom line of the display.
2. Press number 8(NEXT) to select the Second Menu
Screen.
3. Press 4to select LOCKOUT.
4. The meter will automatically return to the
measurements screen and the keypad will be locked.
Only the Off key will respond to commands
individually.
To unlock the keypad...
5. Simultaneously depress both the Enter and Esc keys
to unlock the keypad. These are the two dark blue
keys.

80 Operating the Meter
Display Blanking and Keypad Lockout
To both blank the display and lock the keypad...
1. Access the menu system by pressing the function key
that corresponds to the legend below MENU on the
bottom line of the display.
2. Press number 8(NEXT) to select the Second Menu
Screen.
3. Press 7to select BLANK.
4. The meter will automatically return to the
measurements mode but will be blank. The keypad
will also be locked. Only the Off key will respond to
commands individually.
To both activate the display and unlock the keypad...
5. Simultaneously depress both the Enter and Esc keys
to both activate the display and unlock the keypad.
These are the two dark blue keys.

81Chapter 14 Probe Zero
14 Probe Zero
Understanding the Zero Function
The purpose of “zeroing” the probe and meter is to set the meter
to indicate a zero field strength when there is no measurable
field strength. The Narda 8700 series survey system maintains
measurement accuracy under all conditions by insuring that all
probes always provide true RMS (Root Mean Squared)
indications of field strength. Diode detectors, which are used in
many of Narda’s electric field probes, are always operated in the
square law region. Since the diodes are not operated in a
saturated mode to insure accuracy in multi-signal conditions,
the survey system must be “zeroed”.
The Model 8718B establishes the zero reference as a small
positive voltage inside the meter. This zero offset allows the use
of only positive voltages while handling both positive and
negative zero drift. While it is difficult to distinguish between a
positive zero drift and the presence of an actual field, a negative
indication on the meter must be due to zero drift. This is
indicated on the display by a flashing negative sign between the
field strength value and the unit of measure on the second line of
the display.
12. % S DT
27.5 MAX
CF 1. 0
A L T MAXR MENU FREQ
1
F1 F2 F3 F4
0
-

82 Operating the Meter
Causes of Zero Drift
All sensors have a change in output that is a function of
temperature. In a probe, it is both the thermal coefficient of the
detector and the gain of the probe amplifier that determine how
much a probe drifts over temperature. Thermal compensation
circuitry in the probe is used to minimize the impact of
temperature change. Thermocouple detectors have the lowest
thermal coefficient but their very low level output requires much
more amplifier gain than diode sensors, especially in electric
field probes. Therefore, Narda probes with the greatest amount
of thermal drift are the microwave- band electric field probes,
which all use thermocouple sensors. The lower frequency
electric field probes use diodes and require much less gain.
Narda magnetic field probes use thermocouples but the circuit
requires lower gain than the electric field probes.
The other possible cause of zero drift can occur when a probe is
subjected to a very high field level and then is moved to an area
with a very low field. The high field heats the sensor and can
cause drift. However, this type of drift normally corrects itself
within a few minutes.
Many competitive diode sensor probes exhibit drift for another
reason - reaction to infrared light on the diodes. Narda probes
do not have this problem. Narda uses special diodes with an
integral light shield, photographic paper inside the probe cover,
and a combination anti-static shield and blackout coating on the
inside of the probe cover.
Checking for Zero Drift
There are two indications that the probe may have drifted
enough to require correction.
•Whenever the negative zero drift exceeds 0.1% of full
scale of the probe, the words “RE-AUTO-ZERO” will
flash on the top line of the display. This will replace the
bar graph.
83Chapter 14 Probe Zero
•Whenever the meter continues to show low-level values
and never seems to get back to a zero-field condition,
positive zero drift is a possibility. This can be confirmed
by shielding the probe to see if the meter goes back to a
zero reading. See Shielding the Probe on the following
page for suggested methods.
Temperature Concerns
It is important to allow the meter and probe to become
conditioned to the ambient temperature before attempting to
zero the system. This is especially important when the meter
and probe have been transported or stored at a different
temperature such as in a vehicle, for example. Diode
sensor-based probes require only a few minutes to stabilize.
The thermo-couple sensors used in microwave band and ultra
broadband probes may require 15-20 minutes to stabilize.
Establishing a Zero Field
It is important to “zero” the probe while the probe is not exposed
to a significant RF field level. For accuracy, the field level should
be lower than the lowest value that the probe is capable of
reading. If previous measurements have indicated that the
ambient field level is very low, the probe can be zeroed without
shielding. This is often the case in a typical office environment.
It is recommended that the ambient field level be at least 30 dB
below the full scale measurement range of the probe. When it is
necessary to zero a probe in higher field areas, the probe must
be shielded.
RE - AUTO- ZERO
12. 1 % STD
27.5 MAX CF 1.00
ALT MAXR MENU FREQ
F1 F2 F3 F4

84 Operating the Meter
Shielding the Probe
The probe must be shielded from significant RF fields whenever
it is zeroed with the meter. This is to establish a zero reference
for the field.
There are four ways to shield the probe during zeroing:
•Use the Model 8713B Electric Field Attenuator supplied
with the meter. This conductive fabric is the same
material that is used in RF protective clothing. The
attenuator should be put over the head of the probe and
closed off around the neck of the probe above the
handle using the hook-and-loop fastener band.
•Use the shielded storage case. Place the probe in the
case and close the lid carefully on the cable with the
meter outside the case. Be careful not to move the
probe while zeroing takes place (On probes with low
frequency test points you can create static which will
give inaccurate results, although this is less of a concern
with the new 8700D series probes).
•Use aluminum foil to shield the head of the probe. Fully
wrap the head of the probe and close it around the neck
of the probe about half way down. If the probe has
metallic low frequency test points, these must be
insulated from the aluminum foil. One way to do this is
to use electrical tape to cover the test points. The other
solution is to use a wide elastic band around the head of
the probe over the test points. The elastic band can
easily be moved to use the 8718B’s built-in low
frequency RF test source. Alternately, use an aluminum
can.
•Use your body to shield the probe from the source of
energy.
Note
The Electric Field At-
tenuator can not be
used to zero mag-
netic field probes.

85Chapter 14 Probe Zero
Zeroing the Probe While In Use
The meter and probe are initially zeroed before the meter is
allowed to go into the measurement mode. If you determine that
significant drift may have occurred, it is simple to fine tune the
zero. See Checking for Zero Drift on page 82.
To zero the probe while in use...
1. Shield the probe using one of the methods described
in Shielding the Probe.
2. Press the Auto Zero key. The meter will correct for any
probe drift in about eight seconds. The meter will then
automatically return to the measurements screen.
86 Operating the Meter

87Chapter 15 Advanced Settings
15 Advanced Settings
Description
The Settings menu is used to control several features of the
Model 8718B that need to be accessed infrequently. The
options available under the Settings menu are:
•Check or set the meter’s internal clock (time/date).
•Enter a value for temperature. This feature is used only
when the probe is separated from the meter and
operating at a different ambient temperature.
•Clear the memory of logged data.
•Set the function keys for right or left handed operation.
•Adjust the contrast of the display.
Accessing the Settings Menu
To access the Settings menu...
1. Access the menu system by pressing the function key
that corresponds to the legend below MENU on the
bottom line of the display.
2. Press 8(NEXT) to select the Second Menu Screen.
3. Press 2to select SETTINGS. A new screen will appear
that offers five choices.
SETT I NGS
1CLOCK 4RGT/LEFT
2TEMP 5DISPLAY
3CLEARMEMORY
F1 F2 F3 F4
88 Operating the Meter
Setting the Clock
To check and/or change the time and date...
1. Access the settings menu by following the procedure
described in Accessing the Settings Menu.
2. Press 1to select CLOCK. A new screen will appear
that displays the time on the left side of the screen and
the date on the right. The time is in 24 hour format, i.e.
13:30 equals 1:30 P.M. The date format is MM/DD/YY.
3. Press the Esc key to return to the First Menu Screen
without making any changes.
To set the time...
1. Press F1 (SET). The display will change to show four
underscored lines where the new time must be
entered.
2. Enter the new time in 24-hour format using the numeric
keypad. If you make a mistake, simply enter more
numbers until the correct time has been entered.
3. Press F2 (SAVE) to save the new time.
TIME IS DATE IS
13:42 02/27/98
2 4HR - FORMAT - MM / DD / YY
SET SET
F1 F2 F3 F4
TIME IS DATE IS
__:__ 02/27/98
2 4HR - FORMAT - MM / DD / YY
SAVE
F1 F2 F3 F4
89Chapter 15 Advanced Settings
4. Proceed to setting the date, if required.
5. Alternately, press the Esc key to return to the First
Menu Screen. Press Esc again to return to the
measurements screen.
To set the date...
1. Press F3 (SET). The display will change to show six
underscore lines where the new date must be entered.
2. Enter the new date in DD/MM/YY format using the
numeric keypad. If you make a mistake, simply enter
more numbers until the correct time has been entered.
3. Press F4 (SAVE) to save the new time.
4. Proceed to setting the time, if required.
5. Alternately, press the Esc key to return to the First
Menu Screen. Press Esc again to return to the
measurements screen.
Temperature Correction
This feature is only used when the meter and probe are operating
at significantly different ambient temperatures.
This situation can occur when the meter is located indoors and
the probe is outdoors. Either a probe extension cable or a fiber
optic link system is normally used for such applications.
Temperature correction circuitry is used in the probe and there
is a temperature sensor located inside the meter. To achieve the
highest level of accuracy, it is important that the sensor inside
the meter sense the ambient temperature that the probe is
subjected to. If the two components are operating in different
ambient temperature environments, the 8718B can be set to
TIME IS DATE IS
13: 42 __/ __/ __
2 4HR - FORMAT - DD / MM / YY
SAVE
F1 F2 F3 F4
90 Operating the Meter
correct for the temperature differential. The amount of error that
can occur when the meter and probe are operating at different
temperatures depends on the particular probe design as well as
the temperature differential. The maximum error that can occur
is about 1% per degree Centigrade for diode probes and about
0.1% per degree Centigrade for thermocouple probes. The
change may either increase or decrease the meter reading from
the true value, depending on the probe model.
To correct for a significant temperature differential...
1. Access the settings menu by following the procedure
described in Accessing the Settings Menu.
2. Press 2to select TEMP. A new screen will appear that
shows the current mode. The default mode is Auto
Correct.
3. Press F1 (OK) to continue with the same setting
without change.
4. Press F4 (SET) to either set or change to a specific
probe temperature.
5. If the meter was set for a specific temperature and you
want to return to the auto correct mode, press F1
(AUTO).
6. A new screen will appear that shows two underscored
lines where the probe ambient temperature should be
entered. Use the numeric keypad to enter the
temperature of the probe in degrees Centigrade.
TEMP . CORRECT ION
IS SET FOR AUTO
OK SET
F1 F2 F3 F4
TEMP . CORRECT ION
IS SET FOR __°C
AT THE PROBE
AUTO SAVE
F1 F2 F3 F4

91Chapter 15 Advanced Settings
7. Once the correct probe temperature is displayed on
the screen, press F4 (SAVE). The meter will
automatically return to the measurements screen.
8. Alternately, press F1 (AUTO) to return to the default
auto correct mode.
Clearing the Memory
If you determine that there is insufficient memory available to
perform the desired logging task because much of the meter’s
memory has been used, it will be necessary to empty the
memory. All data will be lost when the memory is cleared.
To download the current memory contents prior to clearing the
memory you must connect the 8718B to your computer. See
Chapter 18, User's Software.
To clear the memory...
1. Access the settings menu by following the procedure
described in Accessing the Settings Menu.
2. Press 3(CLEAR MEMORY). A screen will appear
requesting that you confirm your request and warning that
the stored information will be lost.
3. Press F1 (CLEAR) to clear the memory or F4 (ABORT)
to return to the First Menu Screen without clearing the
memory. Press Esc to return to the measurements
screen.
CLEAR MEMORY
CLEAR I NG THE MEMORY
CAN NOT BE REVERSED
CLEAR ABORT
F1 F2 F3 F4
Note
All data will be lost
when the memory is
cleared.

92 Operating the Meter
Function Key Position
The position of the commands for the function keys (F1-F4), as
described in this guide, is for right-hand operation.
Conventionally, right-handed people hold the probe in their right
hand and the meter in their left hand. The choice of function key
location for the START and LOG commands is particularly
important because it is often desirable to press these keys
without looking at the meter. This situation occurs during spatial
averaging, data logging, and time averaging.
The four function keys on the Model 8718B allow for easy
operation with your thumb and the raised area around each key
makes it easy to be certain that your thumb is in the correct
location. The START and LOG functions are always operated
with the F1 key for right-hand operation.
The 8718B allows you to change to left-handed operation with a
few keystrokes. When set for left-handed operation, the START
and LOG functions will be operated with the F4 key. The
functions normally associated with the F4 key are then operated
with the F1 key. The meter will remain set the same way upon
turn-on and can only be changed by following the procedure
described below.
To check or change the function key location...
1. Access the settings menu by following the procedure
described in Accessing the Settings Menu.
2. Press 4to select RGT/LEFT. A new screen will appear
that shows the current mode.
FUNCT ION KEYS ARE
SET FOR R I GHT - HANDED
OPERAT I ON
OK LEFT
F1 F2 F3 F4
93Chapter 15 Advanced Settings
3. Press F1 (OK) to continue with the same setting
without change. The meter will return to the First Menu
Screen. Press Esc to return to the measurements
screen.
4. Press F4 (LEFT)orF4 (RGT) to change to the alternate
setting for function key menu position. The meter will
return to the first menu screen. Press Esc to return to
the measurements screen.
Adjusting the Display Contrast
The LCD display is set at the factory for the best contrast under
typical conditions. The user can adjust the contrast to optimize
visibility under specific lighting conditions.
To adjust the display contrast...
1. Access the settings menu by following the procedure
described in Accessing the Settings Menu.
2. Press 5to select DISPLAY. A new screen will appear
that shows the current setting. The adjustment range is
from 0-9, with 0the lightest setting and 9the darkest
setting.
3. Press F1 (OK) to continue with the same setting
without change. The meter will return to the First Menu
Screen. Press Esc to return to the measurements
screen.
D I SPLAY CONTRAST
CURRENT SET NGT:6
0=LIGHT 9=DARK
OK SET
F1 F2 F3 F4
I

94 Operating the Meter
4. Press F4 (SET) to change the display contrast setting.
The screen will change to show both the current setting
and display an underscore where the new setting is
entered.
5. Use the numeric keypad to enter a single digit from 0-9
with 0for the lightest setting and 9the darkest setting.
The contrast will change as soon as the numeric value
is entered. You may continue to experiment as many
times as needed by entering a new value.
6. When you are satisfied with the setting, press F4
(SAVE). The meter will return to the First Menu Screen.
Press Esc to return to the measurements screen.
D I SPLAY CONTRAST
OLD SETT G:I6
NEW SETT I NG : _
SAVE
F1 F2 F3 F4
N

95Chapter 16 Operation with a Fiber Optic Link
16 Operation with a Fiber Optic Link
Description
Narda fiber optic link transmitters are compatible with all 8700
series probes and the Model 8718B meter. The meter has a
built-in fiber optic receiver compatible with the HP Versatile Link
type plastic cables and connectors. The fiber optic transmitter
connects directly or via a short cable to the probe. A fiber optic
cable connects the 8718B to the transmitter.
The transmitter contains a rechargeable battery that provides
both power for its own circuitry and to operate the amplifier in
the probe. Full system calibration is maintained because each
of the components in the system – meter, fiber optic transmitter,
and probe – are independently calibrated. The fiber optic
transmitter converts the analog DC voltage out of the probe
amplifier to a series of pulses. The pulse rate is directly
proportional to the probe output.
Application
The fiber optic link provides total isolation between the meter and
the probe which is often desirable when making low frequency
measurements. At frequencies below 50 MHz, and especially
below 10 MHz, there is significant interaction between the field,
the individual making the measurements, and the survey
equipment. There is also the possibility that the probe and meter
will be at different electrical potentials which can result in a false
indication of what is actually a scalar field. See Low Frequency
Measurements in the Applications Booklet for additional information.
96 Operating the Meter
The fiber optic link system also allows the meter and probe to be
separated by up to 50 meters. One application is surveying
towers. A skilled climber carries the probe while the person
actually making the measurements remains on the ground.
Controls and Indicators
The fiber optic transmitter has the following controls and
indicators:
Control Function Indication
BAT Test
S1 OFF
ON
Tests Battery Charge
Turns Battery Off
Turns Power On
LED Ona
LED Off
LED Off
CAL 1
S2 NORM
CAL 2
Tests Channel 1
Normal Operation
Tests Channel 2
Meter mid-scale
Variable Level
Above mid-scale
a. The battery is considered charged when above 15.0 Vdc.
Setting the Meter
The meter has two input ports to receive information from
probes:
•The standard probe cable input
•The fiber optic receiver input
Only one input can be in use at any time. The default input upon
turn-on is the last input port used. It is important to remember
this if you switch back and forth between using the standard
input and the fiber optic receiver.
97Chapter 16 Operation with a Fiber Optic Link
To set the meter to use the fiber optic receiver input...
1. Access the menu system by pressing the function key
that corresponds to the legend below MENU on the
bottom line of the display.
2. Press 8(NEXT) to select the Second Menu Screen.
3. Press 3to select CABLE/FO. A new screen will appear
that shows the current input status.
4. Press F1 (OK) to continue with the same input without
change. The meter will return to the First Menu Screen.
Press Esc to return to the measurements screen.
5. Press F4 (FO) to change to the fiber optic receiver
input. The meter will return to the First Menu Screen.
Press Esc to return to the measurements screen.
To set the meter to use the cable input...
6. Access the CABLE/FO menu as previously described.
A screen will appear that shows the current input status.
7. Press F1 (OK) to continue with the same input without
change. The meter will return to the First Menu Screen.
Press Esc to return to the measurements screen.
PROBE INPUT STATUS
CABLE ON:
FIBER OPTIC: OFF
OK FO
F1 F2 F3 F4
PROBE INPUT STATUS
CABLE OF:F
FIBER OPTIC: ON
OK CABLE
F1 F2 F3 F4

98 Operating the Meter
8. Press F4 (CABLE) to change to the cable input. The
meter will return to the First Menu Screen. Press Esc to
return to the measurements screen.
System Checks
To insure that the entire system – meter, fiber optic
transmitter, and probe – are functioning properly...
1. Set the 8718B to use the fiber optic receiver input as
previously described.
2. Connect the probe to the fiber optic transmitter.
3. Connect a fiber optic cable between the meter and the
fiber optic transmitter.
4. Check the battery charge level in the transmitter by
turning switch S1 (BATT TEST–ON)toBATT TEST.
Verify that the green LED is illuminated which signifies
that the battery is adequately charged for operation. If
the LED fails to illuminate, charge the transmitter
overnight. A full-battery charge takes approximately 16
hours.
5. Set S1 to the ON position and S2 to the NORM
position.
6. Zero the 8718B using the standard procedure.
7. Move S2 ( CAL1–NORM–CAL2) to the CAL1 position.
The meter should read 45-55% of the full scale rating of
the probe. The actual error from the combination of the
8718B and the fiber optic transmitter is less than (±3%).
8. Move S2 to the CAL2 position. The meter should read
approximately 25% higher than the CAL1 position. The
exact value is not critical.
9. Set S2 to the NORM position to begin making
measurements providing that all the system checks
were successfully completed.

99Chapter 17 Operation with a Data Recorder
17 Operation with a Data Recorder
Description
The Model 8718B provides an output signal that can be
connected to a data recorder to provide a continuous record of
measurement over an extended period of time. The recorder
output is available via the smaller of the two jacks located on the
left side of the meter. The output is always on.
Output Level
The recorder output ranges from 0.0 volts to 3.0 volts. The level
corresponds directly with the indication on the bar graph of the
display. Under normal conditions, the bar graph is in the AUTO
mode which results in the bar graph using three 10 dB ranges to
cover the entire dynamic range of the probe, which is typically
30 dB. Thus, the recorder output would produce a sawtooth
pattern if the measured field strength was slowly increased in a
linear fashion over the entire dynamic range of the probe. For
example, the recorder output level with the 8718B bar graph
range set to AUTO used with a probe with a full-scale
measurement range of 100 mW/cm, such as the Model 8723D,
would follow the table on the next page.
100 Operating the Meter
Field Strength Recorder Voltage Bar Graph
0.01 mW/cm20.03 volts 1 % of Full Scale
0.50 mW/cm21.50 volts Half Scale
1.00 mW/cm23.00 volts Full Scale
1.01 mW/cm20.03 volts 1% of Full Scale
5.0 mW/cm21.50 volts Half Scale
10.0 mW/cm23.00 volts Full Scale
10.1 mW/cm20.03 volts 1% of Full Scale
50 mW/cm21.50 volts Half Scale
100 mW/cm23.00 volts Full Scale
>100 mW/cm24.2-4.5 volts "RANGE
OVERLOAD"
The recorder output has an approximate 1/4 second RC time
constant.
The recorder output
can be set to one of
three fixed ranges by
changing the bar
graph range setting.
See Bar Graph
Ranges on page 23.
Note

101Chapter 18 User's Software
18 User’s Software
Description
The 8718B User’s Software is a Windows™ - based program that
performs three basic functions:
•Probe Calibration Data. The User's Software is used to
enter probe calibration information into the memory of
the Model 8718B.
•Data Retrieval. The User’s Software is used to download
data collected with the Model 8718B with one of its three
data logging modes.
•Diagnostics and Upgrades. The User’s Software is used
to provide meter diagnostics and to load firmware
updates into the meter.
The User’s Software for the Model 8718B is supplied on a
compact disk. It should be permanently installed on the hard
drive of a personal computer.
System Requirements
In order to install and operate the User’s Software successfully,
your system must meet the following minimum requirements:
•An IBM or 100% compatible personal computer with
4MBofRAM.
•1 MB of hard drive space.
•Microsoft Windows™3.1, Windows™95, Windows™98,
Windows™NT or later.
•A printer supported by Microsoft Windows
(required for printing reports).
•A CD ROM drive.
•A mouse.
•A cable to connect the computer to the 8718B (supplied).

102 Operating the Meter
Installing the User’s Software
To set up the program...
1. Turn on the computer and start Microsoft Windows
(type WIN) at the DOS prompt if your computer
doesn’t start Windows automatically).
2. Insert the User’s Software into your CD-ROM drive.
The CD starts automatically and the 8718B-menu
screen appears.
3. Follow the instructions that appear on your screen. The
setup program places all of the program files in a
directory on your hard drive called 8718B. A new
program group called RF Safety will be created.
Starting and Exiting the 8718B User’s Program
To start the 8718B User’s Program...
1. Click on Programs from the Start menu in Microsoft
Windows.
2. Select the 8718B User’s Software icon. The Main Menu
Screen appears.
3. Make sure you exit the 8718B User’s Software before
turning off your computer by selecting Exit from the
File menu. You can also double click on the
Control-menu box. Do NOT use Ctrl+Alt+Del to exit
the program.
Establishing Communications between the
Meter and the Computer
You must establish communications between the meter and the
computer in order to enter, change, or view probe calibration
information or to download data from the meter. You can only
view stored logged data using your computer.
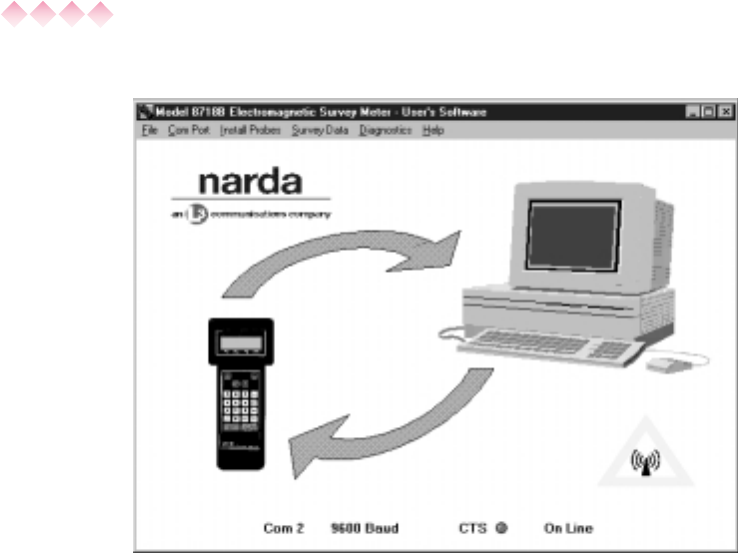
103Chapter 18 User's Software
Main Menu Screen

104 Operating the Meter
To establish communications between the meter and the
computer...
1. Use the supplied computer cable to connect between
the RS232 connector on the meter and a COM port
(COM 1 or COM 2) of your computer.
2. Start the User’s software. The Main Menu Screen
shows the COM port and baud rate settings. Check
that the COM port setting matches the location of the
cable. Note the baud rate setting. The default setting is
9600 baud.
3. Change the baud rate and/or COM port if desired by
selecting the ComPort pull down menu and selecting
the desired rate and/or COM port.
The User’s Software indicates the communications status. Prior
to establishing communications, the CTS (Clear ToSend)
indicator will be black and the words “Not On Line” will be
shown below the indicator.
4. Turn the Model 8718B on.
5. Once the meter has finished booting up, press F4
(MENU) on the meter to access the First Menu Screen.
6. Press 6(RS232) to select the communications port
menu.
7. Check that the baud rate on the meter is set to the
same as the User’s Software. The meter setting will be
the same as the last time the meter was used.
8. Check that the CTS indicator on the computer screen has
turned red and the status has changed to “On Line”.
Viewing or Changing Probe Calibration Data
The 8718B knows the basic parameters of all 8700 series probes
i.e. frequency range, type of probe (electric or magnetic field),
measurement range, and standard calibration frequencies. The
term “installed” means that the meter has stored the calibration
date and the correction factors for a specific probe. Narda installs
probes that are shipped at the same time as the 8718B.
The cable must be a
RS232 serial cable with
a DB9 male connector
on one end and a DB9
female connector on
the other end. Do NOT
use a null modem ca-
ble since these are
wired differently. Note
that certain older
model computers have
a 25-pin connector for
a serial port that will
require either an
adapter or a different
cable.
Note
Operation of an older
model 8718 meter that
has been upgraded to
Version 3.0 firmware is
different. The default
condition upon meter
turn-on for the RS232
port is off (to con-
serve power). The
RS232 port must be
turned on from the
meter menu.
Note

105Chapter 18 User's Software
You can have a maximum of six probes installed at any time.
Since the serial number of the probe is identified as well as the
model number, more than one probe of the same model number
may be installed at the same time.
To view or change probe calibration data in the meter’s
internal memory...
1. Establish communications between the meter and your
computer as described in paragraph in Establishing
Communications...
2. Select Install Probes from the Install Probes menu.
The 8718B will beep to indicate that stored probes
information has been retrieved. The Probe Installation
Screen will appear on the computer.
The table in the top left hand corner lists the probes by model
and serial number that have been installed in your Model 8718B.
A small box just below the table lists the total number of installed
probes.
To simply view the details of any installed probe proceed to
Viewing Installed Probes section. If you have less than six
probes installed and want to install a probe you can proceed as
described in Installing a Probe.If you already have six probes
installed, you must first remove one or more probes to make
room. Proceed to the Removing Installed Probes section.
Viewing Installed Probes
To view the information on a specific probe that has
already been installed...
1. Go to the Probe Installation Screen.
2. Highlight the model and serial number of the probe that
you want to view from the list in the Installed Probes
box. The calibration information for that specific probe
will appear.
3. To leave the Probe Installation window and return to
the Main Menu Screen click the Close button.

106 Operating the Meter
Installing a Probe
You may have a maximum of six probes installed in the 8718B at
any time. If you have six probes installed and want to install
another probe, you must first remove a probe. See Removing
Installed Probes.
To add a probe to the meter’s memory...
1. Click on the New Probe button. The Select Below...
dialog box will appear.
2. Select the model number of the probe you want to
install from the list of files by either double clicking on it
or highlighting it and choosing OK. Each standard
Narda 8700 series probe has a separate file that
defines its basic characteristics. The file names are
simply the model number of the probe preceded by the
letter “p”. The window will now show the model
number of the probe selected, its basic characteristics -
frequency range, full scale measurement range, field
type, and response (flat or shaped) - and the standard
calibration frequencies will be entered in the table on
the right.
3. Enter the five-digit serial number in the highlighted box
in the center of the window.
4. Enter the calibration date by highlighting the box to the
right of legend Enter Cal Date. This date is shown on
the handle of the probe. Hit the Tab key on the
computer.
5. The Calibration Due date is automatically calculated
as one year after the calibration date. Enter a different
calibration date if you are using a different calibration
cycle.
6. Enter the correction factor for each calibration
frequency of the probe by highlighting the default value
of 1.0. A default correction factor value of 1.0 (CF 1.0)
is automatically entered in the table to minimize
measurement error in case the user fails to enter a
value.
Probe Models 8782D
and 8782 are unique
low frequency elec-
tric field probes that
feature a range
switch on the probe
to cover a total of 60
dB. The 8782 series
probes must be en-
tered as two sepa-
rate probes since
there are two differ-
ent full-scale mea-
surement ranges
(dependent on the
switch on the probe
that the meter can-
not control or know
the status of) and
each range has dif-
ferent calibration
factors.
Note
A correction factor
greater than 2.0 or
less than 0.5 will not
be accepted and will
automatically be
changed to one of
these values. Narda
probes never have a
correction factor
outside of this range
for any frequency
within their rated fre-
quency range.
Note
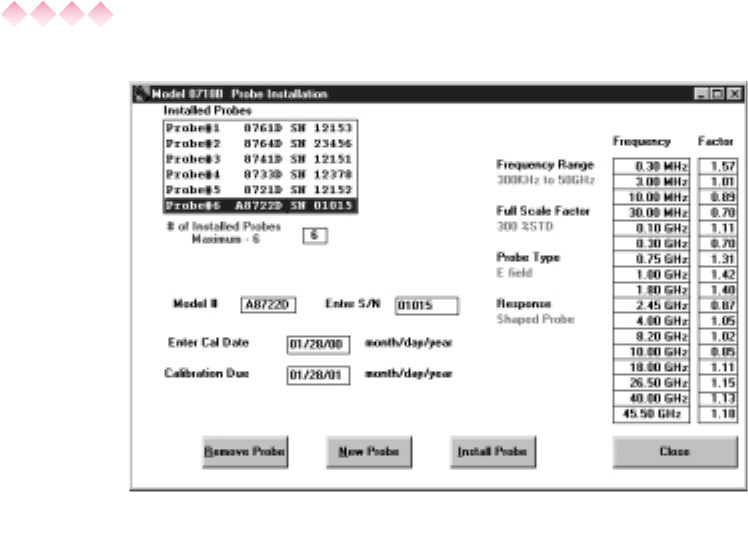
107Chapter 18 User's Software
Probe Installation Screen

Operating the Meter108
7. Enter any special calibration frequencies on the extra
lines provided and enter the appropriate calibration
factors. Delete any standard calibration frequencies
that were not used.
8. Click on the Install Probe button. A dialog box will
appear asking you if you are sure you want to install
the probe.
9. Click on OK. The program will automatically send the
calibration information to the meter via the modem and
cable. The program will then verify that the probe has
been successfully installed in the meter by reading the
meter’s memory.
10. The model number and the serial number of the probe
just installed will now appear in the table of Installed
Probes.
11. To leave the Probe Installation window and return to
the main menu click the Close button.
Removing Installed Probes
To remove a specific probe from the meter’s memory...
1. First view an installed probe as described in Viewing
Installed Probes.
2. Click on the Remove Probe button. A dialog box will
appear asking you to confirm that you want to remove
a probe from the meter’s memory.
3. Click OK. The probe will automatically be removed
from the meter’s memory.
4. The model number and the serial number of the probe
just removed will disappear from the table of Installed
Probes.
5. To leave the Probe Installation window and return to
the Main Menu Window click the Close button.

109Chapter 18 User's Software
Downloading Logged Data from the Meter
To download data from the meter...
1. Establish communications between the meter and your
computer described in Establishing Communications....
2. Select Download New Survey from the Survey Data
menu. A dialog box will appear that reminds you to
make sure that the 8718B is in a menu and not in a
measurement mode..
3. Click OK.
4. The message Downloading, please wait… will flash
on the computer screen.
5. Once the data has been downloaded the
Downloading, please wait… message will stop
flashing and a dialog box will appear.
The dialog box specifies the file name that has been given to the
downloaded data and its location on your hard drive. Make note
of this information and click OK.
File Format for Survey Data
Data files can have one of three forms identified by the
suffix in the file name.
1. The file name will be an eight-digit number with a .SVY
(survey) extension. The eight digits are derived from
the time and date that you downloaded the date. The
format is MDDHHmm.SVY (month, day, hour, and
minute).
2. Exported files that have been converted to standard
spreadsheet files have the same prefix as the original
file with the suffix csv. These files are automatically
stored in the subdirectory labeled Ssdata.
3. Exported files that have been converted to tab files
(standard ASCII text files commonly used in data base
programs) have the same prefix as the original file with
the suffix txt. These files are automatically stored in the
subdirectory labeled Ssdata.

110 Operating the Meter
Three sample files were loaded on your hard drive when
installed the User’s Software. There is a sample for each of the
three modes of data logging.
Selecting a File to View
To view stored surveys on your computer...
1. Select View Stored Surveys from the Survey Data
menu. A dialog box will appear titled Open Survey File.
Normal downloaded survey files stored on the
computer’s hard drive will be listed in the table on the
left. Downloaded survey files are stored in a
subdirectory labeled Svy. You can change drives, select
which types of files are listed, or change directories from
this box.
2. Select the data file you want to view from the list of files
by either double clicking on it or highlighting it and
choosing OK.
3. A new window labeled Logged Survey Data will
appear. The file name will be shown to the right at the
top of the window.
Logged Survey Data Window
The Logged Survey Data window is comprised of two parts:
1) The header section at the top of the window defines the
equipment that was used to make the survey.
a) The first line shows the meter model number, serial
number, Cal. Date, and calibration Due date.
b) The model number, serial number, Cal. Date, and
calibration Due date of the probe used are shown on
the second line.
c) Line three identifies whether or not probe frequency
correction (PROBE CORRECTION) was used during
the survey. Probe correction can be in the form of a
frequency that was entered or a numeric correction
factor.
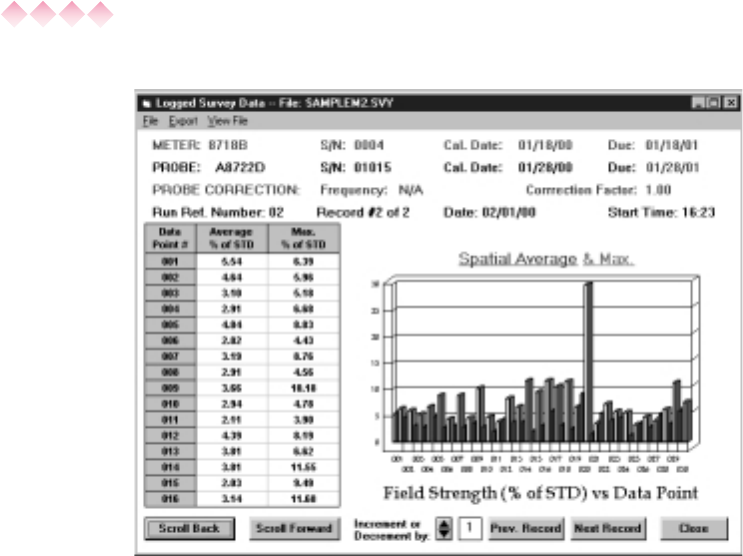
111Chapter 18 User's Software
Logged Survey Data Screen

112 Operating the Meter
d) The fourth line shows the Run Ref. Number that was
entered by the user at the beginning of the survey, the
Record number and total number of records in the file
and the Date and Start Time when the first data point
was taken.
2. The lower section of the window shows the measured data in
both tabular and graphical form.
a) The table on the left side of the screen displays up to
eighteen (18) data points at one time. The Data Point
#number will be a continuous sequence shown
sequentially in the time the data points were taken.
The Field Strength is shown in the unit-of-measure
used during the survey. Mode 2 data (a series of
spatially averaged data points) shows both the
Average and Max. (or peak) value for every data point.
Mode 3 data (continuous logging mode) shows the
Time that each data point was taken
b) The bar graph on the right side of the screen shows
the same data listed in the table. The title of the bar
graph is Logged Data for Mode 1 data, Spatial
Average & Max. for Mode 2 data, and Continuous
Log for Mode 3 data.
c) The range of the vertical axis of the graph is
automatically adjusted to accommodate the data. The
number of data points will also vary depending on the
data with a maximum of thirty (30) displayed at one
time.
d) The Scroll Back and Scroll Forward buttons are used
when there are more than sixteen data points to view.
Each time you click on one of these buttons you
advance or go back by sixteen data points.
e) The New Record and Old Record buttons allow you
to go back and forth between different records within
the same file. Each survey is a different record
identified by the Run Ref. Number that was entered by
the user at the beginning of the survey.
If you used the
PAUSE feature dur-
ing continuous log-
ging, the time shown
for each data point
will be incorrect for
all data points after
the pause feature
was used.
Note

113Chapter 18 User's Software
f) The up and down keys to the right of Increment or
Decrement By are used to determine how many
records you advance or go back every time you click
on the Prev. (previous) Record and Next Record
buttons. The small window to the right of the arrows
indicates the current setting.
To view another survey file...
1. Select Load Survey File from the File menu to close
the current logged data window and view another
logged data file. A dialog box will appear titled Open
Survey File. Normal downloaded survey files stored
on the computer’s hard drive will be listed in the table
on the left. Downloaded survey files are stored in a
subdirectory labeled Svy. You can change drives,
select which types of files are listed, or change
directories from this box.
2. Select the data file you want to view from the list of files
by either double clicking on it or highlighting it and
choosing OK.
3. The new Logged Survey Data window will appear.
To return to the Main Menu Window...
1. To leave the Logged Survey Data window and return
to the Main Menu Window click the Close button.
Printing a Logged Data Record
To print a copy of the Logged Survey Data window that you
are viewing...
1. Select Print Screen from the File menu. The
information will print automatically.
2. To print very large records with many data points it is
suggested that you export the data and use another
program.

114 Operating the Meter
Exporting Data
To export a logged data file for use in a spreadsheet
program...
1. Select Make Spreadsheet (.csv) File from the Export
menu. A dialog box will appear titled Make
Spreadsheet (.csv) File. The file selected to be
exported drive will be listed in the table on the left. The
default directory for exported survey files is Ssdata,
which is a subdirectory under 8718B. You can select
any drive and directory to export your file from this
dialog box.
2. Click OK to convert the file and store it in the selected
location.
To export a logged data file for use in a word processor or
text editor program...
1. Select Make Tab (.txt) File from the Export menu. A
dialog box will appear titled Make Tab (.txt) File. The
file selected to be exported drive will be listed in the
table on the left. The default directory for exported
survey files is Ssdata, which is a subdirectory under
8718B. You can select any drive and directory to
export your file from this dialog box.
2. Click OK to convert the file and store it in the selected
location.
Clearing the Meter’s Memory
To clear the meter’s memory of logged data with the
User’s Software...
1. Select Clear Survey Data from the Survey Data menu.
A dialog box will appear titled Clear Survey Data. It will
ask to confirm that you want to clear the survey data
from the meter’s memory.
2. Click OK to clear the meter’s memory of logged data.
3. If you make a mistake and want to restore the meter’s
memory, Select Restore Survey Data from the Survey

115Chapter 18 User's Software
Data menu. A dialog box will appear titled Restore
Survey Data. It will ask to confirm that you want to
clear the survey data from the meter’s memory.
4. Click OK to restore the last survey data to the meter’s
memory.
To clear the meter’s memory of logged data using the
meter’s menu system...
1. Select 2(SETTINGS) from the Second Menu Screen.
2. Press 3(CLEAR MEMORY). A screen will appear
requesting that you confirm your request and warning
that the stored information will be lost.
3. Press F1 (CLEAR) to clear the memory or F4 (ABORT)
to return to the First Menu Screen without clearing the
meter’s memory.
Diagnostics
The password-protected Diagnostics menu of the User’s
Software can be used if you experience a problem with your
8718B. Narda may be able to troubleshoot the problem using
the built-in diagnostic tools of the User’s Software. Contact
Narda if you believe the meter is not functioning properly.
Update Meter Firmware
A powerful feature of the Model 8718B is the ability to update its
operating software, or firmware, in the field. The password-
protected Update Meter Firmware menu of the User’s Software
is used to update the firmware. Narda may periodically offer
new firmware to correct problems and/or to add new features.
The update process uses the meter’s memory to temporarily
store files during the update process. All logged data will be
lost. Therefore, it is very important to download any data that you
want to save prior to updating the firmware.

116 Operating the Meter
To update the meter’s firmware …
1. Turn your meter on. Observe the firmware version
number, which is displayed briefly about three seconds
after you turn the meter on. The meter can be updated
if the firmware version is 3.0 or higher. Stop if the
firmware version is lower than 3.0 – these meters cannot
be updated in the field.
2. Establish communications between the meter and
your computer as described in Establishing
Communications... It is very important that you make
good connections at both ends of the cable used to
connect the meter to your computer.
3. Since stored data will be overwritten during the update
process, download any survey data that you want to
save by following the directions described under
Downloading Logged Data from the Meter.
4. Select Update Meter Firmware from the Update Meter
Firmware menu.
5. Read the directions and click OK to continue or click
Cancel to abort the update process.
6. Enter the password obtained from Narda and click OK.
7. Read the description of the three meter models. Click
Yes to update a Model 8718B meter. Click No if your
meter is a previously updated Model 8718 unit that
currently has firmware version 3.0 or higher. Click
Cancel if the meter is a Model 8718 that has a firmware
version lower than 3.0. These meters cannot be
updated in the field.
8. The update process begins when you click either Yes
or Noas described above. Do not interrupt the update
process.
9. You should get a message box that the firmware has
been updated in about three minutes (at the
recommended 9600 baud rate). Click OK.
10. You can now use your updated meter.
Note
Download any data
that you want to save
prior to upgrading
the firmware. All
stored data will be
lost during the up-
date process.
Note
Do not interrupt the
update process. If
the process is inter-
rupted the firmware
file may become
corrupted. The
meter will be inoper-
ative and will have to
be returned to Narda
for repair.

117Appendix A Communications with a Computer
ACommunications with a Computer
Application
The Model 8718B can be connected to a computer for real time
transmission of data via the meter’s RS232 connector. A limited
number of the meter’s functions can also be controlled remotely
via the RS232 bus.
Checksum and Modulo Description
Modulo 256 is the remainder of any number X divided by 256. As
an example, if the checksum is 1234, Modulo 256 of 1234 is 210.
The two ASCII digits to be transmitted as the checksum would
be D and 2 (the decimal-hex conversion of 210). An equivalent
calculation is to convert the sum to Hex and transmit the two
lowest digits. The Hex of 1234 is 4D2, therefore the digits to
transmit are ASCII D and 2.
Computer to Model 8718B Message Format
The first character in any message is the “>”. This allows the
Model 8718B to synchronize to the computer. Upon detection
of the “>” character, the 8718B will:
•Set itself to a listen mode, thereby eliminating the
possibility of a bus contention problem.
•Reset its character counter to allow storage of
succeeding characters in an internal buffer.
The next characters(s) is selected from the functions listed in
Command Character Function table.
118 Appendices
>A000CSCR
>C000CSCR
>Dr00CSCR
>E003XXXCSCR
>F0r4XXXXCSCR
>H000CSCR
>P000CSCR
>L000CSCR
>V000CSCR
>X000CSCR
AUTO ZERO
READ CLOCK (TIME DATE)
Display averaging change
r=1, 2, 3, 4 low to high display averaging
SET CF (Correction Factor)
SET FREQ
X is DATA, r is kHz, MHz, GHz
r=0=kHz, r=1=MHz, r=2=GHz
SEND HEADER (24 bytes of data)
DUMP PROBE DATA (432 bytes of data)
DUMP LOG DATA
READ displayed VALUE
Last displayed value (6 bytes) + units (6 bytes)
READ MAX
Command Characters Function
I. Communications Protocol
A) Ground Rules
1) CS= two digit checksum (2 ASCII (Hex) characters)
NOTE: The ">" is NOT included in the checksum calculation
2) CR= one digit camage return (13 or $0D)
3) x= data
4) r= range
5) >=ASCII “>” ($3E)
B) General send format:
1) >ïcmd letter ï00ï# of digits in data ïdata ïCSïCRï
2) All characters are sent and received as capital letters,
don’t send lower case letters unless one is specifically requested.
3) Checksum (CS) is always sent or received as a
hexadecimal value, e.g.,"A7","BC","2E", etc.
4) Data is always sent or received as a decimal value.
Command Characters Function
119Appendix A Communications with a Computer
>A000CSCR
>A000D1CR
3E 41 30 30 30 44 31 0D
>C000CSCR
>C000D3CR
3E 43 30 30 30 44 33 0D
S= seconds in BCD format
M= minutes in BCD format
H= hours in BCD format
X= N/A D= day of month in BCD format
N= month in BCD format
Y= year (00-99) in BCD format
CS= two byte checksum
CR= carriage return )
>E003xxxCSCR
Example: to set CF to 1.53, xxx=153
>E00315371CR
3E 45 30 30 33 31 35 33 37 31 0D
>F0r4xxxxCSCR
r=0 for kHz, 1 for MHz or 2 for GHz
Note: r is in binary, not ASCII Hex
Example: to set frequency for 27.12 MHz
>F0142712A7CR 3
3E 46 30 01 34 32 37 31 32 41 37 0D
>M000CSCR
>M000DDCR
3E 4D 30 30 30 44 44 0D
>V000CSCR
>V000E6CR
3E 56 30 30 30 45 36 0D
Auto Zero
ASCII
Hex
Read Clock
ASCII
Hex
(Where:
Correction Factor
ASCII
Hex
Frequency
ASCII
Hex
Clear All
Survey Data
ASCII
Hex
Read Field
Strength
ASCII
Hex
SEND RESPONSE
ACR
ACR
41 0D
SMHXDNYCSCR
ACR
ACR
ACR
x...xCSCR
II To Change or initiate the following:
A)
B)
C)
D)
E)
F)
Command Characters Function
Response format 12 data bytes (6 data, 6 units) + CSCR.
[Last displayed value (6 characters) + units of
last displayed value (6 characters) exactly as
displayed, except squared and cubed symbols.]
Note: Superscript 2 or 3 are Hex 80 or Hex 81, respectively.
Response Example: ASCII ".0631 mW/cm258"
Hex 2E 30 36 33 31 20 60 57 2F 63 6D 80 35 42 0D
120 Appendices
Read Max
ASCII
Hex
Reset Max
ASCII
Hex
Display Averaging
ASCII
Hex
Read Calibrated
Probe Data
ASCII
Hex
Read Log Data
ASCII
Hex
Read Header
(setup data)
ASCII
Hex
>X000CSCR
>X000E8CR
3E 58 30 30 30 45 38 0D
>Y000CSCR
>Y000E9CR
3E 59 30 30 30 45 39 0D
>Dr00CSCR
r=l for minimum to 4 for maximum display averaging
Example: to set minimum display averaging (4:1)
>D100D5CR
3E 44 31 30 30 44 35 0D
>P000CSCR
>P000EOCR
3E 50 30 30 30 45 30 0D
>L000CSCR
>L000DCCR
3E 4C 30 30 30 44 43 0D
>H000CSCR
>H000DSCR
3E 48 30 30 30 44 38 0D
xxxxxxCSCR
(6 data characters returned
exactly as displayed)
ACR
ACR
x..xCSCR
(432 data bytes returned)
x..xCSCR
(depends on size of log)
x..xCSCR
(24 data bytes sent, use
definition table to decode bits)
G)
H)
I)
J)
K)
L)
Command Characters Function
SEND RESPONSE

121Appendix B Theory of Operation
BTheory of Operation
Overall Functional Description
The meter is a portable, battery-operated instrument that forms
a complete RF Radiation Survey System when used with an
interconnected Narda 8700 Series probe. Optionally, the
system may employ a fiber optic transmitter and cable between
the probe and meter. The survey system is designed to detect
electromagnetic fields and to display the field level on the
meter’s Liquid Crystal Display (LCD). The probe detects the
electromagnetic radiation and transmits a DC signal to the
meter. The meter processes the signal from the probe for
viewing on the LCD screen. The meter displays the field levels
in various units of measure dependent on the field component
detected and the characteristics of the probe used.
Probe Functional Description
The probe senses the electromagnetic fields and develops a
signal for transmission to the meter. The probe has an isotropic
sensing pattern so that the radiation may be sensed from any
direction, except through the handle. Detectors in the probe
sense the electromagnetic radiation present and apply signals
to preamplifiers U1 and/or U2 located within the probe.
Preamplifiers U1 and U2 amplify the signals from the detectors
and route them to the meter via connector P1.
Model 8718B Meter Functional Description
The meter receives the signal(s) from the probe, processes the
signal(s) and provides a visual display of the levels detected.
The signal(s) received from the probe at PROBE connector J1 is
routed to amplifier U2. Amplifier U2 amplifies the signal(s) from
the probe and generates a signal to drive the A/D converter U3.
The output of the A/D converter is routed to microprocessor U5
that drives the LCD.

122 Appendices
The meter also contains built-in self-testing facilities for
checking the condition of the batteries, the operation of the
probe and for zero adjustment of the probe.
The meter provides a means for automatically zero adjusting the
meter and probe. When in an operating mode and the probe is
in a zero field, the operator presses the Auto Zero key to begin
the auto zeroing routine. The 8718B meter uses a unique digital
method to set the zero reference.
The meter provides a means of testing whether the probe is
operational using built-in test signal sources. The test is used to
prove that the probe is operational by generating upscale
indications on the Model 8718B meter.
(a) High Frequency Test Source. A 10.5 GHz (nominal)
oscillator and waveguide aperture for illuminating the
probe. Power output is capable of producing an
upscale indication on the meter of approximately
0.75 mW/cm2 (±3 dB).
(b) Low Frequency Test Source. An external test point
provides a 10 kHz (nominal) signal at the unit and test
points on the probe to excite each low frequency
element and produce an upscale indication on the
meter. The amount of deflection will vary depending
on the model probe being used.
When the Test Source key is depressed, U5 (and part of U1)
and Q1A within the meter generate test signals that are sensed
by the probe, causing the level displayed on the LCD to move
upscale. If no change in reading is observed, either the probe or
the meter may be defective. The test source automatically shuts
off after twenty seconds. The test must be performed with the
meter in the correct location relative to the meter.
Model 8718B Meter Circuits
The 8718B is comprised of five main assemblies: printed circuit
boards (PCB) A1 and A2, keypad S1, LCD display D1 and the
battery pack B1. This section provides an overview of the 8718B
circuits. There are no adjustable components (i.e., potentiometers
or variable resistors) used within the 8718B.
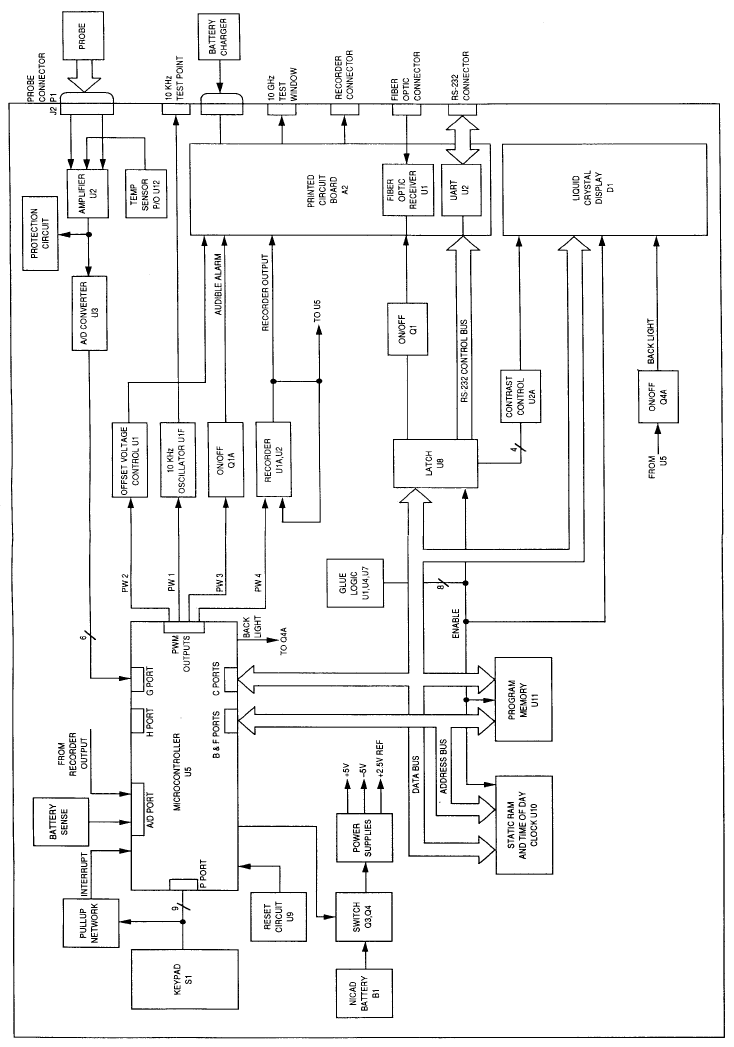
123Appendix B Theory of Operation
Model8718BFunctionalBlockDiagram
124 Appendices
Calibration is performed using the RS-232 port, a voltage
source and a computer.
PCB A1 is the primary circuit board within the meter. The
majority of the components are surface mount. It is located in a
heavily shielded area beneath the keypad. Operating power
from battery B1 is routed through Q3 and Q4 that form a
momentary switch for the micro controller U5. U5 provides a
control signal to the +5V, -5V and +2.5V power supplies made
up of U12, U13 and U14. The DC voltage output (two voltages if
a ultra-broadband probe with a two channel amplifier is used)
from the field sensing probe is coupled through the A2 PCB into
an input amplifier made up of U2 and then input into the Analog
to Digital converter U3. U3’s digital output is applied to the
micro controller U5. The on-board data bus is used to drive the
LCD display. The data bus interfaced with latch U8, static
Random Access Memory (RAM) and Time-of-Day U1O and the
program memory U11. The LCD module receives input from the
data bus, along with a contrast control input from U8 through
U2A, R2 and R21. The LCD back light control is provided from
P/O Q4, which is controlled by U5. The address bus circuit is
made up of U5, U10, U11 and the glue logic circuit comprised of
U4, U7 and parts of U1, U6 and U4. The circuit provides RS-232
interfacing through U8, which also controls A2U2, the RS-232
UART. The 10 GHz test source is controlled by U8 in
conjunction with Q2 and Q3A. Micro controller U5 also provides
Pulse Width modulated (PWM) signals that are used by the
8718. The 10 kHz source control is provided by U5’s PWM
along with U1. A PWM line and Q1 drive the audible alarm
circuit. A PWM line and U1 and U2 also control the Recorder
Output.
This small circuit board primarily handles input/output (I/O)
functions for the meter. It is located in a shielded area behind
the probe connector. A2 contains the RS232 circuit and
interfaces with the charger jack, the recorder output jack, the
probe and fiber optic inputs, and the high frequency test source.
A2 connects to A1 via a filtered connector mounted on A1.
PCB A1
PCB A2

125Appendix B Theory of Operation
The LCD is a self-contained display and meter circuit assembly.
The display has four lines with twenty characters per line. Each
character is a 5 x 7 dot matrix. The display is backlit for
improved visibility under low light conditions. It connects
directly to PCB A1.
The keypad has 22 keys. It is shielded in aluminum and
connects directly to PCB A1.
The battery pack is a custom package consisting of six
individual NiCd cells. It has a rated output of 7.2 volts with a
capacity of 7.2 Ah. The battery pack contains an over current
protection device. It connects directly to PCB A1.
Probe Designs
The probes used with the Model 8718B meter measure either
the electric field or the magnetic field. Some have a flat
frequency response, others have a shaped frequency response
(see Chapter 3, Probe Selection). All 8700 series probes have
square law characteristics that provide an accurate summation
of field levels present from multiple frequency sources. All
probes are internally coated with a thin film, high resistive
coating. The film is on the order of 0.5 M per square inch and
provides a shield against electrostatic charges. All 8700 series
probes utilize a preamplifier in the handle to amplify the detected
signals from the sensors. This eliminates probe-to-meter cable
modulation. The probe amplifiers are connected to the probe
elements by inflexible monolithic resistive leads. This prevents
cable modulation from affecting the signal derived from the
elements. Each instrumentation amplifier consists of three
distinct sections: two analog and one digital.
The 876xD series probes operate from 300 kHz to 3 GHz. They
use three sensors supported along mutually orthogonal axes.
Each sensor consists of a dipole-diode combination. The
dipoles are approximately 8 cm in length. The broad beam
width is achieved through the capacitive divider effect of the
dipole-diode combination. Some linearity correction is provided
for field levels that approach full scale. A patented circuit design
maintains RMS detection over the entire dynamic range of the
probe.
LCD Display D1
Keypad S1
Battery B1
Communications
Band Electric
Field Probes
126 Appendices
The 872xD series probes operate from 300 MHz to >50 GHz.
They contain resistive thermocouples distributed along the
length of the dipole. The spacing prevents resonance over the
operating frequency range of the probes. The dipole may be
viewed as a group of series connected small resistive dipoles or
as a very low Q resonant circuit. Element sensitivity decreases
with frequency. At frequencies above12 GHz the dipole begins
to align along the Poynting Vector with the cold junctions
oriented tangential to the electric field. This is the traveling wave
mode of operation.
Each of the three mutually orthogonal elements contains four
resistive dipoles with the cold junctions oriented at right angles.
This provides for the independence of probe orientation relative
to the polarization of the field.
These probes operate from 300 kHz to 50 GHz. Two distinct
sets of isotropic sensors are used to cover this very broad
bandwidth. The output from each set of detectors is processed
separately by separate amplifier circuits in the probe handle.
The two signals are summed within the 8718B meter. Models
include the Model 8741D that has a flat frequency response and
the x8722D series that have shaped frequency response
characteristics.
In the lower frequency region below 1500 MHz, a dipole with
diode detector and both distributed and discrete components
are used. Three orthogonally mounted conductive dipoles, each
terminated in diode detector, form the low frequency detection
circuit. These diode detectors are operated in their square law
region. This region is defined as that in which the DC diode
current is proportional to the square of electric field tangential to
the dipole. The elements that are used in the higher frequency
region are thin-film thermocouples. They provide true square law
output and function in two modes. Between 1.5 and 12 GHz, they
are resistive dipoles. As a resistive dipole, each probe contains
three mutually perpendicular elements. Above 12 GHz, it utilizes
the phase delay of a traveling wave to produce additional output.
In this mode, the dipole is aligned along the Poynting Vector with
the cold junctions oriented tangential to the electric field. Each of
the three mutually orthogonal elements contains four resistive
dipoles with the cold junctions oriented at right angles.
Microwave Band
Electric Field
Probes
Ultra-broadband
Electric Field
Probes
127Appendix B Theory of Operation
This provides for the independence of probe orientation relative
to the polarization of the field. The instantaneous charge
distribution on adjacent cold junction elements produces a
potential difference across the thin-film resistive thermocouples
and a resultant dissipation of energy in these films. As the
frequency increases, the phase difference between the
potentials developed in adjacent junctions also increases the
open circuit voltage.
The Model 8764D operates from 100 kHz to 300 MHz. It contains
three orthogonal displacement energy sensors with diode
detectors. This unique design has much lower impedance than
traditional dipole designs. The major advantage is the greatly
reduced interaction between the meter and probe, the human
body making the measurements, and the RF field.
The Model 8782D uses an “active antenna” design to accurately
measure RF fields as low as 3 kHz over a 60dB dynamic range.
These probes are responsive to the H-Field component. Each
of the three mutually perpendicular coils in every probe has a
diameter of 3.5 inches (8.9 cm), consists of multiple turns and is
series-resonated somewhat below the low frequency end of the
band. The RF current induced by the “H” field dissipates power
in the thermocouple elements, heats the hot junctions and
provides a DC output voltage proportional to the square of the
induced current. Circuitry is added to minimize high frequency
out-of-band responses typical in many H-field probe designs.
Low Frequency
Electric Field
Probes
Low Frequency
Magnetic Field
Probes
128 Appendices

129Appendix C Maintenance
General
The Model 8718B requires very little maintenance. No operator
adjustments are required. The electronic circuitry is contained
in a very rugged aluminum housing. However, this housing is
not watertight and should not be immersed in water. The LCD
display and the case may be cleaned using a damp cloth. Do
not use any type of detergent or solvent.
Calibration
The Model 8718B is calibrated before it is shipped. Narda
recommends that the Model 8718B be calibrated every two
years. Narda will perform this calibration for a nominal charge.
The meter is completely tested using Automated Test Equipment
(ATE) as part of the calibration service.
Replacement Parts
None of the parts within the meter are considered user
serviceable. The table below contains the model numbers and
part numbers of the accessories supplied with the 8718B and
available as optional accessories.
CMaintenance
130 Appendices
Description Model or
Part Number Comments
Battery Charger, 115 volt 84156000
Battery Charger, 230 volt 84156001
Power Cord 89707000 to
89707008
Supplied with 230
volt charger only,
see table for
outline
Storage Case 32542703
Probe Extension Cable 87744-04
Electric Field Attenuator 8713B
Computer Cable 87239000
User's Software 990125 CD ROM
User's Guide 42983600
Insulated Tripod/Handle 21797900 Optional Accessory
Tripod Adapter 32595900 Optional Accessory
Battery Charger and Line Cord Options
The Model 8718B contains a rechargeable battery. The meter is
supplied with either a 115-volt 50/60 Hz or a 230-volt 50/60 Hz
charger. The 115-volt charger plugs directly into the style of wall
outlets common to North America. The 230-volt charger has an
IEC receptacle and is supplied with any one of nine different
power cords that meet virtually all international requirements.
The table on page 117 identifies the power cord by its outline.
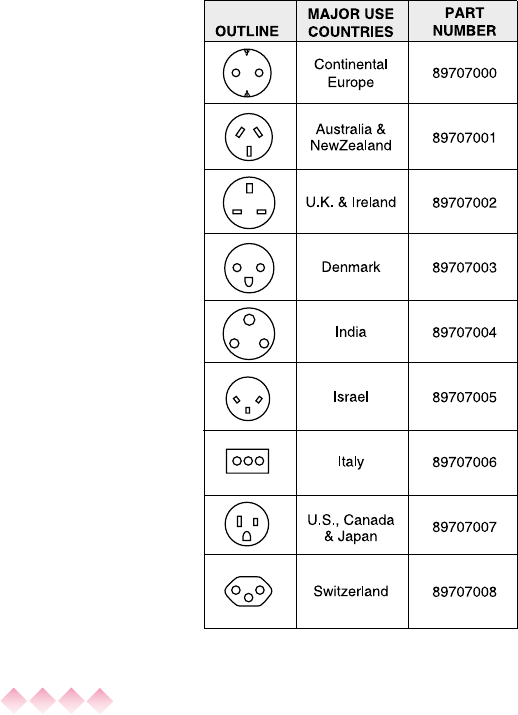
131Appendix C Maintenance
Rechargeable Battery Management Program
The Model 8718B contains a rechargeable nickel-cadmium
battery that must be recycled or disposed of in compliance with
applicable federal, state, or local environmental regulations.
Narda maintains a rechargeable battery management program
in keeping with its highly proactive policy on environmental
protection and conservation of natural resources. This service
is available to our customers at no charge. At the end of this
product’s effective life cycle, it may be returned to Narda for
proper disposal.
132 Appendices
133Index
Audio Alarm
Alarm Description 4, 67
Controlling Alarm Function 67
Fixed Alarm 68
Variable Tone Alarm 69
Back Light 75
Bar Graph 23
Battery
Accuracy of
Battery Status Indicator 77
Battery Capacity 76
Charger, description 3, 130
Charger, line cord options 3, 131
Checking Battery Status 76
Rechargeable
Management Program 131
Clock 88
Communications with Computer 117
Correction Factors 24
Data Logging
Format for Logged Data 44
Memory Capacity 54
Mode 1 Logging 46
Mode 2 Logging 48
Mode 3 Logging 51
Options 43
Data Recorder, operation with
Description 5, 56, 99
Output Level 99
Display Blanking 80
Display Screens, measurement
Alternate 20
Main 19
Fiber Optic Link, operation with
Application 95
Controls and Indicators 95
Setting the Meter 96
System Checks 98
Keypad
Function Keys 6
Numeric Keypad 6
Power Keys 7
Special Function Keys 7
Keypad Lockout 79
Maintenance
Calibration 129
Battery Charger and
Line Cord Options 130
Rechargeable Battery Program 131
Replacement Parts 129
Measurements
Getting Started 13
Entering a Probe Model 14
Making a Measurement 28
Precautions 28
Uncertainty 27
Memory 91
Menu System
Commands 32
Default Conditions 34
First Menu Screen 30
Second Menu Screen 31
Probe Selection
Changing the Probe Model 27
Connecting a Probe 4, 11
Entering a Probe Model 14
Identifying a Probe 12
Key Factors in Selecting a Probe 9
Shaped Frequency
Response Probes 10
INDEX
134 Index
Probe Test
Sources 4
Testing the Probe 23
Probe Zero
Causes of Zero Drift 82
Checking for Zero Drift 82
Establishing a Zero Field 83
Shielding the Probe 84
Temperature Concerns 83
Understanding the Zero Function 81
Zeroing the Probe, in use 85
Zeroing the Probe, initial 17
Spatially-Averaged Measurements
Spatial Averaging with the 8718B 40
Understanding Spatial Averaging 39
Standards Feature 71
Time-Averaged Measurements
Making Time-Averaged
Measurements 57
Measurement Options 57
Mode 1 Averaging 58
Mode 2 Averaging 61
Tripod 5
Units of Measure
Available Units of Measure 37
Changing the Unit of Measure 38
Settings, Advanced
Clock, setting the 88
Display Contrast, adjusting 93
Function Keys, right or left handed 92
Memory, clearing the 91
Menu, accessing the 87
Temperature Correction 89
Theory of Operation
Meter, functional description 121
Meter Circuits 122
Probe Designs 125
Probe, functional description 121
User’s Guide 1, 2
User’s Software
Description 101
Data Window, logged survey 110
Downloading Data from the Meter 109
Diagnostics, meter 115
Establishing Communications 102
Exporting Data 114
File Format for Survey Data 109
Firmware Update 115
Installing a Probe 106
Installing the Software 102
Memory, clearing the meter 114
Printing a Logged Data Record 113
Probe Data,
viewing or changing 104,105
Removing a Probe 108
Selecting a File to View 110
Starting and Exiting the Program 102
System Requirements 101
Zeroing the Probe
See Probe Zero 17, 81-85
INDEX
Narda Safety Test Solutions (Narda STS) warrants each
product of its manufacture to be free from any defect in
material and workmanship for a period of one year from
date of shipment to, and return by, the original purchaser.
All warranty returns, however, must first be authorized by a
factory office representative.
The limit of liability under this warranty shall be to repair or
replace any product, or part thereof, which proves to be
defective after inspection by Narda STS. This warranty shall
not apply to any Narda STS product that has been
disassembled, modified, physically or electrically damaged,
or any product that has been subjected to conditions
exceeding the applicable specifications or ratings.
Narda STS shall not be liable for any direct or consequential
injury, loss or damage incurred through the use, or the
inability to use, any Narda STS product.
Narda STS reserves the right to make design changes to any
Narda STS product without incurring any obligation to make
the same changes to previously purchased units.
This warranty is the full extent of obligation and liability
assumed by Narda STS with respect to any and all Narda
STS products. Narda STS neither makes, nor authorizes any
person to make, any other guarantee or warranty concerning
Narda STS products.
Warranty

USA: 435 Moreland Road
Hauppauge, NY 11788
Tel 1-631 231-1700 Fax 1-631 231-1711
E-Mail NardaSTS@L-3COM.com
www.narda-sts.com
GERMANY: Sandwiesenstrasse 7
D-72793 Pfullingen
Tel +49-7121-9732-777 Fax +49-7121-9732-790
E-Mail support@narda-sts.de
www.narda-sts.de