Navigon 81XX PND User Manual NAVIGON 81xx
Navigon AG PND NAVIGON 81xx
UserManual.wiki
>
Navigon
>
81XX User Manual
Users Manual
Navigation menu
Upload a User Manual
Namespaces
Wiki Guide
HTML
PDF
Info
Views
User Manual
Discussion / Help
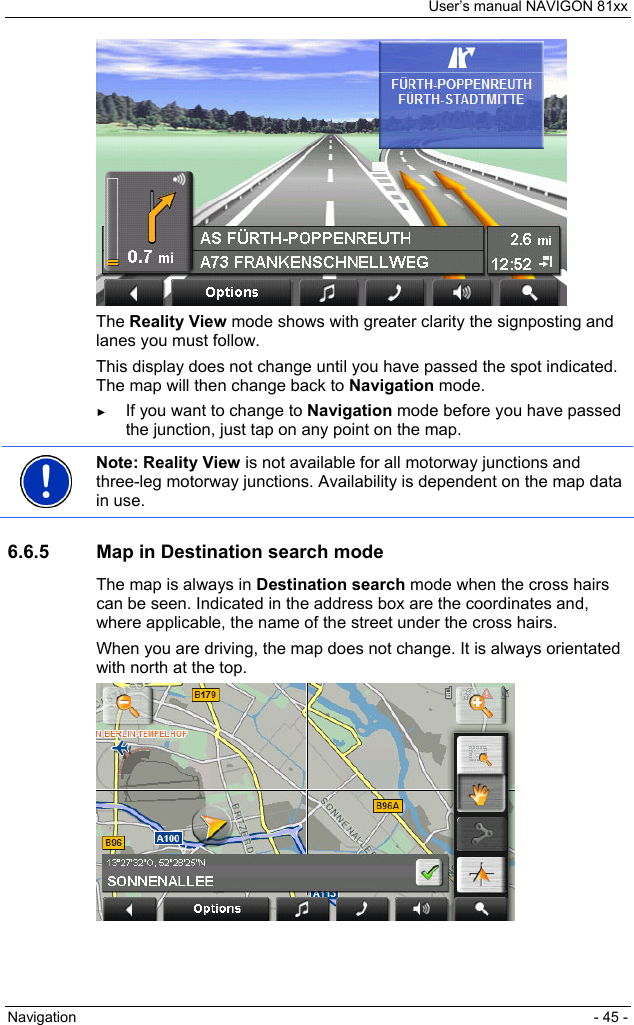
Navigation


![User’s manual NAVIGON 81xx Appendix - 69 - 12.3.4 Canada C Request Country Code selection feature to be disabled for products marketed to the US/CANADA. Operation is subject to the following two conditions: (1) this device may not cause interference, and (2) this device must accept any interference, including interference that may cause undesired operation of the device. This Class [B] digital apparatus complies with Canadian ICES-003. This Category II radiocommunication device complies with Industry Canada Standard RSS-310.](https://usermanual.wiki/Navigon/81XX/User-Guide-932697-Page-69.png)