Nedap N V VP500X Inductive Card Reader User Manual Installation Manual sow feed station
N. V. Nederlandsche Apparatenfabriek NEDAP Inductive Card Reader Installation Manual sow feed station
Contents
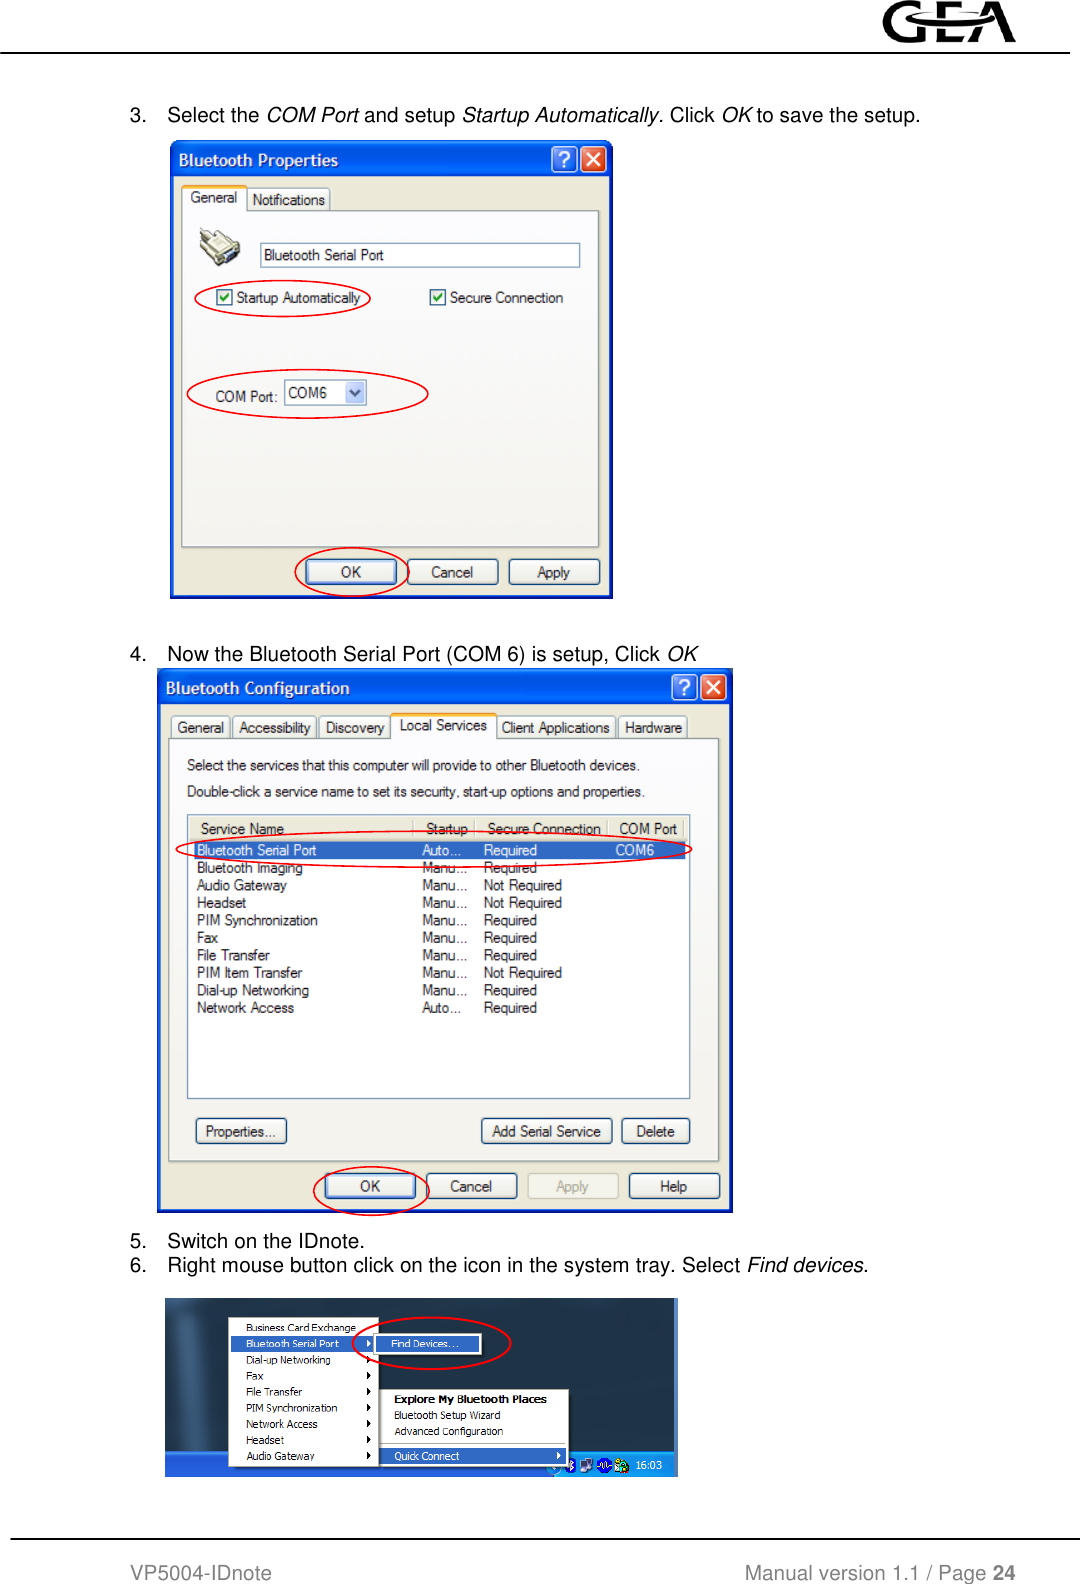
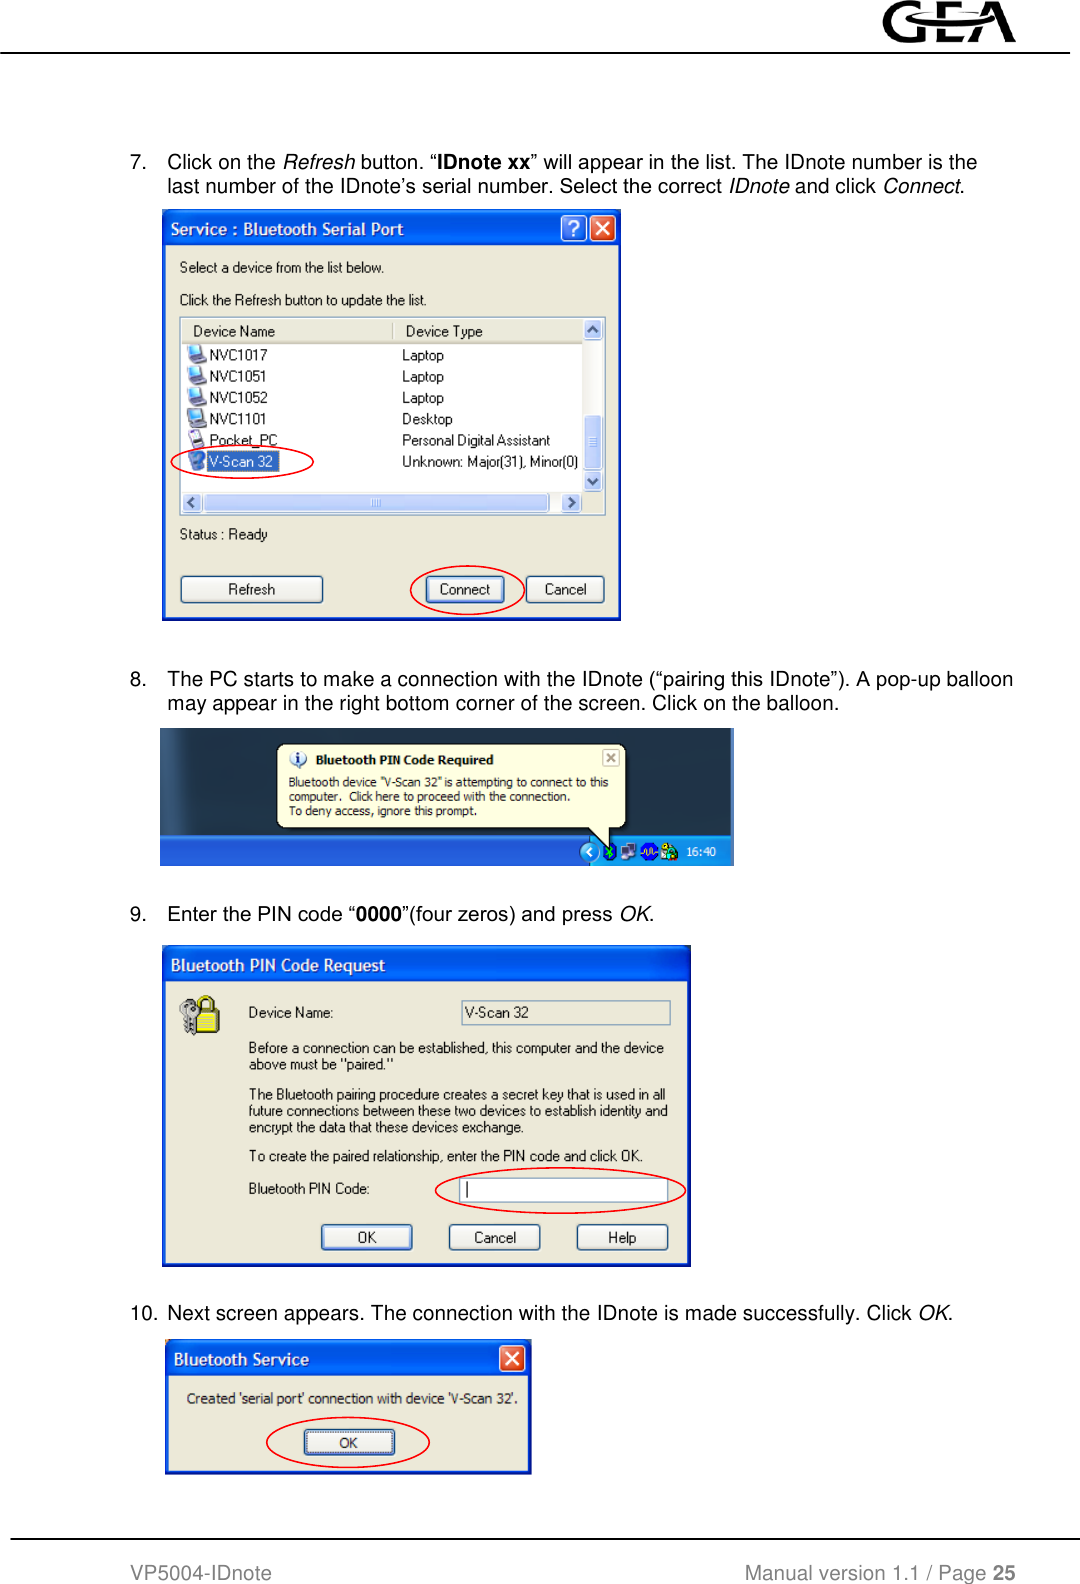
- 1. 14ar01_5280036 VP5004 GEA IDnote manual 1.1 CGDVP500X
- 2. 14br01_5280044 VP5004 IDnote manual 1.1 CGDVP500X
- 3. 19_VP5002 Vscan 2.7 GB 5275571 CGDVP500X
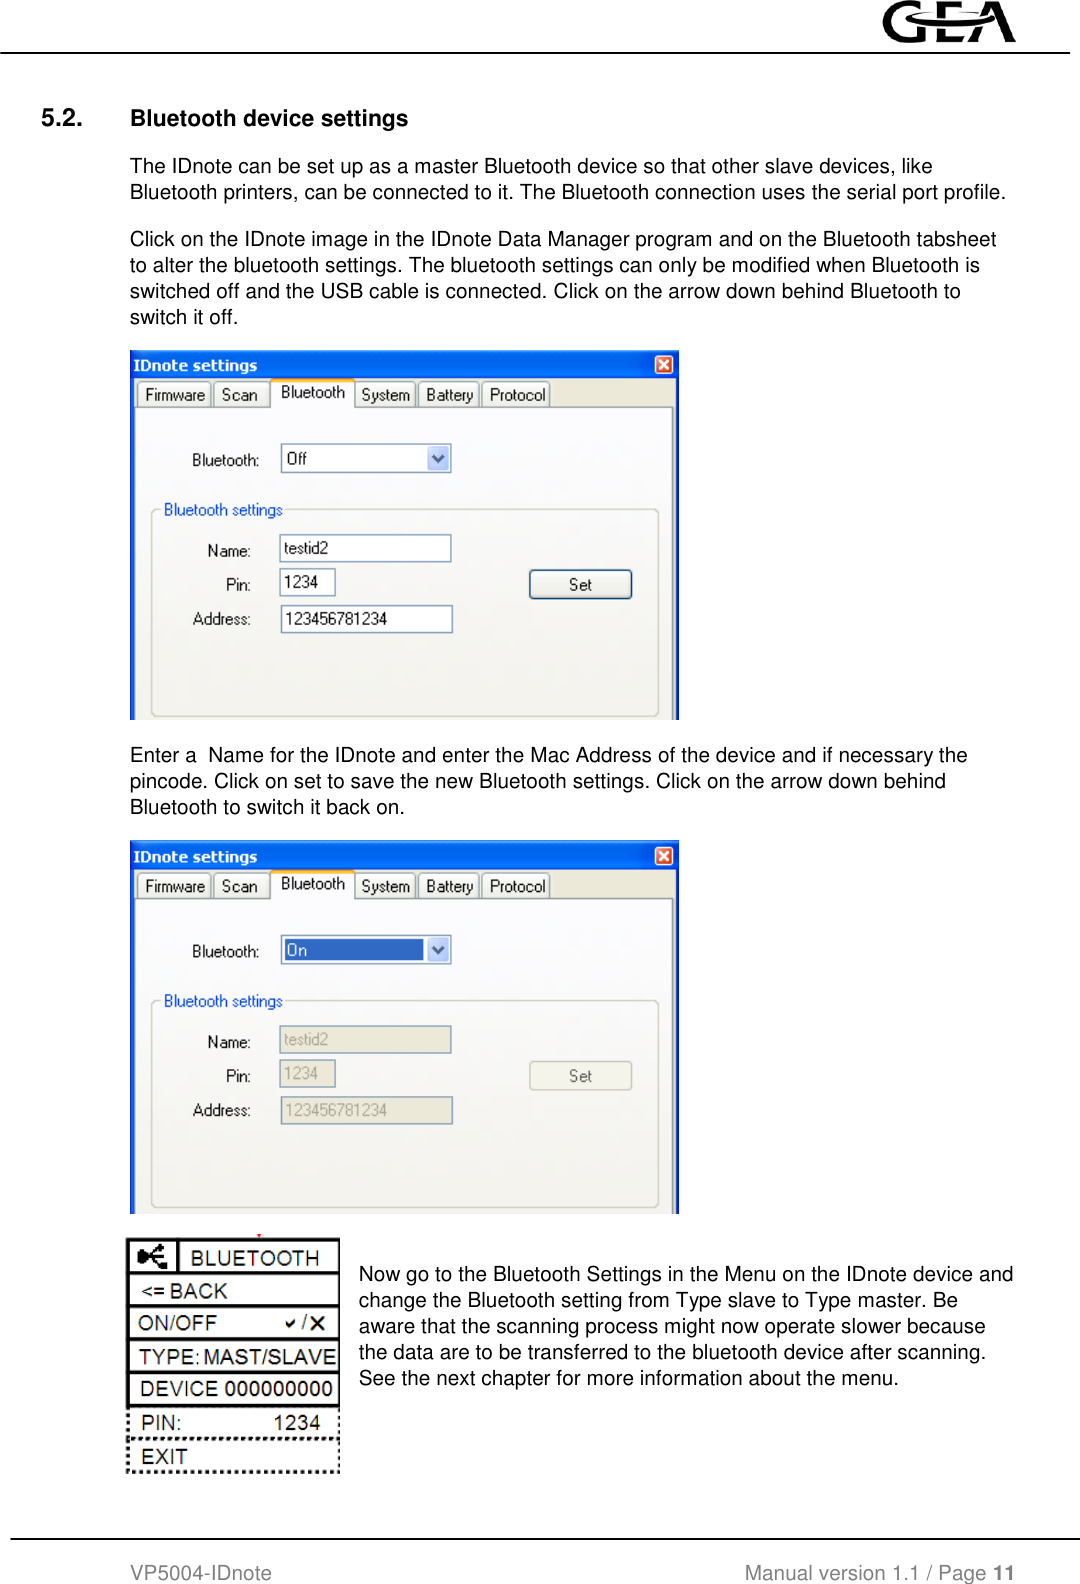
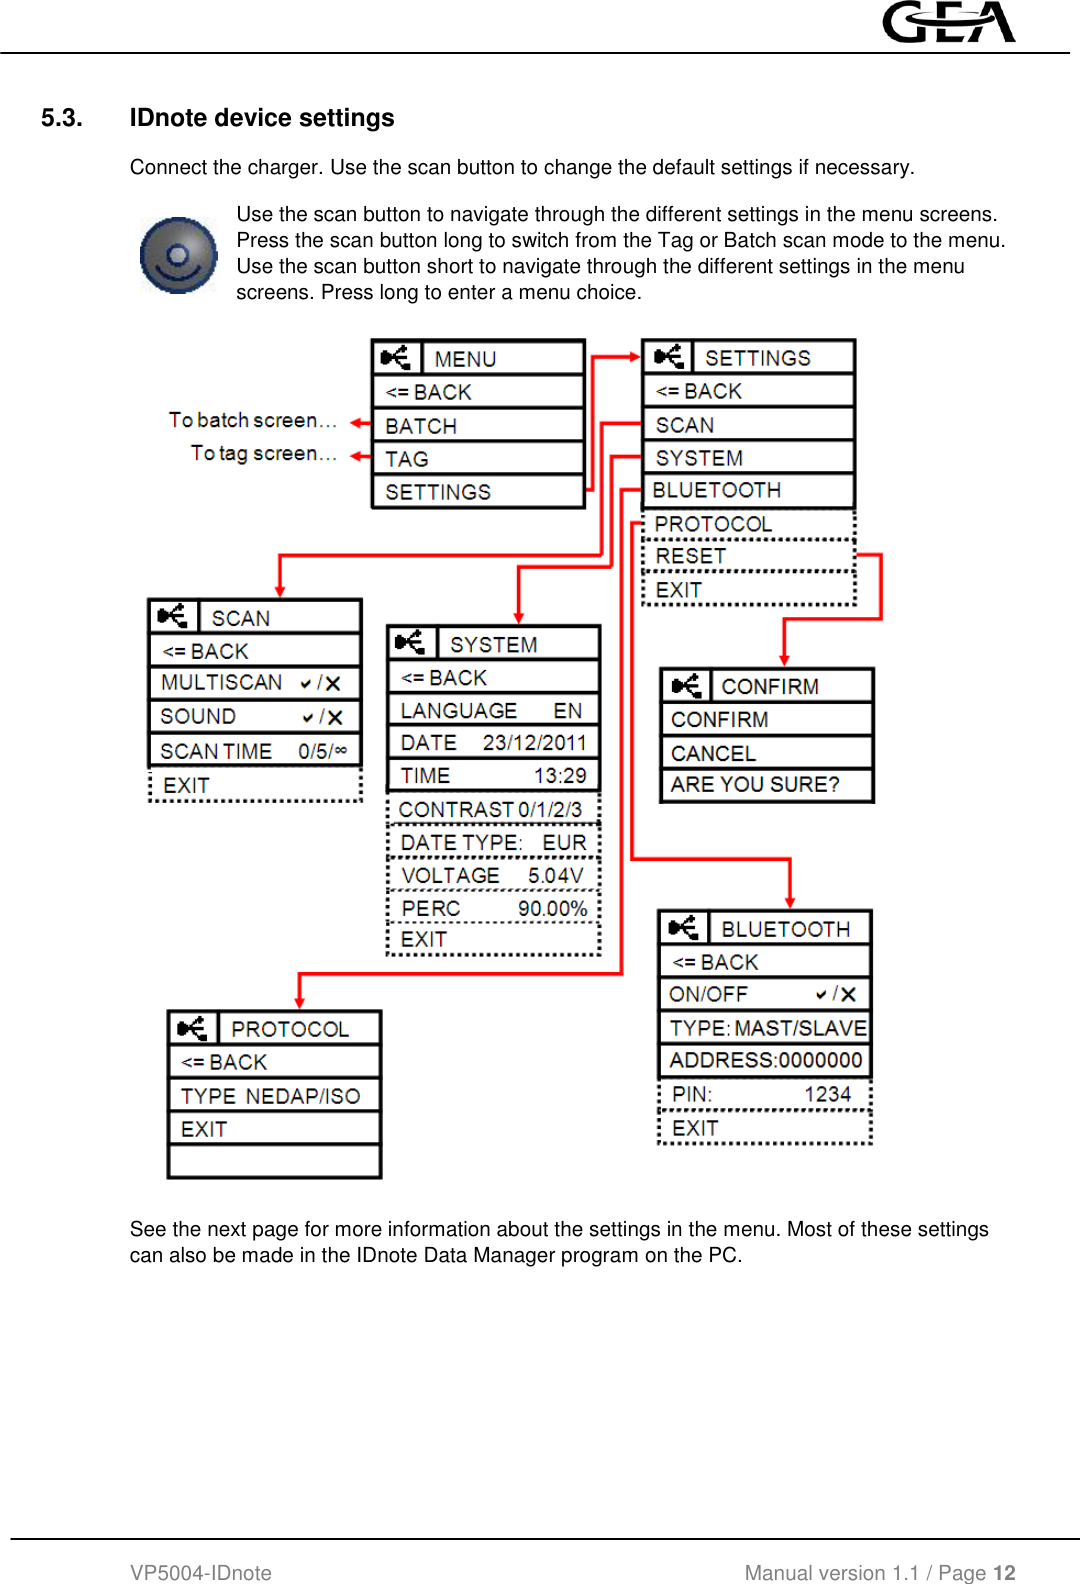
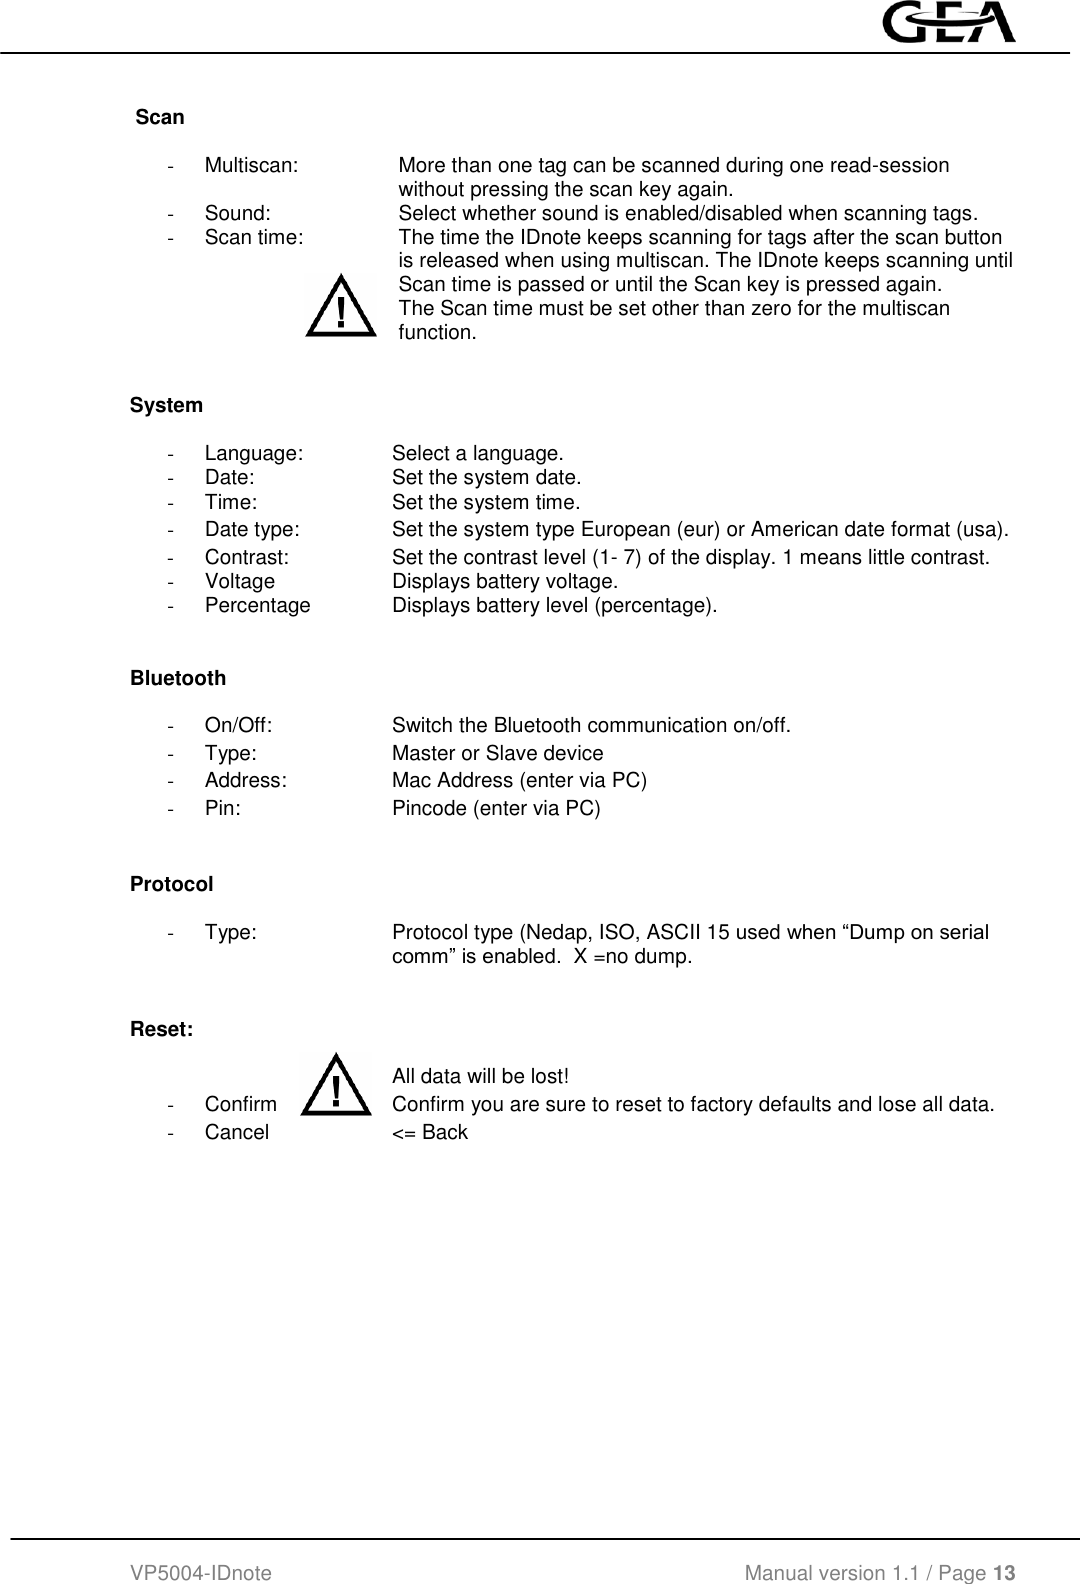
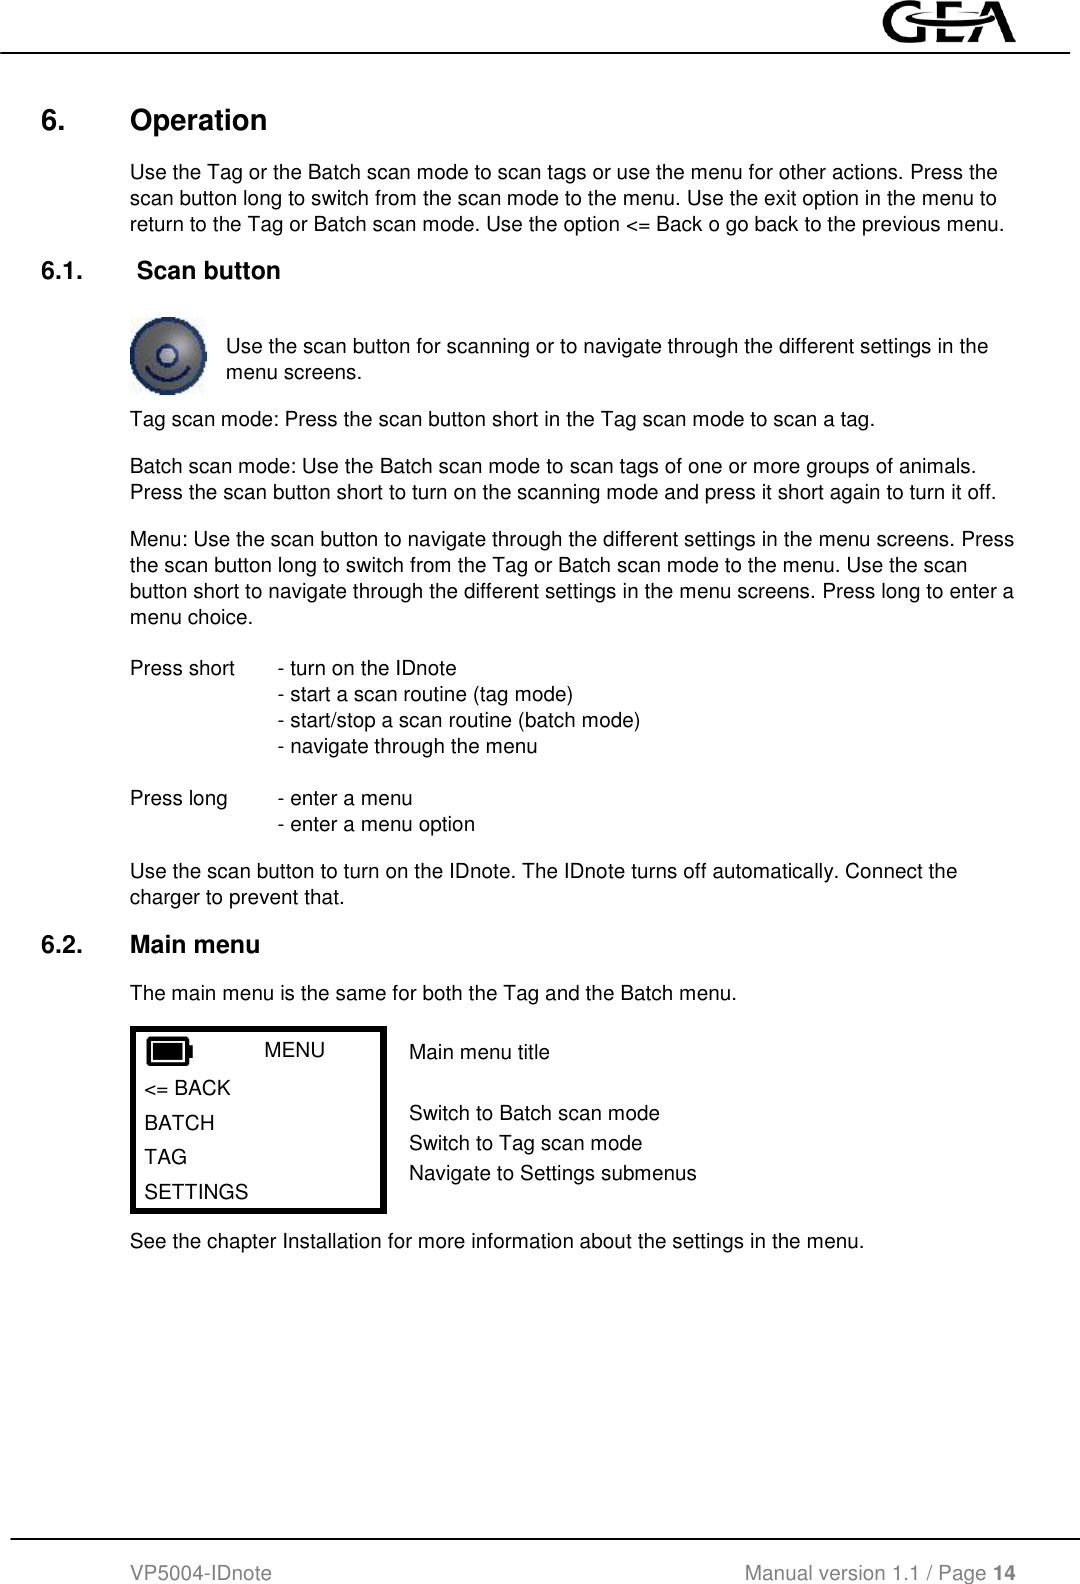
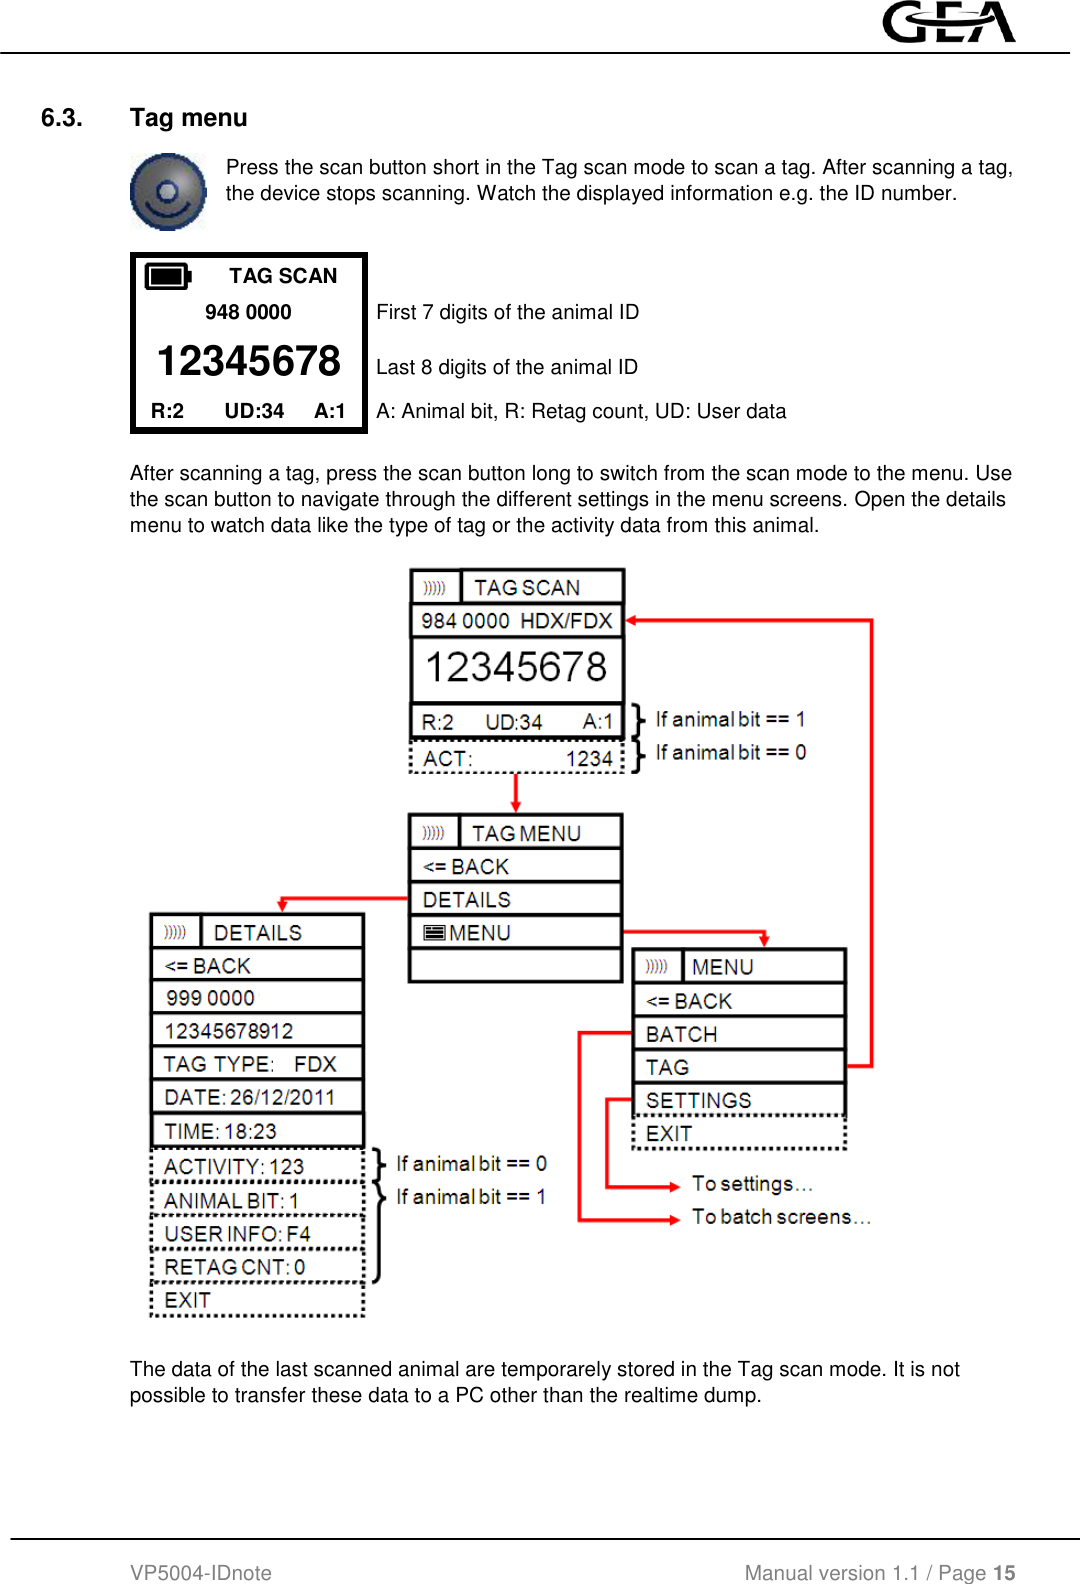
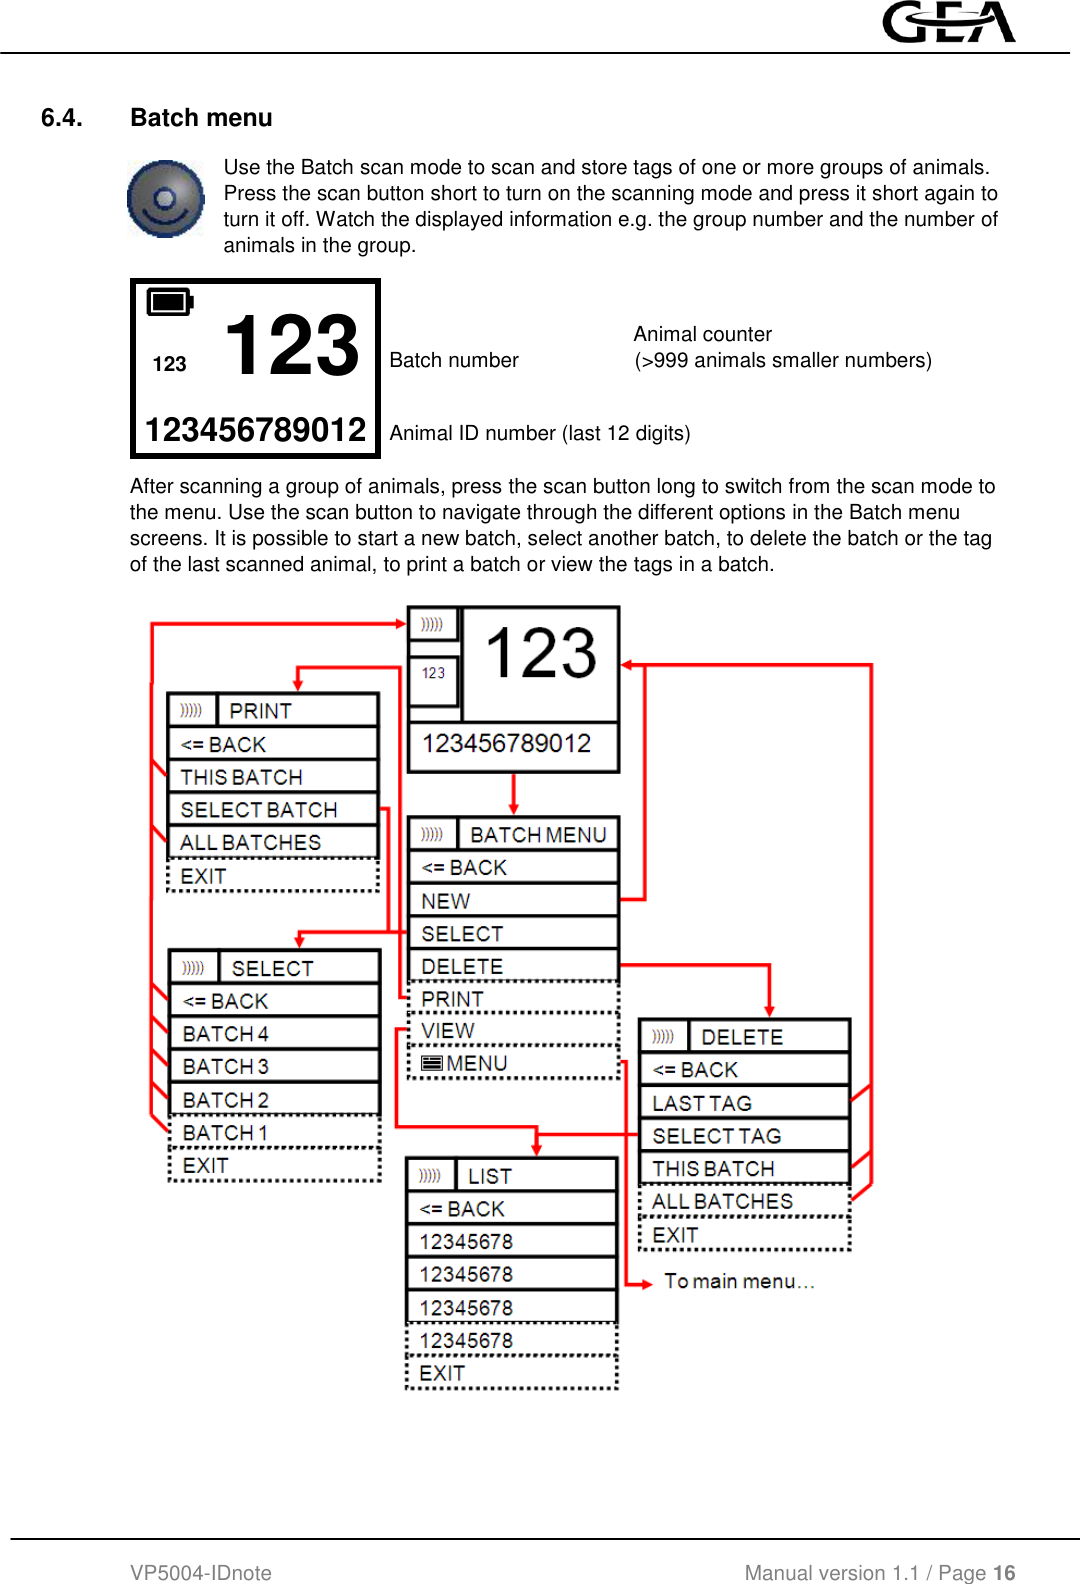
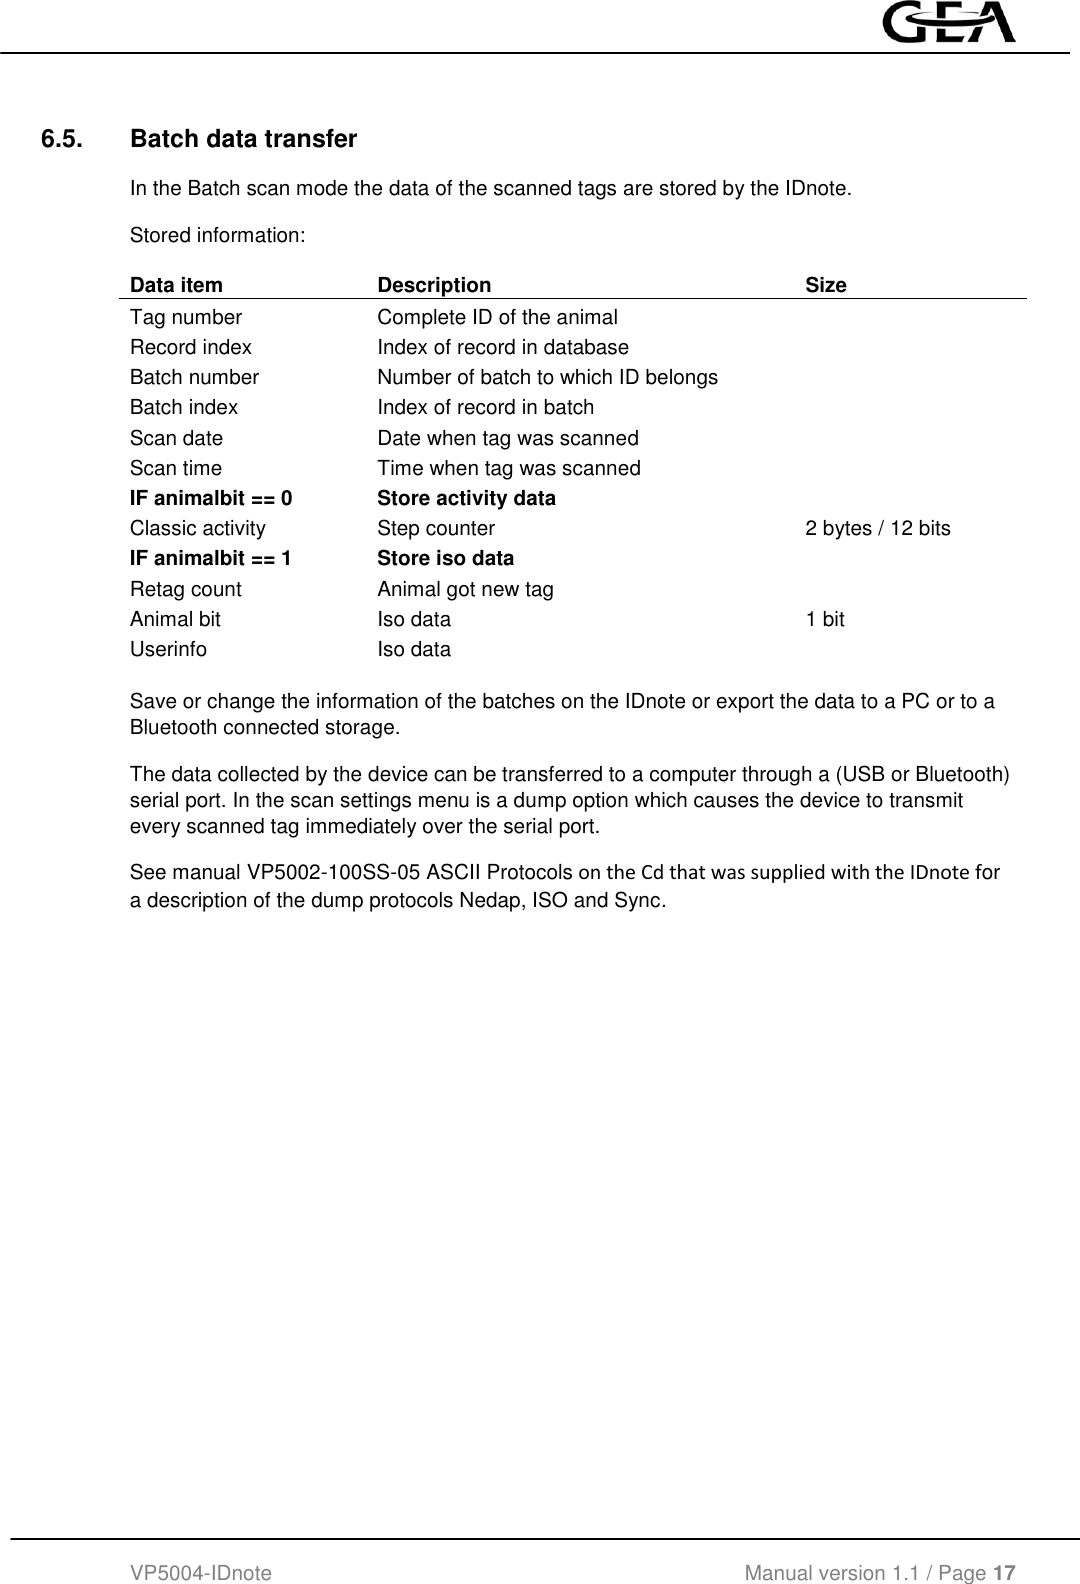
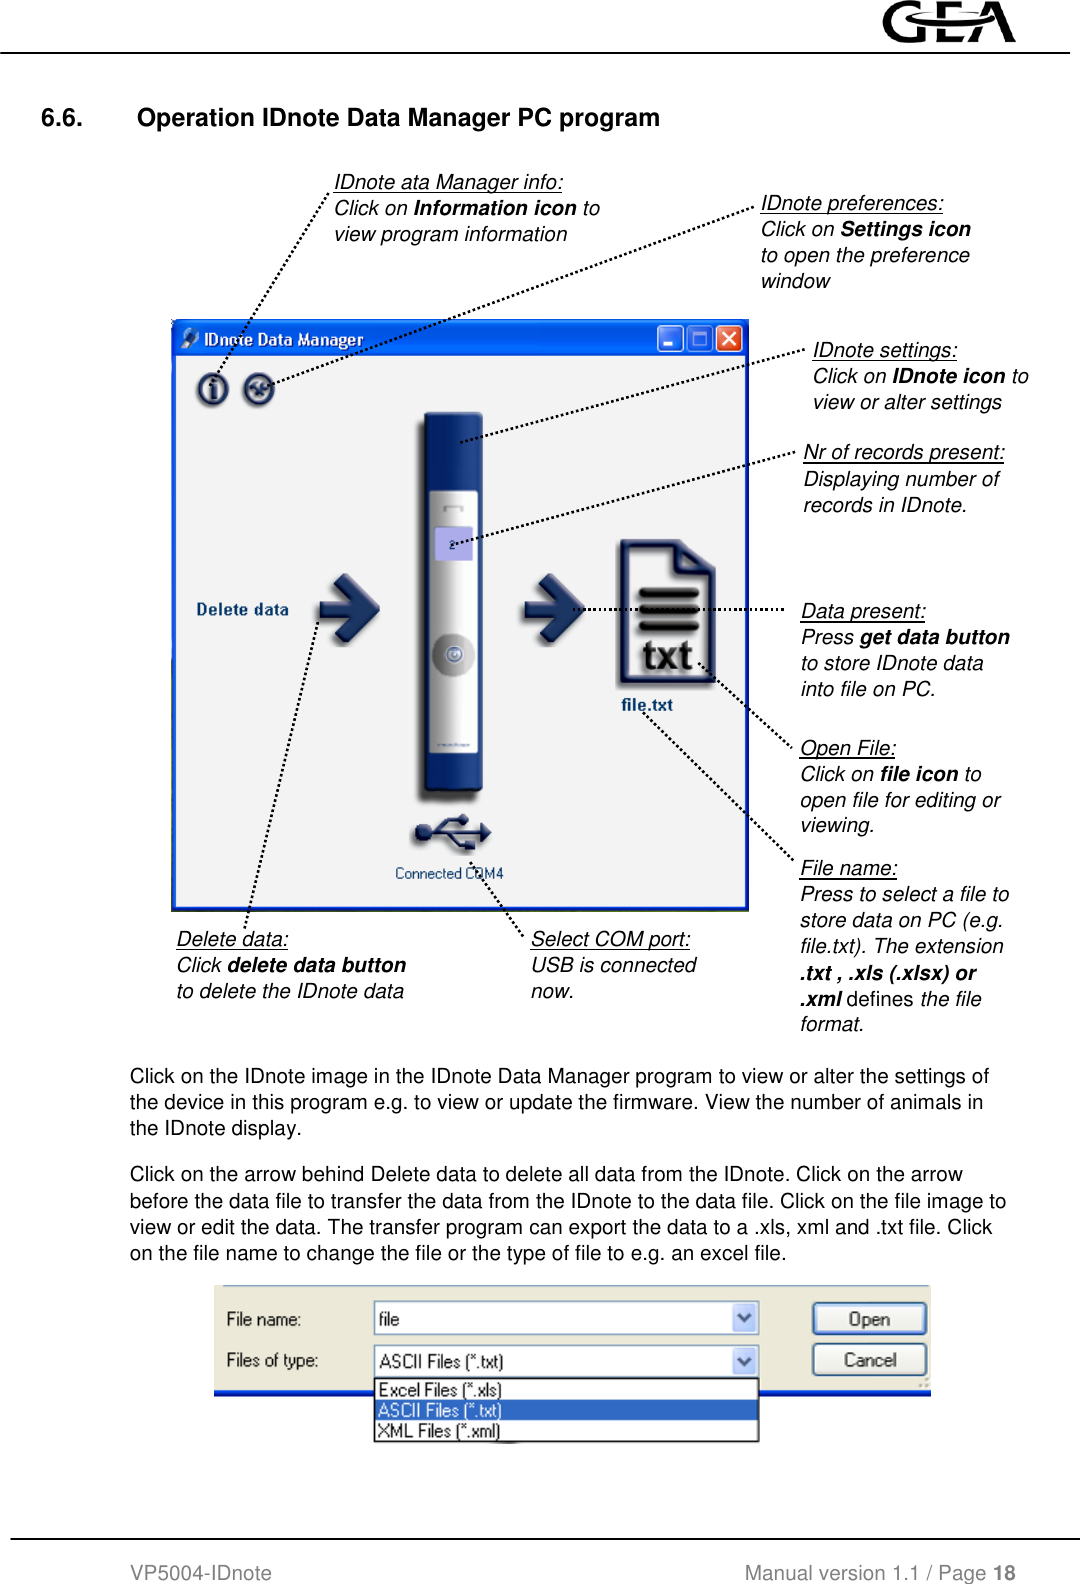
14ar01_5280036 VP5004 GEA IDnote manual 1.1 CGDVP500X