NetComm Wireless 3G39W HSPA+Wi-Fi Router User Manual
NetComm Wireless Limited HSPA+Wi-Fi Router Users Manual
UserManual.wiki
>
NetComm Wireless
>
3G39W User Manual
Users Manual
Navigation menu
Upload a User Manual
Namespaces
Wiki Guide
HTML
PDF
Info
Views
User Manual
Discussion / Help
Navigation
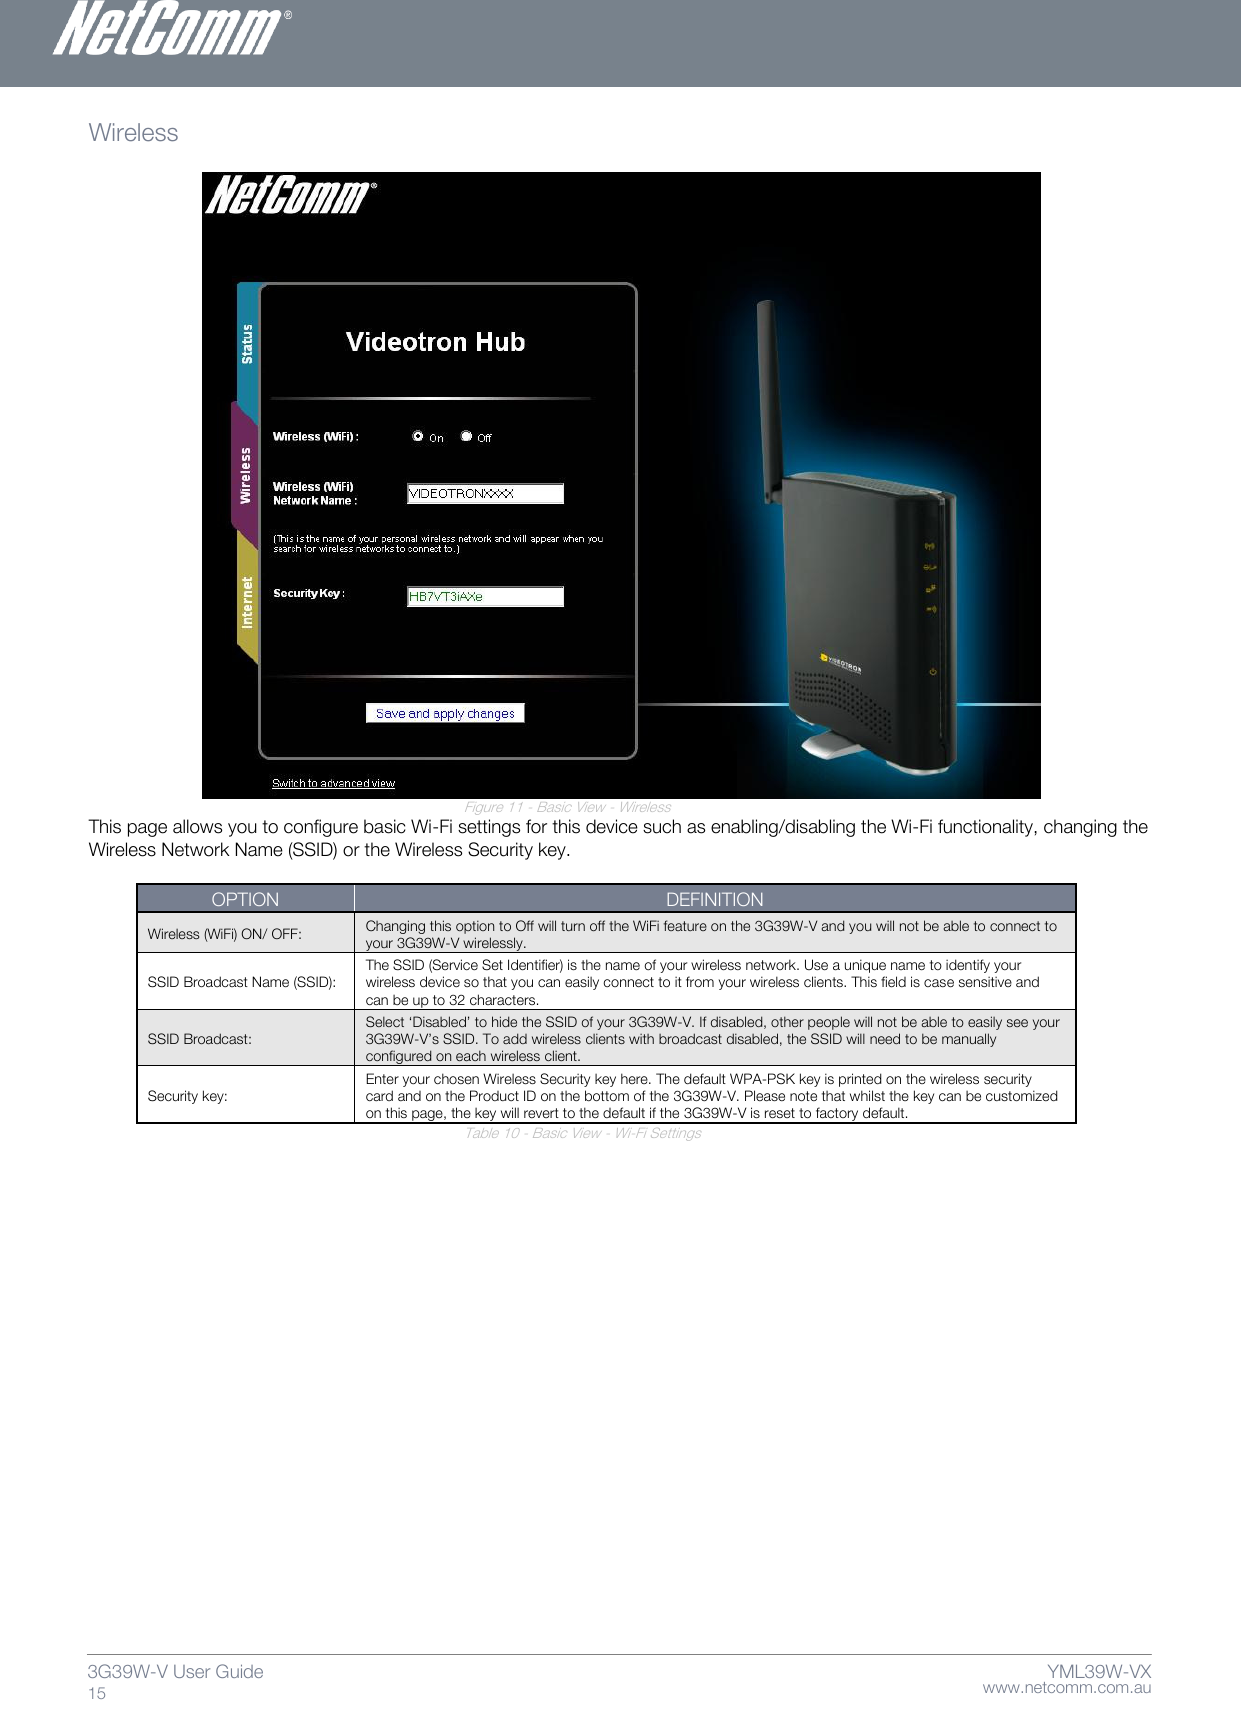
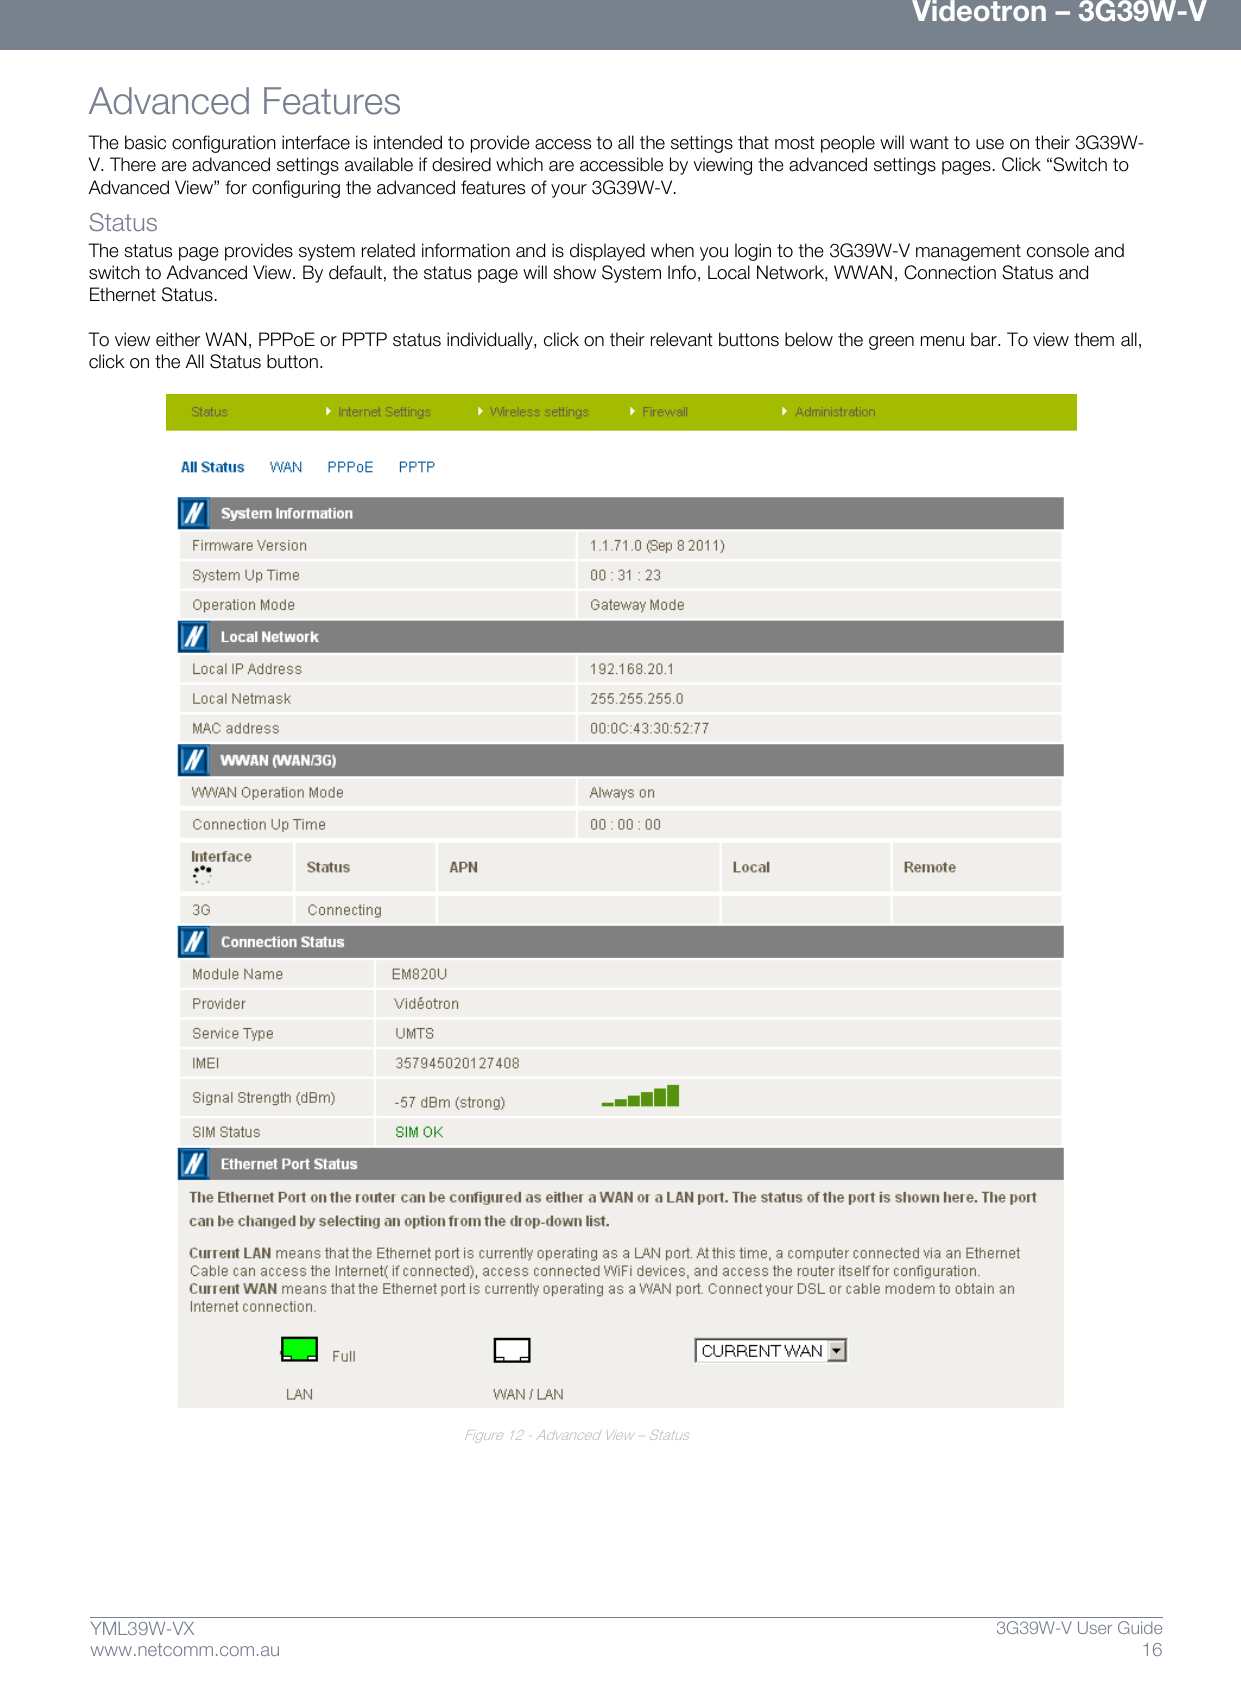
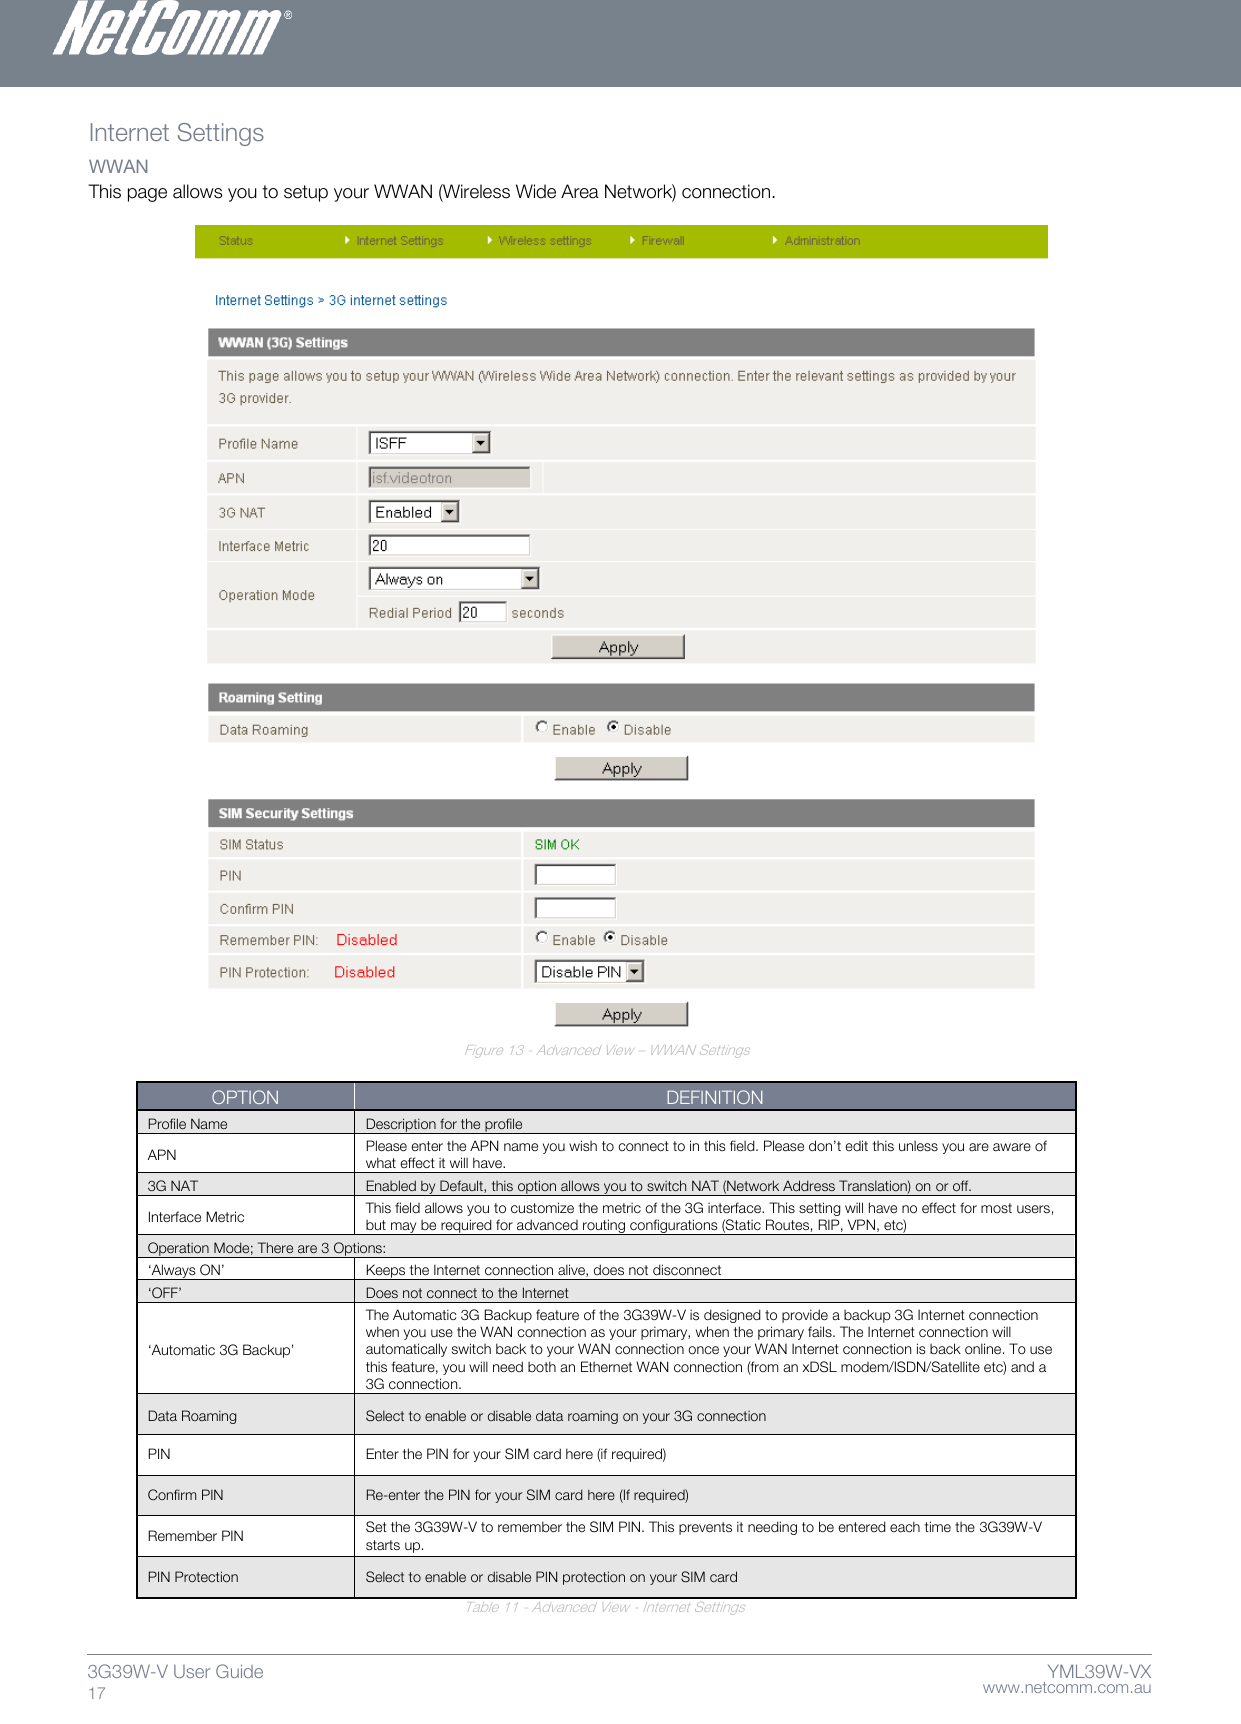
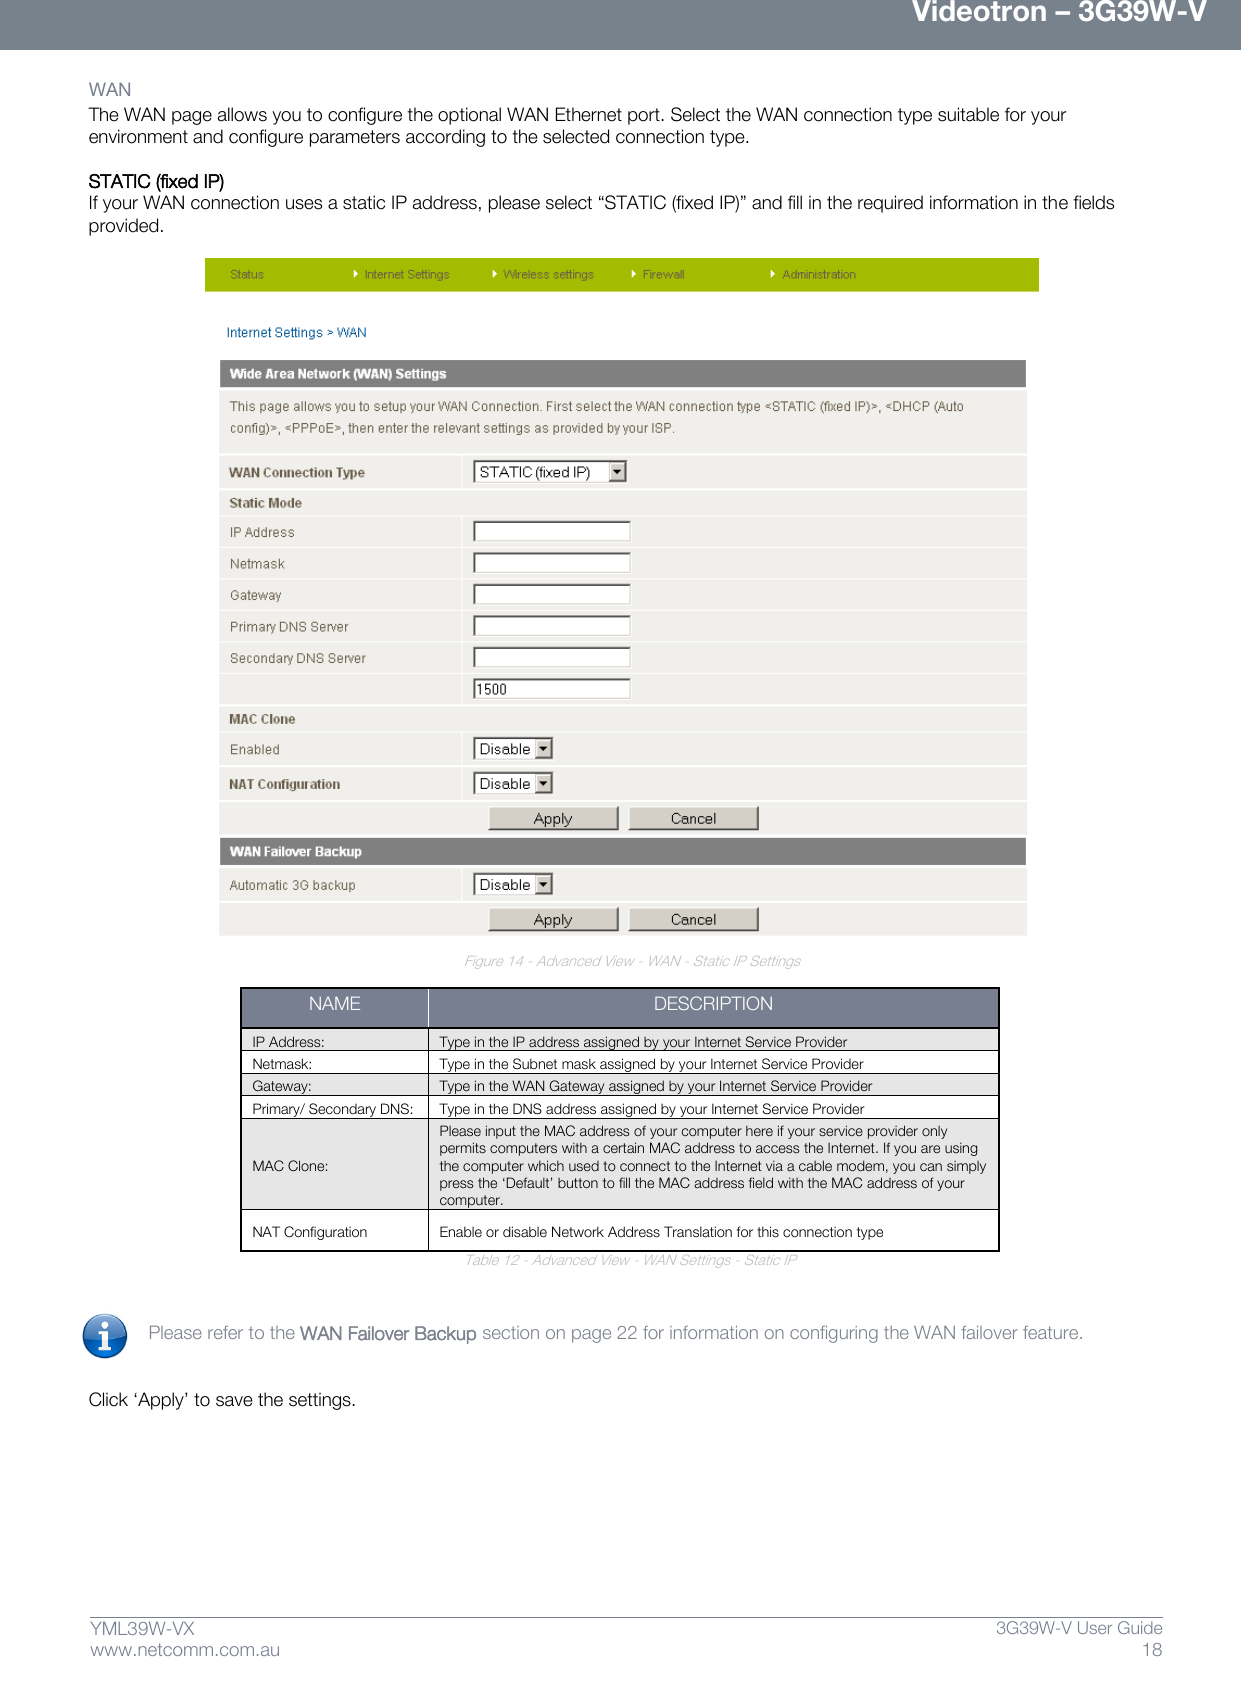
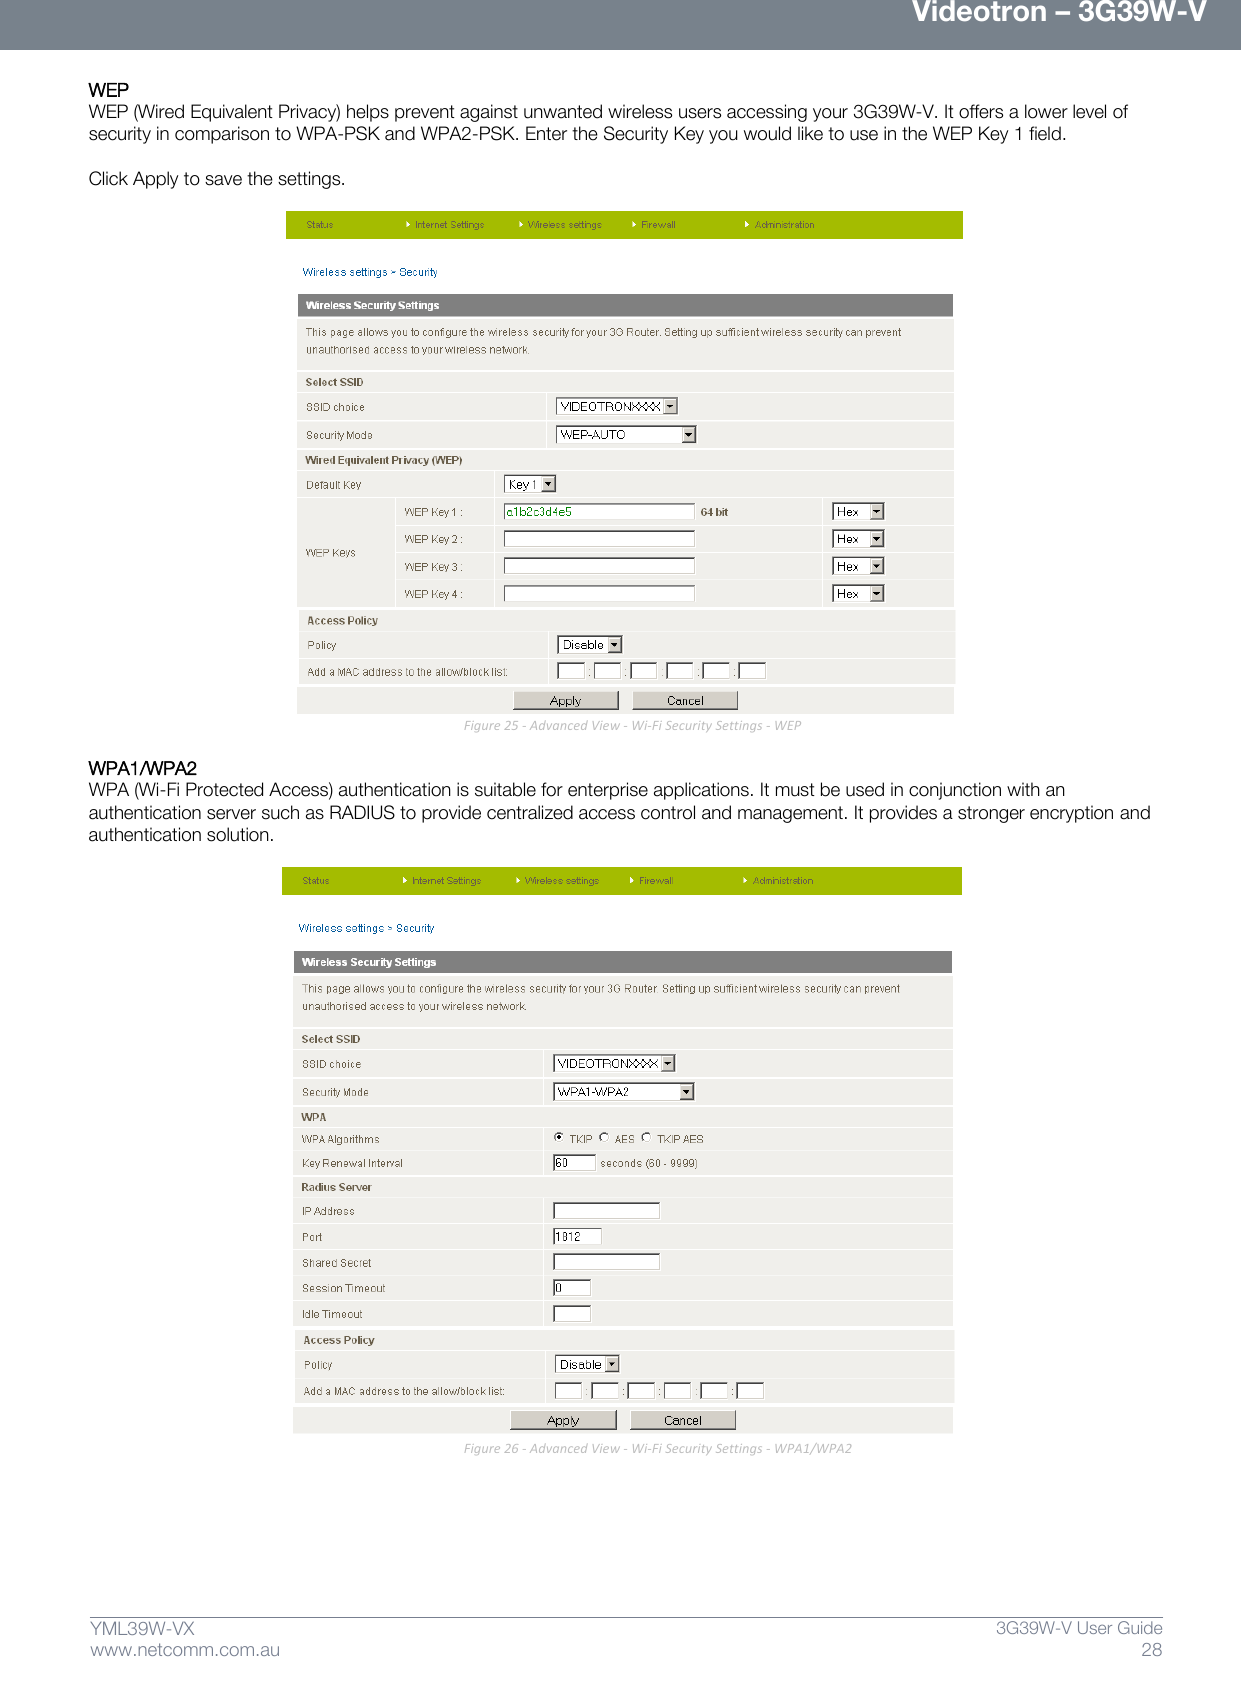
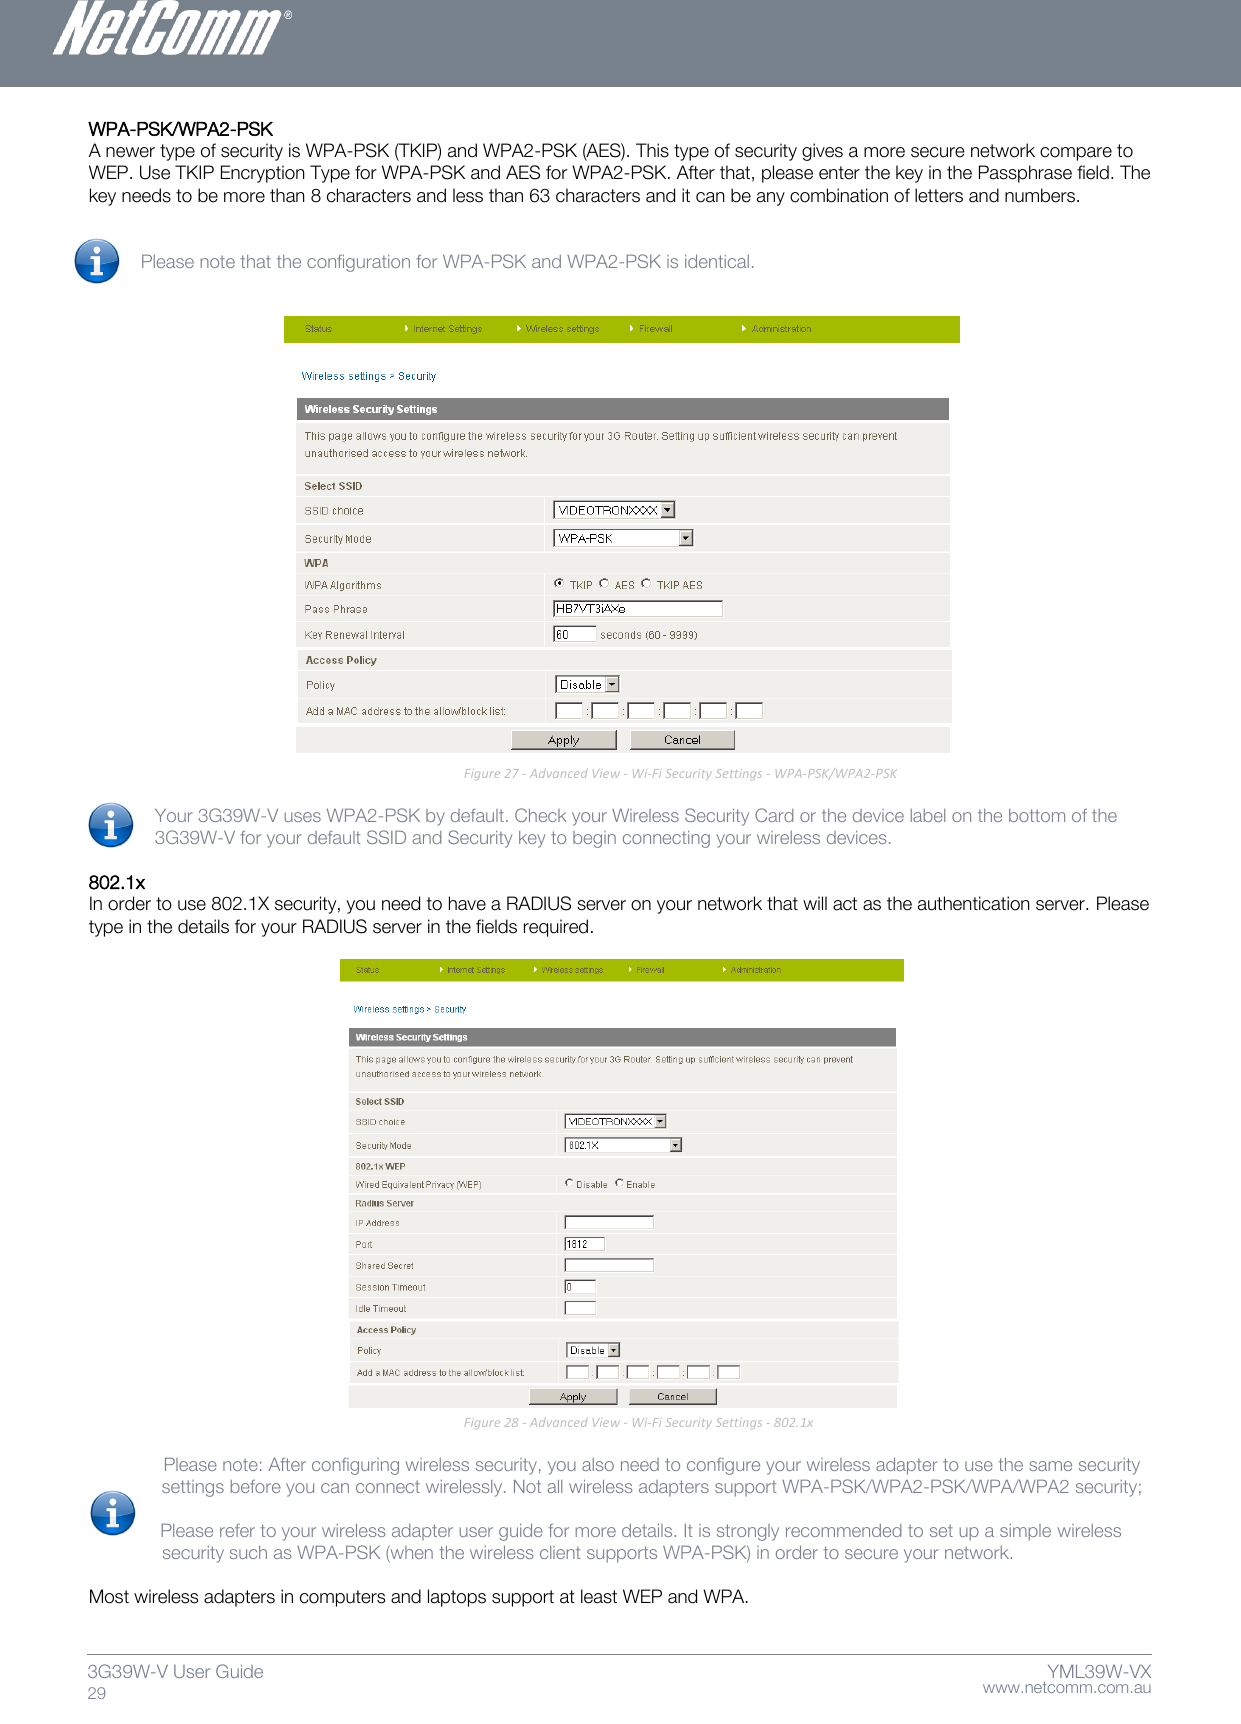
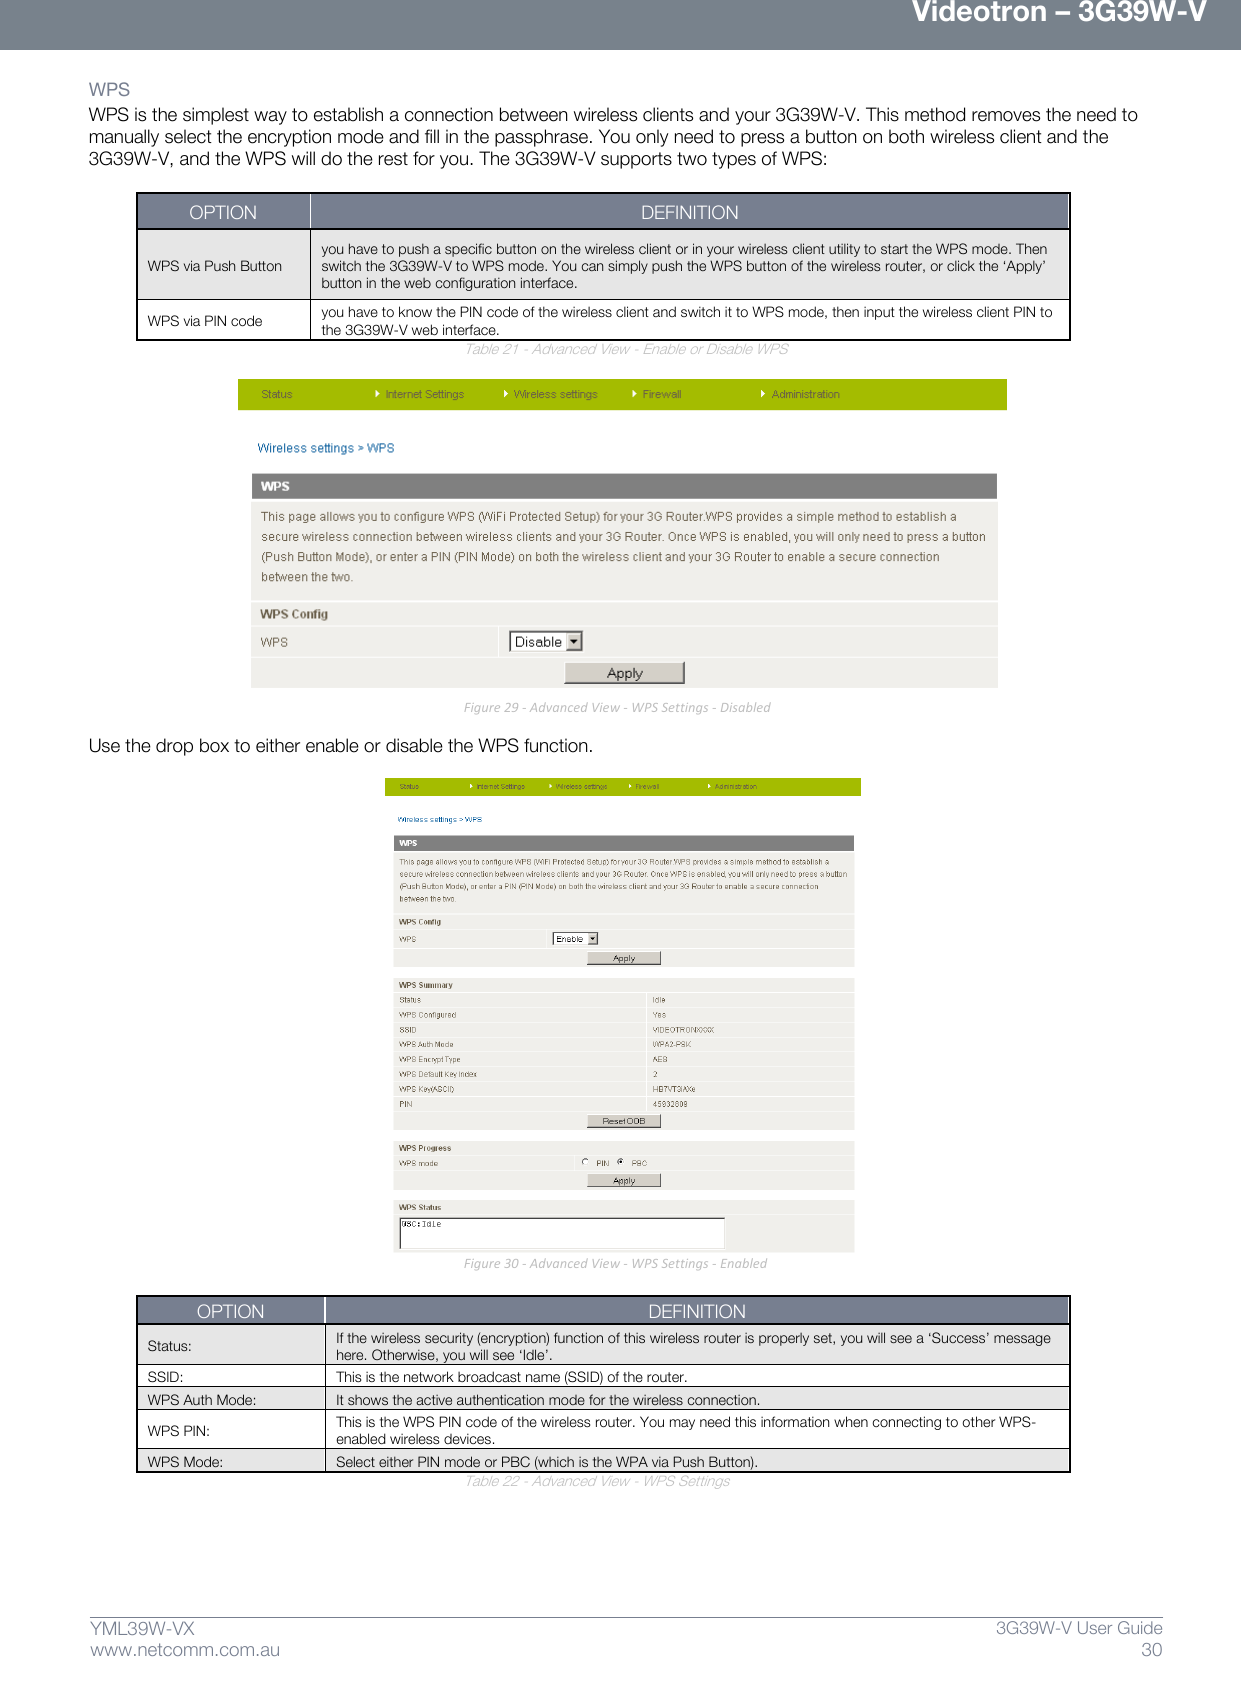
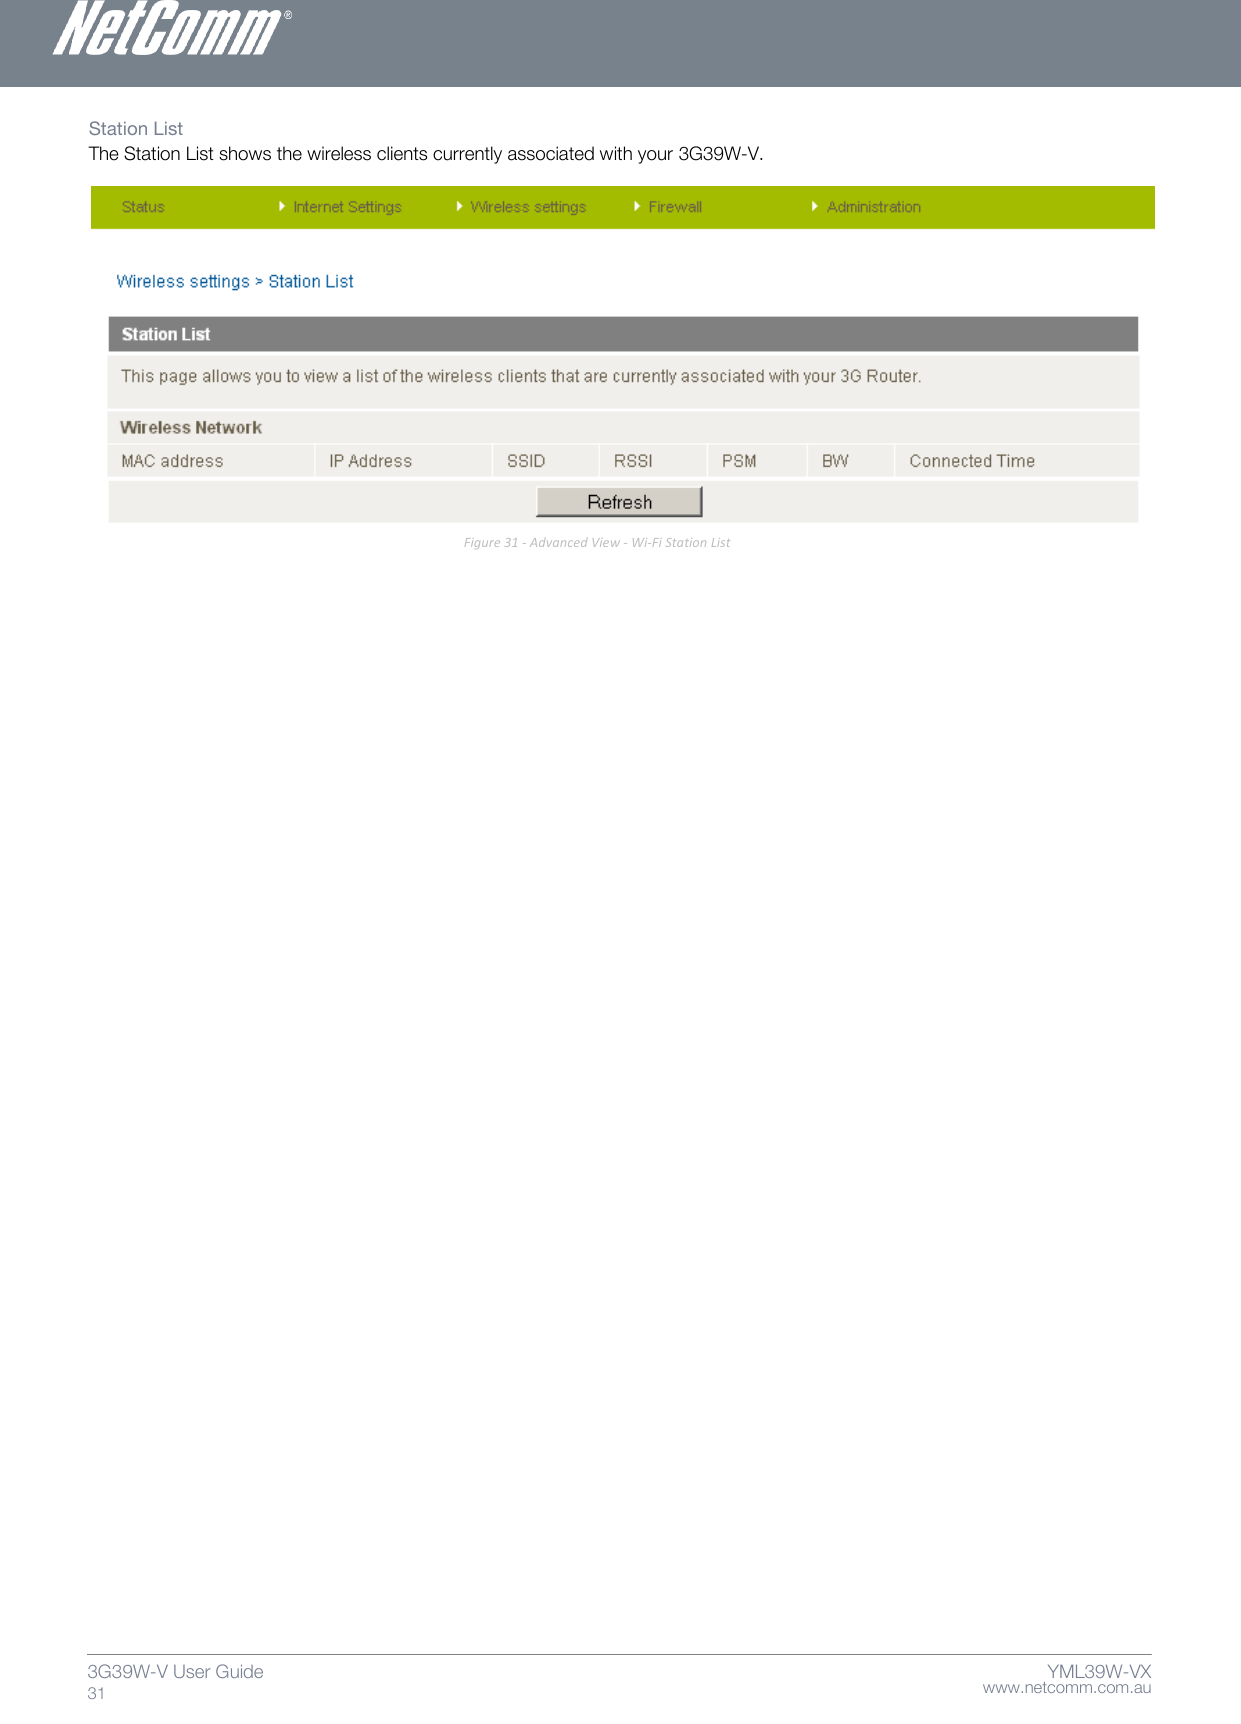
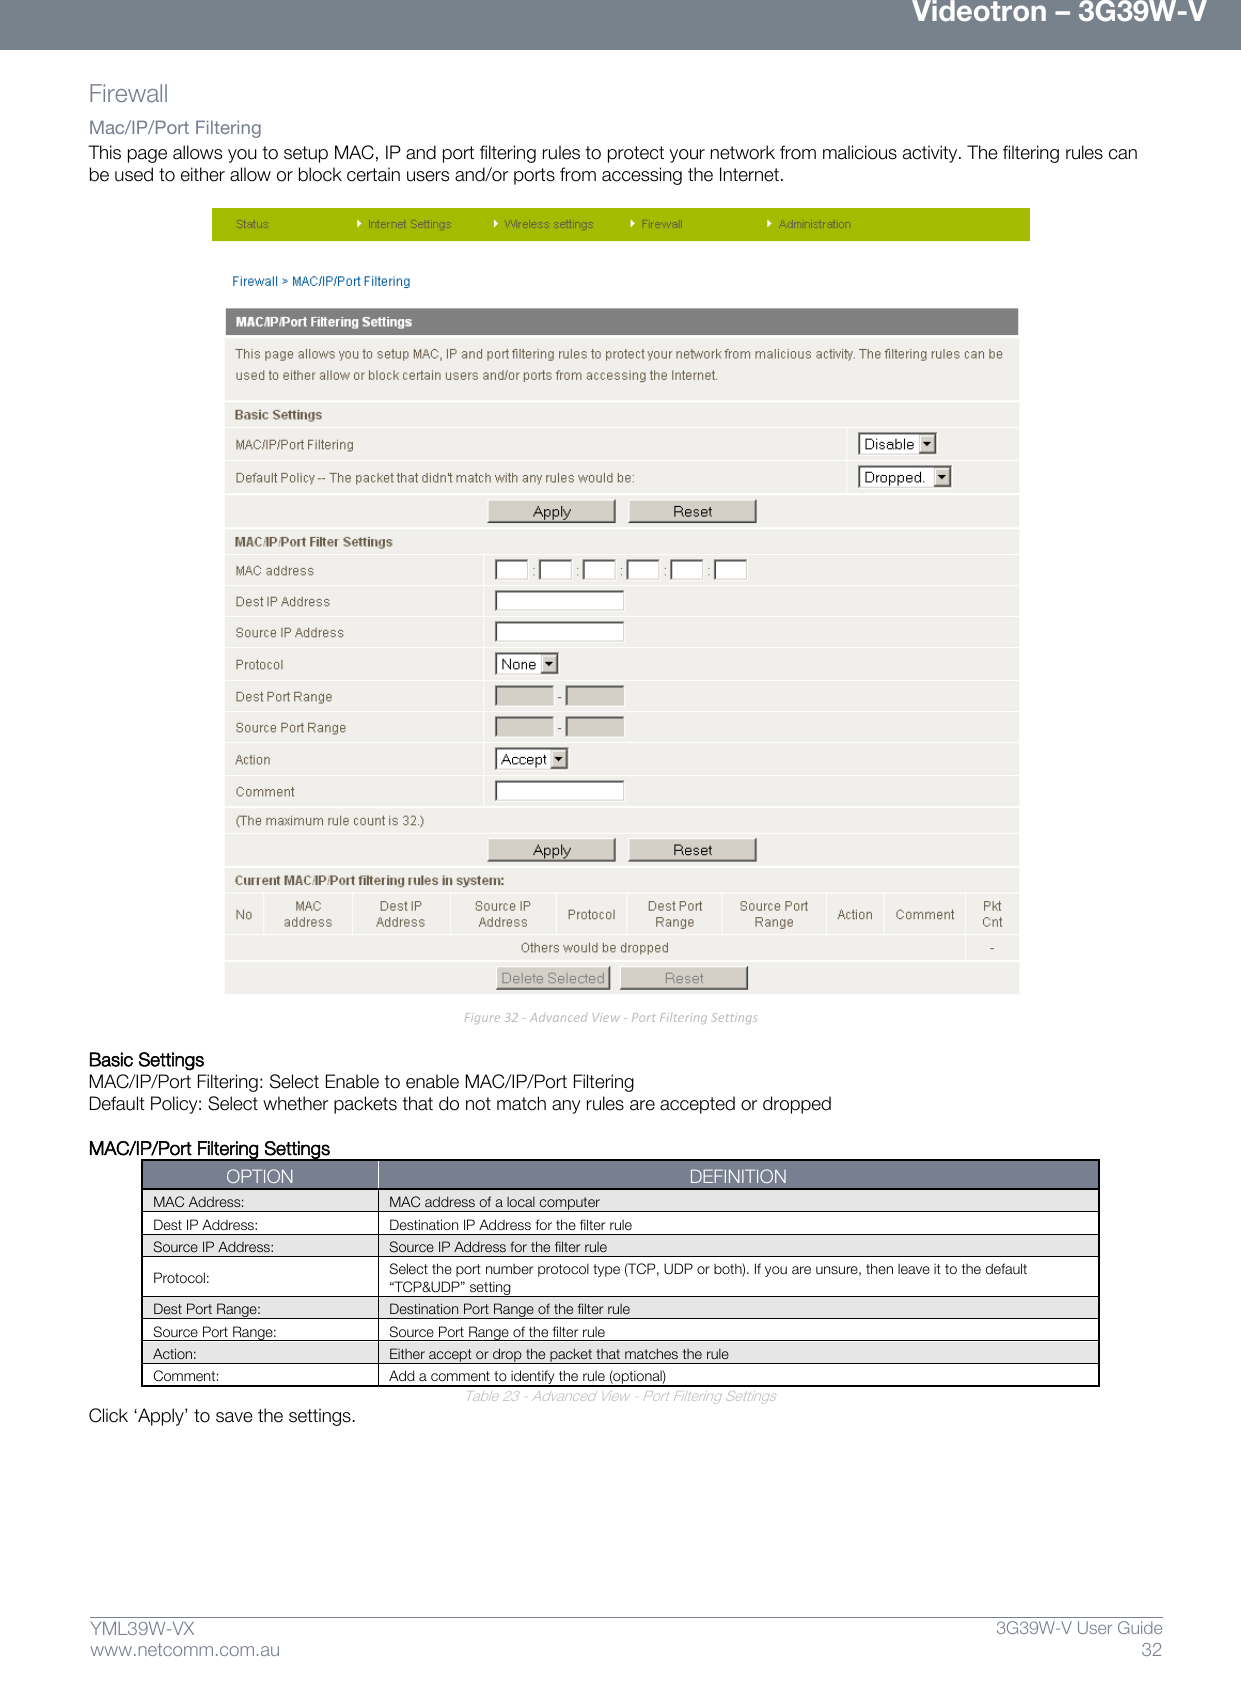
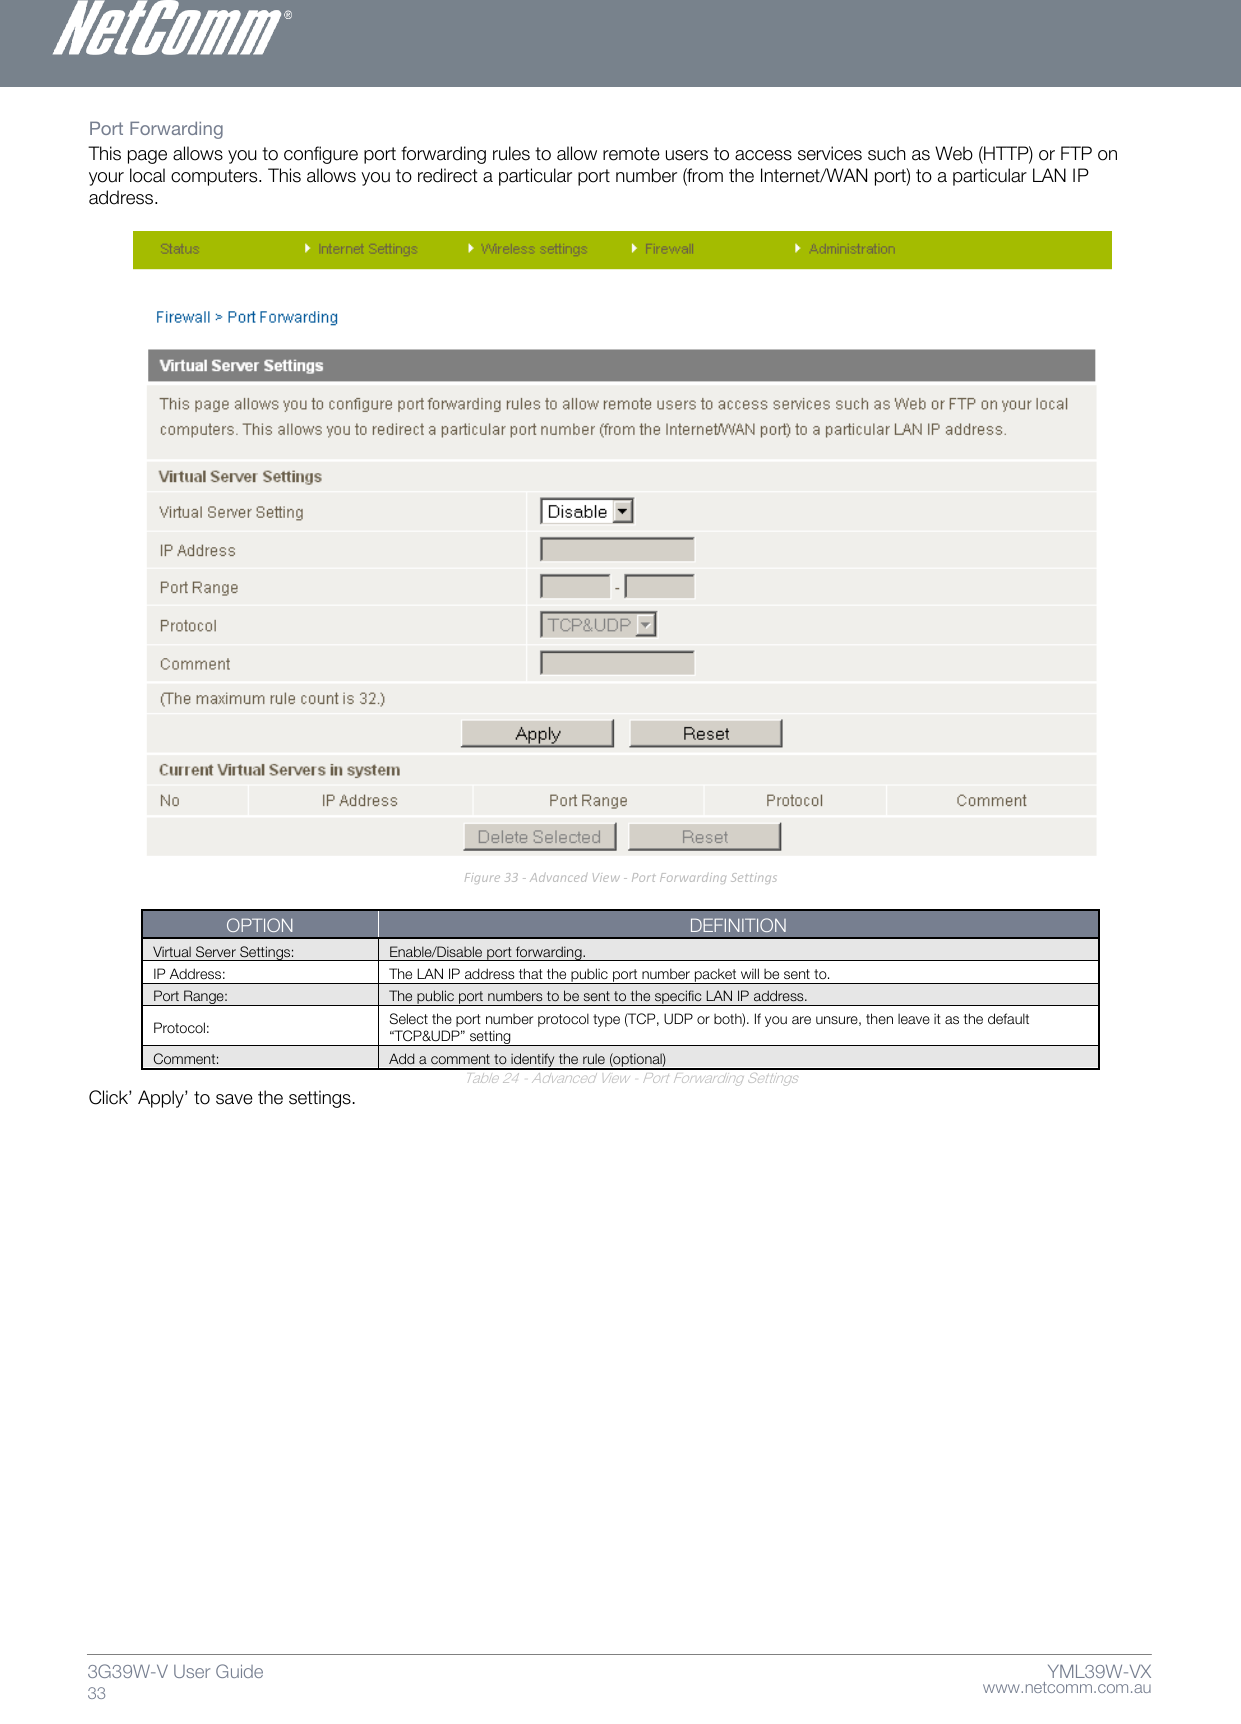
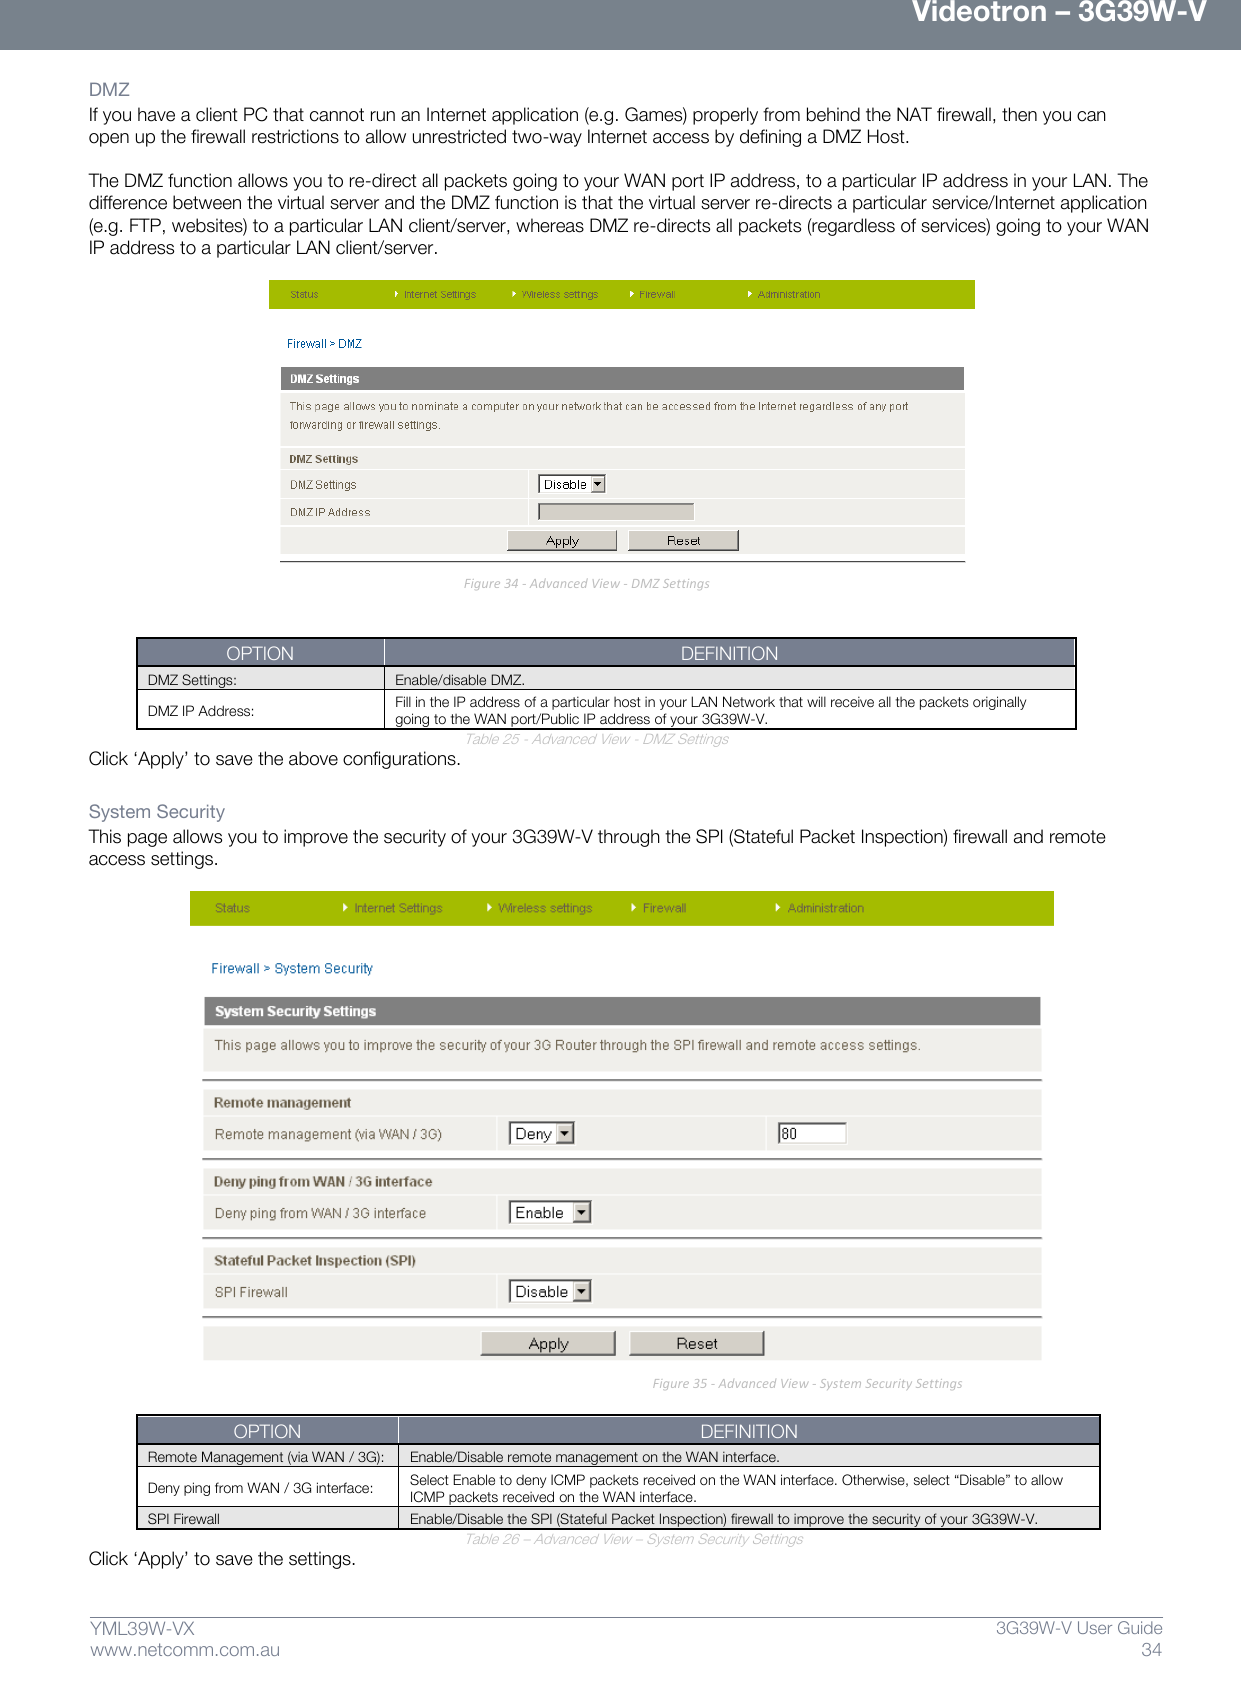
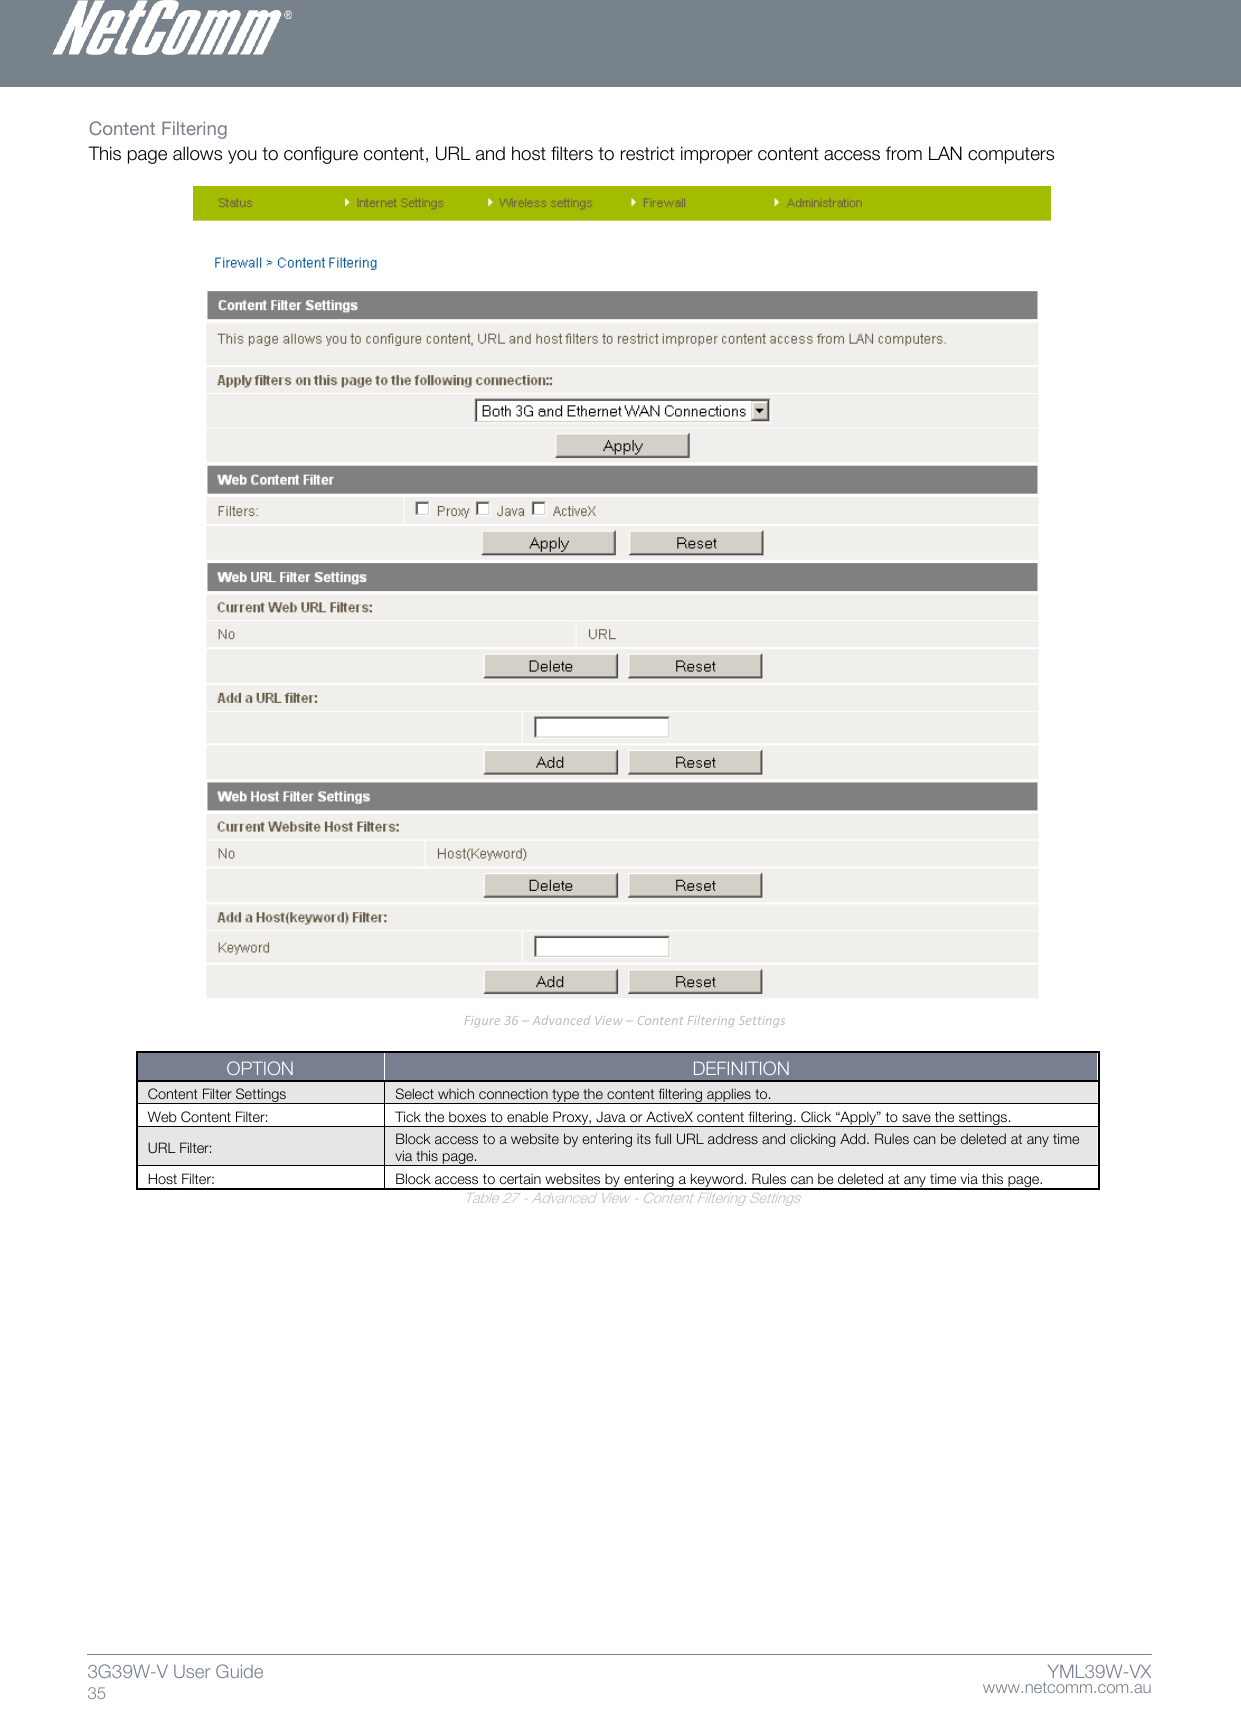
![Videotron – 3G39W-V 10 3G39W-V User Guide www.netcomm.com.au YML39W-VX Hardware installation 1. Attach the supplied antenna to the port marked 3G Antenna. [This should be attached in a clockwise direction.] 2. Insert your SIM card (until you hear a click) into the SIM slot. 3. Connect the power adapter to the Power socket on the back of the 3G39W-V. 4. Plug the power adapter into the wall socket and switch on the power. 5. Wait approximately 60 seconds for the 3G39W-V to power up. Connecting via a cable 1. Connect the yellow Ethernet cable provided to the port marked LAN at the back of the 3G39W-V. 2. Connect the other end of the yellow Ethernet cable to your computer. 3. Wait approximately 30 seconds for the connection to establish. 4. Open your Web browser, http://my.router or http://192.168.20.1 into the address bar and press enter. 5. Follow the steps to set up your 3G39W-V. Connecting wirelessly 1. Ensure Wi-Fi is enabled on your device (computer/laptop/Smartphone). 2. Scan for wireless networks in your area and connect to the network name that matches the Wireless network name found on the Wireless Security Card (included in the box). Figure 2 - Included Security Card Please note: For security purposes, each 3G39W-V has a unique SSID (such as VIDEOTRON6444) and Wireless Security Key. The included Wireless Security Card lists these instead of the xxxxx’s shown in the screenshot above. 3. When prompted for your wireless security settings, enter the Wireless security key listed on your Wireless Security Card. 4. Wait approximately 30 seconds for the connection to establish. 5. Open your Web browser, type http://my.router or http://192.168.20.1 into the address bar and press enter. 6. Follow the steps to set up your 3G39W-V.](https://usermanual.wiki/NetComm-Wireless/3G39W/User-Guide-1595050-Page-10.png)