NetComm Wireless 3GT1WN NetComm 3G Travel Router tl User Manual Users manual
NetComm Wireless Limited NetComm 3G Travel Router tl Users manual
Users manual
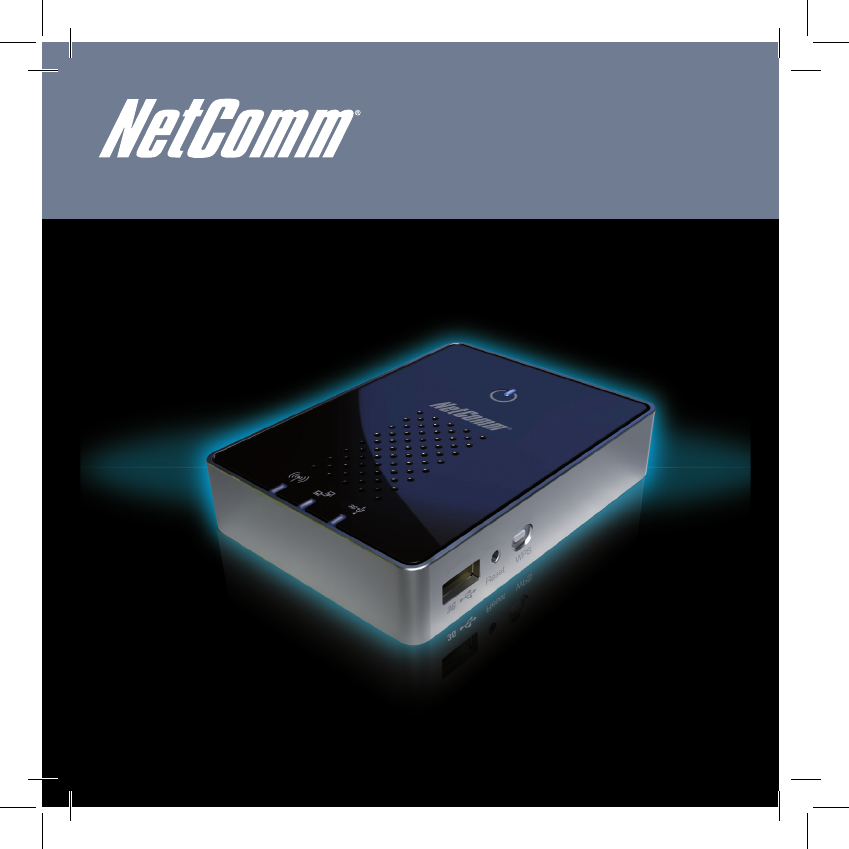
NETCOMM LIBERTY SERIES
3G Travel Router
NetComm 3G Travel Router tl 3GT1Wn

1. Gently insert the supplied battery into the battery compartment on the back of
the 3G Router.
2. Connect the supplied power adapter to a wall power outlet and to the micro
USB port of the 3G Router to charge the battery. The battery is fully charged
when the Power LED lights up Solid Green.
3. Switch the 3G Router on and wait around 2 minutes to allow the device to
power up.
1
Hardware Installation
NETCOMM LIBERTY SERIES
3G Travel Router

Hardware Installation
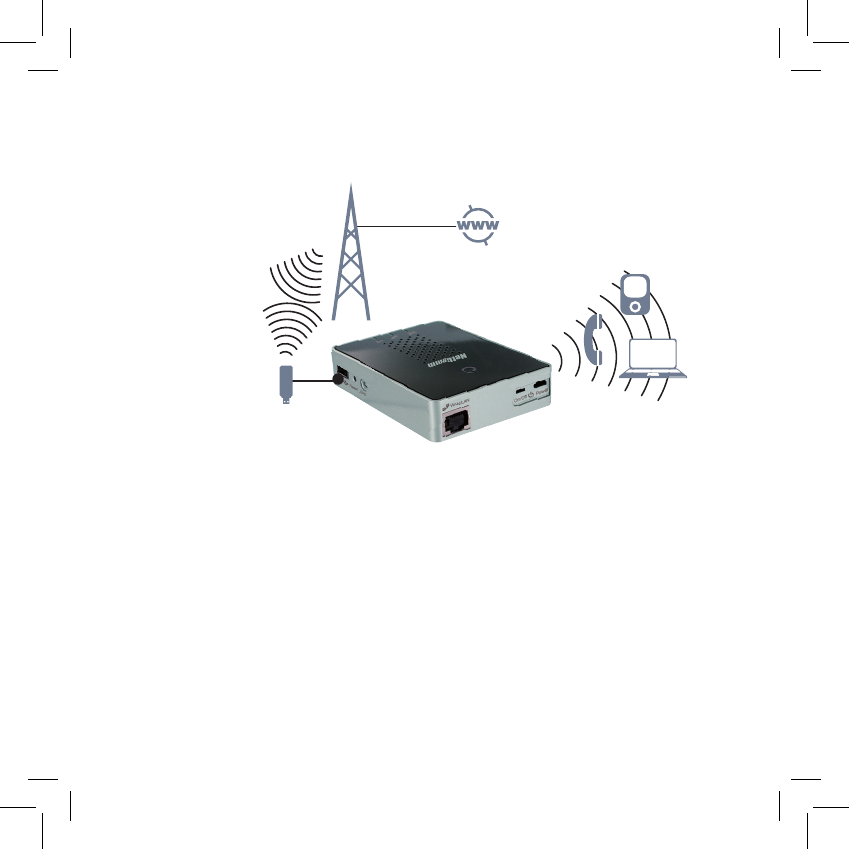
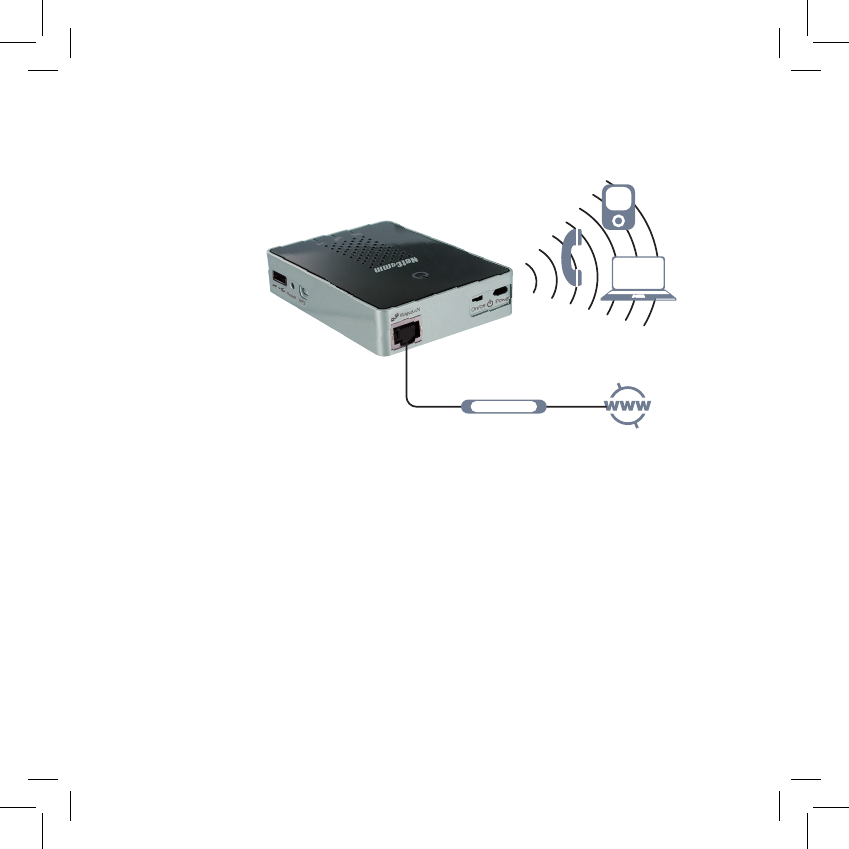
You can use the 3G Router to create a Wireless Local Area Network (WLAN) to
provide Internet access to wireless-enabled devices.
Using the 3G Router with a 3G Mobile Broadband Internet Service
• Connect a compatible 3G USB Modem to the 3G USB port of the 3G Router.
• The 3G Router will automatically attempt to detect the connection details from
the SIM card of your 3G USB modem. Simply wait for 2 minutes to allow the
3G Router to apply the settings.
2
Connecting your device

• If the 3G APN1 connection details were successfully detected, you will now be
able to access the Internet.
Note: Please refer to the ‘Setting up your 3G Router’ section in the user guide (on the CD) if you have any problems connecting to the Internet, or if:
• Your SIM card requires a PIN code
• Your 3G broadband Internet service provider requires you to input the username/password for your 3G connection
• You wish to use other alternate 3G connection details (such as a special APN1)
1 APN stands for Access Point Name
Connecting your device
1. Using your wireless-enabled device, scan the wireless networks in your area and
select the network called NetComm Wireless, then click connect.
2. Enter the following default security key: a1b2c3d4e5
Note: For optimal wireless security, we recommend that you change the default settings through the web interface. For more details, please consult
the User Guide located on the supplied on the CD.
WiFi PDA
Laptop
USB Modem
3G Tower
Wi-Fi phone
3
Establishing Wireless Connection
ADSL Modem
WiFi PDA
Laptop
Wi-Fi phone
Using the 3G Router with a xed line Broadband Internet Service (DSL/Cable)
• Connect your DSL or cable modem with the supplied Ethernet cable to the
WAN/LAN port of your 3G Router.
• On your computer open a web-browser (such as Internet Explorer, Firefox, or
Safari) and type in 192.168.20.1 into the address bar.
• At the login screen type admin into both the username and password elds.
Then click submit.
• Move your mouse over Internet Settings and click on WAN.
• Select your WAN connection type from the drop box.
4
Establishing a WAN connection
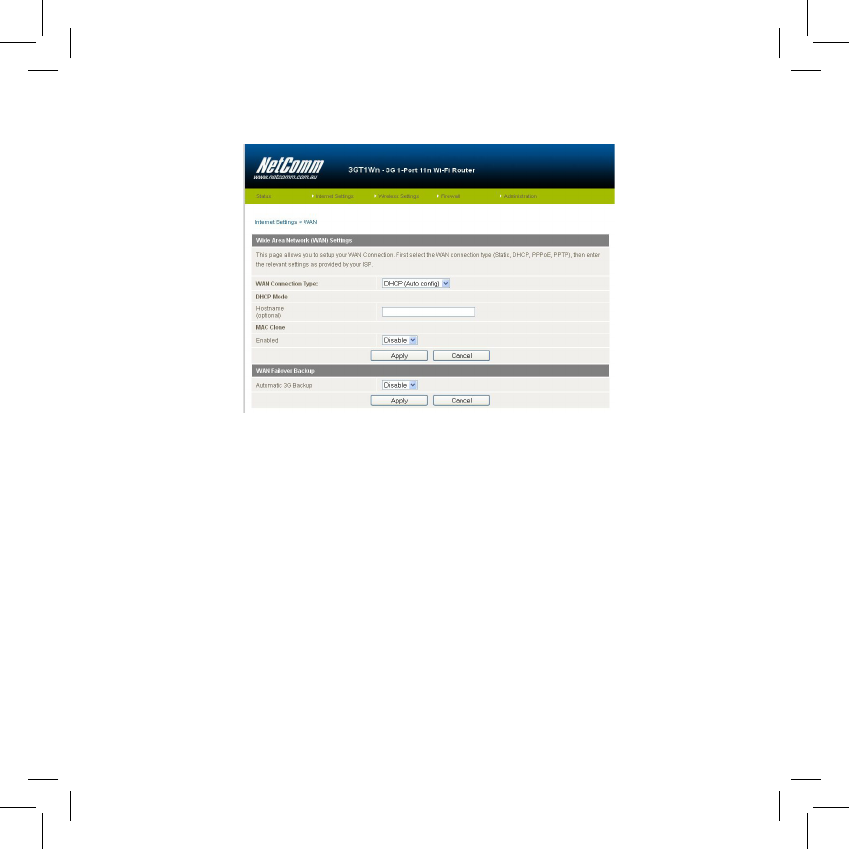
• Enter the relevant information in this screen as supplied by your ISP
• Click on Apply to save the settings
• Wait 2 minutes for the 3G Router to apply the settings
• The Internet connection status can be determined by clicking on status from the
menu after logging in to the 3G Router.
Establishing a WAN connection

5
Establishing a LAN connection
You can establish a LAN connection to your 3G Router using the WAN/LAN port by
following these three basic steps.
1. With the device turned on, simply press the reset button on the side of the 3G
Router quickly for less than 2 seconds and release.
2. With the supplied Ethernet cable, connect your computer to WAN/LAN port
of the 3G Router.
3. Wait for 2 minutes to allow the 3G Router’s DHCP server to assign an IP
address.

Establishing a LAN connection
Charging your battery
If you use the 3G Router until the battery has completely drained, it will power off.
If this occurs, let the unit charge overnight.
Note: The battery must be fully charged before using your 3G Router for the rst time.
To charge your battery please complete the following steps:
1. With the battery inserted into your 3G Router connect the supplied power
adapter to the wall power outlet and to the micro USB socket on the
3G Router.
2. Leave it to charge until the power LED lights up solid Green.
6
Charging your battery
7
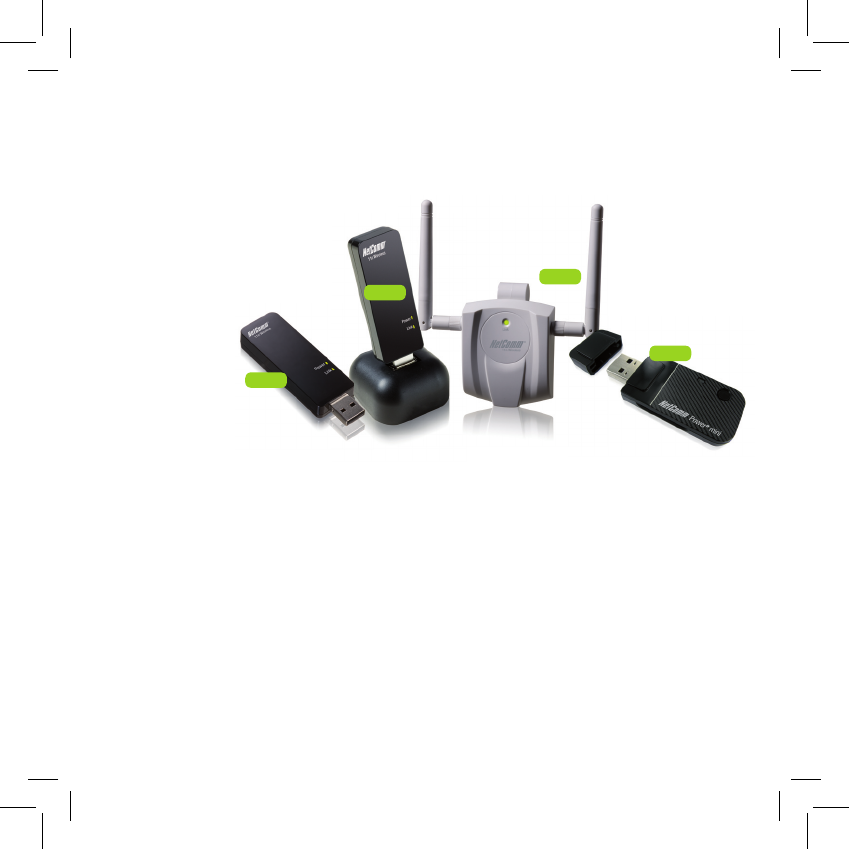
NetComm Velocity Series
Accessories for your product
NP910n Wireless N 150, this product is perfect for users wishing to extend their network with
the convenience of a miniature USB Adapter
NP900n Wireless N 150, this product is perfect for home users
NP901n Wireless N 300, perfect for data intensive applications within a SoHo environment.
The included USB dock gives you the ability to move the USB Adapter so you always
receive the best possible wireless signal
NP902n Wireless N 300, perfect for SoHo, business users and gamers. The NP902n features
a cable to allow you to position the adapter, a removable hook to neatly attach to the
rear of your monitor and 2 detachable external antennas ensuring you receive the best
possible wireless signal at all times.
* Maximum wireless signal rate and coverage values are derived from IEEE Standard 802.11g and 802.11n Draft 2.0 specications. Actual wireless
speed and coverage are dependent on network and environmental conditions included but not limited to volume of network trafc, building
materials and construction/layout.
NP900n
NP901n
NP902n
NP910n
Charging your battery