NetView Technologies NI-1200 NETVUE User Manual
NetView Technologies (Shenzhen) Co., Ltd. NETVUE Users Manual
Users Manual
1
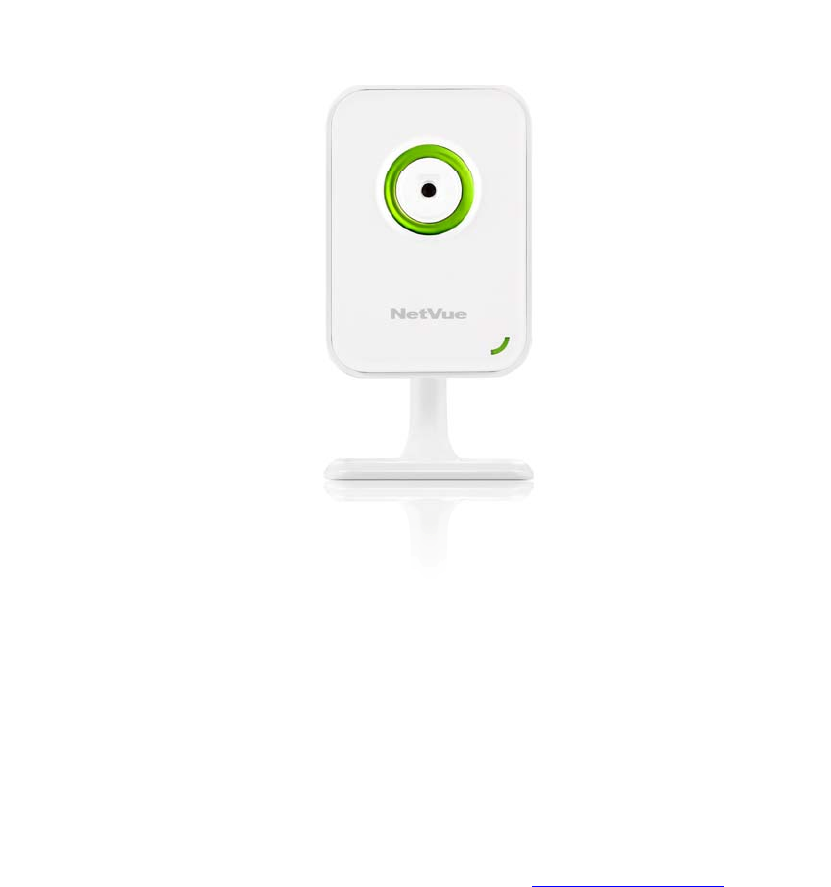
Hassle Free IP Camera User’s Manual
Version: 1.0.0
NetView reserves the right to make any changes and amendment to this manual. The content may
be renewed as our service develops or changes. Please visit www.netviewtech.com for more
information.
2
I. Hardware Installation
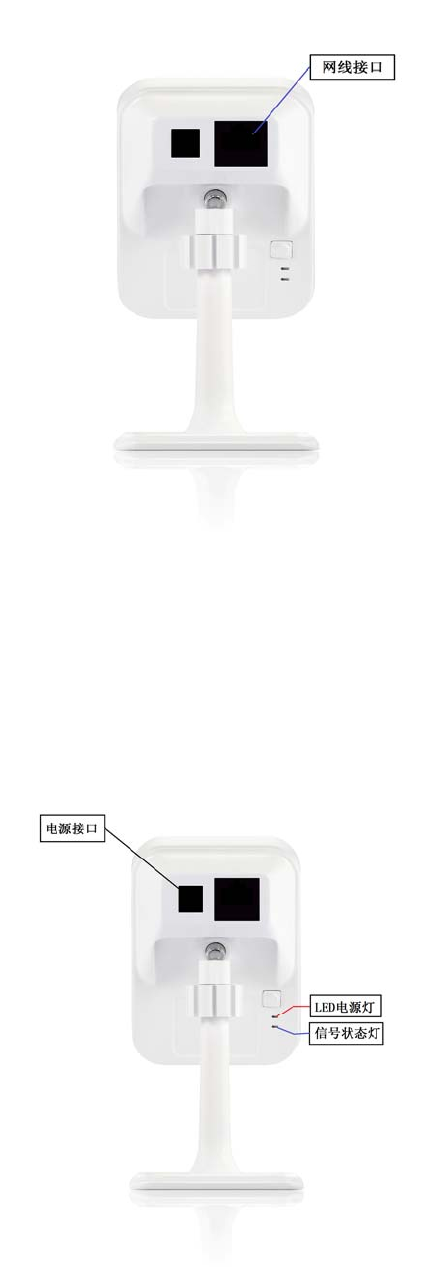
Firstly, connect the network cable with the network interface on the backside of the
camera and the route or Modern, so as to access network.
1. Connect the attached power adapter with the DC input port on the backside of the
camera and the wall socket power or an electrical outlet (Before connecting power,
please check whether the power adapter and the electrical outlet are in good
condition, for the sake of your personal safety and avoiding unnecessary loss.) The
power supply is normal if the red LED power indicator lights.
3
II. Begin to use
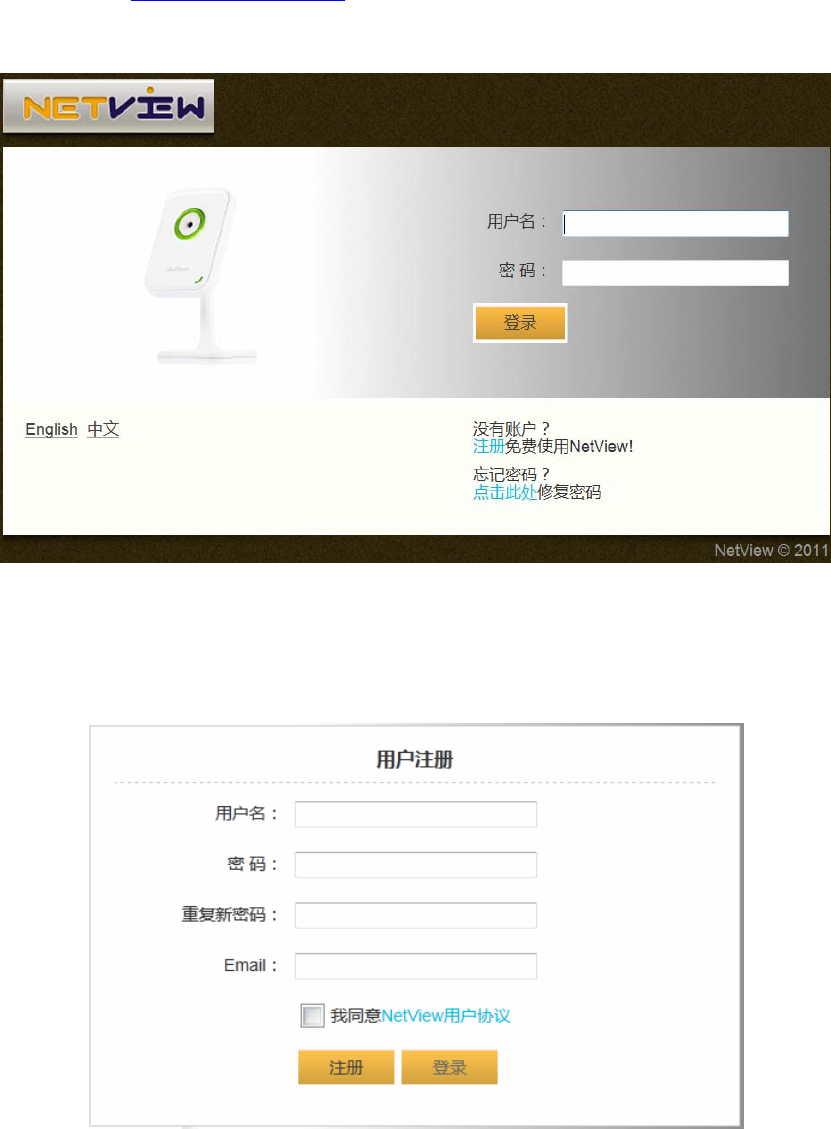
1. Login
Enter www.mynetvue.com in the address bar with a browser, and come to
the user register interface. If you are a new user, please open an account first.
2. Register
On the login interface, click “Register” and enter user register interface.
Complete your register by following the prompt.
(Note: Email is required for password regain. Please ensure it correct.)
3. Add camera
In the message box for adding camera, enter the camera’s ID in the bar Camera ID
(This ID No. is a unique identity of the camera which is attached in the label or package of
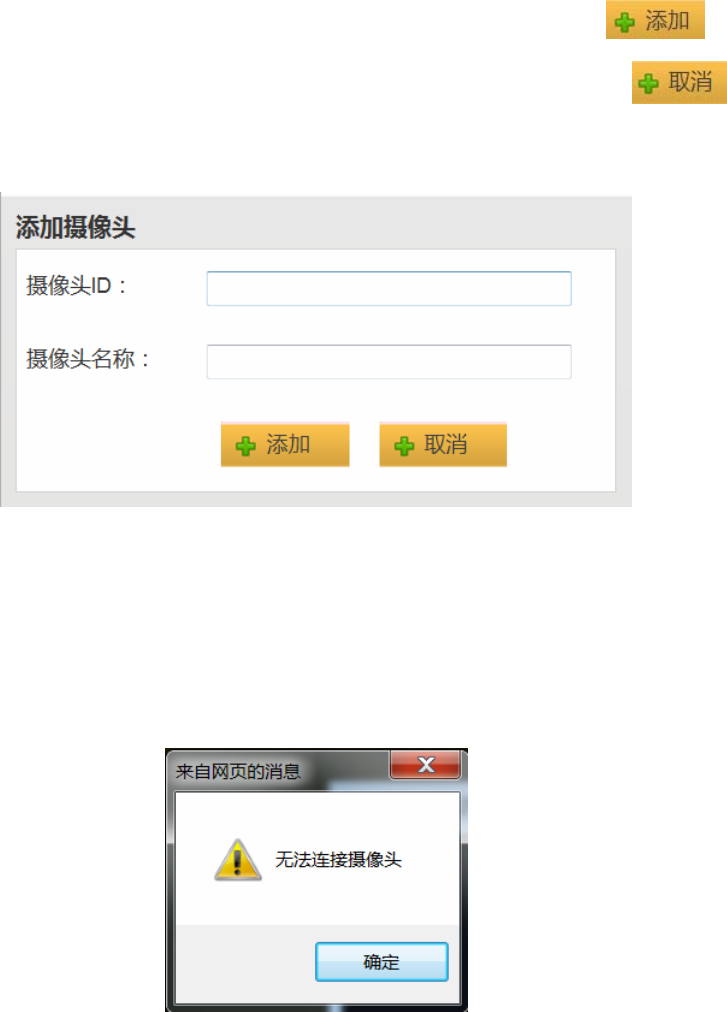
4
the camera), then give the camera your favorite name. Click Add button to
finish this procedure. If you currently don’t want to add the camera, select Cancel ,
and it return back the page.
III. Plugin installation
Verify the installation of a small plugin:
First, playing video from this camera on Web requires a small plugin java. If there is no this
plugin installed in your computer before, after login please follow related prompt popped up on
the browser to download the plugin. If you miss the prompt on the webpage, prompt will appear
when you drag a camera to play video, as below:
5
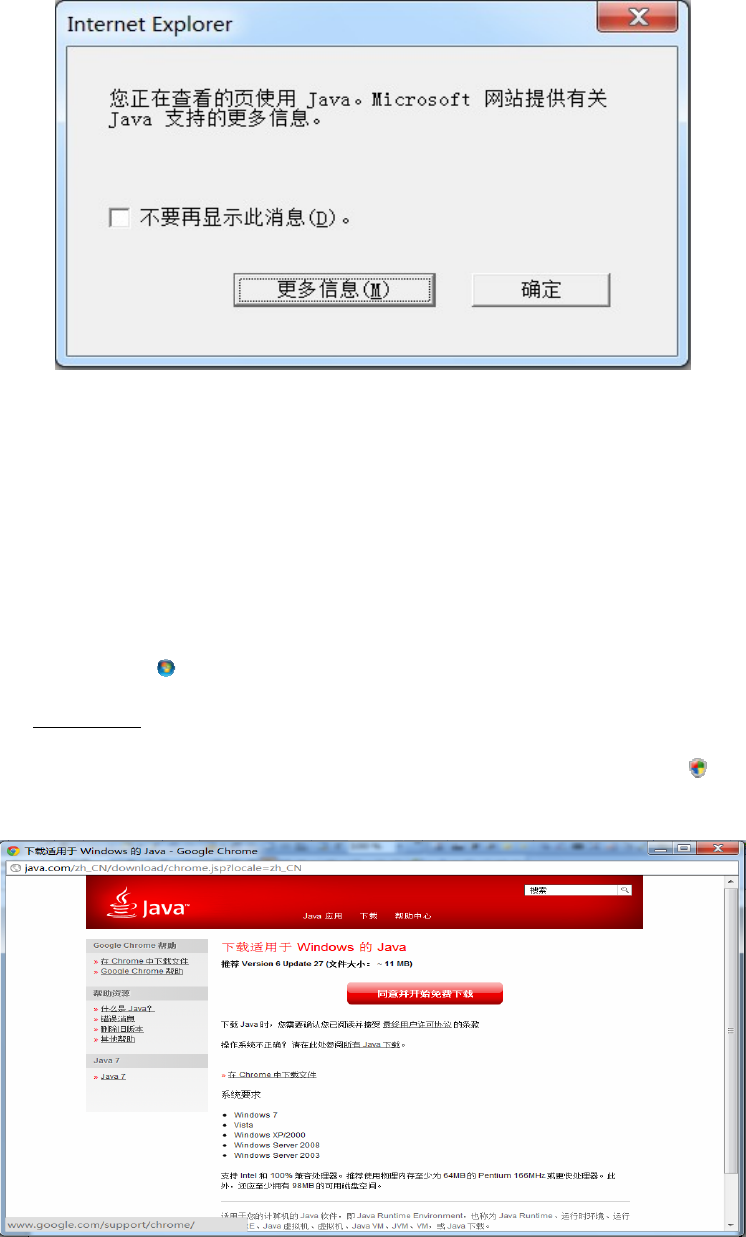
The page you are browsing uses Java. Microsoft webpage provides more information on Java.
Do not show this message again. More information OK
Based on the above sample prompt for java plugin on IE browser, here explain the installation
process(Prompt for process on different browsers varies).
Click “More information(M)”, and then on the new page follow prompt to install java.
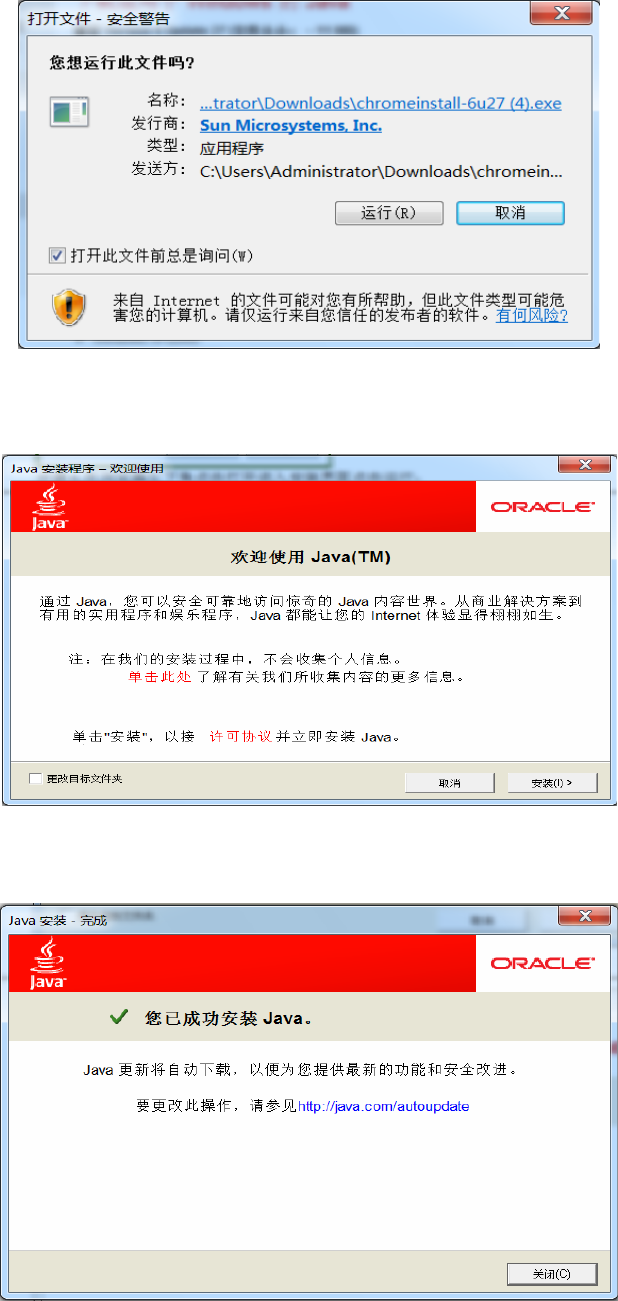
Follow the below steps to install Java:
1. Click “Start” button , then “Internet Explorer” to open Internet Explorer.
2. Enter www.java.com
3. Click “Free Java Download”, and then click “Agree and Start Free Download”. If there is
prompt requesting admin password or confirm, please enter password or confirm.
4. If there is a yellow information bar(Warning you that the page requires ActiveX or Add-Ons
from Sun Microsystems), please click this bar and then the “Install ActiveX” or “Install Add-Ons”.
When it appears message window “Security warning”, please click “Run”.
6
5. Click “Install”. ( Please note that, user can change default installation place C:\Program Files\Java
into other places if user selects the check box Change Destination File and follows instructions.)
6. When a finish window appears, please click “Close”. There is no need to fulfill additional
settings to Java, and no need to restart the computer.
If you download it by a download tool like Thunder etc., you can find it in your assigned file, then
with the mouse double click or right click it to install.

7
IV. Live viewing
After finishing the procedure of adding your camera, with the mouse drag (move the mouse
on the camera icon or name and then press left mouse button for movement) your camera(Or a
shared camera from other user) to designated area on the right side. And the video starts to play.
( Note: Only when the camera is online can it be dragged and played. The camera is online
when its icon is in green , and offline in red .)
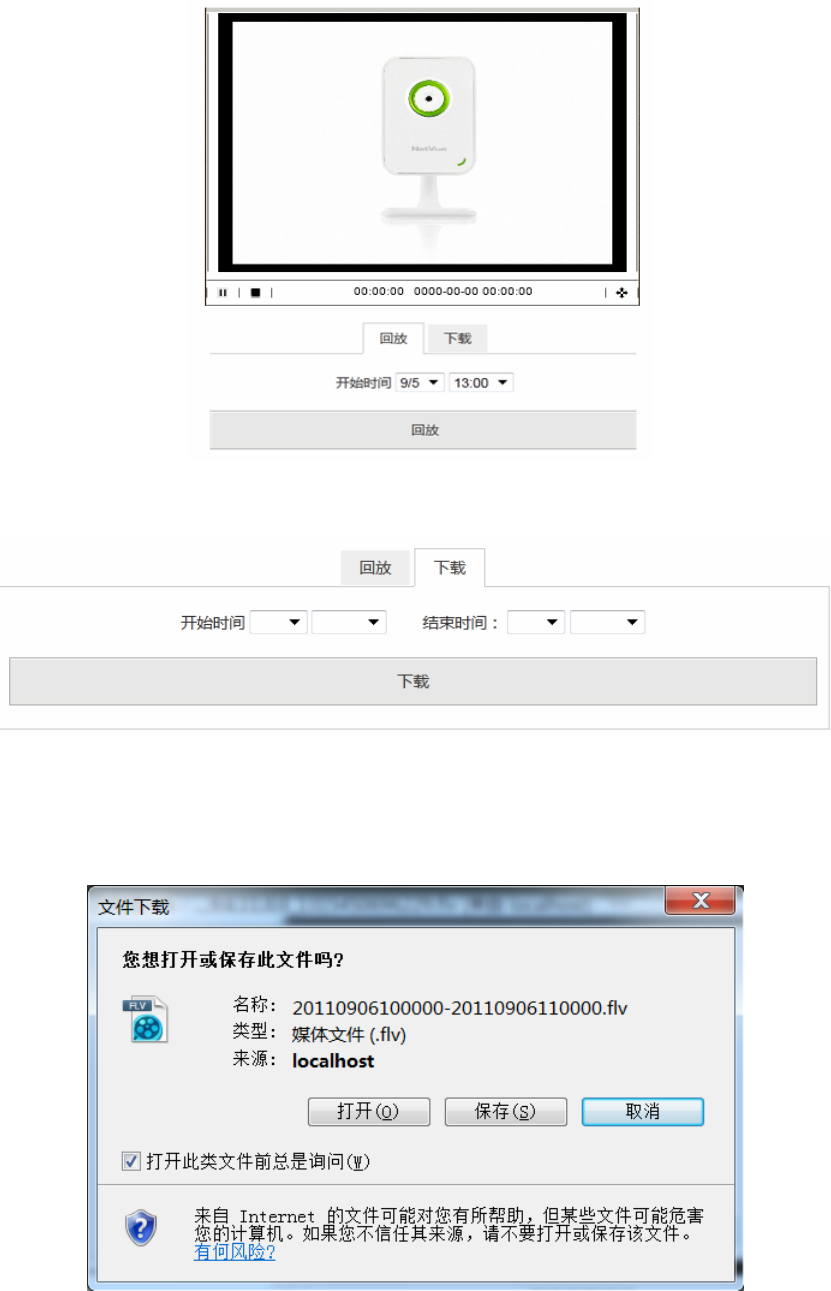
V. Download and playback
The access to video playback and download is on the page of user control center. You can set
the time to begin playing back the video and choose a video clip to download in a time slot as you
want. The precondition is that there is a piece of memory card in the camera and the video data
you want are still kept on the memory card.
8
After selecting a wanted time slot, you can download the video data memorized on the TF
card. The download prompt may be varied due to different browsers you use.
In a popped up download window, select Save, and the video data will be saved in a file pointing
9
to your appointed path after your confirmation. If you download the video data by a download tool
like Thunder etc., you can find them in your assigned file, then with the mouse double click or
right click the video clip to watch.
六、分享
VI.Share
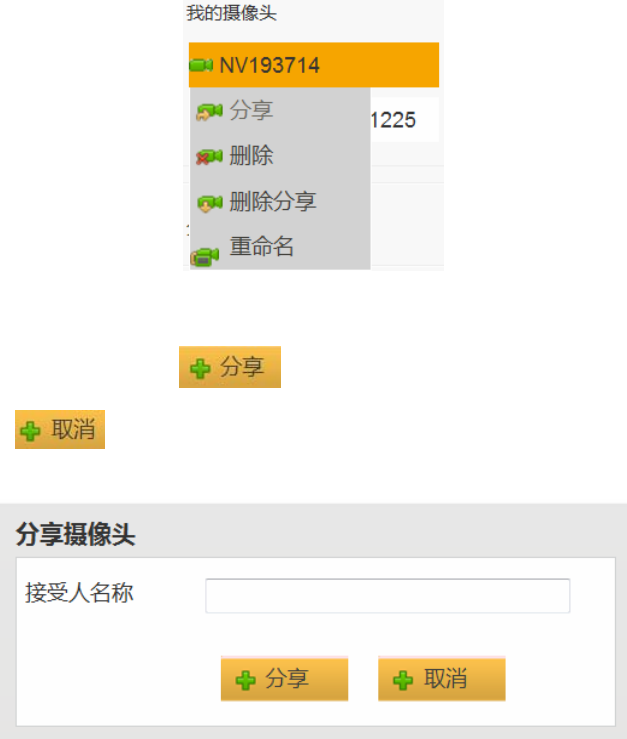
1. Share with friends
In the list of My Camera, move your mouse to a camera, and select Share in the
dropdown list:
In the message window, enter the shared user name (Shared user should have an account
in this website) and click Share to complete. If you currently don’t want to share,
click Cancel to return.
2. Share on a social network site
This function is under development. Please keep attention to it.
3. Embed video in a third website
This function is under development. Please keep attention to it.
VII. WIFI configuration
10
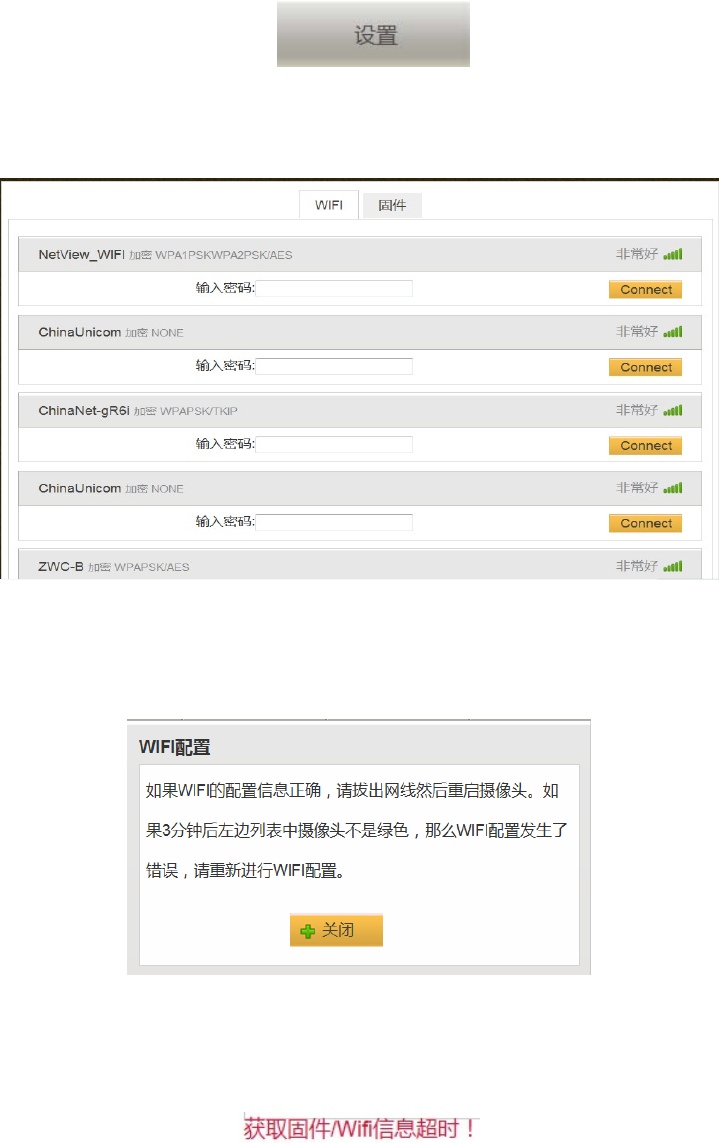
WIFI configuration is on page of user control center.
Select an online camera. Then select your wanted wifi in the list of discovered
wireless signal, and enter its password. Click Connect button to access.
If the below prompt appears, it means that the wifi is being configured.
User can close this window after several seconds. Then remove the network
cable and repower the camera.
If your WIFI configuring information is correct, please disconnect the network cable and restart
the camera. If the camera in the left list is not in green in 3minutes, an error may have occurred on
configuring WIFI. Please reconfigure WIFI.
If it appears the prompt Obtaining firmware/Wifi information has timed out, please
check whether your network is in normal condition.
(Note: In the first time of configuring wifi, please ensure that the camera has been in normal
network condition by network cable. Only after the success of WiFi connection, can you remove
the network cable and use the camera anywhere within the WiFi signal)
11
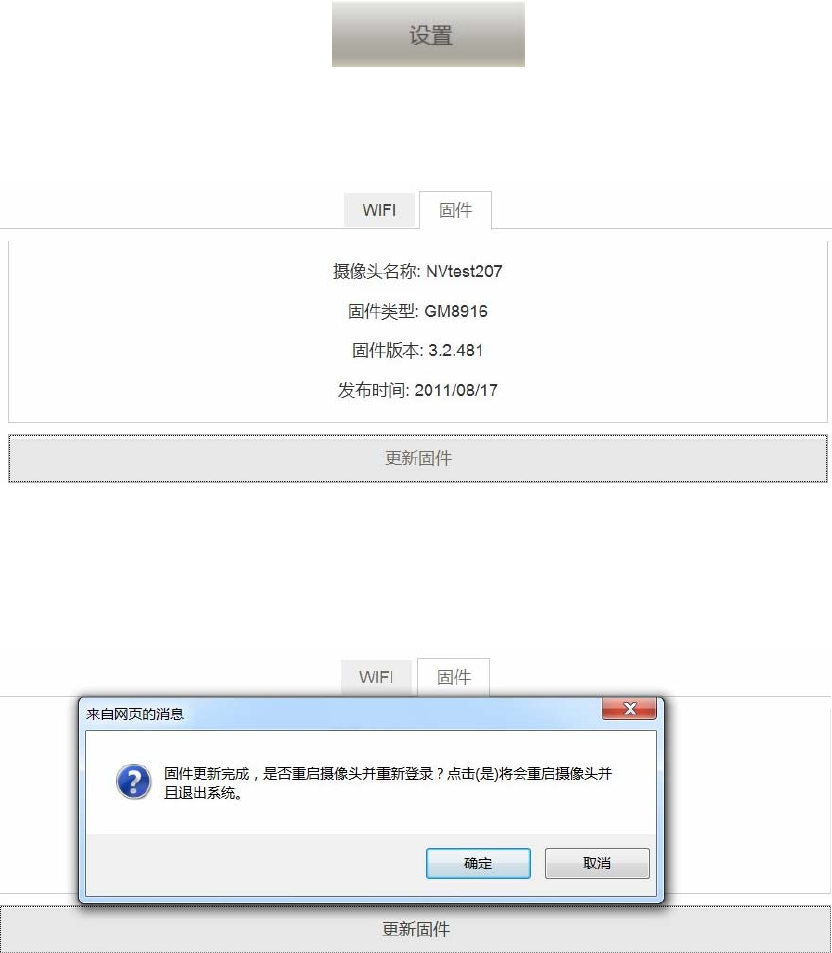
VIII. Firmware update
Firmware update is in the Setting page of User Control
Center. Select an online camera, and click “Firmware” after obtaining
firmware/wifi information.
On the firmware page, information includes camera name, firmware type, firmware
version, and release date. Click Update firmware to complete. There will be prompt to restart
the camera.
Firmware update is finished. Would you like to restart the camera and re-login? Click
(Yes) to restart the camera and exit.
Congratulations on getting your firmware version latest, if no valid button Update
Firmware can be found after firmware/wifi information is obtained.
IX. Other Functions
1. Remove Camera
In the list My camera, move your mouse to the camera name you would like to remove,
and click Remove in the dropdown list. Then the camera is removed. If you want to rework
this camera, please add it again.
12
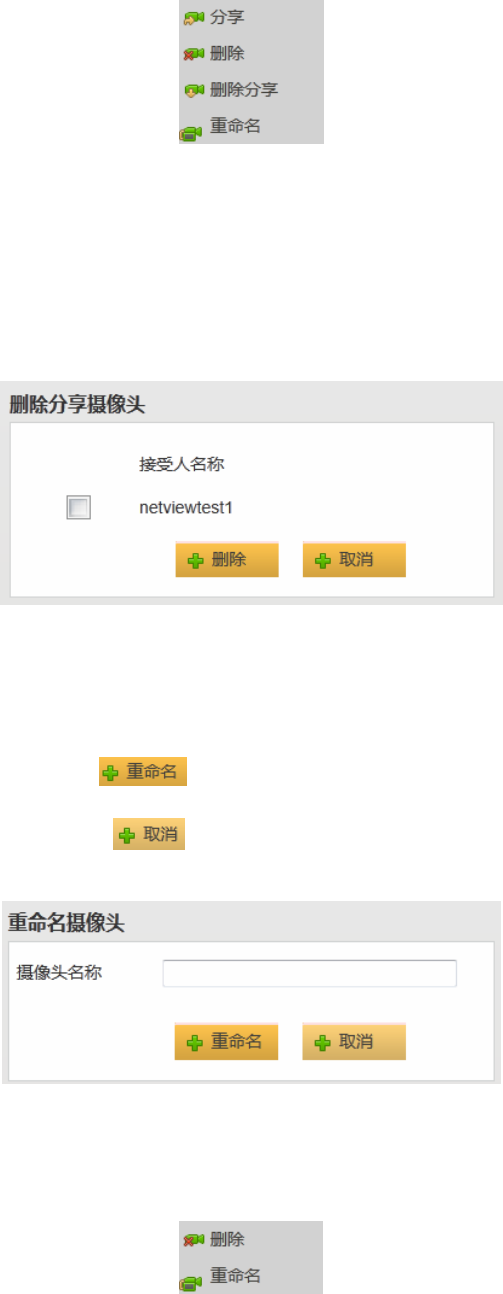
2. Cancel Sharing:
In the list My camera, move your mouse to the camera name you have added, and click
click Cancel Sharing button in the dropdown list. Then from the list of cancel camera, select
the username you would like to cancel sharing. If there is no other shared user, the list will be
blank.
3. Rename Camera
In the list My camera, move your mouse to the camera name you have added, and click
Rename in the dropdown list. Then in the popped up window enter the new name of the
camera and click Rename . If you currently do not want to change the name of the
camera, please click Cancel and return.
4. Revoke Camera:
In the list of shared camera, move your mouse to the camera name that is shared by the
other user, and click Revoke in the dropdown list. Then the shared camera is called off.
5.Rename Shared Camera
In the list of shared camera, move your mouse to the camera name that is shared by the
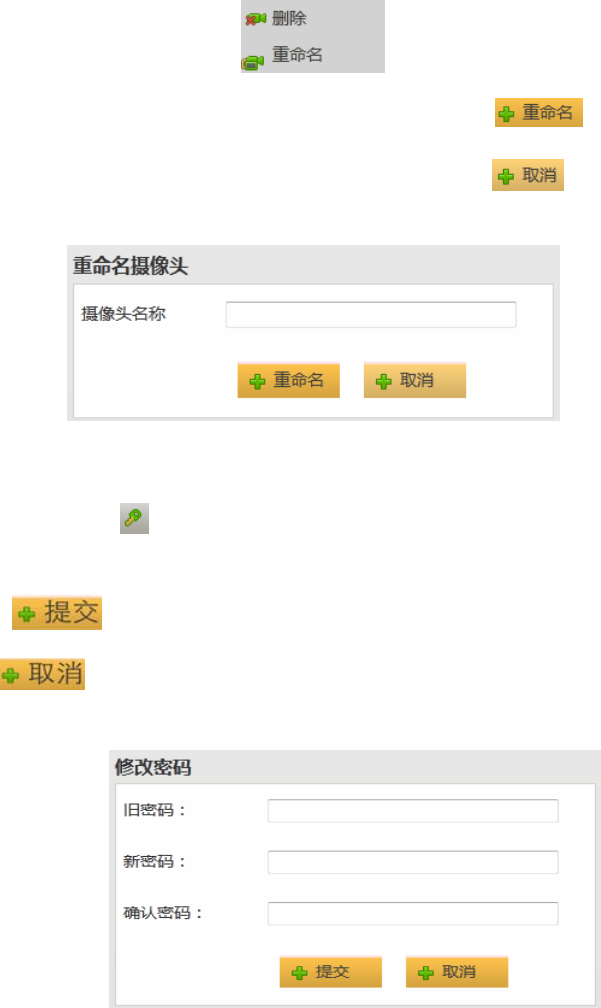
13
other user, and click Rename in the dropdown list.
Then in the dialog box enter a new name and click Rename . If you currently
don’t want to change the name of the camera, please click Cancel and return.
6. Change password
Click the button in the top right corner to change password. You will be required to
enter your old password and new password, and confirm the new password. Then click
Submit button to finish. If you currently don’t want to change password, click
Cancel button to exit.
7. Retrieve Password
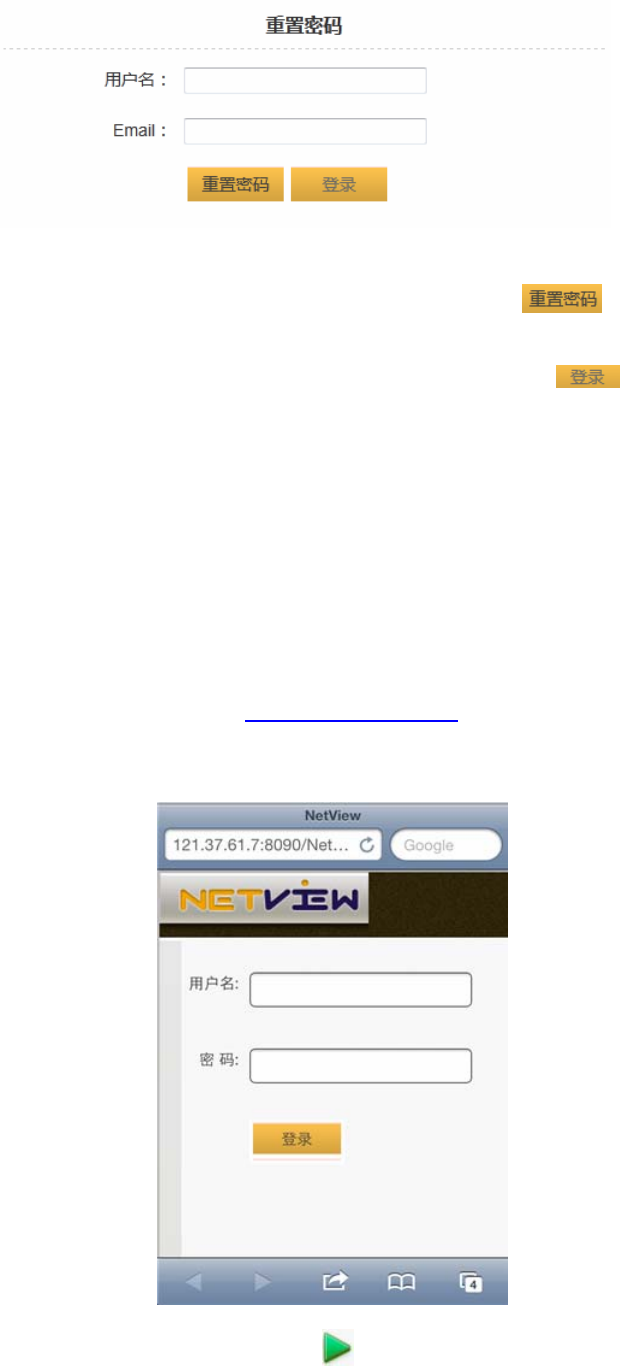
If you have forgotten your password, please don’t worry about it. You can reset your
password according to the reset password function. Have forgotten your password on the login
page? As below please click “Click Here” to enter the interface of Reset Password.
14
Please enter your username and email address (The email must be the one you have
associated with this username), and then click Reset Password button. The new
password of this username will be sent in a mail to your email address. If you suddenly
remember the password before reset password, you can click Login button to login
your account in the popped up login interface.
8. Local storage for video data
You can insert a piece of TF memory card with memory capacity of 2G/4G/8G/16G/32G etc.
into the camera for video data storage. (The camera should be repowered after memory card
is installed.)
X. Mobile phone usage
1.iphone
On your iPhone, enter www.mynetvue.com in the address bar with a
browser. It will come to a mobile phone login page. Please enter your user
name and password to login.
Watch video: Click the triangle button on the right side to play video. (Only when the
15
camera is online can you play the video. The camera is online when its icon is in green ,
and offline in gray . There is no triangle button to play video when the camera is offline.)
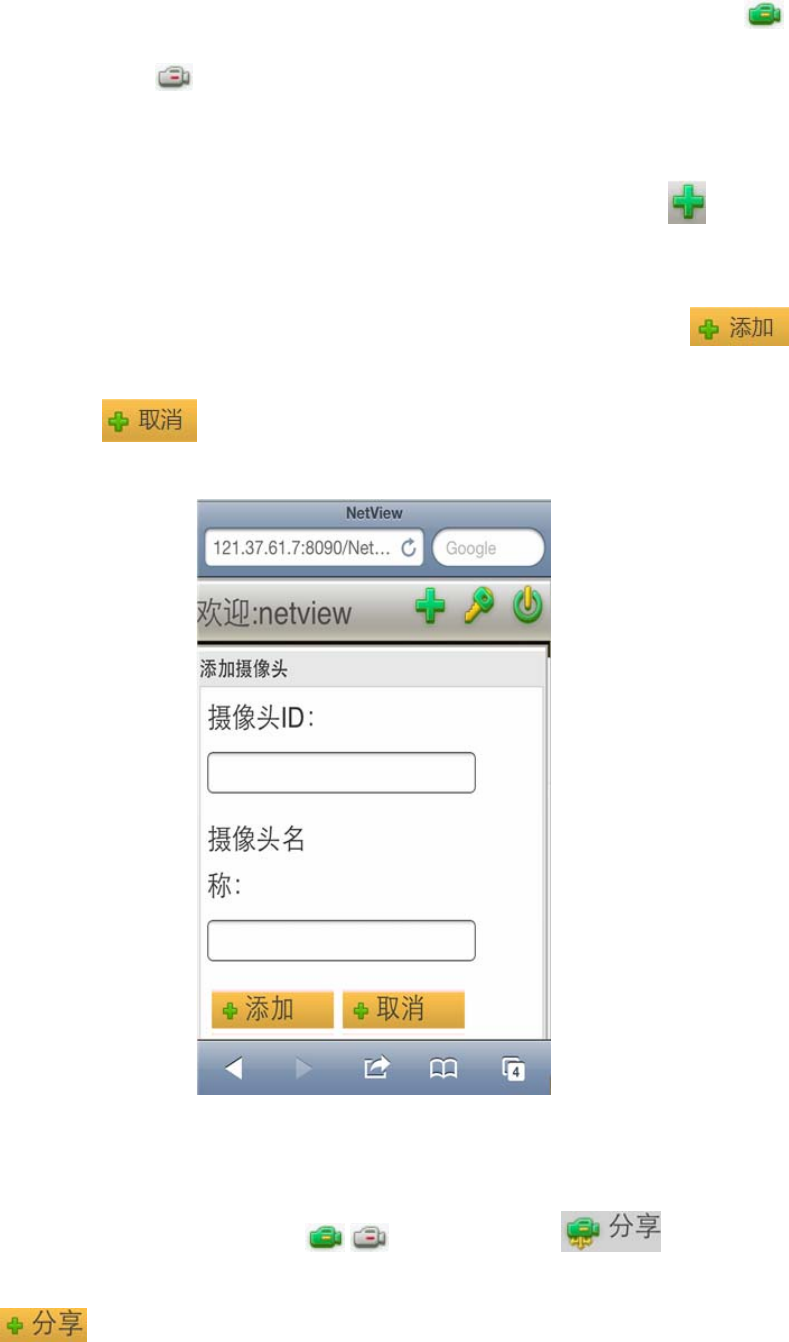
Add camera:
On the live broadcast page of user control center, click Add camera:
In the message box for adding camera, enter the camera’s ID in the bar Camera ID
(This ID No. is a unique identity of the camera which is attached in the label or package
of the camera), then give the camera your favorite name. Click Add button
to finish this procedure. If you currently don’t want to add the camera, select
Cancel , and it return back the page.
Share camera:
In the list My camera, select a camera which you would like to share with the other
users. Click the left camera icon( /), then click Share button in the
dropdown list. In the popped up window, enter the shared username and click Share
button. Then the camera is shared. If you currently don’t want to share the camera,
16
click Cancel button to stop.
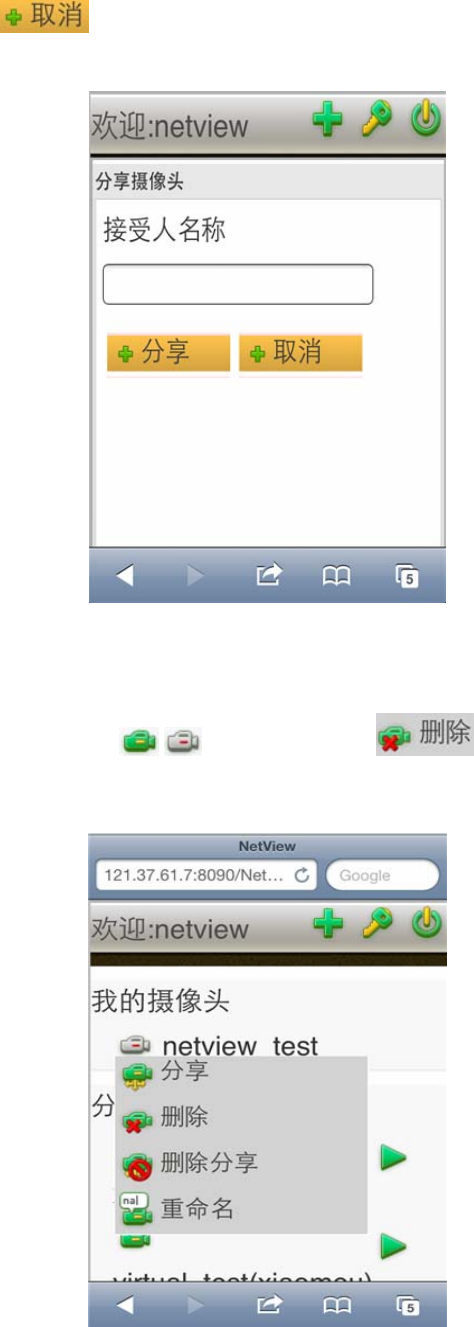
Remove camera:
In the list My camera/Shared Camera, select a camera which you would like to remove.
Click the left camera icon( /), then click Remove button in the dropdown
list. Then the camera is removed.
17
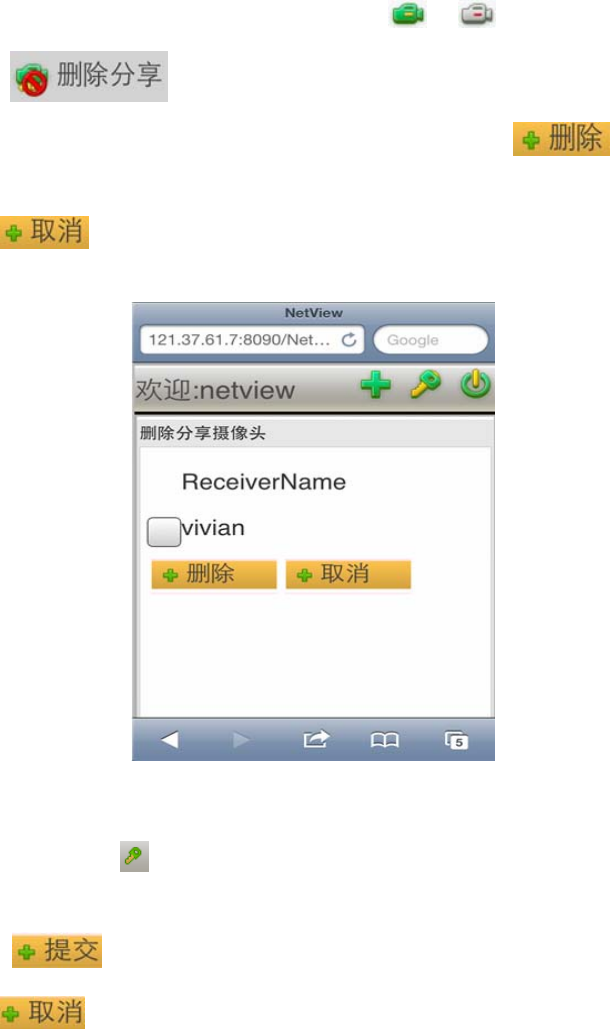
Cancel sharing:
In the list My camera, select a camera which you would like to stop sharing with the
other users. Click the left camera icon( /), then click Cancel
Sharing button in the dropdown list. In the popped up window, select the
user name with whom you want to stop sharing. And click Cancel button. Then
the sharing stops. If you currently don’t want to stop sharing the camera, click
Cancel button to stop.
Change password:
Click the button in the top right corner to change password. You will be required to
enter your old password and new password, and confirm the new password. Then click
Submit button to finish. If you currently don’t want to change password, click
Cancel button to exit.

18
2、Android
For Android mobile phone user, you need to download by your phone our
application software name NetviewA.apk for the Android platform (Apps to
download at: www.netviewtech.com).
Software setup:
Firstly, find the software you have
downloaded on your phone. Now click and begin to setup:
Click Install button as beginning. If you currently don’t want to

19
install, click Cancel button to return back. Install interface will appear if
you decide to install.
If you want to experience the software to watch video, click Open button
after finishing the installation. If you currently don’t want to use the software, click
Finish button to end the procedure. You can find this application software in
the software list on your phone. Click its icon to use it anytime when you want.
Username and password are required to login.
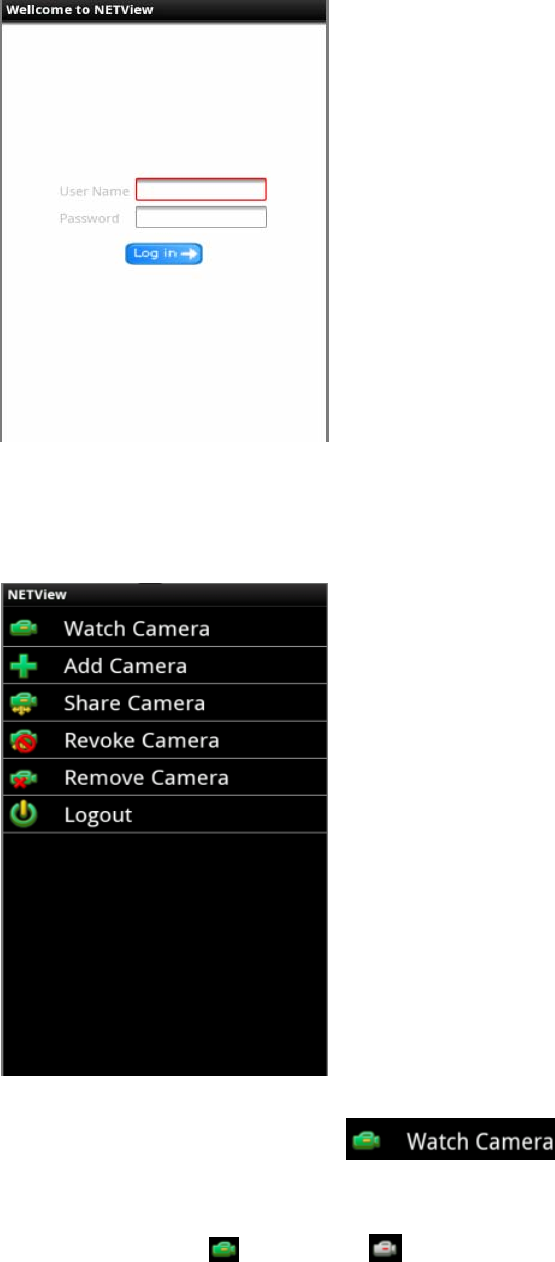
20
Account management center: Enter the account management center after your login.
There are functions here such as Watch Camera, Add Camera, Share Camera, and Remove
Camera.
Watch Camera:
On the page Account Management Center, click Watch Camera . It
appears your camera list (including the shared camera you got from the other users). Select an
online camera and you can now watch real-time video. (Note: Only when the camera is online can
it be played. The camera is online if its icon is in green , offline in gray .)
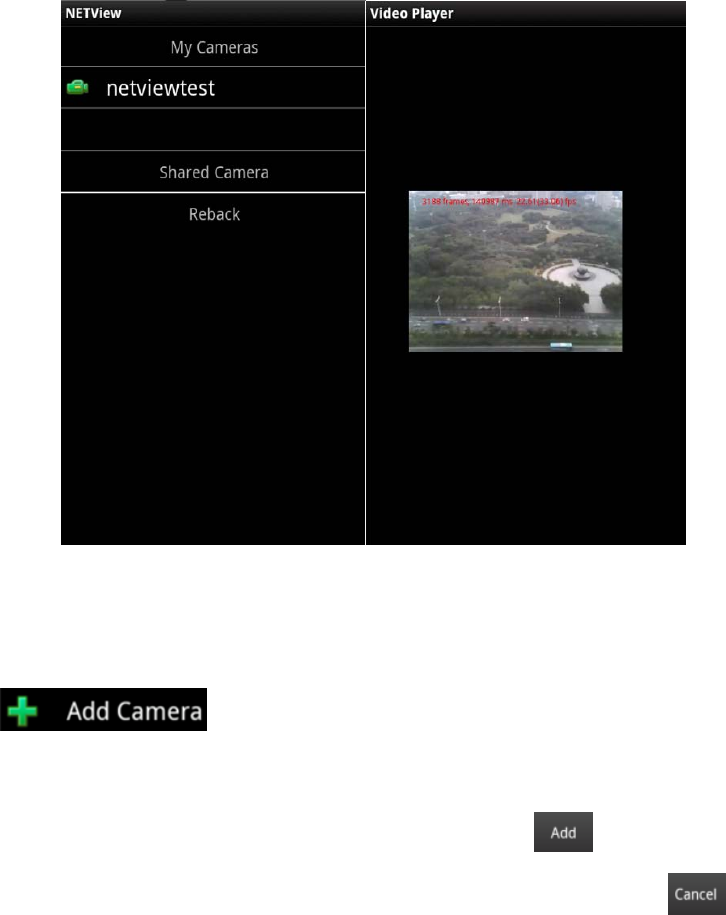
21
(The size of window to play video is related to the screen resolution of your cell phone)
Add camera:
On the page of Account Management Center, click Add camera:
In the popped window, enter the camera’s ID in the bar Camera ID (This ID No. is
a unique identity of the camera which is attached in the label or package of the camera),
then give the camera your favorite name. Click Add button to finish this
procedure. If you currently don’t want to add the camera, select Cancel , and it
return back the page.

22
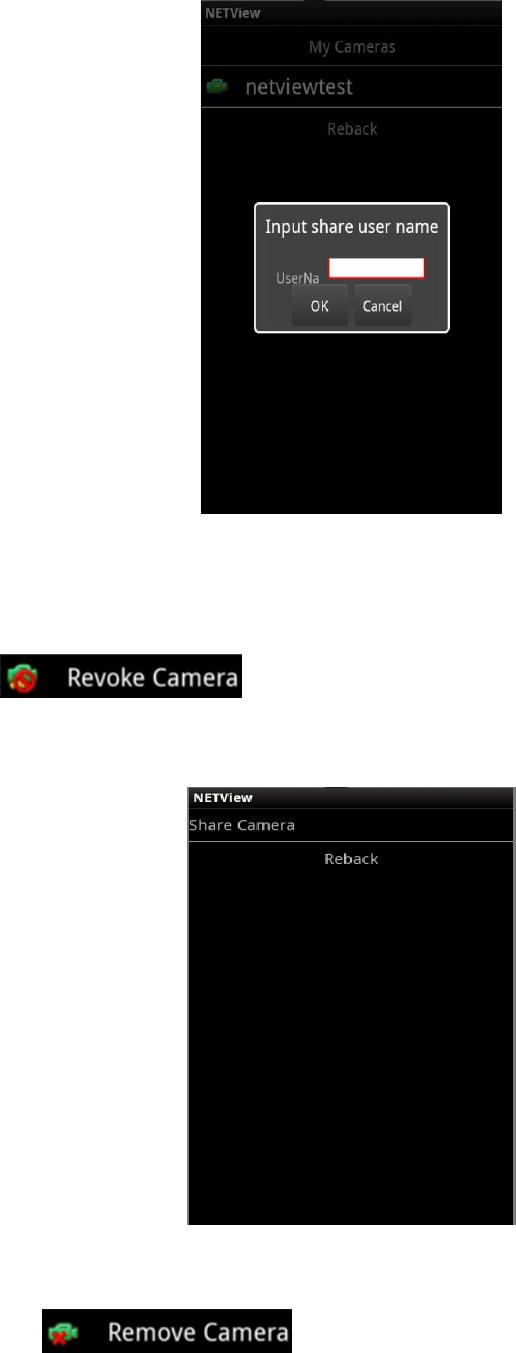
Share Camera:
On the page of Account Management Center, click Share camera:
. Then select from the camera list a camera which you would like to
share with the other users. In the popped window, enter the shared username. Click
OK button to carry out sharing. If you currently don’t want to add the camera, select
Cancel .
23
Revoke Camera:
On the page of Account Management Center, click Revoke
camera to enter a list which shows the shared users. Then select
from the list the users with whom you would like to stop sharing.
Remove Camera:
On the page of Account Management Center, click Remove
camera to enter a list which shows your own cameras and the
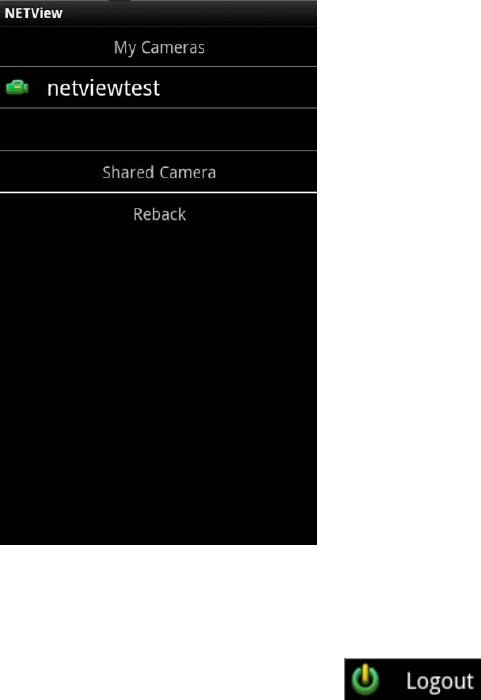
24
cameras shared to you by the other users. Then select from the list the cameras you don’t
want to keep.
Logout:
On the page of Account Management Center, click Logout to exit. It
will come back to the login interface.

25
XI. Trouble shooting
1. Is it easy or not to install and setup a Hassle Free IP Camera?
Answer: It’s extremely easy to install and setup a Hassle Free IP Camera. You can begin using it by
just connecting its power and network cable.
2. Is it difficult to use the Hassle Free IP Camera?
Answer: It’s also very easy to use this product. You can login to our operation website:
www.mynetvue.com to register for an account first and then add the camera to begin watching video.
In addition, you can use iPhone or Android mobile phone to watch video anytime anywhere after
installing our software.
3. If I forget my password, what should I do?
Answer: You can reset your password of the account by password reset function.
4. How can I solve the problem that the LED lamp didn’t light?
Answer: Please check whether the power socket is on normal work? The power adaptor is in good
condition? And whether the network is available?
5. Why did my Web browser display the webpage incorrectly?
Answer: It’s likely because the browser version you use is too old.
6. How will the Hassle Free IP Camera protect user’s data from being revealed?
Answer: We highly value the protection of user’s privacy. So we implement very strict management
system combining fairly strong encryption to protect user’s privacy. There is no need to worry about
the security of the private data in NetView, as long as user can properly use with safe password and
effective antivirus software to remove Trojan horse.
7. What can the Hassle Free IP Camera do for me?
Answer: Hassle Free IP Camera provides you with a video management system aimed at small and
medium sized business and family. Once you have this network camera, you can see the real time
video of the scene on either mobile phone or computer, no matter you are on a business trip or at home.
8. What should I do if I want to use the service of Hassle Free IP Camera?
Answer: Steps to use the service of Hassle Free IP Camera: First, buy this product. Second, install it.
Third, register and begin using.
9. How is the resolution of this camera?
Answer: If you watch the video of the camera on personal computer in the same LAN, the
resolution of real time video is VGA (640 x 480). If for remote video on internet, the resolution
of real time video is QVGA (320 x 240).
10. Does this camera have record function? If yes, how long of video can it record?
Answer: It has record function. A piece of 32G TF memory card can support 7days circulating
memory for video of VGA(640*480)format.
11. How can I use mobile phone or PC to watch real time video from the Hassle Free IP Camera?
Answer: Please refer to its user’s manual or user’s guide.
12. Is there any limitation on mobile phone to watch video?
Answer: Currently it only support iPhone and Android mobile phone.
13. Is the camera waterproof?
Answer: No, it isn’t. This camera is more suitable for indoor use.
14. Does it support WiFi wireless network?
Answer: Yes, it does. Built-in WiFi module leads to easy access and setting to WiFi network.
15. Can this product support audio?

26
Answer: This function is under development, and will be available in subsequent versions.
16. Is there PTZ function?
Answer: This function is under development, and will be available in subsequent versions.
17. Can its video be shared to a social network site and embedded to a third webpage?
Answer: This function is under development, and will be available in subsequent versions.
FCC Warning
1. This device complies with Part 15 of the FCC Rules. Operation is subject to the following two conditions:
(1) This device may not cause harmful interference.
(2) This device must accept any interference received, including interference that may cause undesired operation.
2. Changes or modifications not expressly approved by the party responsible for compliance could void the user's
authority to operate the equipment.
NOTE: This equipment has been tested and found to comply with the limits for a Class B digital device, pursuant
to Part 15 of the FCC Rules. These limits are designed to provide reasonable protection against harmful
interference in a residential installation.
This equipment generates uses and can radiate radio frequency energy and, if not installed and used in accordance
with the instructions, may cause harmful interference to radio communications. However, there is no guarantee
that interference will not occur in a particular installation. If this equipment does cause harmful interference to
radio or television reception, which can be determined by turning the equipment off and on, the user is encouraged
to try to correct the interference by one or more of the following measures:
Reorient or relocate the receiving antenna.
Increase the separation between the equipment and receiver.
Connect the equipment into an outlet on a circuit different from that to which the receiver is connected.
Consult the dealer or an experienced radio/TV technician for help.
RF Exposure warning statement :
The antennas used for this transmitter must be installed to provide a
separation distance of at least 20cm from all persons and must not be colocated
or operating in conjunction with any other antenna or transmitter.