Netgear orporated 07100060 108 Mbps Wireless Router User Manual WGT624v4 RM
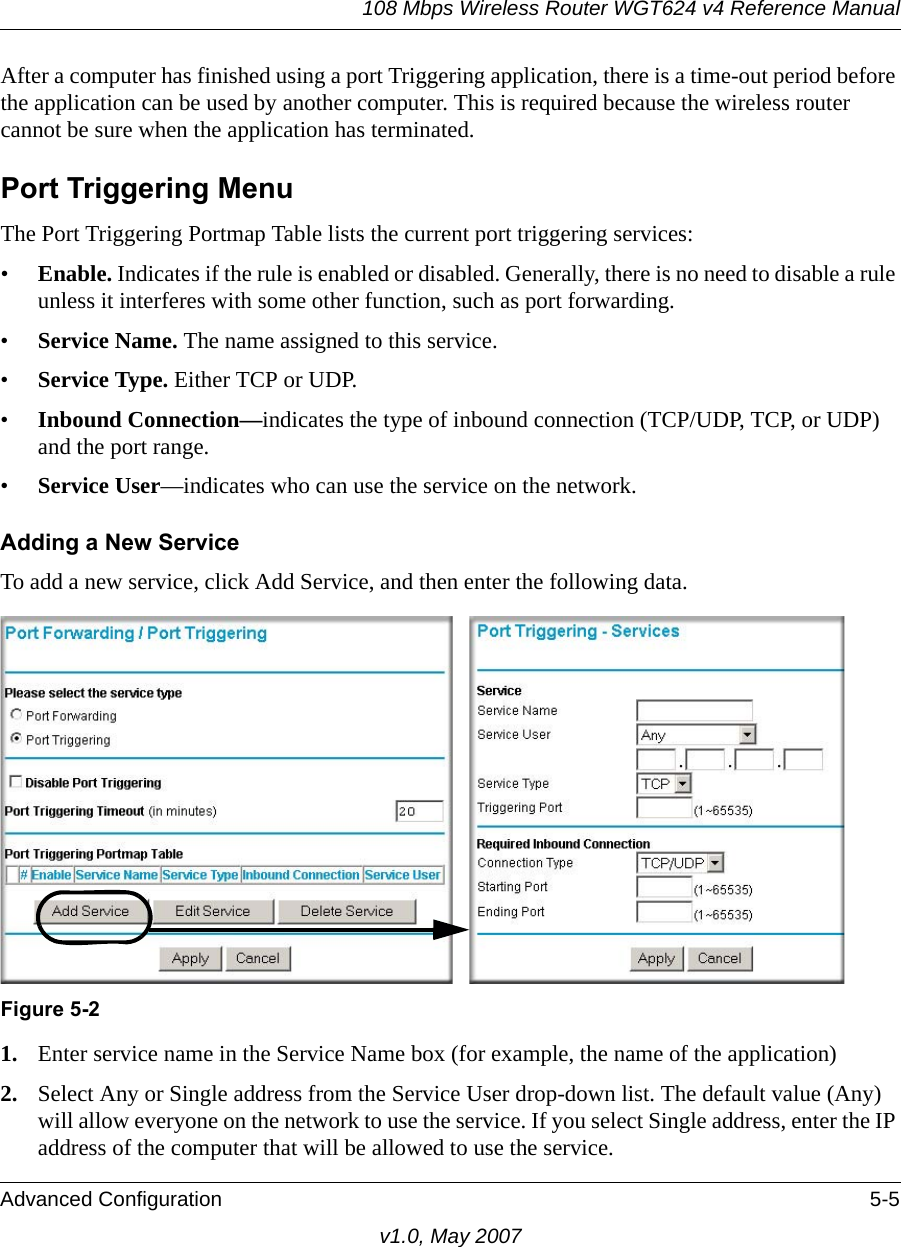
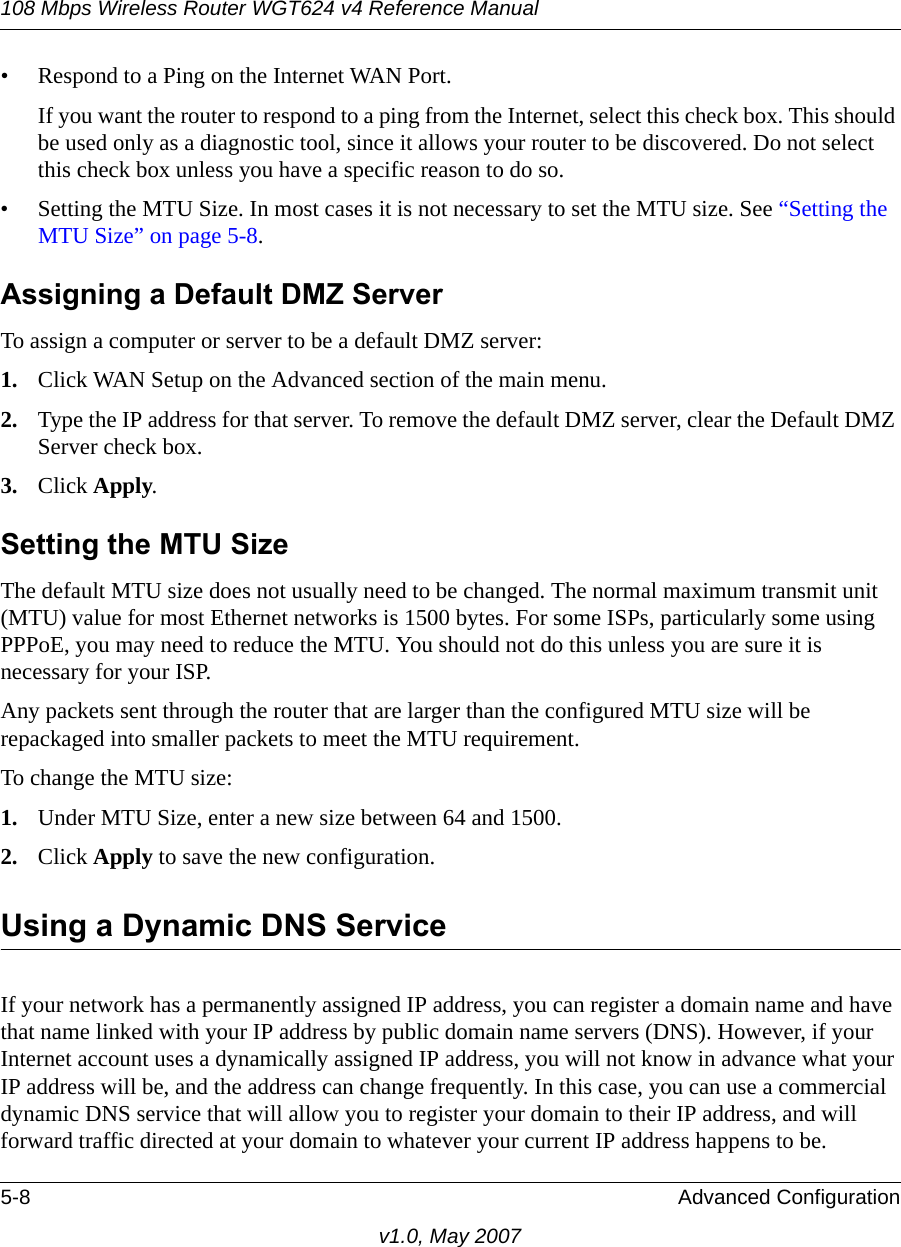
Netgear Incorporated 108 Mbps Wireless Router WGT624v4 RM
UserManual.wiki
>
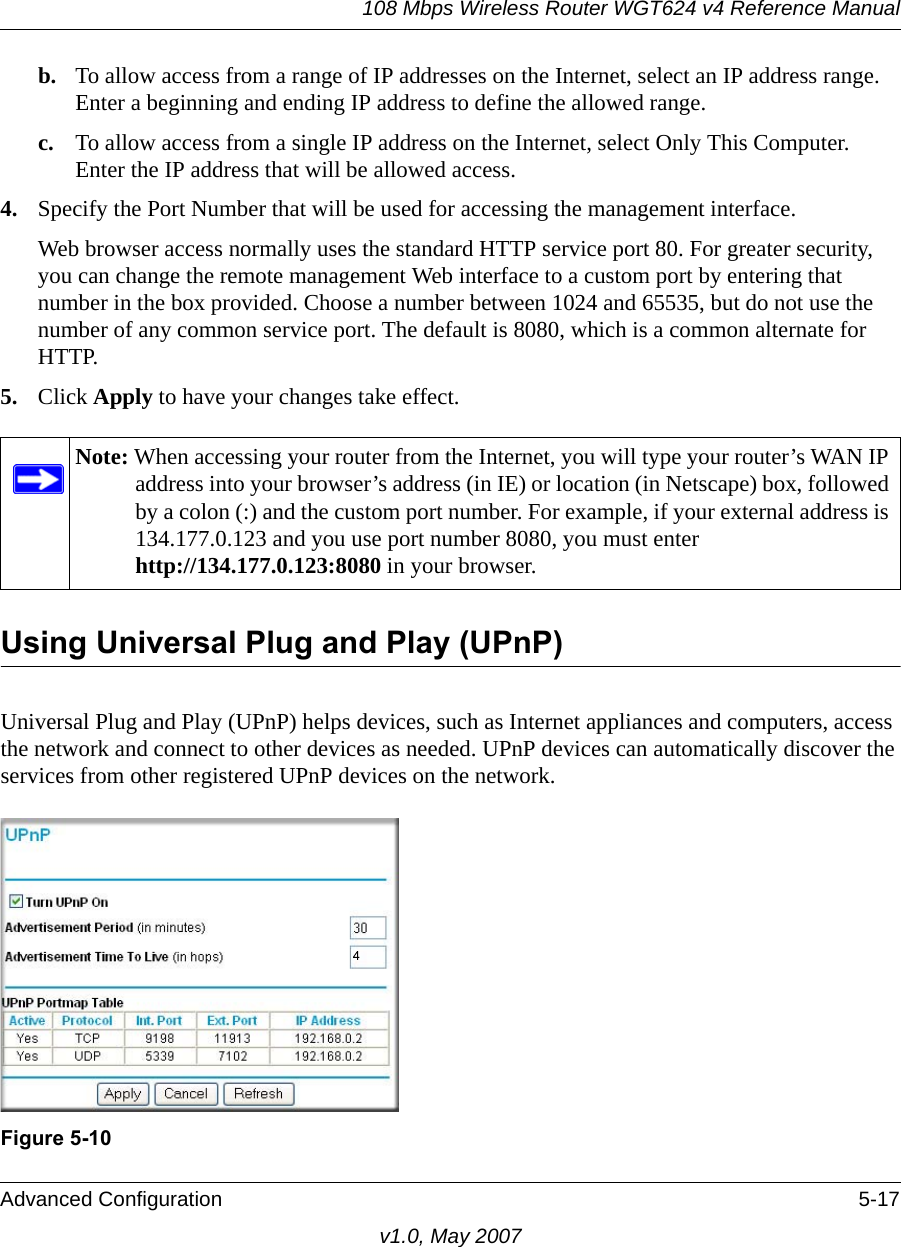
Netgear orporated
>
07100060 User Manual
User Manual
Navigation menu
Upload a User Manual
Namespaces
Wiki Guide
HTML
PDF
Info
Views
User Manual
Discussion / Help
Navigation

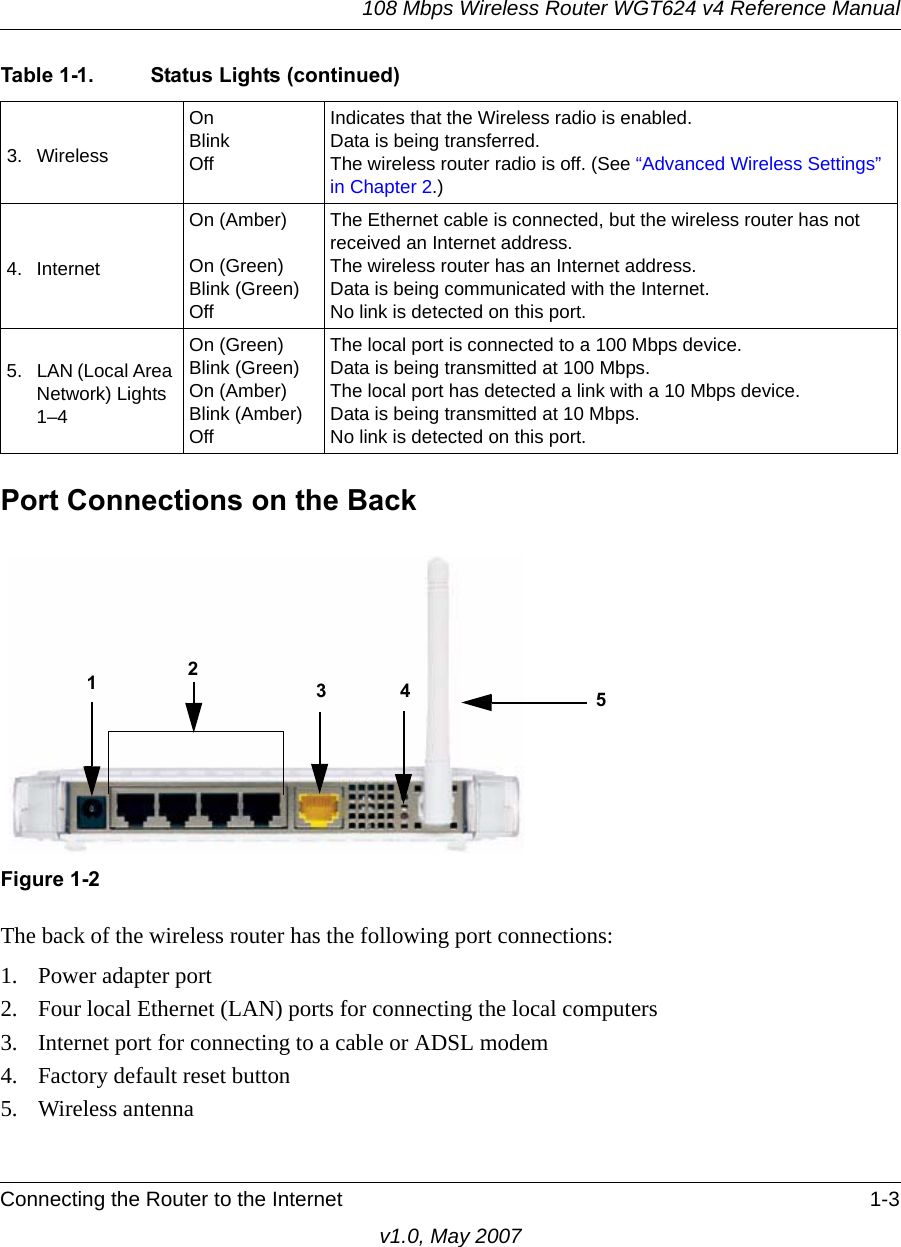
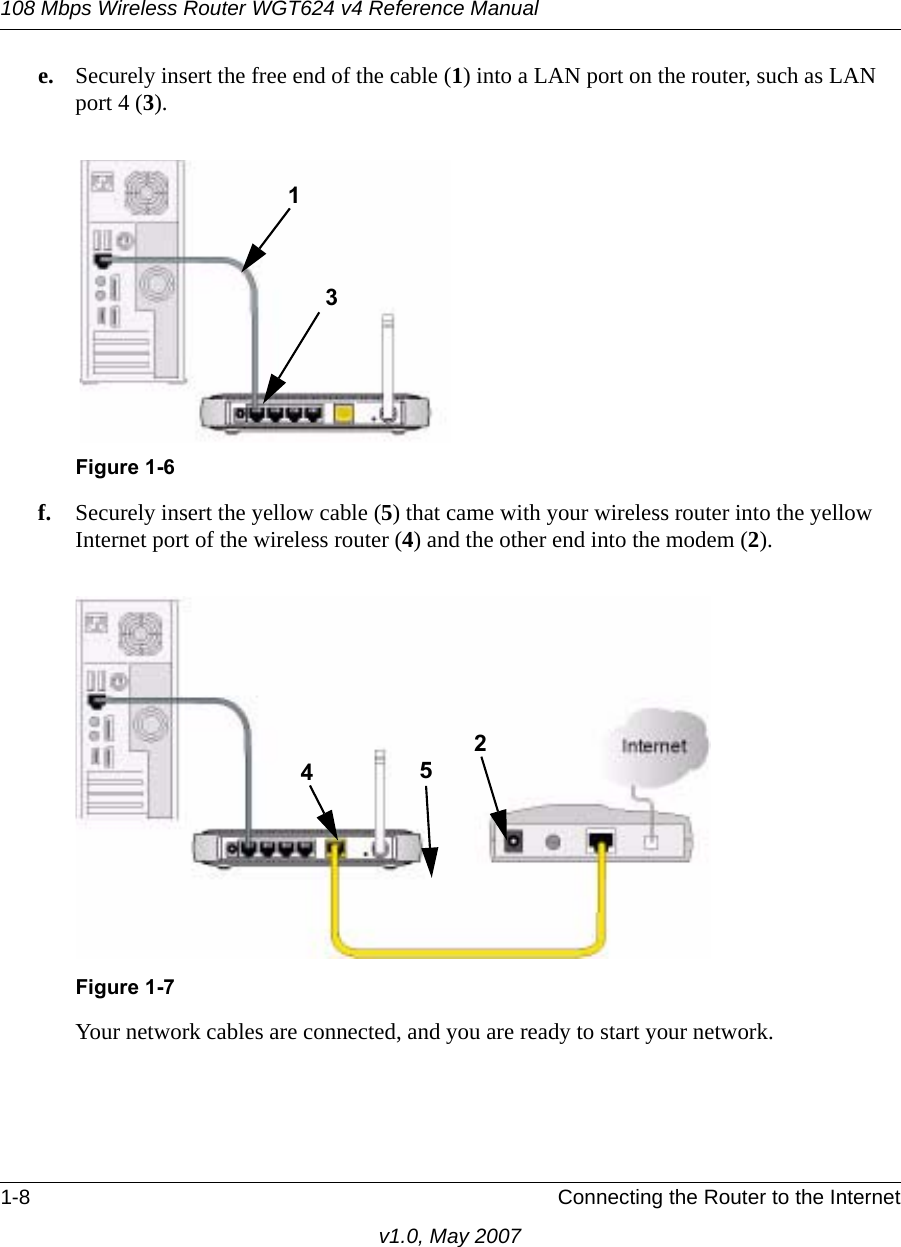
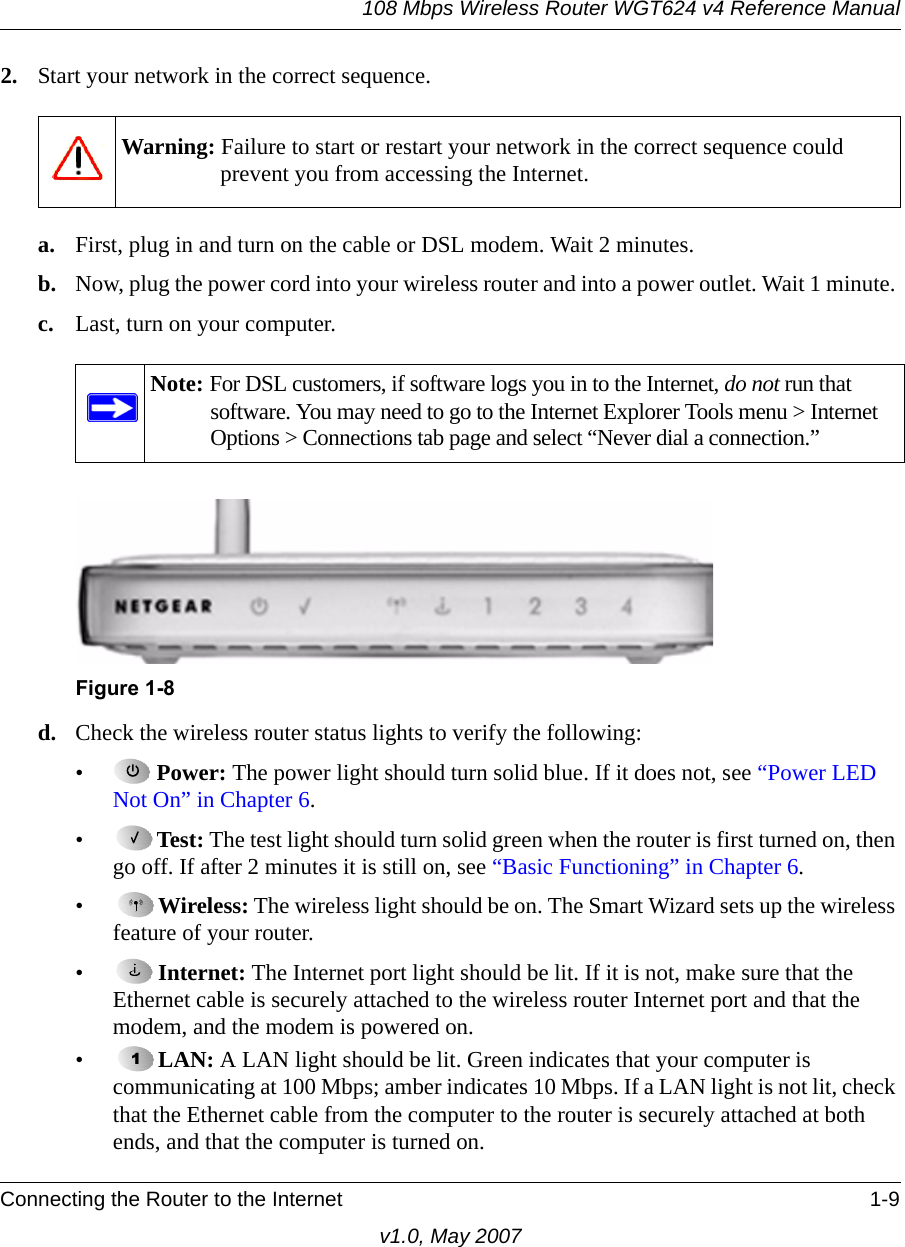
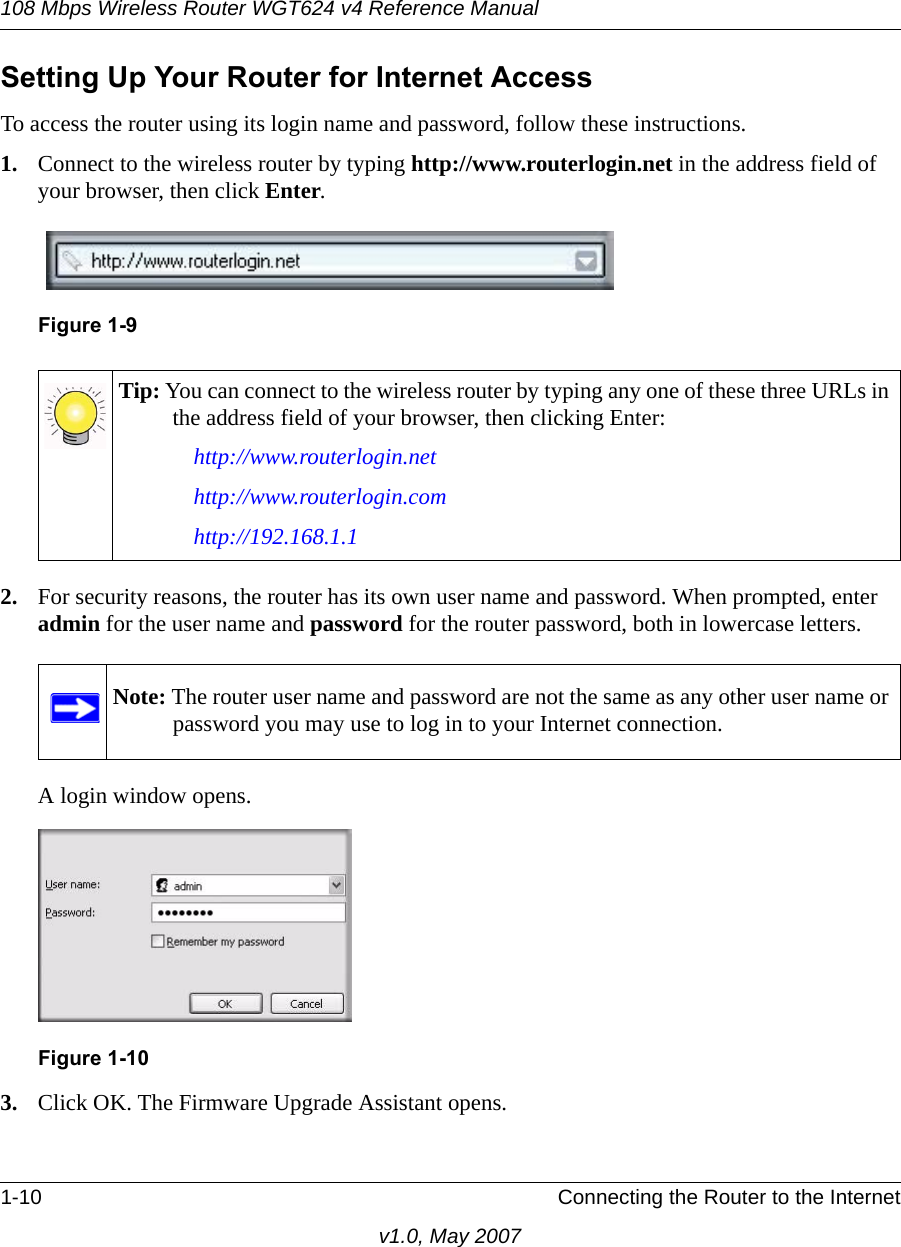
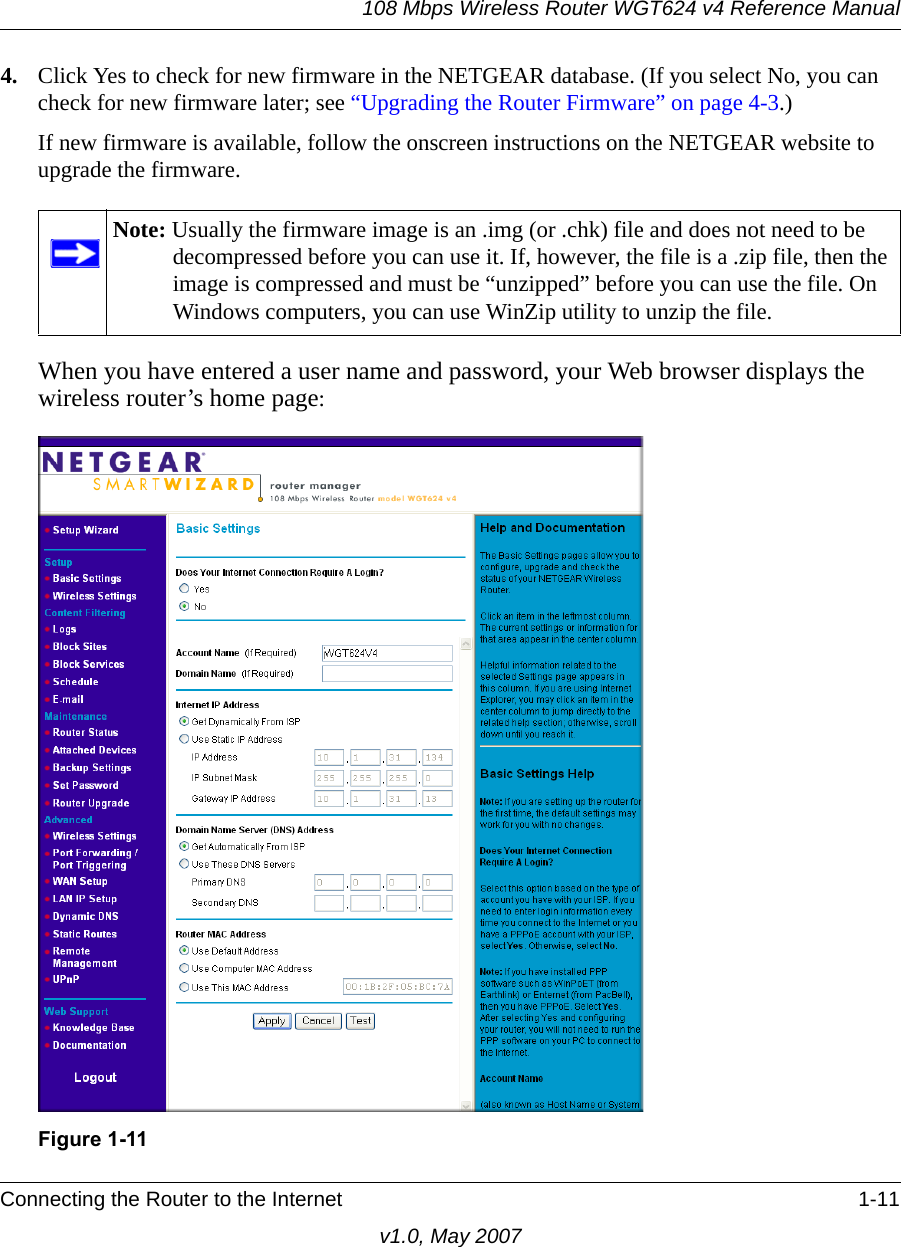

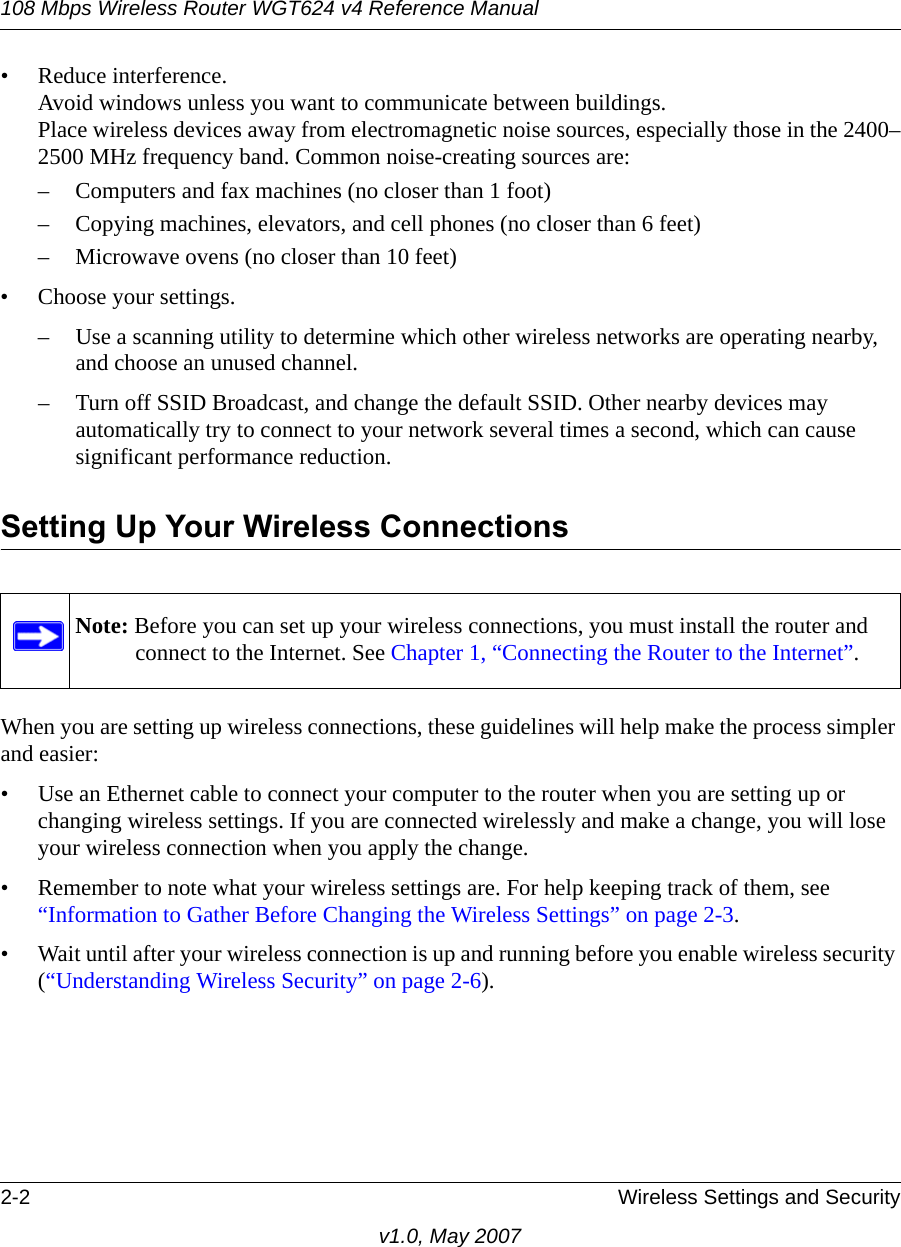

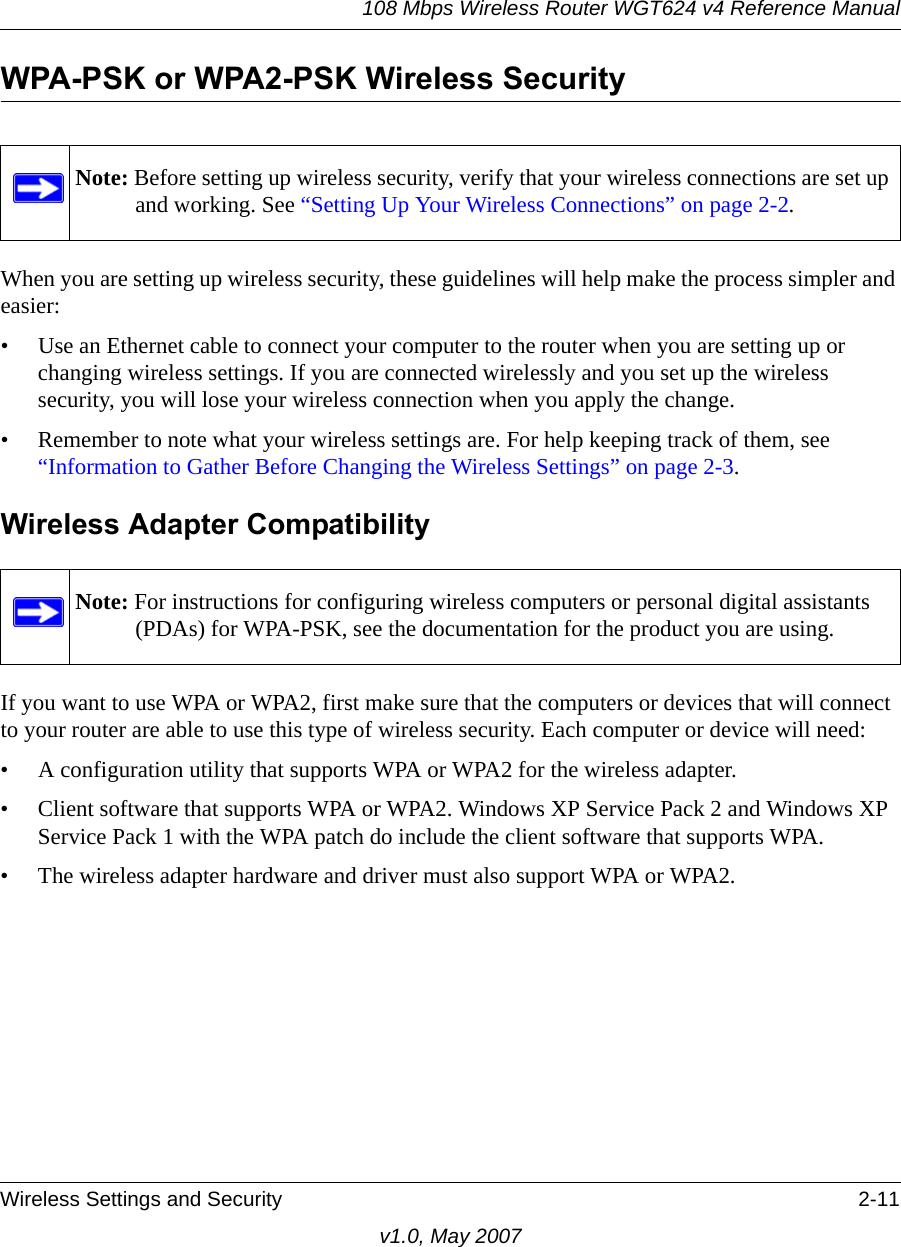
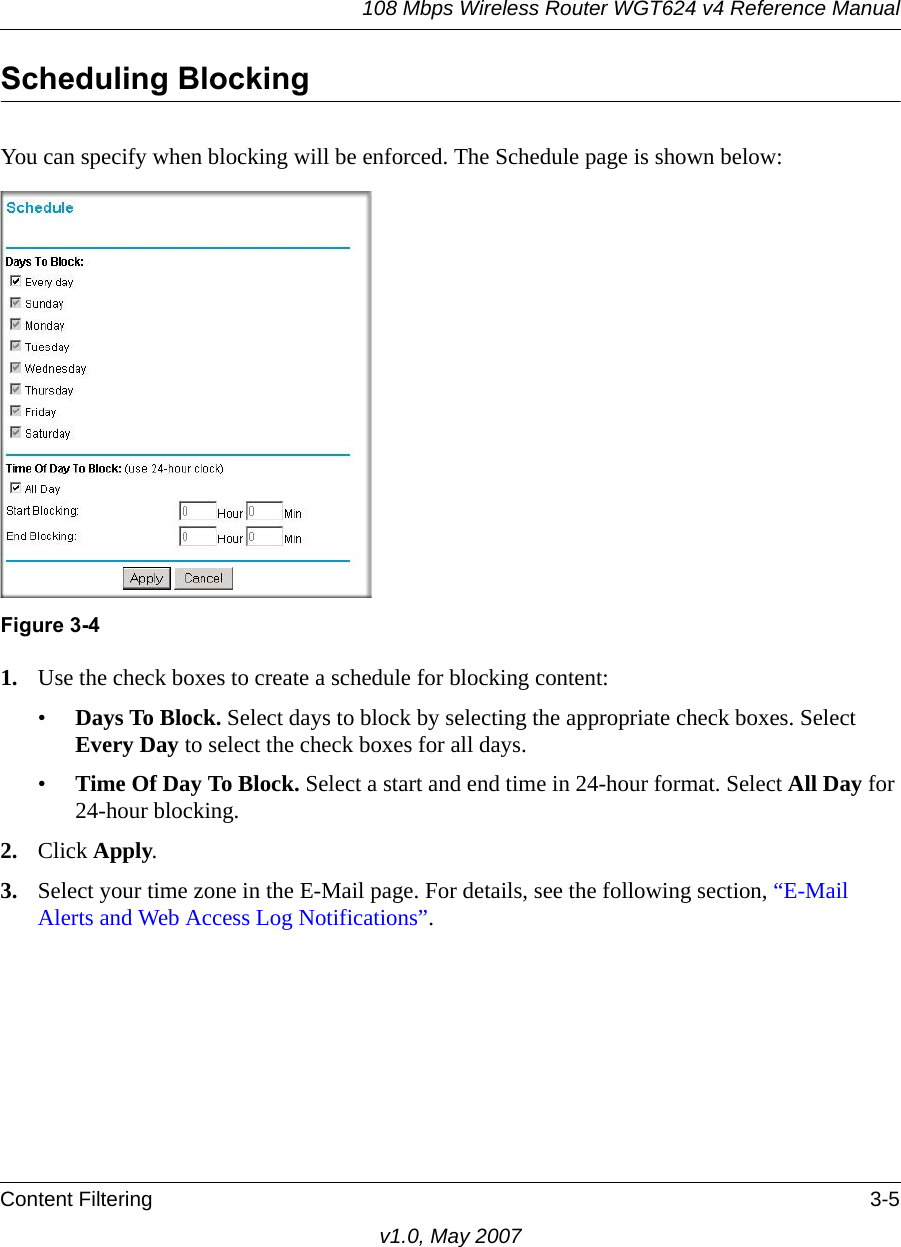
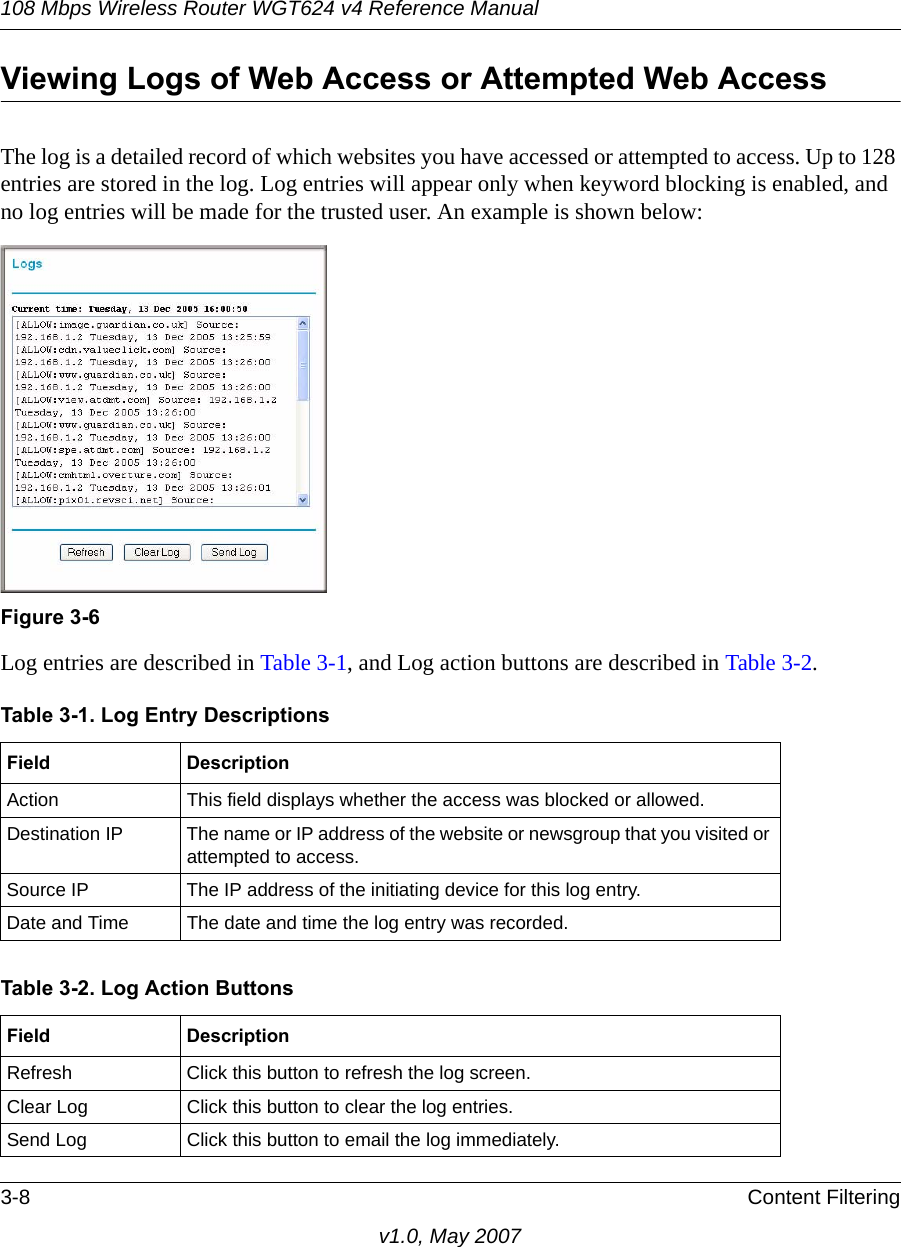
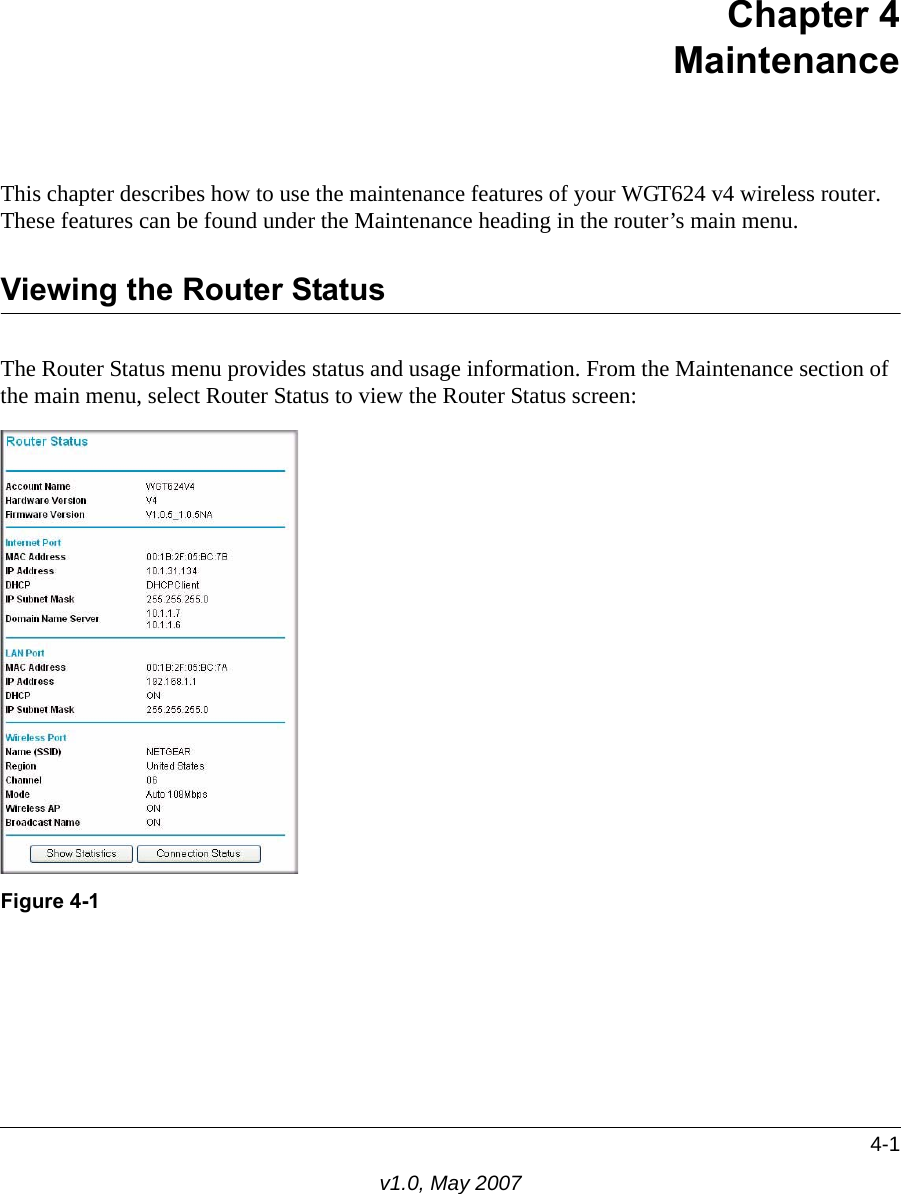
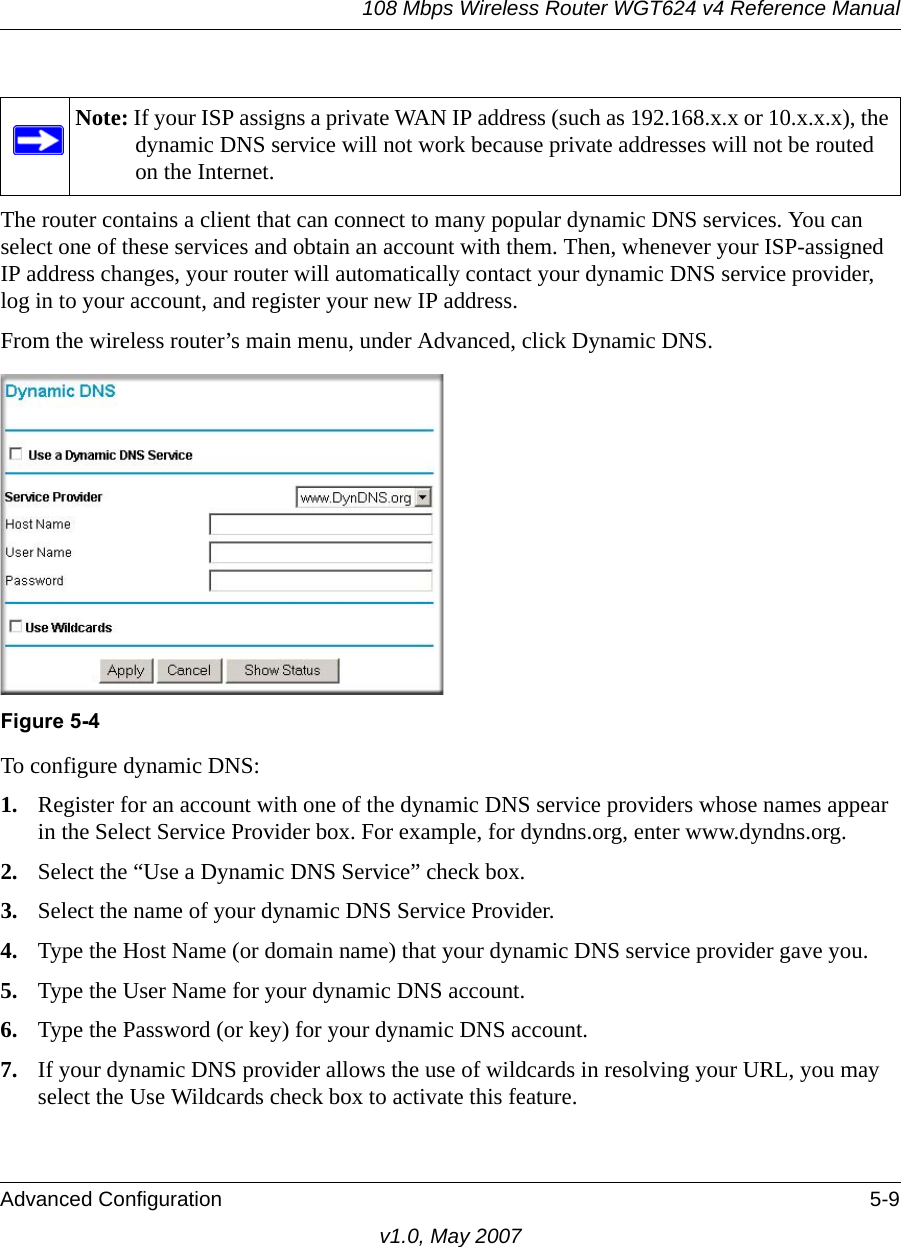
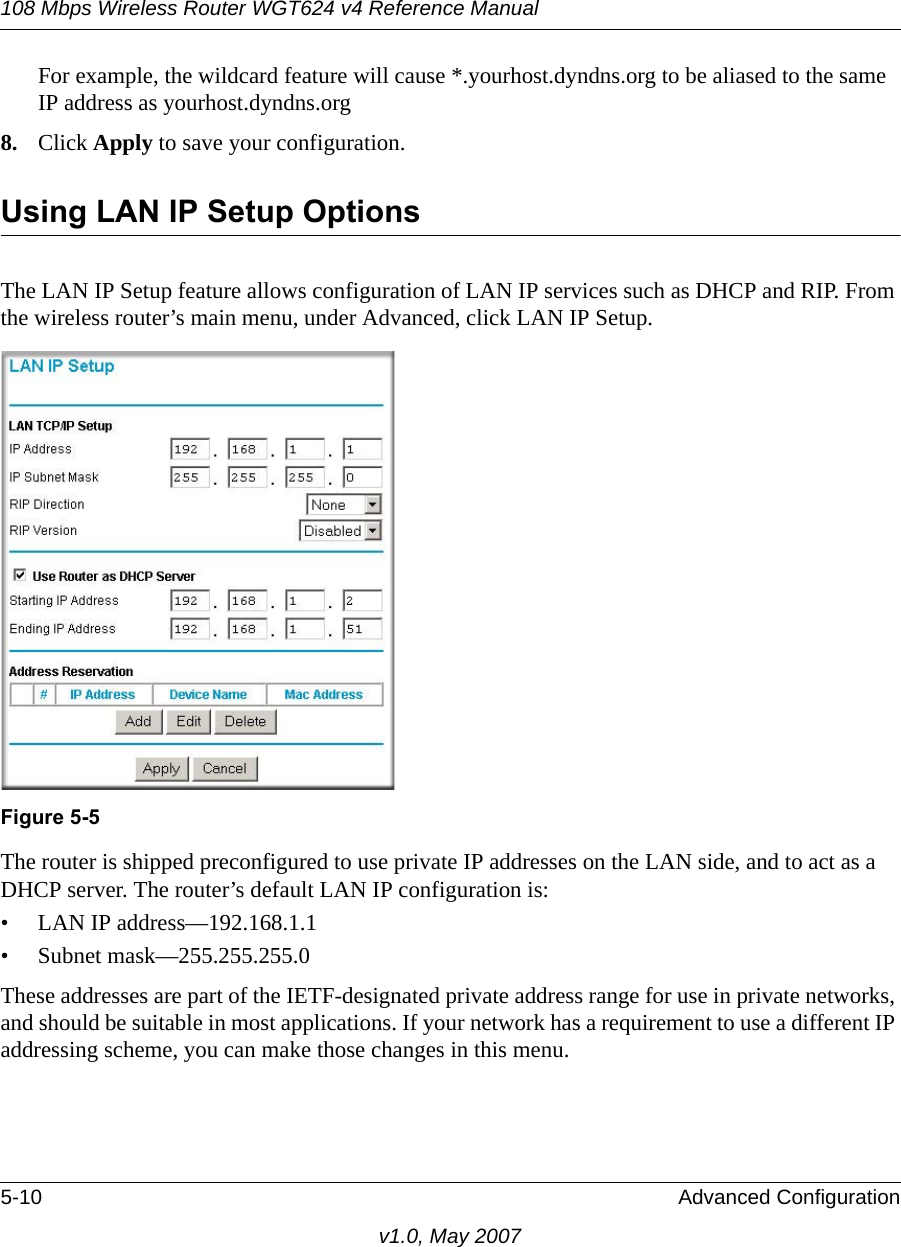
![108 Mbps Wireless Router WGT624 v4 Reference Manual2-12 Wireless Settings and Securityv1.0, May 2007Setting Up WPA-PSK or WPA2-PSKTo set up WPA-PSK or WPA2-PSK wireless security for the WGT624 v4 wireless router:1. Click Wireless Settings in the Setup section of the main menu.2. Select the security option that you want to use:• WPA-PSK [TKIP]. Only computers or devices that use WPA-PSK [TKIP] will be able to connect to the router. WPA2-PSK [AES] devices cannot connect.• WPA2-PSK [AES]. Only computers or devices that use WPA2-PSK [AES] will be able to connect to the router.WPA-PSK [TKIP] devices cannot connect.•WPA-PSK [TKIP] + WPA2-PSK [AES]. This option is recommended, since it is compatible with a greater number of computers and devices.3. Enter a word or group of 8-63 printable characters in the Passphrase box.4. Click Apply to save your settings.Figure 2-5Tip: If you were connected wirelessly to the router, you lost the wireless connection when you clicked Apply. Now you must change the wireless security settings for your computer to match the router settings. Then you will be able to connect to the router.](https://usermanual.wiki/Netgear-orporated/07100060/User-Guide-825546-Page-42.png)