Netgear orporated 08200087 54Mbps Wireless ADSL2+Modem Router User Manual DG834GUv5 SM 17jan08 User Manua
Netgear Incorporated 54Mbps Wireless ADSL2+Modem Router DG834GUv5 SM 17jan08 User Manua
UserManual.wiki
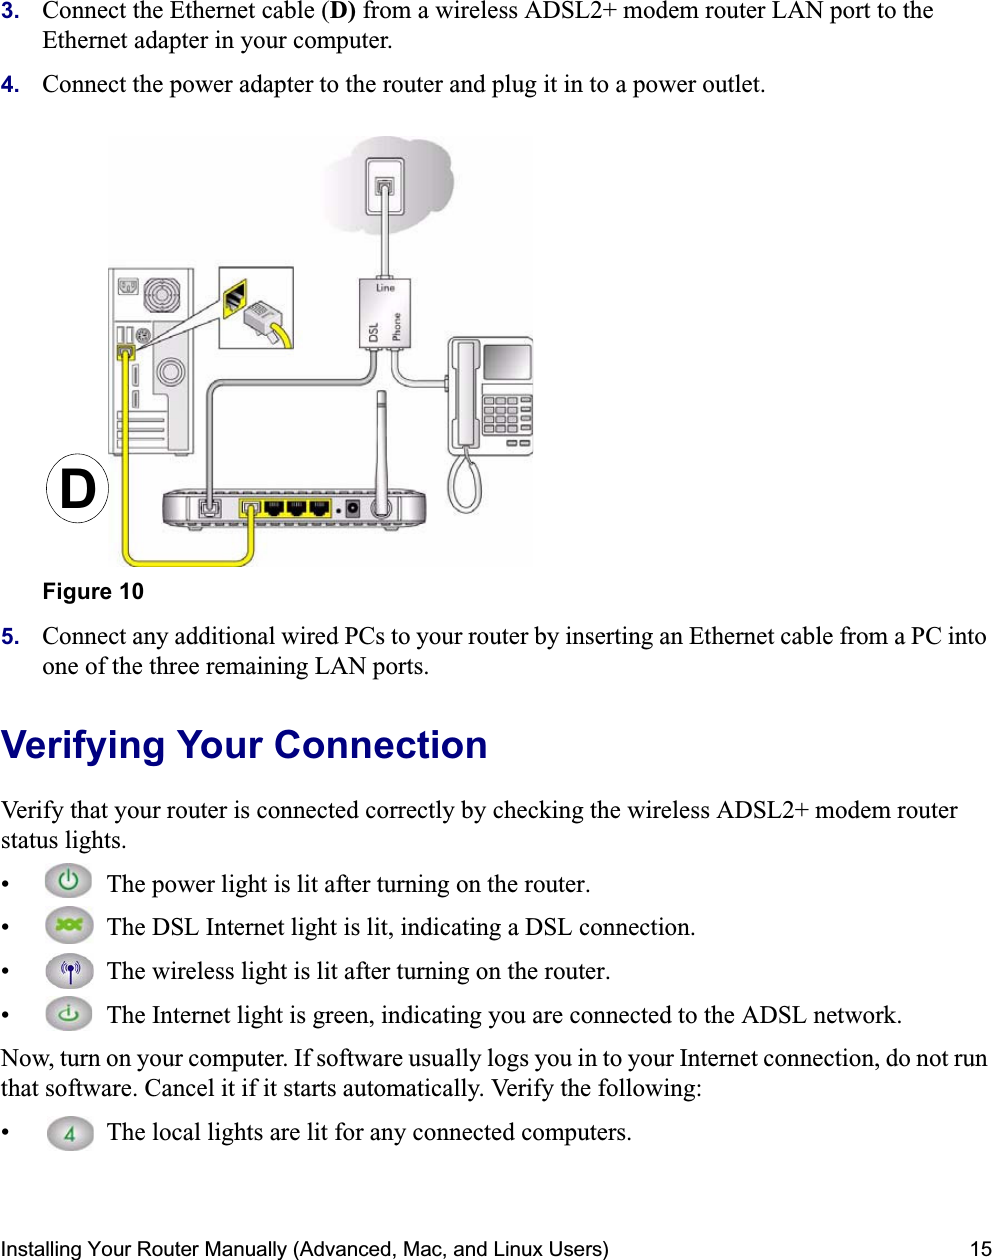
>
Netgear orporated
>
08200087 User Manual
>
manual
Contents
1.
manual
2.
(PY308200087) -User Mannul
manual
Navigation menu
Upload a User Manual
Namespaces
Wiki Guide
HTML
PDF
Info
Views
User Manual
Discussion / Help
Navigation