Netgear orporated 09300113 NETGEAR Wireless-N 150 USB adapter User Manual
Netgear Incorporated NETGEAR Wireless-N 150 USB adapter
UserManual.wiki
>
Netgear orporated
>
09300113 User Manual
user manual
Navigation menu
Upload a User Manual
Namespaces
Wiki Guide
HTML
PDF
Info
Views
User Manual
Discussion / Help
Navigation

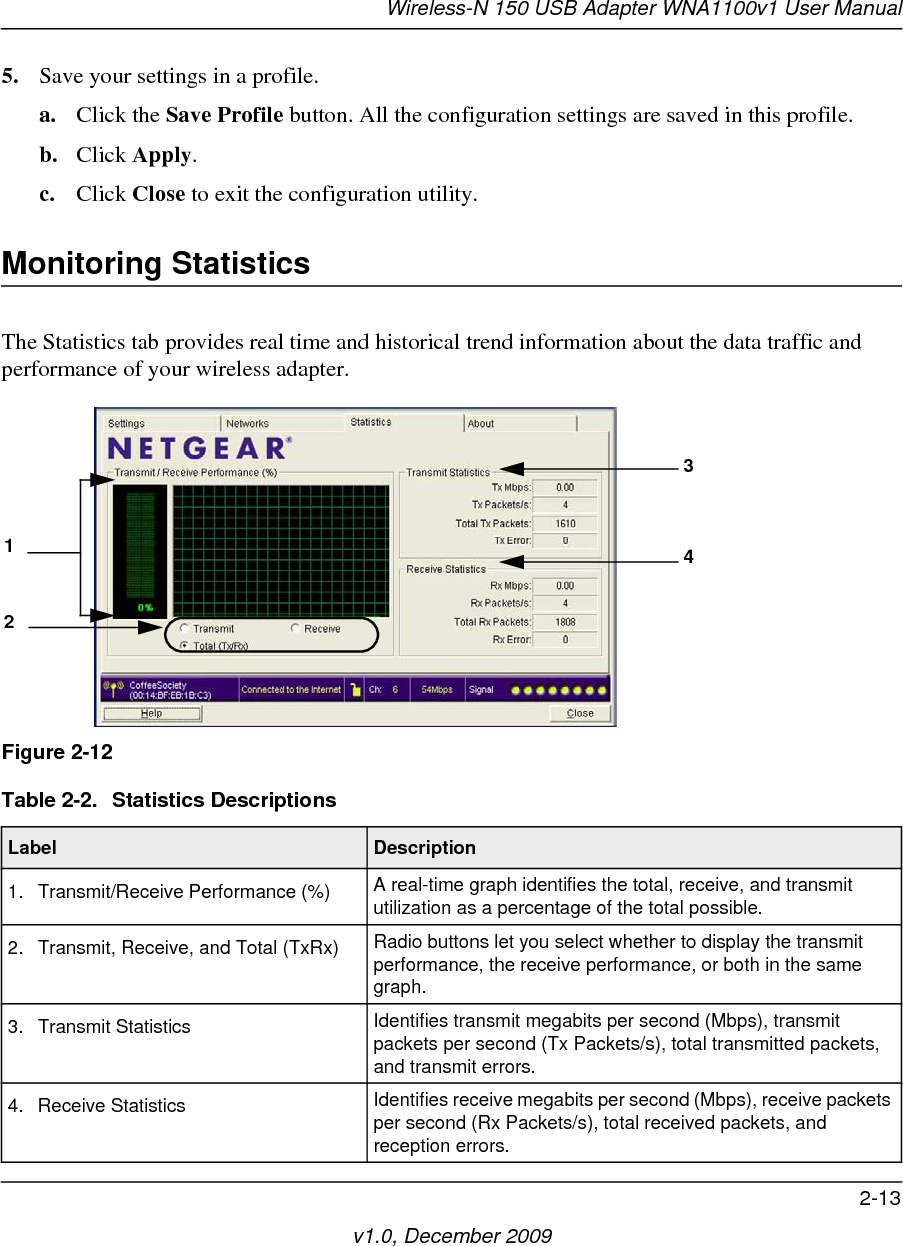
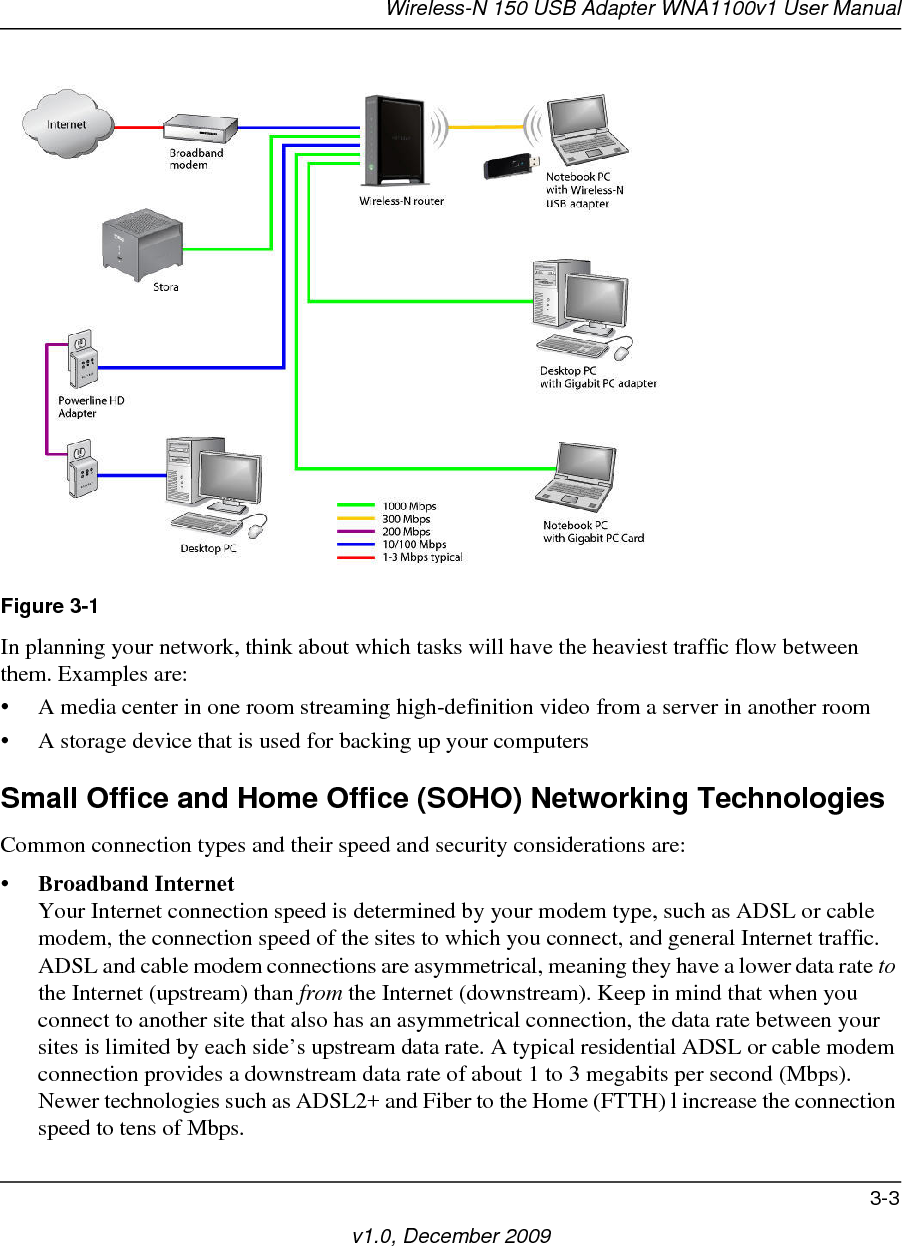
![vv1.0, December 2009ContentsAbout This ManualConventions, Formats, and Scope .................................................................................. viiRevision History ...............................................................................................................viiiChapter 1 Installation with Custom SetupWhat You Need Before You Begin .................................................................................1-1Observe Wireless Location and Range Guidelines ..................................................1-2Installation with Custom Setup .......................................................................................1-2First, Install the WNA1100v1 Software ....................................................................1-2Then, Install Your WNA1100 v1 Adapter .................................................................1-4Use Smart Wizard Automatic Configuration to Connect to a Wireless Network ......1-5Monitoring Wireless Network and the Internet Connections ...........................................1-7WNA1100 v1 Icon ....................................................................................................1-8Smart Wizard Status Bar ..........................................................................................1-9Wireless-N USB Adapter LED ................................................................................1-10Removing the WNA1100 v1 Software ..........................................................................1-10Upgrading the WNA1100 v1 Software ..........................................................................1-11Chapter 2 Network Connections and Wireless SecurityViewing Wireless Networks in Your Area .......................................................................2-1Joining a Network ...........................................................................................................2-2Using Push 'N' Connect to Join a Network ...............................................................2-4Creating a Profile to Connect to a Wireless Network .....................................................2-4Managing Profiles ....................................................................................................2-6Setting Up a Computer-to-Computer (Ad Hoc) Profile .............................................2-6Starting a Computer-to-Computer (Ad Hoc) Network Connection ...........................2-8About Wireless Security .................................................................................................2-9Wireless Network Name (SSID) and Security Settings ..........................................2-10Setting Up WPA-PSK [TKIP] or WPA2-PSK [AES] Security ..................................2-10](https://usermanual.wiki/Netgear-orporated/09300113/User-Guide-1227244-Page-5.png)
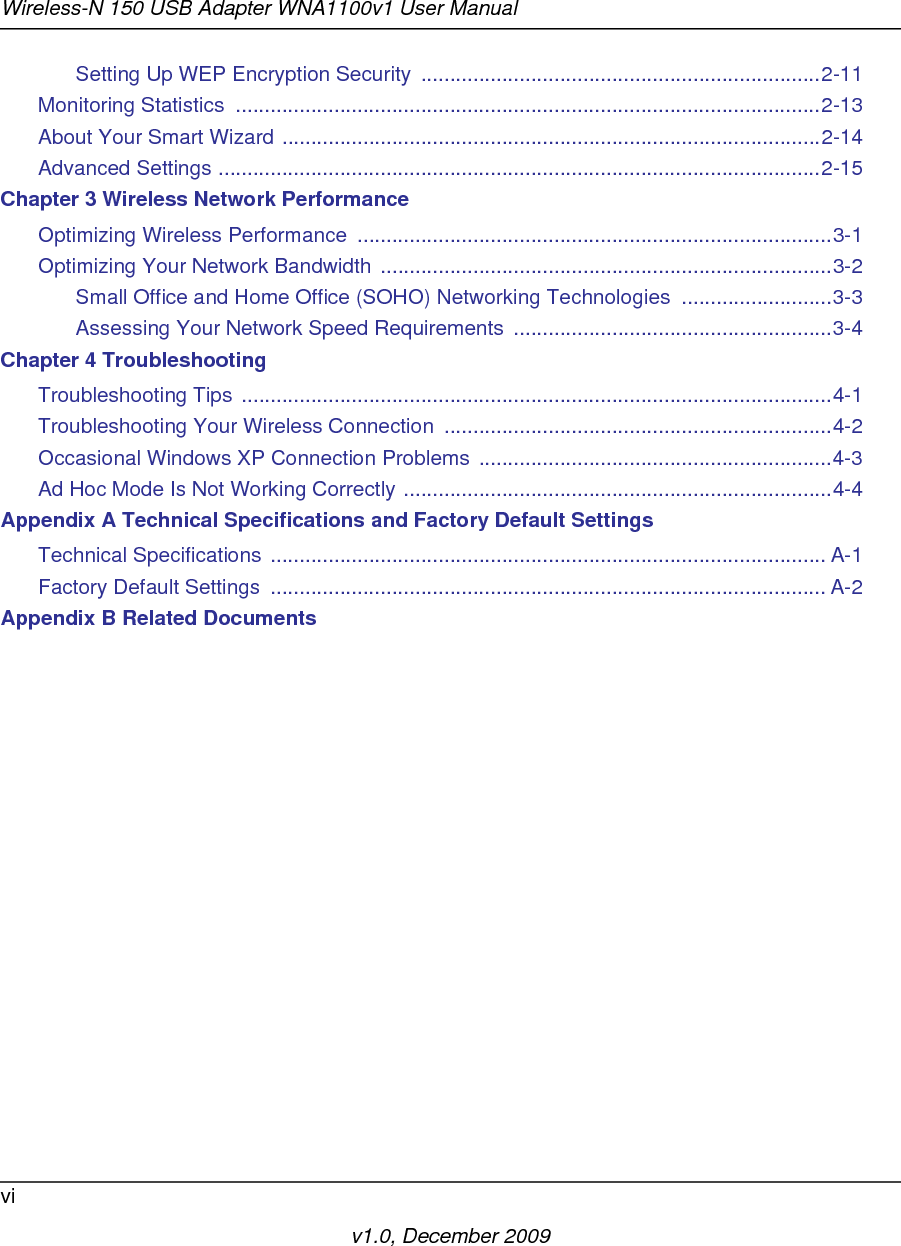


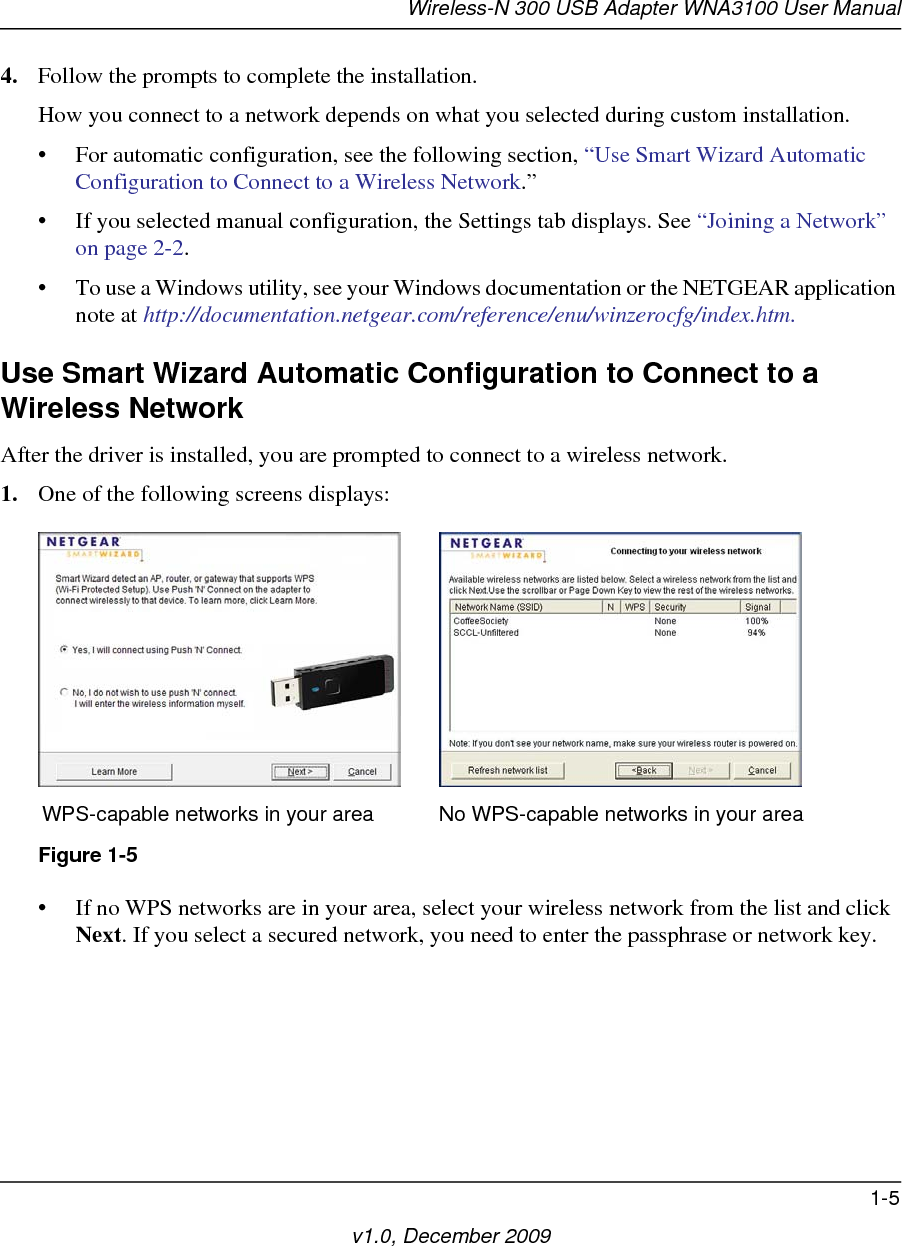

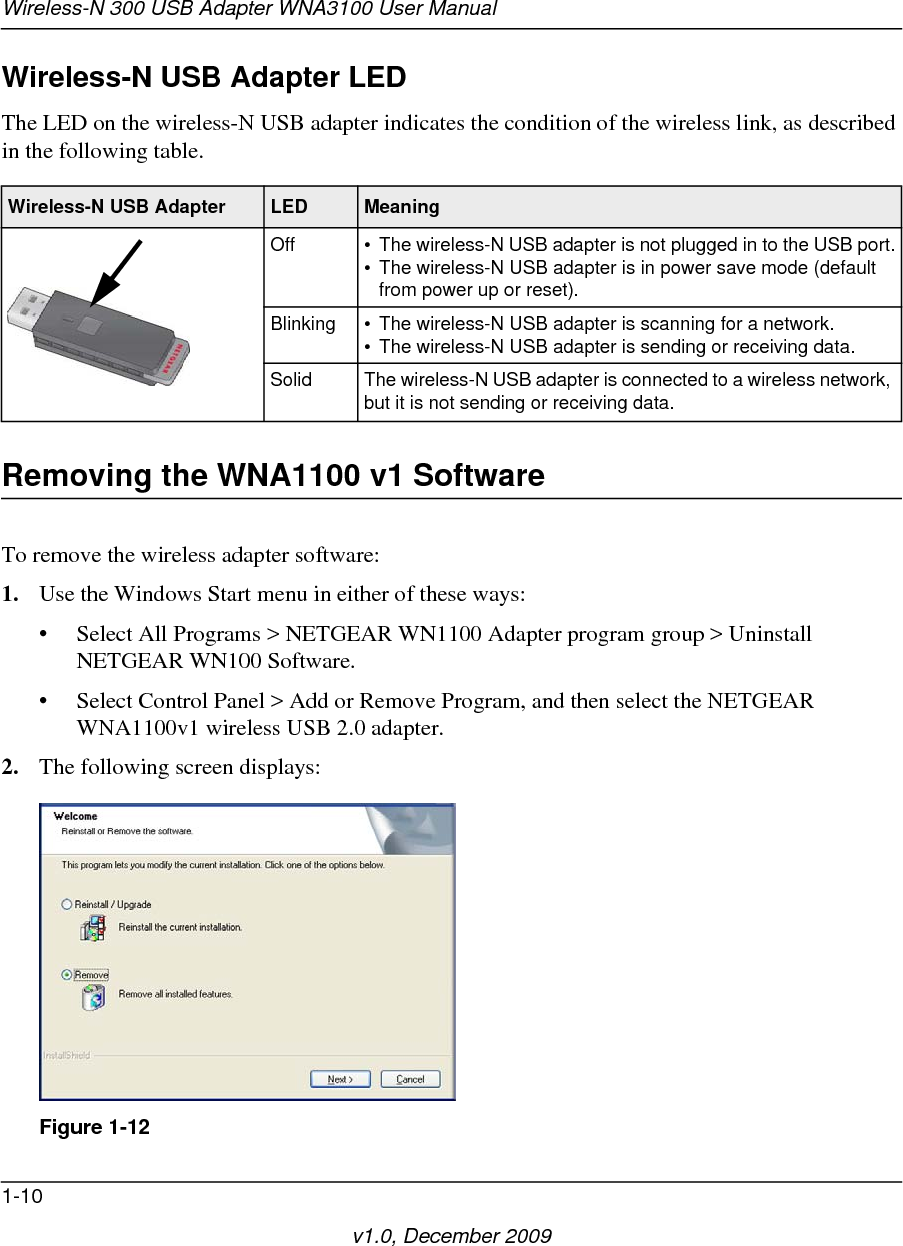
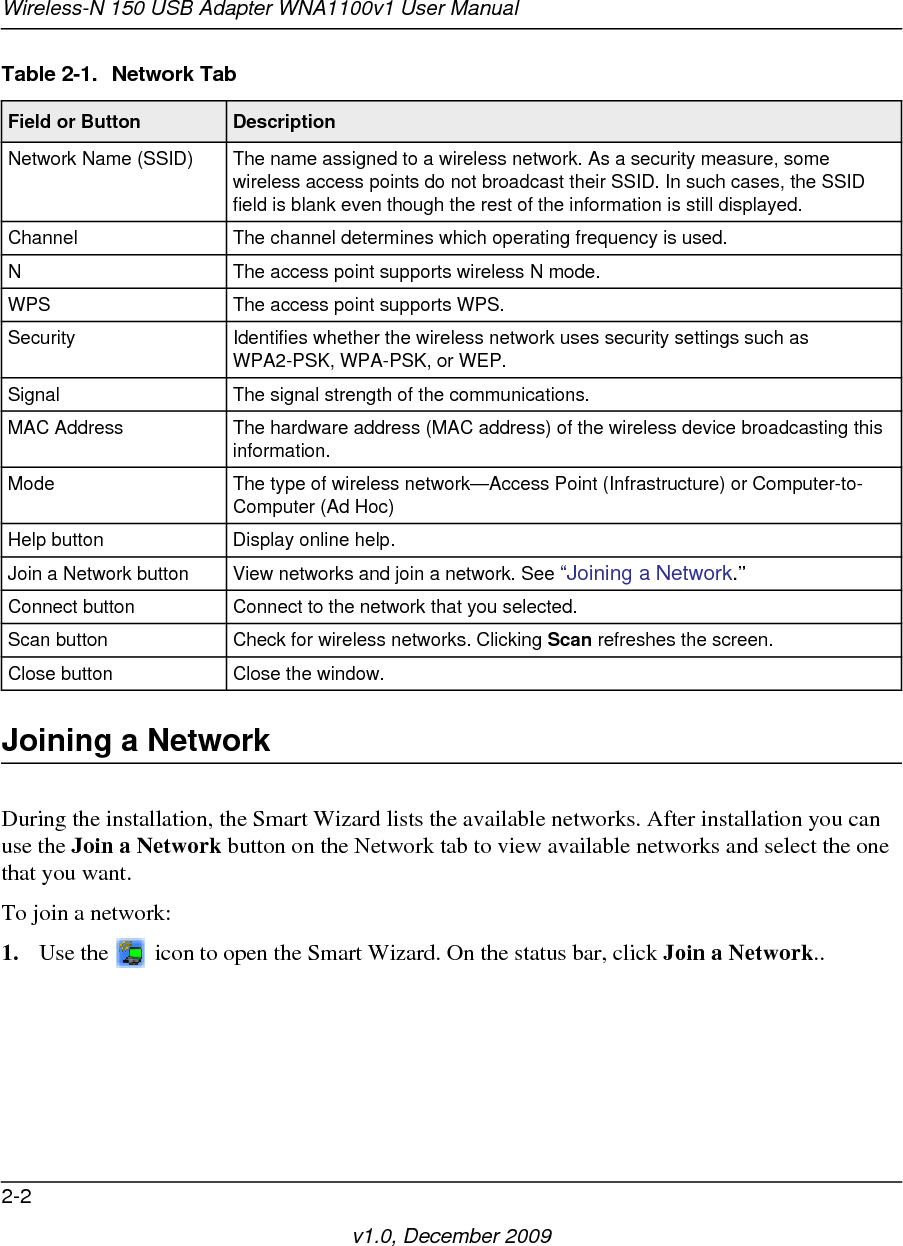

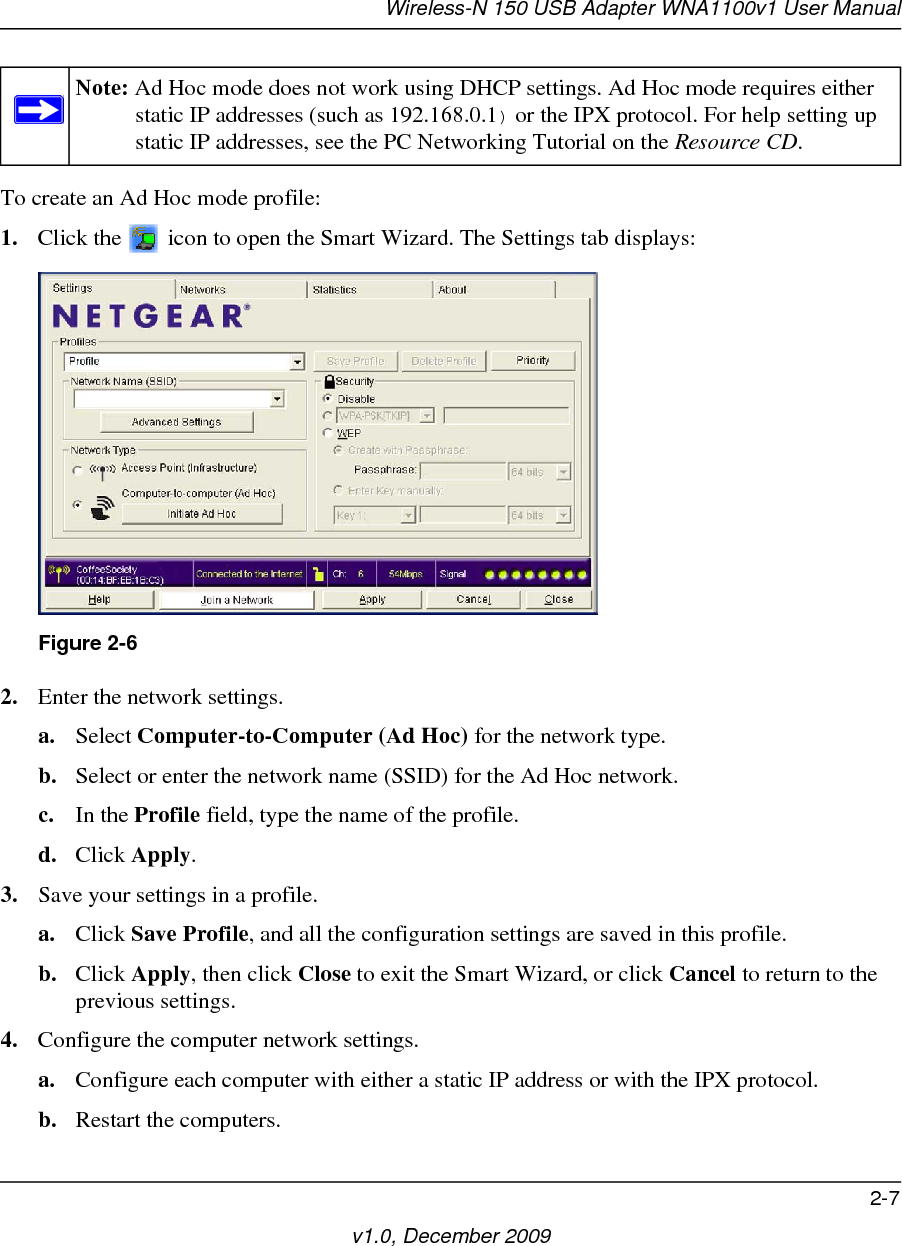
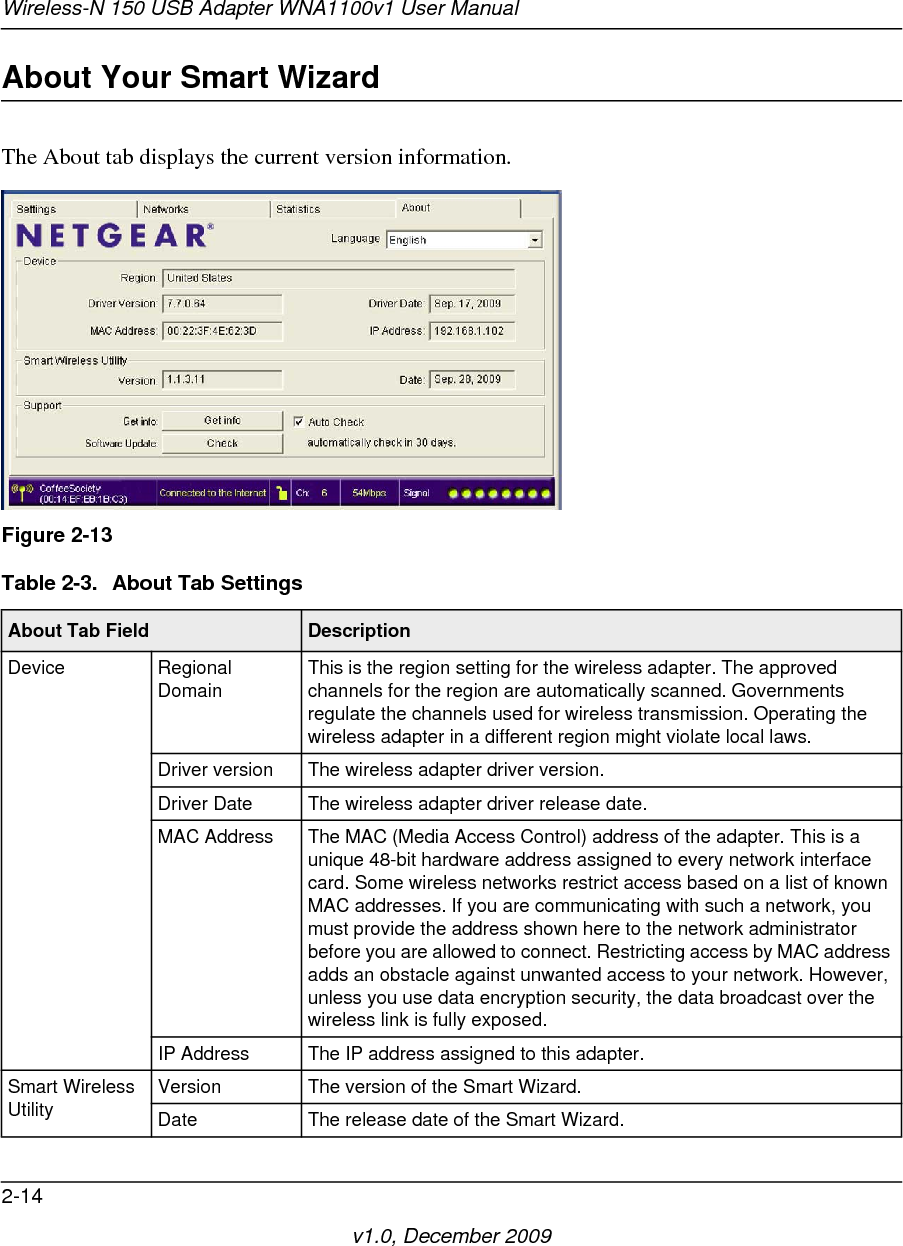
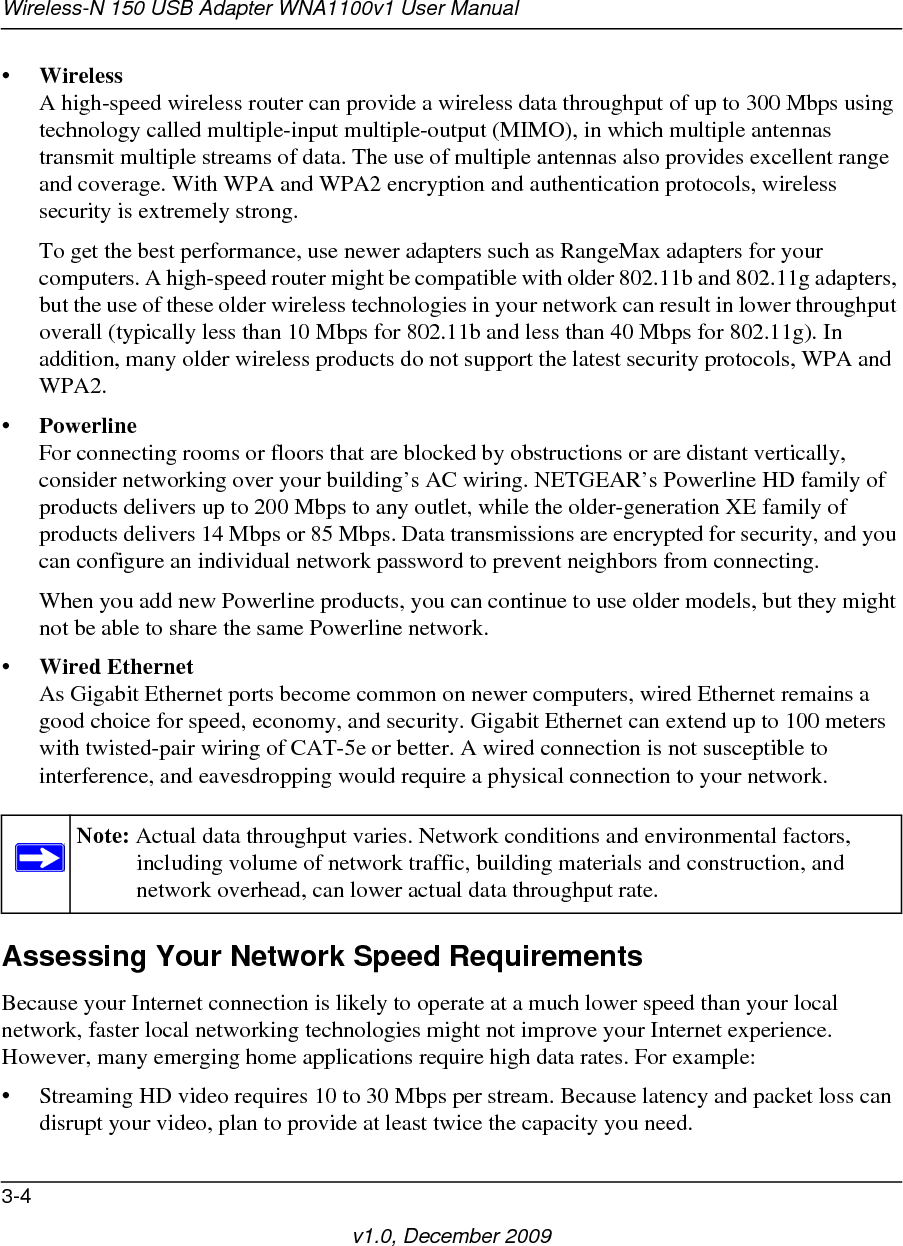
![Wireless-N 150 USB Adapter WNA1100v1 User Manual2-9v1.0, December 20093. Click Initiate Ad Hoc. The Ad Hoc Setting screen displays:4. In the Start Ad Hoc drop-down list, select the wireless standard (802.11g or 802.11b) for your Ad Hoc computer-to-computer network.5. In the Channel drop-down list, Automatic should work. If you notice interference problems with another nearby wireless device, select a channel that is not being used by other nearby wireless networks. Use the Networks tab to view the channels in use in your area.6. Click OK.About Wireless SecurityMany networks use wireless security to encrypt wireless data communications. To connect to a network with wireless security, you must set up the wireless-N USB adapter with exactly the same kind of wireless security settings. If you use the Smart Wizard to set up security, you can take advantage of Push 'N' Connect (WPS) to set up WPA-PSK [TKIP] security. Otherwise, you can manually set one of the following types of wireless security used for home networks:• WPA-PSK [TKIP] or WPA2-PSK [AES]. See “Setting Up WPA-PSK [TKIP] or WPA2-PSK [AES] Security” on page 2-10.•WEP. See “Setting Up WEP Encryption Security” on page 2-11.For more information about wireless security, click the link to “Wireless Networking Basics” in Appendix B. Figure 2-9Note: The channel number differs depending on the country. The connection speed automatically defaults to the highest speed.](https://usermanual.wiki/Netgear-orporated/09300113/User-Guide-1227244-Page-29.png)
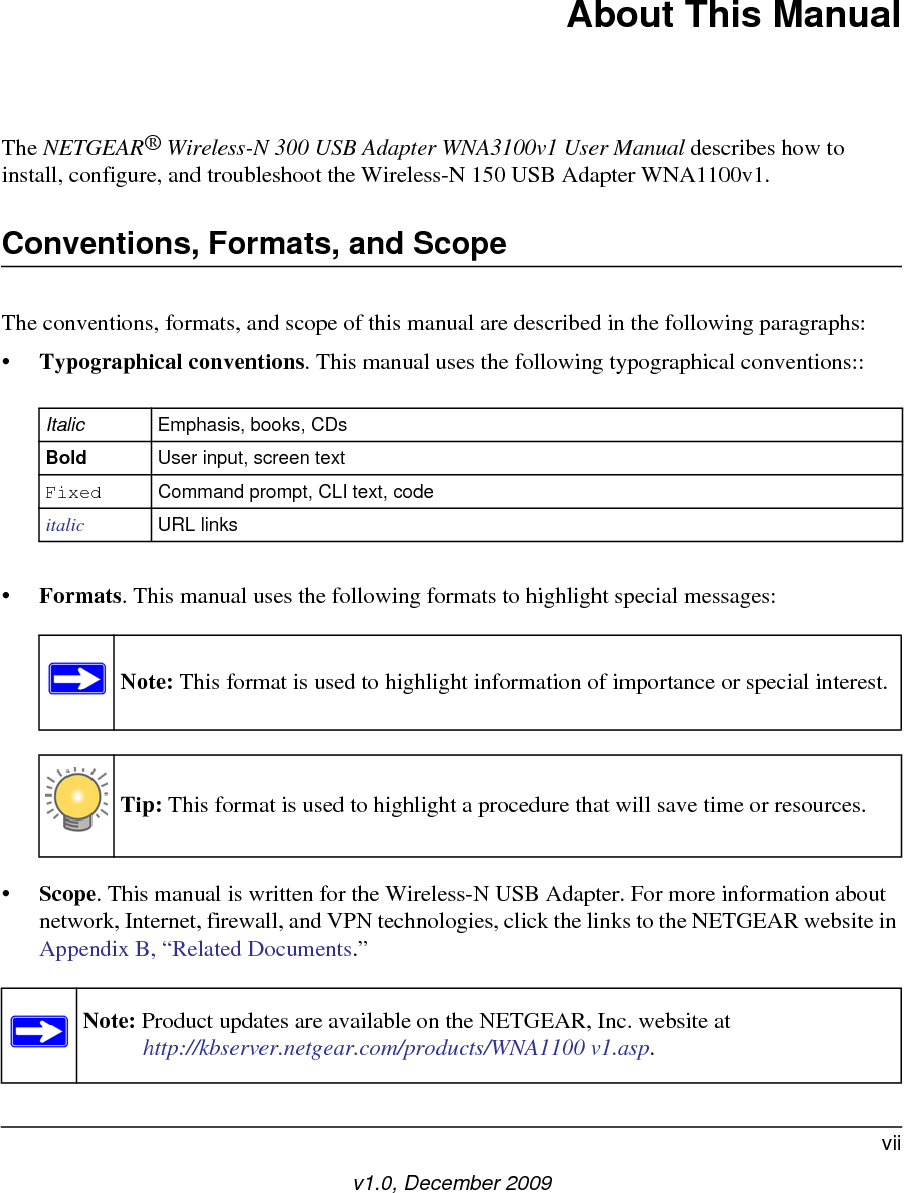
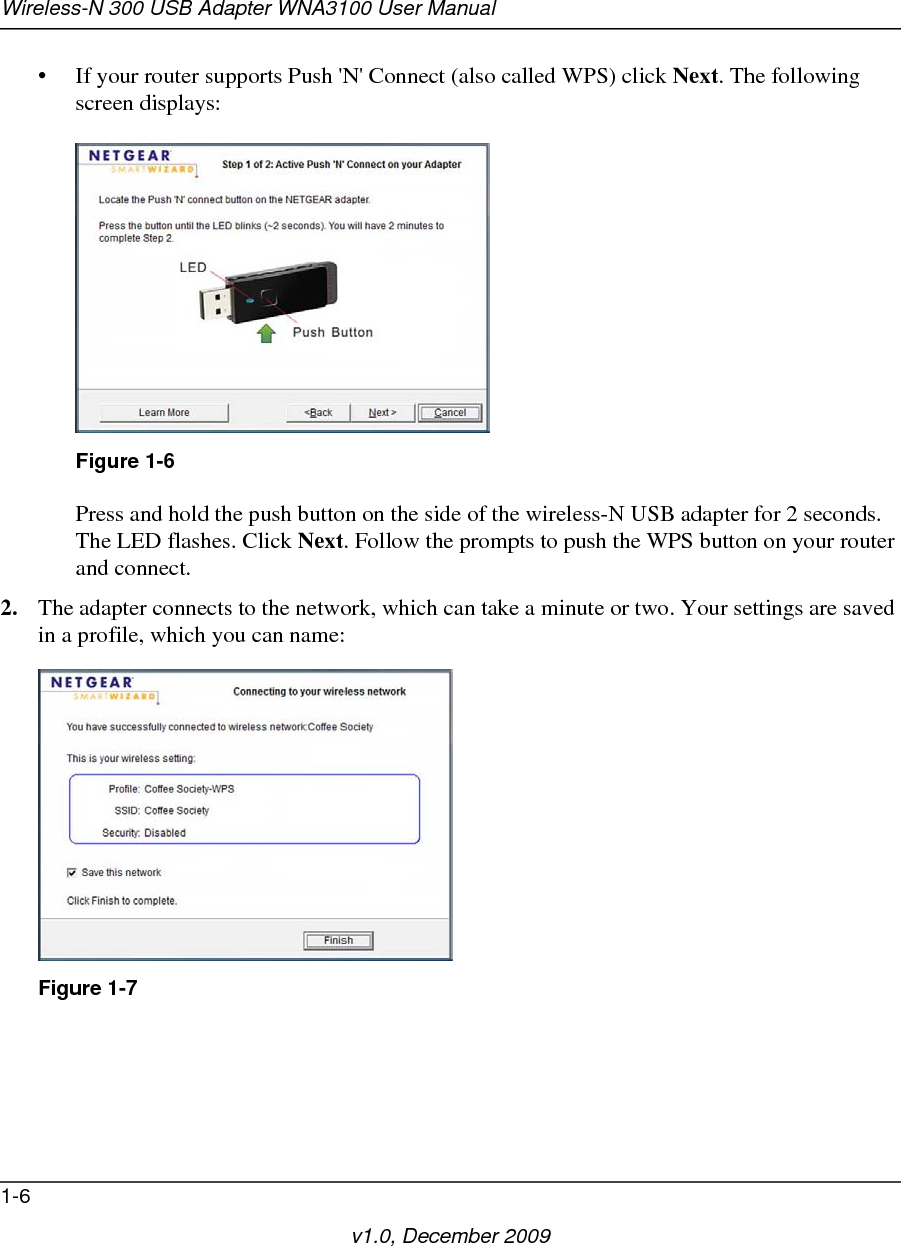
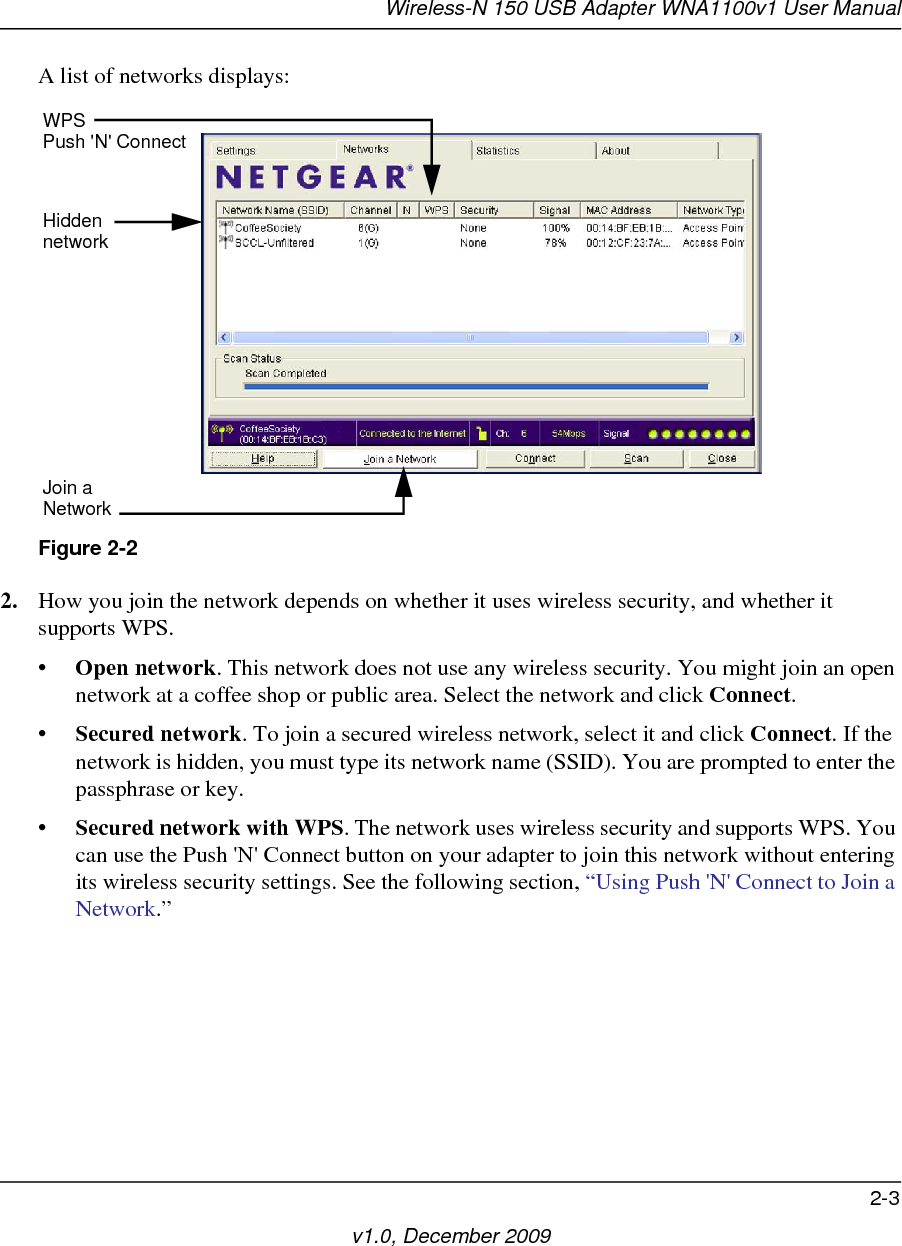
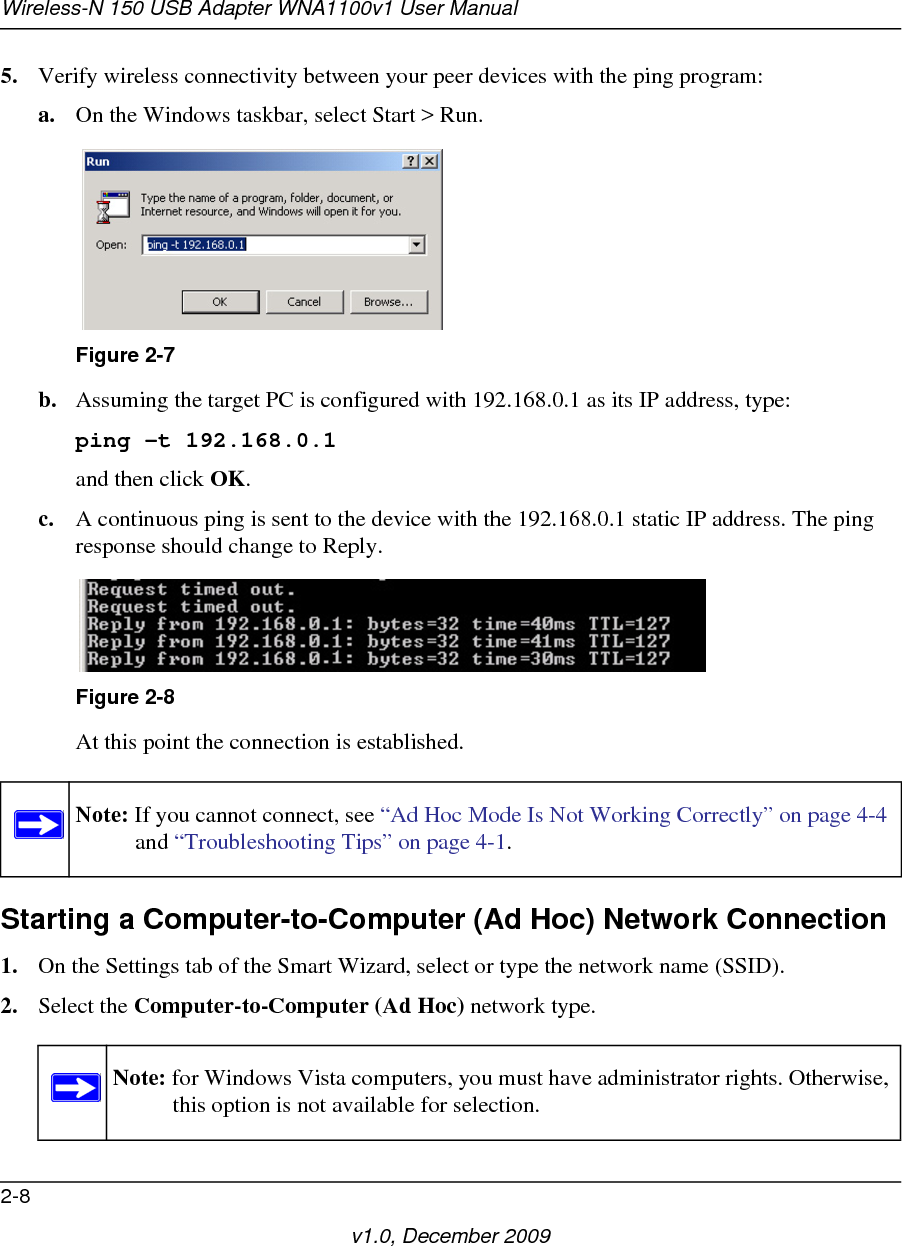
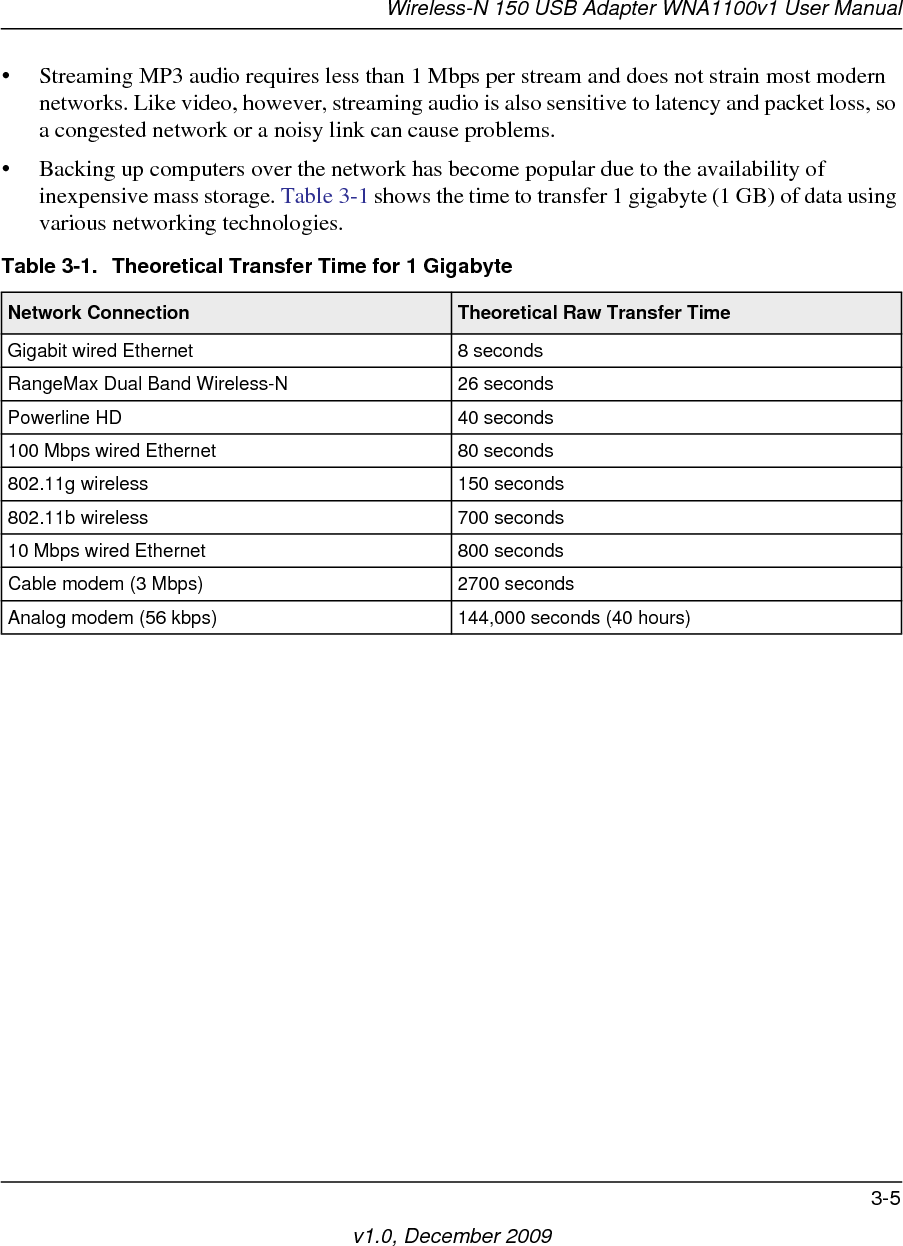
![Wireless-N 150 USB Adapter WNA1100v1 User Manual2-10v1.0, December 2009Wireless Network Name (SSID) and Security SettingsIf you do not use WPS, then you need to know the security settings to join a secured wireless network. You can save the settings in a profile. You can also print this page, fill in the wireless network settings, and put it in a safe place for future reference.•Network Name (SSID) ______________________________ •If WPA2-PSK or WPA-PSK authentication is used: Passphrase: ______________________________ These characters are case-sensitive. •If WEP authentication is used:–WEP encryption key size. Circle one: 64-bit or 128-bit. –Data encryption (WEP) keys. There are two methods for creating WEP data encryption keys. Whichever method you use, record the key values in the spaces below.•Passphrase method: ______________________________ This is case-sensitive. Not all wireless devices support the passphrase method.•Manual method. These values are not case-sensitive. For 64-bit WEP, enter 10 hex digits (any combination of 0–9 or a–f). For 128-bit WEP, enter 26 hex digits.Key 1: _____________________________ Key 2: _____________________________ Key 3: _____________________________ Key 4: _____________________________ Setting Up WPA-PSK [TKIP] or WPA2-PSK [AES] SecurityTo configure WPA-PSK (TKIP) or WPA2-PSK (AES) security:1. Run the WNA1100 v1 Smart Wizard.a. Make sure that the wireless-N USB adapter is fully inserted in a USB port in your computer.b. Use the icon to open the Smart Wizard. The Settings tab displays.2. Configure the security settings. a. In the Profile field, select the profile, or type in a profile name.b. In the Network Name (SSID) field, select the network, or enter the SSID.Note: You will not get a wireless network connection unless the network SSID matches exactly what is configured in the access point.](https://usermanual.wiki/Netgear-orporated/09300113/User-Guide-1227244-Page-30.png)
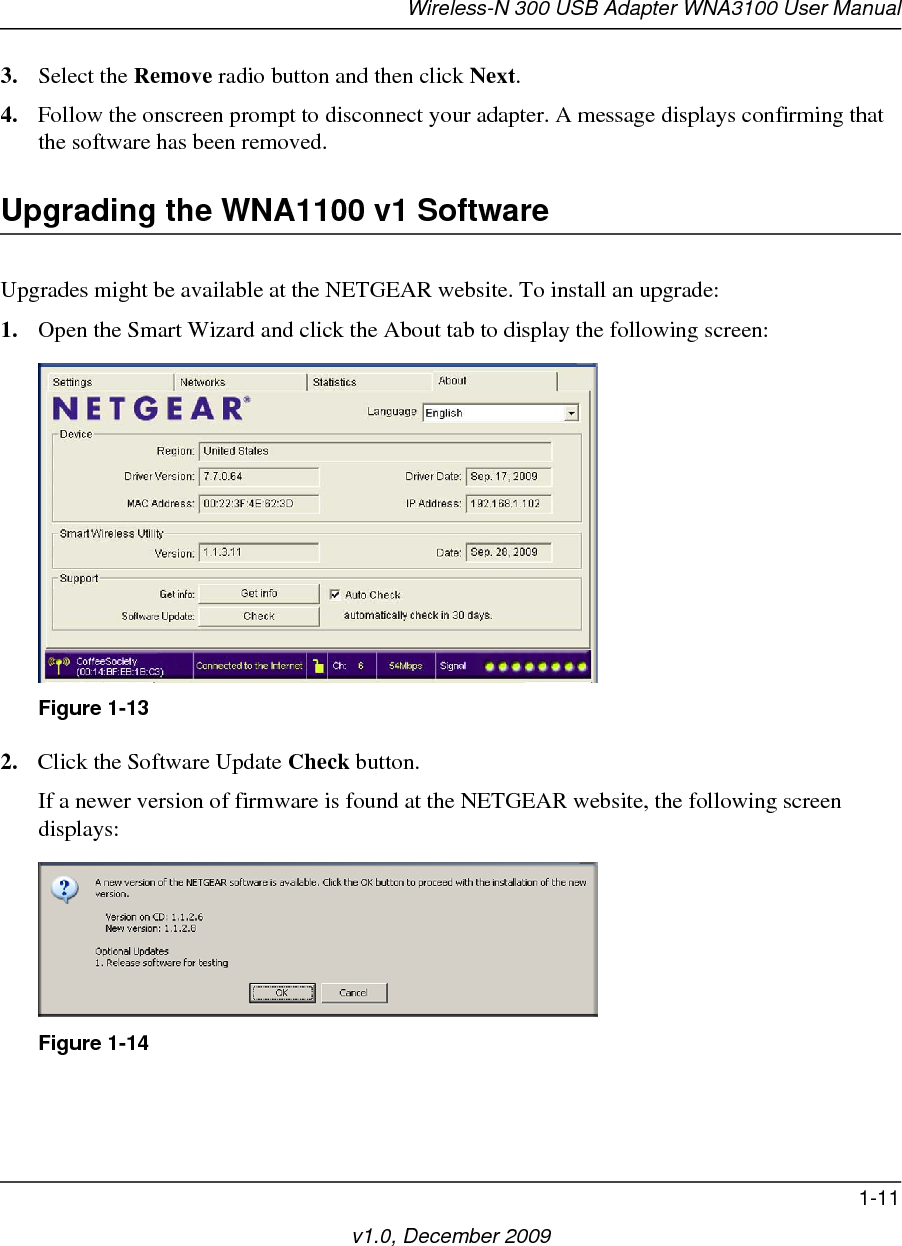
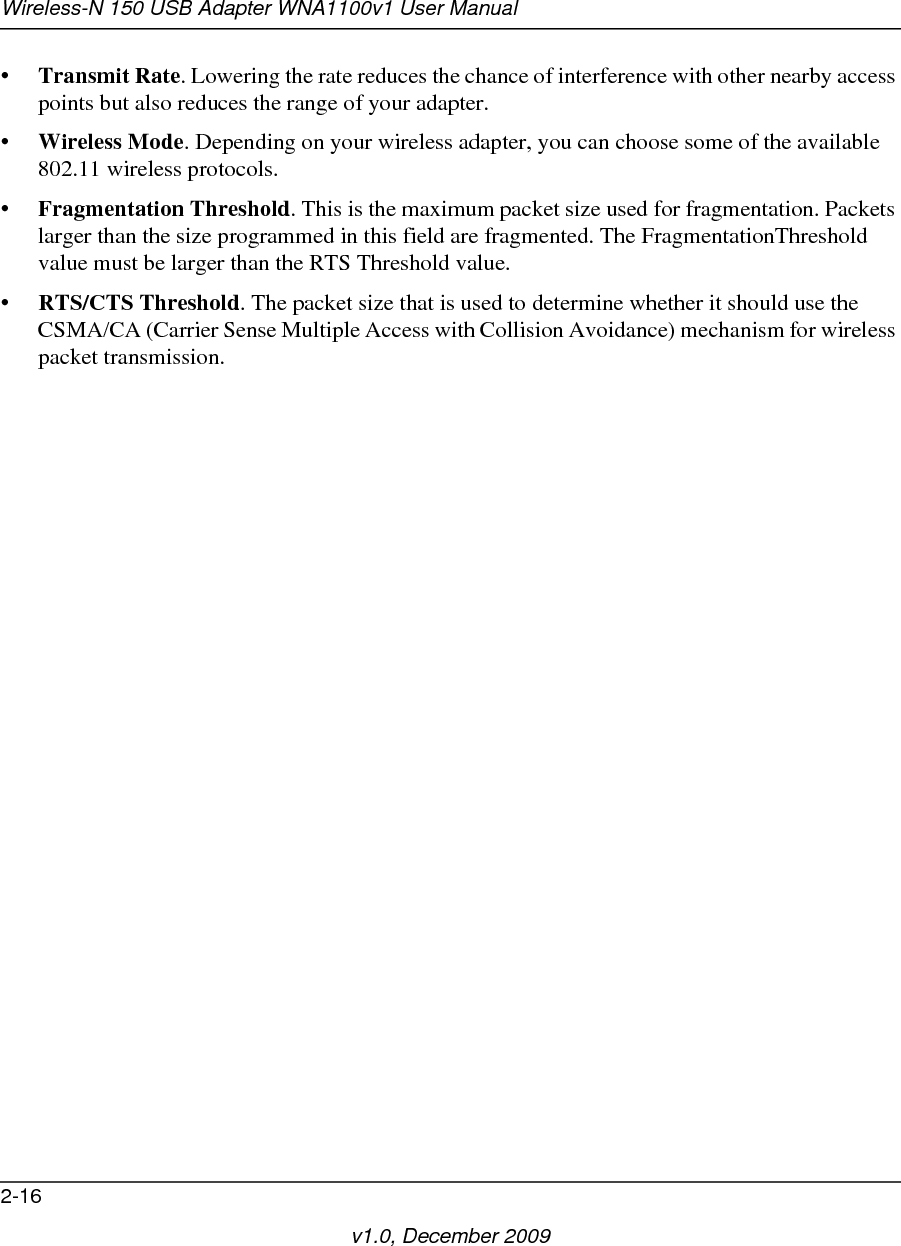
![Wireless-N 150 USB Adapter WNA1100v1 User Manual2-11v1.0, December 2009c. In the Security section, select WPA-PSK [TKIP] or WPA2-PSK [AES], and enter the passphrase.For more about WPA2-PSK, click the link to “Wireless Networking Basics” in Appendix B.3. Save your settings in a profile. a. Click the Save Profile button. All the configuration settings are saved in this profile. b. Click Apply, and then click Close to exit the Smart Wizard.Setting Up WEP Encryption SecurityTo configure WEP encryption security:1. Run the WNA1100 v1 Smart Wizard.a. Make sure that the wireless-N USB adapter is connected to the USB port in your computer.b. Use the icon to open the Smart Wizard. The Settings tab displays.2. Configure the security settings. a. In the Profile field, select the profile, or type in a profile name.Figure 2-10](https://usermanual.wiki/Netgear-orporated/09300113/User-Guide-1227244-Page-31.png)


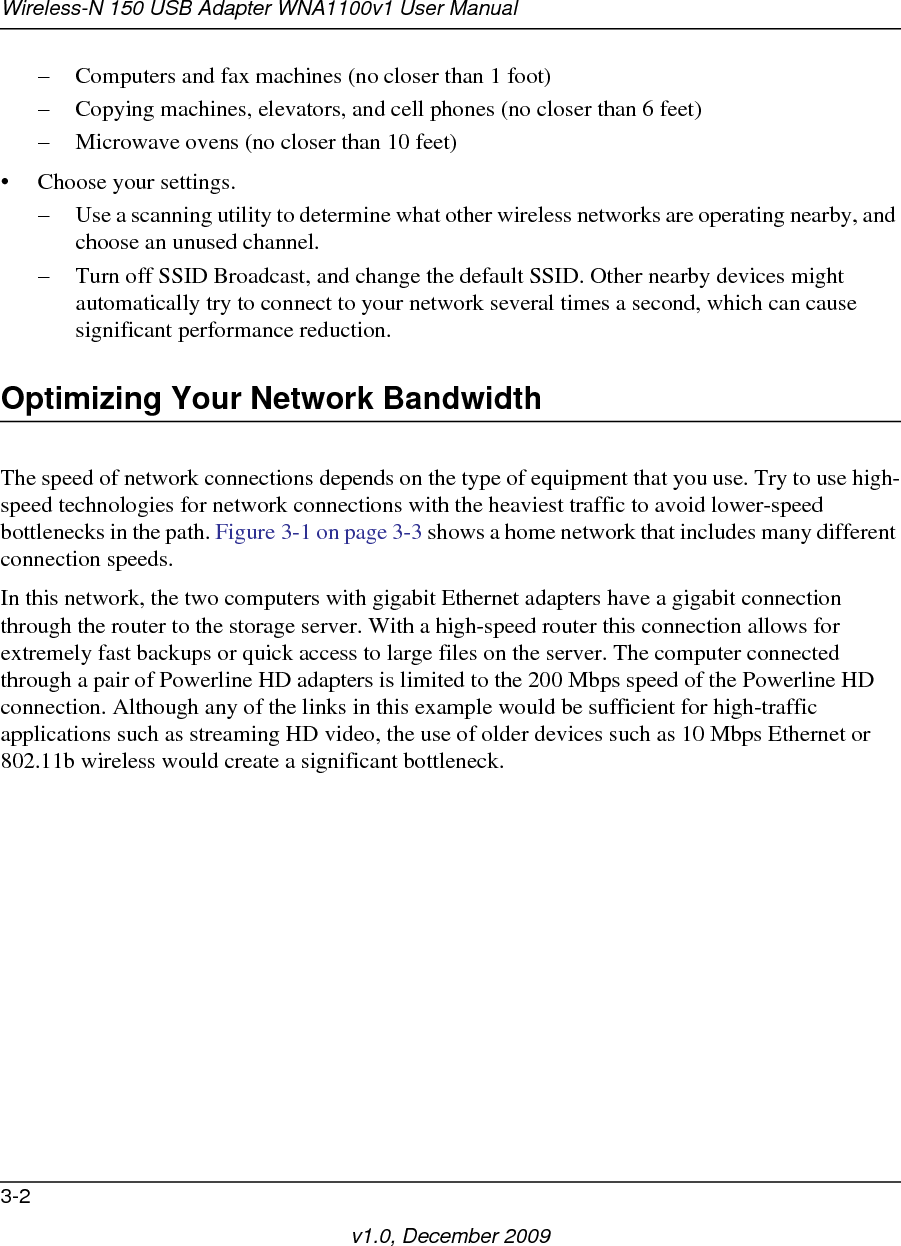
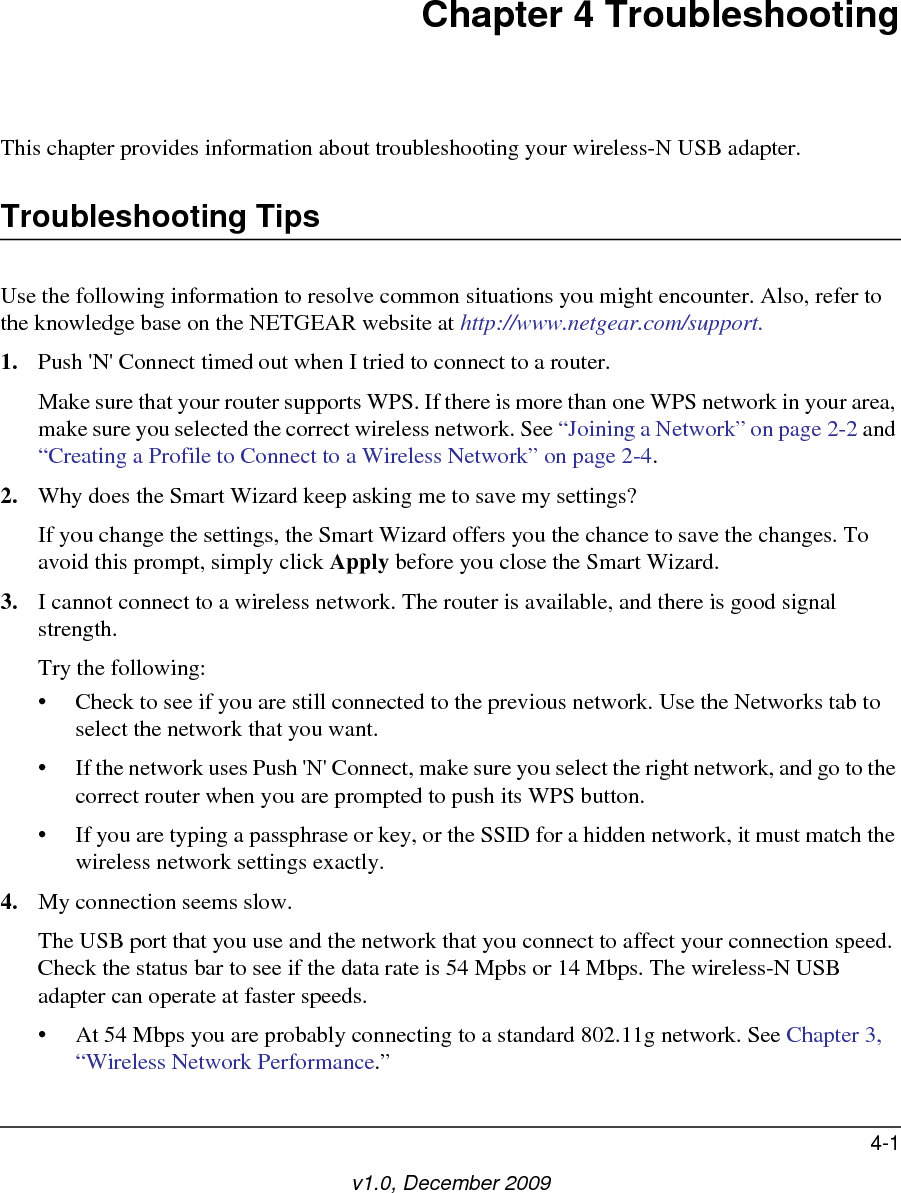
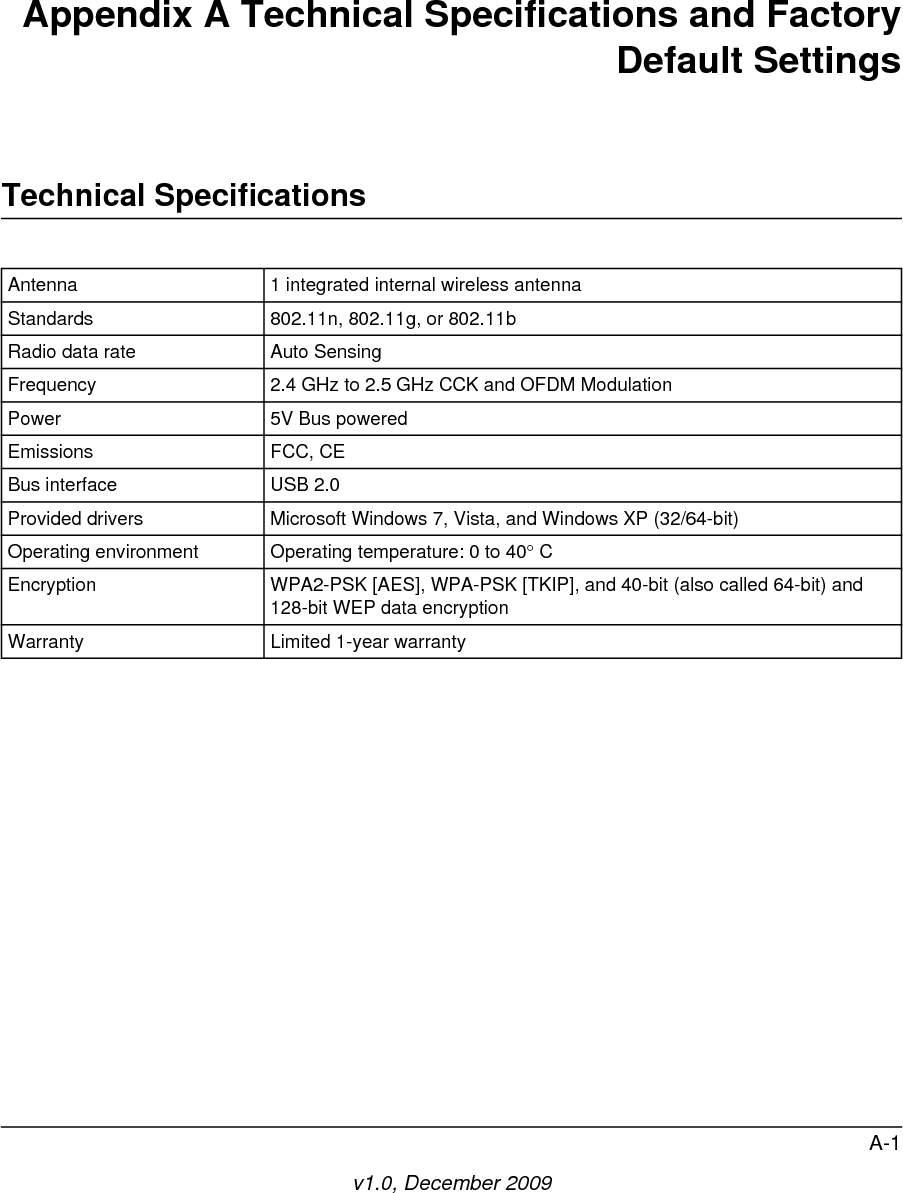
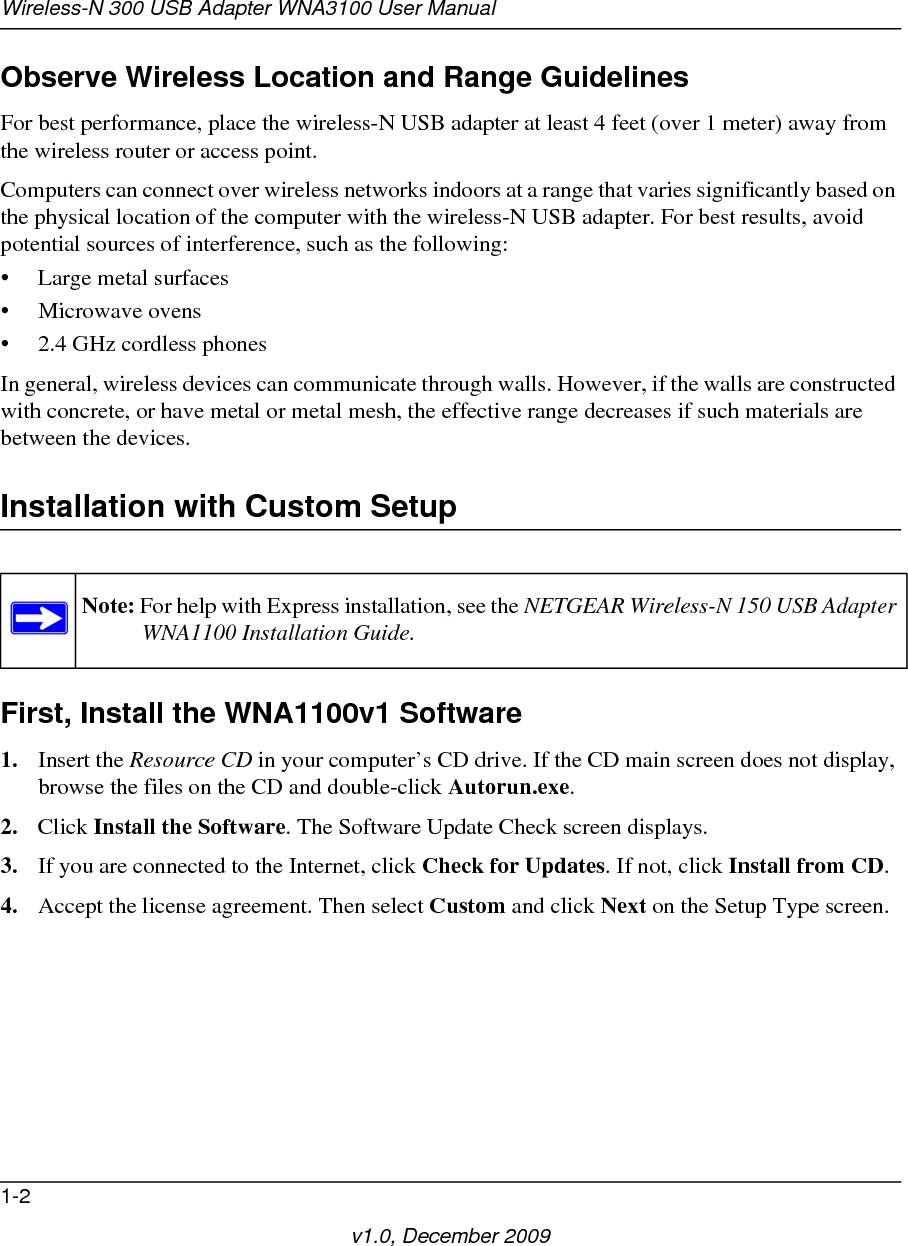
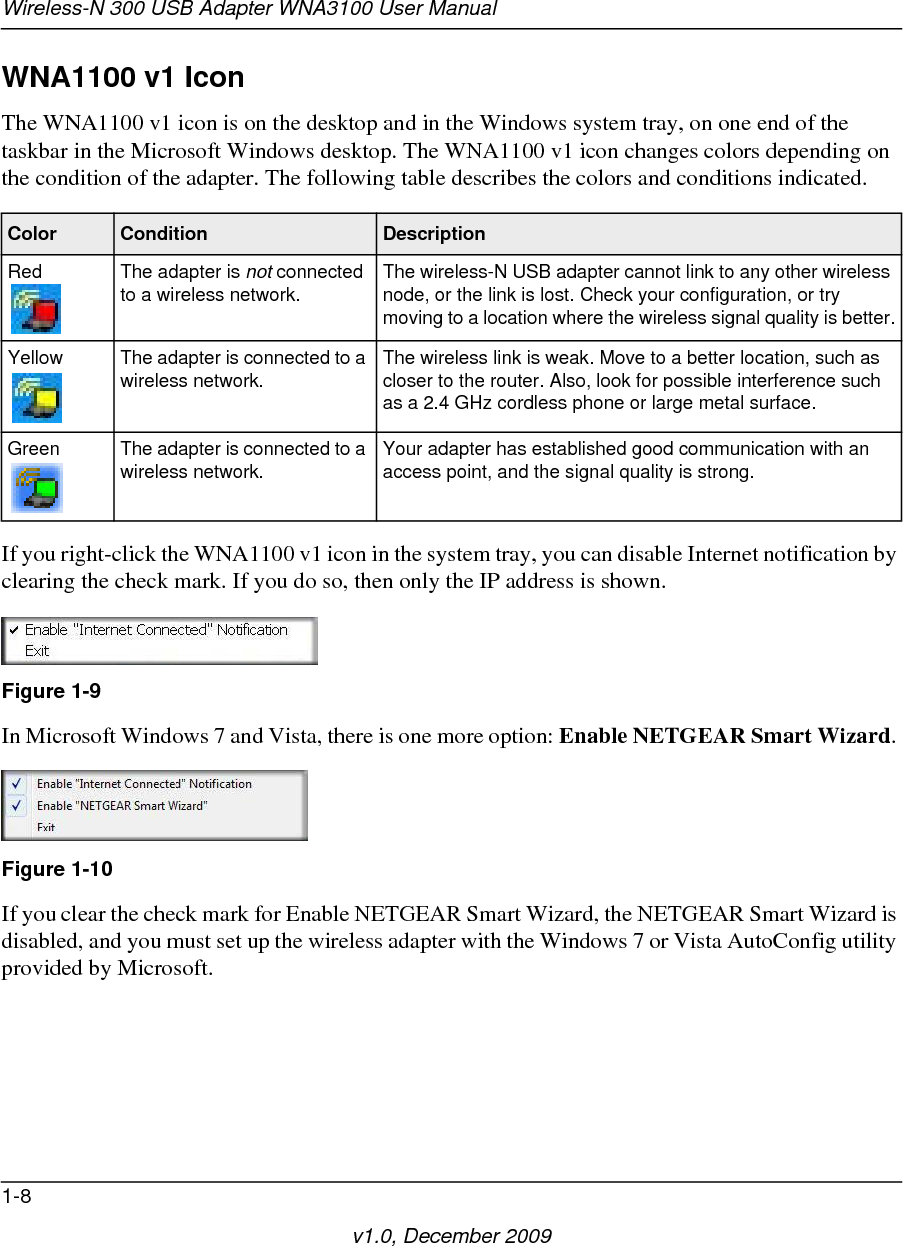
![A-1v1.0, December 2009Appendix A Technical Specifications and FactoryDefault SettingsTechnical SpecificationsAntenna 1 integrated internal wireless antennaStandards 802.11n, 802.11g, or 802.11bRadio data rate Auto SensingFrequency 2.4 GHz to 2.5 GHz CCK and OFDM ModulationPower 5V Bus poweredEmissions FCC, CEBus interface USB 2.0Provided drivers Microsoft Windows 7, Vista, and Windows XP (32/64-bit)Operating environment Operating temperature: 0 to 40 CEncryption WPA2-PSK [AES], WPA-PSK [TKIP], and 40-bit (also called 64-bit) and 128-bit WEP data encryptionWarranty Limited 1-year warranty](https://usermanual.wiki/Netgear-orporated/09300113/User-Guide-1227244-Page-46.png)