Netgear orporated 12200203 ProSafe 3x3 Dual Radio, Dual Band Wireless Access Point User Manual
Netgear Incorporated ProSafe 3x3 Dual Radio, Dual Band Wireless Access Point
Contents
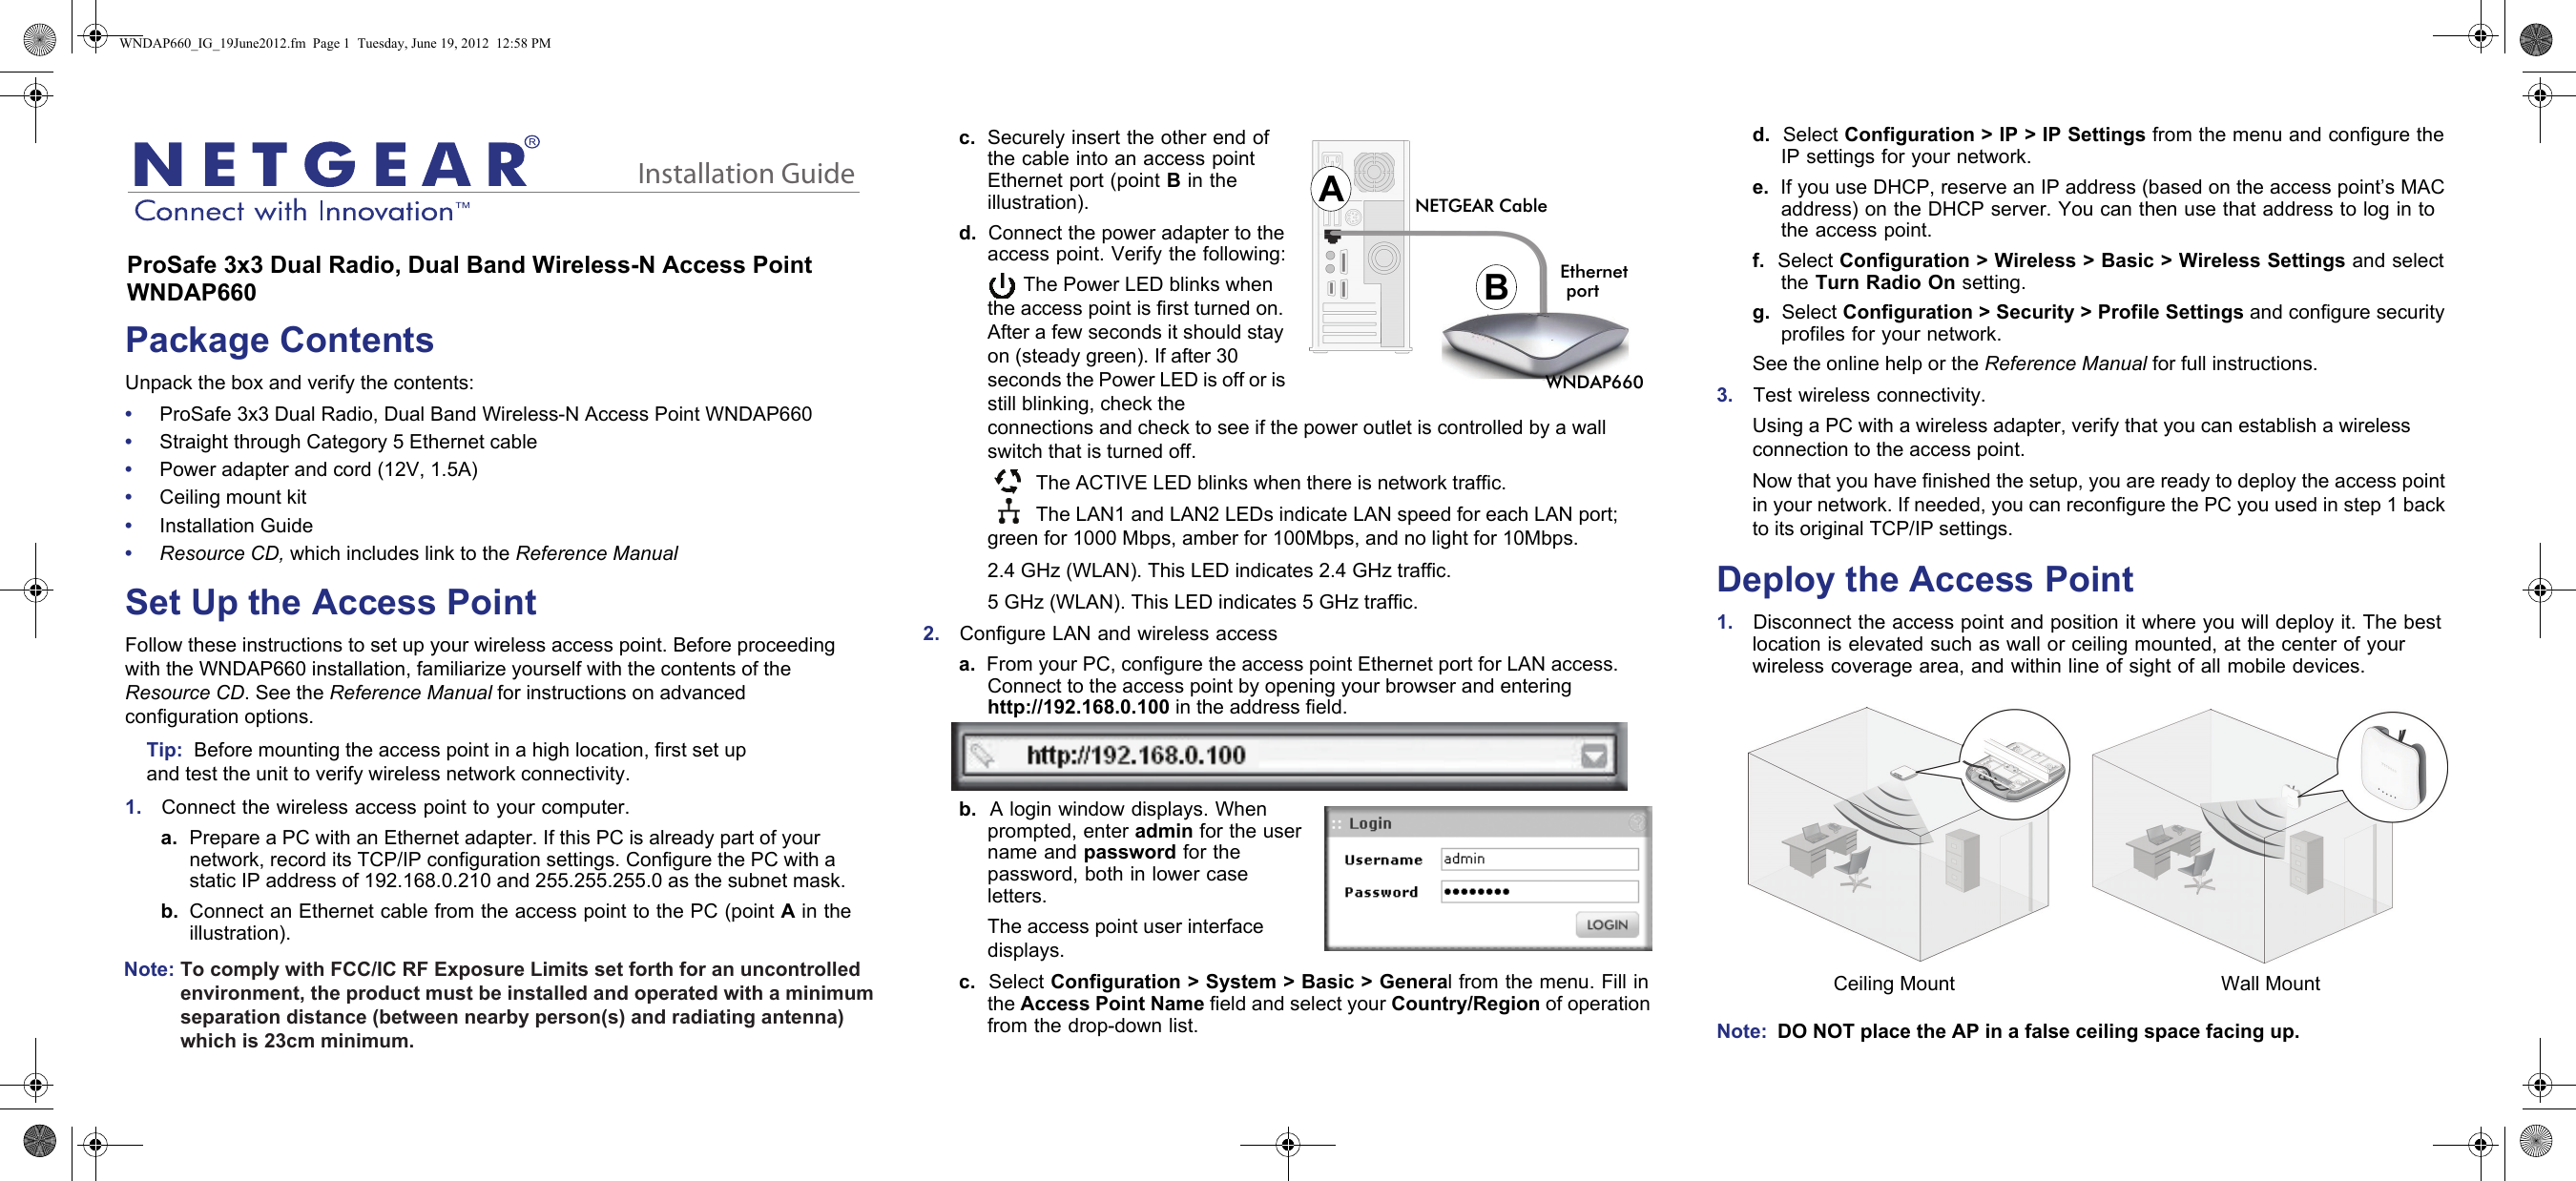
- 1. User Manual
- 2. User Manual - Statements
- 3. User manual rev.pdf
User Manual