Netgear orporated 13200231 WiFi Range Extender User Manual Universal WiFi Range Extender WN3000RP
Netgear Incorporated WiFi Range Extender Universal WiFi Range Extender WN3000RP
Contents
- 1. User Manual
- 2. User Manual Notification of Compliance
User Manual

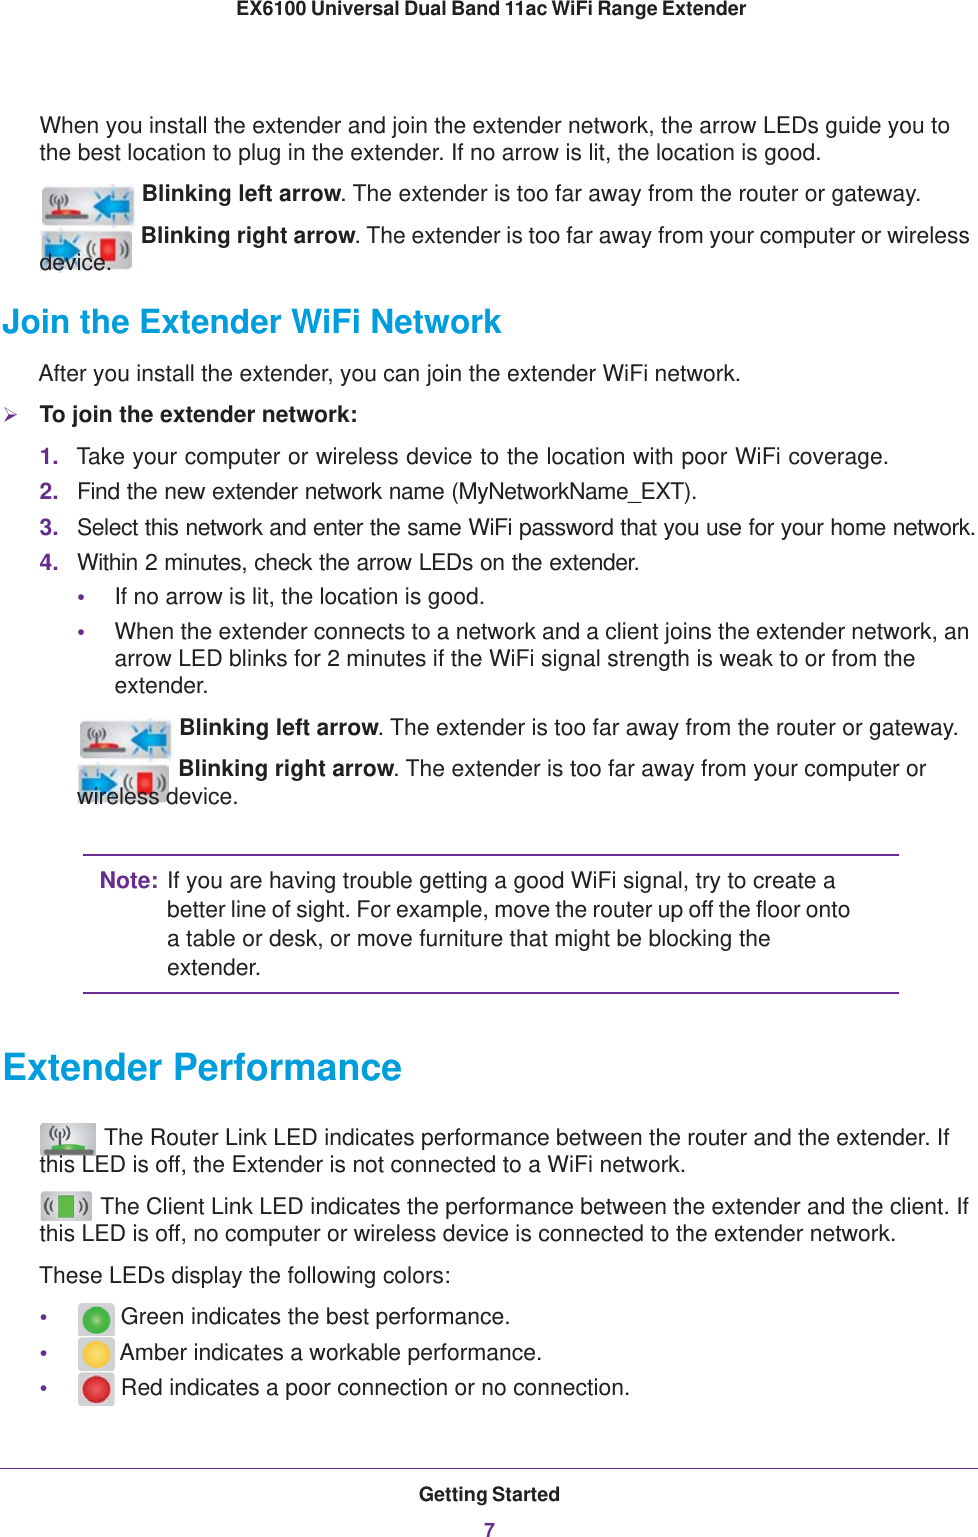
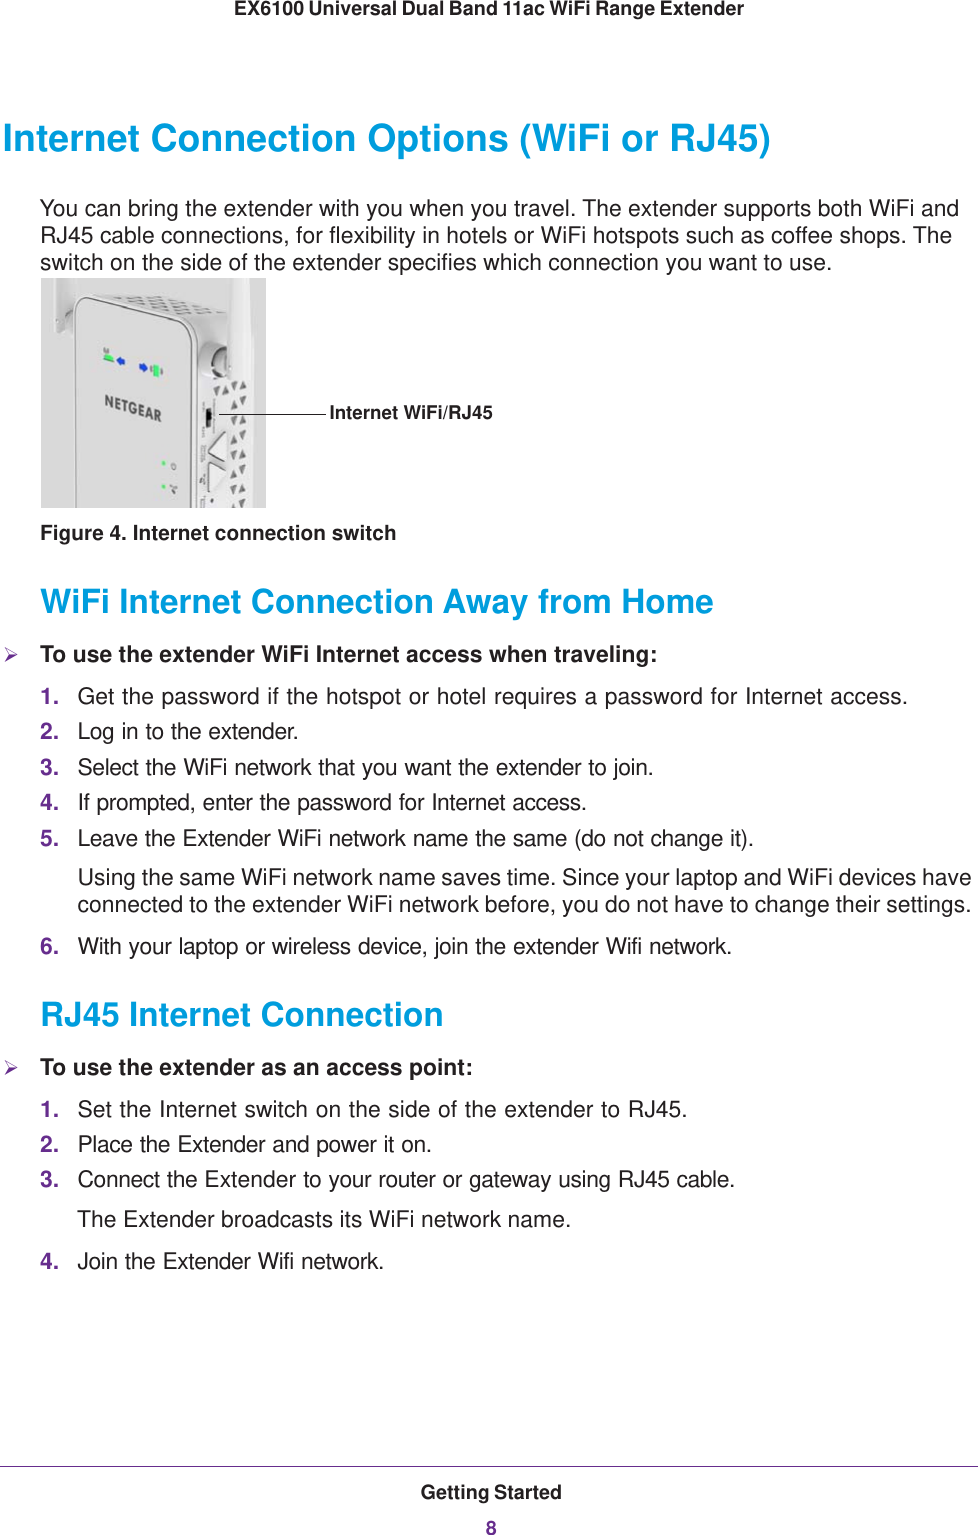

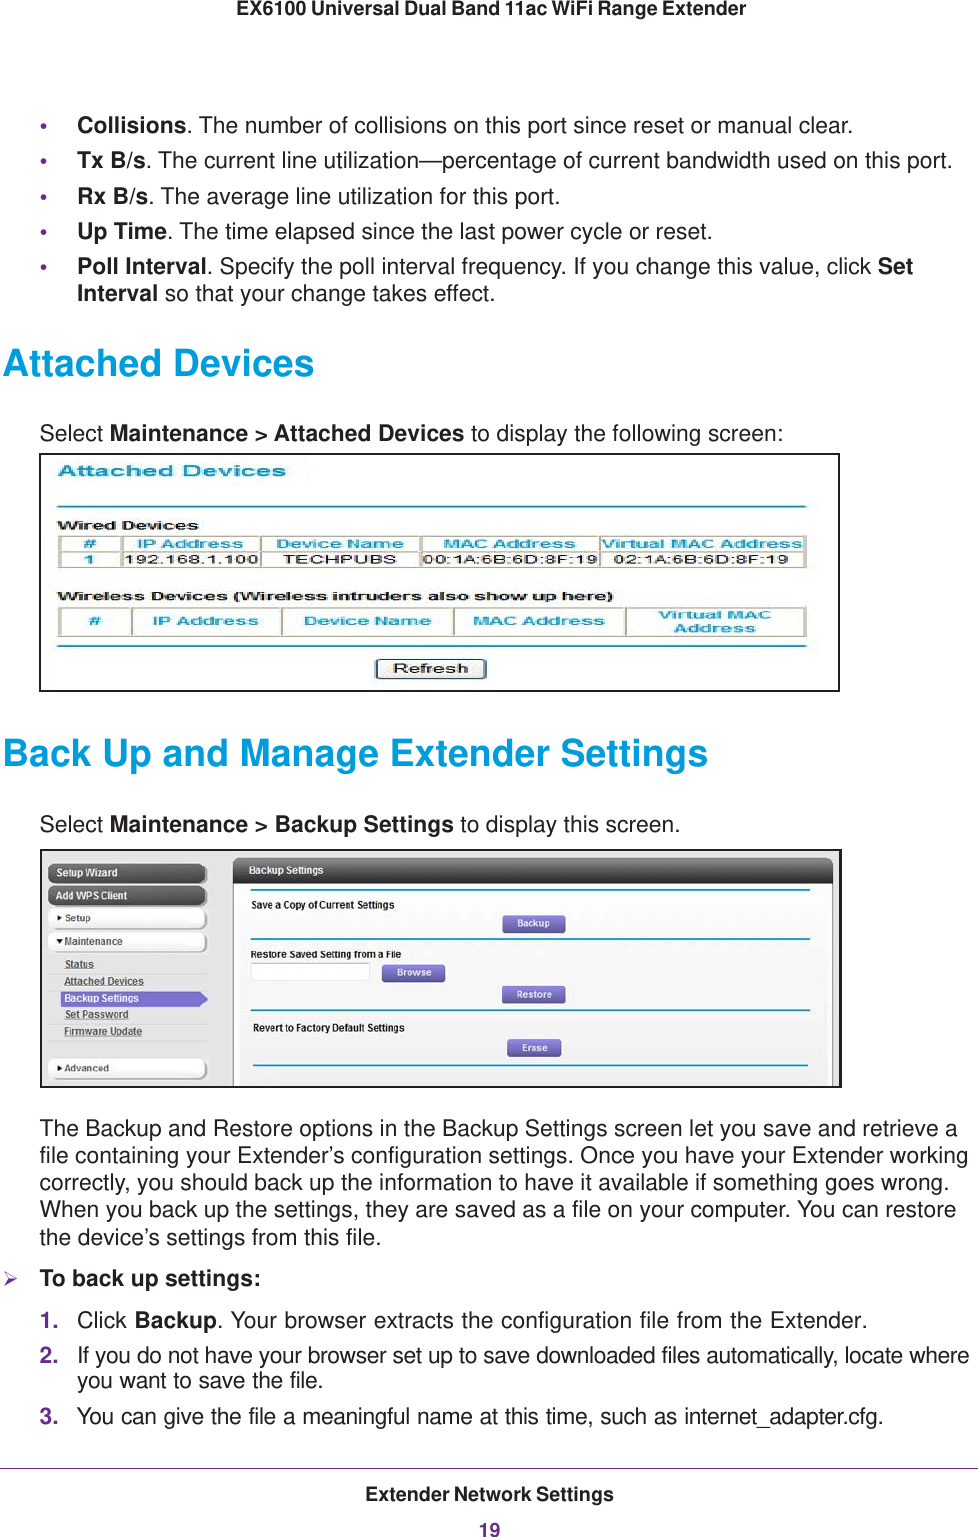
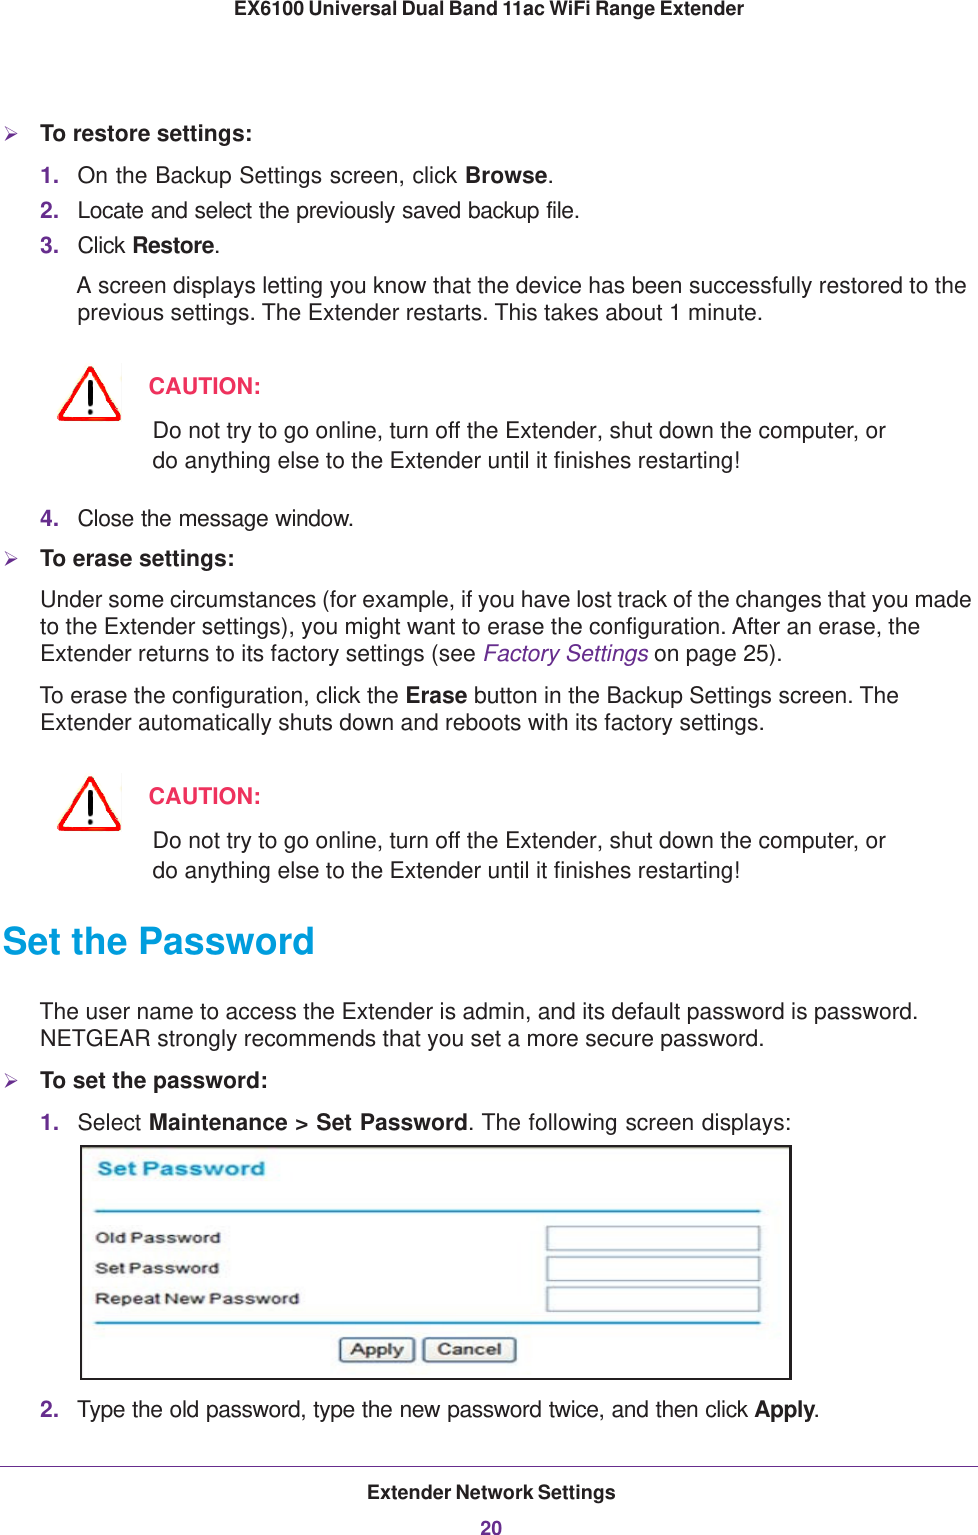
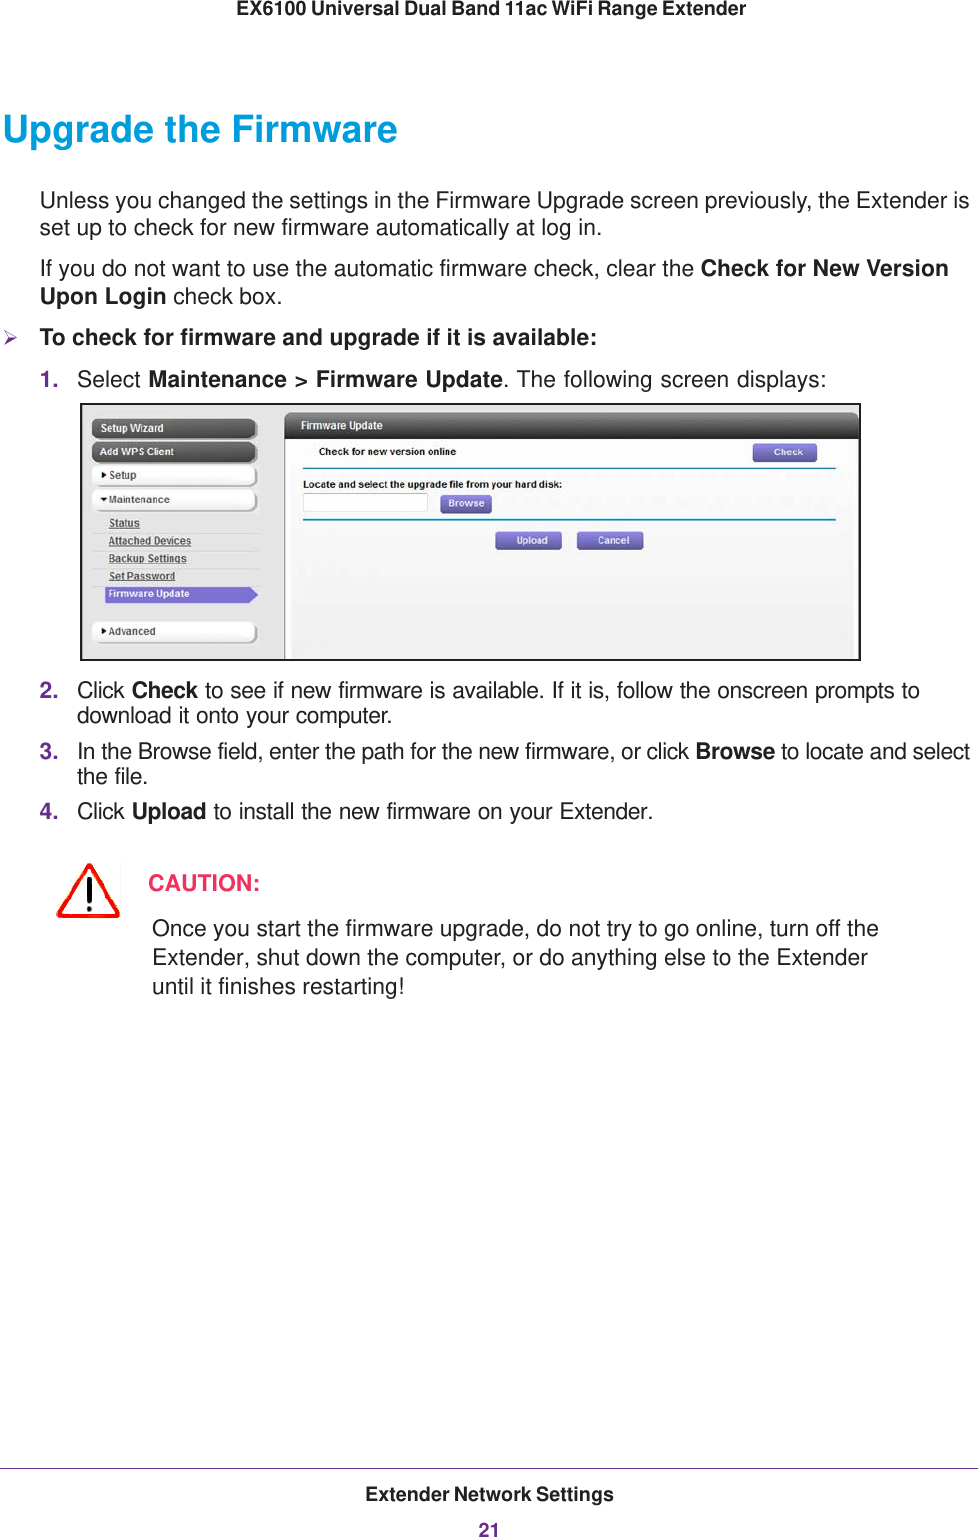
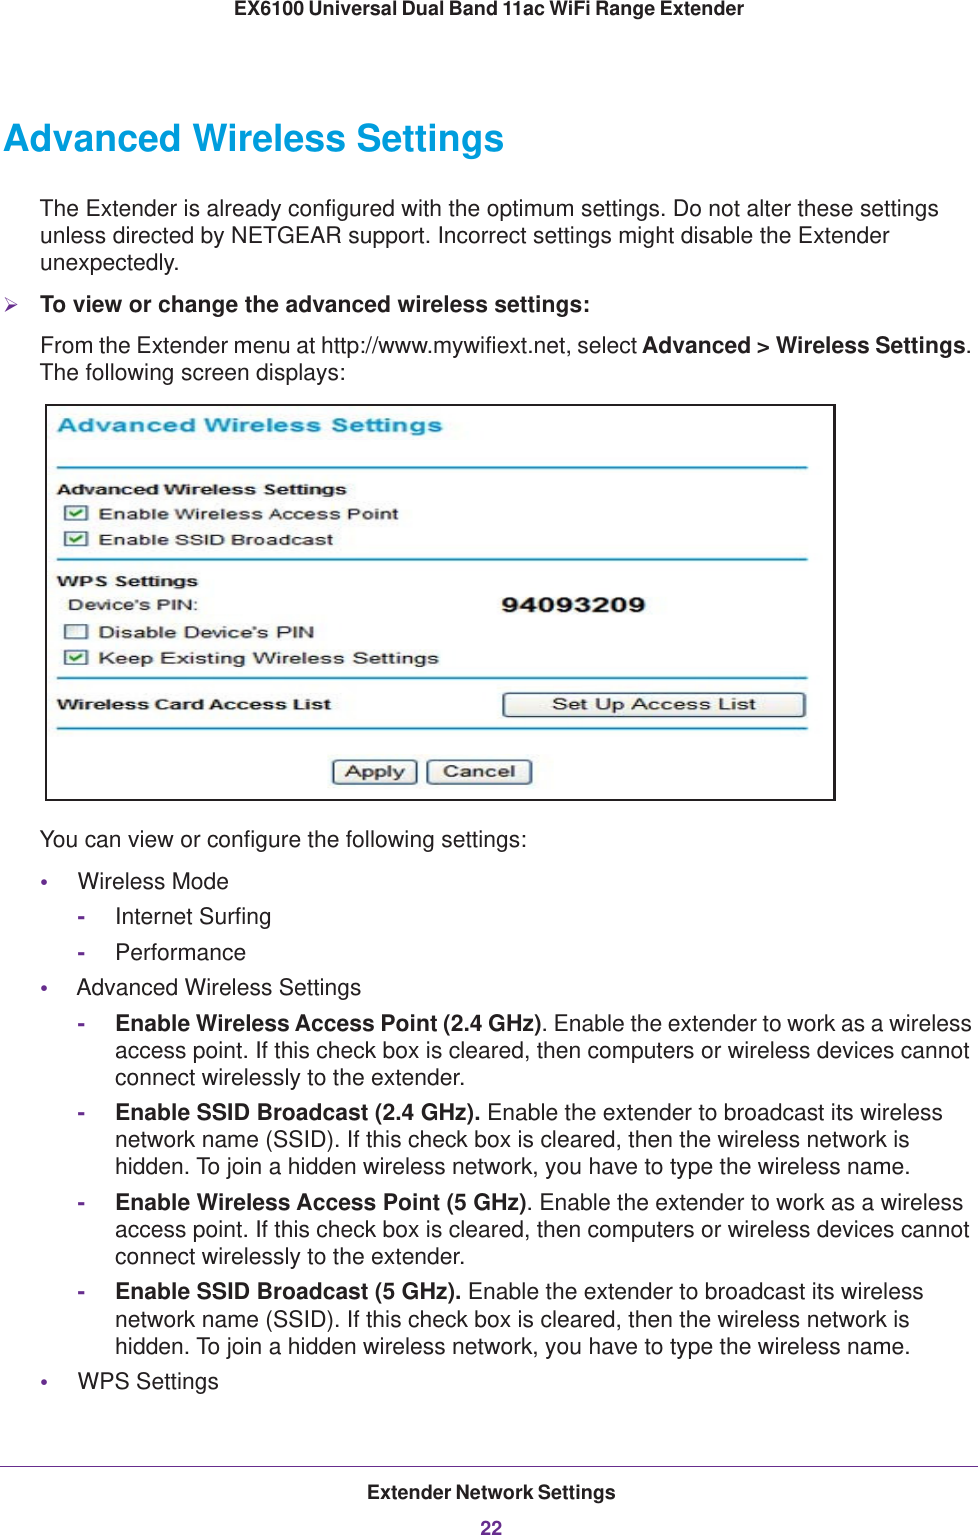
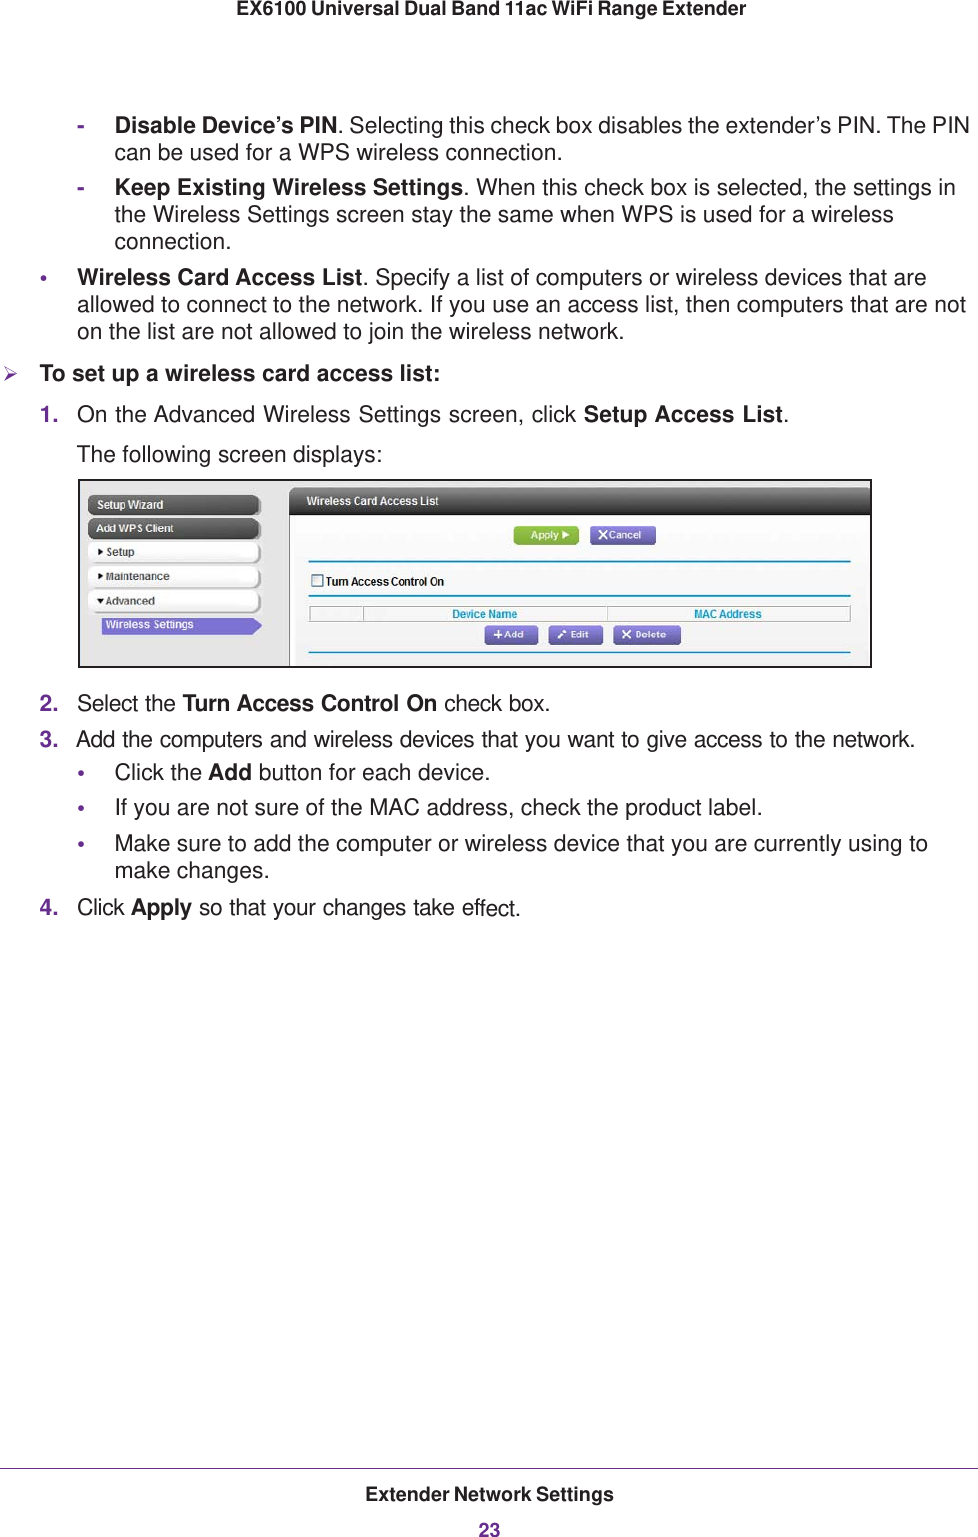
![Extender Network Settings14EX6100 Universal Dual Band 11ac WiFi Range Extender To change the wireless settings for the extender’s network:1. Select Setup > Wireless Settings to display the following screen:2. In the Name (SSID) field, you can type in a new name to customize your extender network. This will make it easier to identify your extender if more than one is operating in your neighborhood.3. In the Security Options section of the screen, select the type of wireless security that you want to use on your network.•None. This is an open wireless network. Any wireless computer or device is allowed to join this network.•WEP. WEP is an older standard, and is less secure than WPA or WPA2. WEP uses encryption keys and data encryption for data security. You can select 64-bit or 128-bit encryption.•WPA-PSK [TKIP]. WPA is more secure than WEP. When using wireless computers or devices that support WPA, you can enter a passphrase to join the extender’s wireless network.•WPA2-PSK [AES]. WPA2 is even more secure, but some older computers do not support this standard. When using wireless computers or devices that support WPA2, you can enter the passphrase to join the extender’s wireless network.•WPA-PSK [TKIP] + WPA2-PASK [AES]. When using wireless computers or devices that support either WPA or WPA2, you can enter the passphrase to join the extender’s wireless network.4. Click Apply to save your settings.5. Use your wireless computer to connect to the extender’s network with its new settings. The Smart Wizard can guide you through this process.](https://usermanual.wiki/Netgear-orporated/13200231.User-Manual/User-Guide-2122654-Page-14.png)