Netgear orporated 13300240 Home Security Touchscreen User Manual
Netgear Incorporated Home Security Touchscreen
Contents
- 1. User Manual
- 2. User Manual(Statement)
User Manual
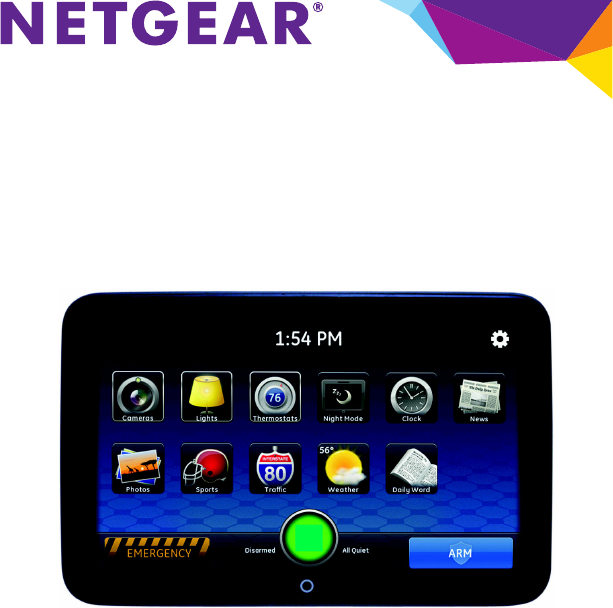
STS7000 Home Security Touch
Screen Installation Guide
Note: This document is for certification purposes. Images are
for position only and might differ from the actual product.
2
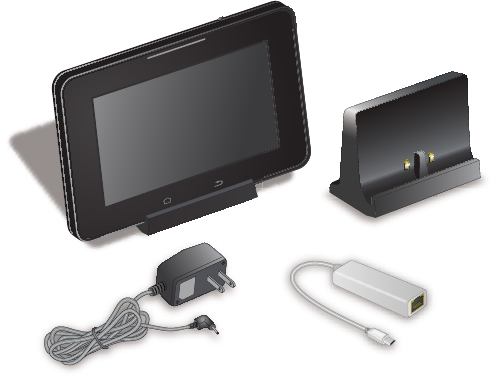
Package Contents
Touch Screen
12V power adapter USB adapter
Stand
3
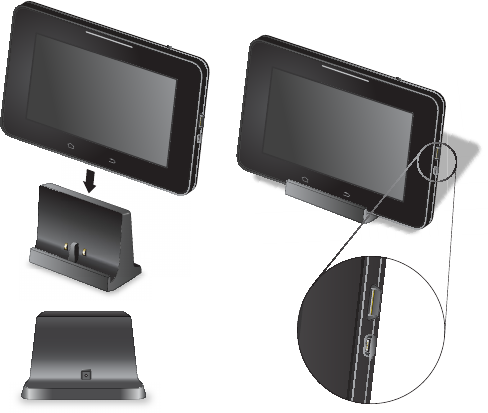
Hardware Features
The Touch Screen includes a stand and controls as shown here.
•Stand. To put the Touch Screen in an upright position, position
the device in the stand.
4
•12V power adapter input. To recharge the battery or to run on
electricity instead of the battery, plug the power cord into the 12V
power adapter input.
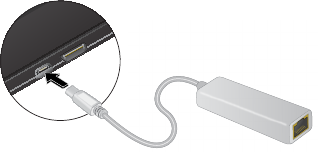
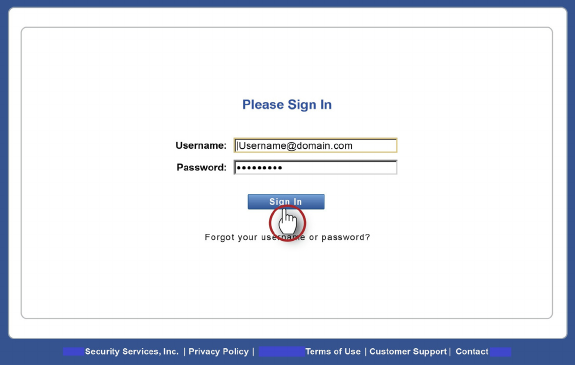
Configure the Touch Screen
To configure the touch screen for use with a wireless
network:
1. Plug the USB adapter into the USB port on the back of the
Touch Screen.
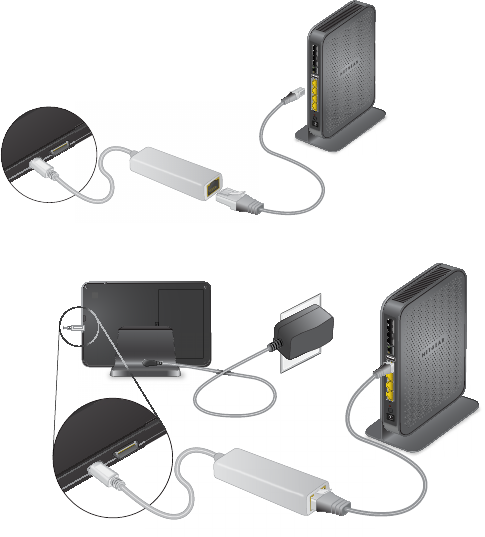
5
2. Connect the adapter to the gateway device LAN port with an
Ethernet cable.
3. Plug the power adapter into the 12V power adapter input.
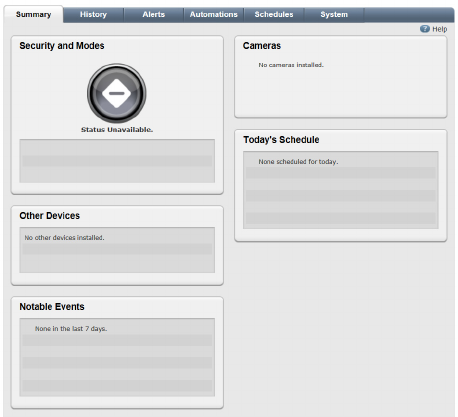
7
The following screen displays.
8
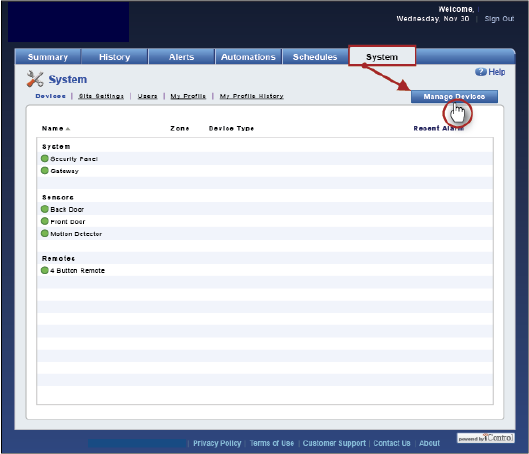
5. Click the System tab.
6. Click Manage Devices.
For the Manage Devices option to appear, your gateway needs to
be connected to the Internet.
9
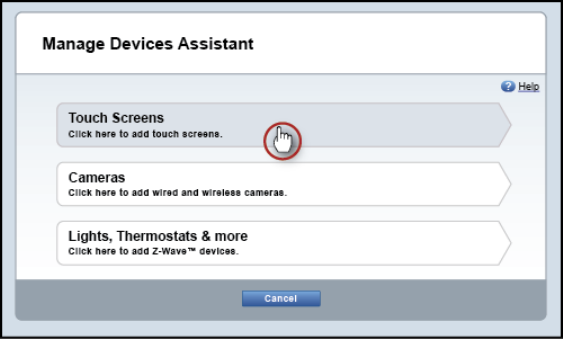
The Manage Devices Assistant screen displays.
10
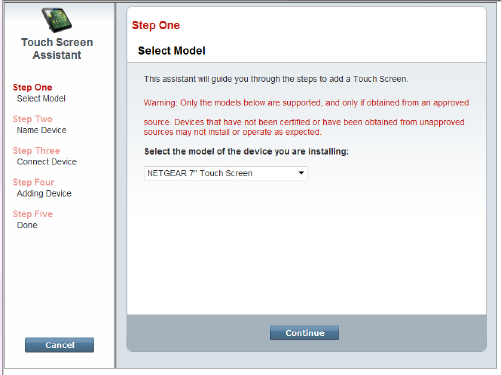
7. Click Touch Screens.
8. From the drop-down list, select NETGEAR 7" Touch Screen
(HSS101).
9. Click Continue.
11
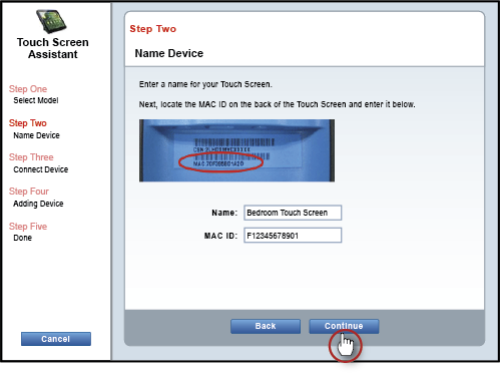
The Name Devices screen displays.
10. Enter a name for your Touch Screen.
11. Type the MAC ID.
12
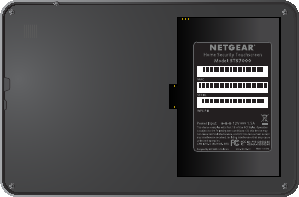
The MAC ID appears inside the back of the Touch Screen and
contains 12 characters, either numbers or the letters A–F.
70F3958CA95A
SOV6D2800002X01
67D1258CA05B
Note: The placement of the MAC ID label might differ from the
MAC ID location depicted in Step Two of the Touch Screen
Assistant.
12. Click Continue.
13
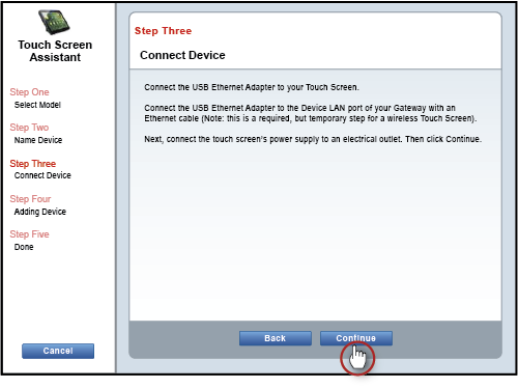
The Connect Device screen displays.
14
13. Click Continue.

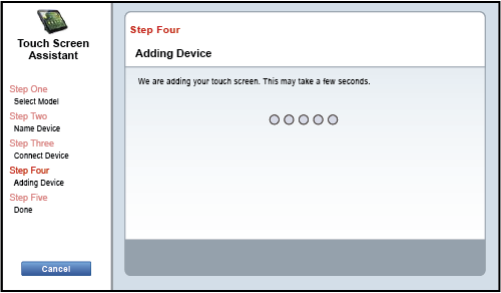
15
Wait while the Touch Screen is added to your wireless network.
Adding the touch screen can take up to two minutes.
14. To add an additional Touch Screen, click Add Another.
15. When you have added all the touch screens, click Finish.
16
16. Disconnect the Ethernet cable from the USB adapter.
17. Disconnect the USB adapter from the Touch Screen.
18. Move the Touch Screen and power supply to your desired location.
19. Plug the power adapter into the 12V power adapter input.
It might take up to 5 minutes to connect to the wireless network. If
the touch screen does not connect, see Troubleshooting.
17
Troubleshooting
This section provides information about troubleshooting your Touch
Screen.
•Dark screen. The screen is blank (dark).
Reason. The Touch Screen is set to night mode.
Resolution. To change the mode, tap the screen.
The screen is dark except the logo, time, and a message that
security information is not available from this device.
Reason. The connection between the Touch Screen and the
gateway is lost.
Resolution. To display technical information about your Touch
Screen, tap the logo in the top-left corner, then, in the screen that
displays, tap Version Information.
•WiFi Connection. Lost or intermittent WiFi connection.
Reasons.
-If the microwave oven is on, it can disrupt WiFi service.
-2.4 GHz cordless telephones can interfere with the Touch
Screen’s WiFi connection because they operate at the same
frequency as other devices on a LAN.
-A 2.4 GHz wireless gaming adapter is nearby.
-A 2.4 GHz baby monitor is nearby.
18
-The Touch Screen is too far from the gateway.
Resolutions.
-The Touch Screen must be within 50 feet of the gateway.
If the Touch Screen is mounted outside the range of the
wireless network, consider including the Model WN2000RPT-
111NAS Wi-Fi Extender for increased range.
-Turn off the microwave oven. No need to unplug it.
-If you determine that your cordless phone is interfering, you
can:
•Change the location of the Touch Screen or the base of the
cordless phone.
•Switch the channel on the access point. If that does not
work, try another channel.
•Operate the phone with the antenna lowered, if that is an
option.
•Use a phone that is not a 2.4 GHz phone.
Support
Contact your Internet service provider for technical support
.
Trademarks
NETGEAR, the NETGEAR logo, and Connect with Innovation are trademarks
and/or registered trademarks of NETGEAR, Inc. and/or its subsidiaries in the
United States and/or other countries. Information is subject to change without
notice. © NETGEAR, Inc. All rights reserved.
Compliance
For the current EU Declaration of Conformity, visit:
http://support.netgear.com/app/answers/detail/a_id/11621/.
September 2013