Netgear orporated 14300289 MoCA 2.0 N600 WiFi bridge / extender User Manual
Netgear Incorporated MoCA 2.0 N600 WiFi bridge / extender
UserManual.wiki
>
Netgear orporated
>
14300289 User Manual
User Manual.pdf
Navigation menu
Upload a User Manual
Namespaces
Wiki Guide
HTML
PDF
Info
Views
User Manual
Discussion / Help
Navigation


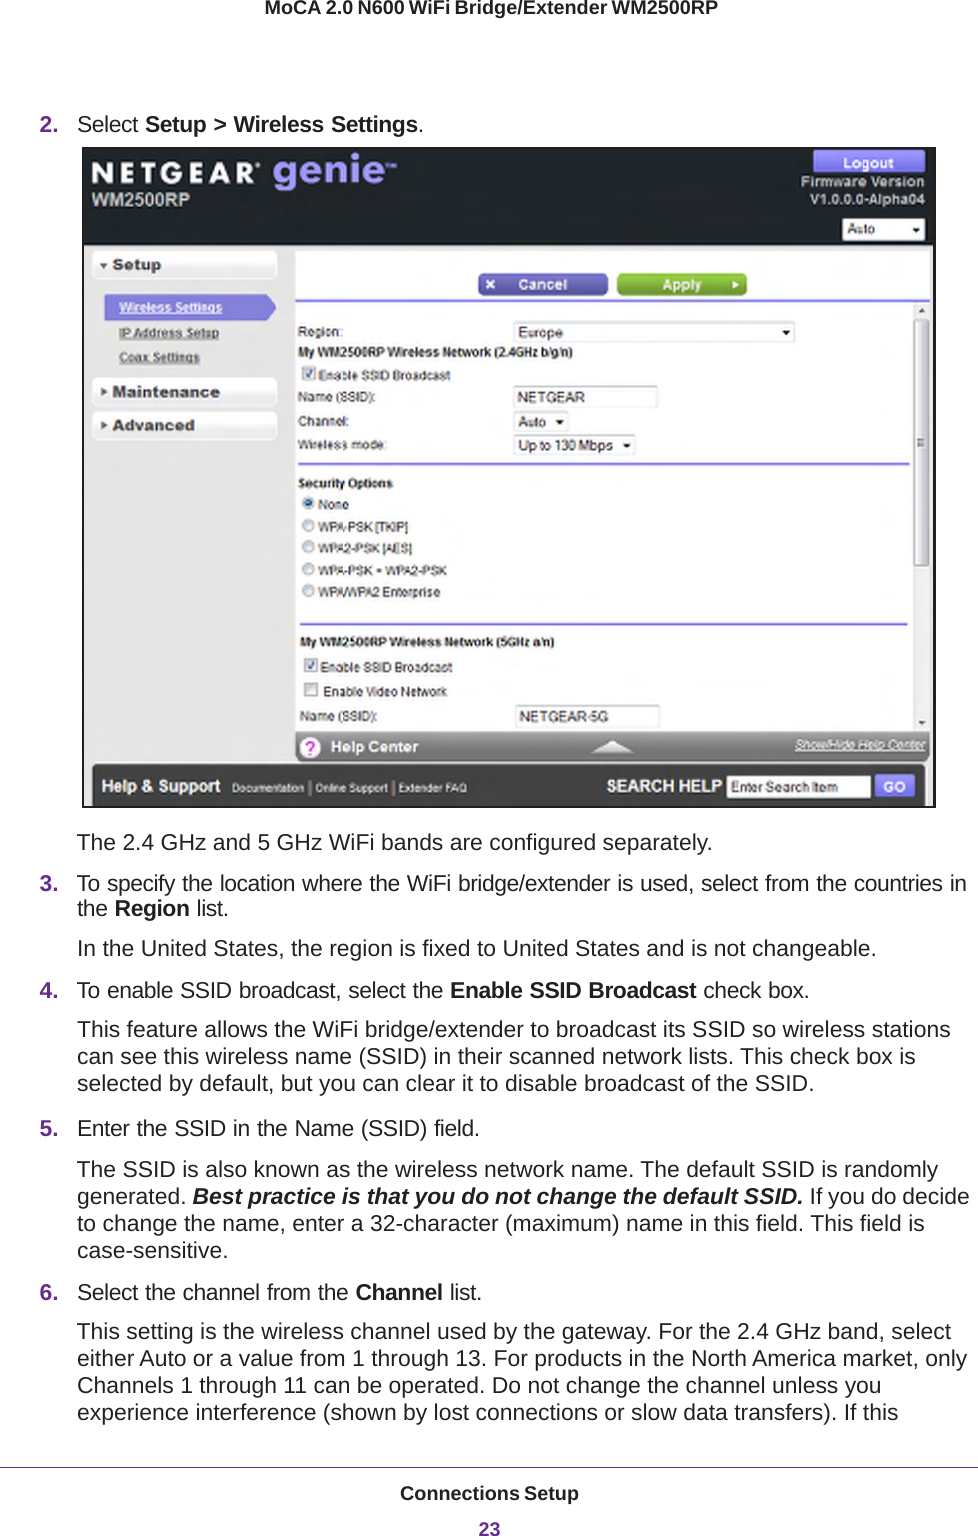
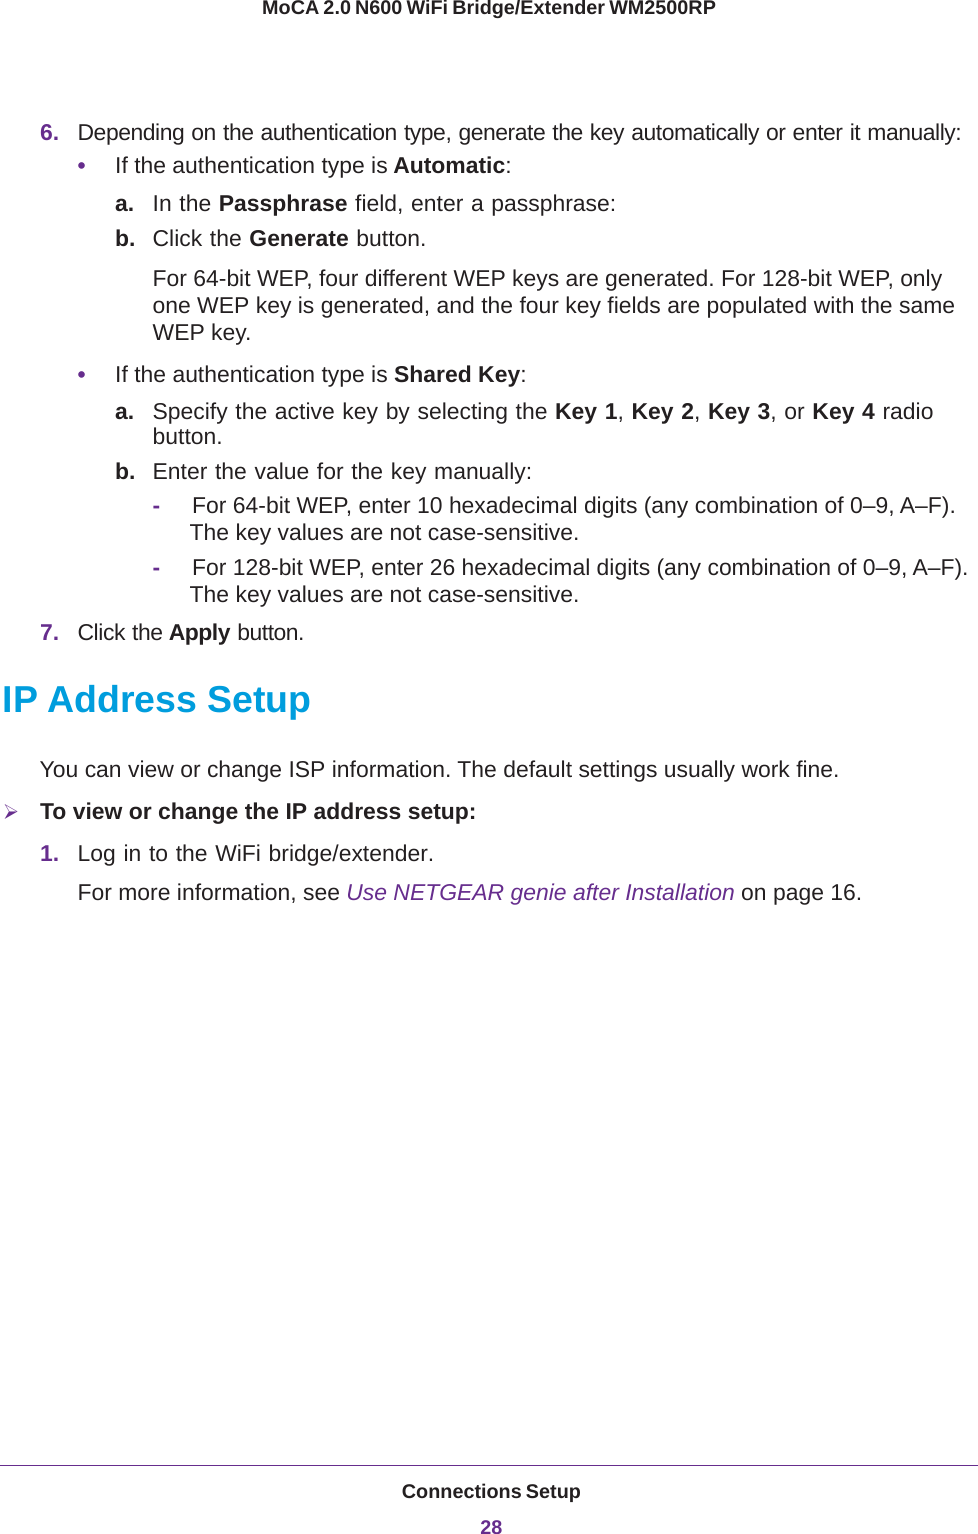
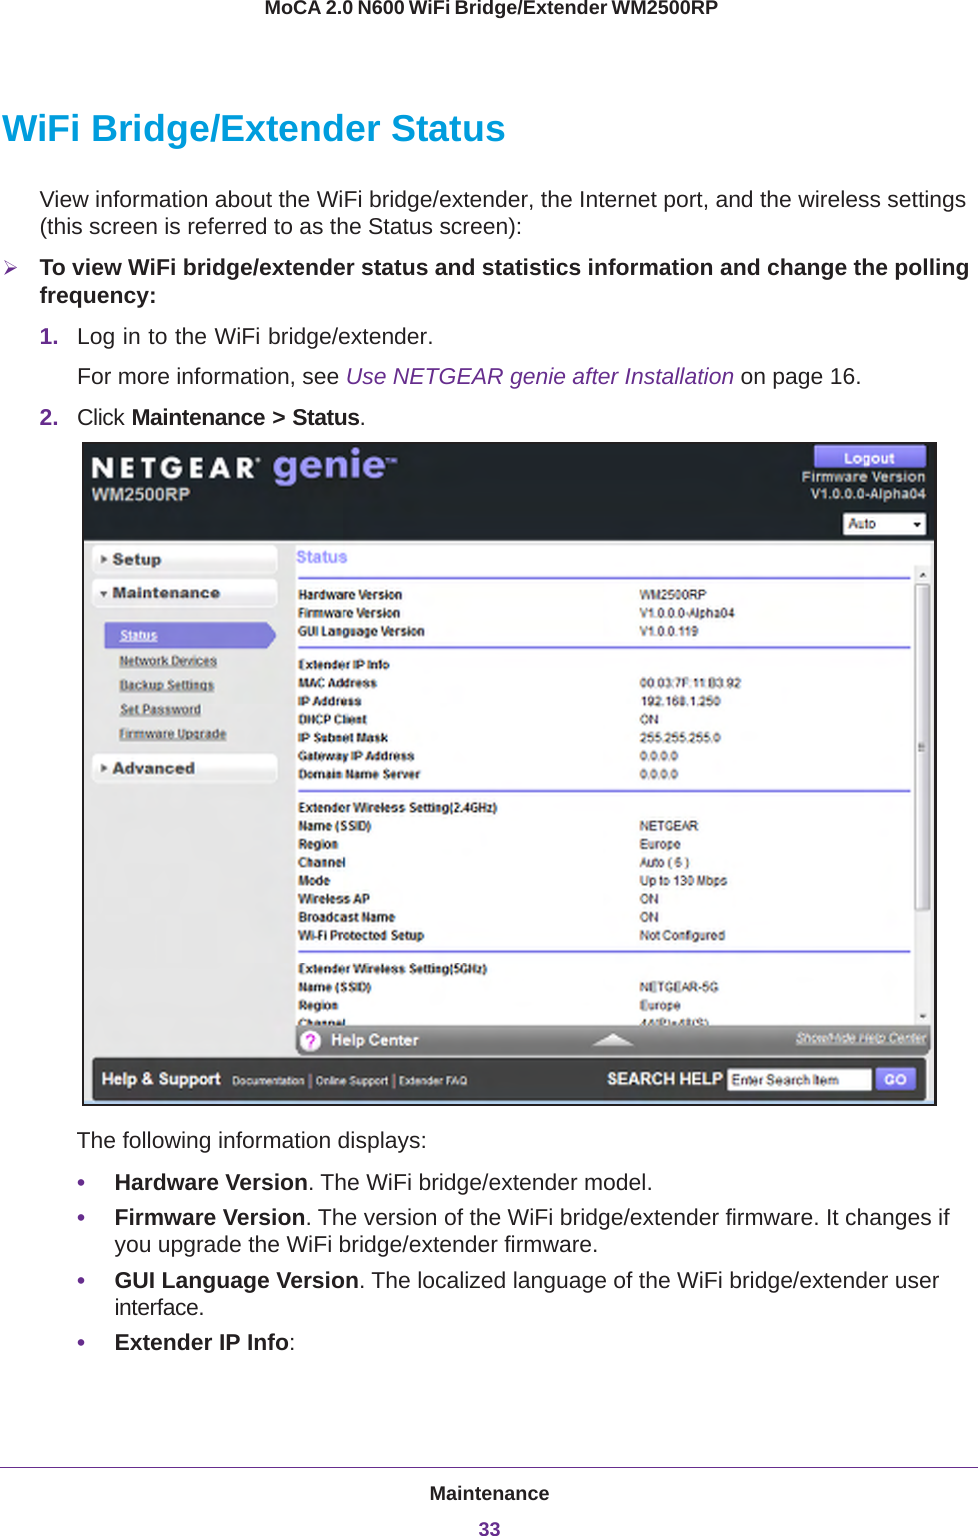
![Connections Setup25 MoCA 2.0 N600 WiFi Bridge/Extender WM2500RPWPA-PSK, WPA2-PSK, and WPA-PSK + WPA2-PSK Mixed ModeThese types of wireless security options use a pre-shared key (PSK), which is the same as a passphrase, wireless network password, or network key.You can select from the following wireless PSK security options:•WPA-PSK [TKIP]. Wi-Fi Protected Access (WPA) data encryption provides strong data security with Temporal Key Integrity Protocol (TKIP) encryption. This option supports speeds of up to 54 Mbps only.•WPA2-PSK [AES]. Wi-Fi Protected Access version 2 (WPA2) data encryption provides strong data security with Advanced Encryption Standard (AES) encryption. This setting is the preset wireless security that is enabled by default. WPA2 provides the most reliable security. This option supports speeds of up to 300 Mbps. If not all clients in your network support WPA2, select WPA-PSK + WPA2-PSK mixed mode.•WPA-PSK [TKIP] + WPA2-PSK [AES]. WPA-PSK + WPA2-PSK is referred to as mixed mode, which supports a combination of TKIP and AES encryption for both WPA and WPA2 clients. For WPA clients, this option supports speeds of up to 54 Mbps only. For WPA2 clients, this option supports speeds of up to 300 Mbps.•WPA/WPA2 Enterprise. This security option is not for home use but is typically used in a business or enterprise. For more information, see WPA/WPA2 Enterprise on page 26.To change the WPA wireless security option and passphrase:1. Log in to the WiFi bridge/extender.For more information, see Use NETGEAR genie after Installation on page 16.2. Select Setup > Wireless Settings.3. In the Security Options section, select one of the WPA options with PSK.4. In the associated Passphrase field, enter the passphrase that you want to use. The passphrase is a text string from 8 to 63 ASCII characters or exactly 64 hexadecimal digits. A hexadecimal digit is one of the following characters: 0, 1, 2, 3, 4, 5, 6, 7, 8, 9, A–F, or a–f.Wireless clients need to use the passphrase to access the wireless network through the WiFi bridge/extender.](https://usermanual.wiki/Netgear-orporated/14300289/User-Guide-2442406-Page-25.png)
![Connections Setup26MoCA 2.0 N600 WiFi Bridge/Extender WM2500RP 5. Click the Apply button.WPA/WPA2 EnterpriseThis security option is not for home use but is typically used in a business or enterprise. WPA/WPA2 Enterprise does not use a passphrase but supports 802.1x authentication, which requires an internal or external RADIUS server. A Remote Authentication Dial In User Service (RADIUS) server provides Authentication, Authorization, and Accounting (AAA) management to grant (or deny) computers access to your wireless network.WPA/WPA2 Enterprise can support WPA [TKIP] for WPA clients only, WPA2 [AES] for WPA2 clients only, and WPA [TKIP] + WPA2 [AES]. WPA [TKIP] + WPA2 [AES] is a combination of TKIP and AES encryption for both WPA and WPA2 clients. WPA clients are supported at speeds of up to 54 Mbps only. WPA2 clients are supported at speeds of up 300 Mbps.WPA/WPA2 Enterprise supports five Extensible Authentication Protocol (EAP) authentication methods: EAP-TLS, EAP-TTLS/MSCHAPv2, PEAPv0/EAP-MSCHAPv2, PEAPv1/EAP-GTC, and EAP-SIM.To configure WPA/WPA2 Enterprise security:1. Log in to the WiFi bridge/extender.For more information, see Use NETGEAR genie after Installation on page 16.2. Select Setup > Wireless Settings.3. In the Security Options section, select the WPA/WPA2 Enterprise radio button.4. Select the WPA mode (WPA [TKIP], WPA2 [AES], or WPA [TKIP] + WPA2 [AES]).5. Type the IP address of the RADIUS server.The address can be on your LAN or it can be an external address.6. Enter the port number for the RADIUS server in the range from 1 to 65535.The default number is 1812.7. Type the shared secret, which must be from 1 through 128 characters (the default value is blank). The shared secret is case-sensitive.](https://usermanual.wiki/Netgear-orporated/14300289/User-Guide-2442406-Page-26.png)