Netgear orporated 14400297 ADSL2+ Modem Router User Manual 2015 rev 3
Netgear Incorporated ADSL2+ Modem Router 2015 rev 3
UserManual.wiki
>
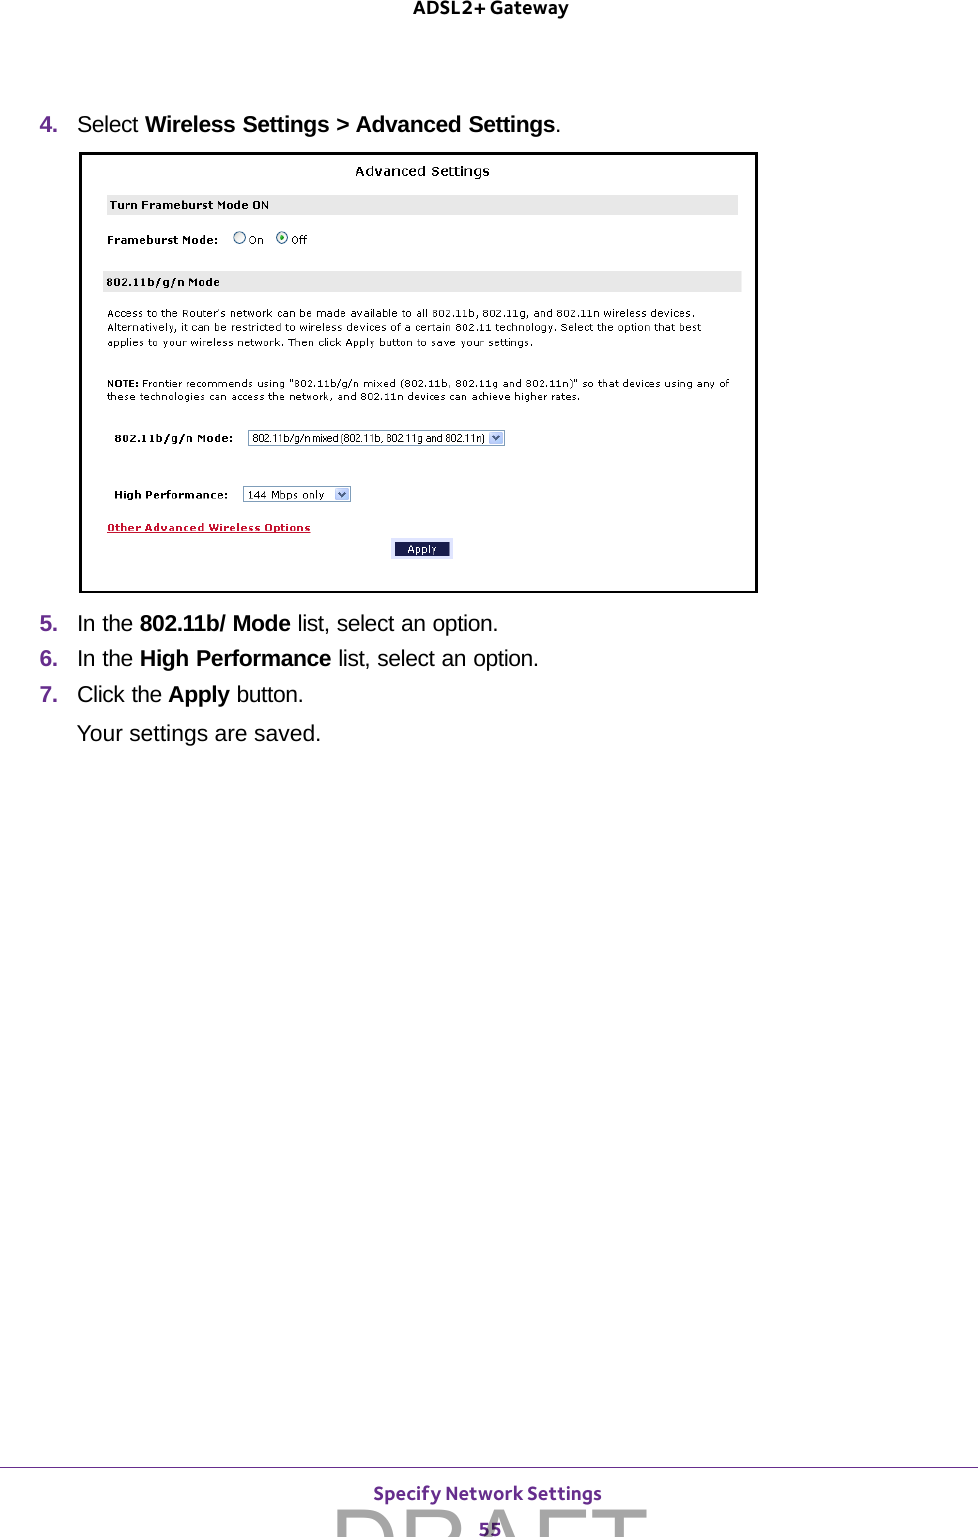
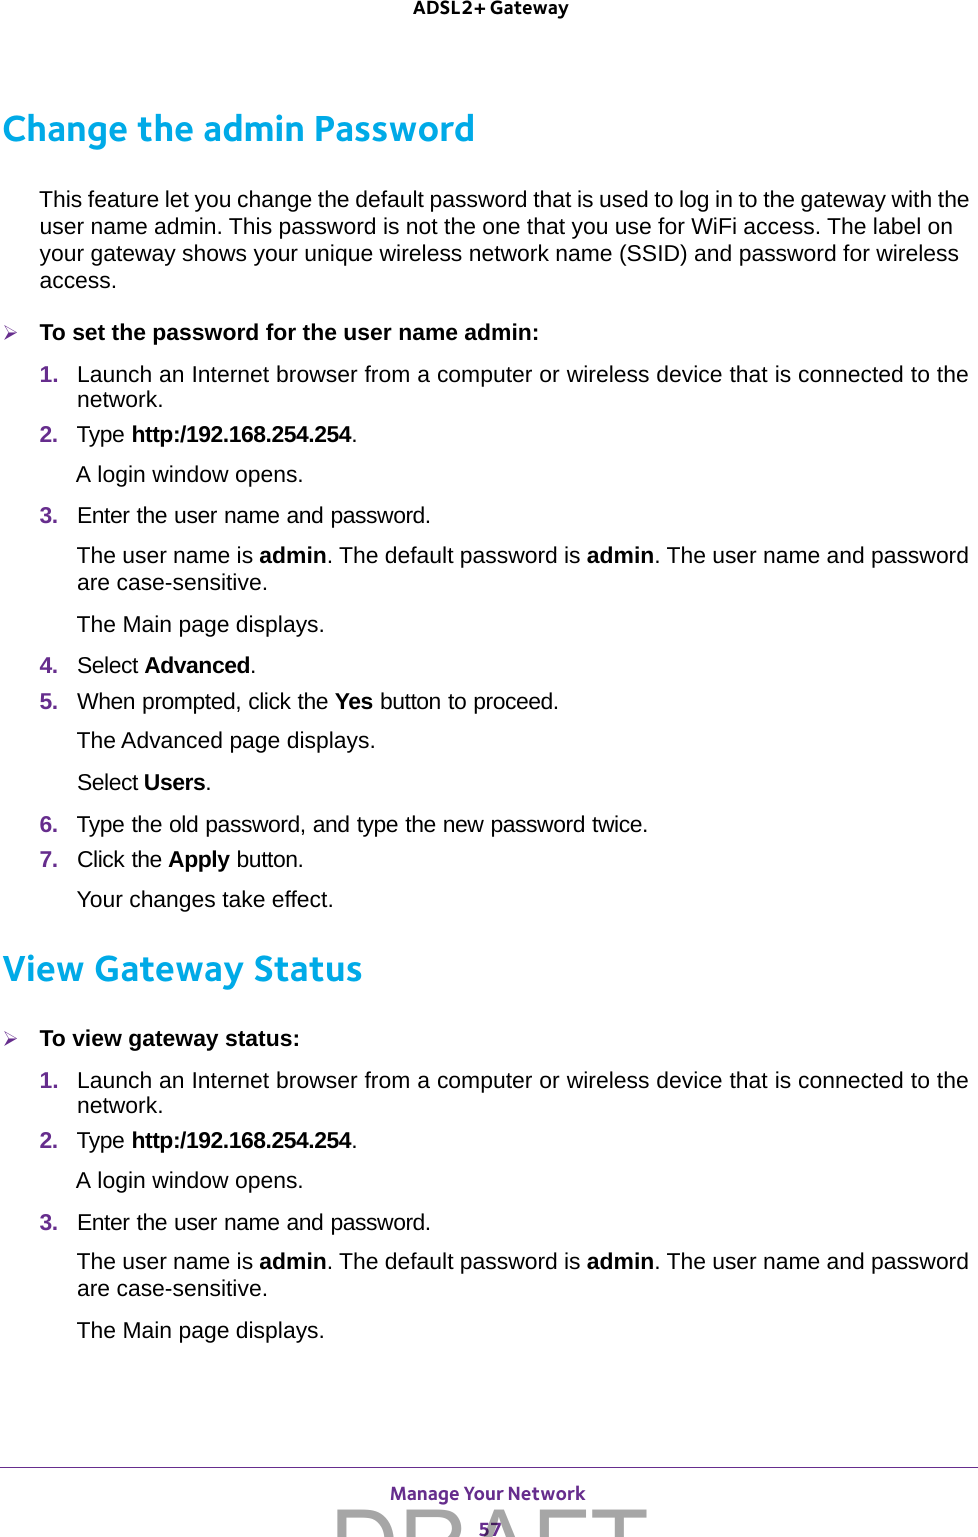
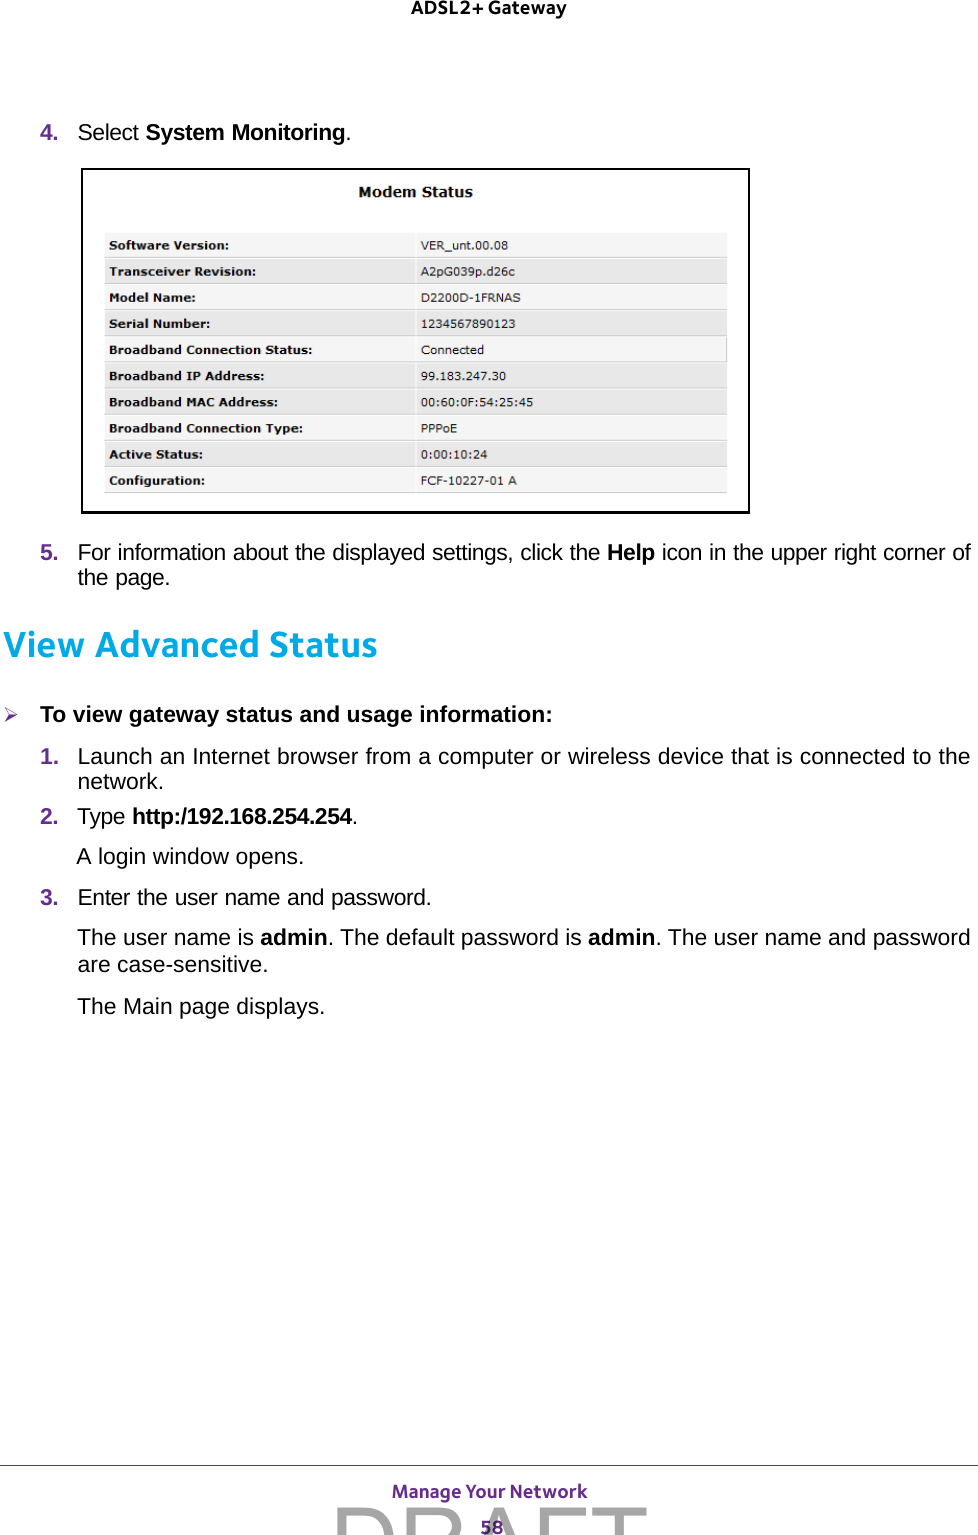
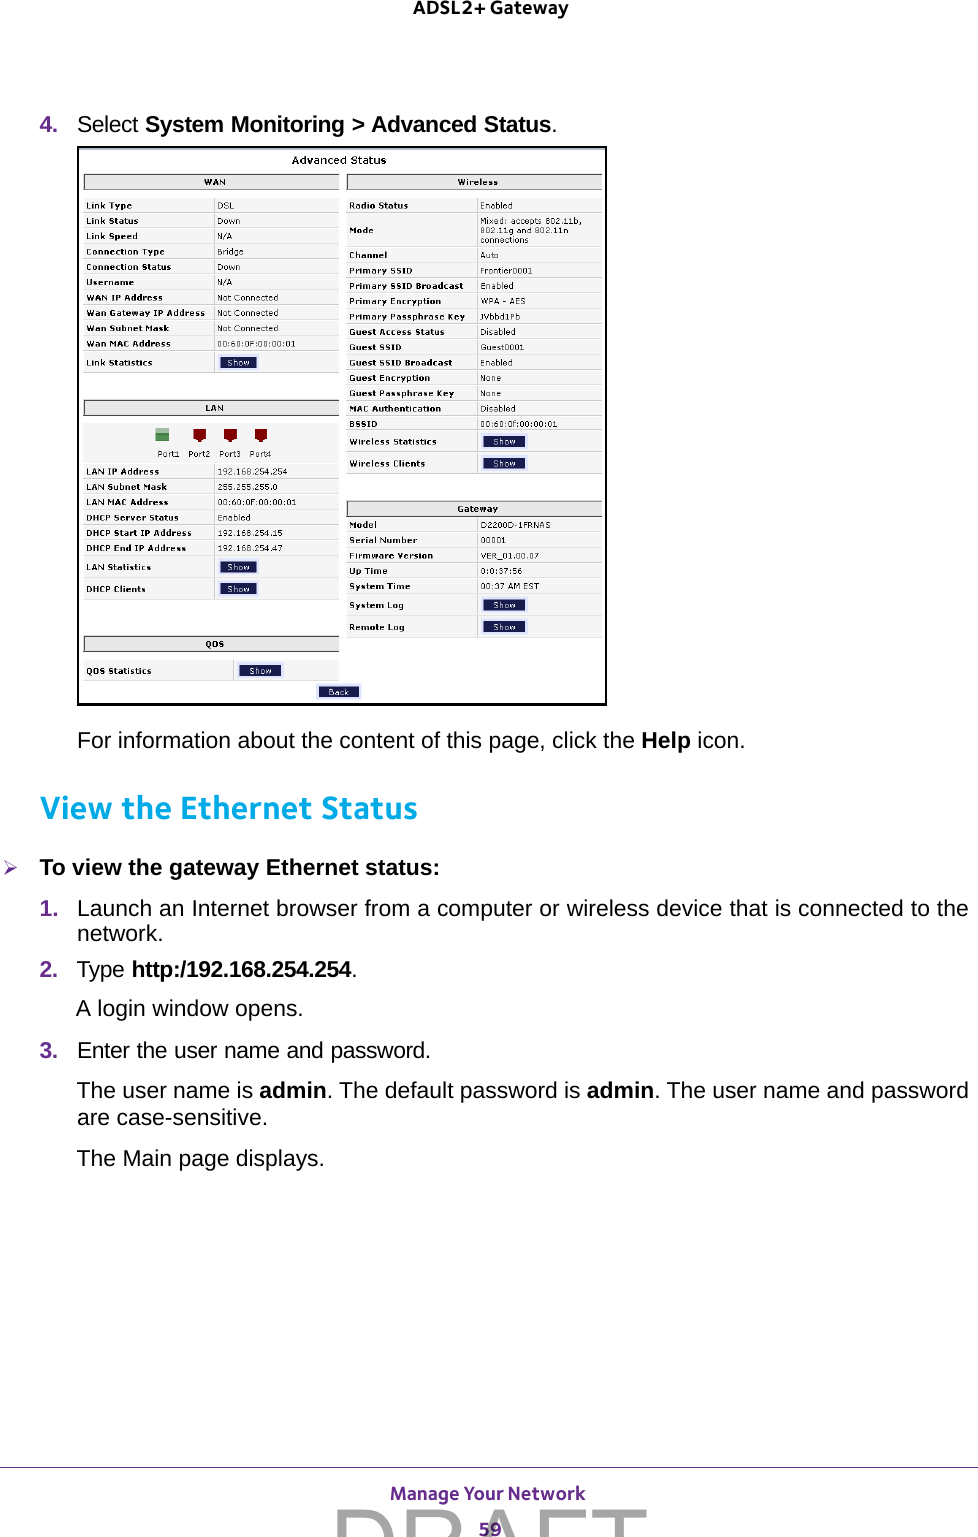
Netgear orporated
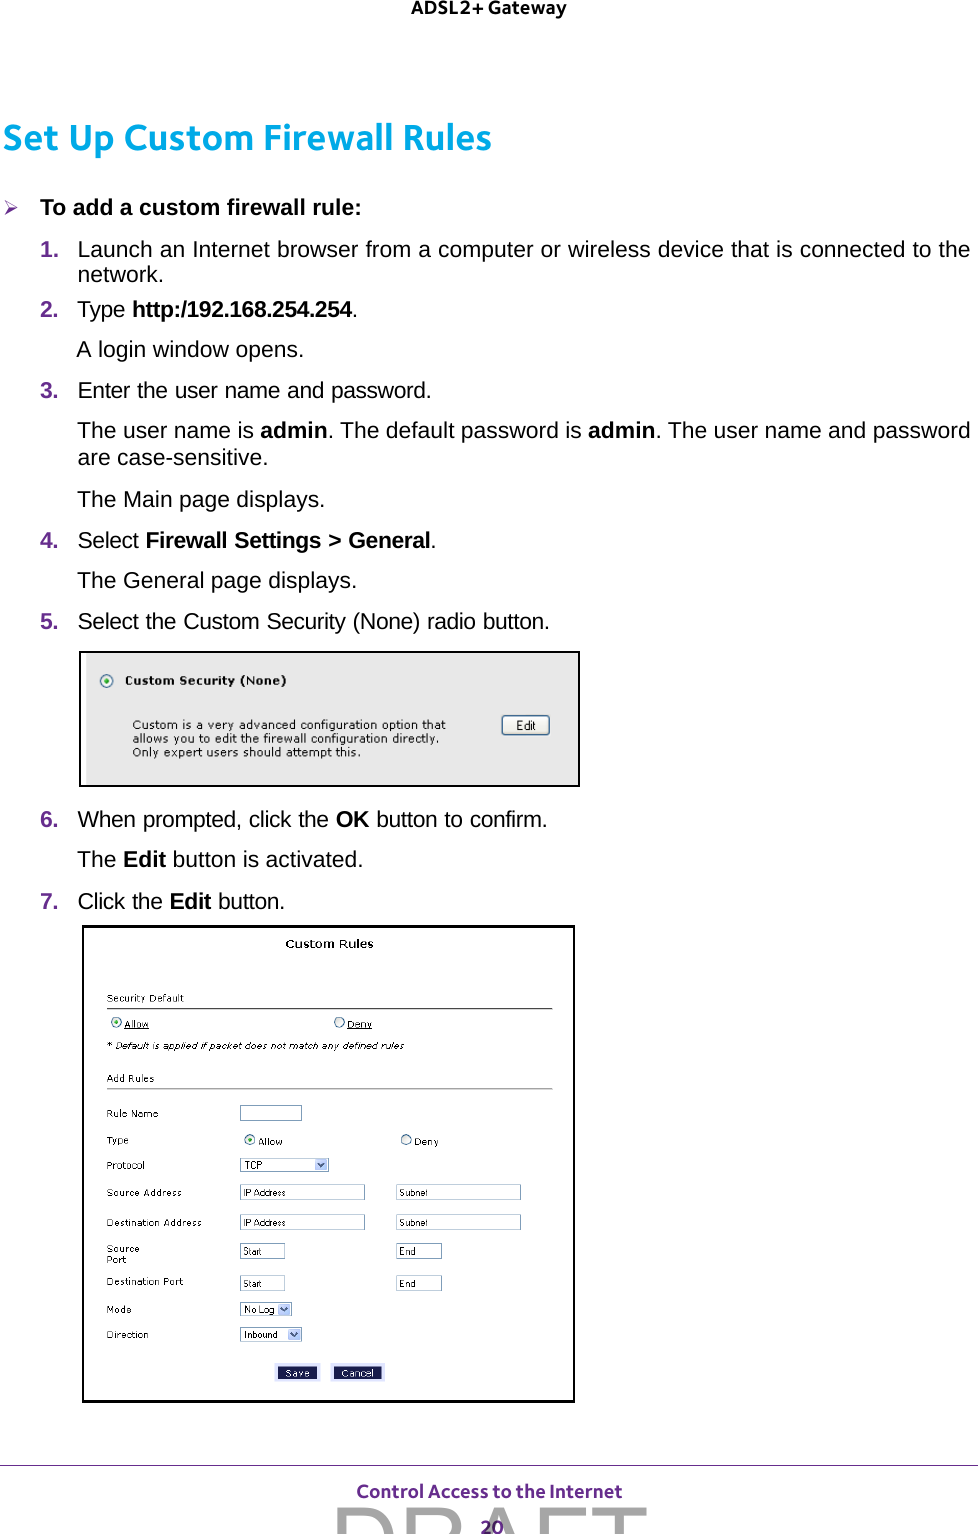
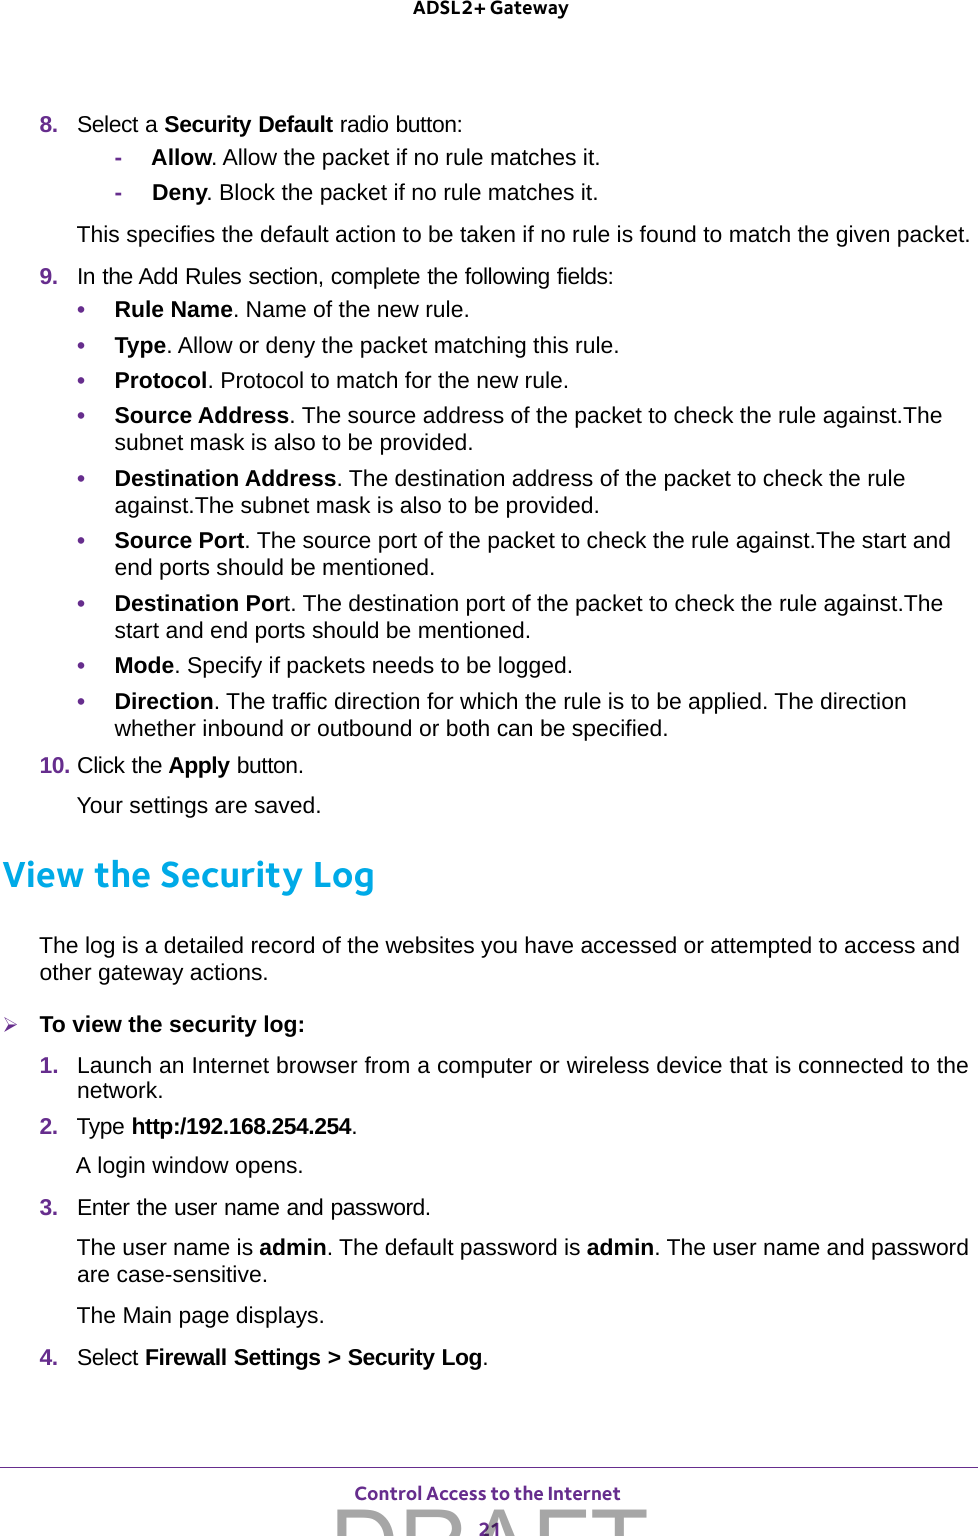
>
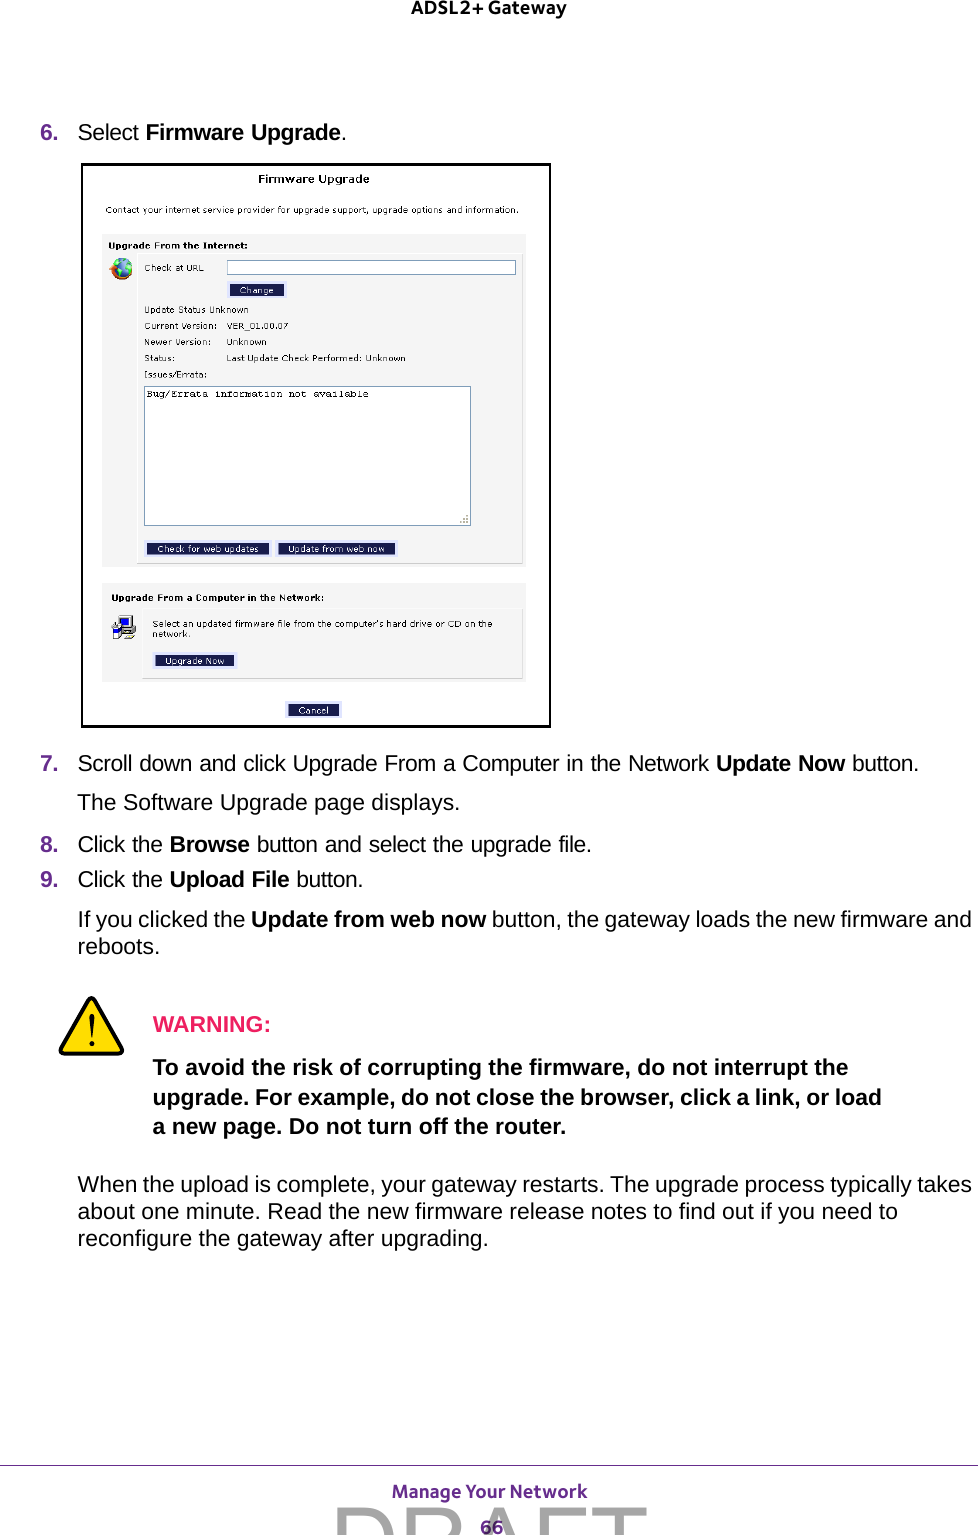
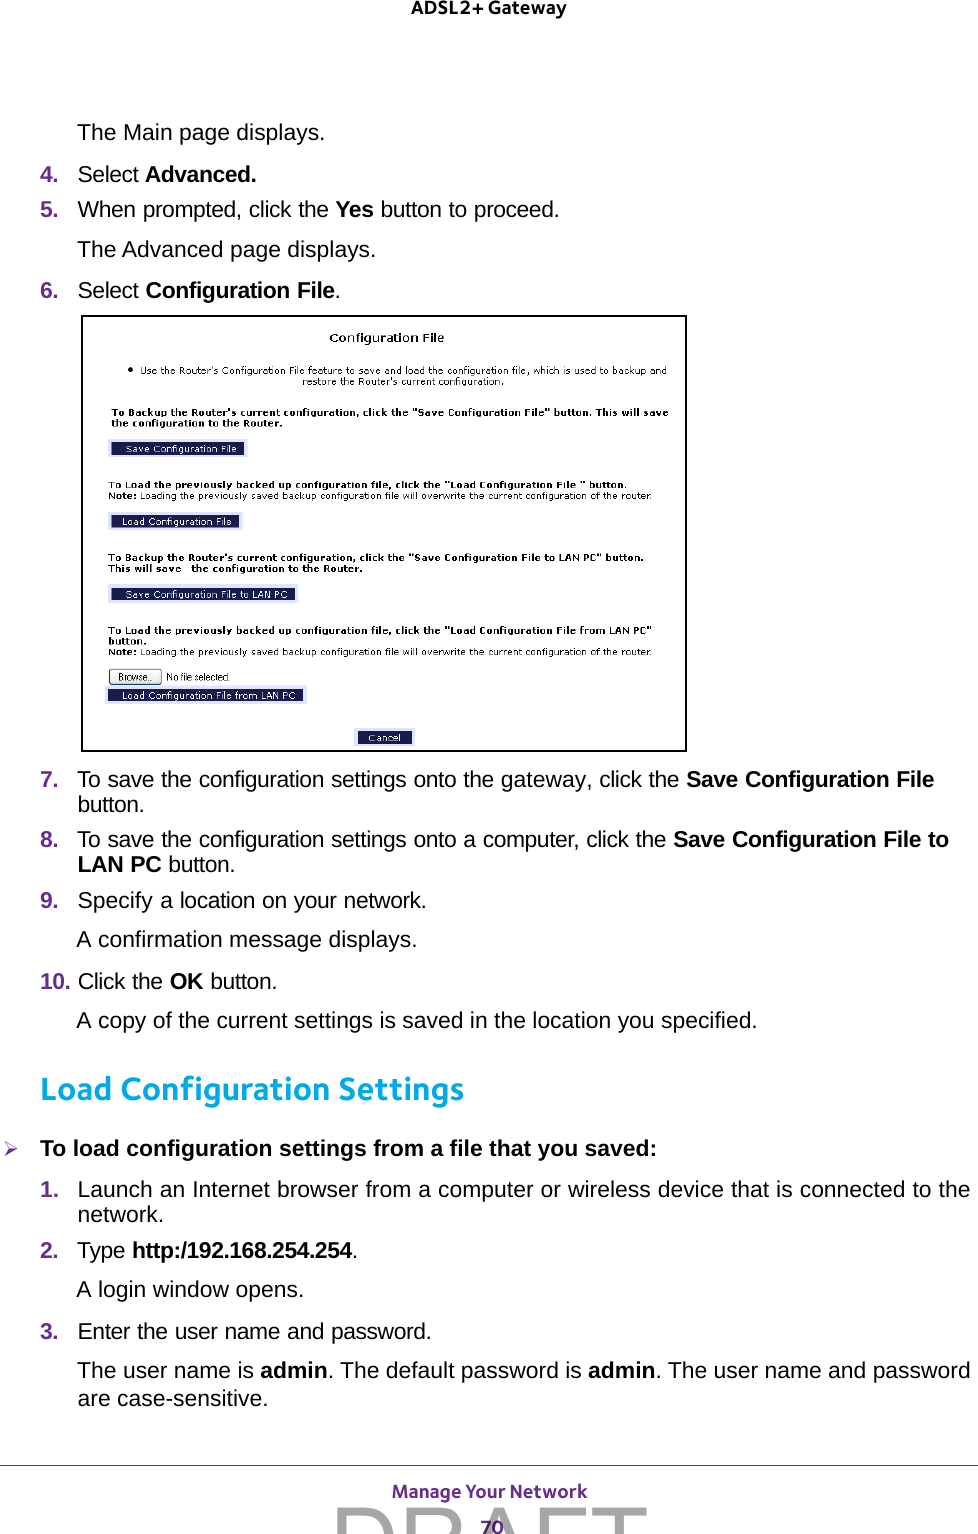
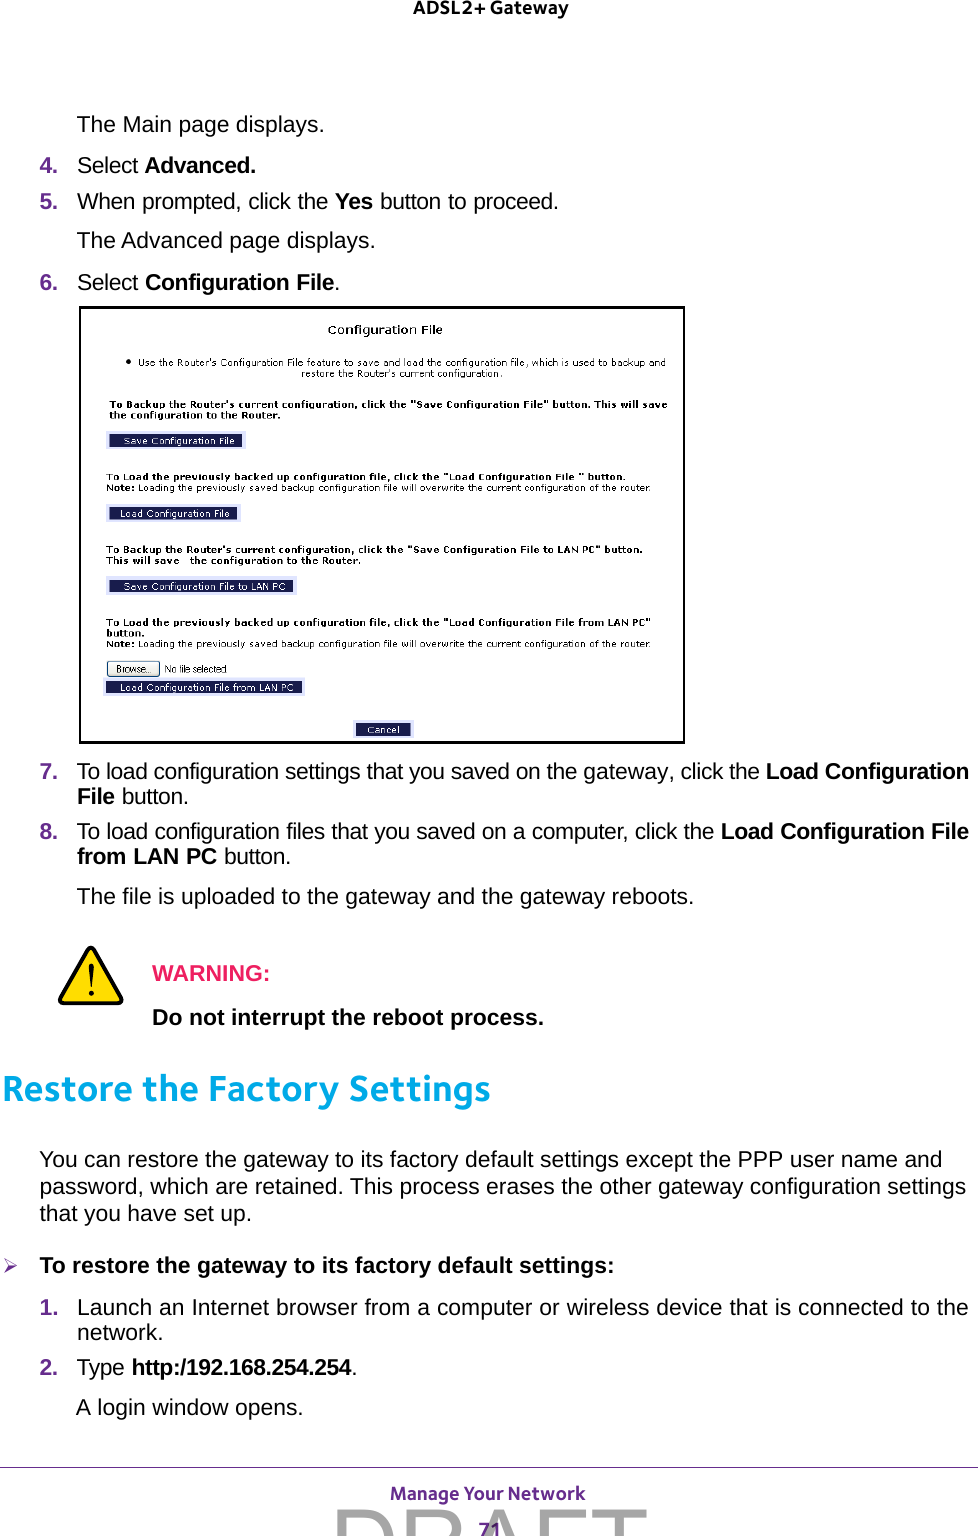
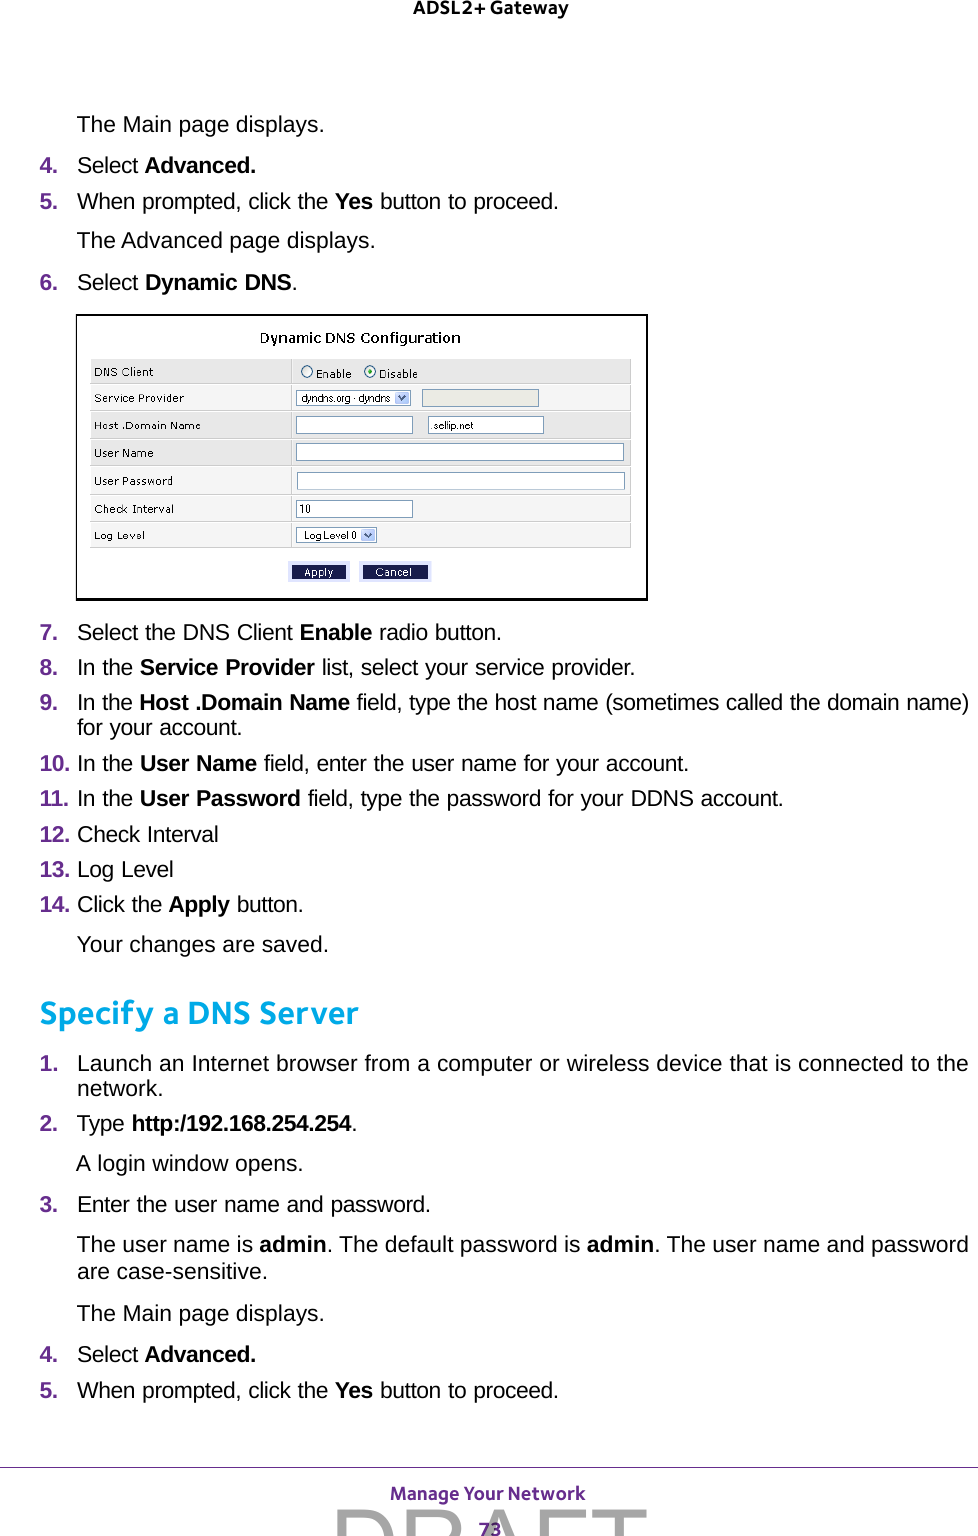
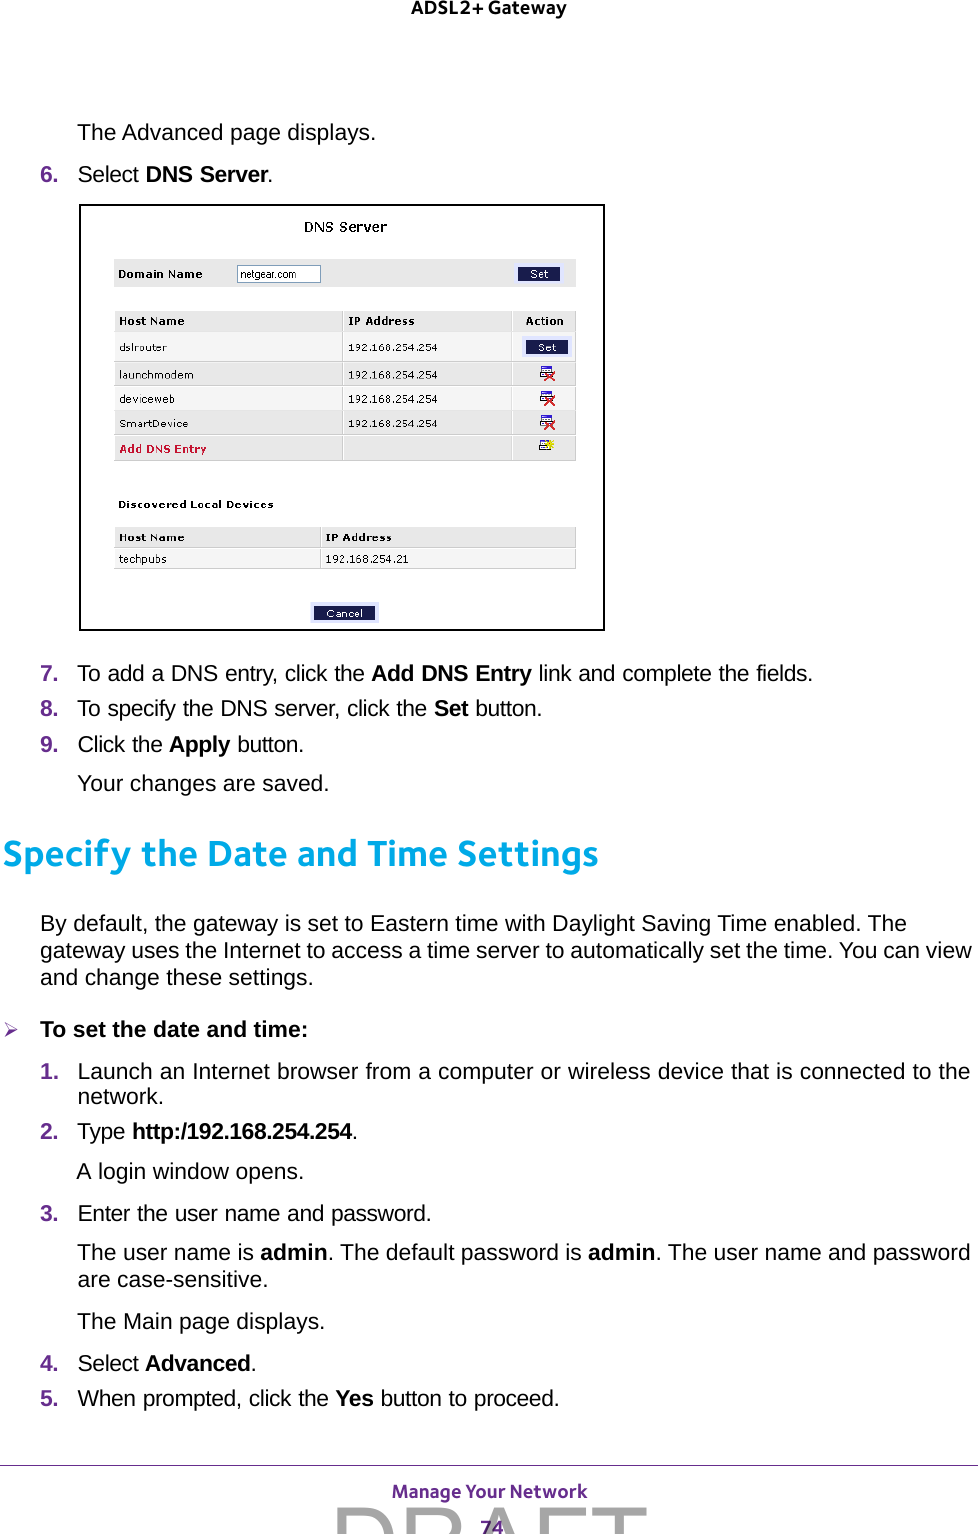
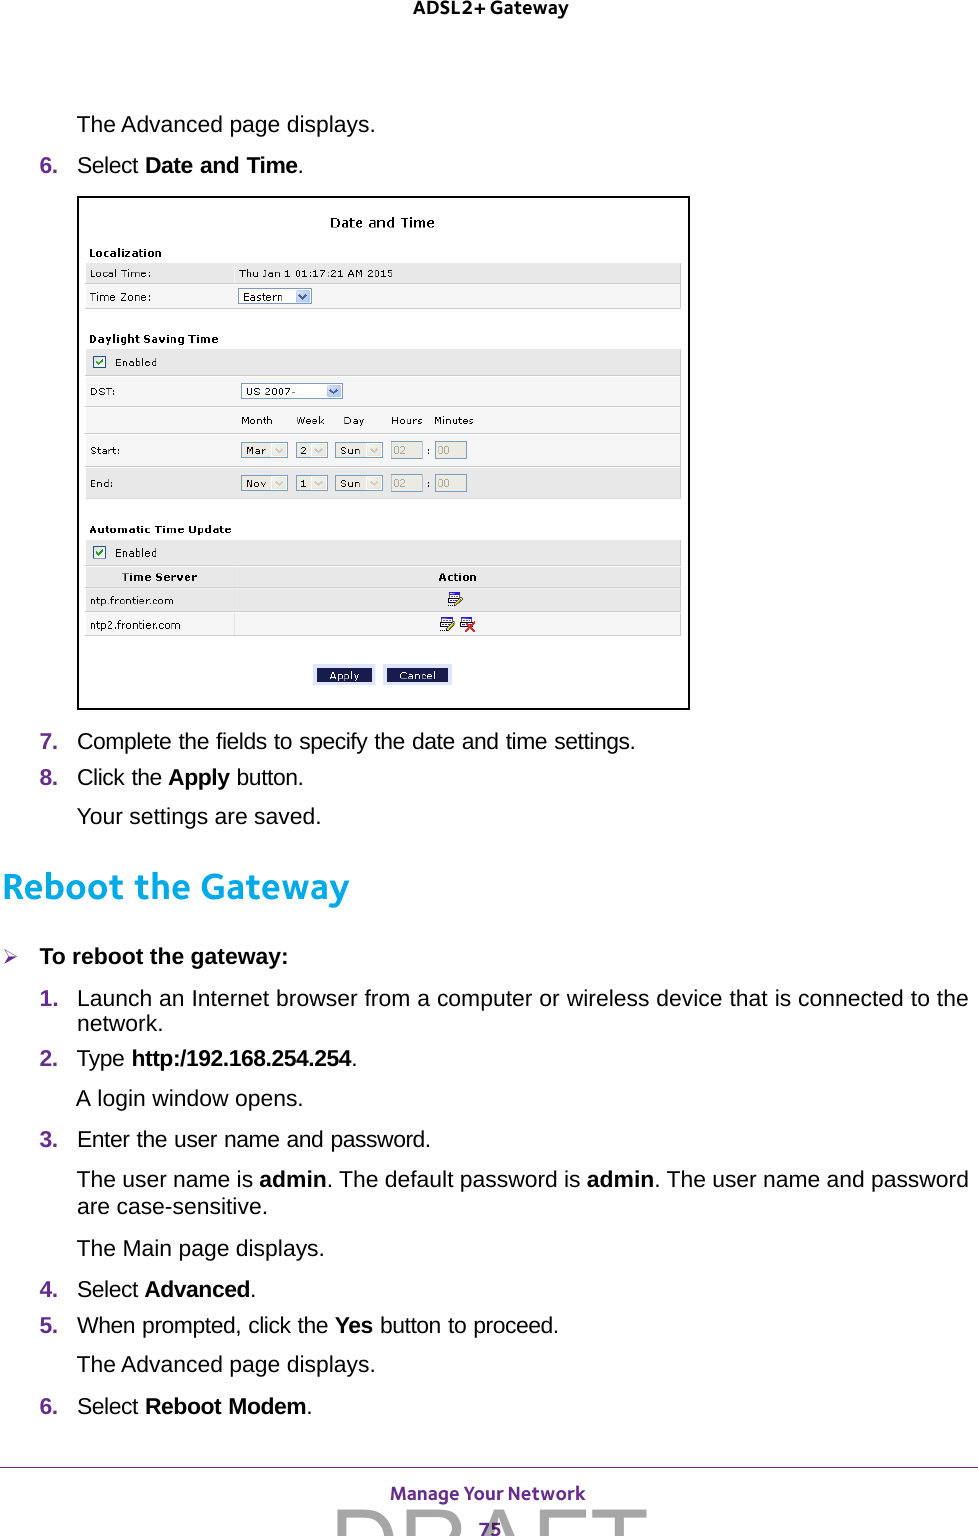
14400297 User Manual
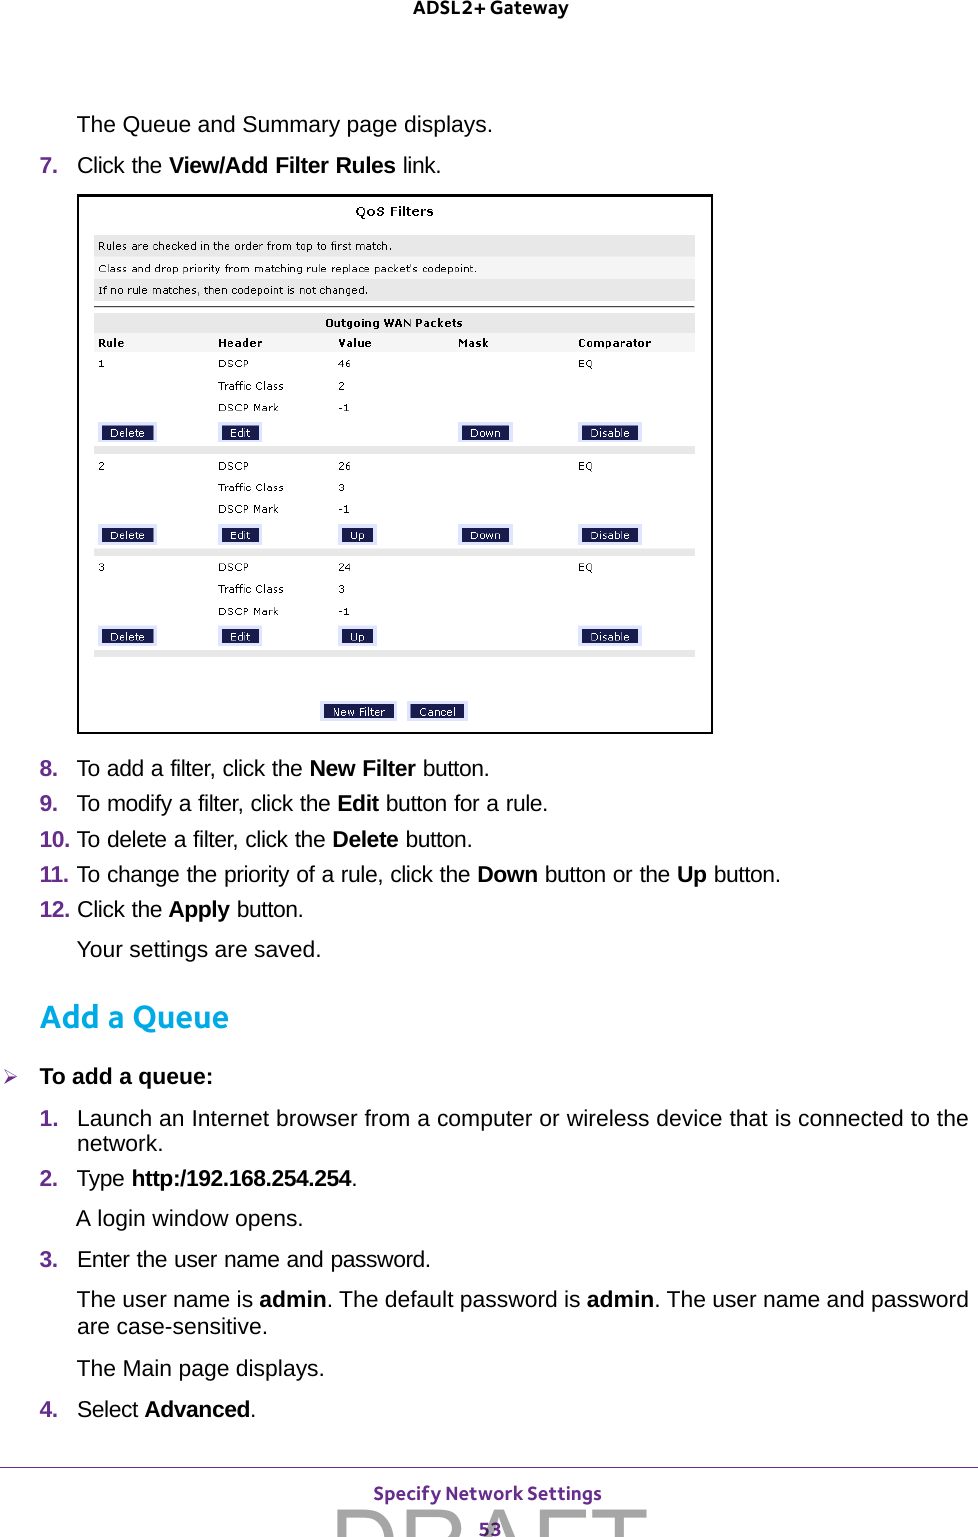
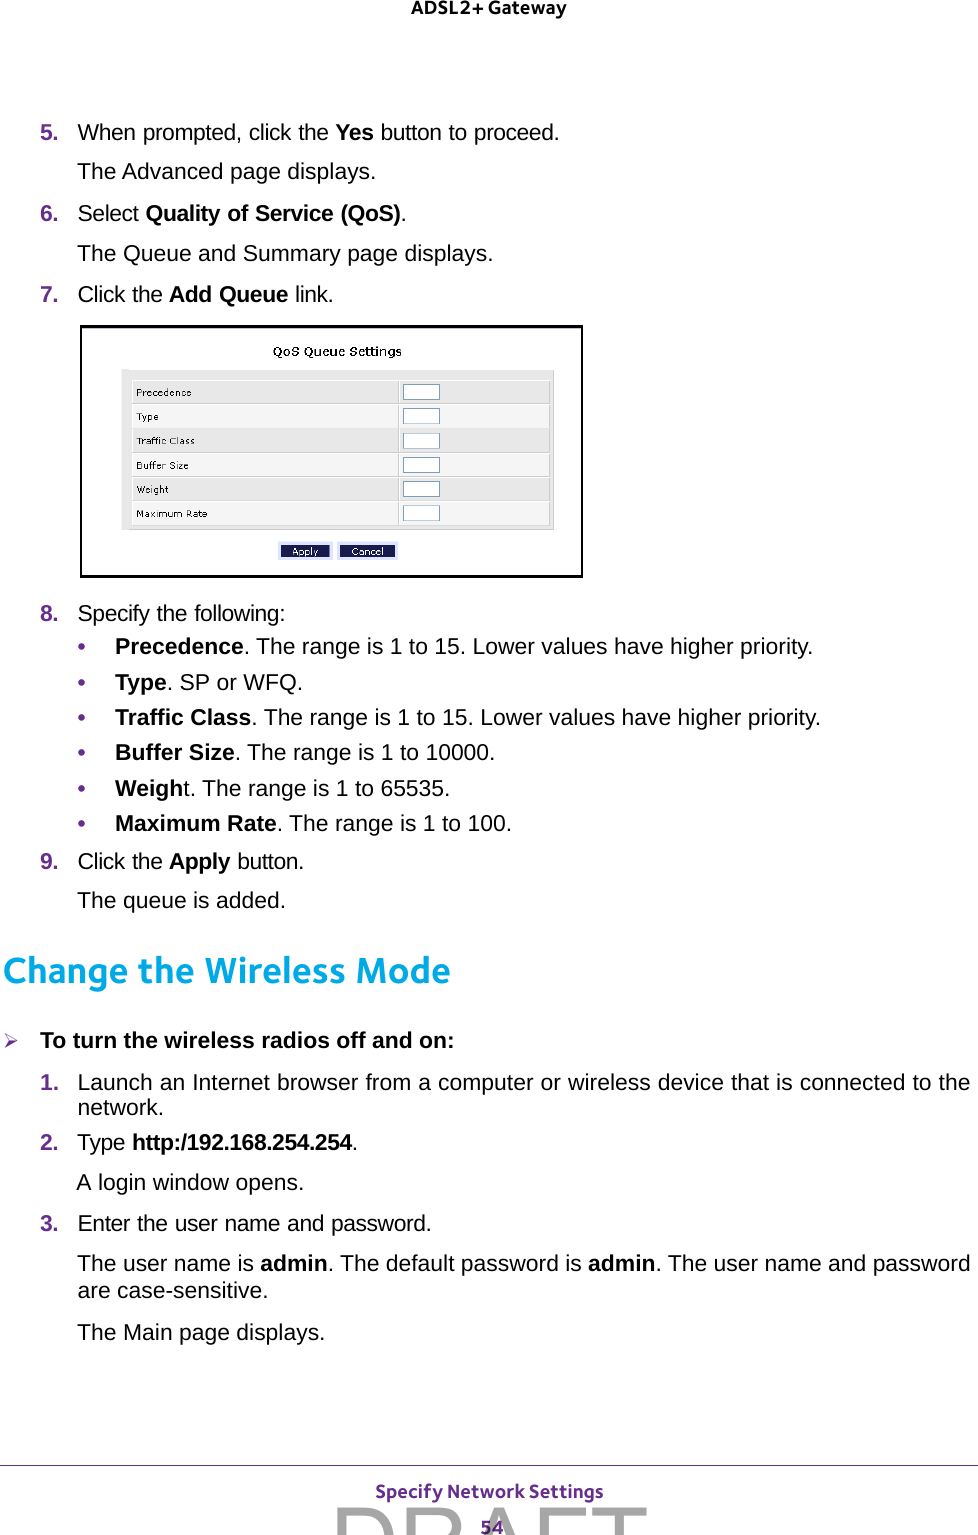
User manual 2015_rev 3.pdf
Navigation menu
Upload a User Manual
Namespaces
Wiki Guide
HTML
PDF
Info
Views
User Manual
Discussion / Help
Navigation

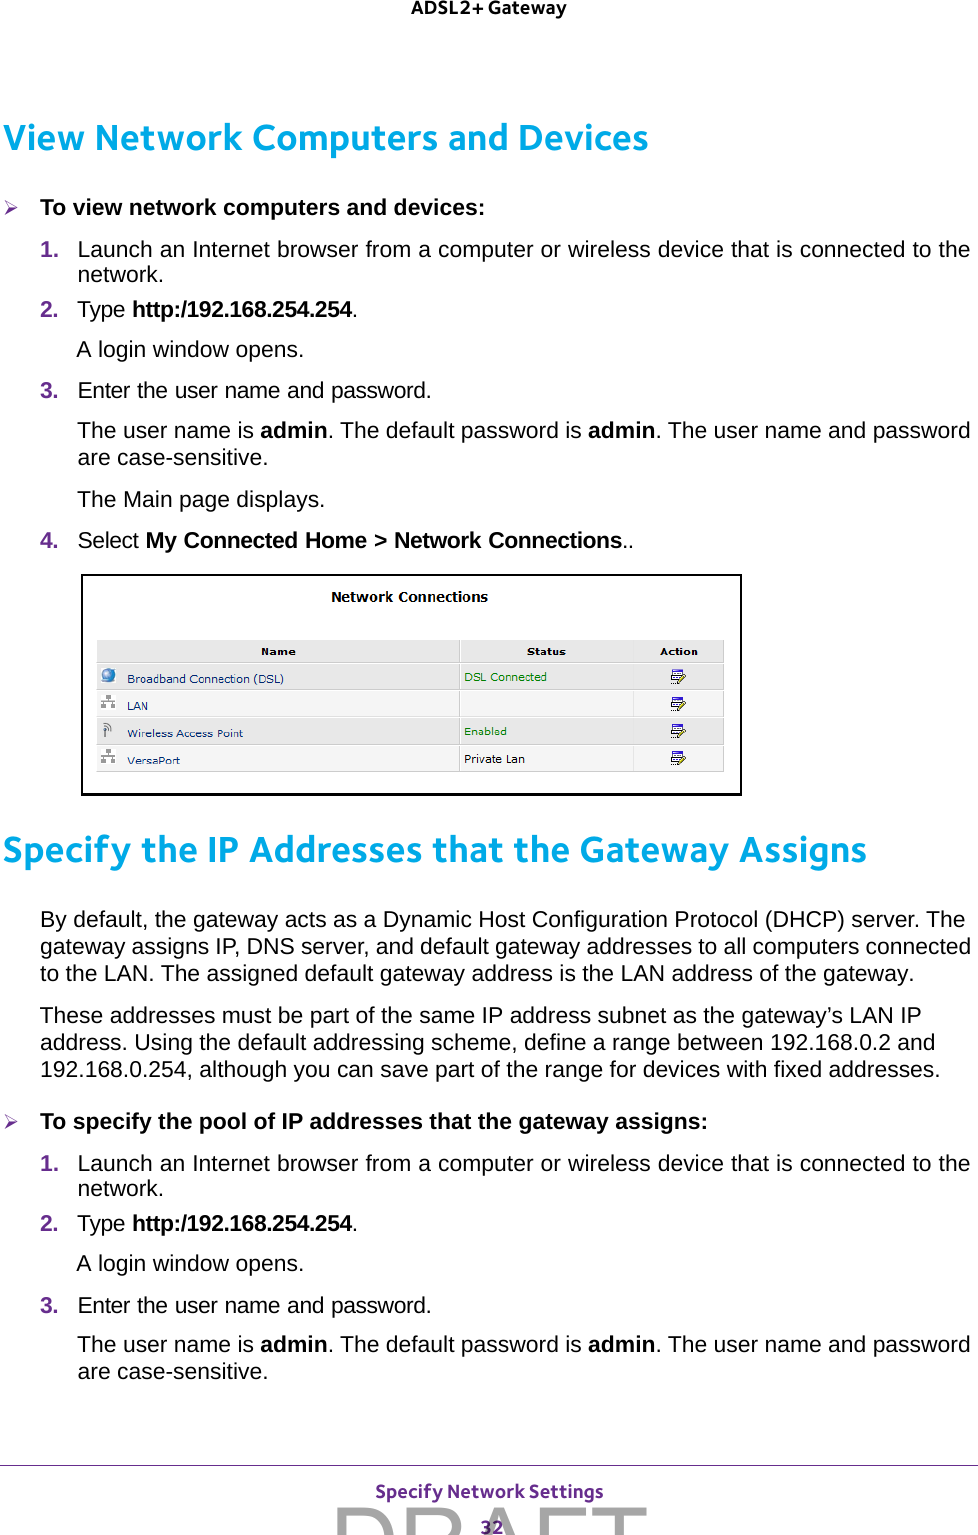
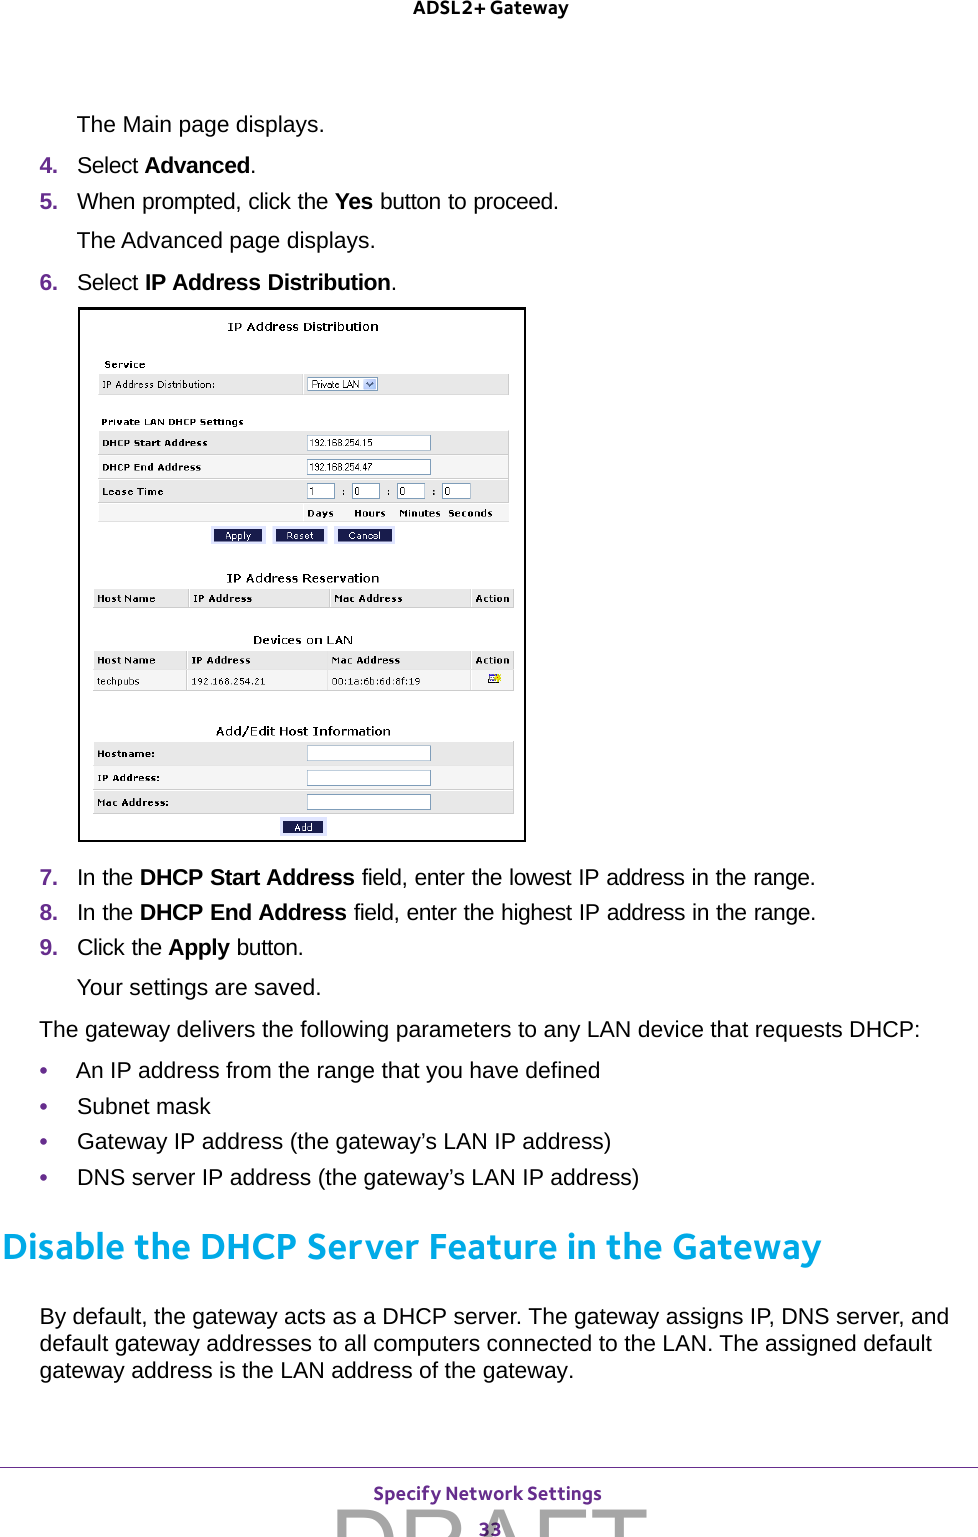
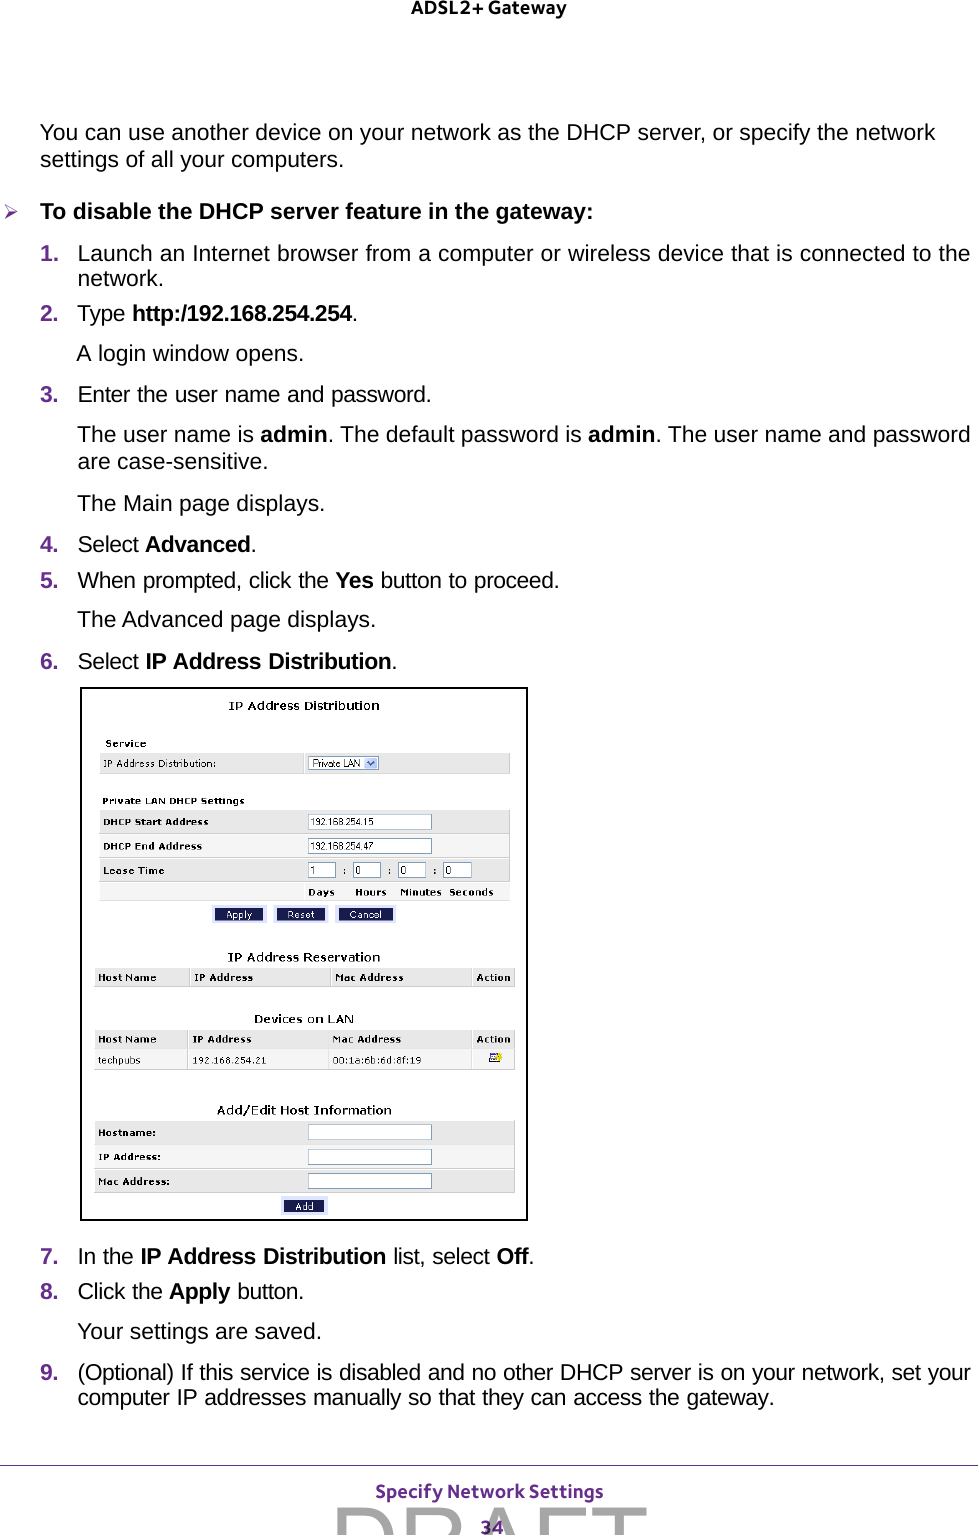
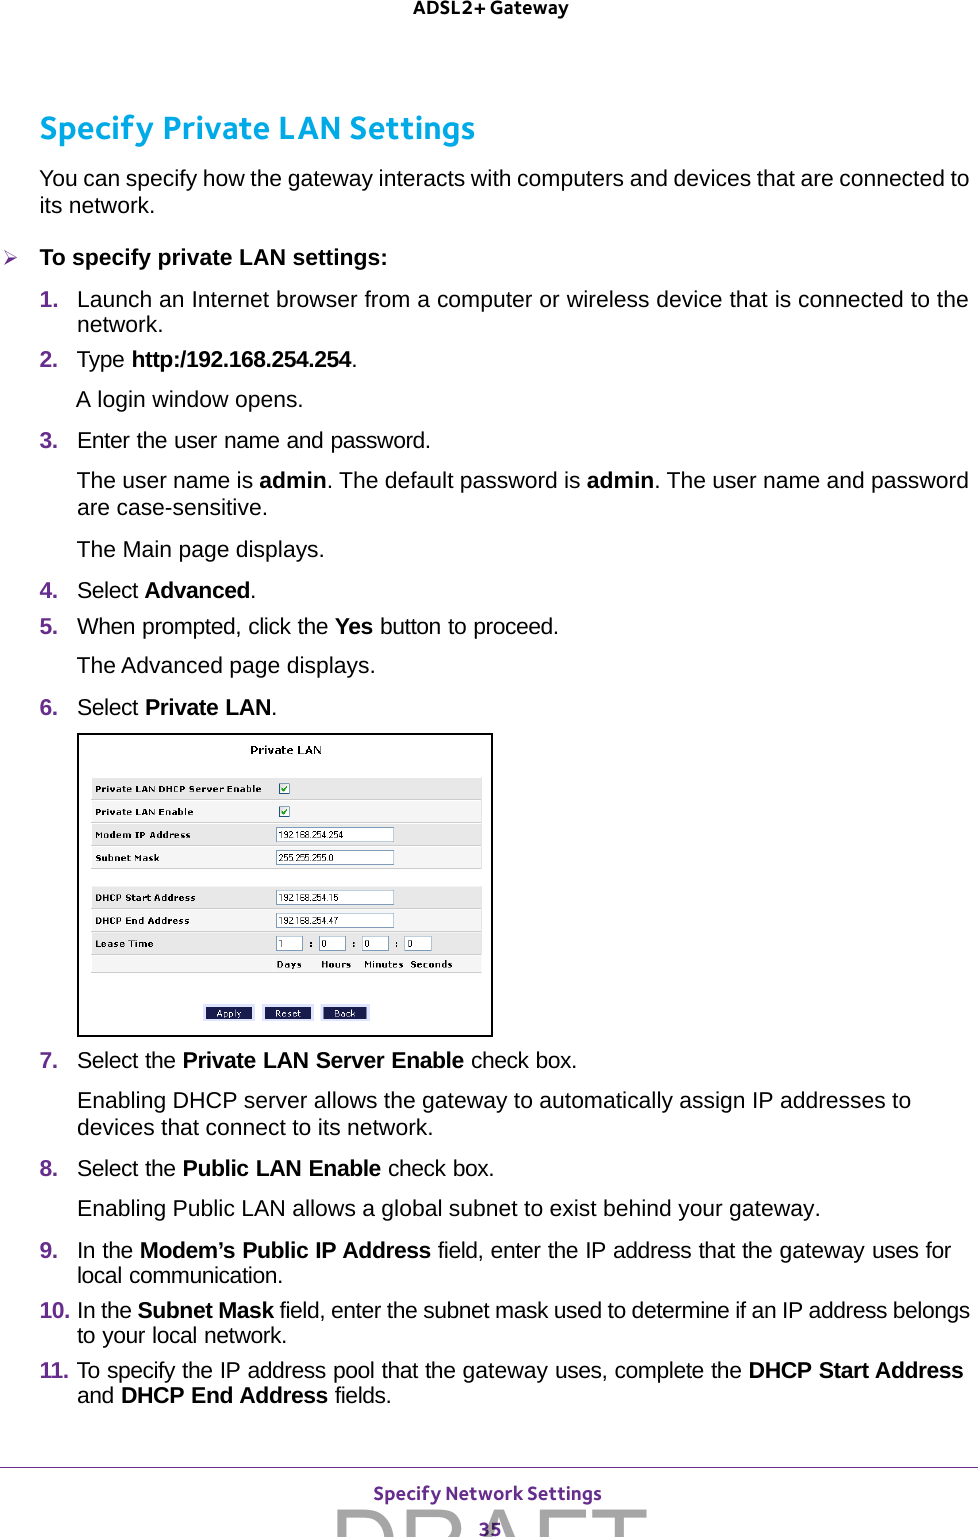
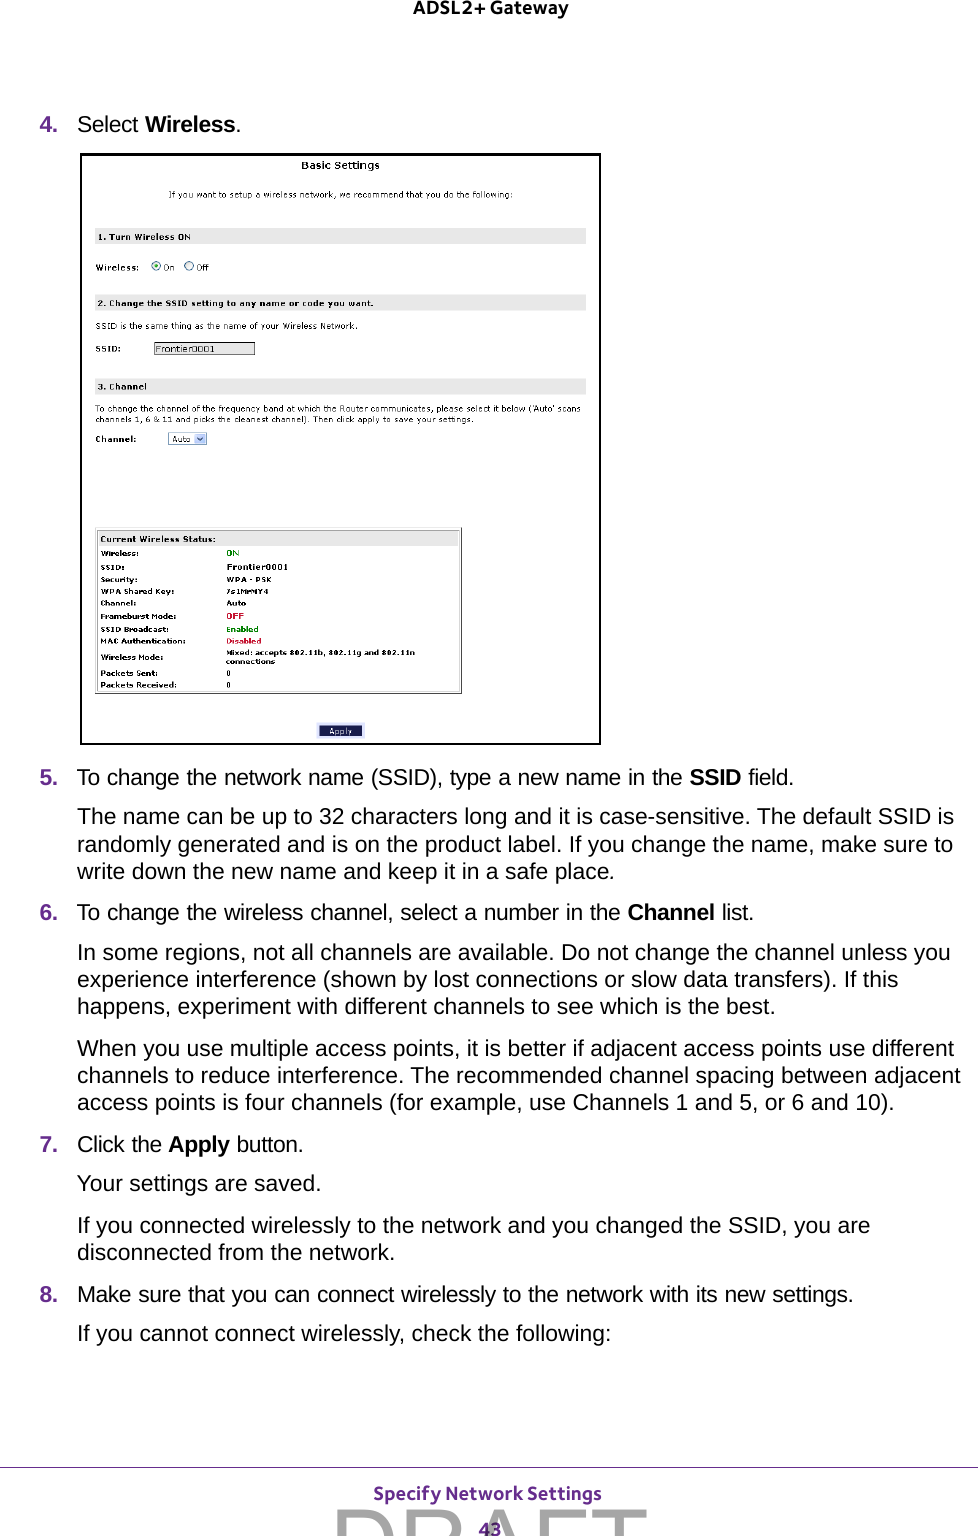
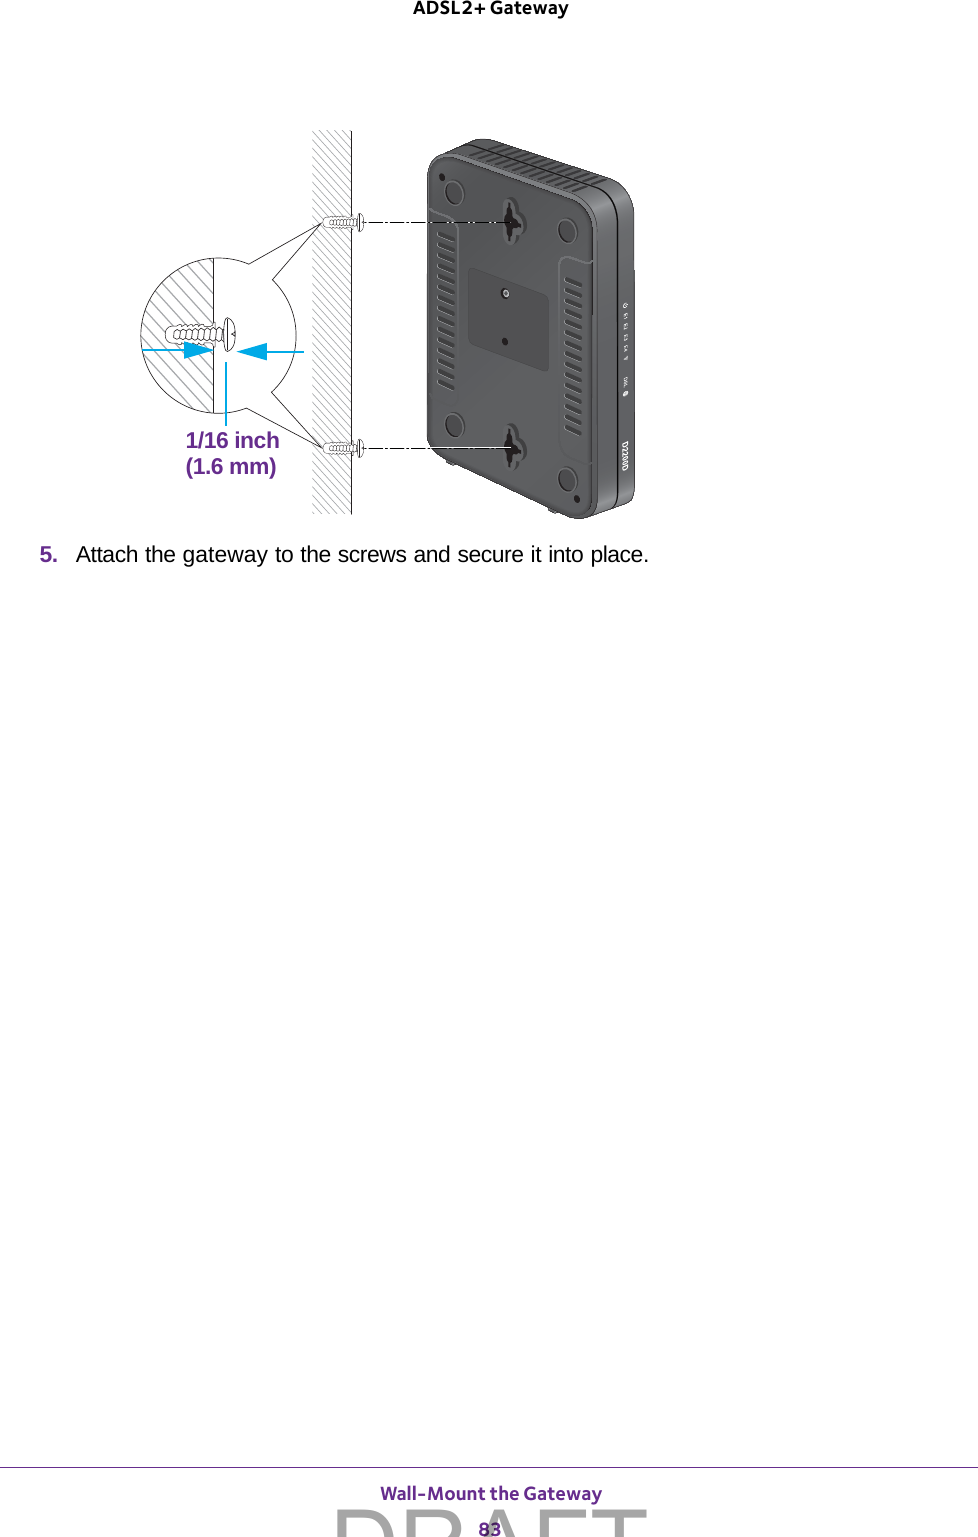
![Specify Network Settings 48ADSL2+ Gateway 4. Select Guest Network.5. Select any of the following wireless settings:•Enable Guest Network. When this check box is selected, the guest network is enabled, and guests can connect to your network using the SSID of this profile.•Enable SSID Broadcast. If this check box is selected, the wireless access point broadcasts its name (SSID) to all wireless stations. Stations with no SSID can adopt the correct SSID for connections to this access point.•Allow guest to see each other and access my local network. If this check box is selected, anyone who connects to this SSID has access to your local network, not just Internet access.6. Give the guest network a name.The guest network name is case-sensitive and can be up to 32 characters. You then manually configure the wireless devices in your network to use the guest network name in addition to the main SSID. 7. Select a radio button for a security option. The WPA2 options use the newest standard for the strongest security, but some older computers and wireless devices cannot use it. NETGEAR recommends that you select the WPA-PSK [TKIP] + WPA2-PSK [AES] radio button. This setting protects your WiFi network and lets computers and wireless devices can connect to the WiFi network by using either WPA2 or WPA security.8. Click the Apply button. Your settings are saved.DRAFT](https://usermanual.wiki/Netgear-orporated/14400297/User-Guide-2680448-Page-48.png)