Netgear orporated AC771S Mobile Hotspot User Manual 2400307 AC771S User Guide FCC 31May2013 optimized
Netgear Incorporated Mobile Hotspot 2400307 AC771S User Guide FCC 31May2013 optimized
UserManual.wiki
>
Netgear orporated
>
AC771S User Manual
2400307 AC771S User Guide (FCC) - 31May2013 (optimized)
Navigation menu
Upload a User Manual
Namespaces
Wiki Guide
HTML
PDF
Info
Views
User Manual
Discussion / Help
Navigation


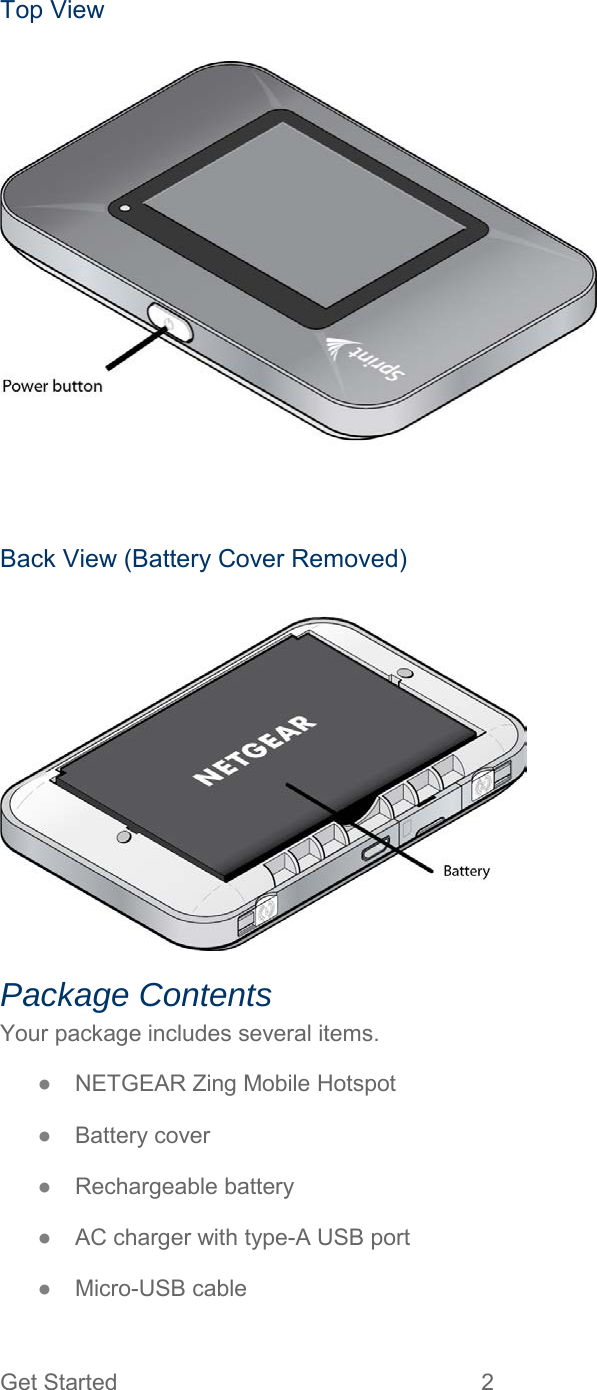
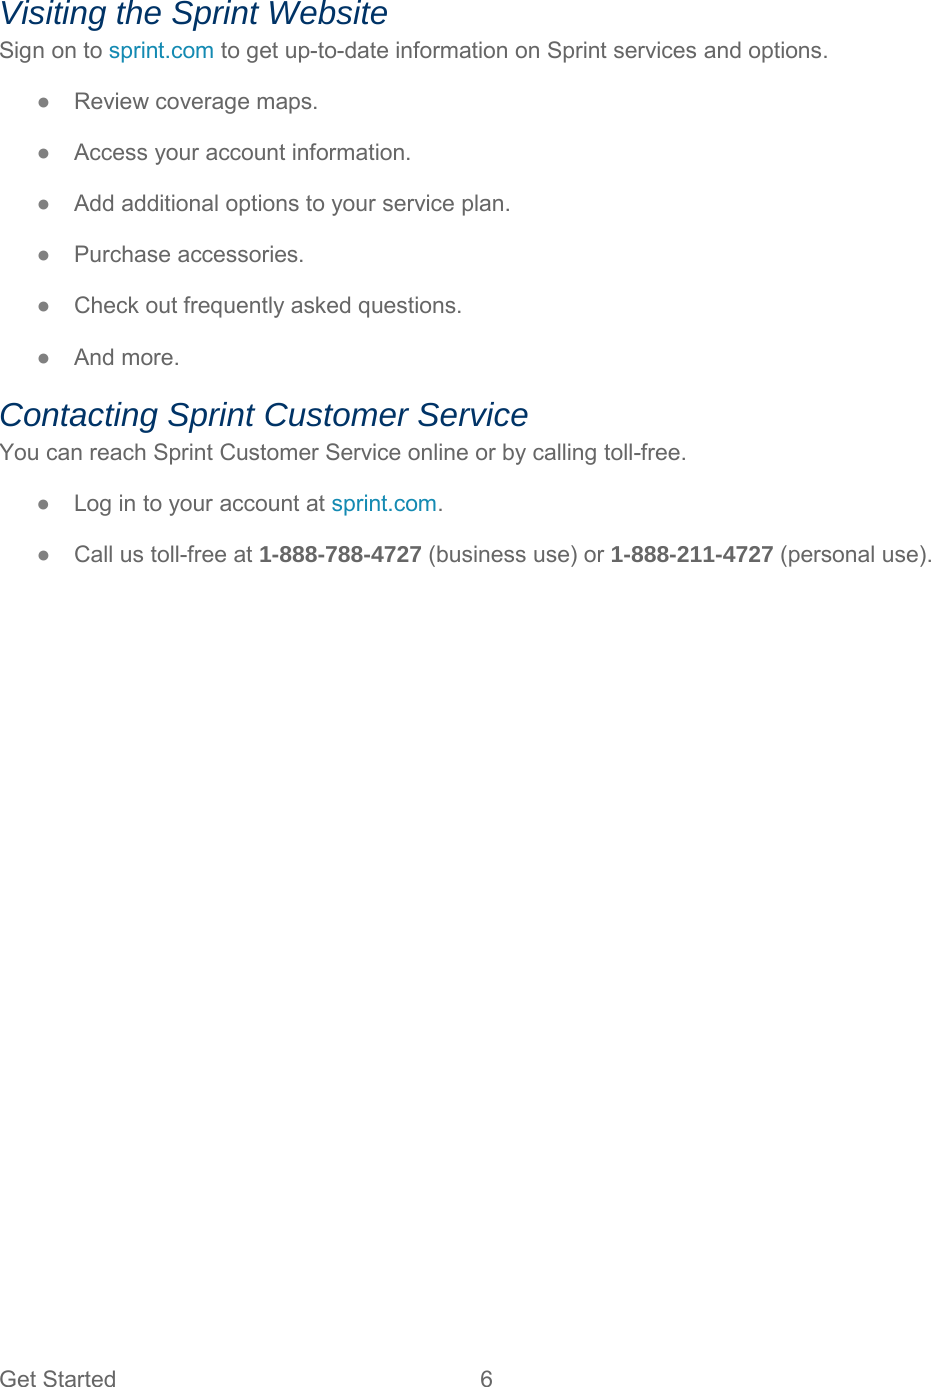
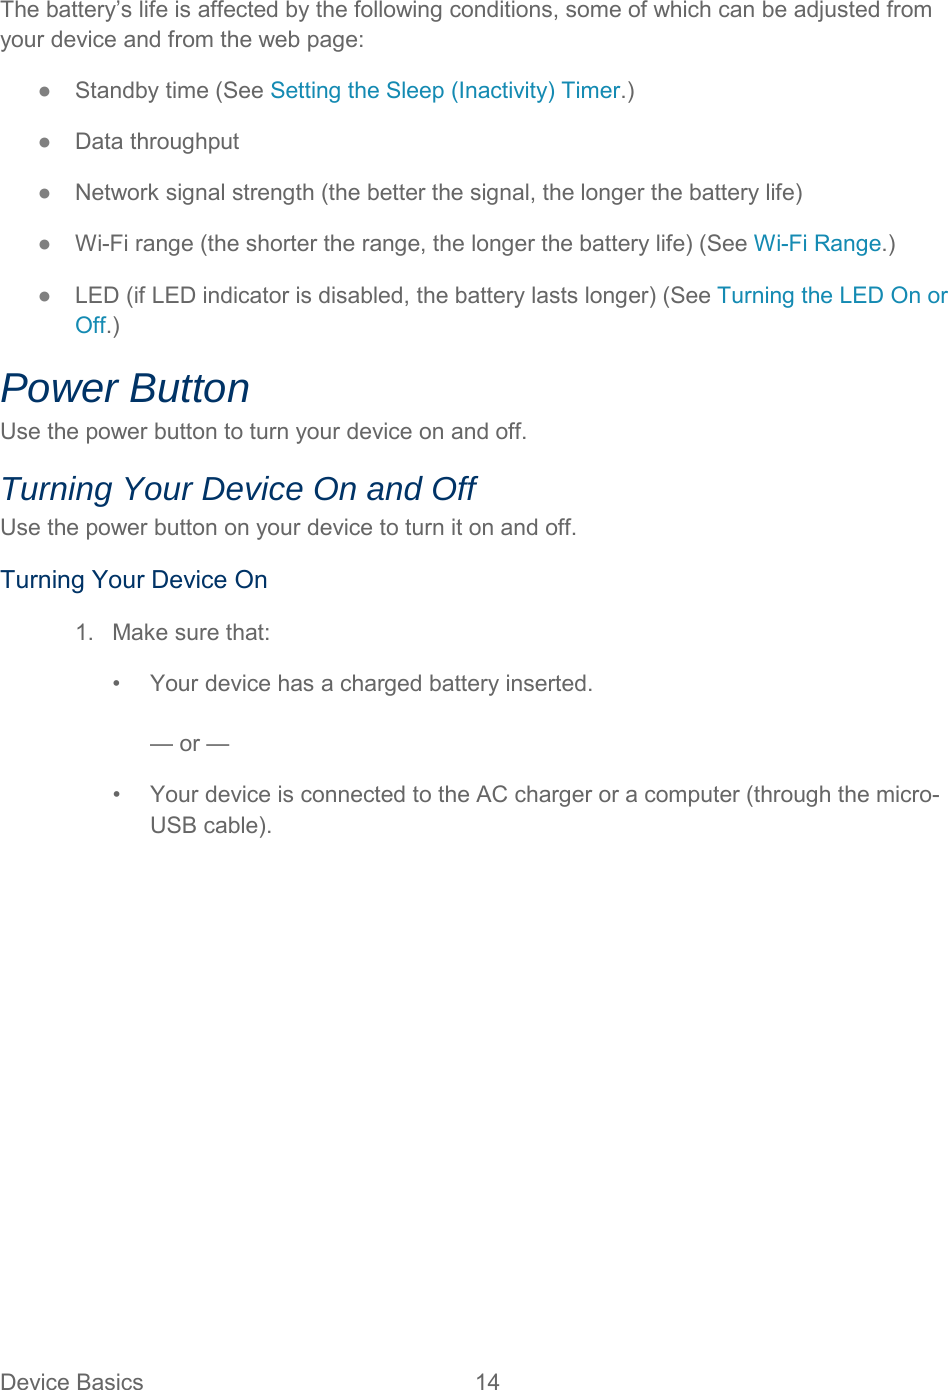
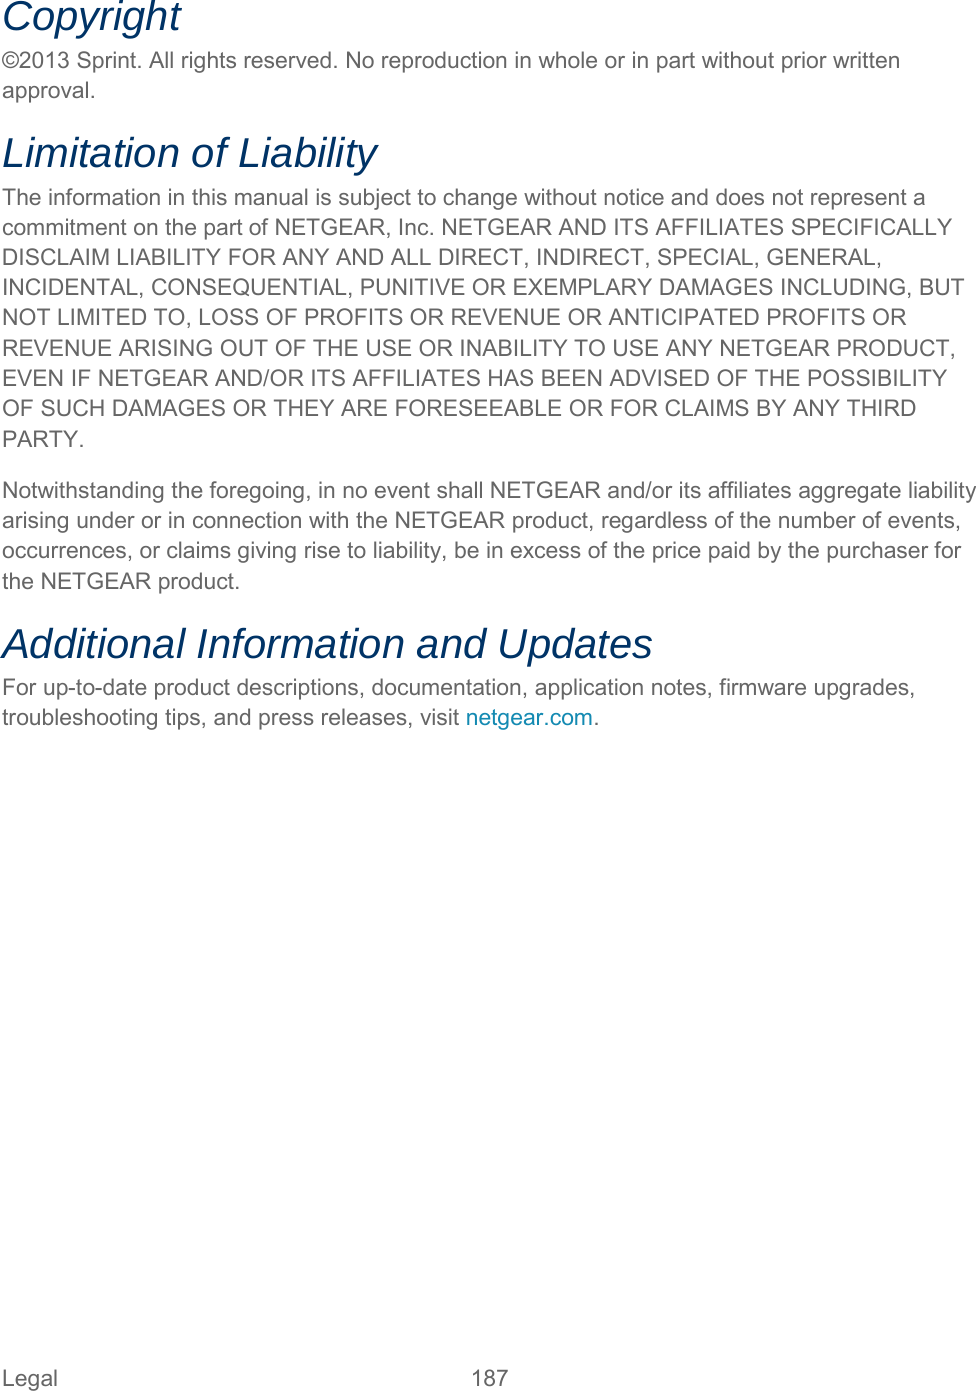
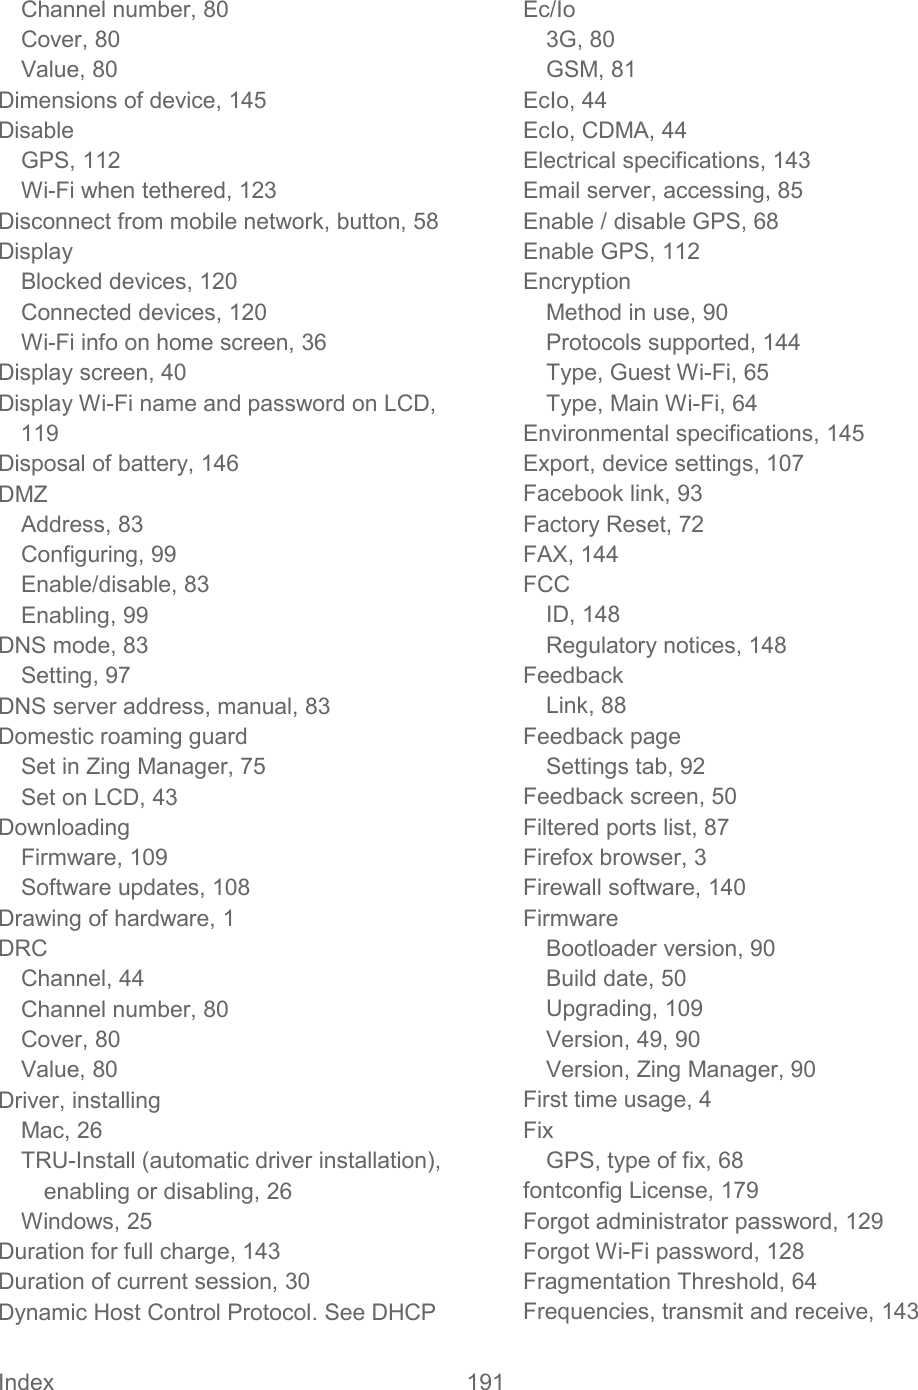
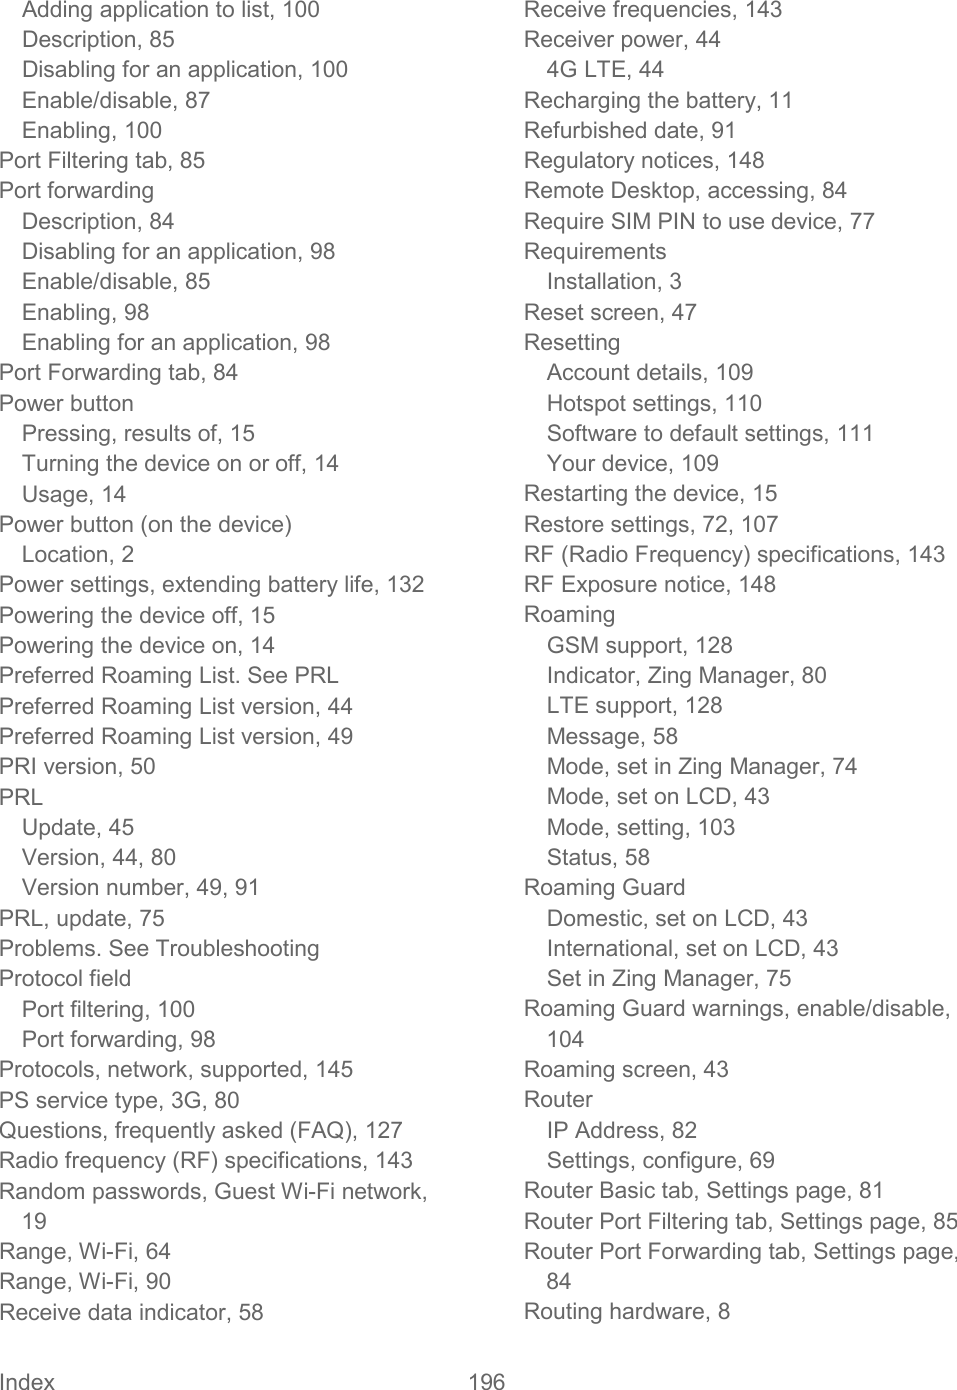
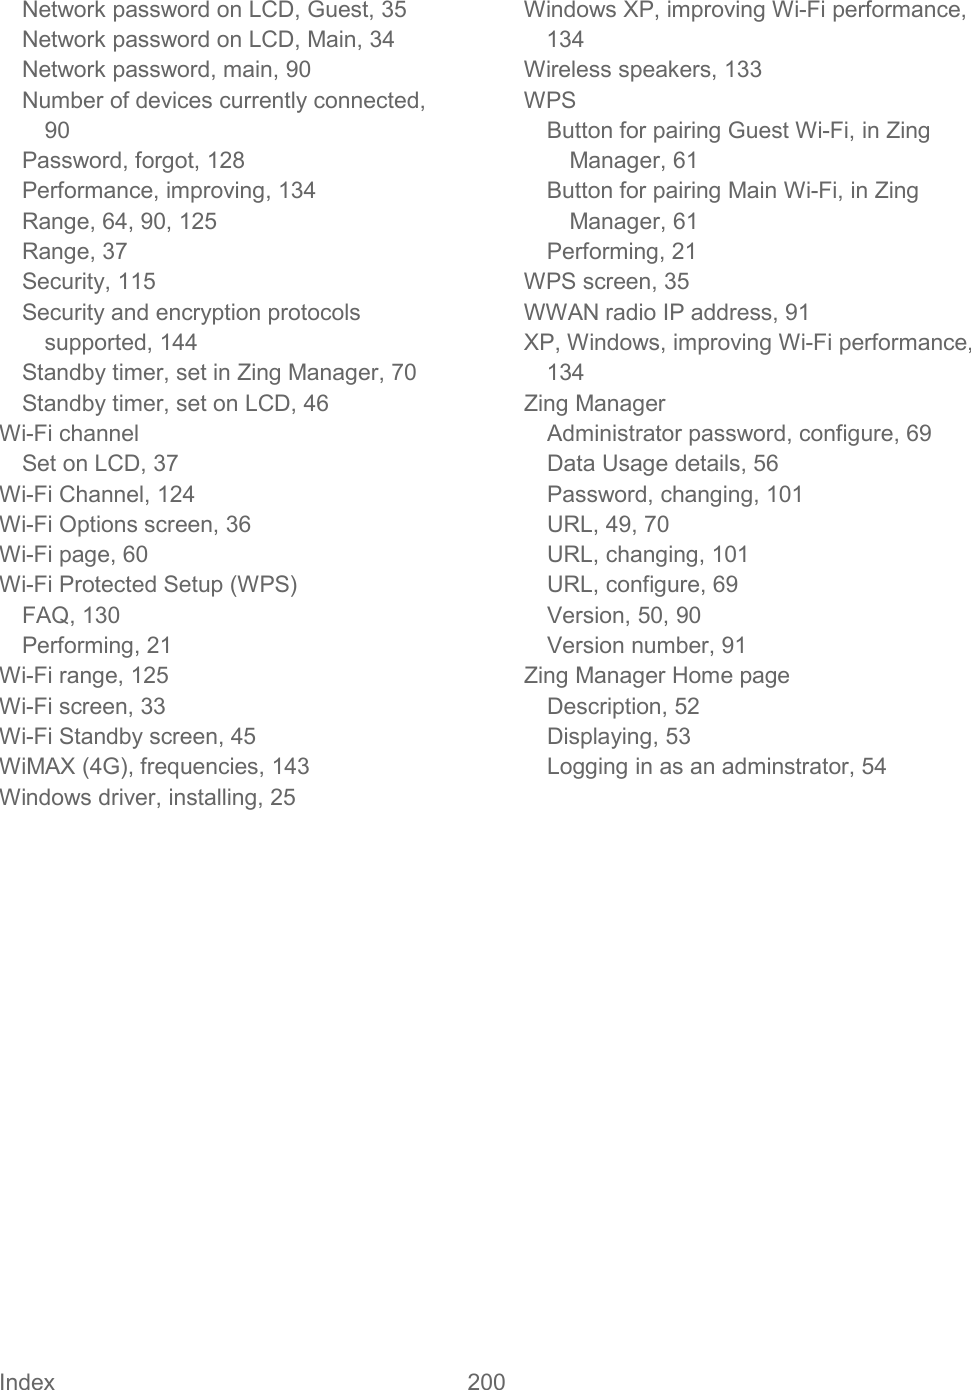
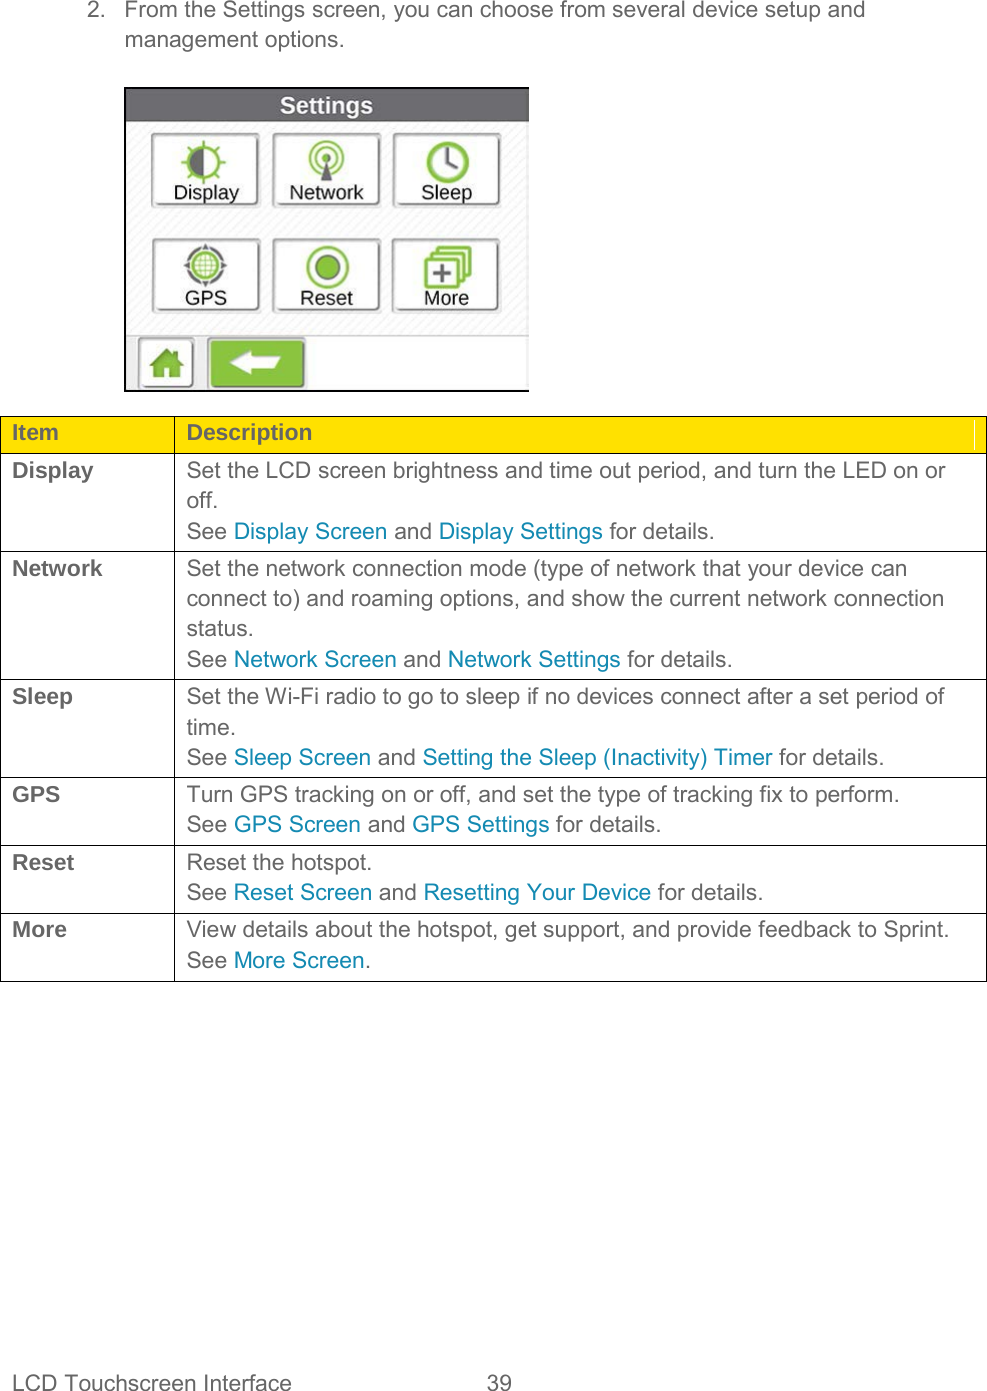
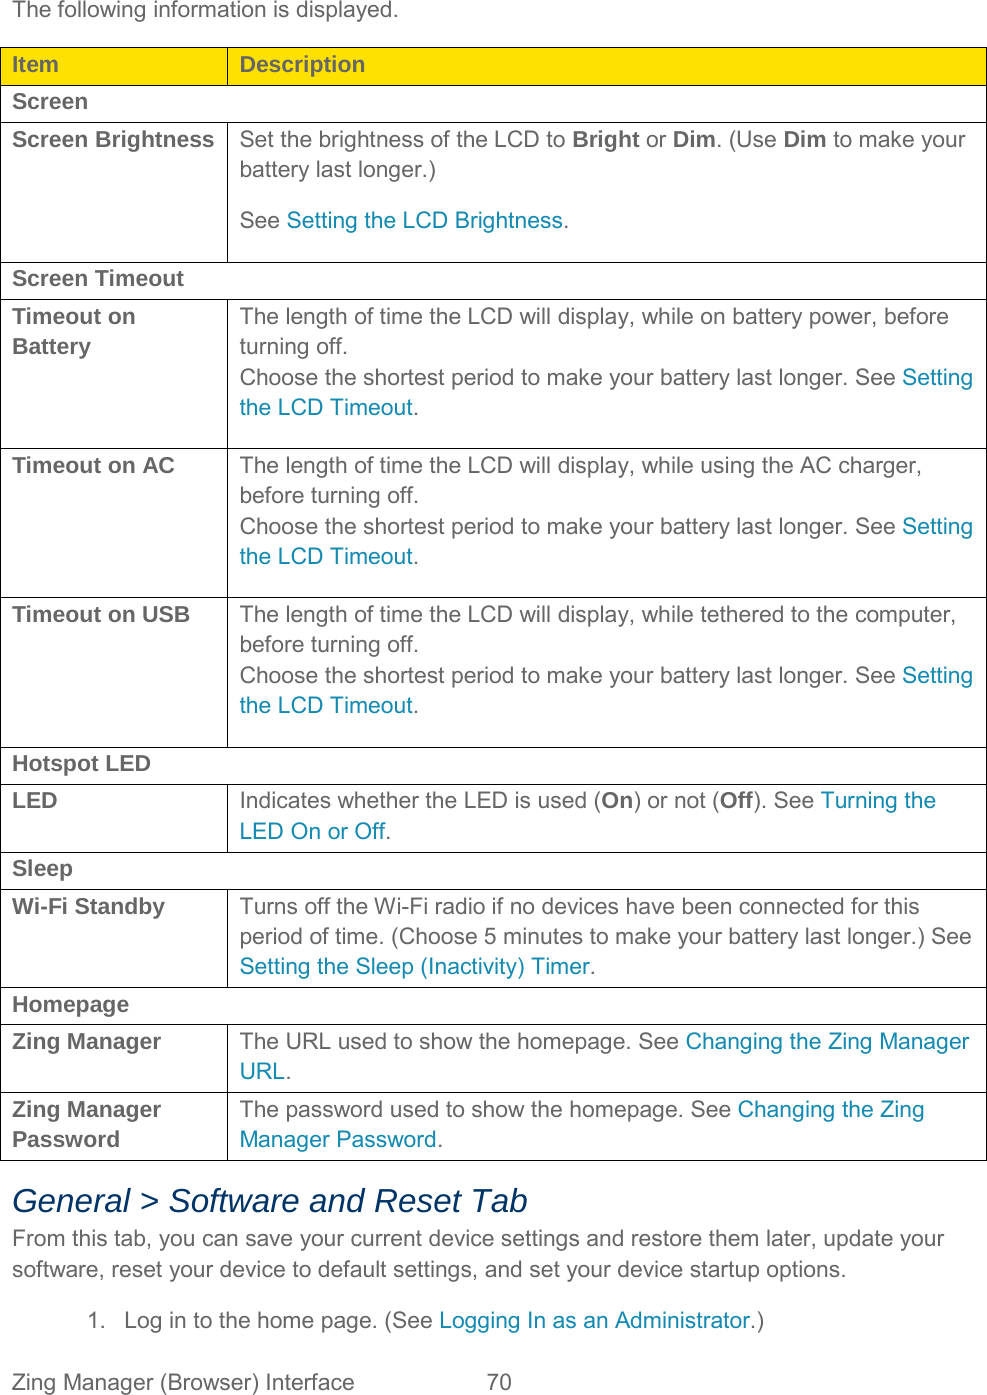
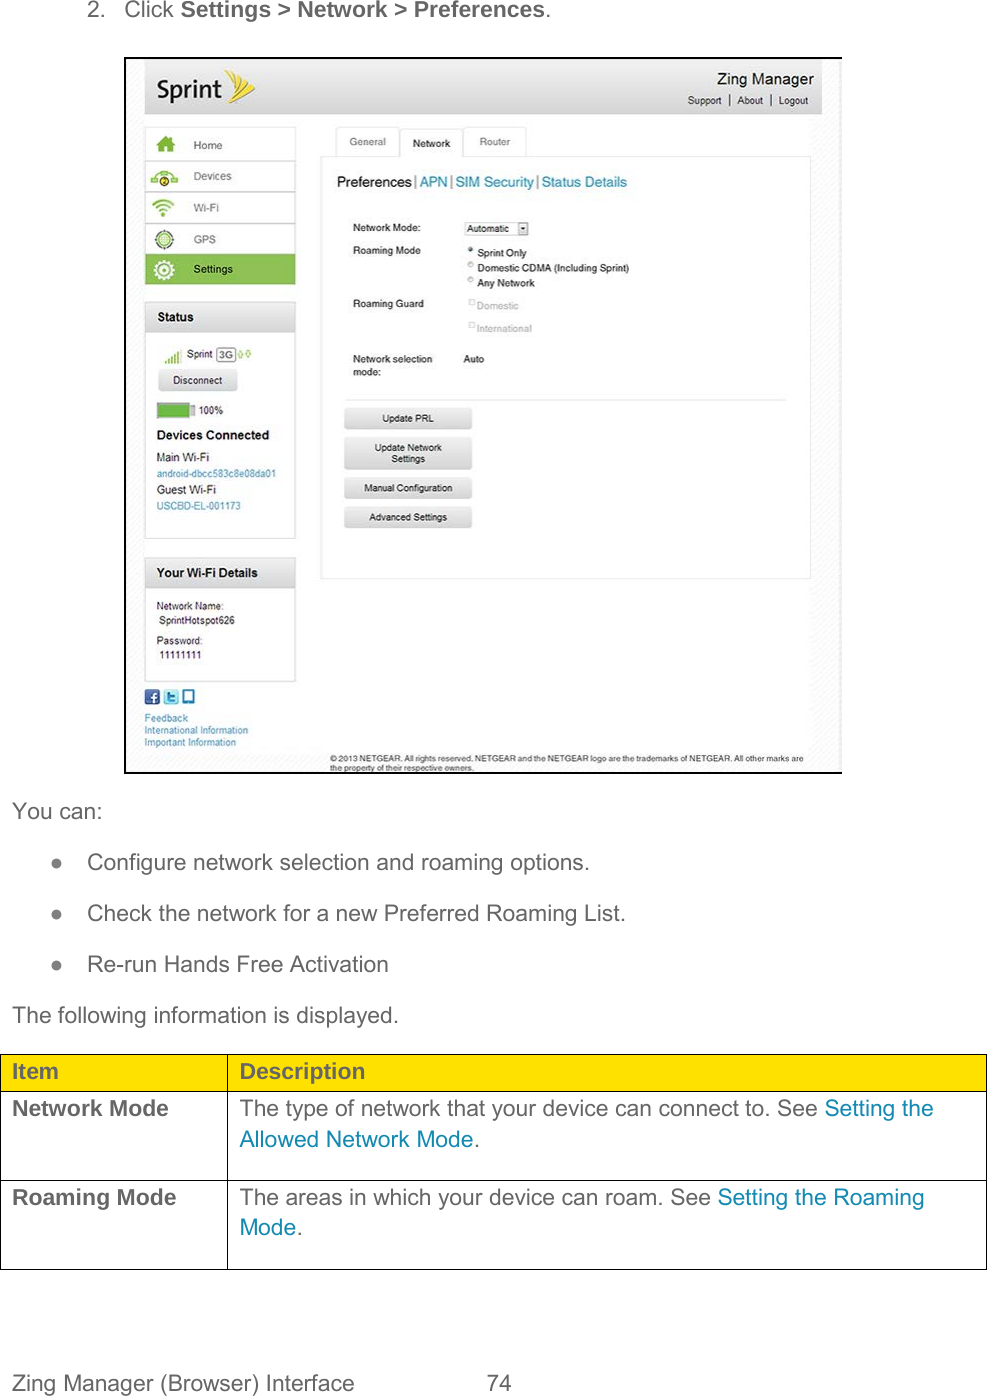
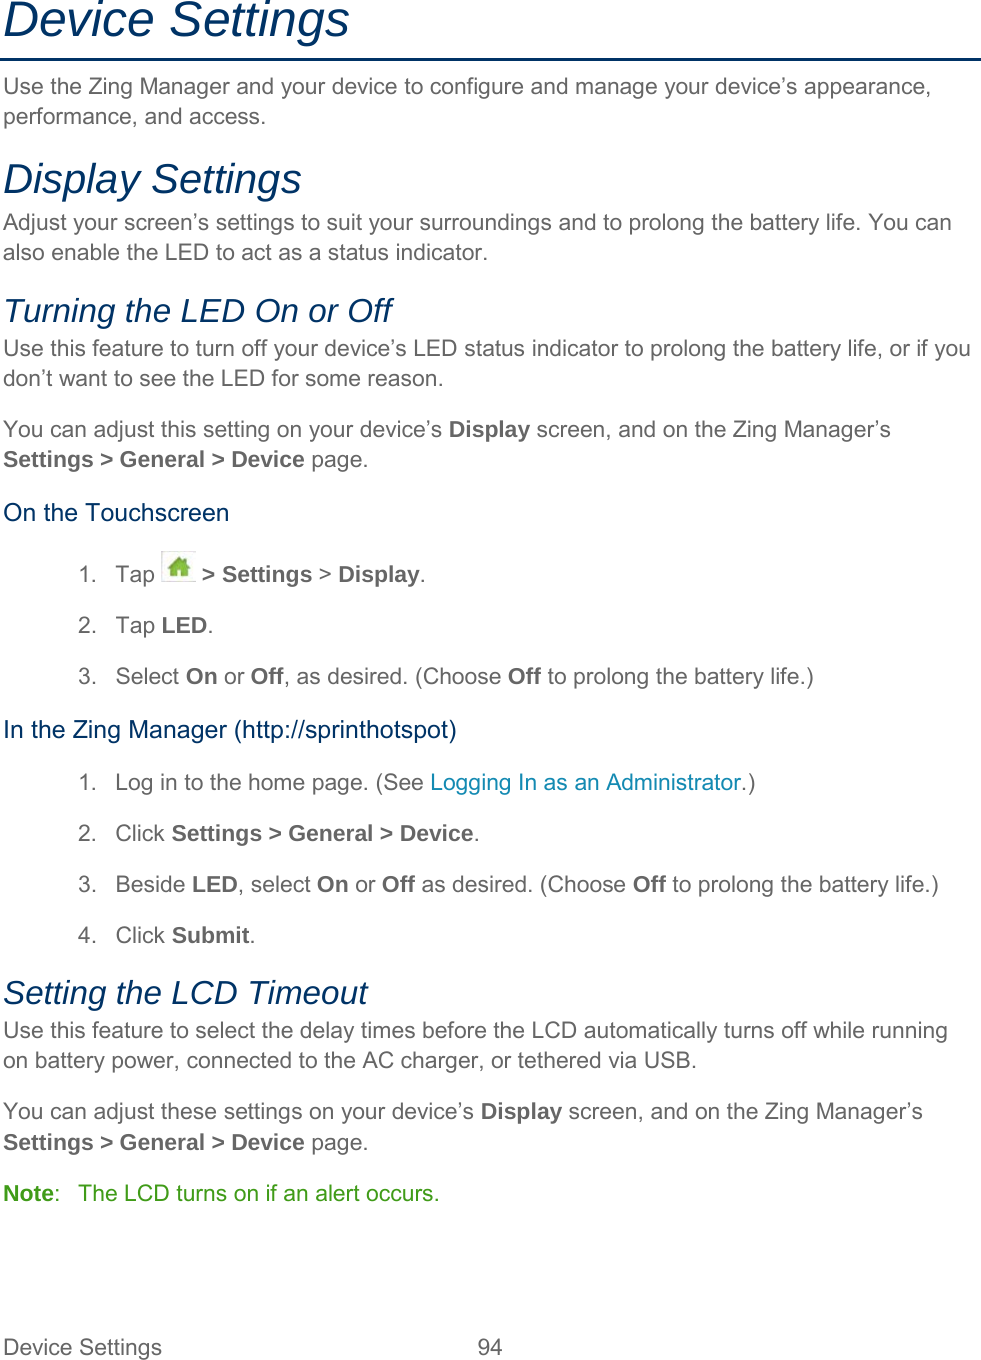
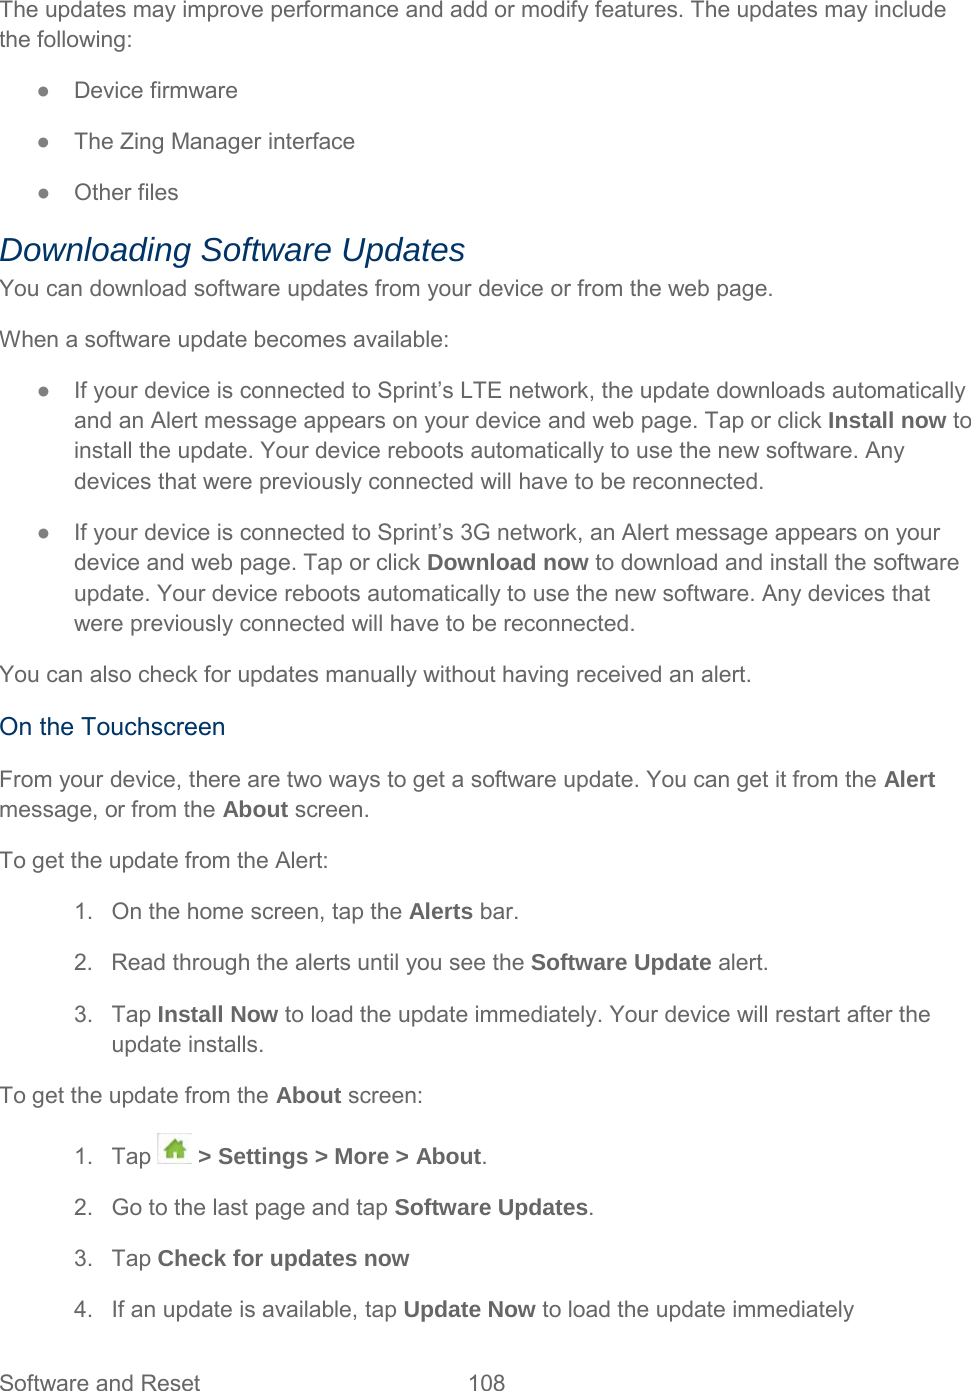
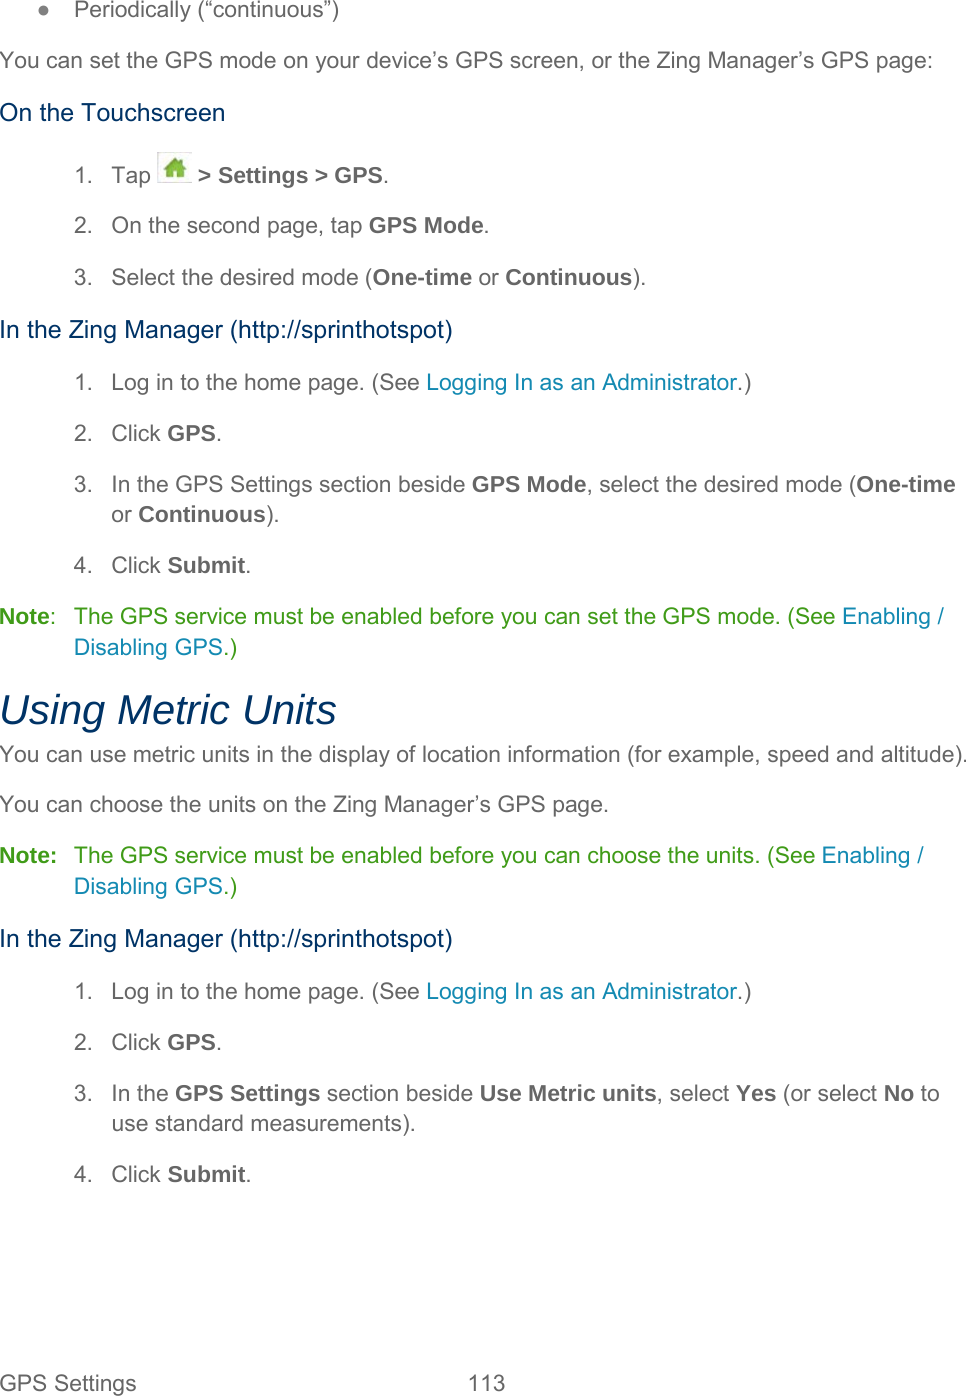
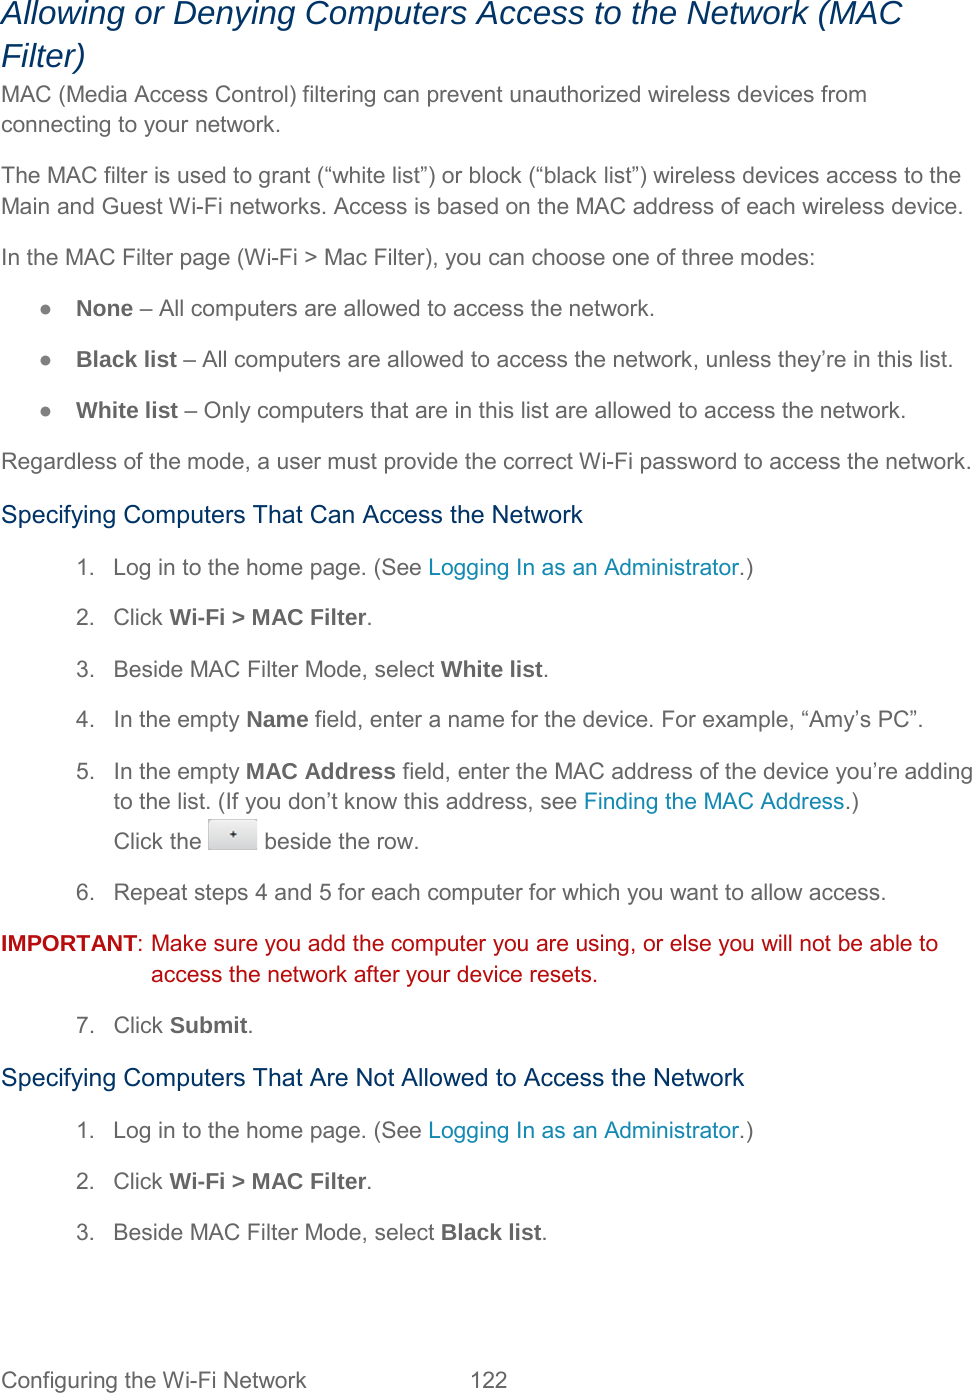
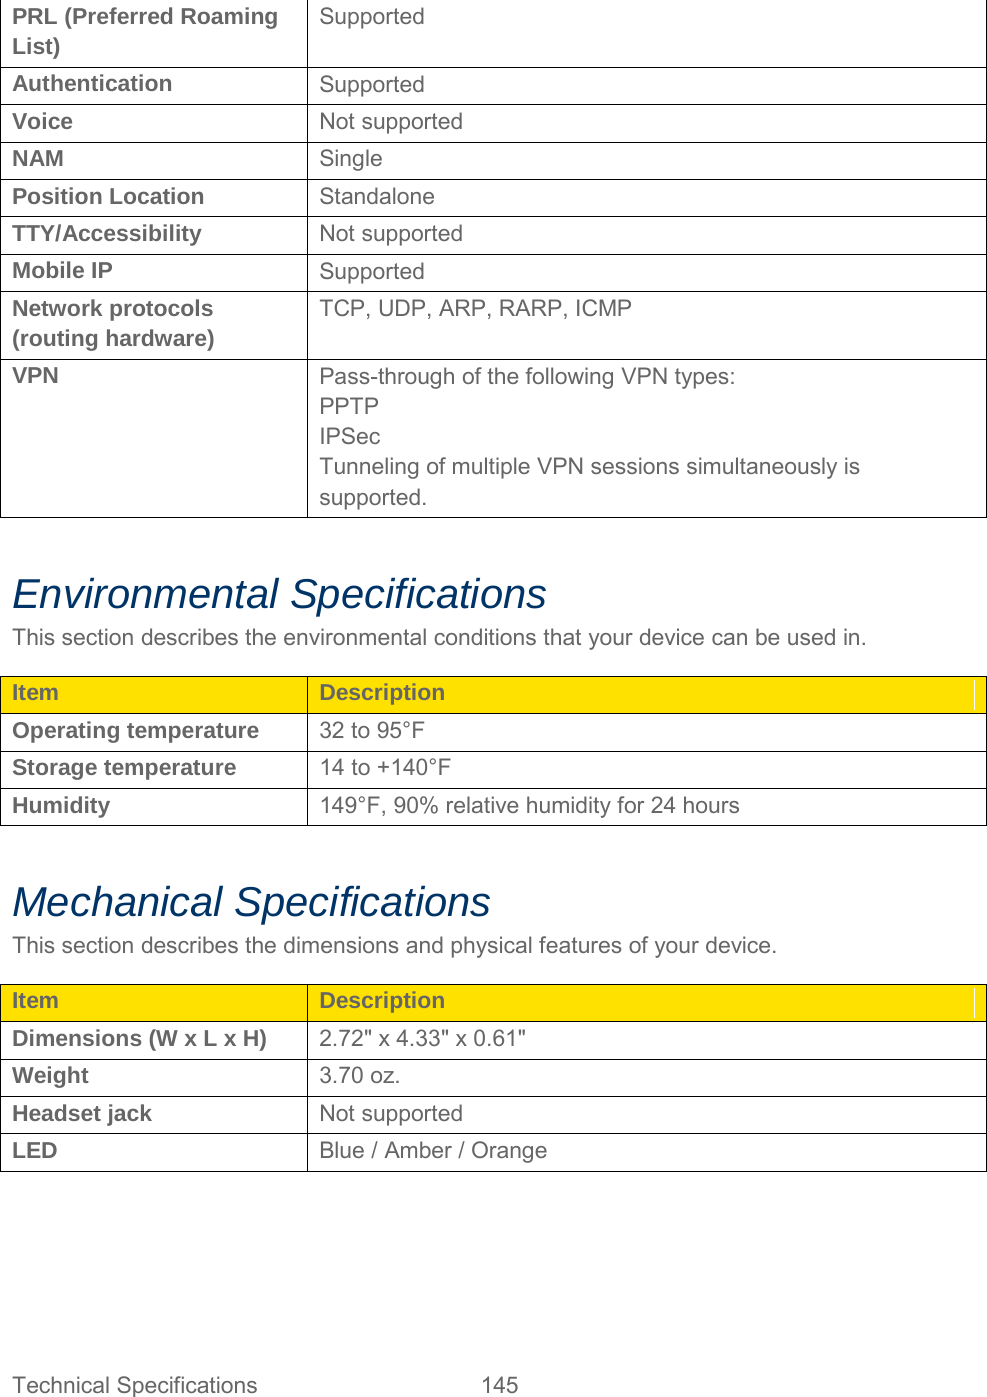
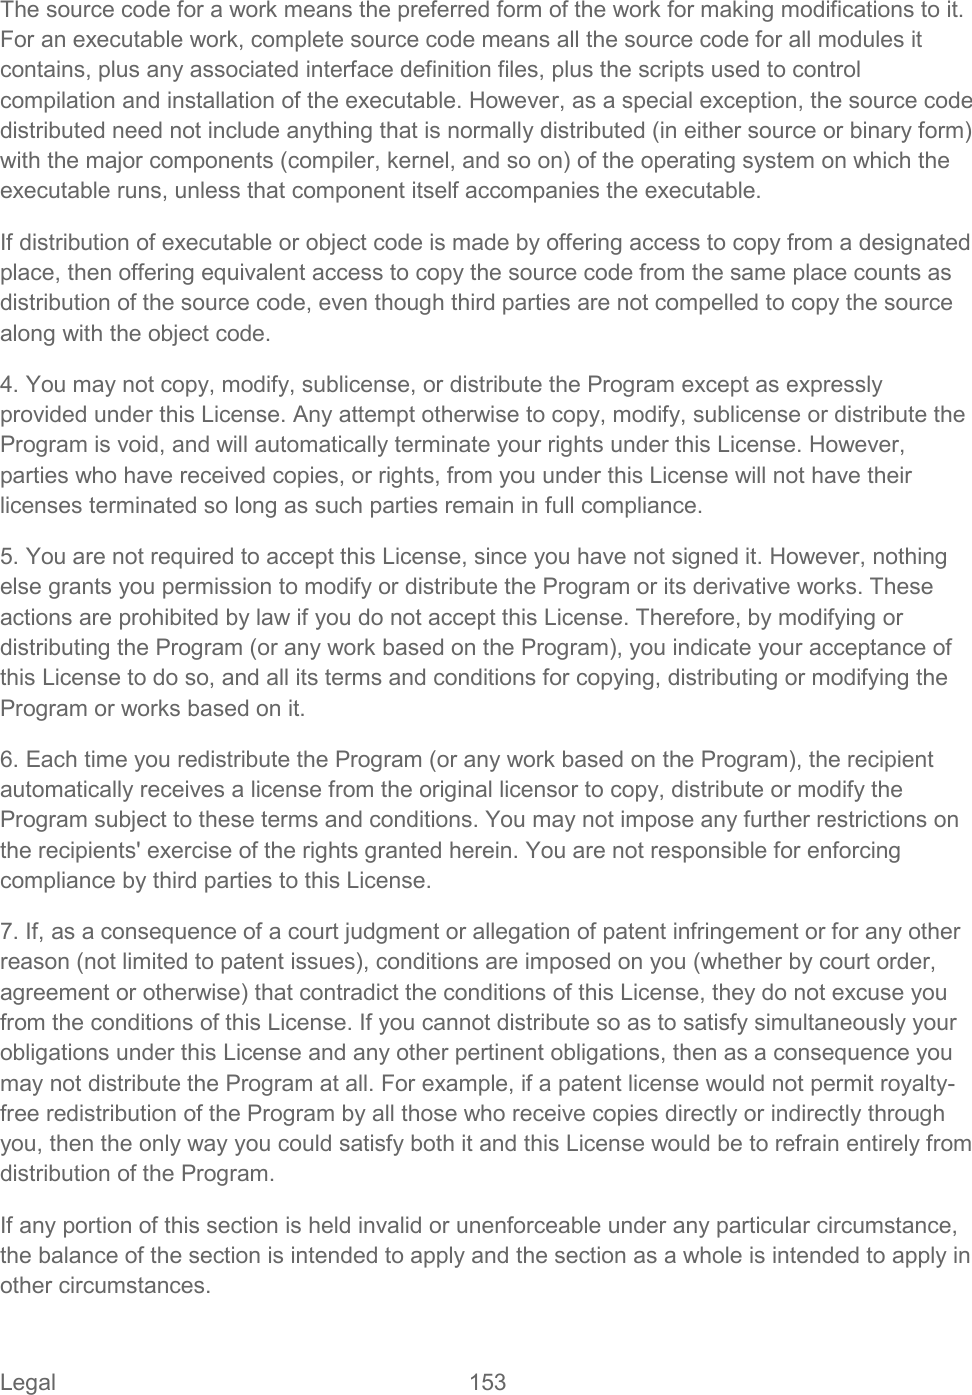
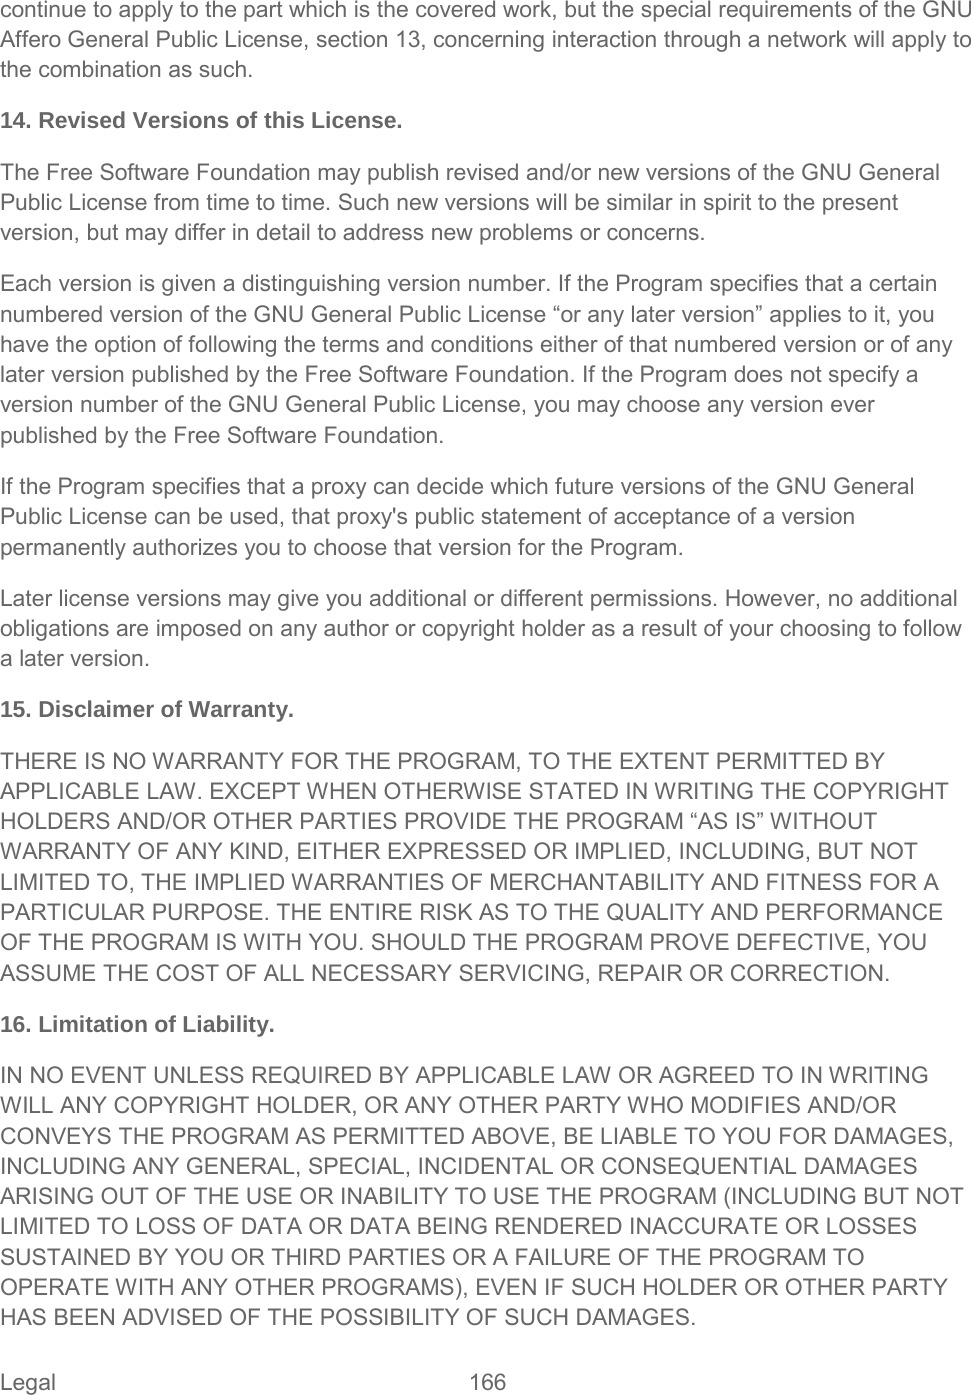
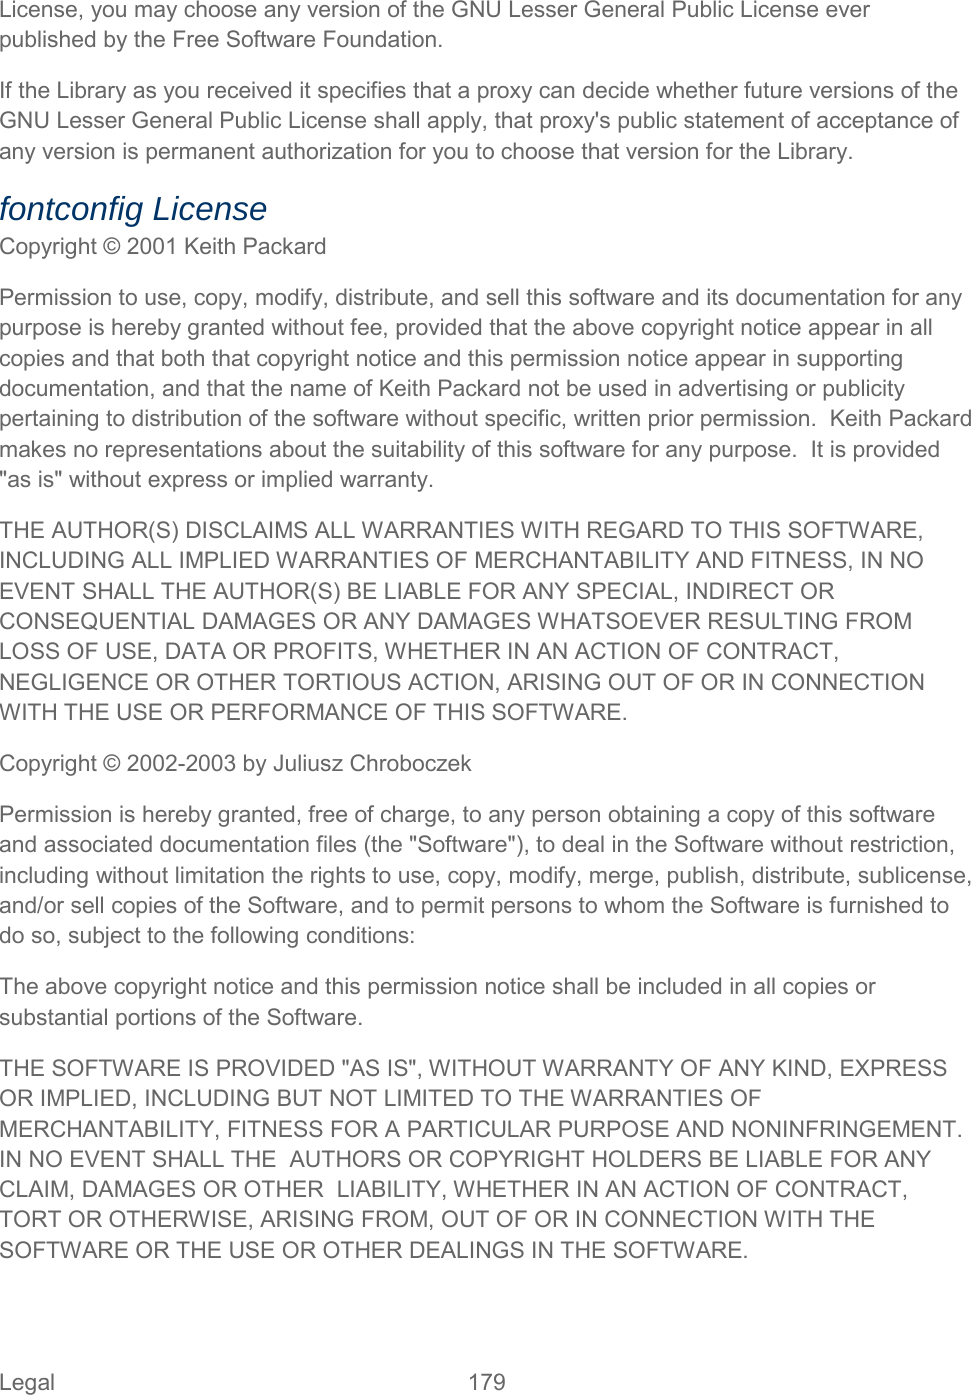
![2. If the LCD is blank, press and hold the Power button until the screen lights up. Turning Your Device Off 1. Press and hold the Power button until the Shut Down button appears. 2. Press the Shut Down button. Controlling Your Device Using the Power Button The power button supports two types of presses. Type of press Result Quick press Removes device from standby (low power) mode. Wakes up (turns on) the LCD if the LCD was dormant. (The LCD turns dark, after a configurable time of inactivity.) Long press (press and hold for two seconds) Turns your device on. Turns your device off. Press the Shut Down button that appears on the screen to confirm that your device should be turned off. Restarting Your Device If you need to restart your device for some reason, you can use these methods. ● Press and hold the power button for two seconds. ● If the touchscreen is not responding, press and hold the power button for five seconds. [tbc:eng] Device Basics 15](https://usermanual.wiki/Netgear-orporated/AC771S/User-Guide-1984013-Page-23.png)
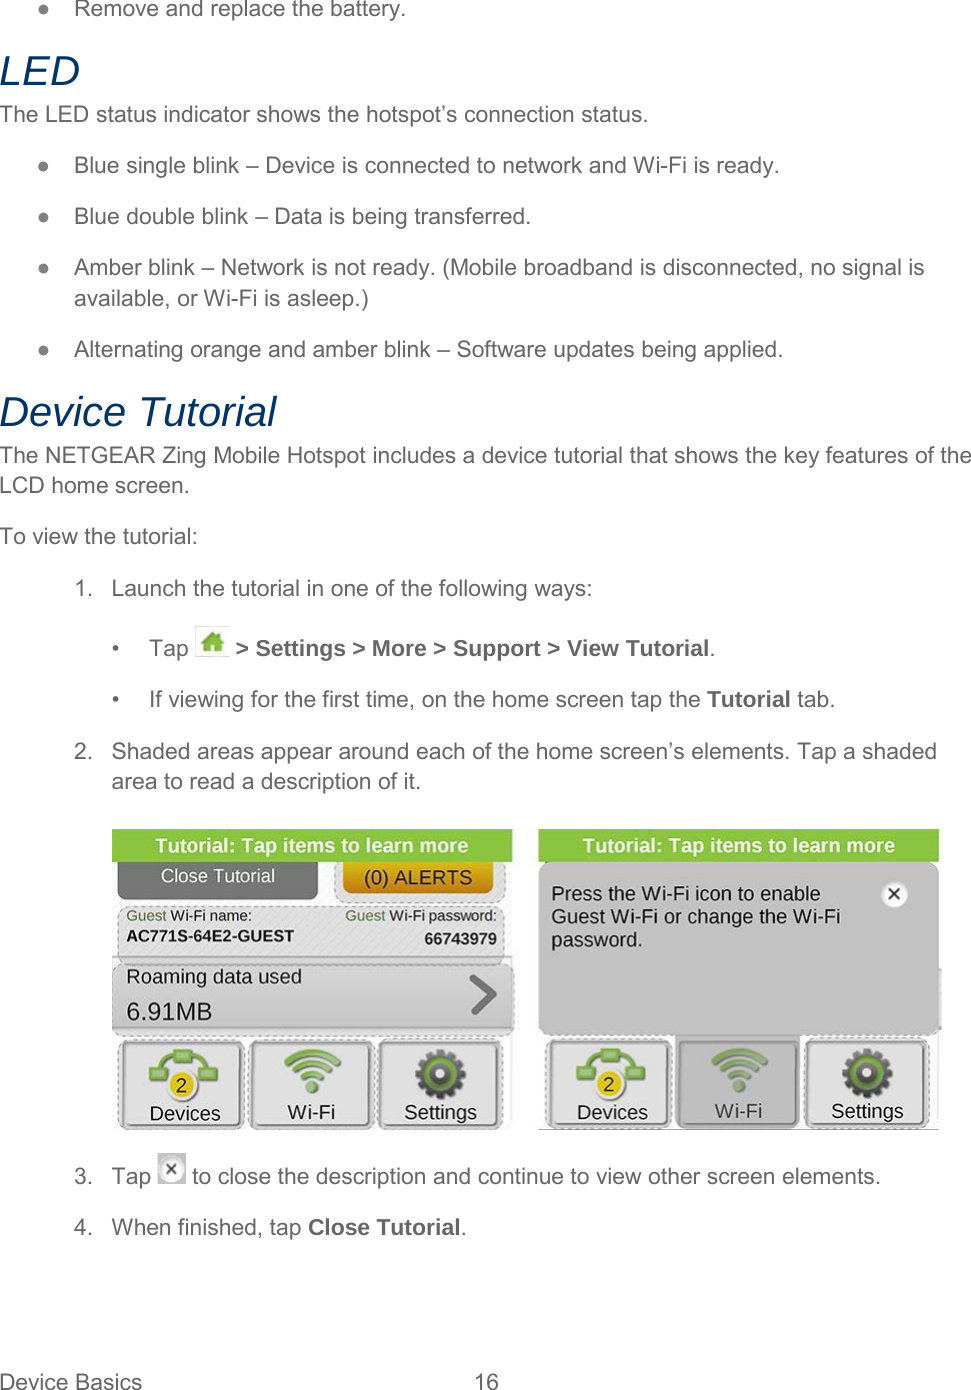


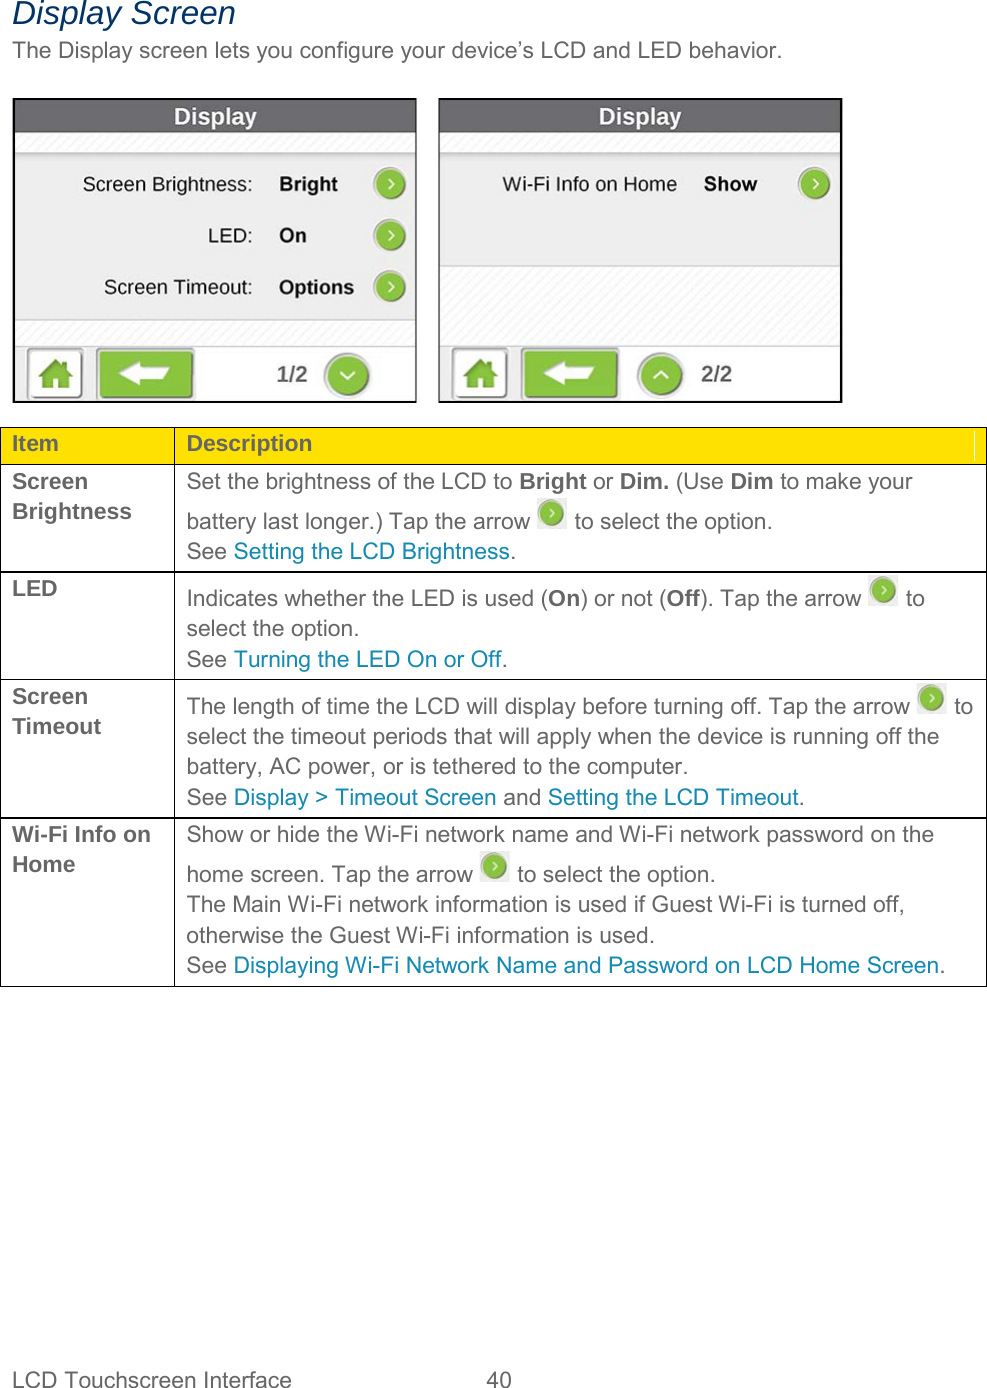


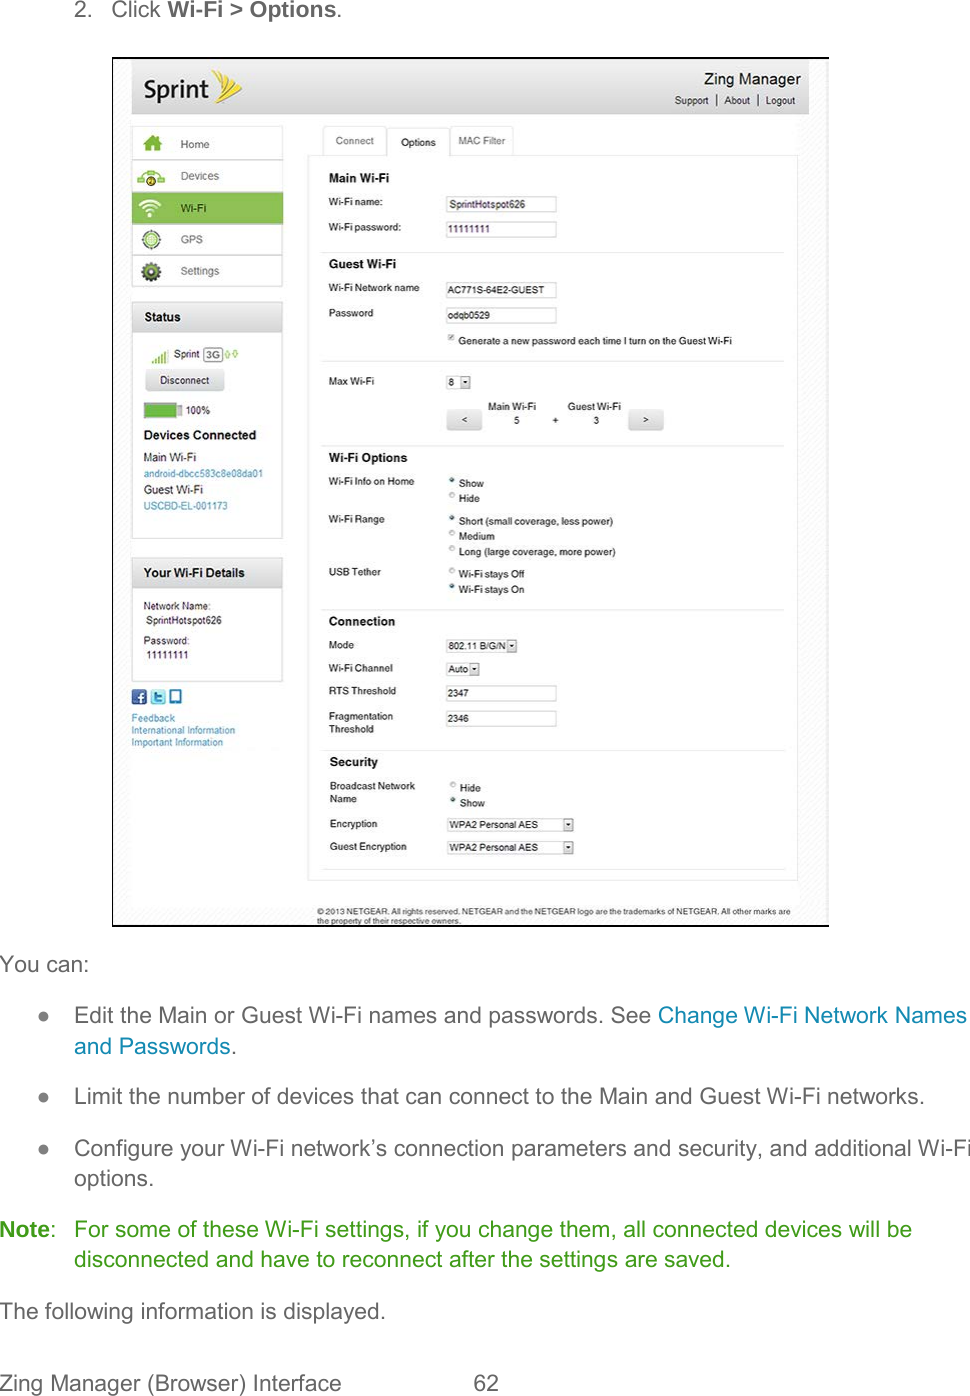

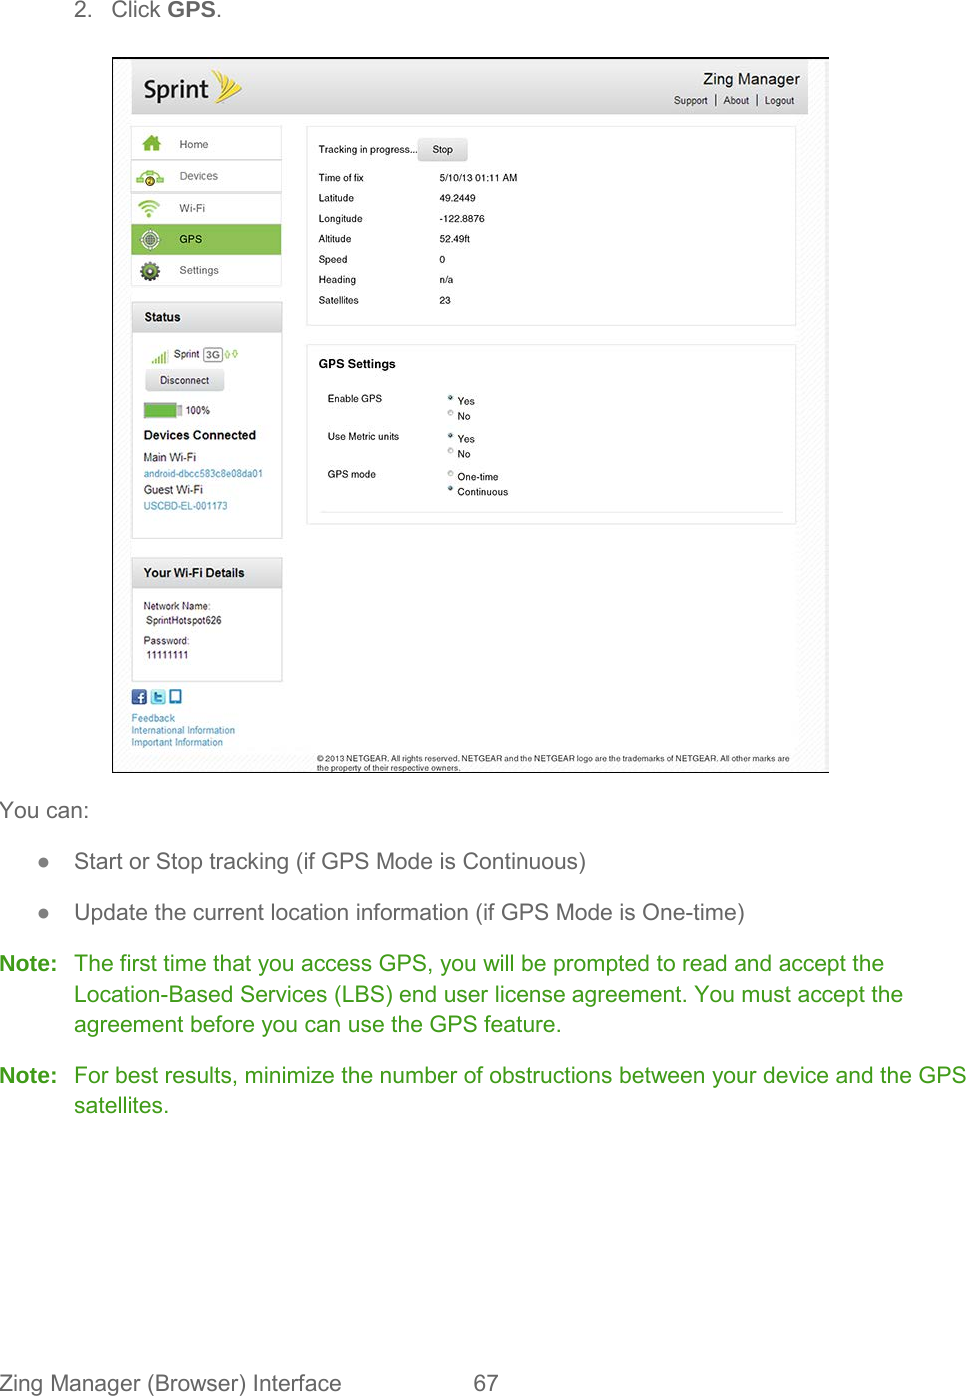
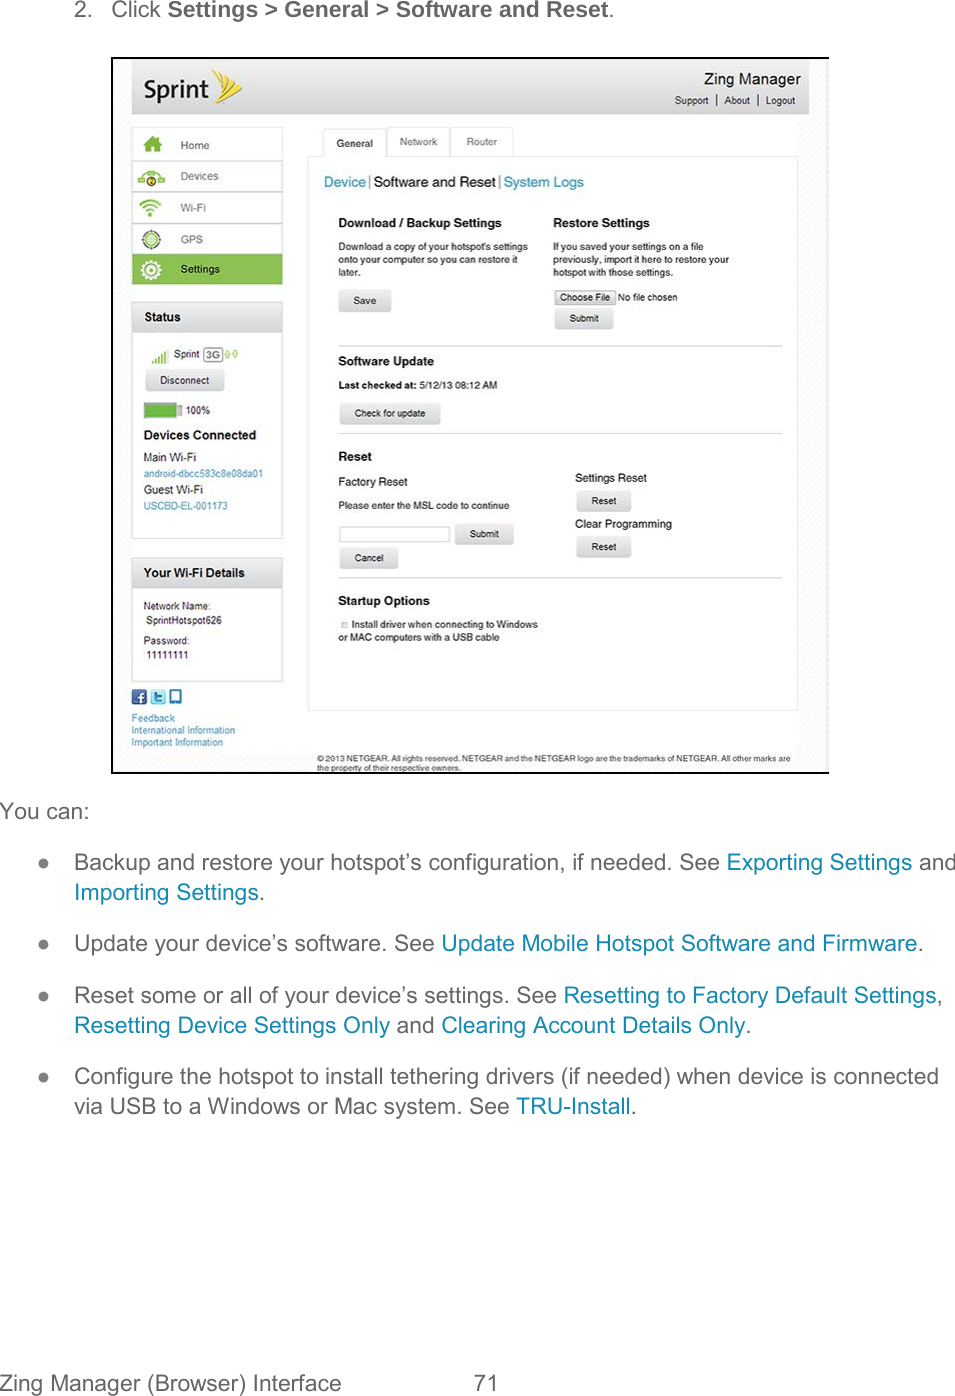
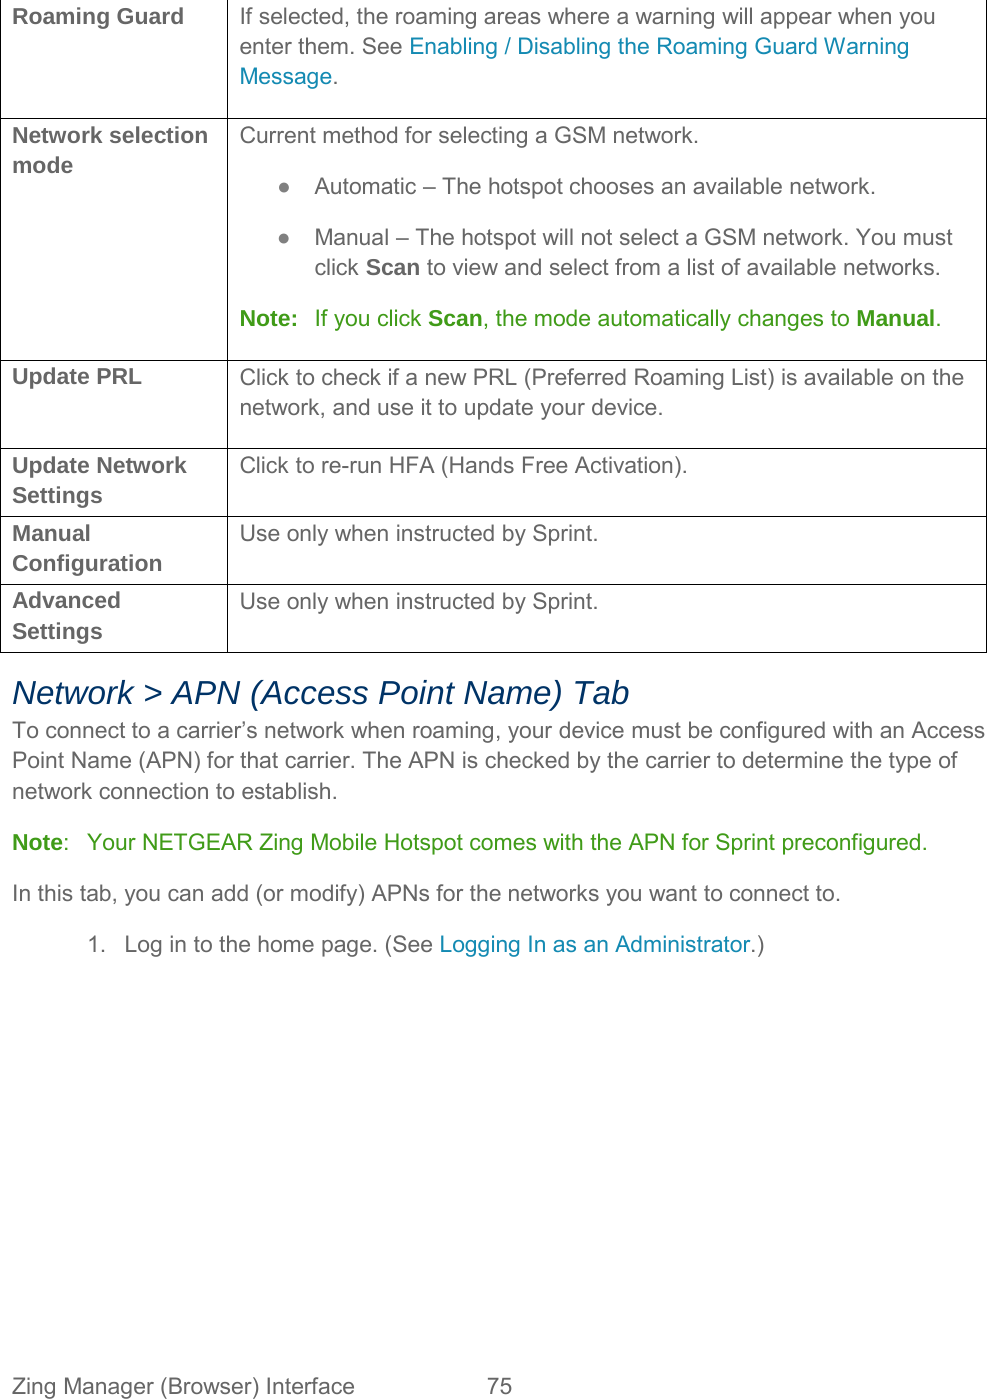


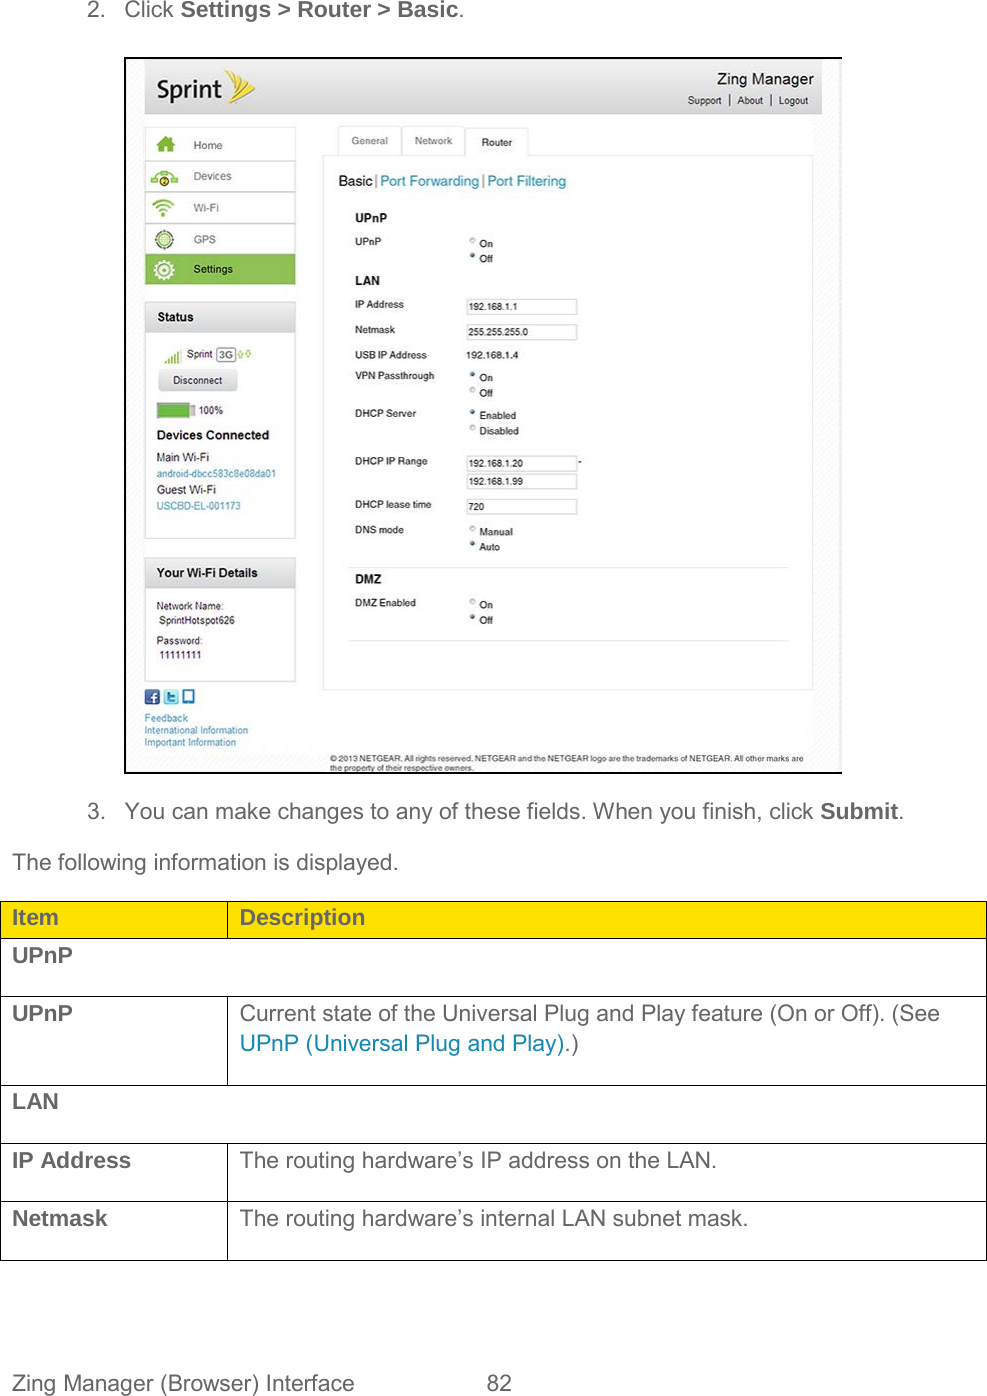
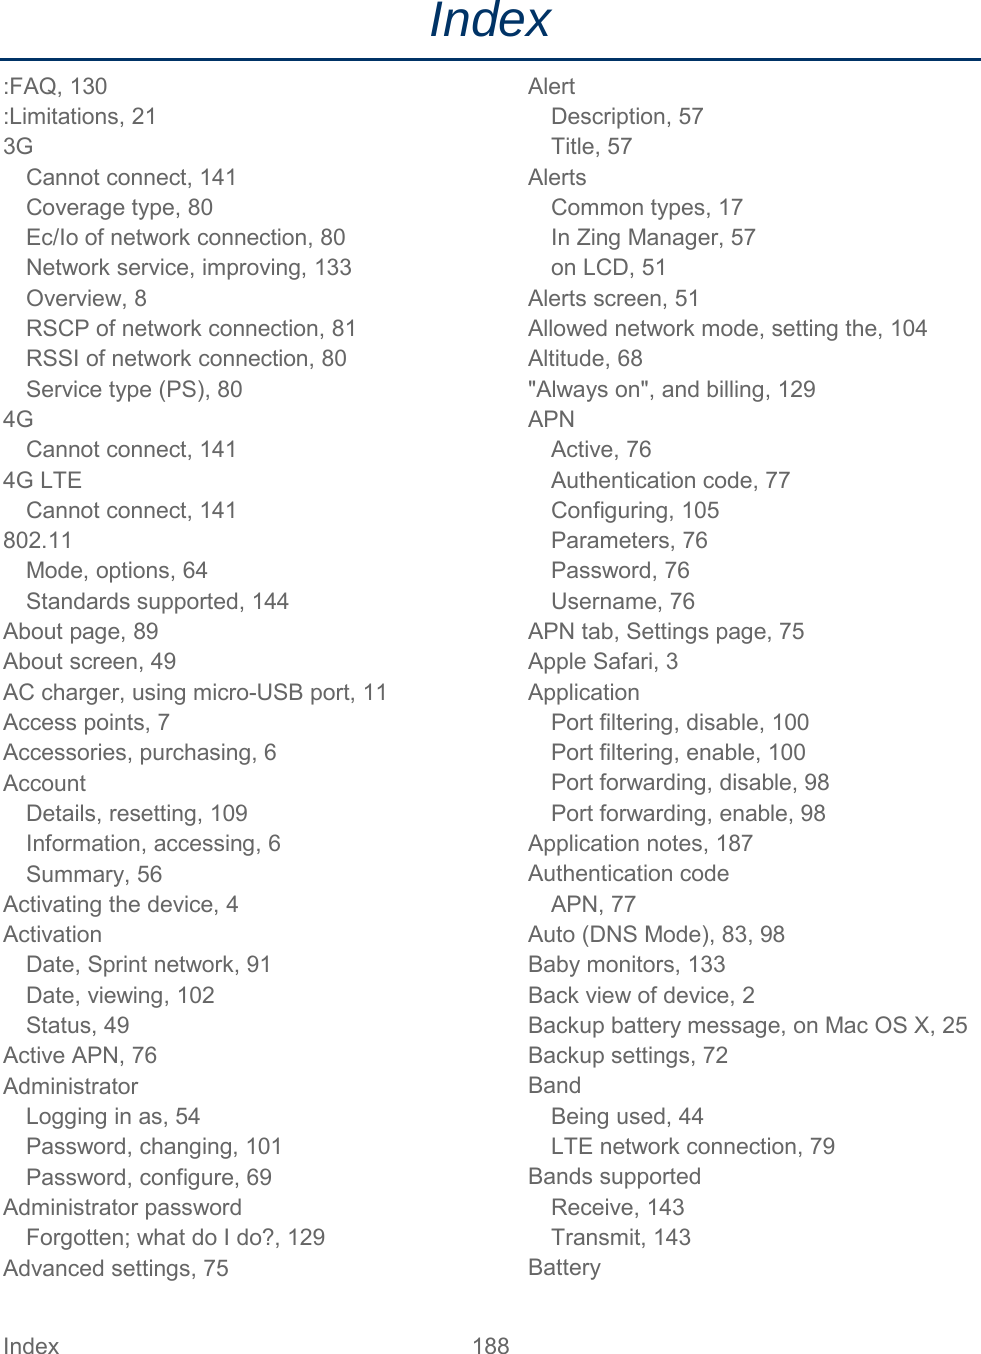
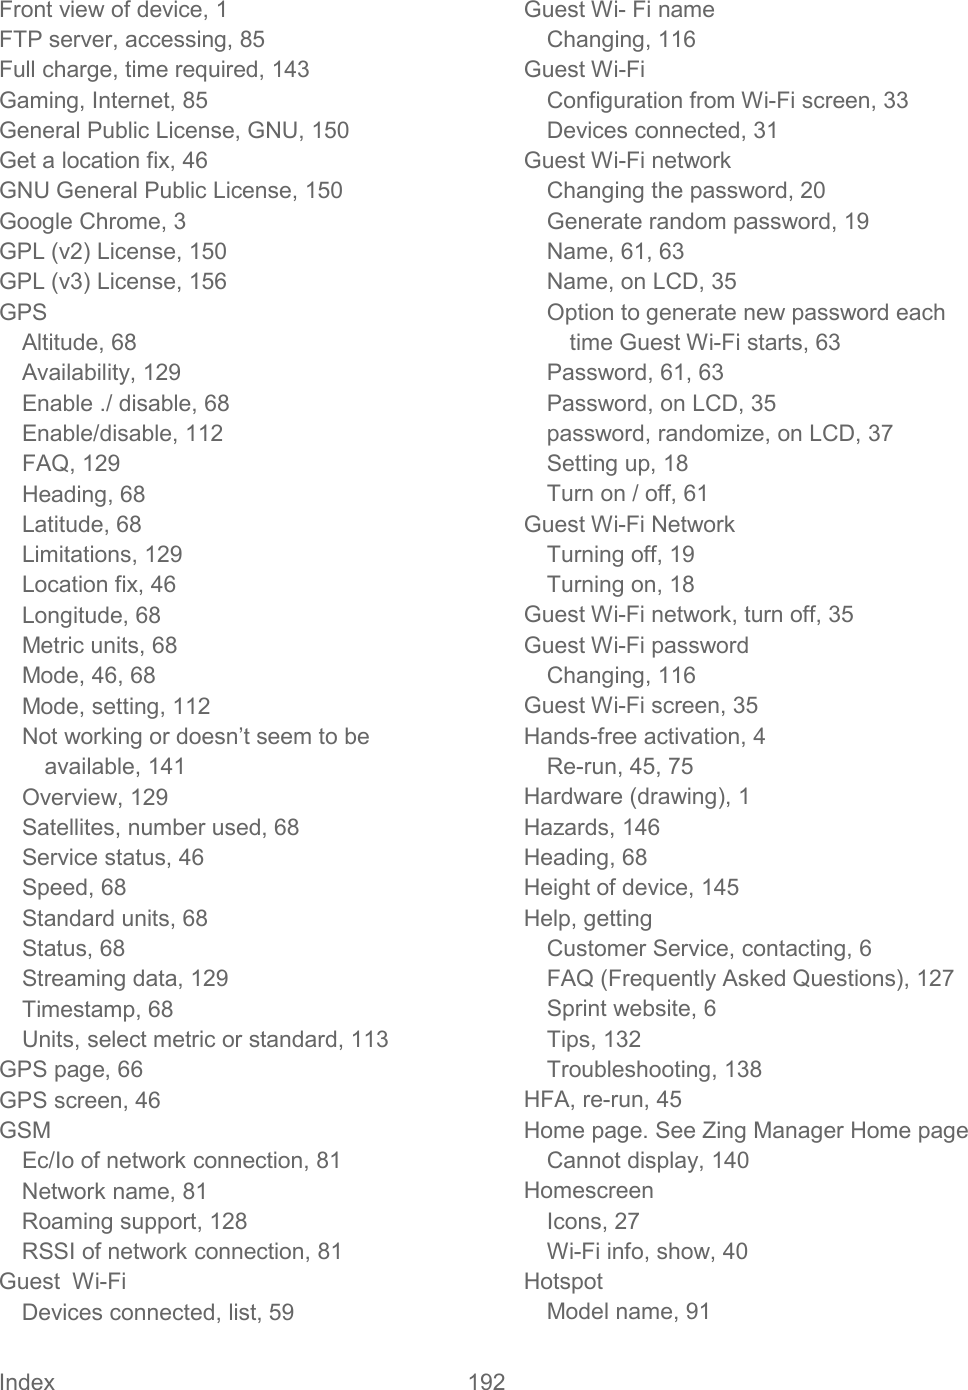
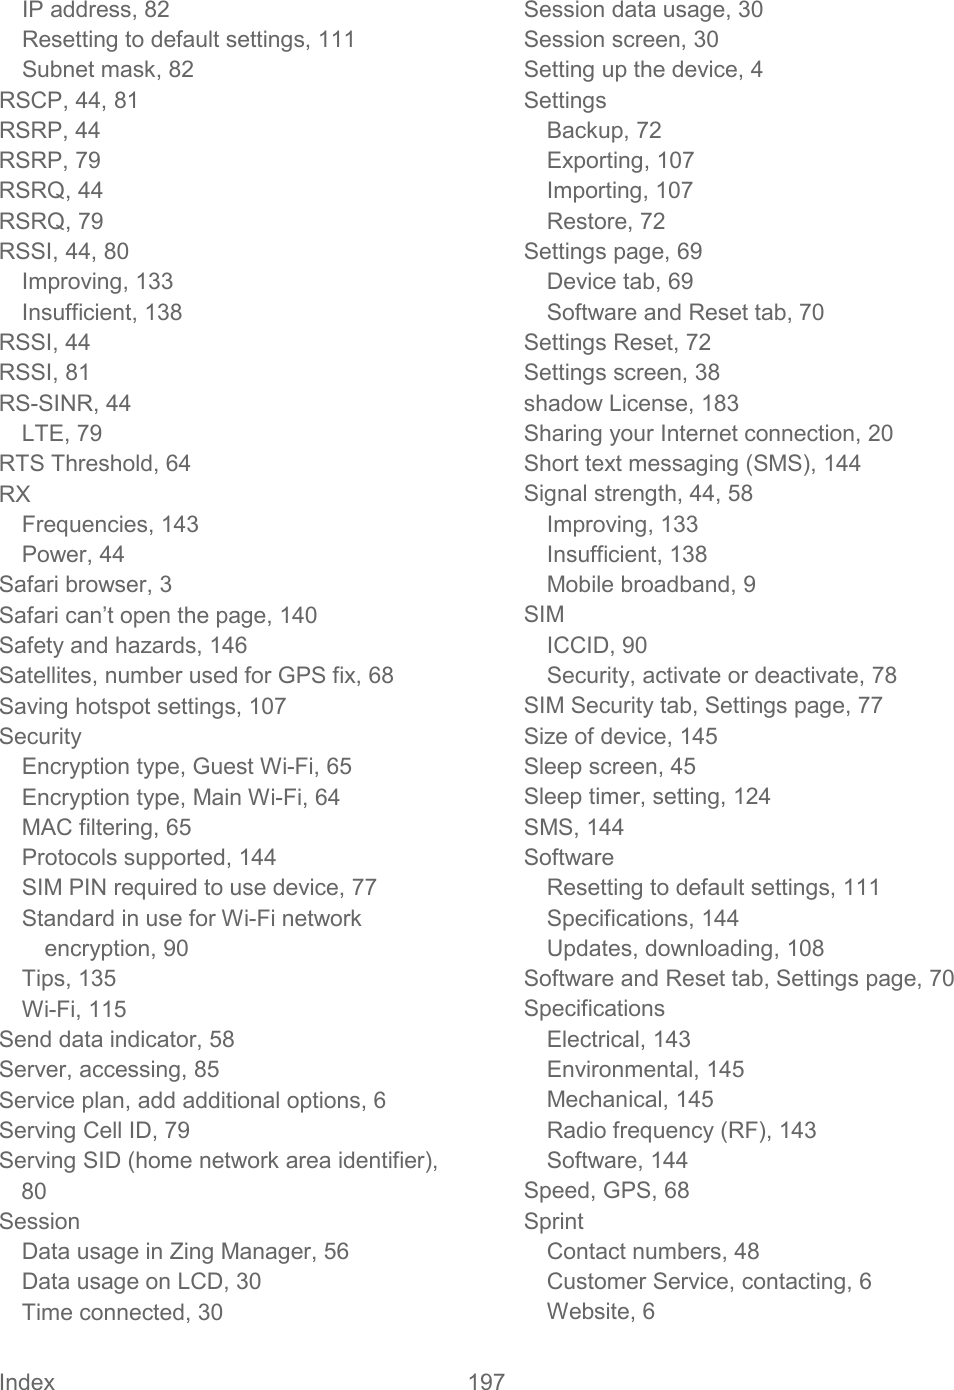
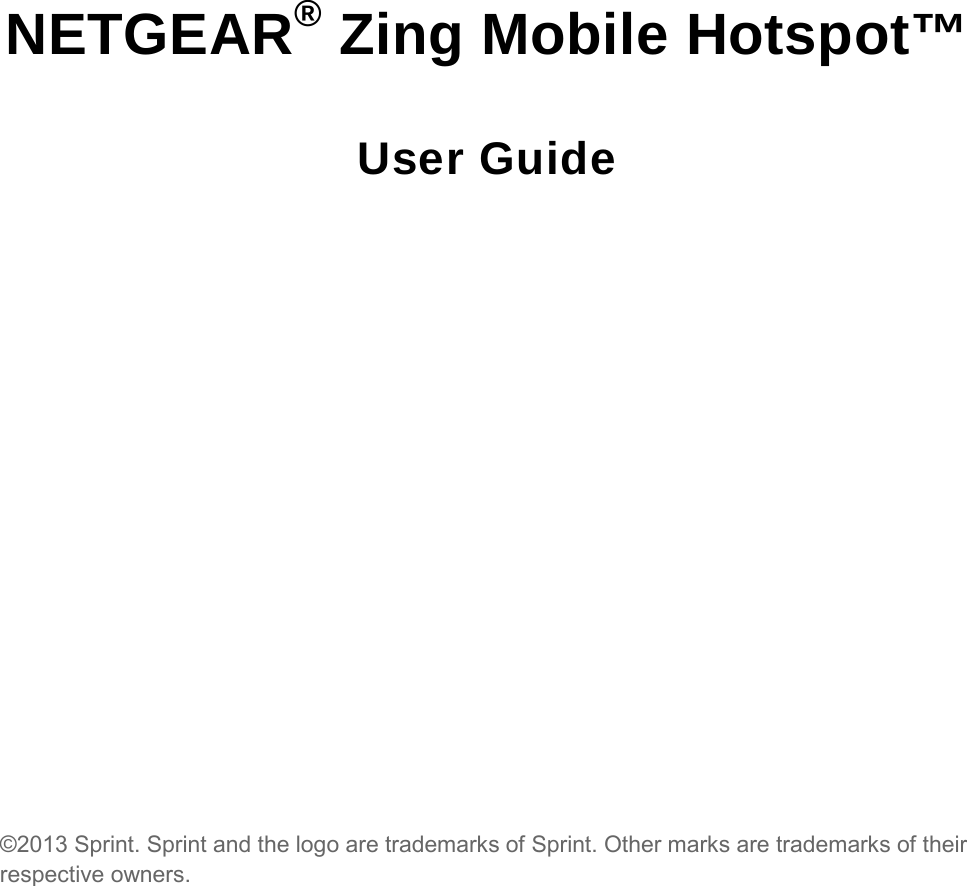
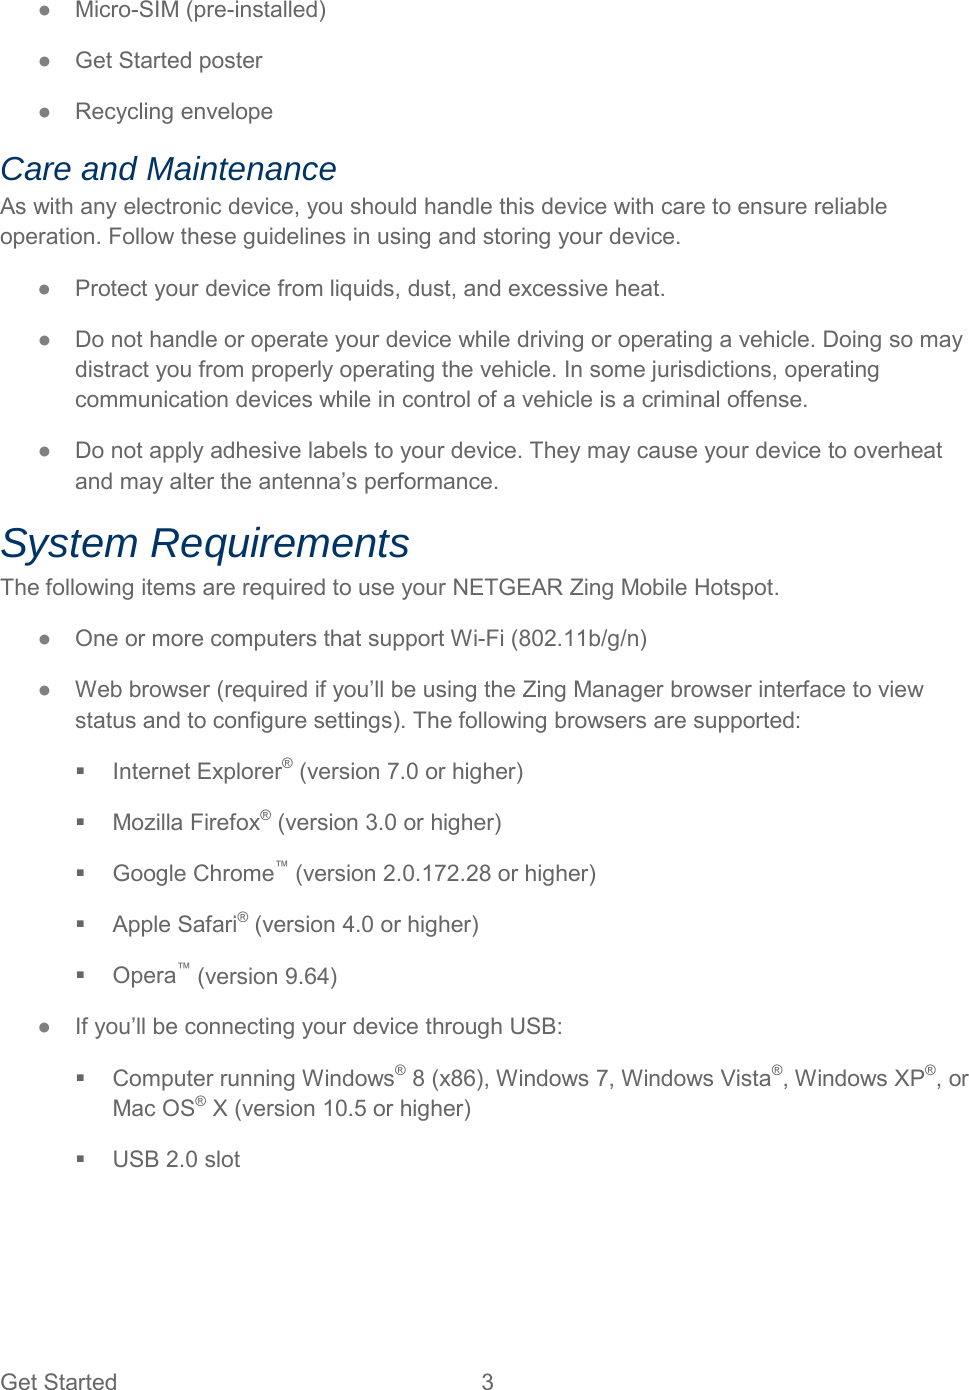
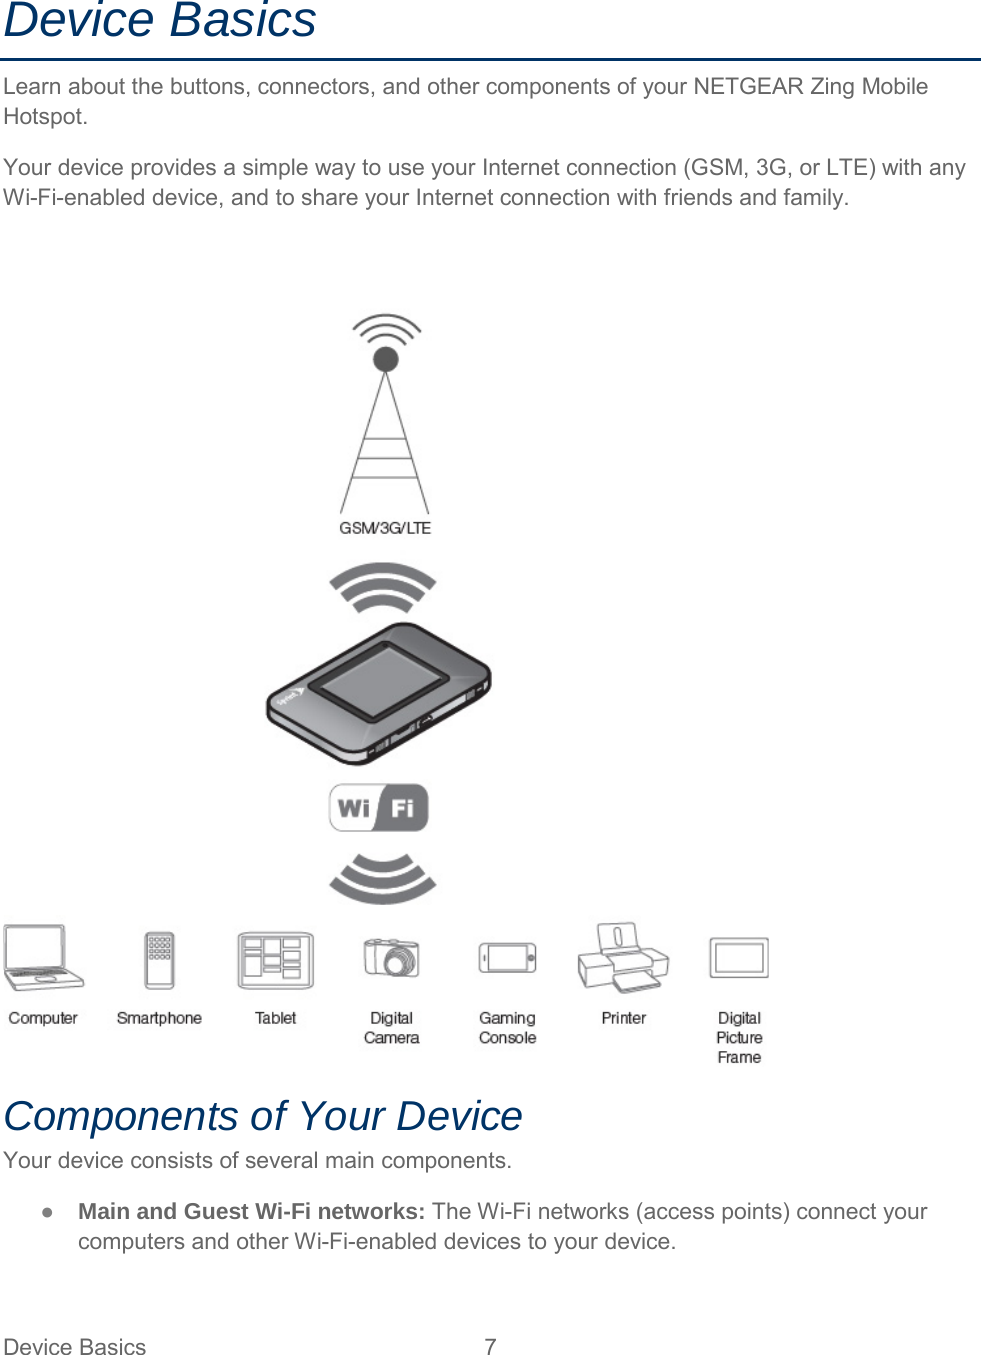
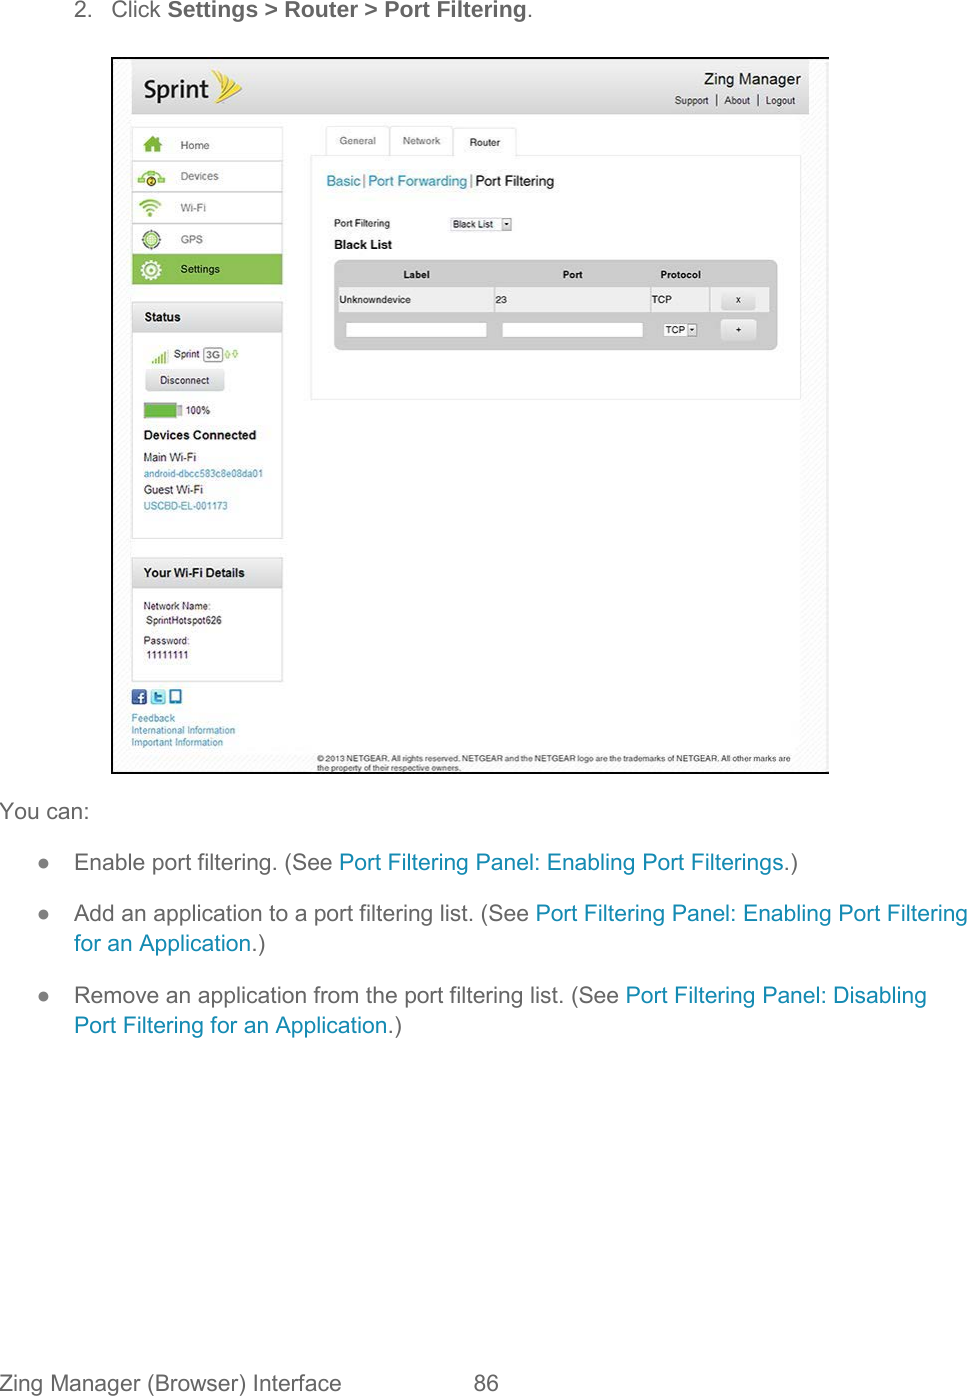
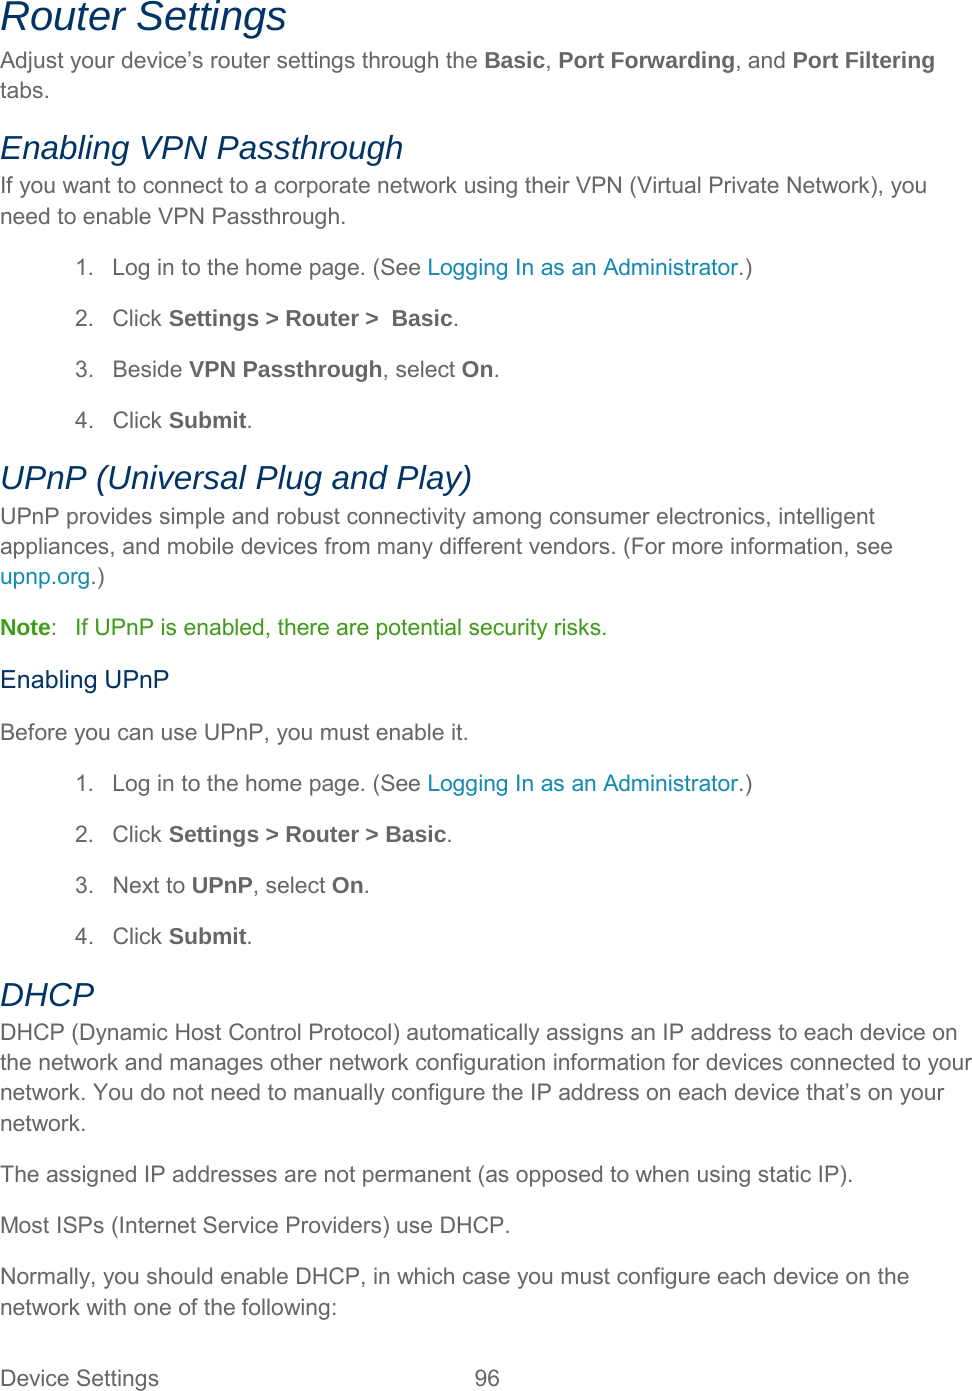
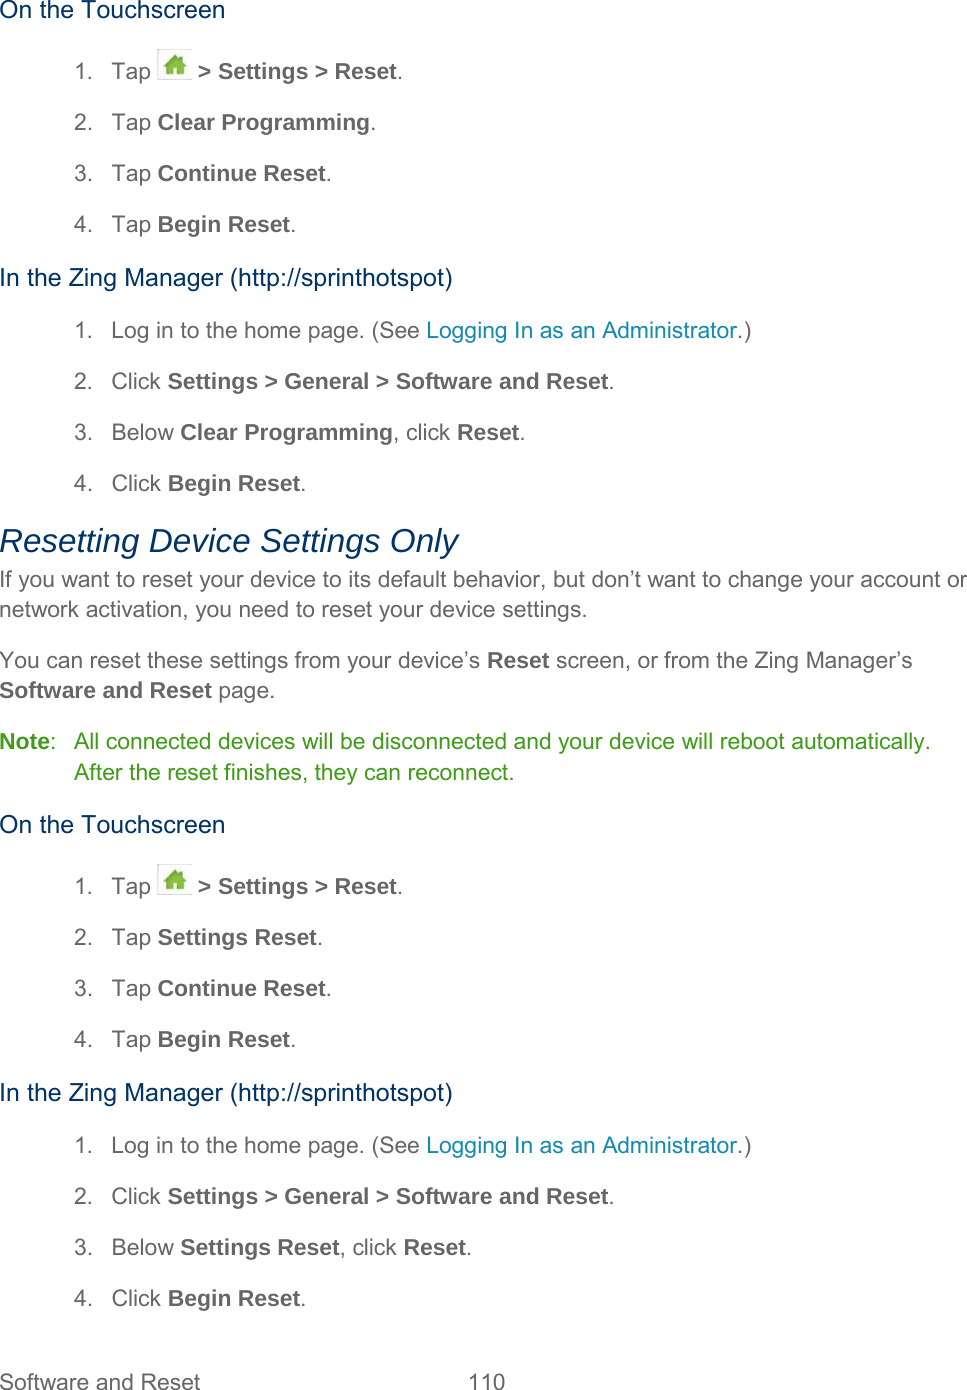
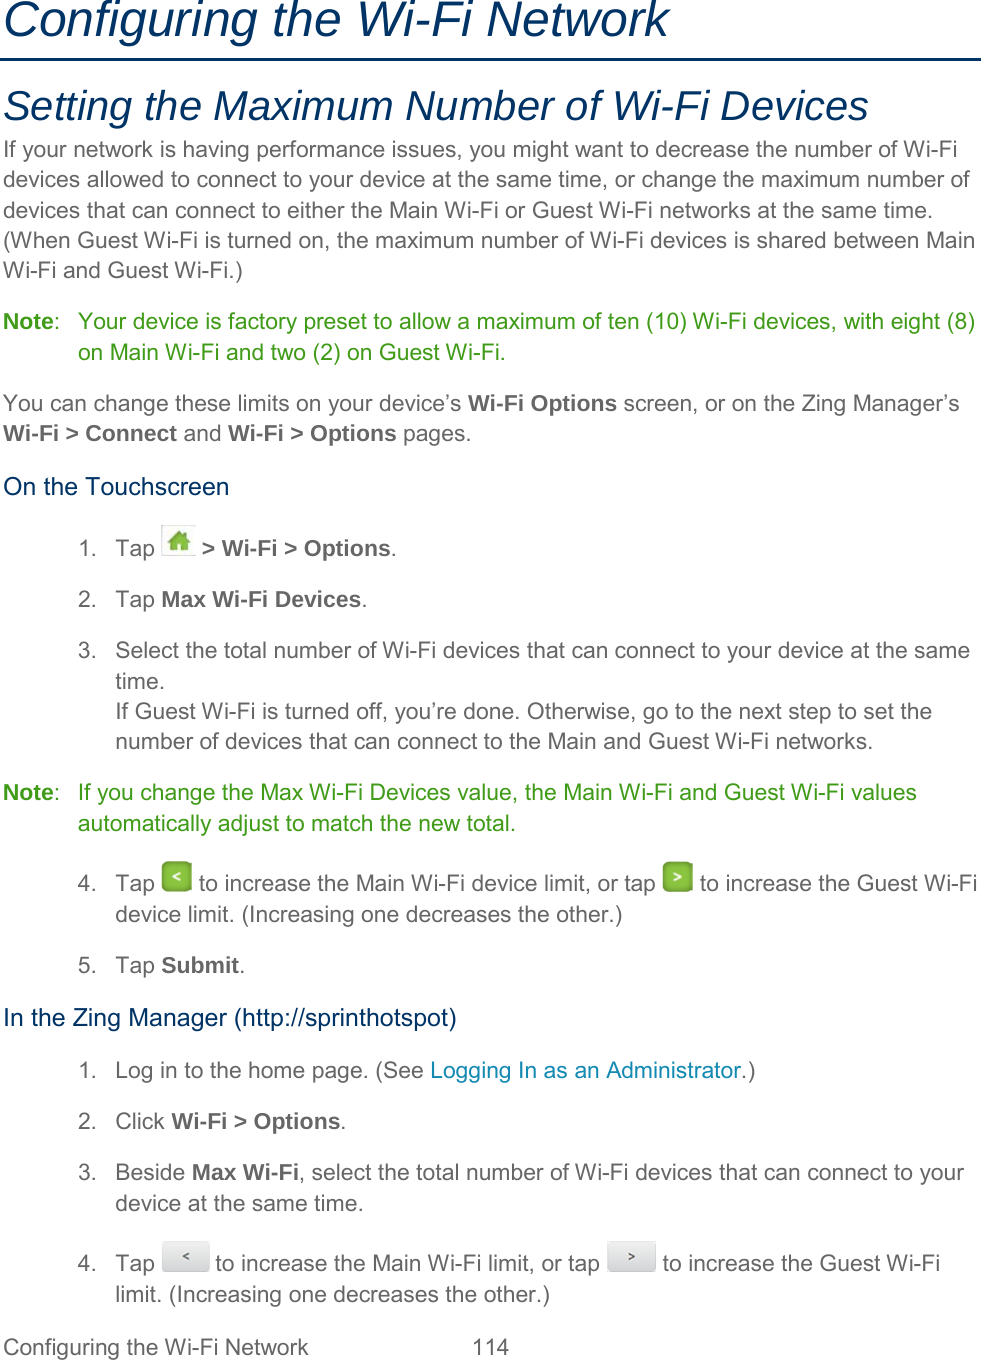
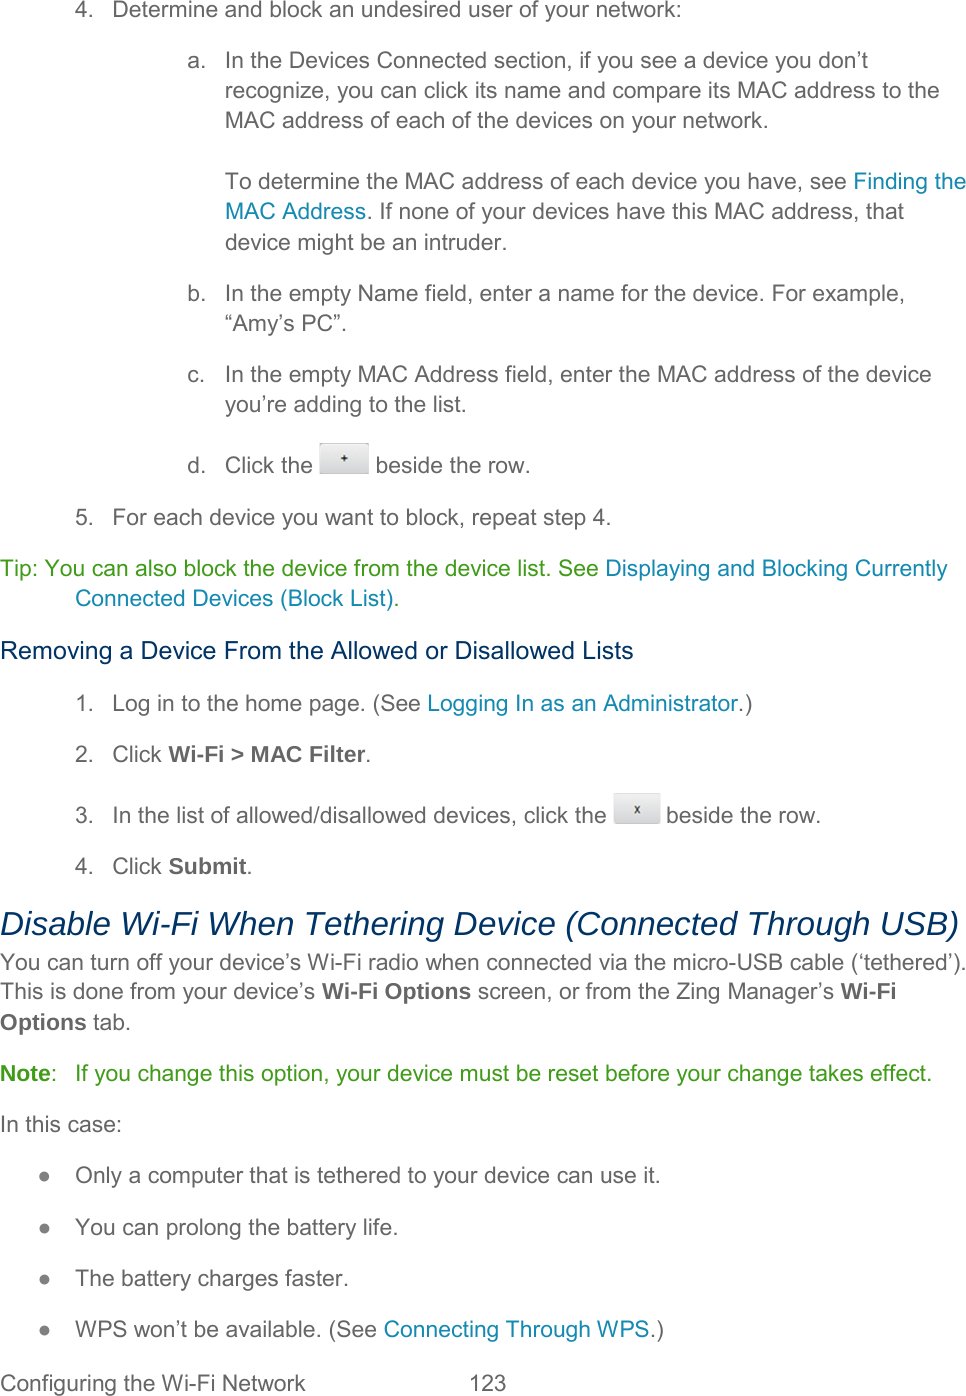
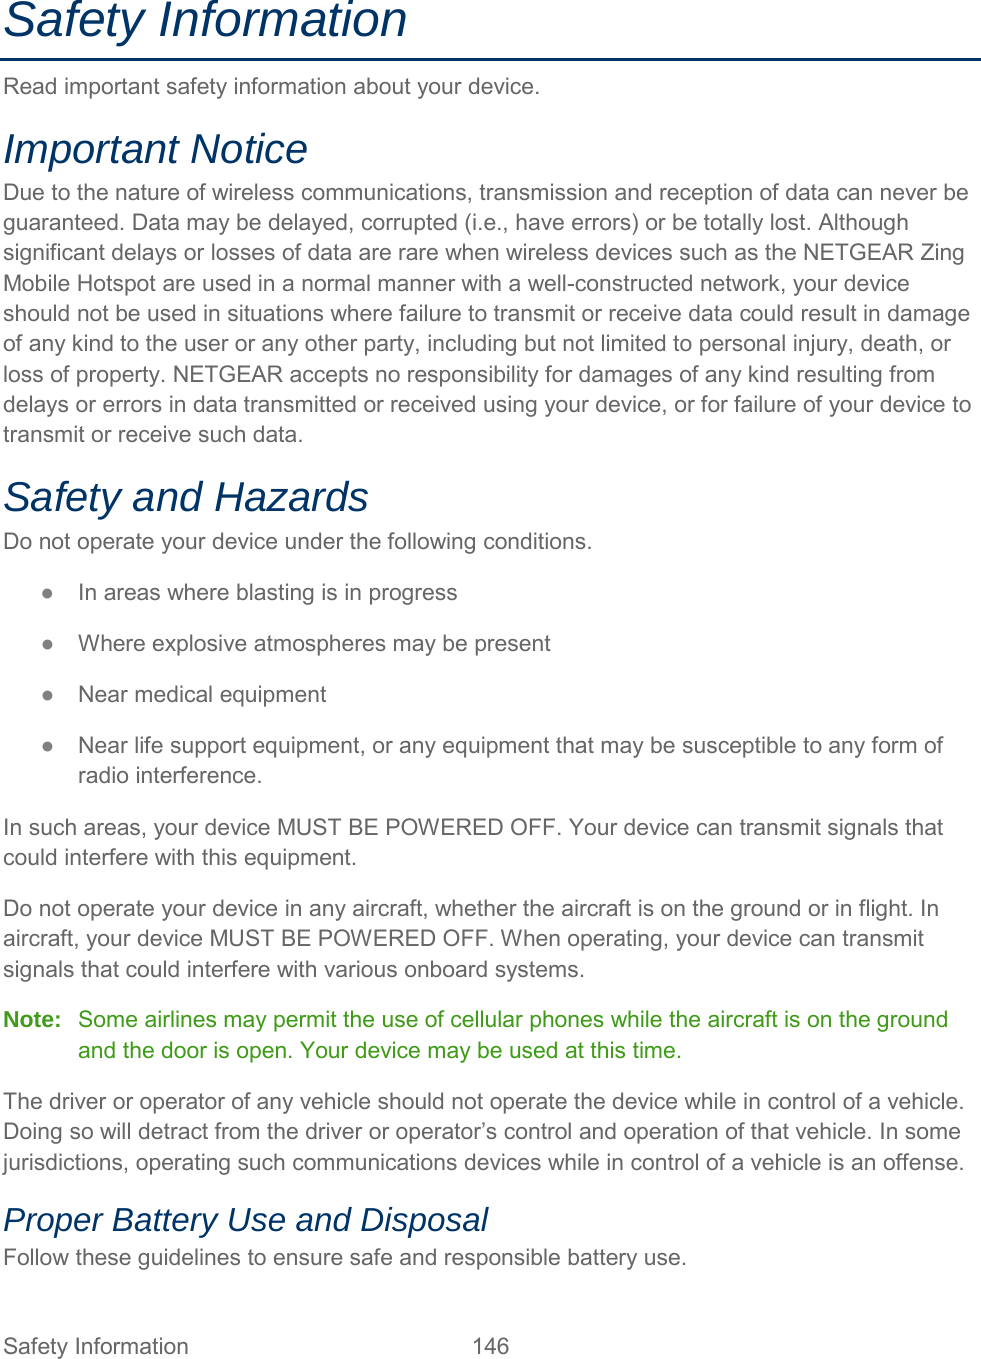
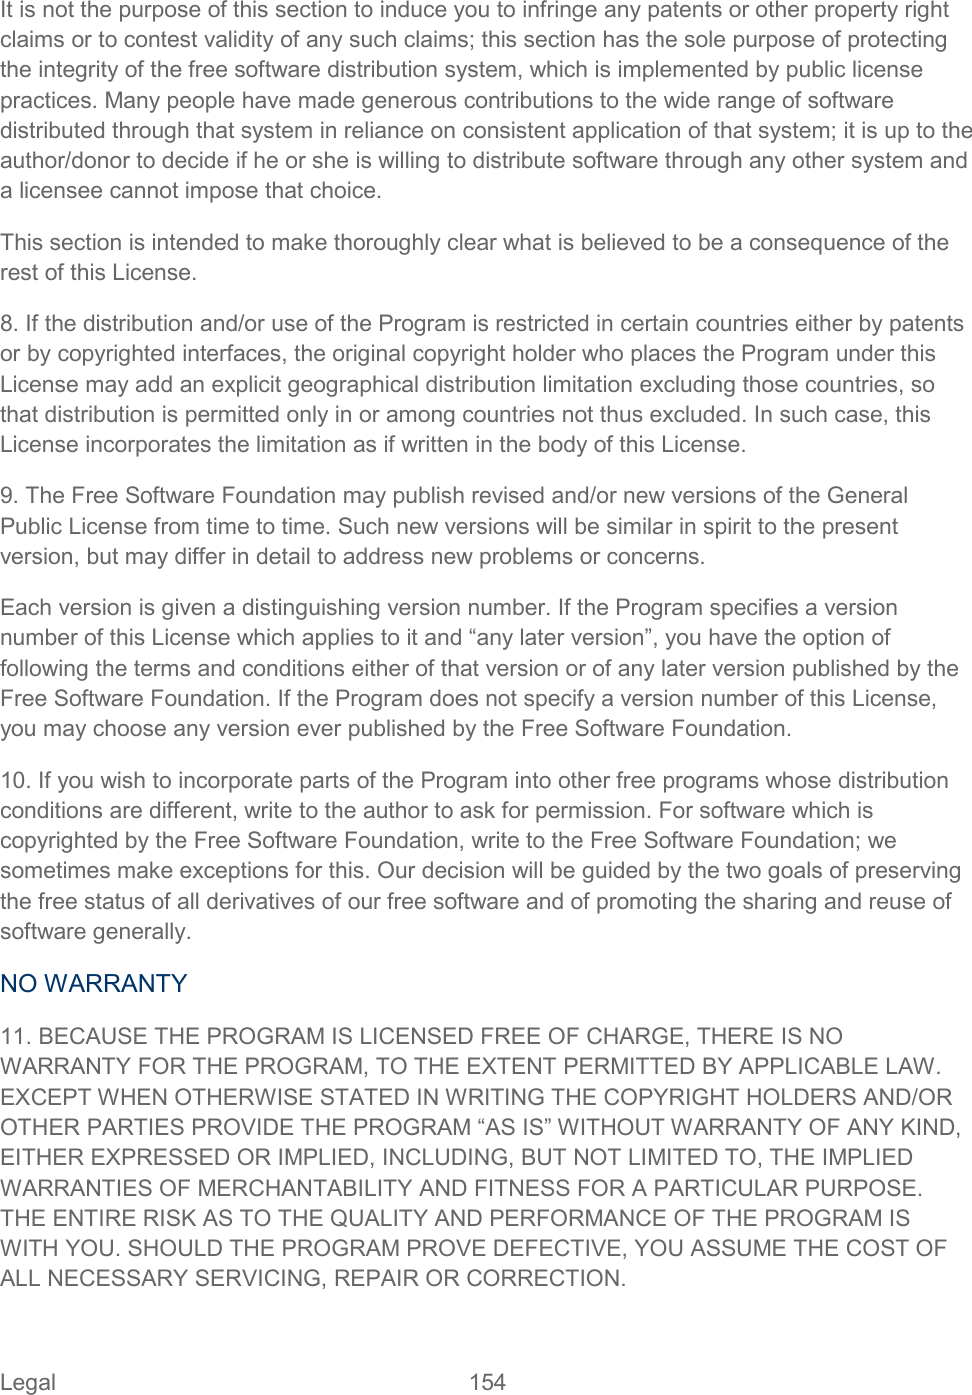
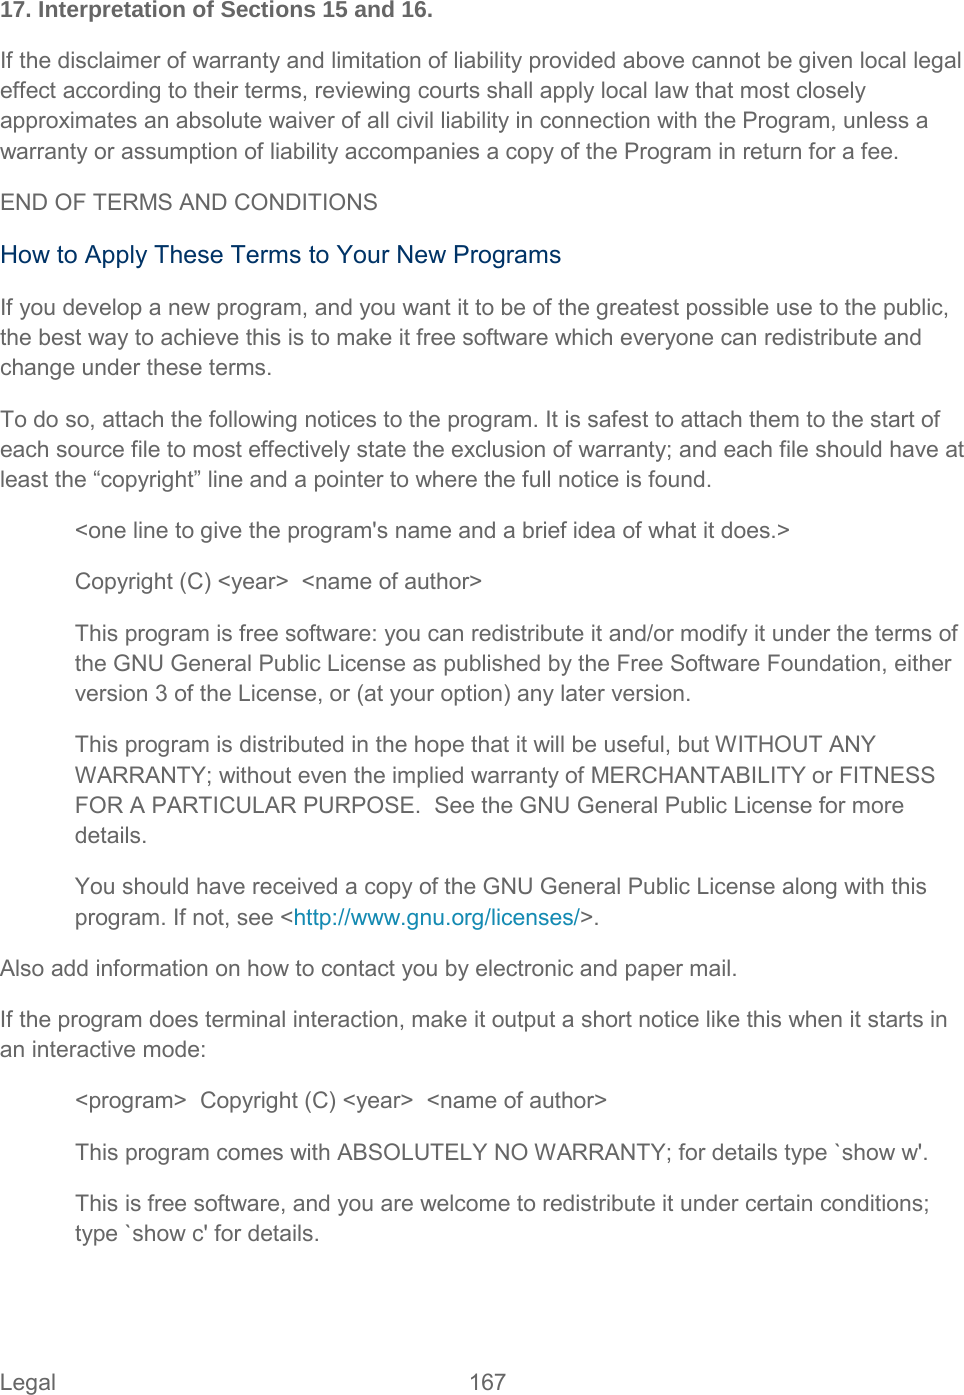
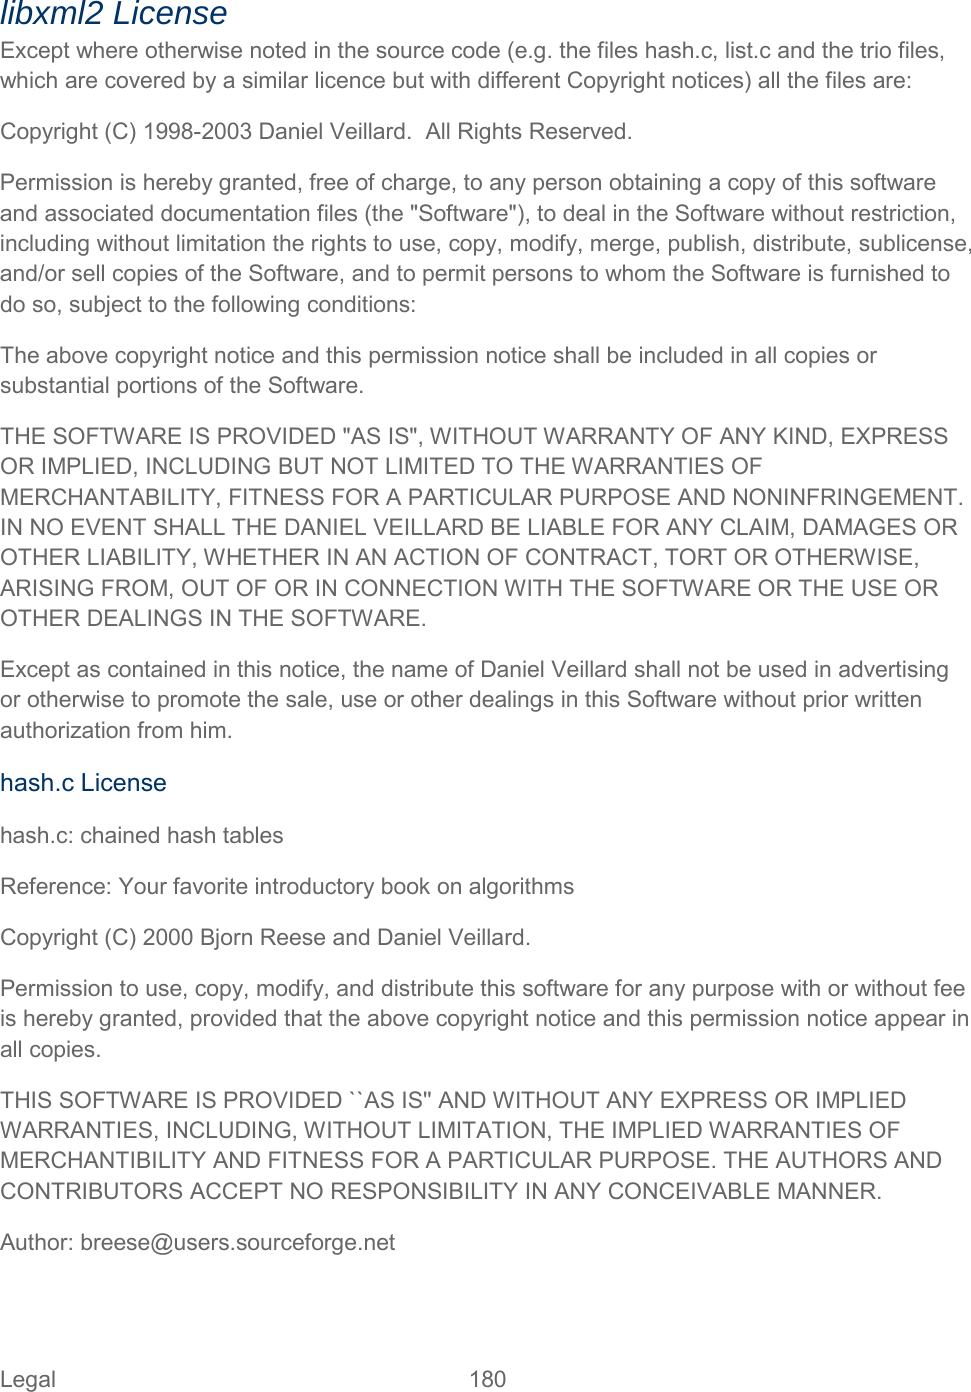
![Router > Port Forwarding Tab Port forwarding lets you forward incoming traffic to specific ports and devices (per their local IP address) on your network. (Normally, incoming traffic is blocked.) 1. Log in to the home page. (See Logging In as an Administrator.) 2. Click Settings > Router > Port Forwarding. You can: ● Enable or disable port forwarding. See Enabling Port Forwarding. Note: You must enable port forwarding before you can view and update the port forwarding list. ● Enter port forwarding details for an application. (See Enabling Port Forwarding for an Application.) For example, you can configure port forwarding so that: You can access your Remote Desktop from the Internet (by specifying the WAN [public] IP address that your device is using). Zing Manager (Browser) Interface 84](https://usermanual.wiki/Netgear-orporated/AC771S/User-Guide-1984013-Page-92.png)


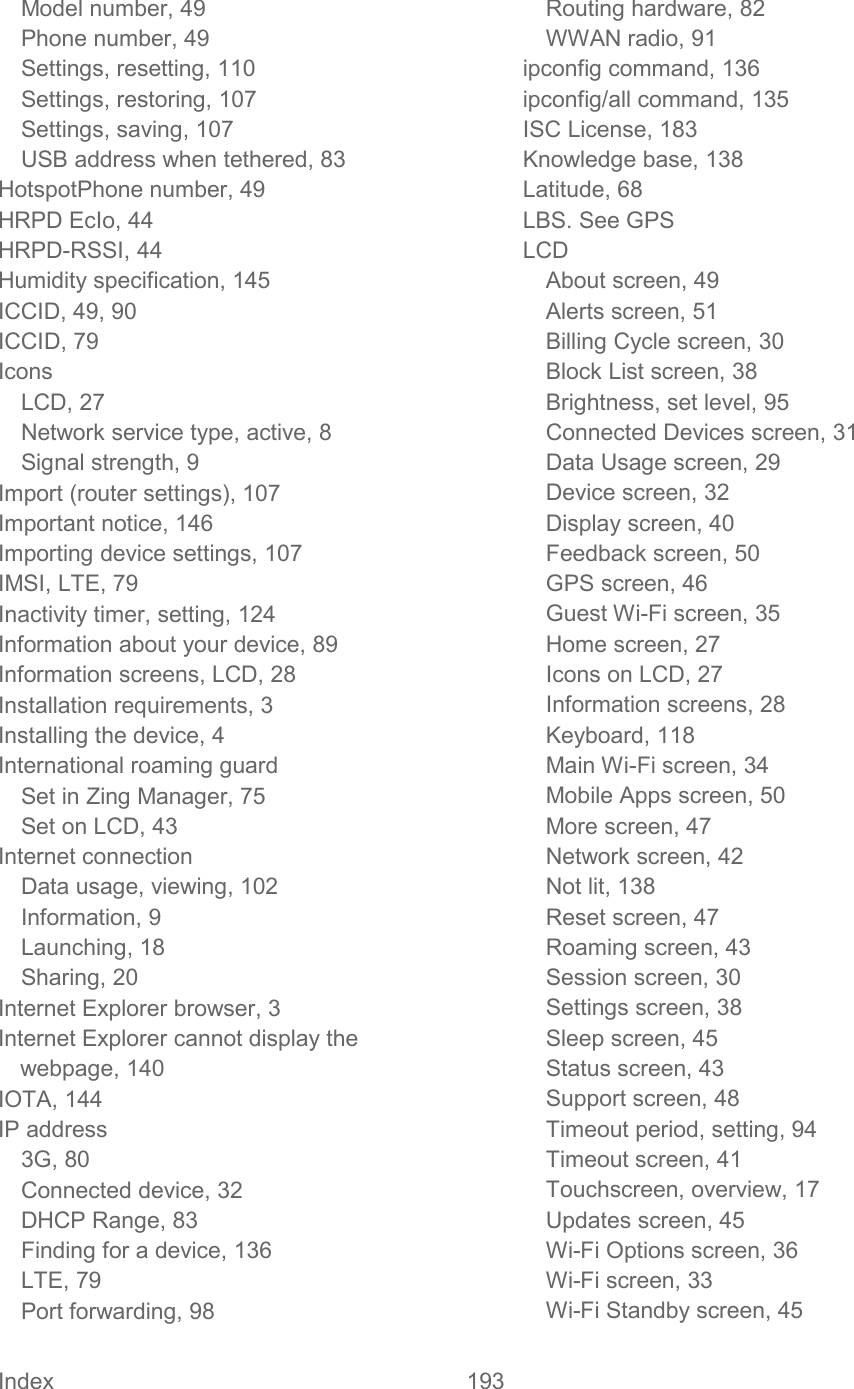
![The hypothetical commands `show w' and `show c' should show the appropriate parts of the General Public License. Of course, your program's commands might be different; for a GUI interface, you would use an “about box”. You should also get your employer (if you work as a programmer) or school, if any, to sign a “copyright disclaimer” for the program, if necessary. For more information on this, and how to apply and follow the GNU GPL, see <http://www.gnu.org/licenses/>. The GNU General Public License does not permit incorporating your program into proprietary programs. If your program is a subroutine library, you may consider it more useful to permit linking proprietary applications with the library. If this is what you want to do, use the GNU Lesser General Public License instead of this License. But first, please read <http://www.gnu.org/philosophy/why-not-lgpl.html>. GNU Lesser General Public License (Version 2.1) Version 2.1, February 1999 Copyright (C) 1991, 1999 Free Software Foundation, Inc. 51 Franklin Street, Fifth Floor, Boston, MA 02110-1301 USA Everyone is permitted to copy and distribute verbatim copiesof this license document, but changing it is not allowed. [This is the first released version of the Lesser GPL. It also counts as the successor of the GNU Library Public License, version 2, hence the version number 2.1.] Preamble The licenses for most software are designed to take away your freedom to share and change it. By contrast, the GNU General Public Licenses are intended to guarantee your freedom to share and change free software--to make sure the software is free for all its users. This license, the Lesser General Public License, applies to some specially designated software packages--typically libraries--of the Free Software Foundation and other authors who decide to use it. You can use it too, but we suggest you first think carefully about whether this license or the ordinary General Public License is the better strategy to use in any particular case, based on the explanations below. When we speak of free software, we are referring to freedom of use, not price. Our General Public Licenses are designed to make sure that you have the freedom to distribute copies of free software (and charge for this service if you wish); that you receive source code or can get it if you want it; that you can change the software and use pieces of it in new free programs; and that you are informed that you can do these things. Legal 168](https://usermanual.wiki/Netgear-orporated/AC771S/User-Guide-1984013-Page-176.png)

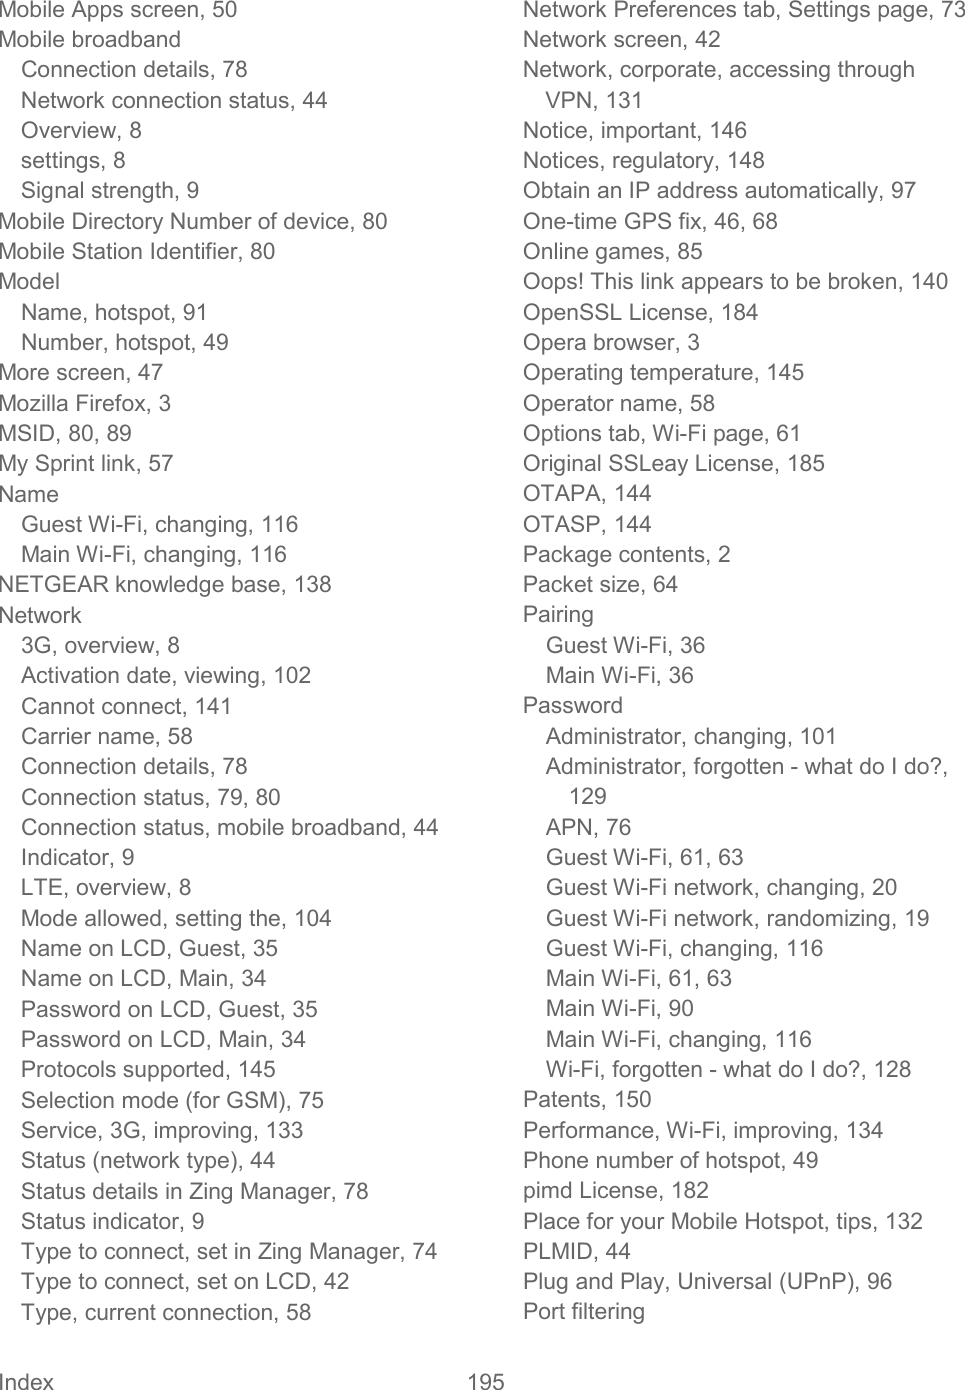
![“This product includes cryptographic software written by Eric Young (eay@cryptsoft.com)” The word ‘cryptographic’ can be left out if the routines from the library being used are not cryptographic related :-). 4. If you include any Windows specific code (or a derivative thereof) from the apps directory (application code) you must include an acknowledgement: “This product includes software written by Tim Hudson (tjh@cryptsoft.com)” THIS SOFTWARE IS PROVIDED BY ERIC YOUNG “AS IS” AND ANY EXPRESS OR IMPLIED WARRANTIES, INCLUDING, BUT NOT LIMITED TO, THE IMPLIED WARRANTIES OF MERCHANTABILITY AND FITNESS FOR A PARTICULAR PURPOSE ARE DISCLAIMED. IN NO EVENT SHALL THE AUTHOR OR CONTRIBUTORS BE LIABLE FOR ANY DIRECT, INDIRECT, INCIDENTAL, SPECIAL, EXEMPLARY, OR CONSEQUENTIAL DAMAGES (INCLUDING, BUT NOT LIMITED TO, PROCUREMENT OF SUBSTITUTE GOODS OR SERVICES; LOSS OF USE, DATA, OR PROFITS; OR BUSINESS INTERRUPTION) HOWEVER CAUSED AND ON ANY THEORY OF LIABILITY, WHETHER IN CONTRACT, STRICT LIABILITY, OR TORT (INCLUDING NEGLIGENCE OR OTHERWISE) ARISING IN ANY WAY OUT OF THE USE OF THIS SOFTWARE, EVEN IF ADVISED OF THE POSSIBILITY OF SUCH DAMAGE. The licence and distribution terms for any publicly available version or derivative of this code cannot be changed. I.e. this code cannot simply be copied and put under another distribution licence [including the GNU Public Licence.] Trademarks SPRINT and the logo are trademarks of Sprint. NETGEAR and the NETGEAR logo are trademarks of NETGEAR, Inc. Windows® is a registered trademark of Microsoft Corporation. Mac and Mac OS are trademarks of Apple Inc., registered in the U.S. and other countries. Linux® is the registered trademark of Linus Torvalds in the U.S. and other countries. Wi-Fi, WPA, and WPA2 are registered marks of the Wi-Fi Alliance. QUALCOMM® is a registered trademark of QUALCOMM Incorporated. Other trademarks are the property of the respective owners. Legal 186](https://usermanual.wiki/Netgear-orporated/AC771S/User-Guide-1984013-Page-194.png)